Vegetarian

Caramel Slice

Thursday, March 29th, 2018

Caramel Slice

I was looking for a recipe for caramel slice and came across one on the internet that claimed it was the best ever caramel slice. Well, it’s a big claim, but I think it’s pretty high up there. Easy to make, super tasty – I won’t be looking for another recipe. This will be my go-to from now on.

Caramel Slice

It’s great as it can be made in advance and I have had a lot of positive comments by people who have tried it. Most going back for a second (or third or fourth) piece. I’m sure you could easily make this gluten-free too by replacing the flour with gluten free flour.

It makes a wonderful addition to a dessert table, as they can be cut quite small so people can have a bite and try other desserts too.

Caramel Slice

Caramel Slice

Recipe from Bakers Corner

Makes 16-60 (The original says 16 slices, but you can make lots of little ones if there will be other sweets)

1 cup (150g) plain flour
1/2 cup (110g) brown sugar
1/2 cup (40g) desiccated coconut
125g butter, melted

100g butter, extra
2 x 395g cans NESTLÉ Sweetened Condensed Milk
1/3 cup (80mL) golden syrup

200g PLAISTOWE Premium Dark Chocolate, melted
1 tbsp vegetable oil

1. Preheat oven to 180°C/160°C fan forced. Lightly grease an 18cm x 28cm lamington pan and line with baking paper. (I used a slightly bigger pan 22cm x 31cm, but it still came out fine, if you do this, the cooking time may be a bit shorter)

Caramel Slice

Caramel Slice

2. In a medium bowl, combine flour, sugar and coconut. Add melted butter, mix well. Press mixture firmly into prepared pan. Bake for 15-20 minutes until lightly browned. Cool. (I didn’t let this cool. I cooked the condensed milk whilst this was in the oven and then poured it straight on and back in the oven.)
3. Place extra butter, NESTLÉ Sweetened Condensed Milk and syrup in a medium saucepan. Stir over low heat until smooth. Pour over base. Bake for 20-25 minutes until golden. Cool.

Caramel Slice

4. Combine PLAISTOWE Premium Dark Chocolate and oil, stir until smooth, pour evenly over slice. Place in fridge until set and then slice. (You may like to clean the knife between each or every couple of slices. a clean knife will give a cleaner edge).

Caramel Slice

Caramel Slice

Nachos

Tuesday, March 7th, 2017

Nachos

Nachos are a big hit with my family. Introduced to our family by Nick, they have become a regular favourite, so it’s great to put this recipe up on the site so everyone can enjoy it whenever they please.

It’s a very easy recipe to make, we often have most of the ingredients on hand. Don’t be turned off making it if you were after one with meat, as it’s so delicious, you won’t even notice its absence.

Nachos

Nachos

Recipe by Nick at Leave Room for Dessert
Serves 4-6

2 tablespoons olive oil
2 onions, finely chopped
2 x 400g cans diced tomatoes
2 x 400g cans red kidney beans, rinsed thoroughly
1 teaspoon salt
1 teaspoon sugar
2 teaspoons cumin powder
2 teaspoons coriander powder
2 teaspoons paprika
1/4 teaspoon chilli powder

shredded lettuce (approx 1 large leaf, or 40g per person)
corn chips (approx 40g per person)
grated cheese (approx 30g per person)
guacamole, avocado, tomato, sour cream and jalapenos, as desired

Combine salt, sugar and spices in a small bowl and set aside. Heat oil in a large saucepan over medium heat. Cook onions for 10-20 minutes (lowering temperature as needed), until soft and caramelized.

Add the tomatoes, kidney beans and spice mix to the onions and cook for 10-20 minutes on medium heat, until red kidney beans are softening. Roughly mash the mixture with potato masher.

Nachos

Place shredded lettuce on a plate, followed by corn chips and then cheese. Place nacho mix on top and serve with sour cream, guacamole, avocado, tomato and jalapenos as desired.

Nachos

Nachos

Nachos

White Bread Roll with Dutch Crunch Topping – Daring Bakers Challenge March 2012

Tuesday, March 27th, 2012


Sara and Erica of Baking JDs were our March 2012 Daring Baker hostesses! Sara & Erica challenged us to make Dutch Crunch bread, a delicious sandwich bread with a unique, crunchy topping. Sara and Erica also challenged us to create a one of a kind sandwich with our bread!

It has been a few months of bread challenges for the Daring Bakers. I must admit I have really enjoyed trying all these new recipes, I know I never would had gotten around to making most of them, or even finding the recipes on the internet. We still have our sourdough starter, and it is really working nicely now, hopefully Nick will do a guest post on it in the future.

This month we had a few challenges, to make a bread, to use the Dutch crunch topping (also called Tiger bread due to its appearance once cooked), and the make a sandwich. I tried one of the bread recipes that was given as a suggestion, and it is one of the best quick breads I have made, with a lovely soft inside, I will be making it again.

The Dutch crunch topping was very interesting to make, as it contains yeast and rice flour, and is like a bread dough in some ways. I used the suggested amount and had a nice thick layer on top of my bread. It came out lovely and crunchy. We used the rolls for sandwiches (I was going to use them as buns for veggie burgers, bit didn’t get around to making the veggie burger patties), and the loaf was warmed in the oven the next day and eaten with slow cooked beef in red wine with cous cous. I would also recommend eating it with olive oil, caramelised balsamic vinegar and dukkah.

The sandwiches we made had proscuitto, tomato, sliced polski-orgorki pickles and semi-dried tomatoes, topped with Persian Feta.


Recipe Source: The recipe for the Dutch Crunch topping came from Rose Levy Beranbaum’s The Bread Bible. The recipes for the breads we’ve suggested came from The Bread Bible and an adaptation of a recipe found on bakingbites.com (http://bakingbites.com/2006/09/cooking-school-dutch-crunch-bread/).

Dutch Crunch Topping

Servings: This recipe should make sufficient topping for two 9×5 loaves (23cmx13cm) or 12 rolls. If you make only 6 rolls in the first soft white roll recipe, you can cut the topping recipe in half.

We’ve provided this recipe first because it is the mandatory aspect of the challenge. Note, however, that you should not prepare the topping until the bread you’ve selected to bake is almost finished rising (~15 minutes from baking).

2 tablespoons (2 packets) (30 ml) (15 gm/½ oz) active dry yeast
1 cup (240 ml) warm water (105-115º F) (41-46°C)
2 tablespoons (30 ml) (30 gm/1 oz) sugar
2 tablespoons (30 ml) vegetable oil
½ teaspoon (2½ ml) (3 gm) salt
1½ cups (360 ml) (240 gm/8½ oz) rice flour (white or brown; NOT sweet or glutinous rice flour) (increase by 1 cup or more for home-made rice flour)

1. Combine all ingredients in a large bowl and beat with a whisk; beat hard to combine. The consistency should be like stiff royal icing – spreadable, but not too runny. If you pull some up with your whisk, as shown below, it should drip off slowly. Add more water or rice flour as necessary. Let stand 15 minutes.

2. Coat the top of each loaf or roll with a thick layer of topping. We tried coating it with a brush but it worked better just to use fingers or a spoon and kind of spread it around. You should err on the side of applying too much topping – a thin layer will not crack properly.
3. Let stand, uncovered, for any additional time your recipe recommends. With the Soft White Roll, you can place the rolls directly into the oven after applying the topping. With the Brown Rice Bread, the loaves should stand for 20 minutes with the topping before baking.
4. When baking, place pans on a rack in the center of the oven and bake your bread as you ordinarily would. The Dutch Cruch topping should crack and turn a nice golden-brown color.

Soft White Roll

Servings: Six sandwich rolls

This recipe approximates the quintessential white sandwich roll found throughout the Bay Area. The recipe is simple, quick, and addictive.

1 tablespoon (1 packet) (15 ml) (7 gm/ ¼ oz) active dry yeast
¼ cup (60 ml) warm water (105-110º F) (41-43°C) (No need to use a thermometer – it should feel between lukewarm and hot to the touch).
1 cup (240 ml) warm milk (105-110º F) (41-43°C) (We’ve tried both nonfat and 2%, with no noticeable difference)
1½ tablespoons (22½ ml) (20 gm/ ⅔ oz) sugar
2 tablespoons (30 ml) vegetable oil (plus additional olive or vegetable oil for greasing bowl during rising)
1½ teaspoons (7½ ml) (9 gm/⅓ oz) salt
Up to 4 cups (960 ml) (600 gm/21oz) all purpose flour

1. In the bowl of an electric mixer or large mixing bowl, combine yeast, water, milk and sugar. Stir to dissolve and let sit for about 5 minutes (The mixture should start to bubble or foam a bit and smell yeasty).

2. Add in vegetable oil, salt and 2 cups of flour. Using the dough hook attachment or a wooden spoon, mix at medium speed until the dough comes together. (The photo to below is with the first 2 cups of flour added).

3. Add remaining flour a quarter cup at time until the dough pulls away from the sides of the bowl, as shown in the photo below (For us, this usually required an additional 1½ to 2 cups of flour).

4. Turn out onto a lightly floured surface and knead for about 4 minutes, until smooth and elastic.
5. Place in a lightly greased bowl and cover with plastic wrap. Let rise for 1 hour, or until doubled (or more) in size (see photo comparison).

6. Once the dough has risen, turn it out onto a lightly floured surface and divide it into 6 equal portions (if you’d like to make rolls) or 2 equal portions (if you’d like to make a loaf) (using a sharp knife or a dough scraper works well). Shape each into a ball or loaf and place on a parchment-lined baking sheet (try not to handle the dough too much at this point).

7. Cover with plastic wrap and let rise for 15 minutes while you prepare the topping.
8. Coat the top of each roll or loaf with the topping as described above. While the original recipe recommends letting them stand for 20 minutes after applying the topping, I got better results by putting them directly into the oven.

9. Once you’ve applied the topping, bake in a preheated moderately hot 380ºF/190°C/gas mark 5 for 25-30 minutes, until well browned. Let cool completely on a wire rack before eating.

Our finished products: Note the roll in the foreground on the left. This is what happens if you don’t put enough topping on the bread – no cracking! So be sure to load on the topping.

Sourdough – Update from December Daring Bakers Challenge

Thursday, January 26th, 2012

I made the sourdough from the December Daring Bakers Challenge very soon after my last post about it. Although it did not really turn out particularly well, so I sort of held back on this post. And the next challenge is to be posted in tomorrow!

Back to the sourdough. After having the sourdough starter go mouldy whilst I was sick, I made sure this one didn’t. The starter was nice and bubbly and certainly smelt quite sour, so I was hoping I had nice active yeast in the mix.

My First Sourdough - not so great looking

My first bread came out of the oven – and it hadn’t risen as much as I had hoped, I still crossed my fingers, although after cutting it through, we found it was still quite dough-y inside. Nice flavour, but texture was all wrong. I still have the starter dough though, and Nick has been making bread every weekend with it – although adding yeast to it – and it has been rising quite well. I wish I could part more information for you on troubleshooting, although as a newbie myself, I am just going to try and keep the starter and continue to feed it and hope the yeast becomes happier. At the moment I have it in the fridge, as I am a little scared I will forget about it on the bench and it will mould again.

Even though the texture of this first bread was not so great, I still made the mushrooms from the given recipes and added some goats cheese on top, and you could hardly notice the bread’s heaviness once it was grilled and had a lovely topping on it.

Nick's sourdough - with a little yeast added

Thanks to our host (Jessica of My Recipe Project) for last month’s challenge – we are finally making sourdough – and I might just have the confidence to make more starter doughs…? 🙂

French Country Bread

Servings: 1 large loaf plus extra wheat starter for further baking

Wheat Starter – Day 1:
Ingredients
4 1/2 tablespoons (70 ml) (40 gm/1 ½ oz) stoneground breadmaking whole-wheat or graham flour
3 tablespoons (45 ml) water
Total scant ½ cup (115 ml) (3 oz/85 gm)

Directions:
1. In a Tupperware or plastic container, mix the flour and water into a paste.
2. Set the lid on top gently, cover with a plastic bag, to prevent messes in case it grows more than expected!
3. Set somewhere warm (around 86 F if possible). I sometimes put mine on a windowsill near a radiator, but even if it’s not that warm, you’ll still get a starter going – it might just take longer.

Wheat Starter – Day 2:
Ingredients
4 1/2 tablespoons (70 ml) (40 gm/1 ½ oz) stoneground breadmaking whole-wheat or graham flour
3 tablespoons (45 ml) water
scant 1/2 cup (115 ml) (3 oz/85 gm) starter from Day 1
Total scant cup (230 ml) (6 oz/170 gm)

Directions:
1. Stir the flour and water into the mixture from Day 1, cover, and return to its warm place.

Wheat Starter – Day 3:
Ingredients
4 1/2 tablespoons (70 ml) (40 gm/1 ½ oz) stoneground breadmaking whole-wheat or graham flour
4 teaspoons (20 ml) water
scant 1 cup (230 ml) (6 oz/170 gm) starter from Day 2
Total 1⅓ cup (320 ml) (230 gm/8-1/10 oz)

Directions:
1. Stir the flour and water into the mixture from Day 2, cover, and return to its warm place.

Wheat Starter – Day 4:
Ingredients
3/4 cup plus 1½ tablespoons (205 ml) (120 gm/4 ¼ oz) unbleached all-purpose flour
1/2 cup less 4 teaspoons (100 ml) water
1⅓ cup (320 ml) (230 gm/8 oz) starter from Day 3
Total scant 2⅔ cup (625 ml) (440 gm/15½ oz)

Directions:
1. Stir the flour and water into the mixture from Day 3, cover, and return to its warm place. At this point it should be bubbling and smell yeasty. If not, repeat this process for a further day or so until it is!

French Country Bread
Stage 1: Refreshing the leaven
Ingredients
1 cup less 1 tablespoon (225 ml) (160 gm/5 ⅔ oz) wheat Leaven Starter
6 tablespoons less 1 teaspoon (85 ml) (50 gm/1¾ oz) stoneground bread making whole-wheat or graham flour
1 cup plus 2 teaspoons (250 ml) (150 gm/5 ⅓ oz) unbleached all purpose flour
1/2 cup (120 ml) water
Production Leaven Total 2¾ cups plus 4 teaspoons (680 ml) (480 gm /1 lb 1 oz)

Directions:
1. Mix everything into a sloppy dough. It may be fairly stiff at this stage. Cover and set aside for 4 hours, until bubbling and expanded slightly.

French Country Bread

Stage 2: Making the final dough
Ingredients
3/4 cup less 1 teaspoon (175 ml) (100 gm/3 ½ oz) stoneground breadmaking whole-wheat or graham flour, plus more for dusting
2 cups plus 2 tablespoons (510 ml) (300gm/10 ½ oz) unbleached all-purpose flour
1¼ teaspoons (7½ ml) (7 gm/¼ oz) sea salt or ⅔ teaspoon (3⅓ ml) (3 gm/⅛ oz) table salt
1 ¼ cups (300 ml) water
1 ¾ cups (425 ml) (300 gm/10 ½ oz) production leaven – this should leave some (1 cup) for your next loaf.
Total 6 cups less 2 tablespoons 1415 ml (1007 gm/35 ½ oz/2 lb 3½ oz)

Directions:
1. Mix the dough with all the ingredients except the production leaven. It will be a soft dough.
2. Knead on an UNFLOURED surface for about 8-10 minutes, getting the tips of your fingers wet if you need to. You can use dough scrapers to stretch and fold the dough at this stage, or air knead if you prefer. Basically, you want to stretch the dough and fold it over itself repeatedly until you have a smoother, more elastic dough.
See my demonstration here: http://www.youtube.com/watch?v=OqS3raEGdwk
3. Smooth your dough into a circle, then scoop your production leaven into the centre. You want to fold the edges of the dough up to incorporate the leaven, but this might be a messy process. Knead for a couple minutes until the leaven is fully incorporated in the dough. See my demonstration here: http://www.youtube.com/watch?v=UPO97R4iO4U

production leaven

4. Spread some water on a clean bit of your work surface and lay the dough on top. Cover with an upturned bowl, lining the rim of the bowl with a bit of water. Leave for an hour, so that the gluten can develop and the yeasts can begin to aerate the dough.
5. Once your dough has rested, you can begin to stretch and fold it. Using wet hands and a dough scraper, stretch the dough away from you as far as you can without breaking it and fold it back in on itself. Repeat this in each direction, to the right, towards you, and to the left. This will help create a more ‘vertical’ dough, ready for proofing. See my demonstration here: http://www.youtube.com/watch?v=rDoJRCMfclE
6. Heavily flour a banneton/proofing basket with whole wheat flour and rest your dough, seam side up, in the basket. Put the basket in a large plastic bag, inflate it, and seal it. Set aside somewhere warm for 3-5 hours, or until it has expanded a fair bit. It is ready to bake when the dough responds to a gently poke by slowly pressing back to shape.

7. Preheat the oven to hot 425°F/220°C/gas mark 7. Line a baking sheet with parchment, then carefully invert the dough onto the sheet. I like to put the baking sheet on top of the basket, then gently flip it over so as to disturb the dough as little as possible. Make 2-3 cuts on top of the loaf and bake for 40-50 minutes, reducing the temperature to moderately hot 400°F/200°C/gas mark 6 after 10 minutes.

8. Cool on a cooling rack.

Garlic and Oregano Roasted Mushrooms and Pancetta on Toasted Sourdough

Servings: 4

Ingredients
4 large or 8 medium field mushrooms, sliced
2 red onions, peeled and cut into wedges
2 garlic cloves, peeled and sliced
4 sprigs oregano, leaves only
100 gm (3 ½ oz) pancetta, cubed (optional)
2 tablespoons (30 ml) extra virgin olive oil
4 slices sourdough bread
butter, for spreading
freshly ground black pepper
sea salt

Directions:
1. Preheat the oven to moderately hot 400°F/200°C/gas mark 6. Place the mushrooms on an oiled baking sheet, with onion wedges scattered beneath them. Sprinkle over the garlic, oregano, and pancetta, drizzle with olive oil and season with black pepper and sea salt. Roast for 25 minutes until the mushrooms are tender.
2. Toast your bread in the toaster. Butter the toast, and then pile your mushroom mixture on top.

A Twist: Instead of roasting your mushrooms, you can also sauté them in a pan and, just before serving, stir in a dash of cream for a rich, warm treat!

Pineapple Sorbet and Tropical Granita with Fruit Salad

Thursday, October 6th, 2011


Daylight savings has just begun, it is no longer dark when I get home from work (and only mildly darker when I leave). I am able to stop and smell the roses (and this is not just a saying in my case, as my first roses are opening for the season, and it just so happens to be a double delight rose).

It is starting to feel like summer, with the all the extra light, although I would not wish Spring gone too soon – as it is my favourite season.

More fruits are coming back in season, and we can start eating icy cold sorbets again.

As pineapples are one of my favourite fruits, I started making this pineapple sorbet at least a year ago now. It can certainly be eaten by itself, although it also pairs perfectly with this refreshing tropical granita and the fruit salad.

This is certainly a great way to make a fruit salad stand out a bit more and grab attention.

I have tried to plate the fruit salad artistically. It is simpler to serve it in a bowl, but it looks very pretty this way.

I have only tried the sorbet using an ice cream maker and it becomes almost creamy in texture. It’s amazing how the colour changes too, lightening up and becoming whiter as the mixture thickens. I am sure you could make it using the alternate method of removing the mix from the freezer and mixing it every hour for 3 or more hours and returning to the freezer. Although I am unsure as to whether it will result in the same creamy texture.

I am entering this recipe into a competition held by King of Fruit, a Queensland based business that supplies fresh pineapple to most outlets in Australia. I was lucky enough to be sent 3 lovely pineapples to inspire some recipes. If you have a chance, please check it out and vote for me 🙂 ( I think you only get one vote per email address.)

I have also entered my Herb and Orange Chicken with Pineapple and Capsicum served with Pomegranate, Orange and Baby Spinach Salad recipe into the competition.

Pineapple Sorbet and Tropical Granita with Fruit Salad

Recipe by Anita @ Leave Room for Dessert

Serves: 4 (with some leftover sorbet and granita)

Pineapple Sorbet

Makes: 1-1.4L sorbet

650g pineapple, cut into pieces
200g sugar (white sugar or castor sugar) (1 cup)
200ml water

Process the pineapple in a food processor. Place the pureed pineapple, sugar and water into a medium saucepan and cook on medium/high heat until the sugar is dissolved and the mixture comes to the boil (this may be difficult to see as the pureed pineapple can create a layer at the top). Boil for 5minutes, then strain into a bowl or jug. Allow to cool and refrigerate for a few hours or preferably overnight until very chilled.

Churn in ice cream maker according to instructions of machine. Eat straight away or freeze in a sealable container until ready to serve. Lasts at least 2 weeks in the freezer.

Tropical Granita

150g caster sugar (3/4 cup)
500 ml water (2 cups)
150g pineapple, cut into pieces
100g strawberries, cut in half
100g passionfruit pulp, fresh or frozen

Process the pineapple and strawberries in a food processor. Place the sugar, water, passionfruit pulp and pureed pineapple and strawberries into a medium saucepan (you can use the saucepan that was used for the pineapple sorbet if you want to save on washing up). Bring to the boil on medium/high and continue to boil for 5min. Remove from heat and allow to cool.

Place a piece of muslin cloth over a sieve, place this over a large pan that will take more than 1L of liquid (20cm x 30cm x 5cm). Pour the granita mix into the muslin cloth and allow the liquid to pass through. Use a spoon to help more liquid through, or use your hands to squeeze excess liquid out. If you don’t have muslin cloth, using a sieve on its own will work fine.

Place the pan in the freezer until solid (overnight). Use a fork to scratch the granita into fluffy ice crystals. Return to the freezer for another 2 hours (if longer, place in a sealed container) before serving.

Fruit Salad

2 slices pineapple, cut into wedges
1-2 apples (I used pink lady apples), cut into slices
2 oranges, peeled and cut into segments
1 punnet (125g) blueberries
1-2 punnets (250g – 500g) strawberries, cut in half or quarters
1-2 bananas, sliced

Mix all fruit together in a bowl or place artistically on a plate.

To serve the Pineapple Sorbet and Tropical Granita with Fruit Salad, prepare the fruit salad and place the pineapple sorbet on top. Place the granita on the fruit salad just before serving.

Any component of this dessert can be served independently.

Vegetable Burgers with Chilli Mayo

Sunday, July 10th, 2011


There are some recipes that once tried, just need to be shared with others.

I love burgers, my Mum and Nick both make great beef burger patties, and I will often order chicken schnitzel burgers and beef burgers when out for dinner or lunch. I never tend to buy vegetable burgers, as I’ve had a few dry and tasteless ones in the past.

Trying these though, have changed my mind totally on the vegetable burger, and I have my sister to thank. It was easy to make (and would have been easier if I had taken my food processor around) and tasted amazing. No one could wait to have them for lunches the next day too, which meant we couldn’t try freezing them (as that would be a great dinner to take out of the freezer, just thaw and cook). I guess this means we will just have to make them again 🙂

The patty was a little more delicate in structure than a normal patty, and this slightly worsened for the lunch meals, although perhaps we needed to pat out some of the liquid. Nonetheless – what an amazing dinner and lunch!

I think it’s about time we made another batch – let me know if you get a chance to try them 🙂

Vegetable Burgers with Chilli Mayo

Recipe adapted from Best Recipes

Makes approximately 12 burger patties

1 tablespoon olive oil, approx
1 onion, diced finely + a pinch of salt
2 x 400g can chickpeas, rinsed in water, drained and patted dry, then roughly chopped or processed
1 sweet potato, peeled and grated
1 zucchini, grated
2 carrots, peeled and grated
2 teaspoons curry powder
3 teaspoons vegetable stock powder
2 eggs, lightly beaten
1 1/2 cups bread crumbs
2 tablespoons vegetable or olive oil for frying

6 tablespoons sweet chilli sauce
6 tablespoons mayonaise

12 burger buns
1 lettuce (6-12 leaves, sliced or torn)
2-3 tomatoes, sliced
2 tablespoons olive oil
3 onions, sliced + a pinch of salt
avocado, sliced, optional
sweet potato chips to serve, optional

Heat oil at medium heat in a medium saucepan, cook the diced onion, stirring occasionally until caramelised (will take about 10 minutes or more). Once caramelised, remove from heat and cool. Make caramelised onions for on top of the patty in the same saucepan with the 3 sliced onions and extra oil (will take more than 10 minutes) – Allow this to cook on low whilst making the patty mixture.

For the vegetable patty, mix the caramelised diced onions, chickpeas, sweet potato, zucchini, carrot, curry powder, vegetable stock powder, eggs and bread crumbs. Allow to stand for 10minutes, if the mixture is too moist, squeeze out excess liquid, or pat with a paper towel.

Divide the mixture into 12 equal portions, roll and then pat into patties the same size/width as the burger buns. Heat a large saucepan or frypan on medium/high heat and cook the patties in a small amount of oil until cooked through, turning once the first side is nicely browned.

Place the cooked patty on a grilled burger bun and top with chilli sauce mixed with mayonnaise, caramelised onion, lettuce, avocado and tomato. Serve with sweet potato chips or a salad.

Chocolate Chip Stollen – Daring Bakers Challenge December 2010

Monday, December 27th, 2010

The 2010 December Daring Bakers’ challenge was hosted by Penny of Sweet Sadie’s Baking. She chose to challenge Daring Bakers’ to make Stollen. She adapted a friend’s family recipe and combined it with information from friends, techniques from Peter Reinhart’s book………and Martha Stewart’s demonstration.

We hosted a lovely lunch on Boxing Day this year. The day started off with rain, then went a little cold, got quite hot and then rained at night. I’m glad for the few hours of cool weather (we are currently experiencing a strange Summer here in Sydney), as we had the oven and BBQ on for the meals. We started with beautiful cheeses from Formaggi Ocello. For lunch we had gammon, lamb and roast chicken, with a garden salad, bok choy salad, pumpkin, beetroot and walnut salad.

And for dessert…

We had profiteroles, a triple chocolate cheese cake, a pavlova, fruit and berries, an almond slice and a chocolate chip stollen.

This was the only opportunity for me to make this month’s Daring Bakers Challenge. The month has been full of Christmas and end of year parties and get-togethers, along with all the shopping for presents. I got some lovely cookbooks, clothes and a gorgeous Le Creseut pot.

I considered making the stollen to the original recipe – as there are a couple people in my family who really enjoy fruit breads, although after taking a vote on whether to make the original version or a choc chip version – there was a resounding vote for the choc chip version.

I thought it may turn out like choc chip hot cross buns – and it was quite similar. It was great an hour out of the oven and great toasted with a bit of butter a day or two after.

Everyone was quite impressed with this as part of our dessert menu. I hope everyone had a great Christmas and have a fantastic New Years.

Chocolate Chip Stollen Wreath

my changes in italics

Makes one large wreath or two traditional shaped Stollen loaves. Serves 10-12 people

¼ cup (60ml) lukewarm water (110º F / 43º C)
2 packages (4 1/2 teaspoons) (22 ml) (14 grams) (1/2 oz) active dry yeast
1 cup (240 ml) milk
10 tablespoons (150 ml) (140 grams) unsalted butter (can use salted butter)
5½ cups (1320 ml) (27 ozs) (770 grams) all-purpose (plain) flour (Measure flour first – then sift- plus extra for dusting)
½ cup (120 ml) (115 gms) sugar
¾ teaspoon (3 ¾ ml) (4 ½ grams) salt (if using salted butter there is no need to alter this salt measurement)
1 teaspoon (5 ml) (6 grams) cinnamon
3 large eggs, lightly beaten
Grated zest of 1 lemon and 1 orange (I left this out)
2 teaspoons (10 ml) (very good) vanilla extract
1 teaspoon (5 ml) lemon extract or orange extract (I left this out)
¾ cup (180 ml) (4 ¾ ozs) (135 grams) mixed peel (link below to make your own) (I left this out)
1 cup (240 ml) (6 ozs) (170 gms) firmly packed raisins (I used approx 1 1/2 cups choc chips – 250g)
3 tablespoons (45ml) rum (I left this out)
12 red glacé cherries (roughly chopped) for the color and the taste. (optional) (I left this out)
1 cup (240 ml) (3 ½ ozs) (100 grams) flaked almonds
Melted unsalted butter for coating the wreath
Confectioners’ (icing) (powdered) sugar for dusting wreath

Note: If you don’t want to use alcohol, double the lemon or orange extract or you could use the juice from the zested orange.

Soak the raisins (I left this out)
In a small bowl, soak the raisins in the rum (or in the orange juice from the zested orange) and set aside. See Note under raisins.

To make the dough:

Pour ¼ cup (60 ml) warm water into a small bowl, sprinkle with yeast and let stand 5 minutes. Stir to dissolve yeast completely.

In a small saucepan, combine 1 cup (240 ml) milk and 10 tablespoons (150 ml) butter over medium – low heat until butter is melted. Let stand until lukewarm, about 5 minutes.

Lightly beat eggs in a small bowl and add lemon and vanilla extracts.

In a large mixing bowl (4 qt) (4 liters) (or in the bowl of an electric mixer with paddle attachment), stir together the flour, sugar, salt, cinnamon, orange and lemon zests.

Then stir in (or mix on low speed with the paddle attachment) the yeast/water mixture, eggs and the lukewarm milk/butter mixture. This should take about 2 minutes. It should be a soft, but not sticky ball. When the dough comes together, cover the bowl with either plastic or a tea cloth and let rest for 10 minutes.

Add in the mixed peel, soaked fruit and almonds and mix with your hands or on low speed to incorporate. Here is where you can add the cherries if you would like. Be delicate with the cherries or all your dough will turn red!

Sprinkle flour on the counter, transfer the dough to the counter, and begin kneading (or mixing with the dough hook) to distribute the fruit evenly, adding additional flour if needed. The dough should be soft and satiny, tacky but not sticky. Knead for approximately 8 minutes (6 minutes by machine). The full six minutes of kneading is needed to distribute the dried fruit and other ingredients and to make the dough have a reasonable bread-dough consistency. You can tell when the dough is kneaded enough – a few raisins will start to fall off the dough onto the counter because at the beginning of the kneading process the dough is very sticky and the raisins will be held into the dough but when the dough is done it is tacky which isn’t enough to bind the outside raisins onto the dough ball.

My KitchenAid couldn’t fit this in it, so I kneaded it by hand

Lightly oil a large bowl and transfer the dough to the bowl, rolling around to coat it with the oil. Cover the bowl with plastic wrap.
Put it in the fridge overnight. The dough becomes very firm in the fridge (since the butter goes firm) but it does rise slowly… the raw dough can be kept in the refrigerator up to a week and then baked on the day you want.

Shaping the Dough and Baking the Wreath

Let the dough rest for 2 hours after taking out of the fridge in order to warm slightly.

Line a sheet pan with parchment paper.

Preheat oven to moderate 350°F/180°C/gas mark 4 with the oven rack on the middle shelf.

Punch dough down, roll into a rectangle about 16 x 24 inches (40 x 61 cms) and ¼ inch (6 mm) thick.

Starting with a long side, roll up tightly, forming a long, thin cylinder.

Transfer the cylinder roll to the sheet pan. Join the ends together, trying to overlap the layers to make the seam stronger and pinch with your fingers to make it stick, forming a large circle. You can form it around a bowl to keep the shape.

Using kitchen scissors, make cuts along outside of circle, in 2-inch (5 cm) intervals, cutting 2/3 of the way through the dough.

Twist each segment outward, forming a wreath shape. Mist the dough with spray oil and cover loosely with plastic wrap.

Proof for approximately 2 hours at room temperature, or until about 1½ times its original size.

Bake the stollen for 20 minutes, then rotate the pan 180 degrees for even baking and continue to bake for 20 to 30 minutes (Mine took approx 40min in total). The bread will bake to a dark mahogany color, should register 190°F/88°C in the center of the loaf, and should sound hollow when thumped on the bottom.

Transfer to a cooling rack and brush the top with melted butter while still hot.

Immediately tap a layer of powdered sugar over the top through a sieve or sifter.

Wait for 1 minute, then tap another layer over the first.

The bread should be coated generously with the powdered sugar.

Let cool at least an hour before serving. Coat the stollen in butter and icing sugar three times, since this many coatings helps keeps the stollen fresh – especially if you intend on sending it in the mail as Christmas presents!

When completely cool, store in a plastic bag. Or leave it out uncovered overnight to dry out slightly, German style.

The stollen tastes even better in a couple of days and it toasts superbly…. so delicious with butter and a cup of tea….mmmmm

Storage
The more rum and the more coatings of butter and sugar you use the longer it will store.
The following is for the recipe as written and uses the 45 mls of rum and two coatings of butter and icing sugar
1. Stollen freezes beautifully about 4 months
2. The baked stollen stores well for 2 weeks covered in foil and plastic wrap on the counter at room temperature and
3. One month in the refrigerator well covered with foil and plastic wrap.

Crostata con la Crema – Daring Bakers Challenge November 2010

Saturday, November 27th, 2010

The 2010 November Daring Bakers’ challenge was hosted by Simona of briciole. She chose to challenge Daring Bakers’ to make pasta frolla for a crostata. She used her own experience as a source, as well as information from Pellegrino Artusi’s Science in the Kitchen and the Art of Eating Well.

Spring is almost over, before it even really begun. This year we had two lovely days of Spring weather at the beginning of September, followed by many days of rain, cold days and lots of windy days.

This last week has been beautiful. Quite warm, but not too hot (I say this, even though I work in an air-conditioned building). Our garden is going crazy – plants and weeds alike. Three plants in particular are quite exciting at the moment: our fig, blueberry and raspberry. All three plants are in their second Spring season and are very happy, we have a number of figs forming, quite a few blueberries and many raspberries.

One thing I didn’t understand when I bought the raspberry is the shop assistance’s advice: Watch out, the raspberry can take over… What? Isn’t that a good thing? Surely people aren’t unhappy about loads of raspberries.

What he should have said was: Watch out, the raspberry sends suckers through the lawn and new plants shoot up more than one metre away from the original plant meaning you have no control of where are how far it will travel… Whoops!! Luckily running the mower over them have stopped new plants forming in the middle of our yard – I hope!

Although my baking (and blogging) has been hindered by the lovely weather and constant maintenance of our yard, this recipe chosen for the daring bakers this month was great, as many components can be made the day or night before, and cooked while everyone is eating dinner.

My family are huge fans of Portuguese custard tarts, so I had no trouble picking pastry cream to fill my tart shell.

I must admit I used the food processor for the dough to make the tart shell. It seemed a bit dry and wasn’t coming together, so I added a touch more egg white (ok, accidentally – a bit more than a touch – making it a little too soft).

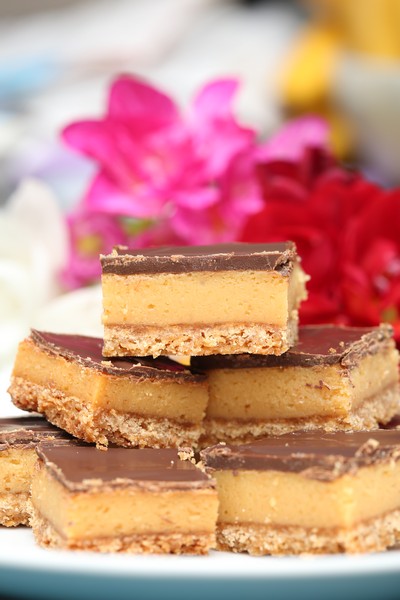
I didn’t blind bake my tart, I just added the pastry cream and cooked it for 40 minutes or more, until the pastry cream was set and the pastry golden. The pastry was lovely in texture and taste – very lovely. I thought I needed more pastry cream for the tart, although perhaps because the pastry was a little soft, it shrunk or fell a little at the sides, making it more level with the pastry cream when cooked.

I was very happy with the length of time required for this challenge and was more than happy to try out another pastry and pastry cream recipe – and my family was more than happy to have it for dessert 🙂

Thanks to our host for this month, for trialling so many recipes for people to choose from and be inspired from.

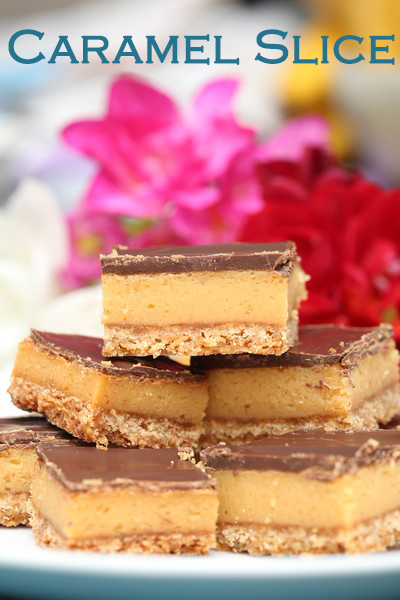
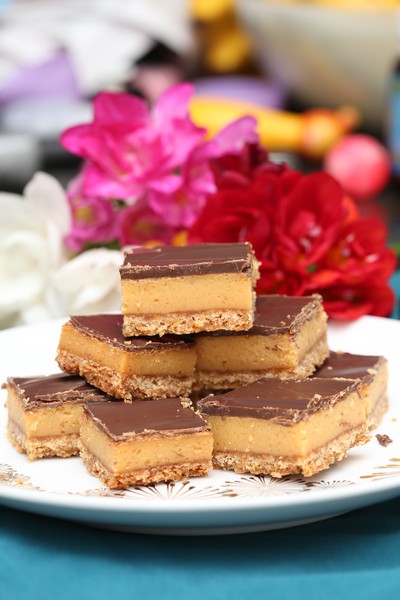
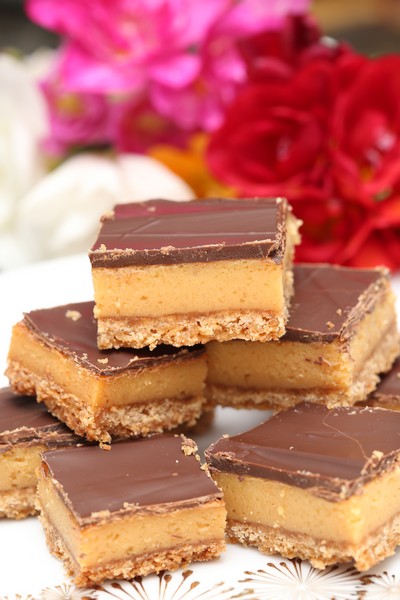
Crostata con la Crema (crostata with pastry cream filling)

Recipe Source: There are many recipes for pasta frolla and different ideas about how to make it. I will give you two versions that I have been using for some time. They have been inspired by those in the book La scienza in cucina e l’arte di mangiare bene by Pellegrino Artusi (1820-1911). The book was first published in 1891, and is available in English translation as Science in the Kitchen and the Art of Eating Well (further details are given in the Additional Information section).

Pasta frolla

1/2 c. minus 1 tablespoon [105 ml, 100 g, 3 ½ oz] superfine sugar (see Note 1) or a scant 3/4 cup [180ml, 90g, 3 oz] of powdered sugar
1 and 3/4 cup [420 ml, 235 g, 8 1/4 oz.] unbleached all-purpose flour
a pinch of salt
1 stick [8 tablespoons / 4 oz. / 115 g] cold unsalted butter, cut into small pieces
grated zest of half a lemon (you could also use vanilla sugar as an option, see Note 2) (I didn’t use this)
1 large egg and 1 large egg yolk, lightly beaten in a small bowl

Note 1: Superfine sugar is often also referred to as ultrafine, baker’s sugar or caster sugar. It’s available in most supermarkets. If you cannot find “superfine” sugar, you can make your own by putting some regular granulated sugar in a food processor or blender and letting it run until the sugar is finely ground.

Note 2: There are different ways of making vanilla sugar. I keep vanilla beans in a jar half-filled with sugar until I need to use them, for example, to make vanilla ice cream. After I remove the split bean from the custard that will go into the ice cream maker, I rinse it, dry it and put it back in the jar with sugar.

Making pasta frolla by hand:

Whisk together sugar, flour and salt in a bowl.

Rub or cut the butter into the flour until the mixture has the consistency of coarse crumbs. You can do this in the bowl or on your work surface, using your fingertips or an implement of choice.

Make a well in the center of the mounded flour and butter mixture and pour the beaten eggs into it (reserve about a teaspoon of the egg mixture for glazing purposes later on – place in the refrigerator, covered, until ready to use).

Add the lemon zest to your flour/butter/egg mixture.

Use a fork to incorporate the liquid into the solid ingredients, and then use your fingertips.

Knead lightly just until the dough comes together into a ball.

Shape the dough into a flat disk and wrap in plastic wrap. Place the dough in the refrigerator and chill for at least two hours. You can refrigerate the dough overnight.

Making pasta frolla with a food processor:

Put sugar, flour, salt, and lemon zest in the food processor and pulse a few times to mix.

Add butter and pulse a few times, until the mixture has the consistency of coarse meal.

Empty food processor’s bowl onto your work surface

See step 3 above and continue as explained in the following steps (minus the lemon zest, which you have already added).

Pastry Cream

2 eggs
1/2 cup caster sugar
500ml milk
1 teaspoon vanilla essence
3 tablespoons plain flour

Heat milk in a saucepan until almost bubbling. Whisk eggs with caster sugar, then whisk in plain flour. Slowly pour half the warm milk over the egg sugar mixture, mixing well to stop the eggs cooking. Pass the egg mixture through a sieve back into the saucepan. Place the saucepan back over medium heat and continue stirring the mixture until it bubbles. Pour the pastry cream into a bowl and place the bowl in a sink or bowl with cold or icy water, add the vanilla essence and stir the pastry cream until cooled. Refrigerate until cool.


Assembling and baking the crostata con la crema:

Heat the oven to 350ºF [180ºC/gas mark 4].

Take the pasta frolla out of the fridge, unwrap it and cut away ¼ of the dough. Reserve this dough to make the lattice top of the crostata. Refrigerate this dough while you work on the tart base.

To help roll the crostata dough, keep the dough on top of the plastic wrap that you had it wrapped in. This can help rolling the dough and can also help when transferring the dough to your pan. You can also use parchment paper for this. However, you can also roll the dough directly on a work surface if you prefer.

Lightly dust the top of the dough and your work surface (if you’re rolling directly on a work surface) with flour. Keep some flour handy to dust the dough as you go along.

If the dough is very firm, start by pressing the dough with the rolling pin from the middle to each end, moving the rolling pin by a pin’s width each time; turn the dough 180 degrees and repeat; when it softens, start rolling.

Roll the dough into a circle about 1/8th inch (3 mm) thick.

If you used the plastic wrap or parchment paper as rolling surface, flip dough over the pan, centering it, and delicately press it all around so the corners are well covered. Peel away the plastic wrap.

Trim the excess dough hanging over the edges of the pan. Press the remaining dough around the border into the sides of the pan making sure the border is an even thickness all the way around.

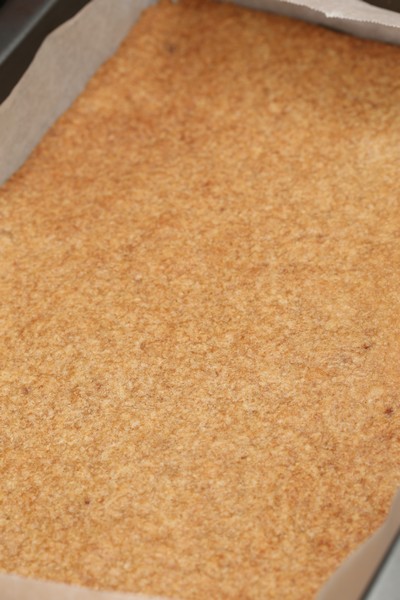
Prick the bottom of the dough with a fork in several places.

Take out of the fridge the reserved pasta frolla you had cut away earlier. Roll it with your pin and cut into strips or use cookie cutters to make small shapes (this is not traditional, but it looks cute); or roll with your hands into ropes.

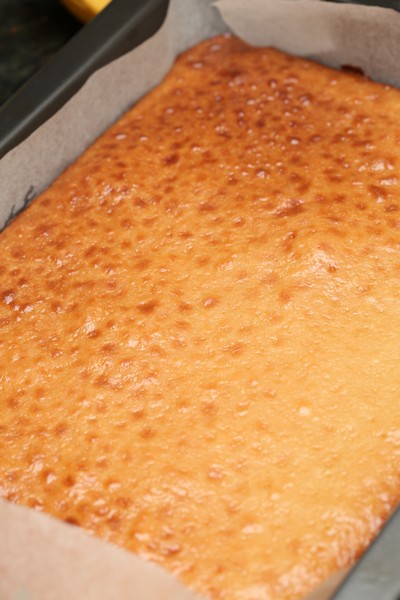
Instead of jam or fruit preserves, cover the bottom of the crostata crust evenly with the pastry cream.

Use the prepared strips or rolls of dough to make a lattice over the surface, or decorate with the cut shapes. (Note: You can use dough scraps to make cookies: see the Additional Information section for some pointers)

Brush the border and strips of dough with the reserved beaten eggs. You can add a drop or two of water to the beaten eggs if you don’t have enough liquid.

Put the tart in the oven and bake for 30 minutes.

After 35 minutes, check the tart, and continue baking until the tart is of a nice golden hue. (Note: Every oven is different. In my oven it took 45 minutes to bake the tart until golden.)

When done, remove the tart from the oven and let cool. If you have used a tart pan with a removable bottom, then release the tart base from the fluted tart ring. Make sure the tart is completely cool before slicing and serving.

Asparagus, Broad Bean and Poached Egg Tart

Sunday, October 24th, 2010

Asparagus is on a great special at the moment in the shops and is tasting fantastic too. I always like using fresh, seasonal ingredients, because not only do they have an amazing taste, they are likely to have traveled less distance to reach the shops, and are also a good price – which is important to most people.

I have only just started getting into eating asparagus. This year in particular has been one where my whole family is eating asparagus – and broad beans too. I now have broad beans with a lot of meals, although we are lucky if they make it to the plate – as I tend to eat them whilst shelling them.

This is a quick and easy meal with fresh ingredients. I wish I was growing asparagus and broad beans as that would make it even more enjoyable and fresh. I haven’t left you with a recipe of how to poach eggs, as I haven’t come across a fool-proof way of making them yet so they look good. For my ones (which still tasted great), I boiled up water in a medium saucepan, added a splash of vinegar, stirred
the water, then added the egg. The eggs came apart a bit whilst cooking, although stayed together enough – they cooked for 2-4 minutes and were then drained.

Asparagus, Broad Bean and Poached Egg Tart

Recipe by Anita @ Leave Room for Dessert

Serves: 4

1 tablespoon olive oil
5 large onions, sliced
1/2 teaspoon salt
2 bunches of asparagus
2 cups broad beans
4-8 poached eggs
2 sheets puff pastry, thawed and halved
Caramelised balsamic vinegar to serve
Shaved Parmesan cheese, to serve

Preheat oven to 180C.

Heat oil in a medium saucepan on high. Add the onion and salt, stir and turn the heat down to medium/low (alternating if need be to make sure the onions don’t burn). Cook for 10-20 minutes until the onions are caramelised.

Place pastry halves on two lined baking trays. Divide the onion mix across the pastry halves, leaving a 2cm gap around the outside edges. Cook in the oven for 10-20 minutes until the pastry on the outside is puffed and golden brown.

Whilst the tarts are cooking, poach the eggs (with the method I used above, or according to your preferred method), and cook the asparagus and broad beans.

To cook the asparagus and broad beans, boil water in a medium saucepan. Place the broad beans in the water and cook for 2 minutes, or a little longer if they haven’t come to the surface of the water. Place in cold water straight away, to stop the cooking. Remove skins from the broad beans. Place the asparagus into the boiling water and cook for 2 minutes. Place in the cold water.

Rinse the broad beans and asparagus under a small amount of hot water, before draining and placing on top of the cooked onion tart. Top with 1-2 poached eggs per tart and drizzle caramelised balsamic vinegar around the edges.

Tropical Snow Egg

Tuesday, August 3rd, 2010

After our trip to Quay last year, I have wanted to replicate Peter Gilmore’s Snow egg. It never occurred to me again, until I saw Peter Gilmore in a Gourmet Traveller video, where he showed roughly how his two signature desserts (the eight-textured chocolate cake and the snow egg) were made, along with his inspiration behind them. I went searching for recipes for poached meringues, crispy tuilles and with terrible luck (and terrible search terms) it took me quite a few hours before I had found the actual recipe on the internet…

And then I saw it everywhere, even little searches brought me to his recipe, either posted by someone who went to Peter’s cooking class or even on a lifestyle website. Then it was the final dish to be prepared by MasterChef contestants in series 2.

The best part of this dessert being on MasterChef were the comments by people below the recipe, as everyone was discussing where to buy maltose. Beforehand I tried looking in the shops and found rice malt – a brownish liquid maltose (+ carbohydrates and a little glucose). I decided to try it out, without trying any other parts of the recipe, to see if this would work. It didn’t. The tuilles melted into a terrible mess. After checking out the MasterChef website I found people suggesting going to Asian grocery stores. And with much luck, my local Asian grocery store had it. I had to ask for it though as it was too difficult to find, although the lovely staff member there found me some – it was labelled: Wheat Sprout Sugar, Ingredients: Rice, malt…

These tuilles were perfect! They worked very well on baking paper and hardly any broke. It also didn’t matter if they stayed on the paper a while.

The other piece of equipment I was missing were the hemisphere moulds. Although my Mum came up with the brillant idea of using an egg poacher for the meringue moulds. Lucky my mum’s one had smooth hemispheres compared to mine with a flat base. These worked perfectly, with the only problem being that there were only 4 moulds, so I had to clean them between cooking each batch of 4 halves. I made a total of 8 snow eggs, so this part got tedious after the 2nd batch.

The flavours Peter uses are gorgeous, although trying to make this using seasonal fruits or frozen fruits I had on hand, made me change the recipe to suit the timing of the year. I decided on a passionfruit ice cream for the “yolk” of the egg, with a tropical, strawberry, pineapple and passion fruit granita along with a strawberry cream. I think most flavours worked wonderfully – although the strawberry cream was maybe a little overpowering in flavour.

I have learnt so much from this challenge – the maltose experience was extremely interesting, as were making the poached meringue and granita. I am so glad I have made this, and even more glad the extremely talented and incredibly gifted Peter Gilmore shared such a beautiful recipe of his. I would much like to go back to Quay at some point as the experience was just amazing. I am also greatly anticipating the launch of his book on 1st November this year!!! I tried to make my own version of Peter Gilmore’s eight textured chocolate cake as I could not find his recipe anywhere – although it didn’t turn out particularly well in the presentation department (and obviously didn’t compare to the flavours of Peter’s, but was still delicious). I’m not sure whether I should post it due to the bad photos… – although I have heard his actual recipe may be in his book – making me super excited!!

And to answer your questions, I think this dessert is worth making. Many components can be made the night or a few nights beforehand, the presentation is lovely, the flavours are beautiful, the concept is amazing. (Although, this is on the condition of getting some hemisphere moulds – as cleaning the egg poachers was too tedious. Please let me know if you find any in Sydney or on the internet?) {now that’s not a hint for a birthday present, if I ever did give one 🙂 }

Tropical Snow Egg

Recipe adapted from Peter Gilmore from Quay‘s Guava and Custard Apple Snow Egg

Passion fruit ice cream
100ml milk
3 egg yolks
100g caster sugar
100g passion fruit pulp
50ml pouring cream

Vanilla custard base
400ml pouring cream
2 vanilla beans, split and seeds scraped
1 whole egg
3 egg yolks
80g caster sugar

Tropical granita
100g caster sugar
500ml water
150g pineapple, diced
100g passion fruit pulp
100g fresh strawberries, hulled and halved

Poached meringue (I used all the left over egg whites from the ice cream and custard – making a meringue of ~200g egg whites and ~200g caster sugar)
Canola oil spray or vegetable oil
150g egg white
150g caster sugar

Maltose tuiles
200g liquid maltose
100g caster sugar
20g flaked almonds

Vanilla cream

100g vanilla custard base
100g double cream

Strawberry Cream
100g of strawberries, pureed and sieved
200g vanilla cream

1 cup icing sugar, to serve

Preheat oven to 150ºC and turn on ice cream machine to chill.

For the passion fruit ice cream, bring milk to the boil in a small saucepan. Whisk egg yolks and sugar together by hand, then pour boiling milk onto the egg yolk mixture while whisking. Pour into a stainless steel bowl and cook while whisking over a pot of simmering water for about 10 minutes or until it is thickened. Whisk sabayon until cool over ice, then whisk in the passion fruit pulp and the cream. Strain and then place the mixture into an ice cream machine and churn for about 40 minutes. Place in the freezer until set.

For the vanilla custard base, heat cream and vanilla seeds together in a small saucepan until it just begins to boil, and then remove from the heat. Whisk by hand the eggs, egg yolks and sugar together in a stainless steel bowl until combined. While whisking the eggs, slowly pour on the hot vanilla cream. Mix well and remove the vanilla pods. Pour this mixture into 4 dariole moulds to a depth of 5 cm, place the dariole moulds into a small baking dish with boiling water around the dariole moulds up to halfway to form a water bath. Place the water bath into a 150ºC oven and cook the custard 25 minutes or until the custard is just set. If the centre is still runny place in the freezer until set then place in refrigerator until needed.

For the granita, combine sugar and water in a large saucepan; bring to the boil then lower heat. Add diced fruit and gently simmer for 10 minutes. Take off the heat and allow to infuse at room temperature for 30 minutes. Pass the liquid through a muslin cloth and discard the solids. Pour the syrup into a lamington or slice tin to a depth of 5cm. Place in the freezer until solid. Scrape with a fork into crystals and then transfer to the freezer until required.

For the poached meringue, whisk the egg whites in an electric mixer until they form soft peaks and then slowly add the sugar bit by bit. Keep whisking until the meringue forms firm peaks and the sugar has dissolved. Spray hemisphere moulds lightly with canola oil spray. Spoon mixture into a piping bag fitted with a 1cm nozzle. Pipe mixture into moulds so it sits above the surface. Place the filled moulds into a large baking dish and pour boiling water into the baking dish to a depth of about 3cm. Bake at 150ºC for 15 minutes until just. Allow to cool for 2 minutes, then trim off tops so they are perfect hemispheres. Gently un-mould and place cut side up on a baking paper lined tray in the fridge until needed. Increase oven temperature to 180ºC.

To make the maltose tuiles, stir maltose and sugar together in a small saucepan then bring to the boil until it reaches hard crack stage (until it caramelises) (this will occur at 160ºC or a little higher). Take care to brush down the sides with a pastry brush dipped in water so it doesn’t crystallise. Once golden add the flaked almonds and immediately pour the mixture onto a silicon mat, allow to cool completely. Process the cooled praline in the bowl of a hand blender to form a fine powder. Next sift a fine layer of the praline mixture through a drum sieve, over an acetate stencil with 11cm circles cut out of it onto a silicon mat on a baking sheet. Melt this mixture in a 180ºC oven for a few minutes until it forms a clear liquid paste. Cool tuiles slightly and peel off silicon sheet while still flexible. Store flat between sheets of baking paper until ready to use.

For the vanilla cream, whisk the cream and custard together to form soft peaks. Store in the fridge until ready to use.

For the strawberry cream, place the strawberry puree in a small bowl and fold through the vanilla cream gently to form a rippled effect. Do this just before you are ready to assemble the dessert.

To assemble, take 8 of the half hemisphere poached meringues. Using a teaspoon or half teaspoon measure remove a small scoop from the centre of each half hemisphere being careful not to break through the outer edge. Then place a teaspoon or half teaspoon measure scoop of passion fruit ice cream in four of the hemispheres. Invert the other four hemispheres over the ice cream filled meringues to form a complete sphere. Use wet fingers to stick the two halves together. Place a tuile on top of each sphere and using a blow torch and an even motion, melt it over the sphere, patting it down if necessary. Dust spheres liberally with icing sugar. Next add a generous spoonful of the strawberry cream in the bottom of each serving glass. Top the cream with the tropical granita. Use two teaspoons to place the snow egg on top of the granita and serve.