Breads

Cinnamon Rolls – Daring Bakers Challenge June 2014

Friday, June 27th, 2014

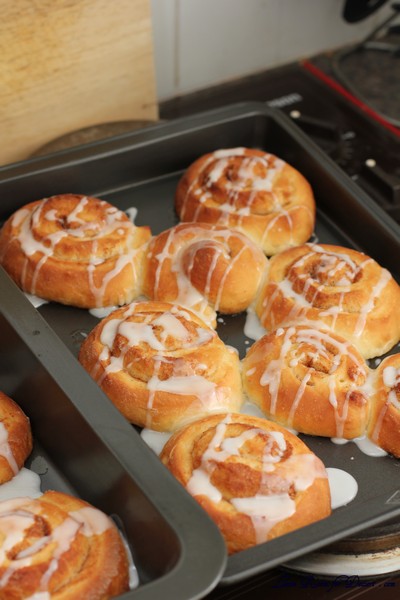
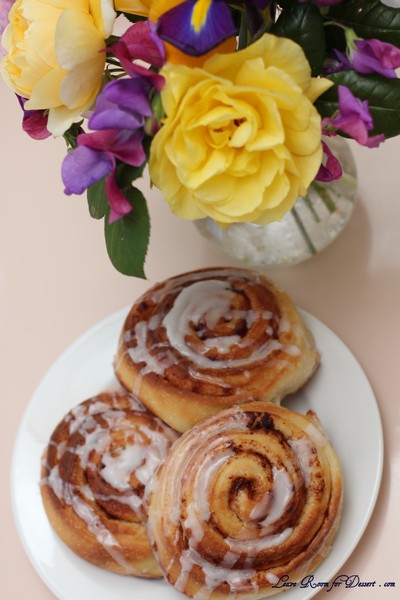
This month the Daring Bakers kept our creativity rolling with cinnamon bun inspired treats. Shelley from C Mom Cook dared us to create our own dough and fill it with any filling we wanted to craft tasty rolled treats, cinnamon not required!

Cinnamon rolls (or scrolls) have been a favourite treat for my family since I tried it a year or two ago. They come out at special holidays, or family breakfasts.

I’m very happy with my current recipe, although as past experiences would confirm, sometimes it does pay to try another recipe. I once tried a new banana bread recipe, only to be asked – Why would you try another one? Your one is great, we don’t need to try another recipe. Only to hear exclamations of happiness for the new recipe.

This recipe for cinnamon rolls differs slightly to my usual one, the dough is slightly more cake like, likely due to the addition of egg. There is also no butter in the middle of the scroll, although this doesn’t seem to make a huge difference to the overall flavour or consistency.

By the end of the day all the rolls were eaten, but I doubt they would have kept well, as some of the ones left to the afternoon had started losing their freshness. Overall the flavour and consistency were lovely. Although I am likely to stick to my original recipe for the future.

There were a few other recipes suggested for this months challenge, including a roasted banana cinnamon bun with maple glaze…. now that I have to try…

Cinnamon Buns

(from The Bread Baker’s Apprentice by Peter Reinhart)
Makes 8-12 large or 12-16 smaller buns

Ingredients
6½ tablespoons (100 ml) (3 oz) (90 gm) granulated sugar
1 teaspoon (5 ml) (6 gm) salt
5½ tablespoons (85 ml) (2¾ oz) (80 gm) shortening, unsalted butter or margarine, at room temperature
1 large egg, slightly beaten
1 teaspoon (5 ml) lemon extract OR 1 teaspoon (5 ml) grated lemon zest (I used vanilla essence)
3½ cups (840 ml) (16 oz) (450 gm) unbleached bread (or all-purpose/plain) flour
2 teaspoons (10 ml) (¼ oz) (6 gm) instant yeast (active dry worked as well)
1 1/8 – 1 ¼ cups (270-300 ml) whole milk or buttermilk, at room temperature
½ cup (120 ml) (3½ oz) (100 gm) cinnamon sugar (6½ tablespoons (100ml) (3 oz) (90 gm) granulated sugar plus 1½ tablespoons (20 ml) (1/3 oz) (10 gm) ground cinnamon)

Directions:

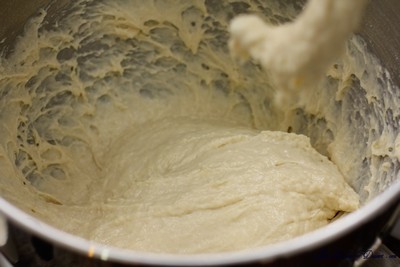
In a stand mixer fitted with the paddle attachment, cream together sugar, salt and shortening (though it is not difficult to do by hand, using a strong spoon).
Add the egg and lemon extract to the creamed sugar and shortening and mix together until smooth.
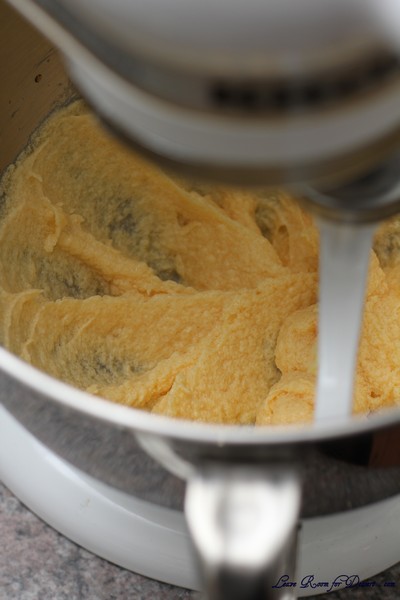
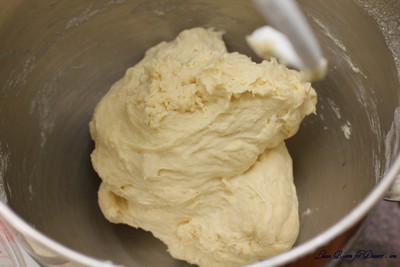
Add the flour, yeast and milk to the mixer and mix on low speed until the dough begins to form a ball.
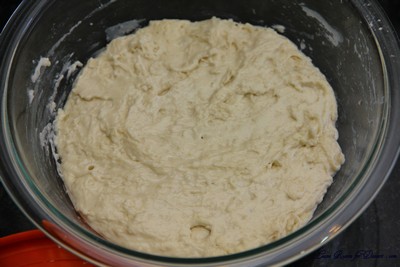
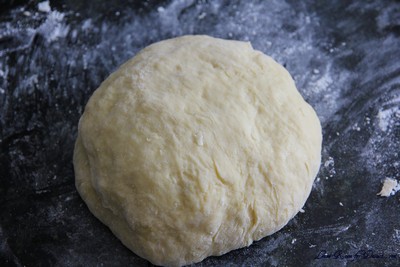
At this point, switch to the dough hook attachment and knead for 10 minutes (if kneading by hand, you will probably need to do so for closer to 12 – 15 minutes). The dough will be silky and supple, but not overly sticky. You may need to add a touch of flour if your dough is too sticky – that is okay.

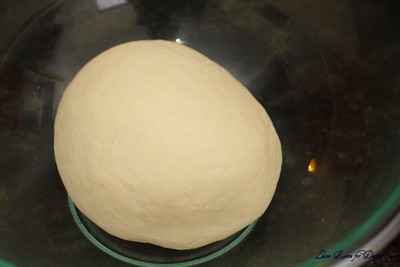
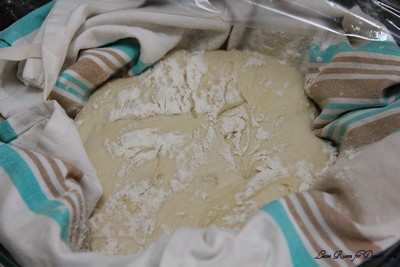
Lightly oil a bowl, turn the kneaded dough out into it, turning to coat, then cover the bowl with plastic wrap.
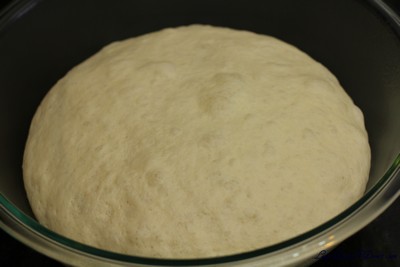
Allow the dough to rest (ferment) until it has doubled in size, approximately 2 hours.
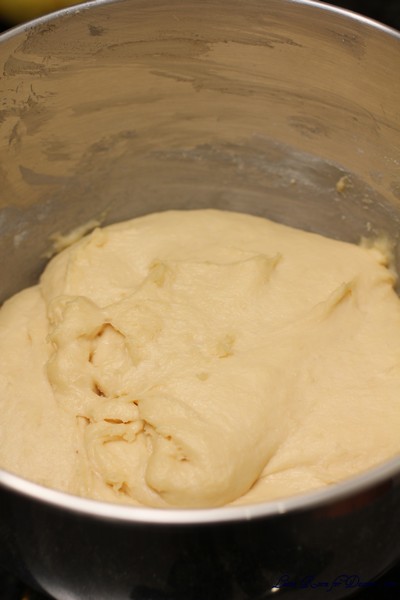
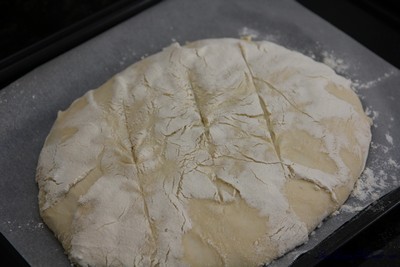
Once the dough has rested and risen, you are ready to shape the cinnamon buns. Prepare your a sheet pan by lining it with parchment paper.
Spray your work surface lightly with cooking spray and turn the dough out onto the work surface.
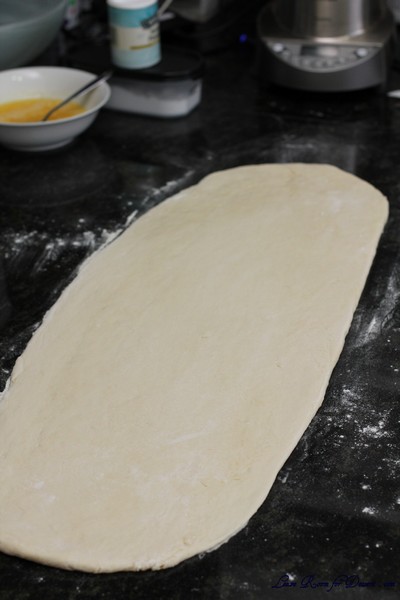
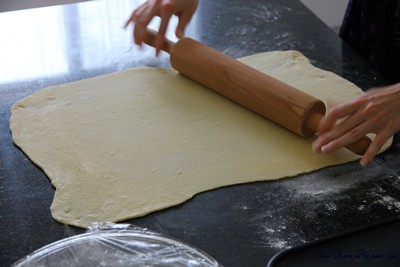
Using a rolling pin, roll the dough, into a rectangle about 2/3 an inch (15 mm) thick, 14 inches (350 mm)wide and 12 inches (300 mm) long (for large buns) (or 18 inches (450 mm) wide by 9 inches (230 mm) long for smaller ones). You may need to sprinkle the dough and/or work surface with a bit of flour to keep the dough from sticking. This is okay.
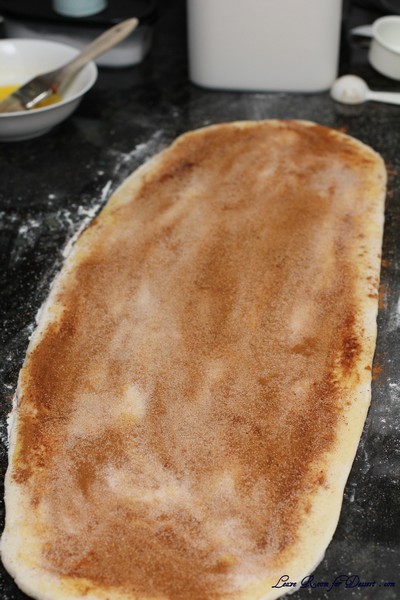
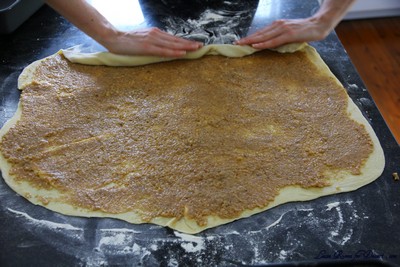
Sprinkle the cinnamon sugar filling over the surface of the dough.

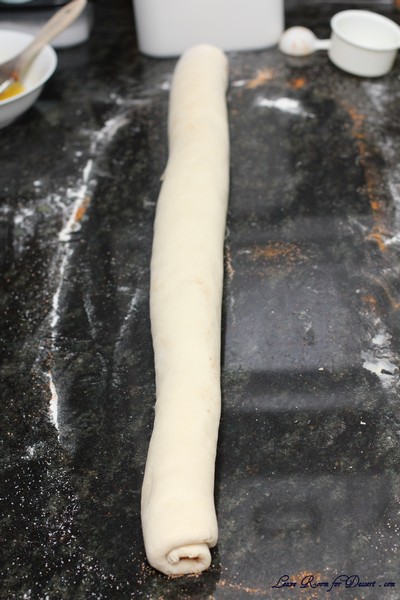
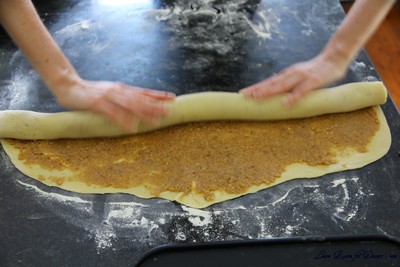
Starting with a long end, roll the dough, creating a spiral, into a log shape, making sure to end with the seam side down.
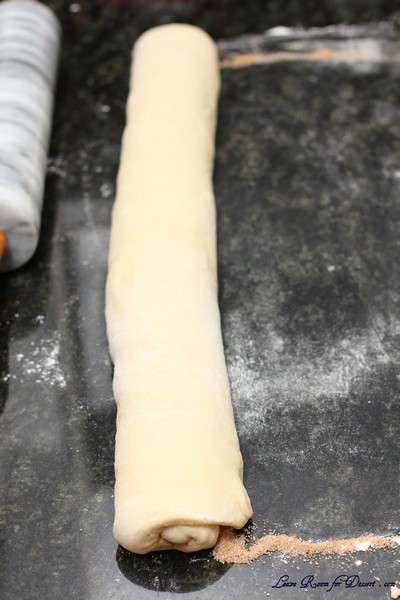
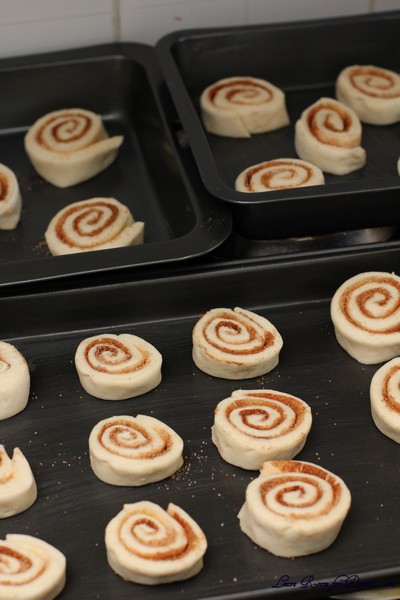
Cut the dough into pieces approximately 1¾ inches (45 mm) thick (for large buns) (1¼ inch (30 mm) for smaller buns).
Place buns approximately ½ inch (15 mm) apart on the prepared pan. They shouldn’t be touching at this time.
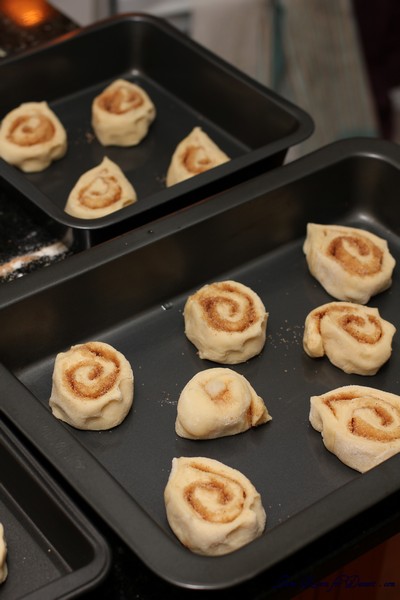
Allow the shaped buns to proof at room temperature for 75 – 90 minutes until they have nearly doubled in size. They will now be touching each other. If you are not planning on baking the buns the same day as you are preparing them, you can place them into the refrigerator after they are shaped (before this rise) for up to 2 days. If you do so, you will need to allow them to return to room temperature prior to baking, which means removing them from the refrigerator about 3 or 4 hours before baking.
Preheat the oven to moderate 350°F/180°C/gas mark 4 degrees at the end of this proofing time.
Bake the buns for 20 – 30 minutes, until golden brown
Allow the buns to cool for 10 minutes in the pan, then drizzle with glaze (recipe below). Remove the buns from the pan to a cooling rack and allow them to cool for at least 20 minutes before eating.

White fondant glaze for cinnamon buns:
(also from The Bread Bakers’ Apprentice)

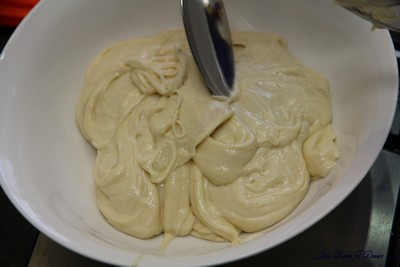
Sift 4 cups (500 gm) (17½ oz) of confectioners’ (icing) sugar into a large bowl. Add 1 teaspoon (5 ml) of lemon or orange extract and between 6 tablespoons to ½ cup (90 to 120 ml) warm milk, whisking well until all of the sugar is dissolved. (Add the smaller amount of milk first, whisking briskly, then add slowly until you have the consistency you want for drizzling over the buns.)

Notes:
You can replace the lemon extract/zest with the extract/flavoring of your choice. I usually use vanilla extract.
This dough is silky, smooth and so lovely to work with, and the resulting buns are light and so incredibly easy to eat. I have made these several times, with traditional cinnamon-sugar filling and also with a fruit compote for a fresh, summery treat. Delicious!

Cinnamon Scrolls

Saturday, March 30th, 2013

I love fond memories of food from when you were younger or on holidays. I always remember the “love heart” candies and have looked all over the internet for these lollies. I have found many a love heart candy – none living up to the shape and size of the original ones, and none living up to the flavour.

I also have memories of a yummy and fantastic cinnamon scroll – the thing is, I have no idea where this originates from. I think it must have been bought somewhere – but I am still left wondering – where was this ideal scroll I ate…

I searched the internet for what I thought would make this magical scroll, and I kept finding recipes with an icing over the top – and this didn’t fit my memory, although almost all the recipes have icing, so I figured there must be a reason, it surely tastes great with the icing.

After trying this recipe, I have not looked elsewhere. This recipe is lovely and I have made it several times, and it has almost become a tradition for Easter or Christmas, holiday times, times with family or friends.

I have tried doing everything for this recipe all in one day, and also leaving to prove over night. Both work fine. Sometimes food has to fit around your schedule. I often make the full quantity – so double the recipe below, which makes about 60, as you can bake them at separate times.

Cinnamon Scrolls

ROLLS:
Recipe adapted from: Sugar and Spice (I changed a couple quantities in the frosting recipe and filling)

Makes about 30

DOUGH:
2 cups whole milk
1/2 cup vegetable oil
1/2 cup sugar
1 pkg active dry yeast (2 1/4 teaspoons or approx 1 tablespoon)
4 1/2 cups flour
1/2 teaspoon baking powder
1/2 teaspoon baking soda (bi-carb soda)
1/2 tablespoon salt

FILLING:
50-100g melted butter, plus more as needed
2 tablespoons ground cinnamon for sprinkling (or more or less to taste)
1/2 cup sugar, plus more as needed

Directions:
Mix milk, vegetable oil, and 1/2 cup of sugar in a pan. Scald the mixture (heat until just before the boiling point.) Remove from heat and let it cool 45 minutes to 1 hour.

When the mixture is lukewarm to warm, but NOT hot, sprinkle in package Active Dry Yeast. Let this sit for a minute and then add 4 cups of flour. Stir mixture together. Cover and let rise for at least an hour.

Next, add 1/2 cup flour, the baking powder, baking soda, and salt. Stir mixture together. From here, you could cover the dough and put it in the fridge until you need it—overnight or even a day or two, if necessary. Just keep your eye on it and if it starts to rise out of the pan, just punch it down. Or, of course, you can just go ahead and make the rolls.

Sprinkle surface generously with flour and roll the dough into a thin rectangular shape (approx 0.5cm x 28cm x 60cm). Brush melted butter on top, then sprinkle sugar over the butter, and finish with a generous sprinkling of cinnamon.

Starting with the wide end, roll the dough tightly towards you in a neat line. Next, pinch the seam to the roll to seal it. Spread 1 tbsp of melted butter in each pan/dish. With a sharp knife, begin cutting the dough into 1 inch slices, and laying them in the pans. Let rest for 20-30 minutes. Bake at 180C for 13 – 17 minutes, or until golden.

IF MAKING AHEAD FOR CHRISTMAS or EASTER MORNING: Instead of popping them into the oven, just put them straight into the fridge and let them rise for the 2nd time in the fridge overnight (they’ll rise VERY slowly in the fridge). Then, in the morning let them sit at room temperature for about 30 minutes, and then pop them in the oven as directed.

FROSTING: (you could multiply the frosting by 1.5 or 2x if you like loads of icing)
Ingredients:
100-200g icing sugar or icing mixture
1/2 tsp. maple flavoring (I left this out)
1/8 (30ml) cup milk
1-2 tablespoons (about 10g) melted butter
2 tablespoons brewed coffee (I didn’t use this, as I don’t like coffee – instead I added a dash of vanilla essence)
Pinch of salt

Directions:
Mix together all ingredients, and stir well until smooth. It should be thick but pourable. Taste and adjust as needed. Generously drizzle over the warm rolls.

Raincoast Crisps – Daring Bakers Challenge February 2013

Wednesday, February 27th, 2013

Sarah from All Our Fingers in the Pie was our February 2013 Daring Bakers’ host and she challenges us to use our creativity in making our own Crisp Flatbreads and Crackers! 🙂
It wouldn’t be the end of the month without me rushing to finish and post my Daring Bakers Challenge. This month was focused around crackers, and after the last challenge made such wonderful ones, I was looking forward to it.

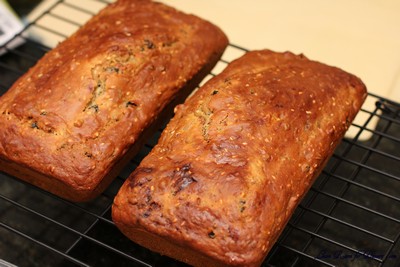
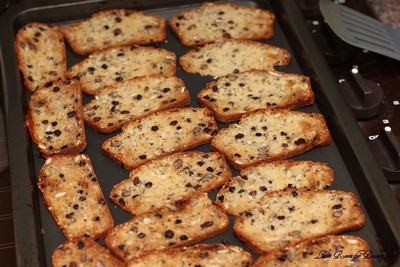
I think I may have chosen the easiest recipe given, as the dough came together very quickly. Although when it came to drying all the crackers, this looked like it would take a reasonable amount of time, as my oven only has two shelves (and the bottom shelf never cooks as fast or even). One loaf when sliced as thin as I could manage fit on two trays and after needing to put a pie in the oven, I decided on leaving the second loaf – as we had already eaten some of the thin slices that weren’t cut very well.

We ate the loaf for breakfast, sliced thickly, grilled and with a bit of butter, and it tasted very nice – with the currants (I used instead of raisins), adding a nice addition of sweetness and moisture. I think my parents in law would be quite surprised to see me eating dried fruit in bread or cake as I’ve always had an aversion to it.

I think the loaf was a little nicer than the crisps, as the flavour was more evident. I would definitely consider making the bread component of this challenge again.

Thanks to our host this month! It’s always a pleasure trying new recipes.

Raincoast Crisps

From Dinner with Julie blog with Julie van Rosendahl
Servings: About 8 dozen

Ingredients
2 cups (480 ml) (280 gm) (10 oz) all-purpose (plain) flour
2 teaspoons (10 ml) (10 gm) (1/3 oz) baking soda
1/2 teaspoon (2½ ml) (3 gm) salt
2 cups (480 ml) buttermilk
1/4 cup (60 ml) (50 gm) (1¾ oz) brown sugar, firmly packed
1/4 cup (60 ml) honey
1 cup (240 ml) (180 gm) (6½ oz) raisins (I used half a cup of currants)
1/2 cup (120 ml) (60 gm) (2 oz) chopped pecans
1/2 cup (120 ml) (125 gm) (4½ oz) roasted pumpkin seeds (optional)
1/4 cup (60 ml) (30 gm) (1 oz) sesame seeds
1/4 cup (60 ml) (30 gm) (1 oz) flax seed, ground
1 tablespoon (15 ml) (2 gm) finely chopped fresh rosemary

Directions
Preheat oven to moderate 350°F/180°C/gas mark 4.
In a large bowl, stir together the flour, baking soda and salt. Add the buttermilk, brown sugar and honey and stir a few strokes. Add the raisins, pecans, pumpkin seeds, sesame seeds, flax seed and rosemary and stir just until blended.
Pour the batter into two 8”x4” (20cmx10cm) loaf pans that have been sprayed with nonstick spray. Bake for about 45 minutes, until golden and springy to the touch. Remove from the pans and cool on a wire rack.

The cooler the bread, the easier it is to slice really thin. You can leave it until the next day or pop it in the freezer. Slice the loaves as thin as you can and place the slices in a single layer on an ungreased cookie sheet. Slice so thin that they are almost lacy. Reduce the oven heat to slow 300°F/150°C/gas mark 2 and bake them for about 15 minutes, then flip them over and bake for another 10 minutes, until crisp and deep golden. You can also cut in half before the second baking. This is the way I like them. The size works better. Be careful not to burn.

Storage and Freezing Instructions/Tips: Store in an airtight container at room temperature for up to 1 month. Prolong the freshness by freezing for up to 3 months.

Panettone – Daring Bakers Challenge December 2012

Thursday, December 27th, 2012

The December 2012 Daring Bakers’ challenge was hosted by the talented Marcellina of Marcellina in Cucina. Marcellina challenged us to create our own custom Panettone, a traditional Italian holiday bread!

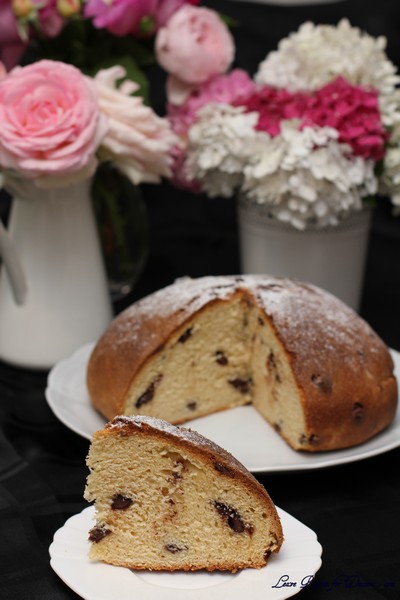
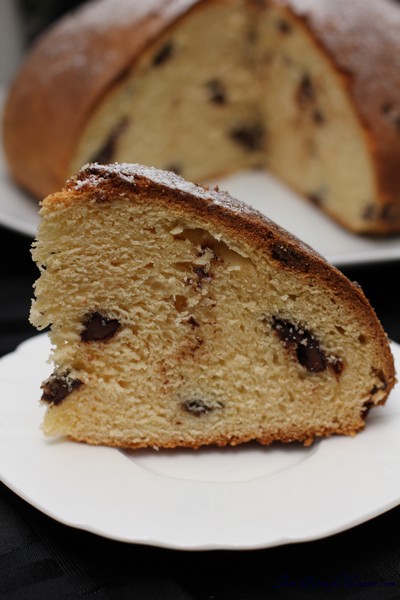
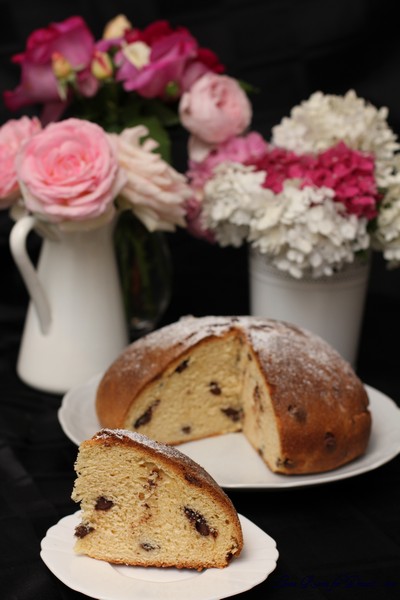
Like most recipes that require dried fruit, I always tend to substitute chocolate. I don’t normally get many complaints either, so no doubt you have already noticed that this isn’t your traditional panettone.

Honestly I have never tried a panettone before, and wasn’t sure what to expect. It was a mix between a cake and bread, and quite interesting – although due to my exclusions of this recipe, I doubt I have done it justice. The addition of the extra flavours would have made it more appealing to most.

A great suggestion I received only a few hours ago included using panettone in place of bread for French toast – it sounds splendid, and I might just give it ago on the weekend.

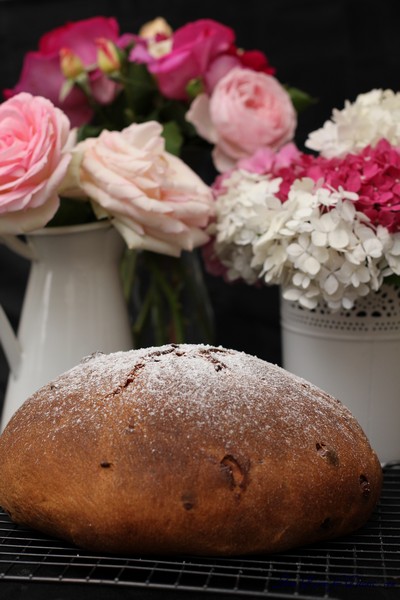
My panettone didn’t rise as much as I would have expected in the second and final rise, it’s quite possible I added too much flour – as I was trying to get a dough consistency. Due to this it looked more like a bun, causing Nick to name it “‘bun’-ettone”. I didn’t add the lemon or orange essence, and I changed the final ingredients for chocolate chips.

For a more detailed post on making the panettone see Marcellina’s post.

I hope everyone had a wonderful Christmas, and has an exciting New Year.

Panettone

Makes 2 Panettoni

Ingredients

Sponge
1 satchel (2¼ teaspoons) (7 gm) active dry yeast
1/3 cup (80 ml) warm water
½ cup (70 gm) unbleached all purpose flour

First Dough
1 satchel (2¼ teaspoons) (7 gm) active dry yeast
3 tablespoons (45 ml) warm water
2 large eggs, at room temp
1¼ cup (175 gm) unbleached all-purpose (plain) flour
¼ cup (55 gm) (2 oz) sugar
½ cup (1 stick) (115 gm) unsalted butter, at room temp

Second dough
2 large eggs
3 large egg yolks
2/3 cup (150 gm) (5-2/3 oz) sugar
3 tablespoons (45 ml) honey
1 tablespoon (15 ml) vanilla extract
1 teaspoon (5 ml) lemon essence/extract
1 teaspoon (5 ml) orange essence/extract
1 teaspoon (5 ml) (6 gm) salt
1 cup (2 sticks) (225 gm) unsalted butter, at room temp
3 cups (420 gm) (15 oz) unbleached all-purpose (plain) flour; plus up to (2/3 cup) 100 gm for kneading

Filling and final dough
1½ cups (250 gm) (9 oz) golden raisins or golden sultanas
½ cup (75 gm) (2-2/3 oz) candied citron ( I didn’t have this so I made it up with candied orange peel)
½ cup (75 gm) (2-2/3 oz) candied orange peel (try making your own; recipe below)
Grated zest of 1 orange
Grated zest of 1 lemon
2 to 3 tablespoons (30-45 ml) (15-25 gm) unbleached all-purpose (plain) flour

Directions:

Sponge

Mix the yeast and water in a small bowl and allow to stand until creamy. That’s about 10 minutes or so
Mix in the flour.
Cover with plastic wrap and allow to double in size for about 20 to 30 minutes

First Dough

By hand:

Mix the yeast and water in a large bowl and allow to stand until creamy. Again, about 10 minutes or so
Mix in the sponge and beat well with a wooden spoon
Stir in the eggs, flour and sugar.
Mix in the butter well
This should only take about 5 – 6 minutes
Cover with plastic wrap and allow double in size, about 1 – 1 ¼ hours

By Mixer:

In the mixer bowl, mix together the yeast and water and allow to stand until creamy. Again, about 10 minutes or so
With the paddle attached mix in the sponge, eggs, flour, and sugar.
Add in the butter and mix for 3 minutes until the dough is smooth and even.
Cover with plastic wrap and allow double in size, about 1 – 1 ¼ hours

Second dough

By Hand:

Be sure to have your dough in a large bowl as above.
With a wooden spoon mix in eggs, egg yolk, sugar, honey, vanilla, essences/extracts and salt.
Mix in the butter.
Then add the flour. Stir until smooth.
At this stage the dough will seem a little too soft, like cookie dough.
Turn it out and knead it on a well-floured surface until it sort of holds its shape. Don’t knead in too much flour but you may need as much as 2/3 cup (100 gm). Be careful the excess flour will affect the finished product.

By Mixer:

With the paddle mix in thoroughly the eggs, egg yolks, sugar, honey, vanilla, essences/extracts, and salt.
Mix in the butter until smooth.
Add the flour and slowly incorporate.
At this stage the dough will seem a little too soft, like cookie dough.
Replace the paddle with the dough hook and knead for about 2 minutes.
Turn out the dough and knead it on a well-floured surface until it sort of holds its shape.
Don’t knead in too much flour but you may need as much as 2/3 cup (100 gm). Be careful the excess flour will affect the finished product.

First Rise

Oil a large bowl lightly, plop in your dough and cover with plastic wrap
Now we need to let it rise until it has tripled in size. There are two ways to go about this.

Rise in a warm place for 2 – 4 hours
Or find a cool spot (64°F -68°F) (18°C – 20°C) and rise overnight
Or rise for 2 hours on your kitchen bench then slow the rise down and place in the refrigerator overnight. If you do this it will take some time to wake up the next morning but I preferred this method.

Filling and Final Rise:

Soak the raisin/sultanas in water 30 minutes before the end of the first rise. Drain and pat dry with paper towels.
Now take your dough and cut it in half. Remember we are making two panettoni.
Combine all your filling ingredients and mix well
Press out one portion of dough into an oval shape
Sprinkle over one quarter of the filling and roll up the dough into a log
Press out again into an oval shape and sprinkle over another quarter of the filling
Roll into a log shape again.
Repeat with the second portion of dough
Shape each into a ball and slip into your prepared pans, panettone papers or homemade panettone papers.
Cut an X into the top of each panettone and allow to double in size.
Rising time will vary according to method of first rise. If it has been in the refrigerator it could take 4 hours or more. If it has been rising on the kitchen bench in a warm place it should be doubled in about 2 hours.

Baking

When you think your dough has only about 30 minutes left to rise preheat your oven to moderately hot 400°F/200°C/gas mark 6 and adjust your oven racks
Just before baking carefully (don’t deflate it!) cut the X into the dough again and place in a knob (a nut) of butter.
Place your panettoni in the oven and bake for 10 minutes
Reduce the heat to moderate 350°F/180°C/gas mark 4 and bake for another 10 minutes
Reduce the heat again to moderate 325°F/160°C/gas mark 3 and bake for 30 minutes until the tops are well browned and a skewer inserted into the panettone comes out clean.
Cooling your panettone is also important. If you have use papers (commercial or homemade) lie your panettoni on their side cushioned with rolled up towels. Turn gently as they cool. If you have used pans cool in the pans for 30 minutes then remove and cushion with towels as above.
Panettone can also be cooled suspended. How to do this? Firstly you need to use papers (commercial or homemade), insert clean knitting needles into the bottom of the panettone in a X shape. Flip over and support the knitting needles on the edges of a large saucepan with the panettone suspended within the saucepan. Yep, a lot of trouble and I didn’t really find that much difference – maybe I took too long to insert the needles.

Empanadas – Daring Bakers Challenge September 2012

Thursday, September 27th, 2012

Patri of the blog, Asi Son Los Cosas, was our September 2012 Daring Bakers’ hostess and she decided to tempt us with one of her family’s favorite recipes for Empanadas! We were given two dough recipes to choose from and encouraged to fill our Empanadas as creatively as we wished!

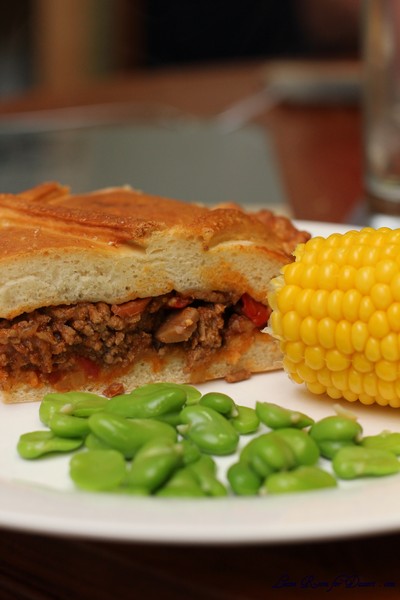
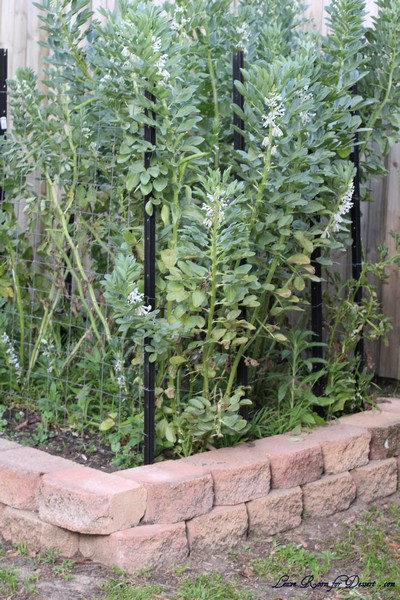
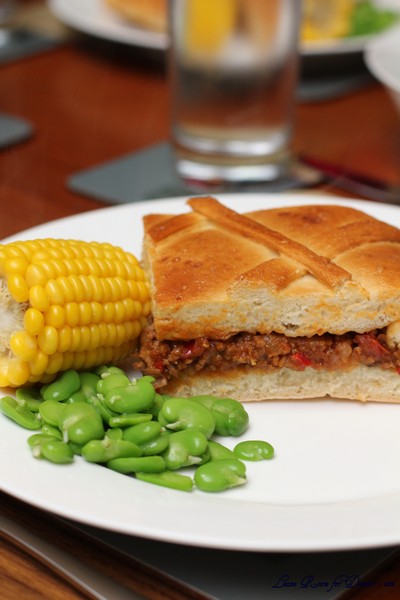
Nick’s veggie beds are all made 🙂 After the removal of some palm trees and their never ending root system, a partly new fence, a sturdy woodshed (made by my very talented Dad), there was finally room and time for Nick to make some raised garden beds. He used retaining wall blocks to build 5 veggie beds. On the weekend we were able to harvest our first broad beans from the bed, and we shared them with family – just as we shared this month’s Daring Bakers Challenge.


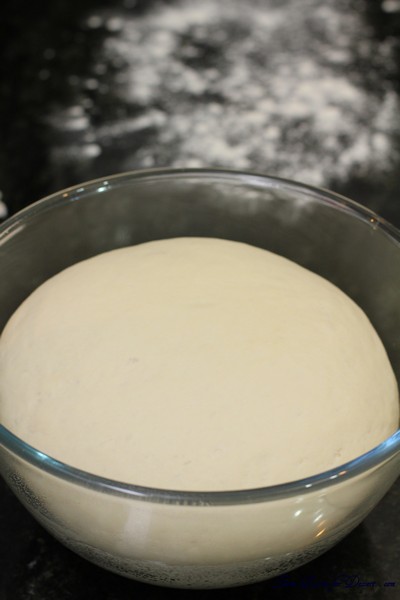
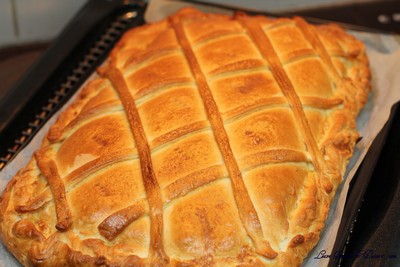
This recipe was quite easy to make and very tasty. I would love to make it again – maybe with a few changes on the ratio of bread to filling. (see my notes below). After seeing how easy it is, I’d love to try some more fillings.

My notes on the recipe:
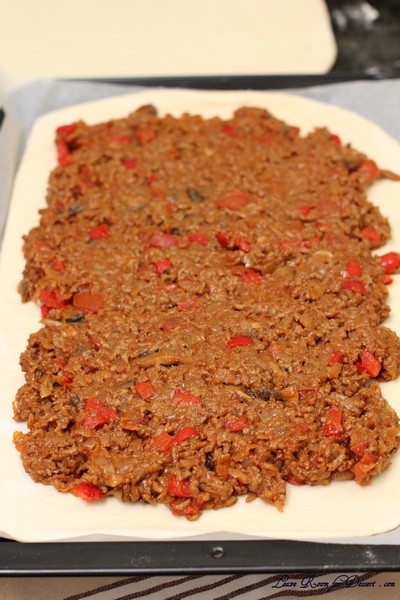
I made double the meat mix and 1x the dough mix. Next time I will make about 4x the meat mix (~1kg), and 1x dough – and make it into 2x emapanadas (one on each tray).
We added extra spices to the meat mix – try some salt, and cumin powder (and maybe some tomato paste). I also used mushrooms and red capsicum.

Empanadas

Serves about 8-10


Dough Ingredients:

5-1/3 cups (1280 ml) (750 gm) bread flour
2 cups (480 ml) of lukewarm water (about 85°F/30ºC), approximately
1 satchel (1 tablespoon) (15 gm) dry yeast or (1 oz) (30 gm) fresh yeast
2 teaspoons (10 ml) (11 gm) salt
4 tablespoons (60 ml) oil (you can use oil from the pan where you have cooked the filling)
1 large egg, for egg wash

Measure out all the ingredients.
Shift the flour into a big bowl and make a well in the middle. Rub the yeast in with your fingers.
In a small bowl, mix the water and the salt.
Now, using your fingers or a wooden spoon, start adding the water and mixing it with the flour-yeast mixture. Keep on working with your fingers or spoon until you have added enough water and all the flour has been incorporated and you have a messy ball of dough.
On a clean counter top, knead the dough for approximately 10 minutes
You could do all the above using a stand mixer, in that case mix the ingredients with the paddle attachment until mixed and then switch to a dough hook and knead on low for about 6 minutes.

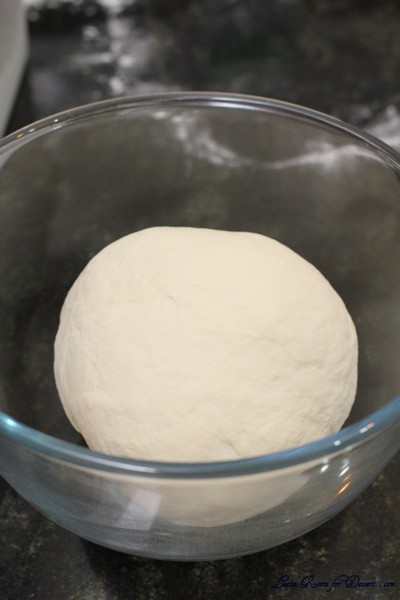
Clean and oil the big bowl you used for mixing and place the kneaded dough in it. Cover it with a napkin or piece of linen and keep it in a warm, draught-free place for approximately 40 to 50 minutes.

Once risen, turn the dough back into a floured counter and cut it in half. Cover one half with the napkin to prevent drying.
Spread the other half of the dough using a rolling pin. You can use a piece of wax paper over the counter, it will make it easier to move the dough around. Depending on the shape of your oven pan or cookie sheet, you will make a rectangle or a round.
Now, the thinness of the dough will depend on your choice of filling and how much bread you like in every bite. For your first time, make it about 3mm thin (about 1/10th of an inch) and then adjust from that in the next ones you make.

Ground meat filling:

400 gm (14 oz) chopped onion (approximately 1 big onion or 2 medium-sized ones)
200 gm (7 oz) tomatoes (peeled and seeded)
1 small green pepper
2 garlic cloves
¾ cup (180 ml) olive oil
300 grams (2/3 pound or 10.5 ounces) minced (ground) meat
1 teaspoon sweet paprika

Heat the oil in a skillet
Fry the finely chopped onions, pepper and garlic until the vegetables are soft. Add then the tomatoes, chopped small, and cook until done.
Add the meat and cook for about 5 minutes.
Add the paprika, and stir into the frittata.
Allow to cool for at least 30 minutes.
Fill the empanada en bake as indicated.

Assembling the empanada:

If you haven’t used wax paper, either lightly flour or line with wax paper your pan or tray.
Cover the base and sides with the dough. Using the rolling pin or a knife, cut the extra dough.
Place the filling, making sure it is cold and that all the base is covered. Using a hot filling will make the bottom layer of the empanada become soggy. Be careful to avoid adding too much oil from the filling, try to make it as “dry” as possible.
Start preheating your oven to moderate 350°F/180ºC/gas mark 4.
Take the other half of the dough and spread it out to the same or less thinness of the base. You can use a piece of wax paper for this too. Take into account that this “top” dough needs to be smaller around than the bottom, as it only needs to cover the filling.

If not using wax paper, move carefully the top to cover the filling. If using wax paper, transfer the dough, turn upside down, cover the filling and gently peel off the wax paper.
Using your fingers, join bottom and top dough, when you have gone all the way around, start pinching top and bottom together with your thumb and index finger and turning them half way in, that way you end up with a rope-like border. As a picture is worth a thousand words, please watch this video to see how it is done: http://youtu.be/CNpB7HkTdDk
When you are finished, make a 1 inch hole in the middle of the top layer. This will help hot air exit the empanada while it’s baking without breaking the cover.
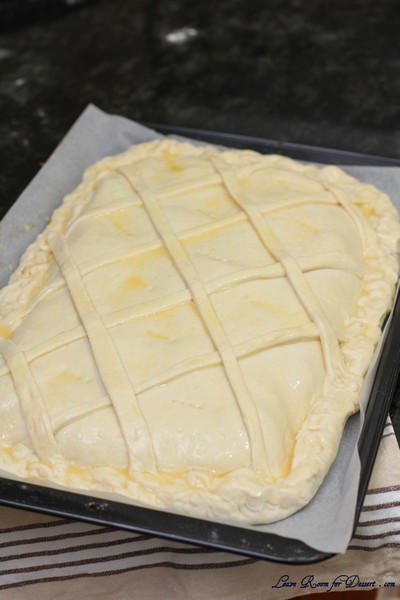
You can use left-over dough to decorate the empanada, using rounds, bows, lines… let your imagination flow and make it pretty!
Using a fork, prick the top layer or, using scissors, make snips that go all the way through the top layer.
In a small bowl, beat an egg and add a tbsp of cold water. With the pastry brush, paint the top of the empanada with the egg wash.

Place the empanada in the oven and bake for about 45 minutes. Check that the bottom part is done.

Challah – Daring Bakers Challenge May 2012

Sunday, May 27th, 2012

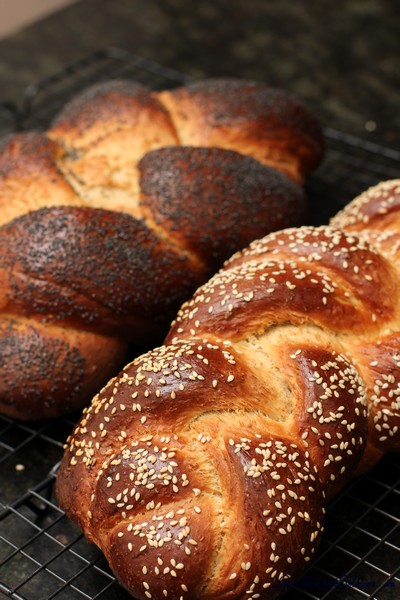
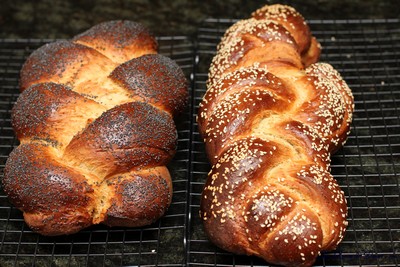
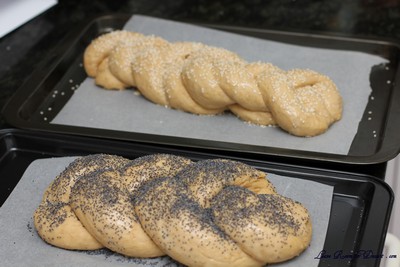
May’s Daring Bakers’ Challenge was pretty twisted – Ruth from The Crafts of Mommyhood challenged us to make challah! Using recipes from all over, and tips from “A Taste of Challah,” by Tamar Ansh, she encouraged us to bake beautifully braided breads.

I could not be happier with how my challah turned out this month. As I have never tried challah before, I can’t tell you how close this recipe is to bought ones, although I can tell you everyone who tried it was very happy with the taste and texture, and it was eaten quite quickly.

As it contains egg, it doesn’t last as long as other breads do, and would require an air-tight container, although is best eaten on the day of making.

It can be eaten by itself, which is how we mainly ate it (before dinner…), with leftovers being eaten grilled, or with caramelised balsamic vinegar and dukkah.

Thanks to our host this month, who gave three recipes for people to try, although I only got around to making one.

My anemone flowers are coming up at the moment, just before winter (I think I planted them in March). They are a beautiful addition to the garden at this time when some other plants are dying off before winter. Although I am not sure what time they will flower next year, as I thought they were going to flower in spring.

Ruth’s “Go-To” Whole Wheat Challah

(adapted from Tammy’s recipes)
Servings: 12

Ingredients
2 (.25 oz.) packages (4½ teaspoons) (22½ ml) (15 gm) (½ oz) dry yeast
1 cup (240 ml) warm water (100°F/38°C)
½ cup (120 ml) (100 gm) (3½ oz) brown sugar, firmly packed
½ cup (one stick) (120 ml) (115 gm/4 oz) margarine or unsalted butter – room temperature
2 tsp. (10 ml) (15 gm) (½ oz) salt
3 large eggs
2 cups (480 ml) (280 gm/10 oz) whole wheat flour
2 cups (480 ml) (280 gm/10 oz) all-purpose flour
½ cup (120 ml) (50 gm) (1¾ oz) rolled oats (Old Fashioned work just fine!)
Additional flour for kneading (½ to 1 cup) (120 to 240 ml) (70 to 140 gm) (2½ to 5 oz)
1 egg beaten with 1 tsp. water for glaze

Directions:

1. In the bowl of your stand mixer, dissolve yeast in warm water. Allow to stand about 5 minutes until creamy/foamy.
2. With paddle attachment beat 3 eggs, sugar, margarine (or butter), whole wheat flour, all purpose flour and oats into the yeast mixture. Or, if mixing by hand (ok, spoon), combine eggs and margarine/butter with yeast mixture until well mixed. Add flours and oats and mix until it becomes difficult to mix.
3. Once combined, switch to the dough hook and knead for 5 to 10 minutes until smooth and elastic, adding flour as/if needed. If kneading by hand, this should take about 10-12 minutes.
4. Form dough into a round, compact ball. Turn in oiled bowl, cover with a kitchen/tea towel. Let rise in warm area (I put it in the oven with the light on) until doubled, approx. 2 hours.
5. Once dough has doubled, punch down. Recover with towel, allow to rise again for an hour, but even 30 minutes will be fine if you’re in a hurry.
6. Punch the dough down again, divide in two.
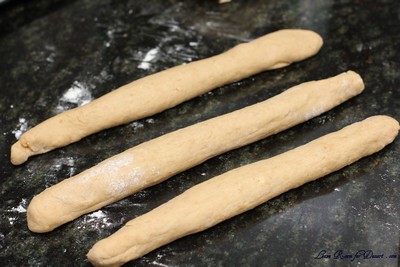
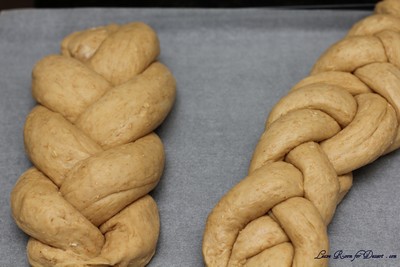
7. Shape each half as desired (3, 4 or 6 strand braid, rolls, etc.). Place shaped loaves onto parchment covered baking trays. Cover with the towel and allow to rise another hour.

8. Preheat oven to 350 degrees.
9. Brush loaves with egg wash. (Sprinkle with vanilla sugar/sesame seeds/poppy seeds/other topping here if desired)
10. Bake 30 to 40 min. until the loaf sounds hollow when tapped on the bottom.

11. Transfer loaves to a wire rack to cool before serving.

White Bread Roll with Dutch Crunch Topping – Daring Bakers Challenge March 2012

Tuesday, March 27th, 2012


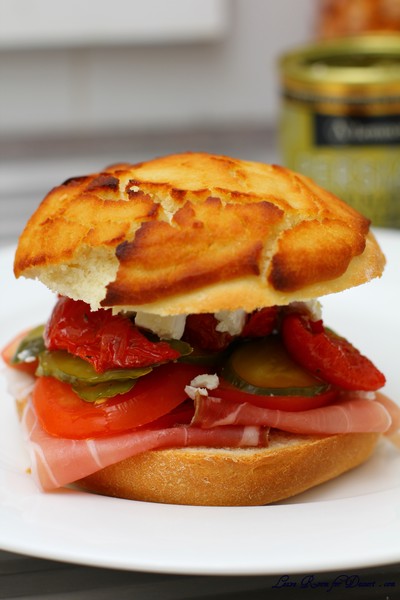
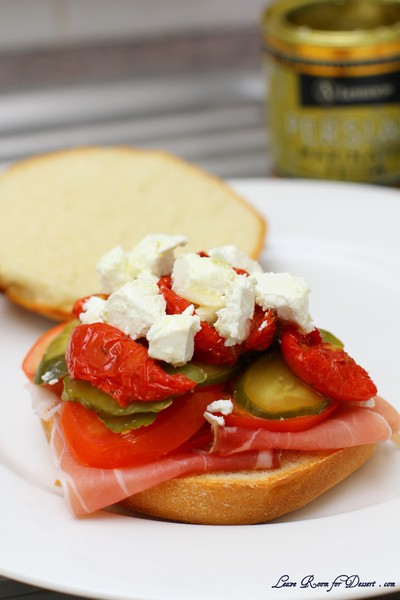
Sara and Erica of Baking JDs were our March 2012 Daring Baker hostesses! Sara & Erica challenged us to make Dutch Crunch bread, a delicious sandwich bread with a unique, crunchy topping. Sara and Erica also challenged us to create a one of a kind sandwich with our bread!

It has been a few months of bread challenges for the Daring Bakers. I must admit I have really enjoyed trying all these new recipes, I know I never would had gotten around to making most of them, or even finding the recipes on the internet. We still have our sourdough starter, and it is really working nicely now, hopefully Nick will do a guest post on it in the future.

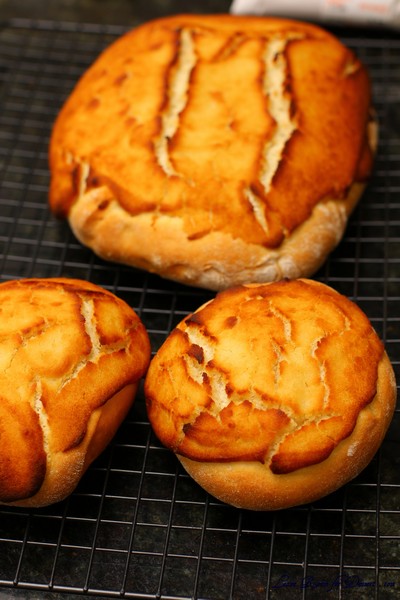
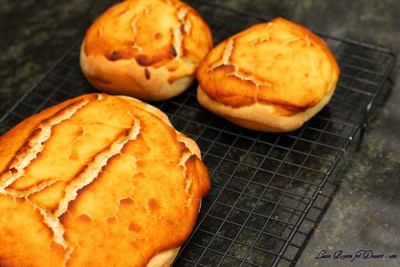
This month we had a few challenges, to make a bread, to use the Dutch crunch topping (also called Tiger bread due to its appearance once cooked), and the make a sandwich. I tried one of the bread recipes that was given as a suggestion, and it is one of the best quick breads I have made, with a lovely soft inside, I will be making it again.

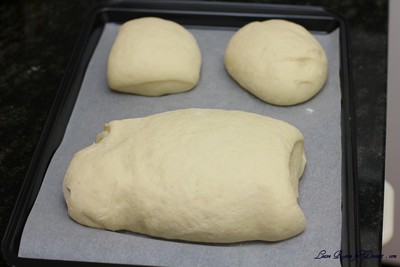
The Dutch crunch topping was very interesting to make, as it contains yeast and rice flour, and is like a bread dough in some ways. I used the suggested amount and had a nice thick layer on top of my bread. It came out lovely and crunchy. We used the rolls for sandwiches (I was going to use them as buns for veggie burgers, bit didn’t get around to making the veggie burger patties), and the loaf was warmed in the oven the next day and eaten with slow cooked beef in red wine with cous cous. I would also recommend eating it with olive oil, caramelised balsamic vinegar and dukkah.

The sandwiches we made had proscuitto, tomato, sliced polski-orgorki pickles and semi-dried tomatoes, topped with Persian Feta.


Recipe Source: The recipe for the Dutch Crunch topping came from Rose Levy Beranbaum’s The Bread Bible. The recipes for the breads we’ve suggested came from The Bread Bible and an adaptation of a recipe found on bakingbites.com (http://bakingbites.com/2006/09/cooking-school-dutch-crunch-bread/).

Dutch Crunch Topping

Servings: This recipe should make sufficient topping for two 9×5 loaves (23cmx13cm) or 12 rolls. If you make only 6 rolls in the first soft white roll recipe, you can cut the topping recipe in half.

We’ve provided this recipe first because it is the mandatory aspect of the challenge. Note, however, that you should not prepare the topping until the bread you’ve selected to bake is almost finished rising (~15 minutes from baking).

2 tablespoons (2 packets) (30 ml) (15 gm/½ oz) active dry yeast
1 cup (240 ml) warm water (105-115º F) (41-46°C)
2 tablespoons (30 ml) (30 gm/1 oz) sugar
2 tablespoons (30 ml) vegetable oil
½ teaspoon (2½ ml) (3 gm) salt
1½ cups (360 ml) (240 gm/8½ oz) rice flour (white or brown; NOT sweet or glutinous rice flour) (increase by 1 cup or more for home-made rice flour)

1. Combine all ingredients in a large bowl and beat with a whisk; beat hard to combine. The consistency should be like stiff royal icing – spreadable, but not too runny. If you pull some up with your whisk, as shown below, it should drip off slowly. Add more water or rice flour as necessary. Let stand 15 minutes.

2. Coat the top of each loaf or roll with a thick layer of topping. We tried coating it with a brush but it worked better just to use fingers or a spoon and kind of spread it around. You should err on the side of applying too much topping – a thin layer will not crack properly.
3. Let stand, uncovered, for any additional time your recipe recommends. With the Soft White Roll, you can place the rolls directly into the oven after applying the topping. With the Brown Rice Bread, the loaves should stand for 20 minutes with the topping before baking.
4. When baking, place pans on a rack in the center of the oven and bake your bread as you ordinarily would. The Dutch Cruch topping should crack and turn a nice golden-brown color.

Soft White Roll

Servings: Six sandwich rolls

This recipe approximates the quintessential white sandwich roll found throughout the Bay Area. The recipe is simple, quick, and addictive.

1 tablespoon (1 packet) (15 ml) (7 gm/ ¼ oz) active dry yeast
¼ cup (60 ml) warm water (105-110º F) (41-43°C) (No need to use a thermometer – it should feel between lukewarm and hot to the touch).
1 cup (240 ml) warm milk (105-110º F) (41-43°C) (We’ve tried both nonfat and 2%, with no noticeable difference)
1½ tablespoons (22½ ml) (20 gm/ ⅔ oz) sugar
2 tablespoons (30 ml) vegetable oil (plus additional olive or vegetable oil for greasing bowl during rising)
1½ teaspoons (7½ ml) (9 gm/⅓ oz) salt
Up to 4 cups (960 ml) (600 gm/21oz) all purpose flour

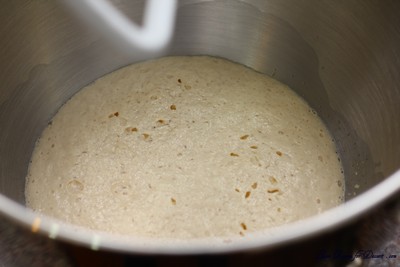
1. In the bowl of an electric mixer or large mixing bowl, combine yeast, water, milk and sugar. Stir to dissolve and let sit for about 5 minutes (The mixture should start to bubble or foam a bit and smell yeasty).

2. Add in vegetable oil, salt and 2 cups of flour. Using the dough hook attachment or a wooden spoon, mix at medium speed until the dough comes together. (The photo to below is with the first 2 cups of flour added).

3. Add remaining flour a quarter cup at time until the dough pulls away from the sides of the bowl, as shown in the photo below (For us, this usually required an additional 1½ to 2 cups of flour).

4. Turn out onto a lightly floured surface and knead for about 4 minutes, until smooth and elastic.
5. Place in a lightly greased bowl and cover with plastic wrap. Let rise for 1 hour, or until doubled (or more) in size (see photo comparison).

6. Once the dough has risen, turn it out onto a lightly floured surface and divide it into 6 equal portions (if you’d like to make rolls) or 2 equal portions (if you’d like to make a loaf) (using a sharp knife or a dough scraper works well). Shape each into a ball or loaf and place on a parchment-lined baking sheet (try not to handle the dough too much at this point).

7. Cover with plastic wrap and let rise for 15 minutes while you prepare the topping.
8. Coat the top of each roll or loaf with the topping as described above. While the original recipe recommends letting them stand for 20 minutes after applying the topping, I got better results by putting them directly into the oven.

9. Once you’ve applied the topping, bake in a preheated moderately hot 380ºF/190°C/gas mark 5 for 25-30 minutes, until well browned. Let cool completely on a wire rack before eating.

Our finished products: Note the roll in the foreground on the left. This is what happens if you don’t put enough topping on the bread – no cracking! So be sure to load on the topping.

Quick Bread – Daring Bakers Challenge February 2012

Monday, February 27th, 2012


The Daring Bakers’ February 2012 host was – Lis! Lisa stepped in last minute and challenged us to create a quick bread we could call our own. She supplied us with a base recipe and shared some recipes she loves from various websites and encouraged us to build upon them and create new flavor profiles.

Could there be a better occasion to make the Daring Bakers Challenge than for a picnic overlooking the Harbour Bridge and Opera House, and listening to great music?

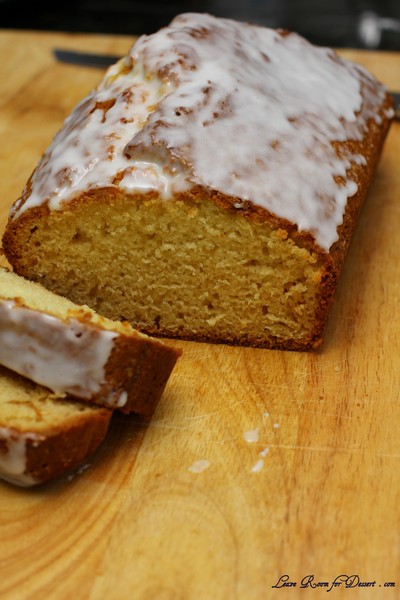
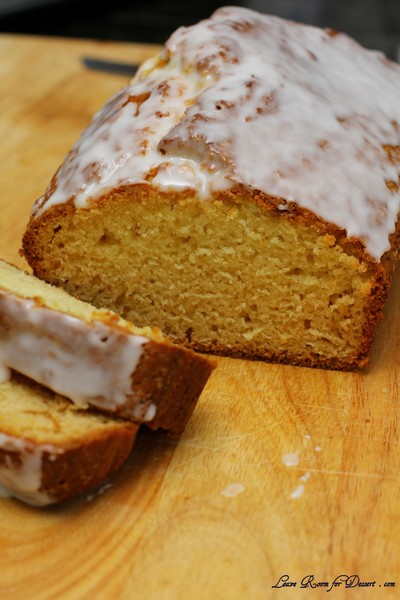
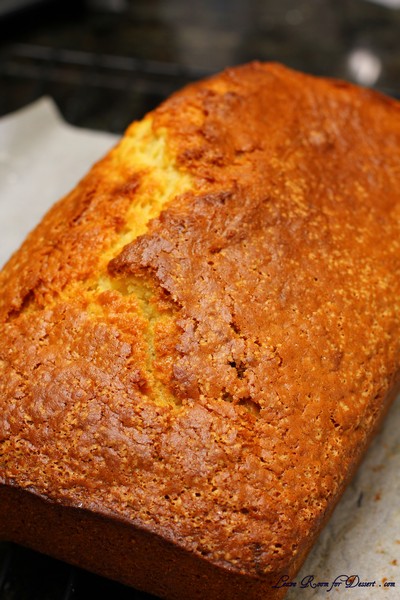
Well this last weekend, I quickly (hence the name) made the quick bread recipe given for our challenge this month. I looked through the ingredients and wondered how it would actually be a ‘bread’ – it really had cake ingredients and a sweet topping.

The quick bread was easy to make and tasted quite lovely. It had a texture that I couldn’t quite place, although others managed to pick the texture to be something like cornbread.

I must admit I did almost eat half the bread/cake in the afternoon, so not much sharing occurred 🙂

Thanks Lis for the recipe! It was great to have a quick and tasty challenge.

Basic Quick Bread

Makes one 9” x 5” (23×13 cm) loaf
Recipe from Sara Schewe

2 cups (480 ml) (250 gm/9 oz) all-purpose (plain) flour
1 cup (240 ml) (225 gm/8 oz) granulated sugar
1 teaspoon (5 ml) (5 gm) baking soda
1/2 teaspoon (2½ ml) (3 gm) fine sea salt or table salt
1 cup (240 ml) buttermilk or soured milk*
1 large egg
1/4 cup (60 ml) mild- or non-flavored oil, like canola
1 teaspoon (5 ml) flavored extract, such as vanilla or almond

for the glaze
1/3 cup (80 ml) (35 gm/1-1/3 oz) confectioners’ (icing) sugar
1-2 teaspoons (5-10 ml) milk

Directions:

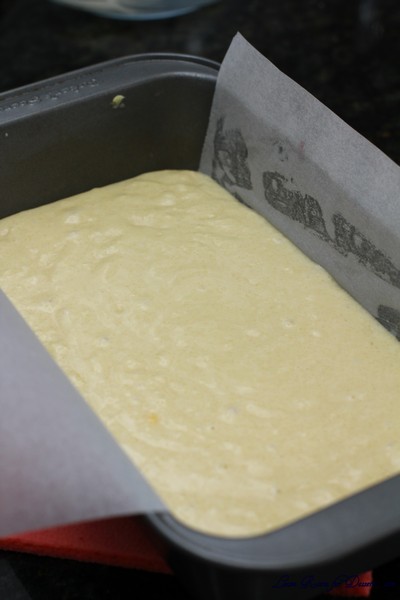
Preheat oven to moderate 350ºF/180ºC/gas mark 4. Grease a 9×5 inch (23×13 centimeter) loaf pan with butter and line with parchment paper cut to fit the length and width of the pan, with enough overhang to allow easy removal after baking. Grease the top sheet of parchment.
In large bowl, whisk flour, sugar, baking soda and salt to combine. Make a well in the center and set aside.
Lightly whisk (butter)milk, egg, oil, and extract to combine. Pour into well and stir until just mixed into a batter. The batter will be lumpy and may still show a few streaks of flour.
Pour batter into prepared pan. Bake for 40-50 minutes, or until a cake tester comes out clean. Cool in pan on wire rack for 10 minutes, then remove from pan and cool completely before slicing. Drizzle with glaze, if desired.

For the glaze: Slowly whisk confectioners’ (icing) sugar and half of the milk, adding more milk as needed to thin the glaze to the desired consistency.

Note: To make soured milk, combine 1 cup milk (240 ml) with 1 tablespoon (15 ml) vinegar or lemon juice and let sit for 10 minutes.

Sourdough – Update from December Daring Bakers Challenge

Thursday, January 26th, 2012

I made the sourdough from the December Daring Bakers Challenge very soon after my last post about it. Although it did not really turn out particularly well, so I sort of held back on this post. And the next challenge is to be posted in tomorrow!

Back to the sourdough. After having the sourdough starter go mouldy whilst I was sick, I made sure this one didn’t. The starter was nice and bubbly and certainly smelt quite sour, so I was hoping I had nice active yeast in the mix.

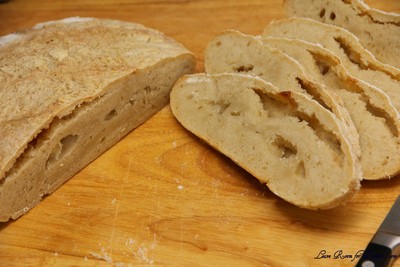
My First Sourdough - not so great looking

My first bread came out of the oven – and it hadn’t risen as much as I had hoped, I still crossed my fingers, although after cutting it through, we found it was still quite dough-y inside. Nice flavour, but texture was all wrong. I still have the starter dough though, and Nick has been making bread every weekend with it – although adding yeast to it – and it has been rising quite well. I wish I could part more information for you on troubleshooting, although as a newbie myself, I am just going to try and keep the starter and continue to feed it and hope the yeast becomes happier. At the moment I have it in the fridge, as I am a little scared I will forget about it on the bench and it will mould again.

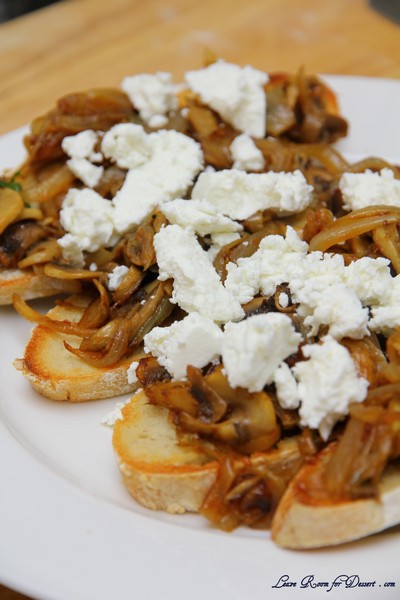
Even though the texture of this first bread was not so great, I still made the mushrooms from the given recipes and added some goats cheese on top, and you could hardly notice the bread’s heaviness once it was grilled and had a lovely topping on it.

Nick's sourdough - with a little yeast added

Thanks to our host (Jessica of My Recipe Project) for last month’s challenge – we are finally making sourdough – and I might just have the confidence to make more starter doughs…? 🙂

French Country Bread

Servings: 1 large loaf plus extra wheat starter for further baking

Wheat Starter – Day 1:
Ingredients
4 1/2 tablespoons (70 ml) (40 gm/1 ½ oz) stoneground breadmaking whole-wheat or graham flour
3 tablespoons (45 ml) water
Total scant ½ cup (115 ml) (3 oz/85 gm)

Directions:
1. In a Tupperware or plastic container, mix the flour and water into a paste.
2. Set the lid on top gently, cover with a plastic bag, to prevent messes in case it grows more than expected!
3. Set somewhere warm (around 86 F if possible). I sometimes put mine on a windowsill near a radiator, but even if it’s not that warm, you’ll still get a starter going – it might just take longer.

Wheat Starter – Day 2:
Ingredients
4 1/2 tablespoons (70 ml) (40 gm/1 ½ oz) stoneground breadmaking whole-wheat or graham flour
3 tablespoons (45 ml) water
scant 1/2 cup (115 ml) (3 oz/85 gm) starter from Day 1
Total scant cup (230 ml) (6 oz/170 gm)

Directions:
1. Stir the flour and water into the mixture from Day 1, cover, and return to its warm place.

Wheat Starter – Day 3:
Ingredients
4 1/2 tablespoons (70 ml) (40 gm/1 ½ oz) stoneground breadmaking whole-wheat or graham flour
4 teaspoons (20 ml) water
scant 1 cup (230 ml) (6 oz/170 gm) starter from Day 2
Total 1⅓ cup (320 ml) (230 gm/8-1/10 oz)

Directions:
1. Stir the flour and water into the mixture from Day 2, cover, and return to its warm place.

Wheat Starter – Day 4:
Ingredients
3/4 cup plus 1½ tablespoons (205 ml) (120 gm/4 ¼ oz) unbleached all-purpose flour
1/2 cup less 4 teaspoons (100 ml) water
1⅓ cup (320 ml) (230 gm/8 oz) starter from Day 3
Total scant 2⅔ cup (625 ml) (440 gm/15½ oz)

Directions:
1. Stir the flour and water into the mixture from Day 3, cover, and return to its warm place. At this point it should be bubbling and smell yeasty. If not, repeat this process for a further day or so until it is!

French Country Bread
Stage 1: Refreshing the leaven
Ingredients
1 cup less 1 tablespoon (225 ml) (160 gm/5 ⅔ oz) wheat Leaven Starter
6 tablespoons less 1 teaspoon (85 ml) (50 gm/1¾ oz) stoneground bread making whole-wheat or graham flour
1 cup plus 2 teaspoons (250 ml) (150 gm/5 ⅓ oz) unbleached all purpose flour
1/2 cup (120 ml) water
Production Leaven Total 2¾ cups plus 4 teaspoons (680 ml) (480 gm /1 lb 1 oz)

Directions:
1. Mix everything into a sloppy dough. It may be fairly stiff at this stage. Cover and set aside for 4 hours, until bubbling and expanded slightly.

French Country Bread

Stage 2: Making the final dough
Ingredients
3/4 cup less 1 teaspoon (175 ml) (100 gm/3 ½ oz) stoneground breadmaking whole-wheat or graham flour, plus more for dusting
2 cups plus 2 tablespoons (510 ml) (300gm/10 ½ oz) unbleached all-purpose flour
1¼ teaspoons (7½ ml) (7 gm/¼ oz) sea salt or ⅔ teaspoon (3⅓ ml) (3 gm/⅛ oz) table salt
1 ¼ cups (300 ml) water
1 ¾ cups (425 ml) (300 gm/10 ½ oz) production leaven – this should leave some (1 cup) for your next loaf.
Total 6 cups less 2 tablespoons 1415 ml (1007 gm/35 ½ oz/2 lb 3½ oz)

Directions:
1. Mix the dough with all the ingredients except the production leaven. It will be a soft dough.
2. Knead on an UNFLOURED surface for about 8-10 minutes, getting the tips of your fingers wet if you need to. You can use dough scrapers to stretch and fold the dough at this stage, or air knead if you prefer. Basically, you want to stretch the dough and fold it over itself repeatedly until you have a smoother, more elastic dough.
See my demonstration here: http://www.youtube.com/watch?v=OqS3raEGdwk
3. Smooth your dough into a circle, then scoop your production leaven into the centre. You want to fold the edges of the dough up to incorporate the leaven, but this might be a messy process. Knead for a couple minutes until the leaven is fully incorporated in the dough. See my demonstration here: http://www.youtube.com/watch?v=UPO97R4iO4U

production leaven

4. Spread some water on a clean bit of your work surface and lay the dough on top. Cover with an upturned bowl, lining the rim of the bowl with a bit of water. Leave for an hour, so that the gluten can develop and the yeasts can begin to aerate the dough.
5. Once your dough has rested, you can begin to stretch and fold it. Using wet hands and a dough scraper, stretch the dough away from you as far as you can without breaking it and fold it back in on itself. Repeat this in each direction, to the right, towards you, and to the left. This will help create a more ‘vertical’ dough, ready for proofing. See my demonstration here: http://www.youtube.com/watch?v=rDoJRCMfclE
6. Heavily flour a banneton/proofing basket with whole wheat flour and rest your dough, seam side up, in the basket. Put the basket in a large plastic bag, inflate it, and seal it. Set aside somewhere warm for 3-5 hours, or until it has expanded a fair bit. It is ready to bake when the dough responds to a gently poke by slowly pressing back to shape.

7. Preheat the oven to hot 425°F/220°C/gas mark 7. Line a baking sheet with parchment, then carefully invert the dough onto the sheet. I like to put the baking sheet on top of the basket, then gently flip it over so as to disturb the dough as little as possible. Make 2-3 cuts on top of the loaf and bake for 40-50 minutes, reducing the temperature to moderately hot 400°F/200°C/gas mark 6 after 10 minutes.

8. Cool on a cooling rack.

Garlic and Oregano Roasted Mushrooms and Pancetta on Toasted Sourdough

Servings: 4

Ingredients
4 large or 8 medium field mushrooms, sliced
2 red onions, peeled and cut into wedges
2 garlic cloves, peeled and sliced
4 sprigs oregano, leaves only
100 gm (3 ½ oz) pancetta, cubed (optional)
2 tablespoons (30 ml) extra virgin olive oil
4 slices sourdough bread
butter, for spreading
freshly ground black pepper
sea salt

Directions:
1. Preheat the oven to moderately hot 400°F/200°C/gas mark 6. Place the mushrooms on an oiled baking sheet, with onion wedges scattered beneath them. Sprinkle over the garlic, oregano, and pancetta, drizzle with olive oil and season with black pepper and sea salt. Roast for 25 minutes until the mushrooms are tender.
2. Toast your bread in the toaster. Butter the toast, and then pile your mushroom mixture on top.

A Twist: Instead of roasting your mushrooms, you can also sauté them in a pan and, just before serving, stir in a dash of cream for a rich, warm treat!

Povitica – Daring Bakers Challenge October 2011

Thursday, October 27th, 2011

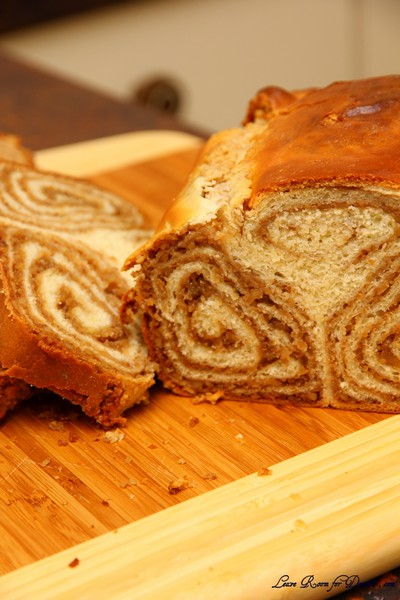
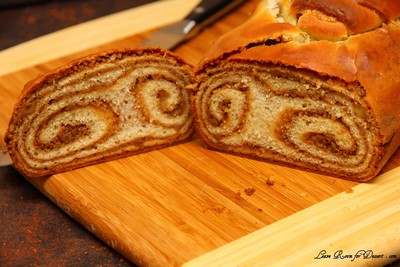
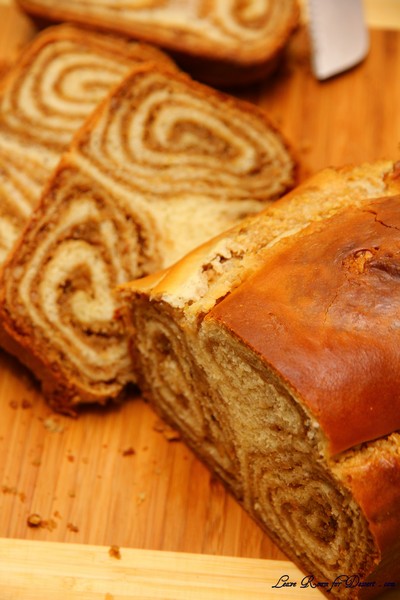
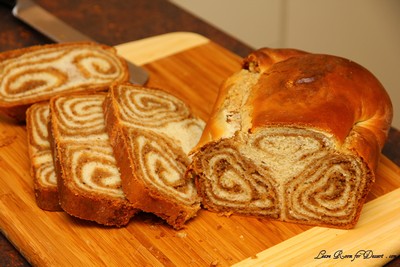
The Daring Baker’s October 2011 challenge was Povitica, hosted by Jenni of The Gingered Whisk. Povitica is a traditional Eastern European Dessert Bread that is as lovely to look at as it is to eat!

I have a long list of desserts I would love to make, and I am slowly getting through them, although so many times I log in to see what we are making for the Daring Bakers and find I have never heard of the dish we will be making.

I had never heard of a Povitica before this challenge, and neither had anyone I shared the two loaves I made with. Although, when I found out it was a nut bread I thought it sounded similar to the yeasted meringue coffee cake we made in March, and in many ways it was.

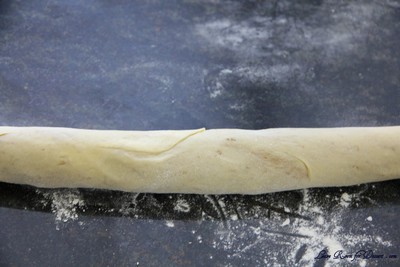
Both had a lovely walnut filling swirled through the bread. The recipe for the povitica was lovely – the dough rolled beautifully and thin, and rolling it to make the swirls was quite satisfying. I found the filling a little difficult to spread, and found adding a bit more warm milk helped, although the easiest way was to use a spatula and only put it on small sections at a time, to reduce the risk of tearing the dough.

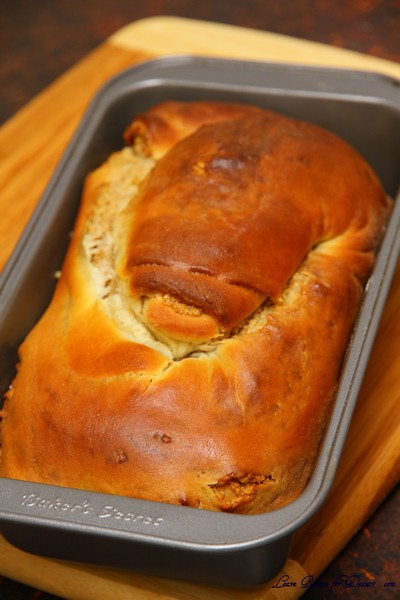
It is a great cake alternative for someone who does not enjoy sweet cakes. For the top glaze, I used a little milk instead of the coffee mixture, and the top looked beautiful.

In the following photos hopefully you will see my lovely new* big granite benchtop – it was installed just in time for this challenge. I want to thank my Dad so much for all the hard work he has done making my kitchen more useable. I also want to thank Arthur for the benchtop and cupboards.

Povitica

(makes 4 loaves)
Recipe source: Jenni of The Gingered Whisk

To activate the Yeast:
2 Teaspoons (10 ml/9 gm) Sugar
1 Teaspoon (5 ml/3 gm) All-Purpose (Plain) Flour
½ Cup (120ml) Warm Water
2 Tablespoons (30ml/14 gm/½ oz/2 sachets) Dry Yeast

Dough:
2 Cups (480ml) Whole Milk
¾ Cup (180 ml/170gm/6 oz) Sugar
3 Teaspoons (15 ml/18 gm/2/3 oz) Table Salt
4 Large Eggs
½ Cup (120ml/115 gm/one stick/4 oz) Unsalted Butter, melted
8 cups (1.92 l/1.12 kg/39½ oz/2½ lb) All-Purpose Flour, measure first then sift, divided

Walnut Filling:
7 Cups (1.68 l/1.12 kg/2.5 lbs) Ground English Walnuts
1 Cup (240ml) Whole Milk
1 Cup (240ml/225 gm/2 sticks/8 oz) Unsalted Butter
2 Whole Eggs, Beaten
1 Teaspoon (5ml) Pure Vanilla Extract
2 Cups (480ml/450 gm/16 oz) Sugar
1 Teaspoon (5 ml/4 gm) Unsweetened Cocoa Powder
1 Teaspoon (5 ml/3 gm) Cinnamon

Topping:
½ Cup (120 ml) Cold STRONG Coffee
2 Tablespoons (30 ml/28 gm/1 oz) Granulated Sugar
Melted Butter

To Activate Yeast:
1. In a small bowl, stir 2 teaspoons sugar, 1 teaspoon flour, and the yeast into ½ cup warm water and cover with plastic wrap.
2. Allow to stand for 5 minutes

To Make the Dough:
3. In a medium saucepan, heat the milk up to just below boiling (about 180°F/82°C), stirring constantly so that a film does not form on the top of the milk. You want it hot enough to scald you, but not boiling. Allow to cool slightly, until it is about 110°F/43°C.
4. In a large bowl, mix the scalded milk, ¾ cup (180 gm/170 gm/6 oz) sugar, and the salt until combined.
5. Add the beaten eggs, yeast mixture, melted butter, and 2 cups (480 ml/280 gm/10 oz) of flour.

6. Blend thoroughly and slowly add remaining flour, mixing well until the dough starts to clean the bowl.

7. Turn dough out onto floured surface and knead, gradually adding flour a little at a time, until smooth and does not stick. Note: I did not use all 8 cups of flour

8. Divide the dough into 4 equal pieces (they will each weight about 1.25 pounds/565 grams)
9. Place dough in 4 lightly oiled bowls, cover loosely with a layer of plastic wrap and then a kitchen towel and let rise an hour and a half in a warm place, until doubled in size.

To Make the Filling
10. In a large bowl mix together the ground walnuts, sugar, cinnamon and cocoa.
11. Heat the milk and butter to boiling.
12. Pour the liquid over the nut/sugar mixture.
13. Add the eggs and vanilla and mix thoroughly.
14. Allow to stand at room temperature until ready to be spread on the dough.
15. If the mixture thickens, add a small amount of warm milk.

To Roll and Assemble the Dough:
16. Spread a clean sheet or cloth over your entire table so that it is covered.
17. Sprinkle with a couple of tablespoons to a handful of flour (use flour sparingly)
18. Place the dough on the sheet and roll the dough out with a rolling pin, starting in the middle and working your way out, until it measures roughly 10-12 inches (25½ cm by 30½ cm) in diameter.

19. Spoon 1 to 1.5 teaspoons (5ml to 7 ½ ml/4 gm to 7 gm) of melted butter on top. (I didn’t do this)
20. Using the tops of your hands, stretch dough out from the center until the dough is thin and uniformly opaque. You can also use your rolling pin, if you prefer.
21. As you work, continually pick up the dough from the table, not only to help in stretching it out, but also to make sure that it isn’t sticking.
22. When you think it the dough is thin enough, try to get it a little thinner. It should be so thin that you can see the color and perhaps the pattern of the sheet underneath.

23. Spoon filling evenly over dough until covered.

24. Lift the edge of the cloth and gently roll the dough like a jelly roll.


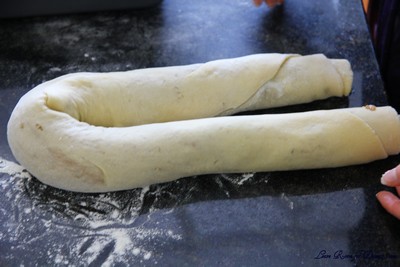
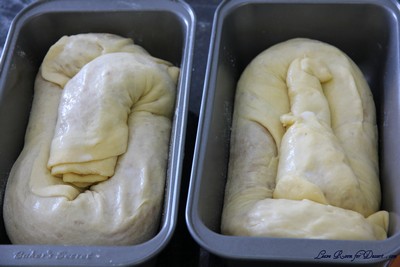
25. Once the dough is rolled up into a rope, gently lift it up and place it into a greased loaf pan in the shape of a “U”, with the ends meeting in the middle. You want to coil the dough around itself, as this will give the dough its characteristic look when sliced.

26. Repeat with remaining three loaves, coiling each rope of dough in its own loaf pan.
27. Brush the top of each loaf with a mixture of ½ cup (120 ml) of cold STRONG coffee and 2 tablespoons (30ml/28 gm/1 oz) of sugar. If you prefer, you can also use egg whites in place of this.

28. Cover pans lightly will plastic wrap and allow to rest for approximately 15 minutes.
29. Preheat oven to moderate 350°F/180°C/gas mark 4.
30. Remove plastic wrap from dough and place into the preheated oven and bake for approximately 15 minutes.
31. Turn down the oven temperature to slow 300°F/150°C/gas mark 2 and bake for an additional 45 minutes, or until done.
32. Remove bread from oven and brush with melted butter.
33. Check the bread at 30 minutes to ensure that the bread is not getting too brown. You may cover the loaves with a sheet of aluminum foil if you need to.
34. Remove from the oven and allow to cool on a wire rack for 20-30 minutes, still in the bread pan. Remember, the bread weighs about 2.5 and it needs to be able to hold its own weight, which is difficult when still warm and fresh out of the oven. Allowing it to cool in the pan helps the loaf to hold its shape.


35. It is recommended that the best way to cut Povitica loaves into slices is by turning the loaf upside down and slicing with a serrated knife.

Smaller batch measurements courtesy of Audax
Half Batch Dough Ingredients (Makes two loaves each 1.25 lbs/565 grams)
To activate the Yeast:
1 Teaspoon (5 ml/4 ½ gm) Sugar
½ Teaspoon (2½ ml/1½ gm) All-Purpose (Plain) Flour
¼ Cup (60 ml) Warm Water
1 Tablespoon (15 ml/7 gm/¼ oz/1 sachet) Dry Yeast

Dough:
1 Cup (240 ml) Whole Milk
6 Tablespoons (90 ml/85 gm/3 oz) Sugar
1½ Teaspoons (7½ ml/9 gm/1/3 oz) Table Salt
2 Large Eggs
¼ Cup (60 ml/60 gm/½ stick/2 oz) Unsalted Butter, melted
4 cups (960 ml/560 gm/19¾ oz/1¼ lb) All-Purpose Flour, measure first then sift, divided

Topping:
¼ Cup (60 ml) Cold STRONG Coffee
1 Tablespoon (15 ml/14 gm/½ oz) Granulated Sugar
Melted Butter

Half Batch Filling Ingredients (enough filling for the two loaves(
3½ Cups (840 ml/560 gm/1¼ lb/20 oz) Ground English Walnuts
½ Cup (120 ml) Whole Milk
½ Cup (120 ml/115 gm/1 stick/4 oz) Unsalted Butter
1 Whole Egg, Beaten
½ Teaspoon (2½ ml) Pure Vanilla Extract
1 Cup (240 ml/225 gm/8 oz) Sugar
½ Teaspoon (2½ ml/2 gm) Unsweetened Cocoa Powder
½ Teaspoon (2½ ml/1½ gm) Cinnamon

Quarter Batch Dough Ingredients (Makes one loaf 1.25 lbs/565 grams)
To activate the Yeast:
½ Teaspoon (2½ ml/2¼ gm) Sugar
¼ Teaspoon (1¼ ml/¾ gm) All-Purpose (Plain) Flour
2 Tablespoons (30 ml) Warm Water
1½ Teaspoons (7½ ml/3½ gm/0.125 oz/½ sachet) Dry Yeast

Dough:
½ Cup (120 ml) Whole Milk
3 Tablespoons (45 ml/43 gm/1½ oz) Sugar
¾ Teaspoon (3¾ ml/9 gm/0.17 oz) Table Salt
1 Large Egg
1 tablespoon (30 ml/30 gm/¼ stick/1 oz) Unsalted Butter, melted
2 cups (480 ml/280 gm/10 oz/0.62 lb) All-Purpose Flour, measure first then sift, divided

Topping:
2 Tablespoons (30 ml) Cold STRONG Coffee
1½ Teaspoons (7½ ml/7 gm/¼ oz) Granulated Sugar
Melted Butter

Quarter Batch Filling Ingredients (enough filling for one loaf)
1¾ Cups (420 ml/280 gm/10 oz) Ground English Walnuts
¼ Cup (60 ml) Whole Milk
¼ Cup (60 ml/58 gm/½ stick/2 oz) Unsalted Butter
1 Egg Yolk From A Large Egg, Beaten
¼ Teaspoon (1¼ ml) Pure Vanilla Extract
½ Cup (120 ml/115 gm/4 oz) Sugar
¼ Teaspoon (1¼ ml/1 gm) Unsweetened Cocoa Powder
¼ Teaspoon (1¼ ml/¾ gm) Cinnamon

Storage:
There are several options for storing (and eating) your four loaves of Povitica:

• The Povitica will keep fresh for 1 week at room temperature.
• The Povitica will keep fresh for 2 weeks if refrigerated.
• The Povitica can be frozen for up to three months when wrapped a layer of wax paper followed by a layer of aluminum foil. It is recommended to not freeze Povitica with cream cheese fillings as it doesn’t hold up to being thawed really well – it crumbles.