The 2010 December Daring Bakers’ challenge was hosted by Penny of Sweet Sadie’s Baking. She chose to challenge Daring Bakers’ to make Stollen. She adapted a friend’s family recipe and combined it with information from friends, techniques from Peter Reinhart’s book………and Martha Stewart’s demonstration.
We hosted a lovely lunch on Boxing Day this year. The day started off with rain, then went a little cold, got quite hot and then rained at night. I’m glad for the few hours of cool weather (we are currently experiencing a strange Summer here in Sydney), as we had the oven and BBQ on for the meals. We started with beautiful cheeses from Formaggi Ocello. For lunch we had gammon, lamb and roast chicken, with a garden salad, bok choy salad, pumpkin, beetroot and walnut salad.
And for dessert…
We had profiteroles, a triple chocolate cheese cake, a pavlova, fruit and berries, an almond slice and a chocolate chip stollen.
This was the only opportunity for me to make this month’s Daring Bakers Challenge. The month has been full of Christmas and end of year parties and get-togethers, along with all the shopping for presents. I got some lovely cookbooks, clothes and a gorgeous Le Creseut pot.
I considered making the stollen to the original recipe – as there are a couple people in my family who really enjoy fruit breads, although after taking a vote on whether to make the original version or a choc chip version – there was a resounding vote for the choc chip version.
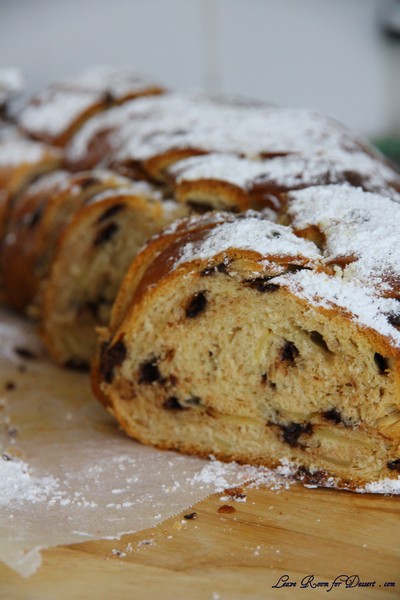
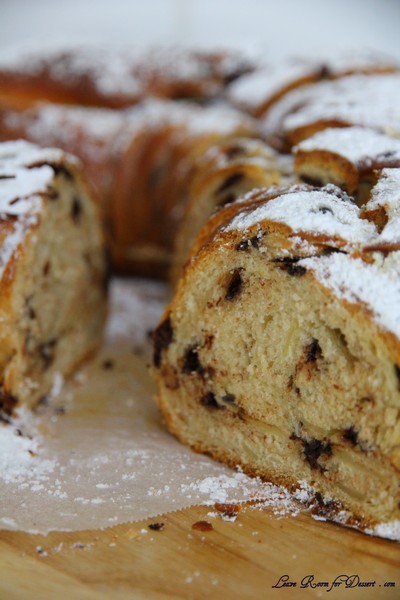
I thought it may turn out like choc chip hot cross buns – and it was quite similar. It was great an hour out of the oven and great toasted with a bit of butter a day or two after.
Everyone was quite impressed with this as part of our dessert menu. I hope everyone had a great Christmas and have a fantastic New Years.
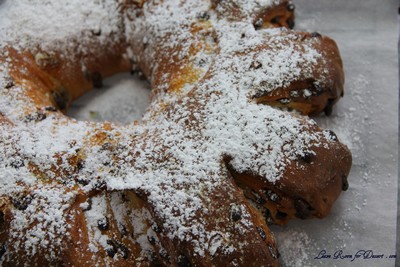
Chocolate Chip Stollen Wreath
my changes in italics
Makes one large wreath or two traditional shaped Stollen loaves. Serves 10-12 people
¼ cup (60ml) lukewarm water (110º F / 43º C)
2 packages (4 1/2 teaspoons) (22 ml) (14 grams) (1/2 oz) active dry yeast
1 cup (240 ml) milk
10 tablespoons (150 ml) (140 grams) unsalted butter (can use salted butter)
5½ cups (1320 ml) (27 ozs) (770 grams) all-purpose (plain) flour (Measure flour first – then sift- plus extra for dusting)
½ cup (120 ml) (115 gms) sugar
¾ teaspoon (3 ¾ ml) (4 ½ grams) salt (if using salted butter there is no need to alter this salt measurement)
1 teaspoon (5 ml) (6 grams) cinnamon
3 large eggs, lightly beaten
Grated zest of 1 lemon and 1 orange (I left this out)
2 teaspoons (10 ml) (very good) vanilla extract
1 teaspoon (5 ml) lemon extract or orange extract (I left this out)
¾ cup (180 ml) (4 ¾ ozs) (135 grams) mixed peel (link below to make your own) (I left this out)
1 cup (240 ml) (6 ozs) (170 gms) firmly packed raisins (I used approx 1 1/2 cups choc chips – 250g)
3 tablespoons (45ml) rum (I left this out)
12 red glacé cherries (roughly chopped) for the color and the taste. (optional) (I left this out)
1 cup (240 ml) (3 ½ ozs) (100 grams) flaked almonds
Melted unsalted butter for coating the wreath
Confectioners’ (icing) (powdered) sugar for dusting wreath
Note: If you don’t want to use alcohol, double the lemon or orange extract or you could use the juice from the zested orange.
Soak the raisins (I left this out)
In a small bowl, soak the raisins in the rum (or in the orange juice from the zested orange) and set aside. See Note under raisins.
To make the dough:
Pour ¼ cup (60 ml) warm water into a small bowl, sprinkle with yeast and let stand 5 minutes. Stir to dissolve yeast completely.
In a small saucepan, combine 1 cup (240 ml) milk and 10 tablespoons (150 ml) butter over medium – low heat until butter is melted. Let stand until lukewarm, about 5 minutes.
Lightly beat eggs in a small bowl and add lemon and vanilla extracts.
In a large mixing bowl (4 qt) (4 liters) (or in the bowl of an electric mixer with paddle attachment), stir together the flour, sugar, salt, cinnamon, orange and lemon zests.
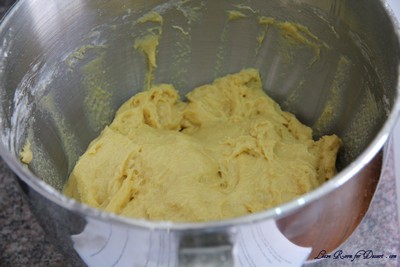
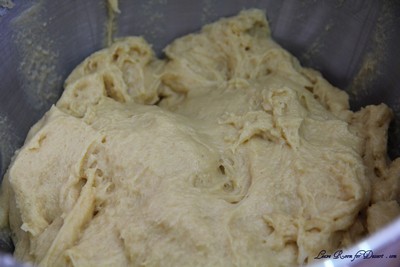
Then stir in (or mix on low speed with the paddle attachment) the yeast/water mixture, eggs and the lukewarm milk/butter mixture. This should take about 2 minutes. It should be a soft, but not sticky ball. When the dough comes together, cover the bowl with either plastic or a tea cloth and let rest for 10 minutes.
Add in the mixed peel, soaked fruit and almonds and mix with your hands or on low speed to incorporate. Here is where you can add the cherries if you would like. Be delicate with the cherries or all your dough will turn red!
Sprinkle flour on the counter, transfer the dough to the counter, and begin kneading (or mixing with the dough hook) to distribute the fruit evenly, adding additional flour if needed. The dough should be soft and satiny, tacky but not sticky. Knead for approximately 8 minutes (6 minutes by machine). The full six minutes of kneading is needed to distribute the dried fruit and other ingredients and to make the dough have a reasonable bread-dough consistency. You can tell when the dough is kneaded enough – a few raisins will start to fall off the dough onto the counter because at the beginning of the kneading process the dough is very sticky and the raisins will be held into the dough but when the dough is done it is tacky which isn’t enough to bind the outside raisins onto the dough ball.
My KitchenAid couldn’t fit this in it, so I kneaded it by hand
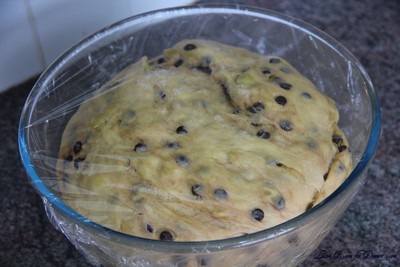
Lightly oil a large bowl and transfer the dough to the bowl, rolling around to coat it with the oil. Cover the bowl with plastic wrap.
Put it in the fridge overnight. The dough becomes very firm in the fridge (since the butter goes firm) but it does rise slowly… the raw dough can be kept in the refrigerator up to a week and then baked on the day you want.
Shaping the Dough and Baking the Wreath
Let the dough rest for 2 hours after taking out of the fridge in order to warm slightly.
Line a sheet pan with parchment paper.
Preheat oven to moderate 350°F/180°C/gas mark 4 with the oven rack on the middle shelf.
Punch dough down, roll into a rectangle about 16 x 24 inches (40 x 61 cms) and ¼ inch (6 mm) thick.
Starting with a long side, roll up tightly, forming a long, thin cylinder.
Transfer the cylinder roll to the sheet pan. Join the ends together, trying to overlap the layers to make the seam stronger and pinch with your fingers to make it stick, forming a large circle. You can form it around a bowl to keep the shape.
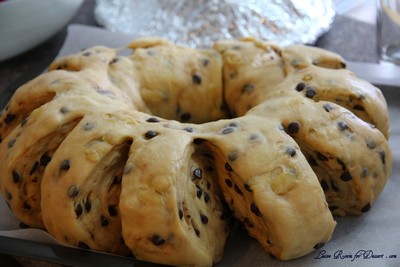
Using kitchen scissors, make cuts along outside of circle, in 2-inch (5 cm) intervals, cutting 2/3 of the way through the dough.
Twist each segment outward, forming a wreath shape. Mist the dough with spray oil and cover loosely with plastic wrap.
Proof for approximately 2 hours at room temperature, or until about 1½ times its original size.
Bake the stollen for 20 minutes, then rotate the pan 180 degrees for even baking and continue to bake for 20 to 30 minutes (Mine took approx 40min in total). The bread will bake to a dark mahogany color, should register 190°F/88°C in the center of the loaf, and should sound hollow when thumped on the bottom.
Transfer to a cooling rack and brush the top with melted butter while still hot.
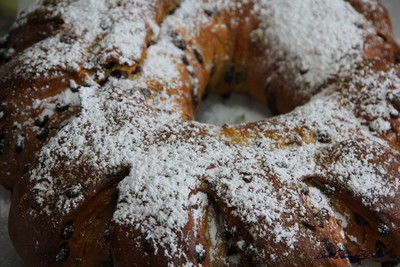
Immediately tap a layer of powdered sugar over the top through a sieve or sifter.
Wait for 1 minute, then tap another layer over the first.
The bread should be coated generously with the powdered sugar.
Let cool at least an hour before serving. Coat the stollen in butter and icing sugar three times, since this many coatings helps keeps the stollen fresh – especially if you intend on sending it in the mail as Christmas presents!
When completely cool, store in a plastic bag. Or leave it out uncovered overnight to dry out slightly, German style.
The stollen tastes even better in a couple of days and it toasts superbly…. so delicious with butter and a cup of tea….mmmmm
Storage
The more rum and the more coatings of butter and sugar you use the longer it will store.
The following is for the recipe as written and uses the 45 mls of rum and two coatings of butter and icing sugar
1. Stollen freezes beautifully about 4 months
2. The baked stollen stores well for 2 weeks covered in foil and plastic wrap on the counter at room temperature and
3. One month in the refrigerator well covered with foil and plastic wrap.





ohh yum! Looks wonderful and sounds like it was pretty great too!
Your stollen turned out wonderful! I too loved this challenge and agree it tastes delicious toasted =)
Yum! Your stollen looks wonderful. That sounds like a thoroughly delicious meal!
Your stollen looks beautiful. When I tried making a chocolate chip version, the warmth of the dough and my hands completely melted the chips into the dough, so I’m amazed at how clean yours looks. Happy new year!
Your stollen looks fantastic! My choc version was a bit dry but yours looks very moist! Yes, we are having strange weather here in Oz. We were flooded in for Christmas! Happy New Year!
It looks just gorgeous! Excellent work on this challenge, and it sounds like the perfect addition to all your holiday desserts. Have a fantastic New Year’s!
Your stollen looks beautiful! I didn’t know that it could be made in a ring shape and its lovely to have the [very Anita inspired!] chocolate alternative to fruit 🙂
Oh!! Chocolate Chip! I cant believe I didnt try this! Your stollen looks perfect and I will definitely try your version when the weather cools down. I hope you had a happy and safe christmas, well done! P.s. I am envious of your dessert menu, it sounds delicious!
Beautiful work!
I have to say, you have a beautiful blog, I am loving browsing through and looking at your photographs.
Can’t wait to see what you do next challenge
Oh!! – i wish I’d made a choccy version! Great idea! Looks delish!
Yum Yum Yum! Your chocolate chip stollen looks marvelous!