Dessert

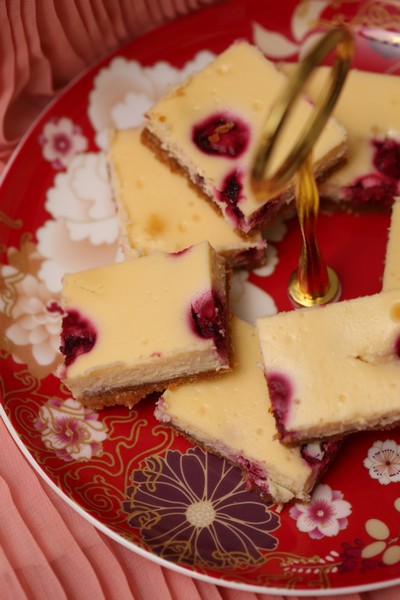
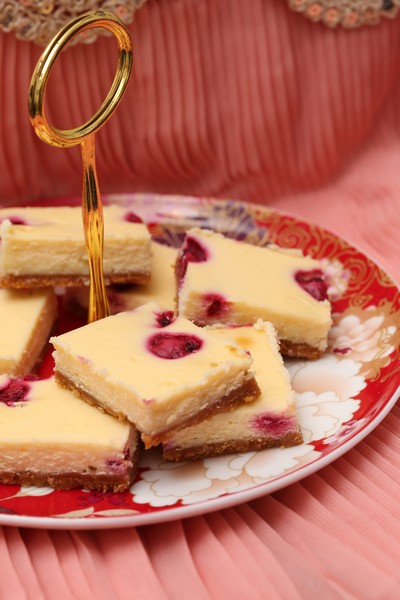
White Chocolate Raspberry Cheesecake Slice

Wednesday, June 20th, 2018

White Chocolate Raspberry Cheesecake Slice

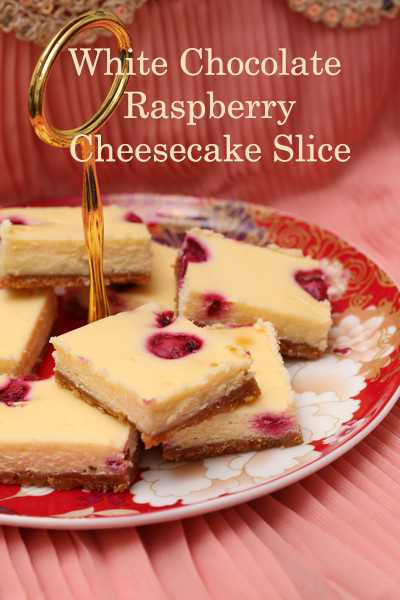
This is a wonderful addition to any party. These yummy desserts have the perfect combination of sweet, tart, creamy and crunchy. Make them big or small depending on what else is on offer.

White Chocolate and Raspberry Cheesecake Slice

We have served this at a number of parties so far, and they are a great alternative to some of the other rich chocolate dense desserts. It is also very easy to make them very small, so they can be served to lots of people, and also made a day or two in advance.

White Chocolate and Raspberry Cheesecake Slice

White Chocolate Raspberry Cheesecake Slice

Recipe from Taste
Makes 16 (or up to 45-60 small pieces)

200g packet granita biscuits
100g butter, melted
375g cream cheese, softened
1/2 cup (125g) sour cream
1/2 cup (100g) caster sugar
2 eggs
100g white chocolate, coarsely chopped
1/2 cup (60g) frozen raspberries
Icing sugar, to dust

Grease and line the base and side of a 19 x 29cm slice pan with baking paper, allowing the sides to overhang. (I have used a larger pan 22cm x 31cm, it worked out fine, but you may need a touch less time for cooking).

Place the biscuits in the bowl of a food processor and process until finely crushed. Add the butter and process until well combined. Spoon into the prepared pan and use a glass to spread and press mixture firmly over the base of the pan. Place in the fridge for 30 minutes to chill. (If you need to leave it longer, no worries).

Preheat oven to 160°C. Place the cream cheese and sour cream in the bowl of a food processor and process until smooth. Add the sugar and eggs and process until smooth.

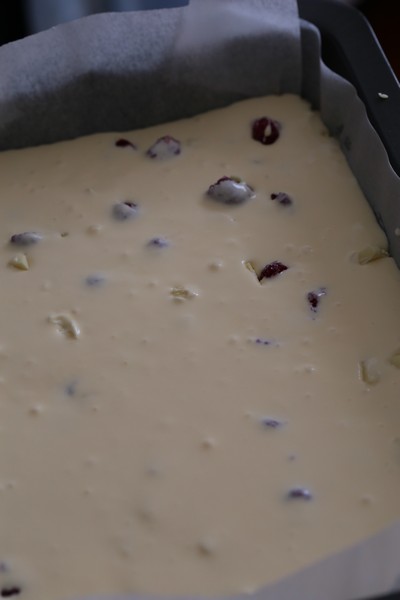
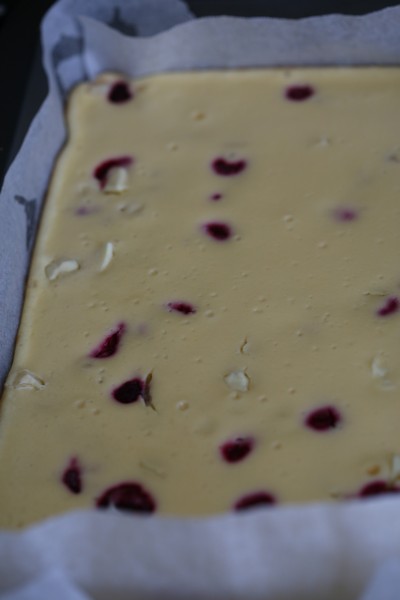
Sprinkle the biscuit base evenly with white chocolate and raspberries. Pour over the cream cheese mixture. Gently tap the pan to settle mixture. Bake in preheated oven for 20-25 minutes or until filling is just set. Turn oven off and leave the door ajar. Set aside to cool in oven. Place in the fridge to cool completely. Cut into squares to serve. Dust with icing sugar.
WhiteChocRaspberrySlice1

WhiteChocRaspberrySlice2

WhiteChocRaspberrySlice3

White Chocolate and Raspberry Cheesecake Slice

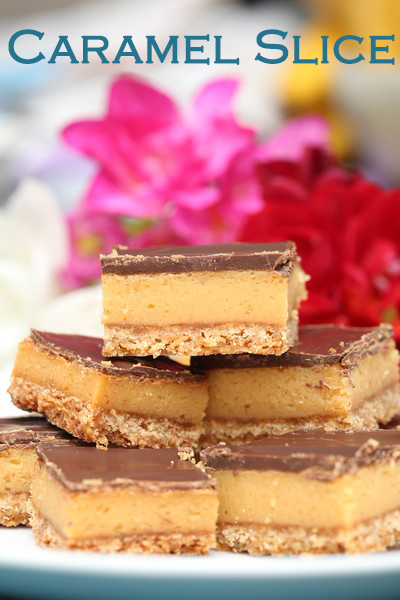
Caramel Slice

Thursday, March 29th, 2018

Caramel Slice

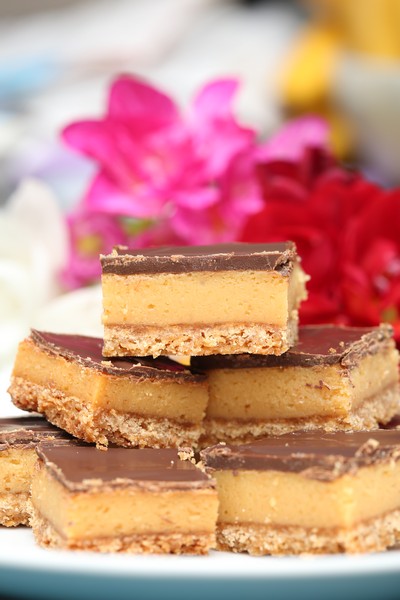
I was looking for a recipe for caramel slice and came across one on the internet that claimed it was the best ever caramel slice. Well, it’s a big claim, but I think it’s pretty high up there. Easy to make, super tasty – I won’t be looking for another recipe. This will be my go-to from now on.

Caramel Slice

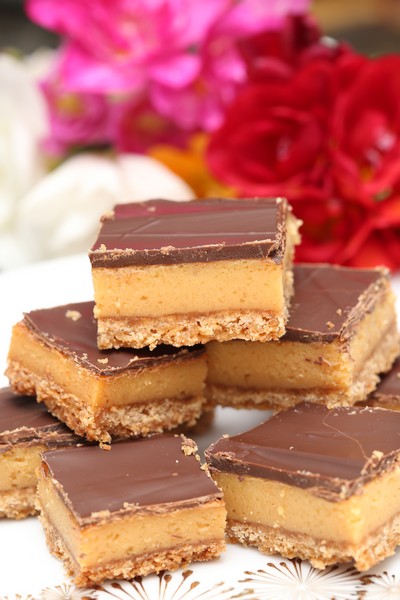
It’s great as it can be made in advance and I have had a lot of positive comments by people who have tried it. Most going back for a second (or third or fourth) piece. I’m sure you could easily make this gluten-free too by replacing the flour with gluten free flour.

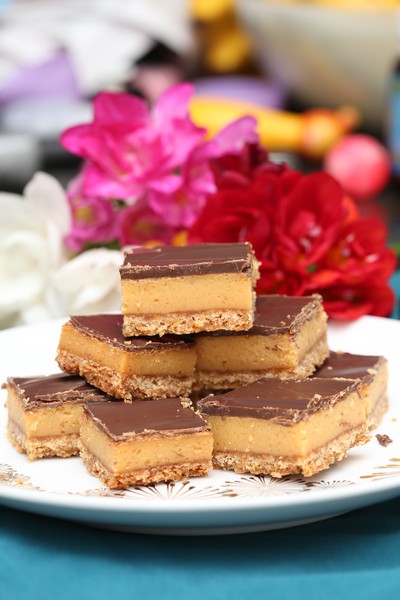
It makes a wonderful addition to a dessert table, as they can be cut quite small so people can have a bite and try other desserts too.

Caramel Slice

Caramel Slice

Recipe from Bakers Corner

Makes 16-60 (The original says 16 slices, but you can make lots of little ones if there will be other sweets)

1 cup (150g) plain flour
1/2 cup (110g) brown sugar
1/2 cup (40g) desiccated coconut
125g butter, melted

100g butter, extra
2 x 395g cans NESTLÉ Sweetened Condensed Milk
1/3 cup (80mL) golden syrup

200g PLAISTOWE Premium Dark Chocolate, melted
1 tbsp vegetable oil

1. Preheat oven to 180°C/160°C fan forced. Lightly grease an 18cm x 28cm lamington pan and line with baking paper. (I used a slightly bigger pan 22cm x 31cm, but it still came out fine, if you do this, the cooking time may be a bit shorter)

Caramel Slice

Caramel Slice

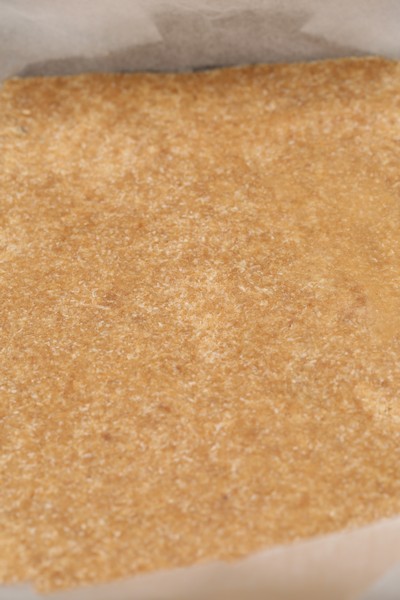
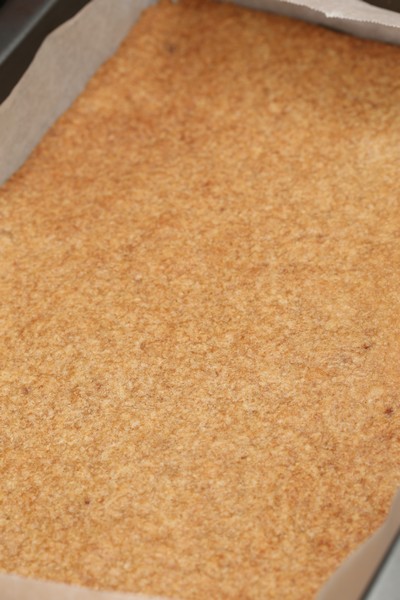
2. In a medium bowl, combine flour, sugar and coconut. Add melted butter, mix well. Press mixture firmly into prepared pan. Bake for 15-20 minutes until lightly browned. Cool. (I didn’t let this cool. I cooked the condensed milk whilst this was in the oven and then poured it straight on and back in the oven.)
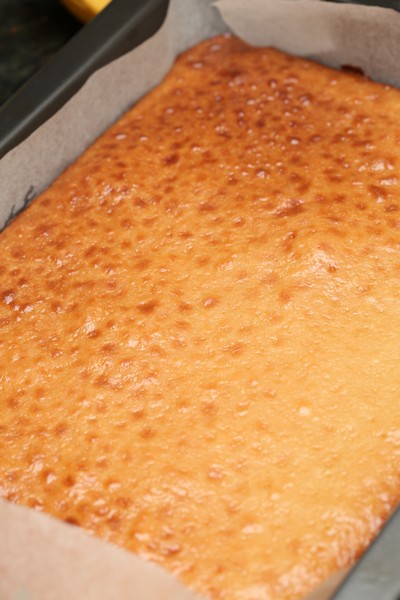
3. Place extra butter, NESTLÉ Sweetened Condensed Milk and syrup in a medium saucepan. Stir over low heat until smooth. Pour over base. Bake for 20-25 minutes until golden. Cool.

Caramel Slice

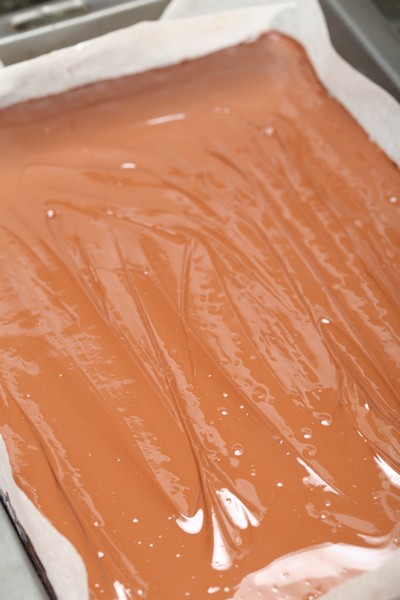
4. Combine PLAISTOWE Premium Dark Chocolate and oil, stir until smooth, pour evenly over slice. Place in fridge until set and then slice. (You may like to clean the knife between each or every couple of slices. a clean knife will give a cleaner edge).

Caramel Slice

Caramel Slice

Nutella and Berry Dessert Pizza

Sunday, July 16th, 2017

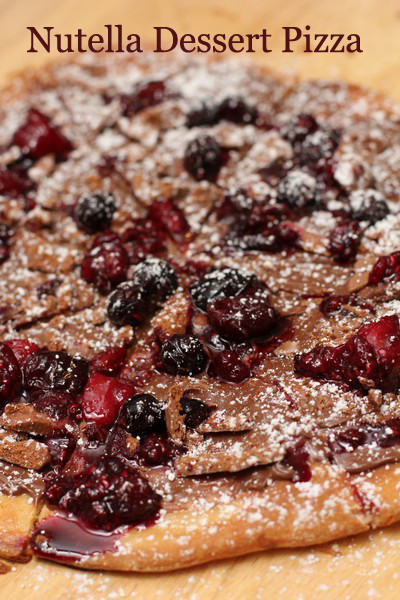
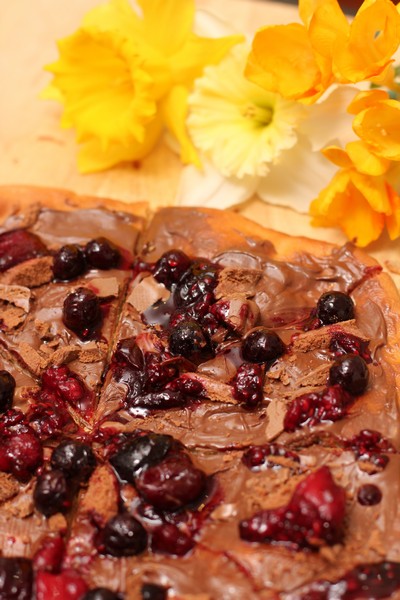
Nutella Dessert Pizza

Only recently I tried my first dessert pizza. It was so tasty I couldn’t wait to have it again and try it at home. Rather than making just one dessert pizza I figured it would be better to make savoury pizzas for dinner and with the same mix make the dessert pizza.

Nutella Dessert Pizza

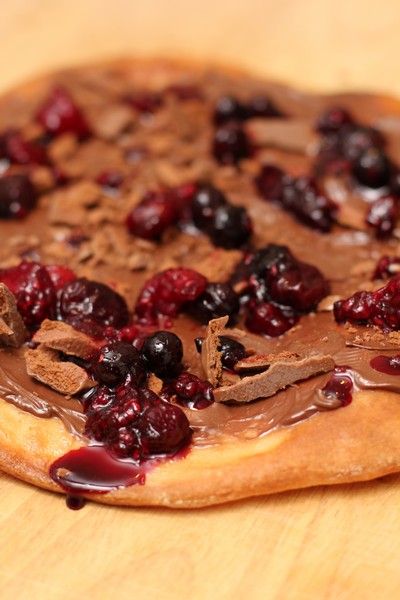
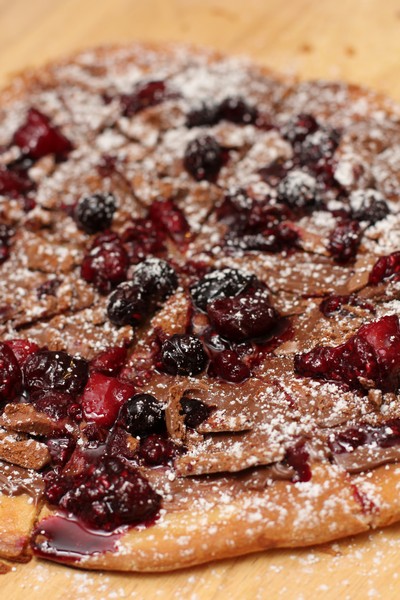
I was very happy with how the pizza turned out and would definitely make it again. The addition of the berry sauce helps cut some of the sweetness from the nutella. I think it would also go very well with roasted hazelnuts on top.

Nutella Dessert Pizza

Nutella and Berry Dessert Pizza

Recipe by Anita @ Leave Room for Dessert

Serves: 6-8

1 pizza base (I used this recipe omitting the oregano, making four pizzas – three savoury and one for the dessert pizza)
10g butter, melted
2-4 heaped tablespoons nutella (choc hazelnut spread), to taste
1 Tim Tam biscuit, chopped (optional)
icing sugar to dust
vanilla ice cream, to serve

Berry Sauce
100g mixed frozen berries
1/4 cup water
1 tablespoon caster sugar

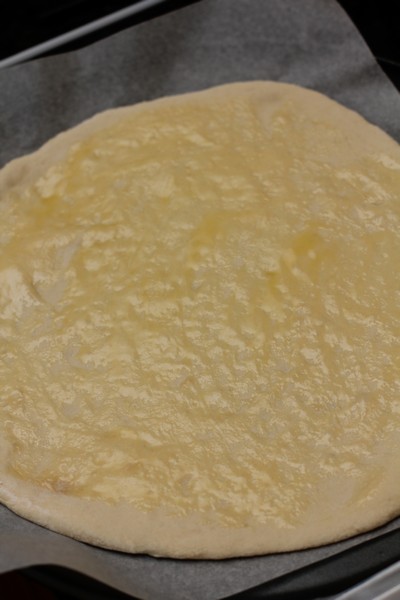
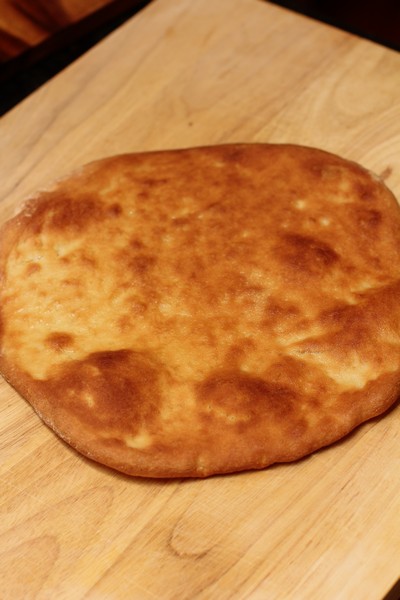
Brush melated butter on the pizza base and cook for 5-10 minutes at 200C, until browned.
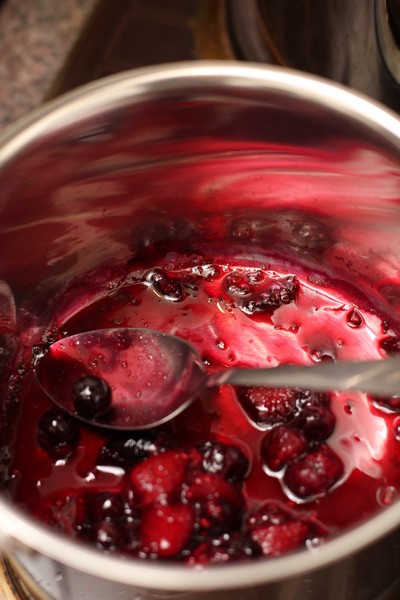
While the pizza is cooking, mix the frozen berries with the water and sugar in a small saucepan. Cook on medium heat for 5-15 minutes until the sauce has reduced and thickened slightly.

NutellaDessertPizza02

NutellaDessertPizza03

NutellaDessertPizza04

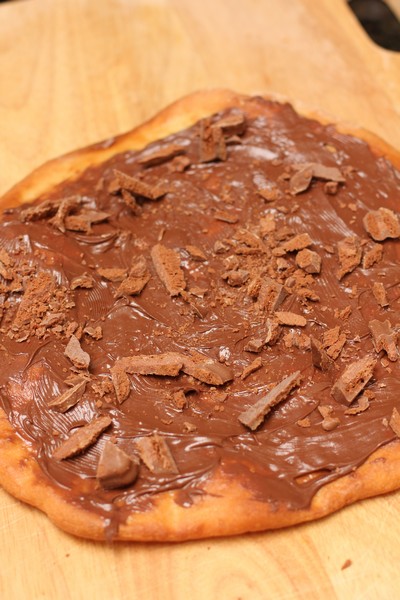
Allow the pizza base to cool slightly or completely and then top with nutella. It may take a little while to get the nutella to spread properly. Top with chopped Tim Tam, berry sauce, icing sugar and ice cream.

NutellaDessertPizza01

NutellaDessertPizza07

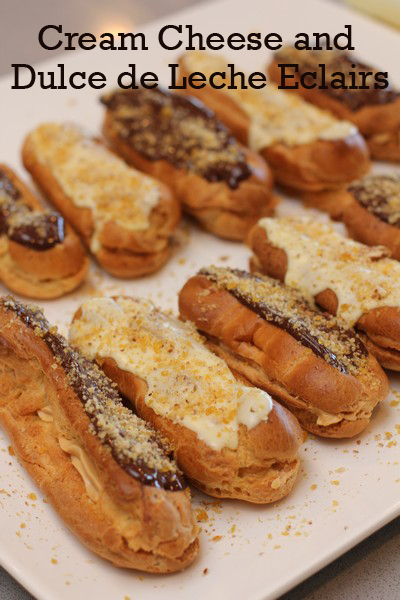
Cream Cheese and Dulce de Leche Eclairs – MasterChef 2016

Friday, March 3rd, 2017

Cream Cheese Dulce de Leche Eclairs

I saw a lot of dishes I would love to eat on MasterChef Australia last year. So far I have only managed to make this one, due to busy times at home. In previous years I have made some creations that took a full day or two to prepare, which in itself didn’t bother me, as I love experimenting and I love a challenge, although it does get harder to justify using all that time when priorities have changed.

These eclairs were given great reviews from the judges, so much so that I questioned my go-to recipe for eclairs (a custard and cream eclair topped with dark chocolate, that I will need to post some day soon). After making the filling for these ecalirs, my instant reaction was how sweet it was, which may or may not have been contributed to by the bought caramel rather than dulche de leche (which I couldn’t source and didn’t want to make).

CreamCheeseCaramelEclairs06

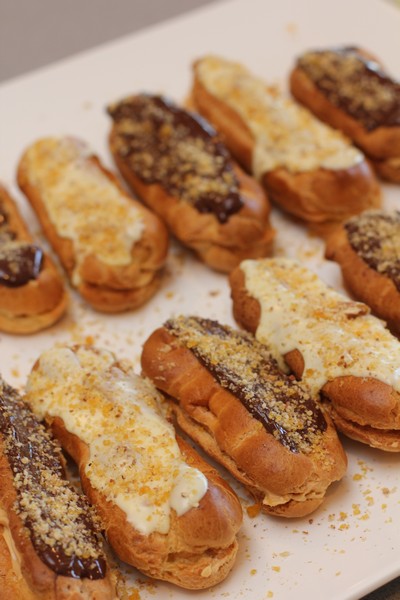
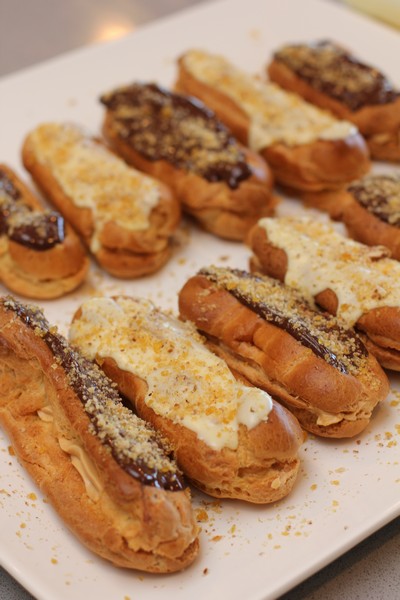
I decided to put dark chocolate on top of some, to cut some of the sweetness, and leave white chocolate on the other half, to try the original recipe and give an honest opinion on the recipe.
The result was as expected, the dark chocolate made the eclairs less sweet, but lost a lot of the subtle flavours in the filling, whereas the white chocolate was a bit too sweet for most people’s liking. (This didn’t stop all eclairs being eaten, they really were lovely). I’m just unsure whether I would make it again, as custard and cream filled eclairs are the perfect balance of everything (according to me and my family, that is 🙂 )

Cream Cheese and Dulce de Leche Eclairs

Recipe by Chloe Bowles on MasterChef

Eclairs:
1/2 cup milk
80g butter
1 cup flour
4 eggs

Cream Cheese Filling:
200g ready made dulce de leche (I used Nestle Top N Fill Caramel)
1/2 cup double cream
50g coverture white chocolate callets
200g cream cheese
1/2 cup icing sugar

Pecan Praline:
1/2 cup pecan nuts
120g sugar

White Chocolate Topping:
200g coverture white chocolate callets

Preheat oven to 210C.
For the Eclairs, line a baking tray with baking paper and set aside. Make a choux pastry by placing milk, butter and ½ cup water into a saucepan over medium heat until butter is completely melted. Add flour and mix vigorously with a wooden spoon until mixture forms a ball and pulls away from the sides of the saucepan.

Transfer dough to a stand mixer fitted with a paddle attachment. Beat until the dough has cooled to room temperature and is no longer steaming. Add eggs, one at a time, beating well after each addition, until mixture is smooth and glossy. Scrape sides of bowl occasionally if needed

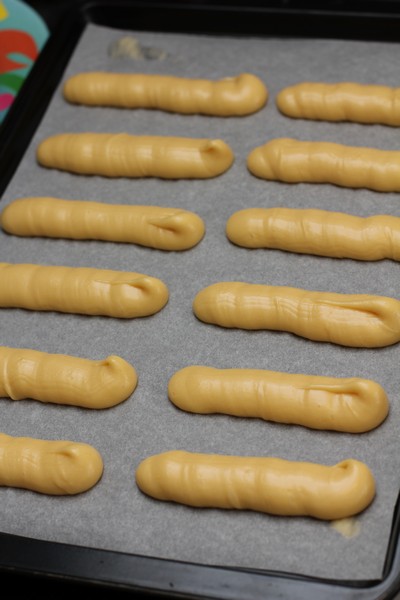
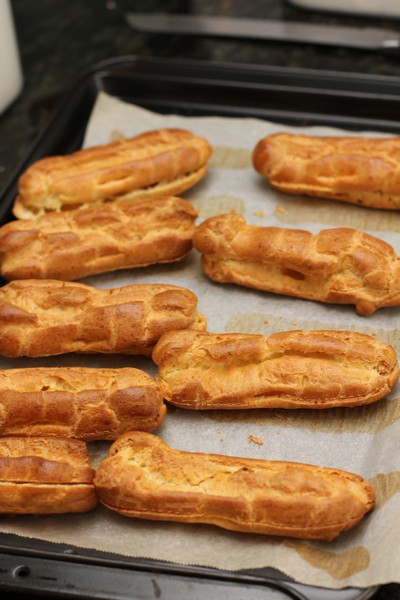
Transfer dough to a piping bag fitted with a wide tip and pipe onto the paper lined baking tray in 10 cm lengths. Use fingers to flick a little water over the choux to help create steam in the oven. Place the tray into the oven and bake for 10 minutes. Remove from oven and pierce the sides of the eclairs with the tip of a sharp knife. Reduce oven to 190C and bake until golden brown and cooked through, about 15 minutes.

CreamCheeseCaramelEclairs01

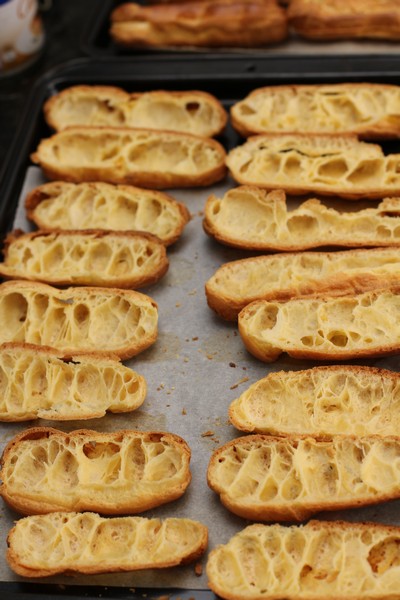
Remove from the oven and transfer eclairs to a cooling rack set over a baking tray and set aside to cool. Once cooled, use a serrated knife to cut eclairs in half lengthways. Turn top halves, cut side down, onto the cooling rack and set aside.

CreamCheeseCaramelEclairs04

CreamCheeseCaramelEclairs03

For the Cream Cheese Filling, combine dulce de leche and cream in a saucepan over a medium heat and bring to just under boiling point. Remove from heat and add white chocolate. Stir well until smooth.

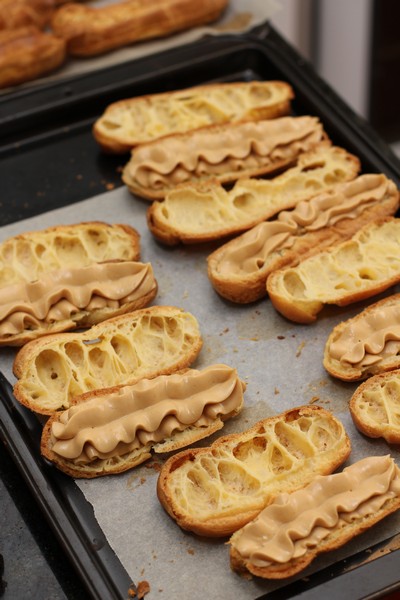
Place cream cheese and icing sugar in a stand mixer fitted with a whisk attachment and whisk until light and fluffy. Reduce speed to low, add cooled dulce de leche mixture and whisk until combined. Transfer to a piping bag and set aside in the fridge.

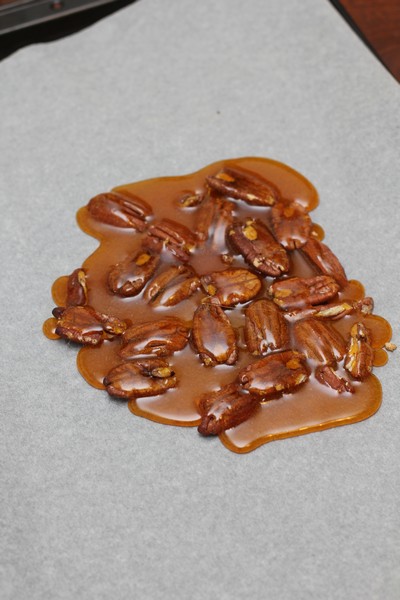
For the Pecan Praline, line a baking tray with baking paper. Spread pecans over the lined tray and roast in the oven until slightly golden, about 3-5 minutes. Remove from oven and set aside to cool.

Meanwhile, melt sugar in a small frypan over low heat until amber in colour then pour immediately over roasted pecans and set aside to cool and completely set. Once set, break into chunks then transfer to a food processor and blitz to a fine crumb. Set aside.

CreamCheeseCaramelEclairs02

For the White Chocolate Topping, place white chocolate into a bowl and set over a saucepan of simmering water. Stir until completely melted, then spread over the top halves of the reserved Eclairs. Tap the wire rack so that excess chocolate drips away.

To serve, pipe some Cream Cheese Filling onto the bottom halves of the Eclairs. Top with the white chocolate coated top halves and sprinkle with Pecan Praline.

CreamCheeseCaramelEclairs05

CreamCheeseCaramelEclairs07

Iced Vovo Pavlova

Monday, June 15th, 2015

Iced Vovo Pavlova

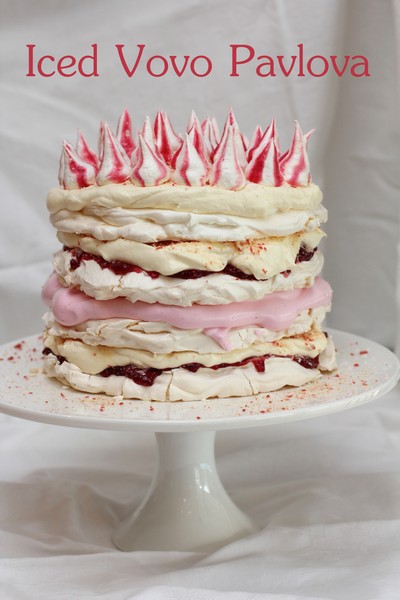
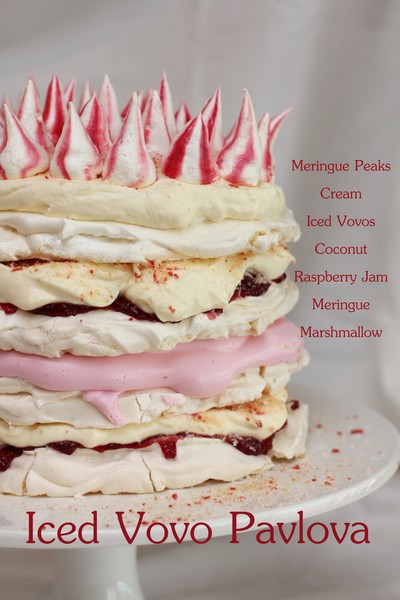
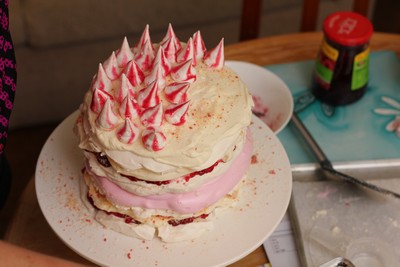
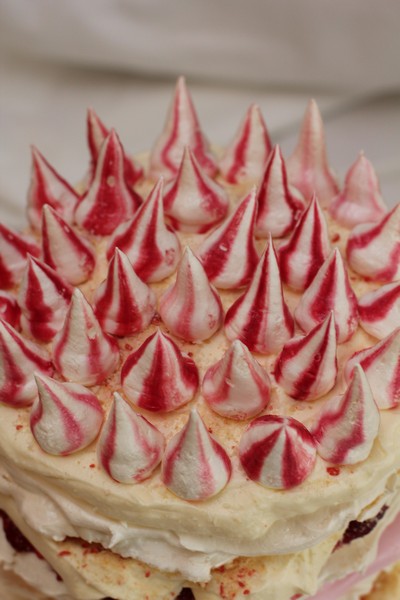
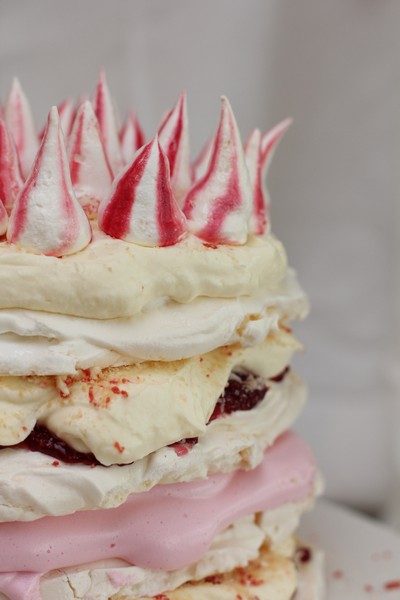
I saw the January Taste Magazine’s Cover whilst looking over a number of my food-related emails – it was an Iced Vovo Pavlova – it looked amazing! I made sure I bought the magazine as I thought this would be lovely to make for Australia Day celebrations.

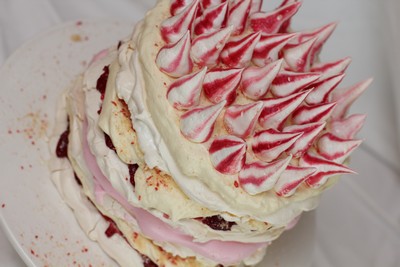
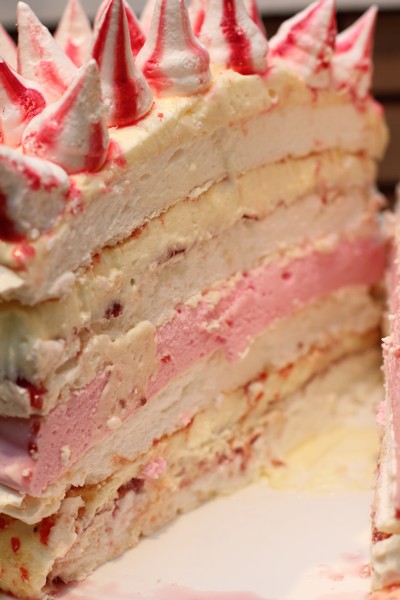
I didn’t choose the best day to make meringue though, a hot and steamy 30C+ day in Sydney. So sweating in the kitchen I persevered and managed to get it all done. Luckily I took the photos straight away, as it starting weeping and melting in the heat (as it was a lot taller than I expected, and didn’t fit in the fridge).

Iced Vovo Pavlova

As for taste, I was surprised at how similar to the Iced Vovo biscuit it tasted – due to the combination of coconut, raspberry jam and marshmallow, with lovely cream layers and crunchy pavlova. My only issue, I found it a bit too sweet. I would have liked a cake/sponge/biscuit layer and less meringue, but that’s just me – maybe something to create in the future.

You can find the recipe on Taste if you wish to try it yourself 🙂

Iced Vovo Pavlova

Iced Vovo Pavlova

Iced Vovo Pavlova

Iced Vovo Pavlova

Iced Vovo Pavlova

Iced Vovo Pavlova

Iced Vovo Pavlova

Iced Vovo Pavlova

Iced Vovo Pavlova

Iced Vovo Pavlova

Iced Vovo Pavlova

Choc Top Extraordinaire

Monday, August 11th, 2014

Choc Top Extraordinaire
There have been many lovely dessert recipes on MasterChef this year (like most years). Some of the top chefs in Australia share some of their beautiful recipes, some which can be mastered at home, and others which are a bit more difficult to achieve at home (either due to equipment or accessibility to ingredients).

One of the recent recipes was by Nick Palumbo from Messina (an amazing gelato store and one of the best in Sydney), and it was a decadent looking choc-top. Having visited Messina many times to try both their gelato and magnificent desserts from their Creative Department, I knew this dessert was one I wanted to try.

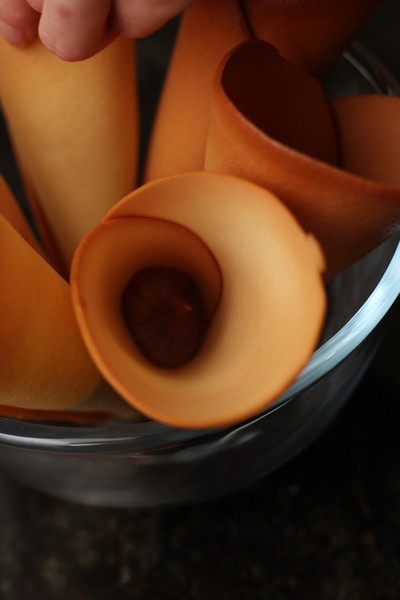
I took two days to make the components (as I needed to organise my time around my bubs naps). The first day I made the almond meal, hazelnut paste, amaretti and gelato base (and left it in the fridge over night before churning), the second day I made the ice cream cones, Italian meringue, ganache and chocolate dip and assembled it.

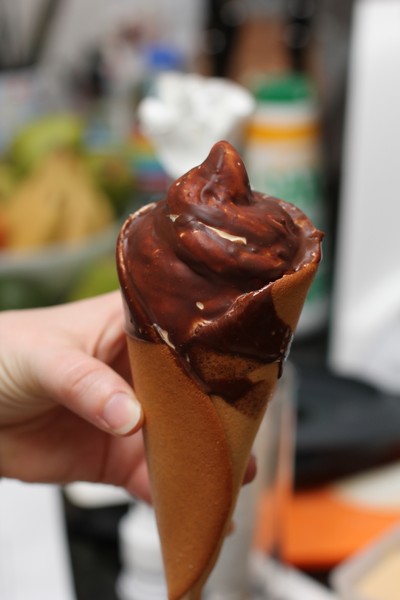
Choc Top

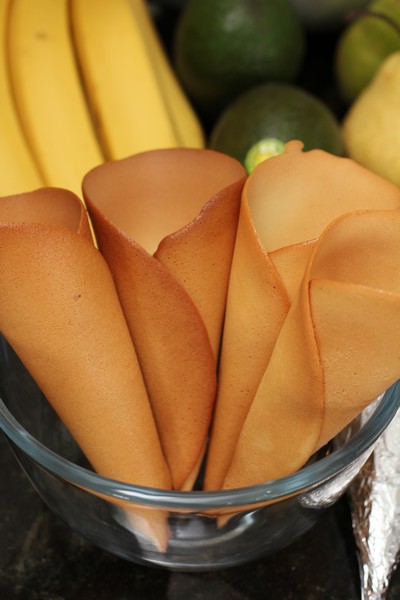
My first cone didn’t turn out very well (shape-wise), which meant we got to try it! It was lovely and crunchy and a had wonderful flavour. I would love to make them again (even if they were time consuming). I think I may have also taken the caramel a little too far, as I ended up with a slight bitter taste in the gelato (although it still went well with all the other flavours.

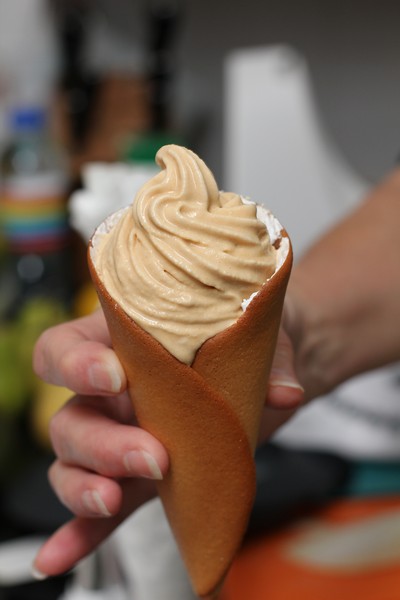
The cone that made it into the pictures, was piped (using a piping bag) and placed in the freezer for a while (maybe 20 mins?) and then dipped into the chocolate, which had cooled a little, but was still warm. The choc-tops were very lovely, quite sweet (probably not helped by the melting gelato). I would love to make the cone mixture again, even if just in rounds to have with ice cream.

Choc Top

My notes to help the home cook:

    • I made 1/3 of the almond meal, hazelnut paste and gelato (this base was placed in my two ice cream makers). I made half the quantity of the amaretti, ganache, chocolate dip and cones (it made 7 cones – which only used about half the gelato and even less of the biscuits).
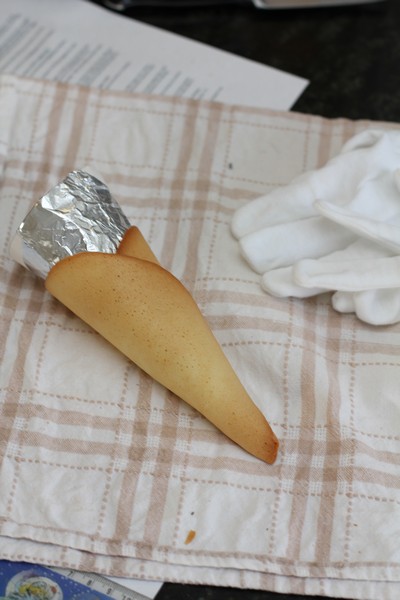
    • I used some cotton gloves handle the cones before setting.
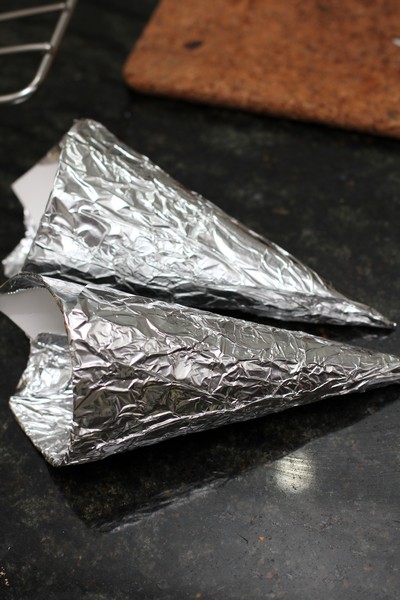
    • I made my own templates for moulding the cones. Cut an A4 piece of cardboard in half. Twist the cardboard, making the middle of one of the long edges the point of the cone. When satisfied with the shape, staple in place and then cover in foil.

Homemade cone rollers

  • I found a skin formed on the top of my gelato base, as it was left in the fridge overnight (I just whisked it back in).
  • I made the ganache and Italian meringue 3 hours before serving, and this was fine (could have even gone longer).
  • I churned the gelato and placed it in the freezer 2 hours before serving, and it should have been in longer. Once I piped it into the cones it was already melting, although we didn’t have time or space to leave them to set in the freezer for longer – this made dipping them in the chocolate very hard.

Choc Top Extraordnaire

Recipe by Nick Palumbo (recipe seen on MasterChef season 6)

Ingredients
Almond Meal:
100 g almonds, skin on

Hazelnut Paste:
200 g hazelnuts
20 g vegetable oil (I needed a little more oil than this)

Gelato:
3000 g milk
200 g egg yolks
70 g maltodextrine (I used dextrose, as I didn’t find this in time)
300 g skim milk powder (I used normal milk powder, as that’s what I had available)
20 g Murray River salt
800 g caster sugar
1000 g cream

Amaretti Biscuit:
100 g egg white
100 g icing sugar
100 g sugar
5 grams bi-carb soda
pinch cream of tartar
5 g bitter almond extract (I used vanilla essence, as I don’t like almond essence)
30 g almond meal

Ganache:
50 g hazelnut paste
160 g cream
20 g dextrose (glucose powder)
40 g liquid glucose
160 g milk chocolate

Italian Meringue:
125 g egg whites, room temperature
200 g sugar
50 g liquid glucose

Sugar Cone:
4 egg whites
230 g caster sugar
80 g milk
2 g vanilla extract
pinch salt
170 g plain flour plus more for dusting
40 g unsalted butter, melted
cooking spray

Chocolate Dip:
320 g dark chocolate
40 g hazelnut paste
120 g cocoa butter

Method

Preheat one oven to 150C and a second oven to 195C.
To make the almond meal, place almonds on a baking tray and place in the 195C oven for 8 minutes. Remove from oven and place in blast chiller to cool down. Transfer almonds to the thermomix and blend to make almond meal, being careful not to blend too much. Set aside to use in the amaretii biscuit.

To make the hazelnut paste, place hazelnuts and vegetable oil in a thermomix and blend until smooth. Pass through a drum sieve into a bowl and set aside to use in the ganache and chocolate dip.

To make the gelato, place milk in a 7 L saucepan, set over medium heat and heat to 40C.
Place egg yolks in a bowl and whisk till pale.
Place malodextrine, skim milk powders and salt in a bowl and mix until combined.
Once the milk hits 40 C, add the powders and blend. Pour about ¼ of the mix slowly into the egg yolks and keep whisking. Then, pour the yolks with a ¼ mix, back into the saucepan with the rest of the mixture and bring up to 75 C. Take off the heat and let stand.
In a large saucepan, place the sugar with a little water and make a slurry and put on a stove on highest heat and let sugar caramelize till you get a dark amber colour.
At the same time, place the cream in a saucepan and heat to just before boiling, careful not to burn the cream.
Once sugar is dark amber colour, take off heat and very slowly pour the hot cream in, being careful that it doesn’t bubble over.
Once sugar and cream are combined, add to the reserved mixture. Blend with a stick blender and strain into shallow pans. Transfer to the blast chiller and cool until the mix gets to around 5 degrees.
Transfer mix to the soft serve machine and set to production mode.

To make the ganache, place hazelnut paste, cream, dextrose and glucose in a thermomix and heat to 80C, speed 3. Turn off thermomix and reset to 37C, speed 3. Slowly add chocolate until combined. Transfer to a shallow container and place in the fridge to cool.

To make the amaretti biscuits, place egg whites, icing sugar and sugar in mixer with whisk attachment and mix until meringue forms and sugar is dissolved. Add bi carb and cream of tartar while still whisking and then add the bitter almond extract. Fold in reserved 30 grams almond meal. Transfer mixture to a piping bag and pipe small droplets the size of a 20 cent coin onto a paper lined tray.
Place in the 150C oven and bake for 10 minutes, reduce oven to 110 C and continue to bake until dry and crunchy, about 40 minutes. Remove from oven and set aside.

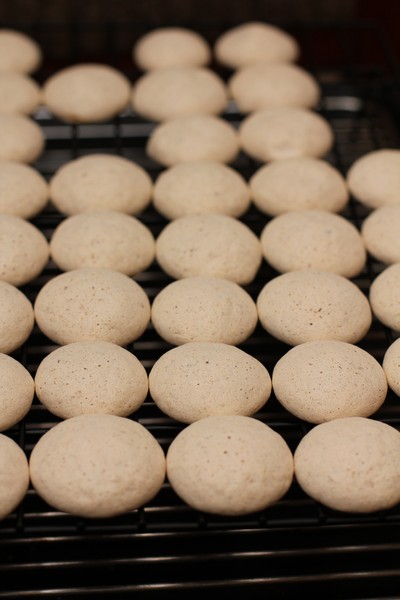
Amaretti

To make the Italian meringue, place sugar, glucose and enough water to make a slurry in a saucepan and set over medium heat. Heat to 121C.
While the sugar is heating, place egg whites in the bowl of an electric mixer and whisk until firm peaks form.
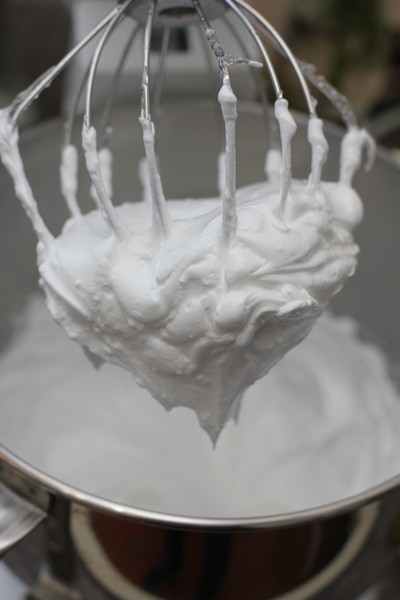
While the mixer is running, slowly pour in hot sugar syrup. Whisk until mixture is room temperature and thick and glossy. Transfer mixture to a piping bag and set aside in the freezer.

Italian Meringue

To make the sugar cone, place egg white, sugar, milk, vanilla and salt into a food processor and blend together for a few minutes. Add flour and butter and beat until fully incorporated and batter is smooth.
Lightly spray a 25cm crepe pan with a small amount of cooking spray. Pour 45gr of batter on to the cold pan and roll the pan around and tap it a little so you form what looks like a pancake about 18cm round, making sure it is even thickness all over.
Place pan in a preheated oven at 195 C until a nice tan colour around edges, about 9 minutes. Take out and flip and place back in oven for another 1-2 minutes.
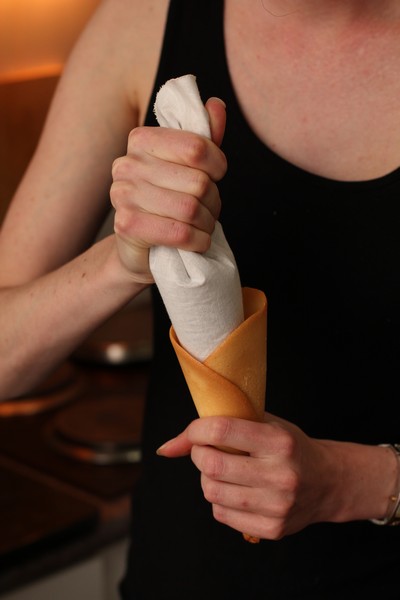
Take pan out of oven and quickly lay sugar disc onto a clean towel and top with cone roller, leaving enough of the disc sitting off the edge of the roller to allow for a pointed cone base to form. Using towel and cone roller as a guide, roll sugar disc into a cone shape with a 6cm opening. Hold seam side down for 1 to 2 minutes or until cone cools, making sure to also pinch the bottom of the cone so there is no hole at the bottom.
Cool pan completely in an ice bath, wipe dry and repeat until all batter has been used. Set cones aside.

Rolling the cone

Cones

To make the chocolate dip, place chocolate, hazelnut paste and cocoa butter in a thermomix and set on time 10 minutes, temperature 50, speed 4. Set aside, keeping at 50C.

Transfer the ganache to a piping bag and return to the fridge.

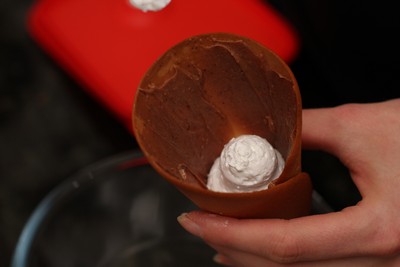
To assemble the cone, take the ganache piping bag from the fridge and pipe a little into the base of the sugar cone. Using a small palette knife, work the ganache up the inside wall of the cone all the way up to the opening, making sure to have the same thickness lining the inside of the cone.
Piping
Ganache
Take the Italian meringue piping bag from the freezer, cut the tip and pipe a little into the cone. Using a small palette knife, work the meringue up the inside wall of the cone all the way up to the opening, making sure to have the same thickness of meringue lining the inside of the cone.
Meringue and Ganache

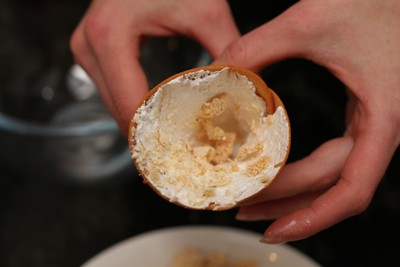
Crush amaretti biscuits finely and sprinkle inside the cone covering the meringue. Tip cone upside down to remove any excess crushed amaretti that didn’t stick to the meringue.
Meringue and Amaretti
Place the cone hard up to the gelato machine and ensure that the gelato packs firmly inside the cone. Once you have packed the cone level, slowly turn the cone around in a circular motion to achieve the classic soft serve cone. Place in the blast chiller to firm up for 1 minute.
Piped caramel gelato
Remove gelato from blast chiller and stab the gelato with the Italian meringue piping bag and pipe in 3 lots of meringue.
Stab the gelato with the ganache piping bag and pipe in 3 lots of ganache. Return the gelato to the blast chiller to firm 1-2 minutes.
Dip the cone in the chocolate topping ensuring that you cover the gelato and at least 2 cm of cone as well, ensure it doesn’t run down the cone by keeping it on an angle.
ChocTop
Sieve crushed amaretti biscuit and sprinkle the gelato with larger pieces of crushed amaretti biscuit.
Serve

Eve

Friday, February 14th, 2014

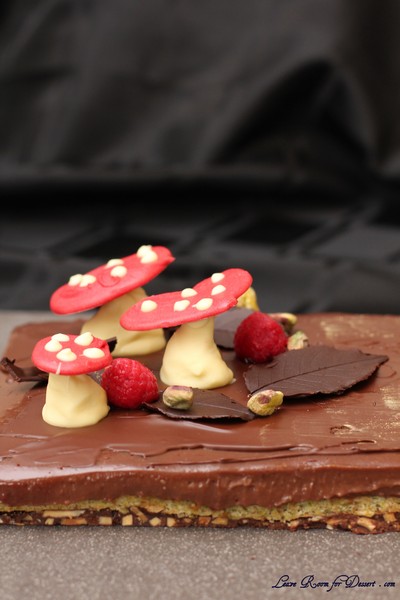
One of my biggest cooking challenges since giving birth, was this cake, but I had desperately wanted to make it for Valentines day (as I knew Nick would probably prefer a different cake for his birthday), so the next best excuse was today (even though we don’t normally celebrate the day).
Eve was made by Kirsten Tibballs from Savour Chocolate and Patessiere School on one of the MasterChef episodes in their “Love” week last year. Having been lucky enough to do a short course at Savour a while ago, and tasting their wonderful creations, I was looking forward to making this cake. I have also noticed Kirsten has a cookbook released recently which looks lovely and one day I would like to get my hands on it.

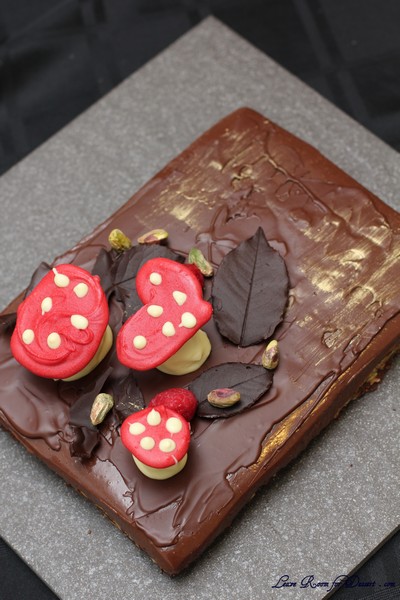
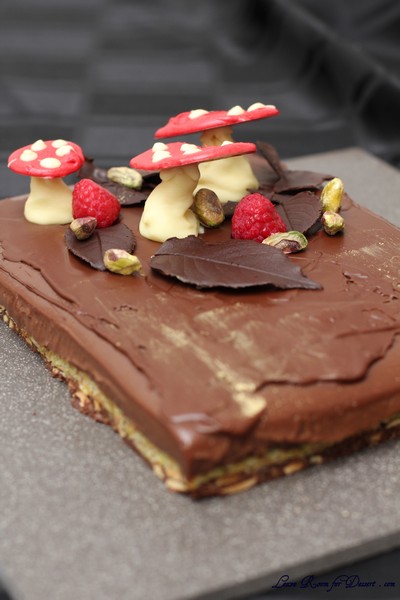
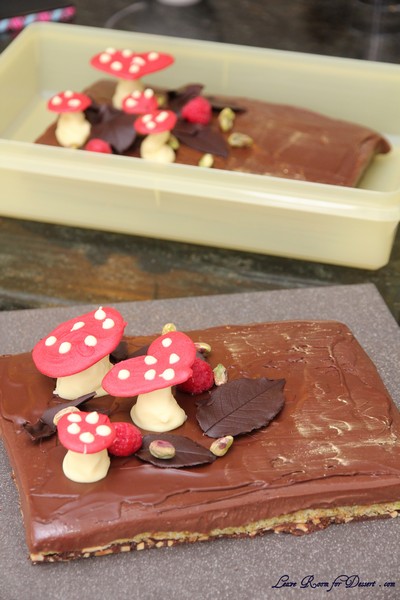
The cake turned out extremely well, and it was extremely rich (you only need a small slice). I was happy with all three components, although a number of people thought a little less cremeux would be good. It looked quite impressive once put together and I was super happy with the result.
My notes and troubleshooting:

I had trouble with the red colouring for the mushrooms. The powder I used wasn’t turning the chocolate red, more of a brown colour, so then I added some of my Wilton colouring gel, and although it turned it a maroon colour (and not vibrant red initially), it also seized the chocolate, meaning it was hard to pipe – I had to pipe it best I could and then use a spoon or knife to spread it into a shape.

For the stems of the mushrooms, I ended up seizing the chocolate too much, so couldn’t pipe it – it was so solid I ended up just moulding it with my hands (like fondant).

I cut the cake into two, as it was quite large and I thought the decorations wouldn’t look in proportion if the cake was left its original size.

I used less chocolate for many aspects (mushrooms and toppings), as I didn’t want much left over. I also just used what chocolate I had available, e.g. cooking chocolate that didn’t require tempering

For the hazelnut praline paste I halved this recipe from Sweet as Honey. I added a bit of water, but it didn’t really get as liquidy as the photos on that website. Therefore for the crispy almond layer I needed to add more melted chocolate and some hazelnut spread.
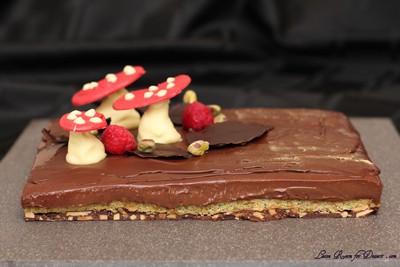
Eve Cake

Recipe by Kirsten Tibballs
*You will need a 33cm x 23cm cake pan for this recipe

Pistachio dacquoise
145g egg whites, at room temperature
2g cream of tartar
64g caster sugar
2 drops green food colouring
128g ground pistachios, sifted
100g icing sugar, sifted
24g plain flour, sifted
Good quality raspberry jam, for brushing

Crispy almond layer
70g Callebaut dark chocolate, broken into pieces
180g Hazelnut praline paste, or increase chocolate by 40g and add 1 tablespoon almond oil (I made my own hazelnut praline, but also added 50g more chocolate and 1 tablespoon Nutella)
172g slivered almonds, roasted
30g Callebaut cocoa nibs or almonds (I used the almonds)

Chocolate cremeux
690g thickened cream
156g egg yolks
76g caster sugar
265g Callebaut milk chocolate (33.6% cocoa), broken into pieces
265g Callebaut dark chocolate (60% cocoa), broken into pieces

Chocolate leaves and bark
100g good quality dark chocolate (57.8% cocoa) (I used only about 30-50g)
Assorted fresh leaves, washed and dried with paper towel

Chocolate mushrooms
150g Callebaut W2 white chocolate (28% cocoa) (I used only 50-100g)

Red chocolate heart tops
200g Callebaut velvet white chocolate (I used only 50-100g)
20g red soluble oil based powder

Edible pebbles
30g pistachios, roughly chopped
Edible green metallic (I used gold)

Pistachio dacquoise
1. For the pistachio dacquoise, preheat oven to 170C.
2. Whisk egg whites and cream of tartar in the bowl of an electric mixer to soft peaks, on medium speed.
3. Increase speed to high, then gradually add caster sugar while mixing continuously to allow sugar to dissolve. Add food colouring, whisking to combine.

4. Meanwhile, combine pistachios, icing sugar and flour in a bowl.

5. Gently fold meringue into bowl with pistachio mixture until just combined.

6. Using a palette knife, evenly spread mixture into a 35 x 25cm Flexipat or same-size tray lined with baking paper. Bake in oven for 15-18 minutes, then remove, and set aside to cool completely.
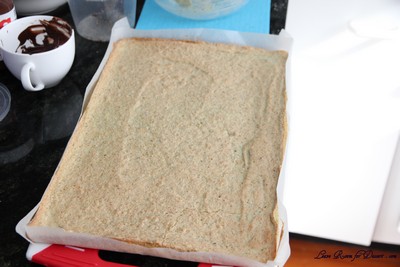
7. Trim dacquoise to 33cm x 23cm rectangle.

Crispy almond layer
1. For the crispy almond layer, grease and line the cake pan with baking paper.

2. Melt chocolate to 36°C in a microwave in 30 second increments. Add remaining ingredients and stir to combine.

3. Evenly press mixture into cake pan. Set aside until just before the almond layer sets, then place dacquoise layer on top.

4. Brush a thin layer of jam over the top of the pistachio dacquoise.

Chocolate cremeux
1. For the chocolate cremeux, bring cream to the boil in a saucepan over medium heat.

2. Meanwhile, whisk egg yolks and sugar in a bowl until well combined. Whisking constantly, slowly add half of the warm cream to bowl with egg yolk mixture until combined.

3. Pour egg yolk mixture into pan with remaining cream, and place over low heat. Using a wooden spoon, stir constantly until mixture reaches 80°C, and coats the back of the wooden spoon.

4. Meanwhile, place chocolate in a medium bowl. Strain cream mixture through a fine sieve over the chocolate, and stir until melted and combined.

5. Pour crémeux over the raspberry jam layer.

6. Refrigerate for 4 hours or until set. You can freeze for up to 1 month in the freezer.

Chocolate leaves and bark
1. For the chocolate leaves and bark, temper dark chocolate as per instructions below.

2. For the bark, brush a thin layer of chocolate onto a piece of baking paper and roll up and set aside.

3. For the leaves, brush a thin layer on each leaf, until you can’t see the leaf. Once the chocolate has set, carefully remove the leaf.

Chocolate mushrooms
1. For the chocolate mushrooms, temper chocolate as per instructions below. Add a few drops of water at a time, stirring until the chocolate thickens to a piping consistency. With a disposable piping bag fitted with a 1cm nozzle, pipe 3 mushroom bases onto a tray lined with baking paper. Set aside until firm.

Red chocolate heart tops
1. For the heart tops, temper chocolate as per instructions below. Sift the red powder into ¾ of the white chocolate and mix until combined. Transfer red chocolate to a piping bag made of baking paper. Pipe red chocolate into heart shapes, using a template as a guide underneath a sheet of baking paper. (see last page) Set the chocolate for 20-30 minutes before removing from the paper.

2. Use the remaining white chocolate to pipe white dots onto the mushroom tops, and to stick the tops and stems together.

Edible pebbles
1. Place pistachios in a bowl and add green metallic, tossing to coat.

To Assemble
1. To assemble, temper the dark chocolate as per instructions below. Brush a thin layer of chocolate onto the surface of the cake to create a rough texture. Brush with gold metallic once set.

2. Garnish with chocolate leaves, bark, chocolate mushrooms, pebbles, raspberries and hazelnuts.
Tempering chocolate
1. Place required chocolate in a plastic bowl (glass retains too much heat).

2. Melt chocolate in a microwave for no more than 30-second increments, stirring in between.

3. Melt chocolate until you have 50% solid chocolate and 50% melted chocolate. Continue stirring without applying any additional heat. It may take a few minutes for all of the solid chocolate to melt. Stir continuously during this time.

4. If the chocolate does not melt completely, apply gentle heat with a hair drier. Do a test by spreading a small amount of chocolate onto a piece of baking paper, in a room at a temperature no higher than 22C. The chocolate should set at room temperature in 5-10 minutes.

a. Dark couverture should set in approximately 5 minutes.

b. Milk couverture should set in approximately 7 minutes.

c. White chocolate should set in approximately 10 minutes.

5. It is necessary to maintain the chocolate in a liquid state by reheating if necessary. Be sure to take a new test every time you reheat.

6. To test if your chocolate is tempered correctly, dip a teaspoon or a square of acetate in the couverture and leave it to set. This should take around 5-10 minutes at room temperature. If the couverture does not set after 10 minutes, it is not tempered correctly. If it sets but there are streaks on the surface, you will need to continue stirring the couverture, then take another test.
Passion Fruit Caramel Chocolates – Daring Bakers Challenge July 2013

Sunday, July 28th, 2013

In a “celebration” of past Daring Baker and Daring Cook challenges, Lisa challenged all of us to search through the Daring Kitchen archives and pick any one we’d like! The REAL challenge was picking which delicious recipe(s) to try!

I remember before I started the Daring Bakers, each month on some of my favourite food blogs I couldn’t wait to see what everyone had made. Seeing their wonderful creations and wishing I had made them was the reason I joined up to the Daring Bakers.

So when this challenge came up, I thought it was a great opportunity for me to try some of those dishes I had missed making. Some of the dishes I considered making were eclairs, a French Yule Log or tuiles. Although after I attended a chocolate tempering class last year (and received some silicone chocolate moulds for Christmas), I decided to go back to a challenge I had already done, although hadn’t made one of components I would have liked to make.

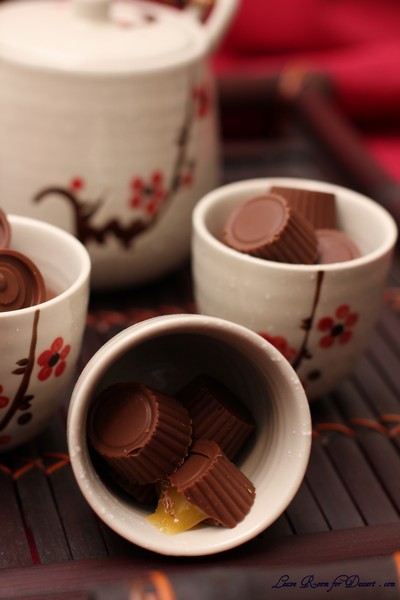
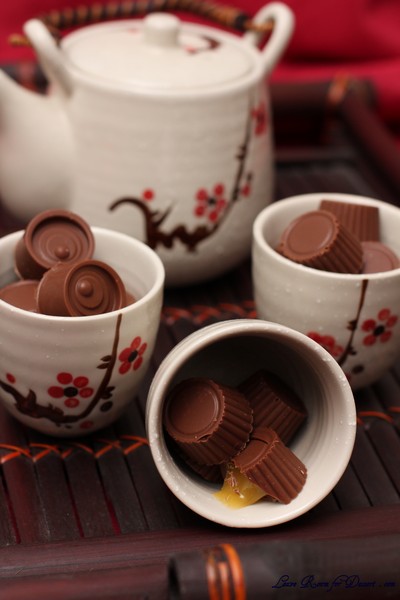
So, passion fruit caramel chocolates became my challenge for this month. The caramel just tasted divine, and some tips on chocolate tempering from the class came in handy too. When I handed out the chocolates I got a lot of great responses and comments that I could certainly make them again (which I will – because I loved them). They made quite a mess though, although to make yummy food, sometimes you need to spread chocolate over the counter and lots of utensils.

From Daring Bakers August 2011
Lisa’s Passion Fruit Caramel Bonbons was adapted from CandyBarLab.com

Passion Fruit Caramel Chocolates aka Bonbons

Servings: 16 large (1.5” – 2” molds) or 20 to 25 medium bonbons (would have made more than 30 small chocolates)

Painted passion fruit caramel filled bonbons
Ingredients, sans passion fruit, From CandyBarLab.com, with my revisions

Ingredients
Dark or milk chocolate melted, preferably tempered, about 1 lb / 450g
1 cup (225g / 8oz) Granulated White Sugar
1/2 cup (125ml / 4 fluid oz) Light Corn Syrup
1/2 cup (125ml / 4 fluid oz) Water
4 Tbsp (60g / 2 oz) Unsalted Butter
2 Tbsp (30ml / 1 fluid oz) Heavy Cream
1/4 cup (60ml / 2 fluid oz) Passion Fruit Puree (I purchased frozen passionfruit pulp, then thawed it and removed the seeds)
1/2 Tbsp salt

Equipment
2 or 3 quart, heavy-bottomed pot
Candy thermometer
Whisk

Directions:
1. Place the sugar, corn syrup and water in a medium saucepan.
2. Set over medium-high heat and stir to combine.
3. Bring the mixture to a boil and cook until dark amber in color 310°F-315°F / 155°C-158°C, about 5 minutes.
4. Use a pastry brush, dipped in water, to wash down sides of pan to prevent crystallization as the mixture boils.
5. Remove saucepan from the heat and gradually whisk in the passion fruit puree, heavy cream and butter.
6. Transfer to a medium bowl and let cool.
7. Transfer cooled caramel to a pastry bag fitted with a medium plain tip or a squeeze bottle.
8. Coat the molds with chocolate using the method mentioned above.
9. Fill chocolate coated molds with caramel. You can use a spoon too but it’s less messy and goes a lot quicker with either of the two aforementioned methods.
10. Finish off with a layer of chocolate as mentioned in the method above for making filled chocolates with molds
11. Once fully set, carefully knock the chocolates out of the mold

Tempering Methods

Method 1: On marble or granite

Marble slab, chocolate or bench scraper, dipping forks and chocolate thermometer

Tempering Ranges:

Celcius
Dark: 45°C-50°C > 27°C > 32°C
Milk: 45°C > 27°C > 30°C
White: 45°C > 27°C > 29°C

Fahrenheit
Dark: 113°F-122°F > 80.6°F > 89.6°F
Milk: 113°F > 80.6°F > 86°F
White: 113°F > 80.6°F > 84.2°F

Chocolate is melted and heated until it reaches 45°C / 113°F. It is then poured onto a marble surface and moved around the surface with a scraper until it has thickened and cools to 27°C / 80.6°F. Once cooled it is then put back into the bowl and over heat to bring it back up to 32°C/30°C/29°C /// 89.6°F/86°F/84.2°F depending on the chocolate you’re tempering. It is now ready for using in molds, dipping and coating.

Tempering using a marble surface

• Finely chop chocolate if in bar/slab form.
• Place chocolate in a heatproof bowl.
• Place bowl over a saucepan of simmering water (make sure the bowl does not touch the water).
Tip: Make sure that your bowl fits snuggly into the saucepan so that there’s no chance of steam forming droplets that
may fall into your chocolate. If water gets into your chocolate it will seize!
• Using a rubber spatula, gently stir the chocolate so that it melts evenly
• Once it’s melted, keep an eye on the thermometer, as soon as it reaches 45°C / 113°F remove from heat (between 45°C-50°C / 113°F-122°F for dark chocolate)
• Pour ¾ of the melted chocolate onto a marble or granite slab or worktop
• Using a scraper or large palette knife move the chocolate around the surface to help it cool
Tip: Keep the motions neat and tidy, if you’re not working with a lot of chocolate you don’t want to spread it too far otherwise you may end up with chocolate that begins to cool too quickly and start to set as well as drops below
• the necessary temperature. Use a motion that folds the chocolate on itself
• Check temperature regularly with a thermometer
• Once it reaches 27°C / 80°F put the chocolate back into the heatproof bowl with the remaining chocolate
• Gently stir together with a rubber spatula
• Check the temperature to see if it’s risen back up to the working temperature of the chocolate (milk, dark or white) as seen in the above chart
• If the temperature has not risen to its working temperature, put the bowl back over the simmering water, stirring gently
• IMPORTANT: You really need to keep an eye on the temperature as it can rise quicker than you think, so as soon as it’s up to its working temperature, remove from heat
• It’s now tempered and ready to use
Tip: If you’re using the chocolate to dip a lot of truffles etc. which means the chocolate will be sitting off heat for a while it will naturally start to thicken as it cools. To keep it at an ideal viscosity for even coating, put the bowl over steam for 30sec-1min every 5-10mins, just do not let the temperature go over the working temperature!
Tip: Having the chocolate in a warmed glass bowl and wrapped in hot kitchen towel can also help keep the chocolate at its working temperature for longer
Tip: It is also easier to keep the heat if you work with larger amounts of chocolate rather than small amounts. Any leftover chocolate can be kept to be used later and then re-tempered
Tip: Remember, don’t let any water get into your chocolate at any stage of the tempering process!
Method 2: With tempered chocolate pieces, also called “seeding”

Tempering Ranges:

Celsius
Dark: 45°C-50°C > 27°C > 32°C
Milk: 45°C > 27°C > 30°C
White: 45°C > 27°C > 29°C

Fahrenheit
Dark: 113°F-122°F > 80.6°F > 89.6°F
Milk: 113°F > 80.6°F > 86°F
White: 113°F > 80.6°F > 84.2°F

Chocolate is melted and heated until it reaches 45°C / 113°F. Tempered un-melted chocolate is then stirred and melted in until it brings the temperature down to 27°C/80.6°F. It is then put back over heat and brought up to its working temperature of 32°C/30°C/29°C /// 89.6°F/86°F/84.2°F depending on the chocolate you’re using. It is now ready for using in molds, dipping and coating.

Tempering using the seeding method with couverture callets

• Finely chop chocolate if in bar/slab form (about the size of almonds).
• Place about ⅔ of the chocolate in a heatproof bowl
• Set aside ⅓ of the chocolate pieces
• Place bowl over a saucepan of simmering water (make sure the bowl does not touch the water)
Tip: Make sure that your bowl fits snuggly into the saucepan so that there’s no chance of steam forming droplets that may fall into your chocolate. If water gets into your chocolate it will seize!
• Using a rubber spatula, gently stir the chocolate so that it melts evenly
• Once it’s melted, keep an eye on the thermometer, as soon as it reaches 45°C / 113°F remove from heat (between 45°C-50°C / 113°F-122°F for dark chocolate)
• Add small amounts of the remaining ⅓ un-melted chocolate (seeds) and stir in to melt
• Continue to add small additions of chocolate until you’ve brought the chocolate down to 27°C/80.6°F (You can bring the dark chocolate down to between 80°F and 82°F)
• Put it back on the double boiler and bring the temperature back up until it reaches its working temperature of the chocolate (milk, dark or white) as seen in the above chart. (32°C/89.6°F for dark, 30°C/86°F for milk and 29°C/84.2°F for white)
• If you still have a few un-melted bits of chocolate, put the bowl back over the simmering water, stirring gently and watching the thermometer constantly.
• IMPORTANT: You really need to keep an eye on the temperature so that it doesn’t go over its working temperature

It’s now tempered and ready to use

Tip: Another way of adding the “seed” is by dropping in one large chunk of tempered chocolate (the seed). That way you only need to fish out one piece of unmelted chocoalte and don’t need to fish out several small bits of unmelted chocolate once the chocolate has reached temper.
Other Tips

• If you’re using the chocolate to dip a lot of truffles etc. which means the chocolate will be sitting off heat for a while it will naturally start to thicken as it cools. To keep it at an ideal viscosity for even coating, put the bowl over steam for 30sec – 1min every 10 – 15mins, just do not let the temperature go over the working temperature!
• Having the chocolate in a warmed glass bowl and wrapped in hot kitchen towel can also help keep the chocolate at its working temperature for longer
• It is also easier to keep the heat if you work with larger amounts of chocolate rather than small amounts. Any leftover chocolate can be kept to be used later and then re-tempered
• Remember, don’t let any water get into your chocolate at any stage of the tempering process!
• Unless you’ve been working with chocolate for a while and have developed a feel for the tempering process and can tell the chocolate’s temperature by touching it to your lower lip like a pro, it’s imperative that you use a thermometer to determine the temperature, as going a few degrees either way can ruin the temper.
• If at any stage you do make a mistake with the tempering process you can simply start again from the beginning.
• While a marble or granite top is ideal for cooling the chocolate in the first method, you can also cool it on a countertop that’s laminated, glass or steel. It will take longer to cool, but it’s possible! (but I definitely wouldn’t recommend a wood or rough textured counter top Wink )
• Any chocolate left over after making your molded or dipped chocolate can be stored away in a cool place and then re-tempered before using again. There’s no need to ever waste good chocolate! Smile
• Wooden spoons can retain moisture so it’s best to use a rubber spatula while tempering

How to make filled chocolate with molds

Tempered Chocolate
Various Colored Cocoa Butters (optional)
OR Food Grade Cocoa Butter colored with powdered food coloring

Other Equipment:
A small brush
Chocolate molds
A Ladle
Bench or plastic scraper
OR
A small brush or spoon

Directions:

1. If using colored cocoa butter and plastic molds, paint designs at the bottom of the wells in each mold. Let dry. You can also use lustre dusts mixed with a bit of extract or vodka, instead of colored cocoa butters for a nice sheen. Let painted molds dry.

2. When coating the molds with the tempered chocolate, I like to do it how the chocolate pro’s do it (much faster and a lot less tedious). While holding mold over bowl of tempered chocolate, take a nice ladle of the chocolate and pour over the mold, making sure it cover and fills every well. Knock the mold a few times against a flat surface to get rid of air bubbles, then turn the mold upside down over the bowl of chocolate, and knock out the excess chocolate. Turn right side up and drag a bench or plastic scraper across so all the chocolate in between the wells is scraped off cleanly, leaving you with only chocolate filled wells. Put in the fridge to set, about 5 to 10 minutes. Alternatively, you could take a small brush and paint the tempered chocolate into each mold, or spoon it in if you’d like.

3. Remove from refrigerator and fill each well with the filling of your choice. Again take a ladle of chocolate and pour it on top of the filled chocolate wells, knocking against a flat surface to settle it in. Scrape excess chocolate off the mold with the bench scraper then refrigerate until set.

4. When set, pop your beautiful filled chocolates out of each well and enjoy!

Crack Pie – Daring Bakers Challenge June 2013

Thursday, June 27th, 2013

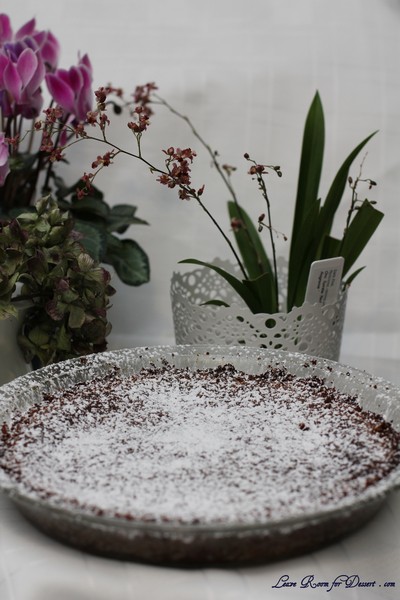
Rachael from pizzarossa was our lovely June 2013 Daring Bakers’ host and she had us whipping up delicious pies in our kitchens! Cream pies, fruit pies, chocolate pies, even crack pies! There’s nothing like pie!

What a range of pies we were able to choose from this month! I absolutely love my mum’s apple crumble, and love anything with pastry, so was extremely excited. The only difficulty was choosing.

I had never heard about a “Crack Pie” before, although the description certainly sold it, and when I started researching I found out the recipe was from Christina Tosi from Momofuku Milk Bar in New York (although I did find other recipes also saying it was from Monofuku, with some differences in quantities, so I am unsure which is correct).

I made the oat cookie base the night before making the pie, and when I was crumbling it by hand the next night, I wished I had taken out my food processor – it would have sped up the process (which is important when you are making pizza for dinner at the same time).

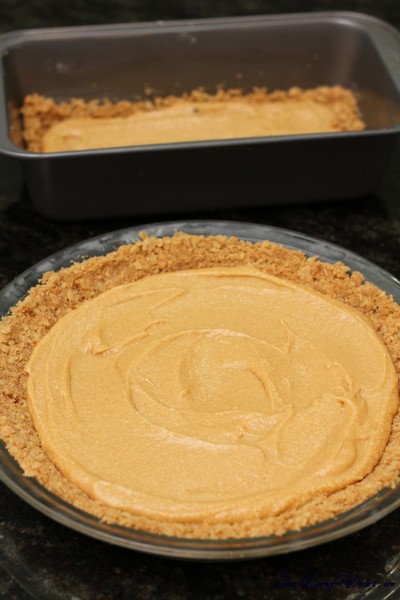
When pressing the cookie mixture into my pie dish, I thought it looked like too much mixture, so split the mixture and placed some of it in a loaf tin. When I started added the filling, I thought I probably could have fit it all in the pie dish – although added it to the loaf tin as well. Make sure you double check the temperature of your oven and check very regularly (I left mine in for 25 minutes and burnt part of the edge of the pie – plus the one in the loaf tin). I had turned my oven down after cooking the pizza, although it held the heat more than expected.

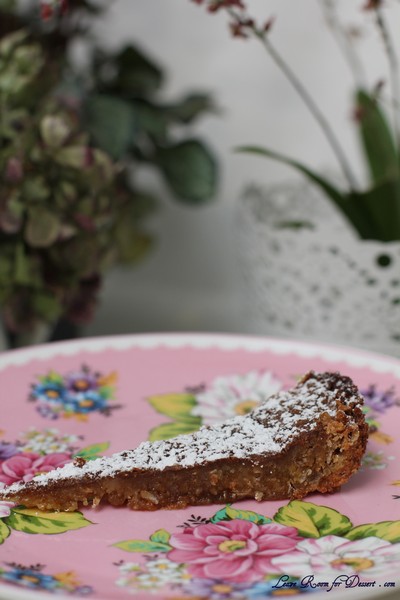
Now for the taste – a very rich and caramel flavour with a lovely texture. Very moreish, although a bit sweet to eat too much. I wish it had been a bit higher, perhaps I should have used all the crust and filling – even when I thought it was too much – or perhaps I need a higher pie dish 🙂

Crack Pie

Recipe from Bon Appetit

Servings:12
Preparation time: 20 + 20 minutes
Baking time: 18 + 50 minutes
Cooling time: 1 hour + 2 hours, approx.
Chilling time: overnight

Oat Cookie Crust

9 tablespoons (1 stick + 1 tbsp) (135 ml) (4½ oz) (125g) unsalted butter, room temperature, divided (6 & 3 tbsp; 85gm & 40gm)
5 1/2 tablespoons (85 ml)(2½ oz) (70 gm) (packed) light brown sugar, divided (4 & 1½ tbsp; 50 gm & 20 gm)
2 tablespoons (30 ml) (30 gm) (1 oz) white sugar
1 large egg
3/4 cup plus 2 tablespoons (210 ml) (80 gm) (2¾ oz) old-fashioned oats
1/2 cup (120 ml) (2½ oz) (70 gm) all-purpose flour
1/8 teaspoon (2/3 gm) baking powder
1/8 teaspoon (2/3 gm) baking soda
1/4 teaspoon (1½ gm) salt

1. Position rack in center of oven and preheat to moderate 350°F/180°C/gas mark 4. Line a 13x9x2 inch/33x22x5cm metal baking pan with parchment (baking) paper. Lightly spray or butter a 9 inch/22cm diameter glass or ceramic pie dish.

2. Combine 6 tablespoons (85 gm) of the softened butter, 4 tablespoons (50 gm) of the brown sugar and the white sugar in medium bowl. Using an electric mixer, beat until light and fluffy, about 2 minutes.

3. Add egg and beat until pale and fluffy, about 1 minute.

4. Add oats, flour, baking powder, baking soda, and salt and beat until well blended, about 1 minute.

5. Dump oat mixture into prepared baking pan and press out evenly to edges of pan.

6. Bake until light golden, 18 minutes. Transfer baking pan to wire rack and cool cookie completely, about an hour.

7. Using your fingertips, crumble the cookie a into large bowl – there should be no identifiable pieces of cookie remaining. Add the remaining 3 tablespoons (45 gm) butter and 1-1/2 tablespoons (20 gm) brown sugar. Rub in with your fingertips until the mixture is moist and sticks together when pressed between your fingers.

8. Transfer cookie crust mixture to pie dish. Using your fingers, press mixture evenly onto bottom and up sides of pie dish (about 1 inch/2.5cm up the sides if your pie dish is deep). If your pie dish is shallow, place it on a baking sheet in case of overflow.

Filling

3/4 cup (160 ml) (170 gm) (6 oz) white sugar
1/2 cup (packed) (120 ml) (100 gm) (3½ oz) light brown sugar
1 tablespoon (15 ml) (8 gm) (¼ oz) dry milk powder
1/4 teaspoon (1½ gm) salt
1/2 cup (1 stick) (120mlk) (4 oz) (115gm) unsalted butter, melted, cooled slightly
6 1/2 tablespoons (100ml) heavy whipping cream
4 large egg yolks
1 teaspoon vanilla extract
Powdered sugar for dusting

1. Position rack in center of oven and preheat to moderate 350°F/180°C/gas mark 4. If possible, use bottom-only heat, or the filling may brown too quickly.

2. Whisk both sugars, milk powder, and salt together in a medium bowl.

3. Add melted butter and whisk until blended.

4. Add cream, then egg yolks and vanilla and whisk until well blended.

5. Pour filling into crust.
6. Bake 30 minutes (filling may begin to bubble up). Reduce oven temperature to 325°F/160°C/gas mark 3. Continue to bake until filling is brown on top and set around edges but center still jiggles slightly, about 20 minutes longer.

7. Cool pie completely in pie dish on wire rack. Chill uncovered overnight.
8. Sift powdered sugar lightly over top of pie. Cut pie into thin wedges and serve cold.
Vanilla Slice – Daring Bakers Challenge October 2012

Saturday, October 27th, 2012

Our October 2012 Daring Bakers’ challenge was hosted by Suz of Serenely Full. Suz challenged us to not only tackle buttery and flaky puff pastry, but then take it step further and create a sinfully delicious Mille Feuille dessert with it!

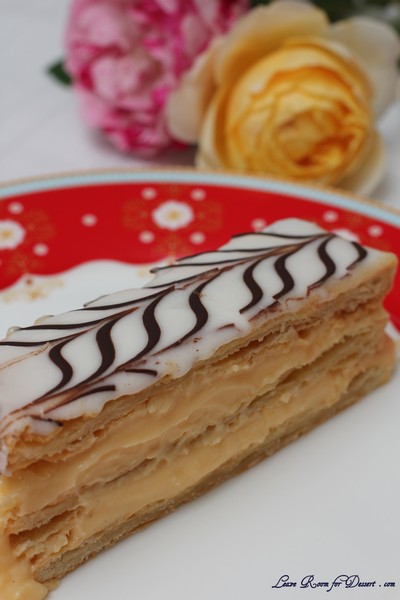
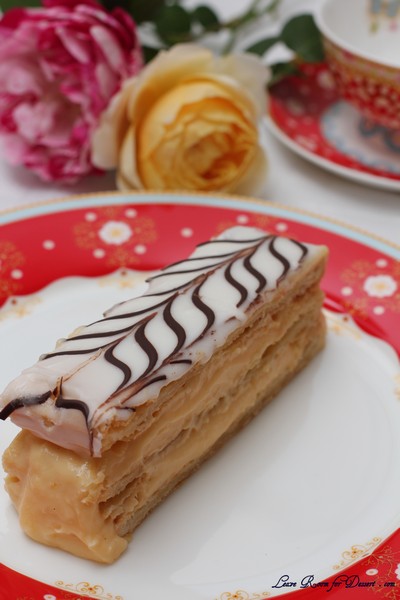
Anyone would have thought it was my Mum’s birthday – as I arrive with a large vanilla slice and a couple of roses in hand. It just so happens that my Mum has always wanted a vanilla slice made for her, as she will often buy them from bakeries. Although it was someone’s birthday, they certainly hadn’t asked for vanilla slice – and we didn’t need it after a large lunch of chicken schnitzel followed by cake. It did however almost all get eaten on the day I assembled it.

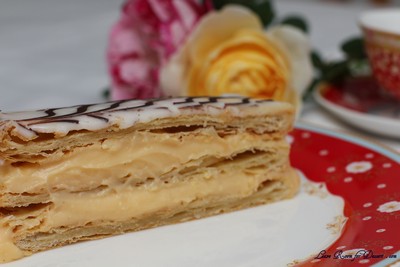
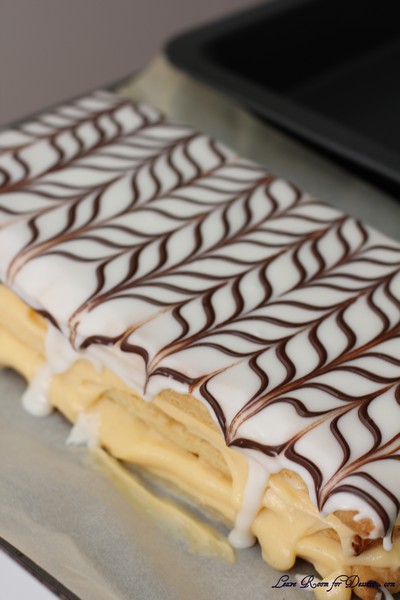
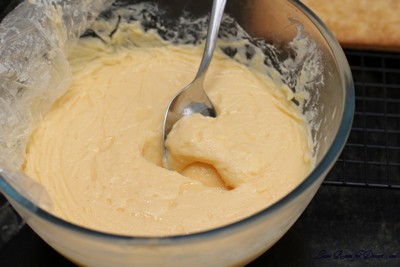
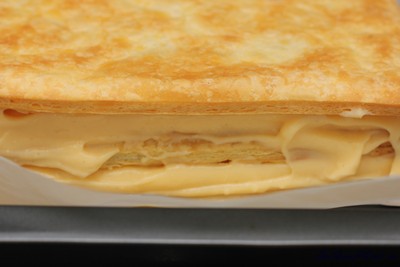
We have made puff pastry before in previous Daring Bakers Challenges, and I actually really enjoy making it. Finding time to make it is a little more difficult. I also had lots of fun making the decoration on top. The puff pastry and vanilla custard were both easy to make, the only difficulty I had with this challenge was cutting and presenting it nicely. I found the custard flowed out the sides quite a bit, so even neatening the pastry was difficult.

This certainly didn’t stop anyone from enjoying it though, and I even have a request to make it for my Mum’s birthday. The next time I make it I will probably try another custard recipe, to find one that will hopefully hold its shape whilst cutting.

If you don’t wish to make the icing with egg white, you are able to make it with some teaspoons or tablespoons of hot water instead.

Thanks to our host for providing an extremely yummy challenge this month 🙂

Pâte feuilletée /Puff Pastry

Servings: Makes 8-10 mille-feuille (yields: 675g pastry)

Ingredients
1¾ cup (250g) plain/all-purpose flour
Scant ¼ cup (55 ml) (1¾ oz)(50g) unsalted butter, chilled and cubed
1 teaspoon (5ml) (6 gm) salt
½ cup plus 2 tablespoons (5/8 cup)(150 ml) cold water

14 tablespoons (210 ml) (7 oz) (200g) butter (for the beurrage), room temperature
3½ tablespoons (55ml) (30g) plain flour (for the beurrage)

Additional flour for rolling/turning

Directions:

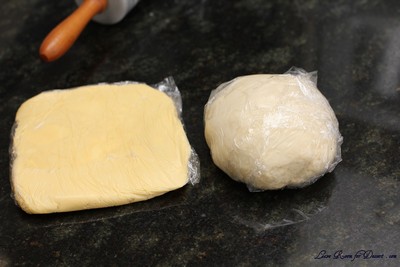
1. Cut the larger quantity of butter into smallish pieces and set aside at room temperature.
2. Put the larger quantity of flour into a bowl with the salt and the cold, cubed butter.
3. Lightly rub the butter and flour between your fingertips until it forms a mealy breadcrumb texture.

4. Add the cold water and bring together with a fork or spoon until the mixture starts to cohere and come away from the sides of the bowl.
5. As the dough begins to come together, you can use your hands to start kneading and incorporating all the remaining loose bits. If the dough’s a little dry, you can add a touch more water.
6. Knead for three minutes on a floured surface until the dough is smooth.
7. Wrap in clingfilm and refrigerate for at least 30 minutes.

8. While the dough is chilling, take your room temperature butter and mix with the smaller amount of plain flour until it forms a paste.
9. Place the butter paste between two sheets of clingfilm, and either with a rolling pin or your hands (I found hands easiest) shape it into a 4.5”/12cm square. You can use a ruler (or similar) to neaten the edges.

10. Refrigerate for about 10-15 minutes so the butter firms up slightly. If it’s still soft, leave it a bit longer. If it’s too hard and inflexible, leave it out to soften a touch. You want it to be solid but still malleable.
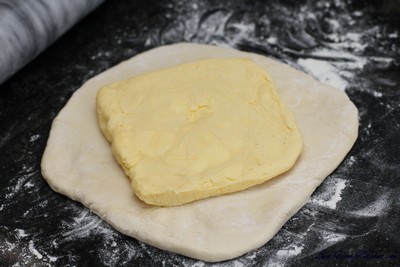
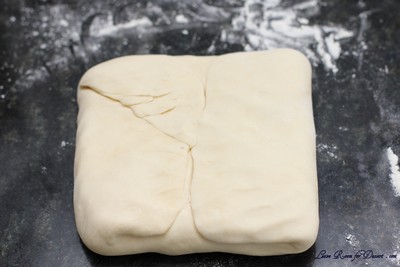
11. Once the dough has chilled, roll it out on a floured surface into a 6”/15cm square. Place the square of butter in the middle, with each corner touching the centre of the square’s sides (see photo below).


12. Fold each corner of dough over the butter so they meet the centre (you might have to stretch them a little) and it resembles an envelope, and seal up the edges with your fingers. You’ll be left with a little square parcel.

13. Turn the dough parcel over and tap the length of it with your rolling pan to flatten it slightly.
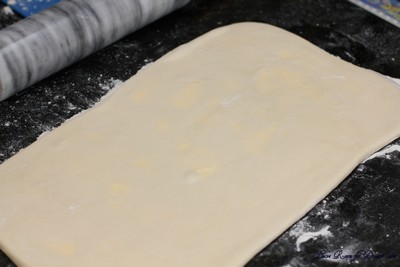
14. Keeping the work surface well floured, roll the dough carefully into a rectangle ¼ inch /6 mm in thickness.
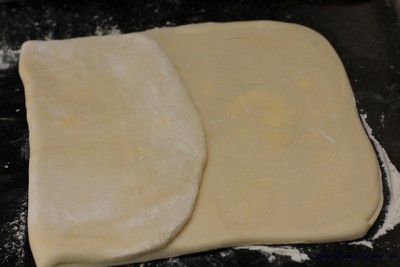
15. With the longest side facing you, fold one third (on the right) inwards, so it’s covering the middle section, and ensure that it is lined up (see below).


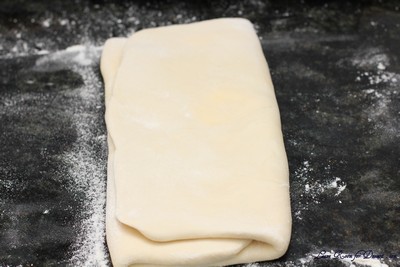
16. Then, fold the remaining flap of dough (on the left) inwards, so you’re left with a narrow three-layered strip (see below).

17. Repeat steps 14, 15, 16.
18. Wrap up in clingfilm and chill for at least 30 minutes.
19. Repeat steps 14, 15, 16 twice.
20. Wrap up in clingfilm and chill again for at least 30 minutes.
21. Repeat steps 14, 15, 16 two final times.
22. Wrap up in clingfilm and refrigerate until needed. The dough keeps a couple of days in the fridge.

Pastry Cream / Crème Pâtissière:

(full batch; makes enough for 8-10 mille-feuille)

Ingredients

2 cups (450ml) whole milk
¼ cup (1¼ oz)(35 gm) cornflour/cornstarch
1 cup less 1 tablespoon (200gm) (7 oz) caster sugar
4 large egg yolks (if you’re making the royal icing, reserve two egg whites)
2 large eggs
¼ cup (2 oz) (60gm) unsalted butter, cubed
2 teaspoons (10 ml) vanilla essence

Directions:

1. Mix the cornflour/cornstarch with ½ cup of milk and stir until dissolved.

2. Heat the remaining milk in a saucepan with the sugar, dissolving the sugar and bringing the milk to the boil. Remove from heat.
3. Beat the whole eggs into the cornflour/milk mixture. Then beat in the egg yolks. Pour in 1/3 of the hot milk, stirring constantly to prevent the eggs from cooking.

4. Now, bring the remaining milk back to the boil, and add the eggy mixture, whisking as your pour. Keep whisking (don’t stop or it’ll solidify) on a medium heat until the mixture starts to thicken.

5. Remove the saucepan from the heat and thoroughly whisk the pastry cream. At this stage the pastry cream can look slightly lumpy, but a good whisking soon makes it smoother.
(N.B. If you’re worried about the pastry cream continuing to cook off the heat, you can transfer it to a stainless steel/ceramic bowl.)
6. Beat in the butter and vanilla until fully incorporated.
7. If you haven’t already, pour the pastry cream into a stainless steel or ceramic bowl, and then place clingfilm over the surface to stop a skin forming.
8. Refrigerate overnight to give the pastry cream time to further thicken.

Mille-Feuille/ Napoleon/ Custard Slice

Servings: Makes 8- 10

Ingredients
1 x batch pâte feuilletée/puff pastry (see above)
1 x batch crème pâtissière/pastry cream (see above)

2 ¾ cups (660 ml) (12⅓oz) (350gm) icing sugar
2 teaspoons (10 ml) lemon juice
2 large egg whites
½ cup (2¾ oz) (80gm) dark chocolate

Directions:

1. Preheat oven to moderately hot 200 °C /400°F/gas mark 6.
2. Lightly dust your work space with flour and remove your dough from the fridge.
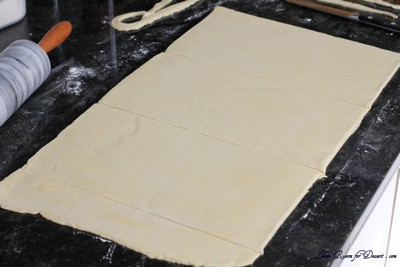
3. Roll into a large rectangle, the thickness of cardboard. The recipe I followed specified no other dimensions, but I rolled mine to about 12”/30cm x 18”/46cm.

(I found it easiest to start the rolling on the work surface, and finish it off on a large piece of greaseproof paper. That way it’s easier to move the sheets of pastry around.)

4. Cut into three equal pieces and place on a baking tray. If you don’t have space for all three, you can bake them separately.

(I baked mine in separate batches. See below.)

5. Prick the pastry sheets all over with a fork.
6. Place another sheet of greaseproof paper over the top and then a heavy baking tray. This will prevent the layers from puffing up too much.

(N.B. I found my baking trays weren’t heavy enough, so also used a pyrex dish to add more weight. Just ensure that the pastry sheets are evenly weighted down.)

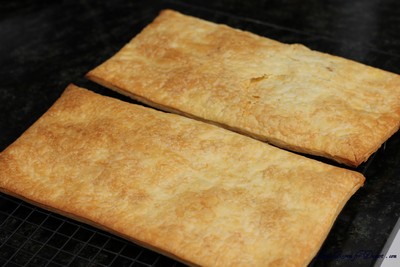
7. Bake each sheet for about 25 minutes in a moderately hot oven 200 °C /400°F/gas mark 6, removing the top layer of greaseproof paper/tray 10 minutes before the end for the tops to brown. Keep an eye on them and lower the temperature if you think they’re browning too much.
8. Remove the baked sheets from the oven and leave on a wire rack to cool.

9. Once the pastry has cooled, you’re ready to assemble your mille-feuille. Get a sturdy flat board, your pastry and the chilled crème pâtissière from the fridge.
10. Lay one sheet on the board and spread half the crème patisserie evenly over the top.
11. Take the second sheet and place it on top, pressing down lightly with your hands to ensure that it sticks to the filling.
12. Spread the remaining crème pâtissière and place the last sheet of pastry on top, pressing down again. (Don’t worry if there’s some oozing at the sides. That can be neatened later.)

13. Pop in the fridge while you prepare the icing / chocolate.
14. Melt the chocolate in a bain marie, stirring periodically. Once melted, transfer to a piping bag (or plastic bag with end snipped), resting nozzle side down in a glass or other tall container.

15. To make the icing, whisk 2 egg whites with 2 teaspoons lemon juice until lightly frothy.
16. Whisk in about (2 cups) 300gm of the icing sugar on a low setting until smooth and combined. The mixture should be thick enough to leave trails on the surface. If it’s too thin, whisk in a bit more icing sugar.

17. Once ready, immediately pour over the top of the mille-feuille and spread evenly. I found that I didn’t quite need all of the icing.
18. Still working quickly, pipe a row of thin chocolate lines along the widest length of your pastry sheet (see below). You can make them as far apart/close together as you like.

(Again, don’t worry if it looks messy. It can be neatened later on.)

19. STILL working quickly (phew), take a sharp knife and lightly draw it down (from top to bottom) through the rows of chocolate. A centimeter (½ inch) or so further across, draw the knife up the way this time, from bottom to top. Move along, draw it down again. Then up. And so on, moving along the rows of chocolate until the top is covered in a pretty swirly pattern.

20. Once you’ve decorated your mille-feuille (no doubt far more beautifully than I did), with a clean knife mark out where you’re going to cut your slices, depending on how big you want them to be and leaving space to trim the edges. I got ten out of mine – two rows of five.


21. Chill for a couple of hours to give the icing (etc.) time to set.
22. With a sharp knife, trim the edges and cut your slices.
23. Dig in!

Storage & Freezing Instructions/Tips:
The puff pastry dough will keep in the fridge for up to two days. Any leftovers can be well wrapped up & frozen for a year. Thaw for 30 minutes on the counter or overnight in the fridge.

The completed mille-feuille can be made a day or two in advance; it will last 2 or 3 days in an airtight container in the fridge, though will become less crisp.