Snacks

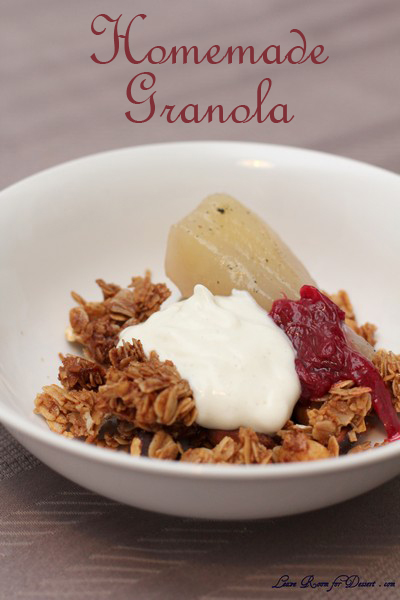
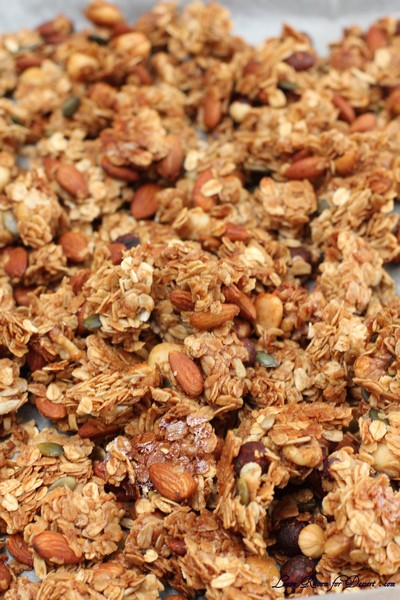
Anita’s Homemade Granola

Tuesday, July 15th, 2014

I’ve never been much of a fan of most breakfast type cereals, including muesli and porridge, but one day Thomas Dux was handing out little trials of granola and yoghurt. Both tasted amazing, and their marketing had worked brilliantly – I was in the door buying granola and yoghurt (the yoghurt I had liked is no longer being stocked, but I have now come across the FiveAM yoghurt which I love, and I am trying to make my own yoghurt as well).

The granola was Irrewarra Sourdough’s granola, and it is strangely addictive. So addictive that I was sad each time I finished a pack. So I decided it was time to make my own and I tried many different recipes on the internet. Many were not sweet enough, others fell apart easily, and some just lacked a bit of flavour.

I ended up coming up with my own version, which is now loved by my family, so much, that when a batch is finished everyone gets sad…

Anita’s Homemade Granola

Recipe by Anita @ Leave Room for Dessert

150g honey
1 tablespoon ground cinnamon
1 tablespoon vanilla essence
1 vanilla bean, seeds scraped (optional)
1/4 teaspoon salt
140g (3/4 cup) vegetable oil

500g (5 cups) rolled oats
400g (3 cups) mixed nuts (I use what I have in the cupboard, almond, hazelnuts, macadamias, pecan, walnuts etc), chopped
40g (1/4 cup) sunflower seeds
40g (1/4 cup) pepitas (pumpkin seeds)
65g (1 cup) shredded coconut
40g (1/4 cup) hemp seeds

Preheat oven to 150C (fan forced). Line two baking trays with baking paper.

Mix together the oats, nuts, seeds and coconut in very large bowl.

Whisk together the honey, cinnamon, vanilla essence and vanilla bean seeds (if using) and salt in a bowl until well combined. Add the oil and whisk again until well combined.

Pour the honey mixture into the oat mixture and stir with a spoon or spatula until well combined.

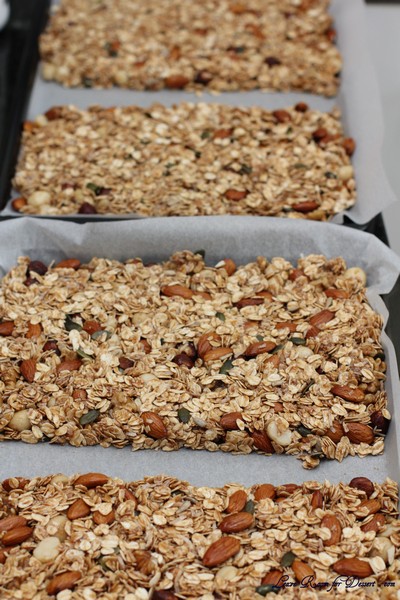
Divide the mixture onto the two trays and push to fill the tray. Once the mixture has filled the tray, make a line in the centre of each (this helps make the cooking more even). Make sure to press the mixture down firmly.

If you want smaller pieces more like a muesli,

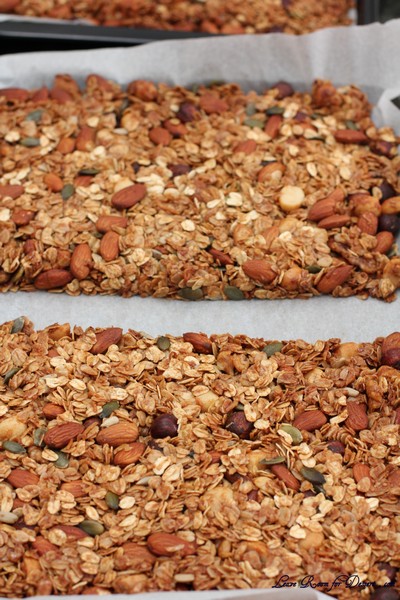
Bake for 15- 20 minutes, stirring the granola occasionally (every 5-10 minutes) to ensure even cooking. Once cooked to your liking, turn the temperature down to very low and allow the granola to dry in the oven 10min at 100C – this will make it store longer.

If you want large chunks:

Bake for 20-30 minutes or until the granola is nice and golden (checking and rotating trays after 10 minutes). Wait until the granola has cooled completely before breaking into edible sized pieces.

When breaking the pieces apart, you may find the edges break easily, but the centre portion may have some give or stickiness. If this is the case, put the broken pieces back in the oven for 5-10 minutes. Again, wait until completely cooled before transferring to a container for storage.

Poached Pears

Recipe adapted from Taste

4 brown pears, free from blemishes and bruises, peeled, cored and cut into quarters
lemon juice (optional)
1 cup sugar
3 cups water
1 vanilla bean, split, seeded

Place sugar and water in a saucepan over medium heat and stir until sugar has dissolved. Increase heat and simmer for 5 minutes.

Add pears and a split, seeded vanilla bean. Allow the pears to simmer, covered with a square of baking paper, in the liquid for 10-15 minutes or until tender. Turn occasionally to ensure even cooking. Serve pear warm or cooled with a little poaching liquid.

Stewed Rhubarb

This made quite a tart rhubarb, although when served with sweet granola and poached pears it was nice. It you are not serving with other sweet ingredients, more sugar will be required.

100g rhubarb
50g sugar (more may be required, it depends on the tartness of your rhubarb)

Cut rhubarb into 5cm lengths (approx), and place in a saucepan with sugar. Cook 5-10 minutes or medium heat until sugar is dissolved and rhubarb is tender.

Seedy Crisps – Daring Bakers Challenge July 2012

Friday, July 27th, 2012

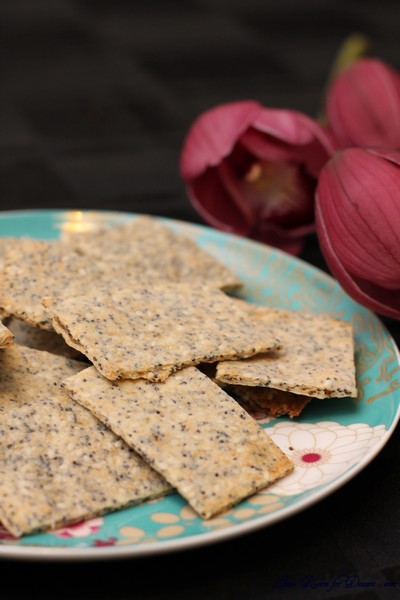
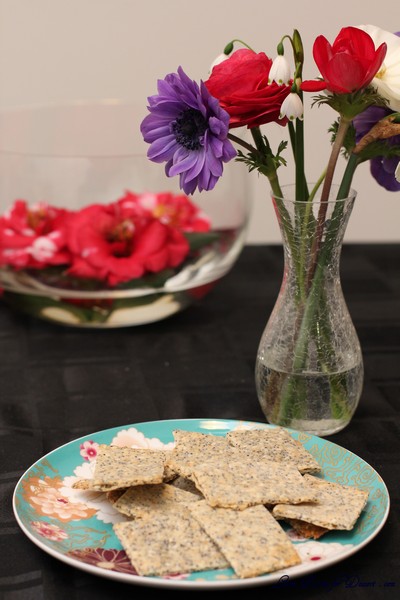
Our July 2012 Daring Bakers’ Host was Dana McFarland and she challenged us to make homemade crackers! Dana showed us some techniques for making crackers and encouraged to use our creativity to make each cracker our own by using ingredients we love.

There are some things you never even consider making. For some this may be ice cream, marshmallow, nougat or maybe a crouquembouche. I didn’t realise until this month, that I had never thought of making crackers before.

Whilst making the crackers or seedy crisps, I wasn’t sure how they would turn out. I couldn’t imagine their taste. When the first taste was taken, I understood why this challenge was chosen.

When everyone else tried these crisps, they were gobbled up quite quickly, with brie and dips. There was a lot of suggestion to make it again, possibly to serve it with the spinach dip.

Thanks Dana for a wonderful challenge I never expected.

Seedy Crisps

(Roll with pasta rollers or by hand)

Recipe Source: Brown, Alton (2011). Good Eats 3:The Early Years, “Seedy Crisps”. Stewart, Tabori & Chang, New York, NY.

Servings: Varies depending on thickness; approximately 50 crackers

1 cup (240 ml) (140 gm/5 oz) whole wheat four
1 cup (240 ml) 140 gm/5 oz) all-purpose (plain) flour
1/3 cup (80 ml) (50 gm) (1¾ oz)poppy seeds
1/3 cup (80 ml) (40 gm) (1¼ oz) sesame seeds
1½ teaspoons (7½ ml) (9 gm) table salt
1½ teaspoons (7½ ml) (8 gm) baking powder
3 tablespoons (45 ml) olive oil
¾ cup plus 1 tablespoon (195 ml) (6½ fl oz) water

1. Mix the flours, seeds, salt and baking powder in a large bowl.
2. Add the oil and stir until combined.
3. Add the water until the dough comes together.
4. Kneed the dough 5 or 6 times and allow to rest, covered, on the counter for 15 minutes. You can also chill the dough at this point and come back later.
5. Preheat the oven to hot 450°F/230°C/gas mark 8.
6. Working with a quarter of the dough at a time, either use a rolling pin to reach a desired thickness (thick or thin) or roll out in your pasta rollers. If you use pasta rollers, ensure the dough is well-floured so as not to stick.
7. Place strips of dough on a sheet pan lined with parchment.
8. If the crackers are thick, bake for 7minutes, flip them over and bake for 7 minutes more. Then cut or break into crackers shapes while still warm. Return to the oven for a further 5 minutes until crispy.
9. If not crispy enough when cooled, crackers can be returned to the oven.
10. Store in an airtight container and eat within 2 weeks

Sourdough – Update from December Daring Bakers Challenge

Thursday, January 26th, 2012

I made the sourdough from the December Daring Bakers Challenge very soon after my last post about it. Although it did not really turn out particularly well, so I sort of held back on this post. And the next challenge is to be posted in tomorrow!

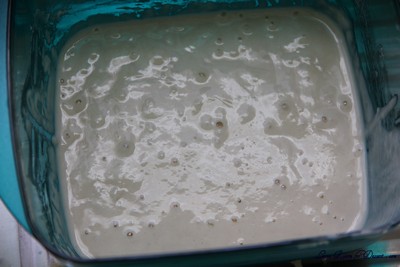
Back to the sourdough. After having the sourdough starter go mouldy whilst I was sick, I made sure this one didn’t. The starter was nice and bubbly and certainly smelt quite sour, so I was hoping I had nice active yeast in the mix.

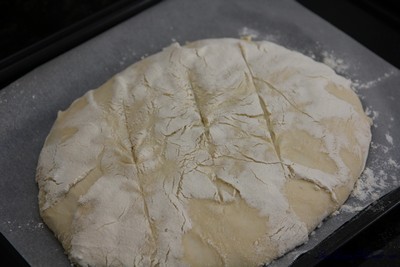
My First Sourdough - not so great looking

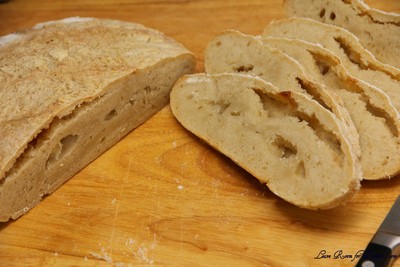
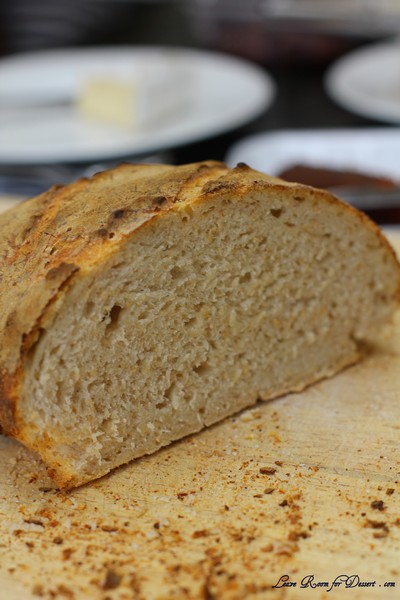
My first bread came out of the oven – and it hadn’t risen as much as I had hoped, I still crossed my fingers, although after cutting it through, we found it was still quite dough-y inside. Nice flavour, but texture was all wrong. I still have the starter dough though, and Nick has been making bread every weekend with it – although adding yeast to it – and it has been rising quite well. I wish I could part more information for you on troubleshooting, although as a newbie myself, I am just going to try and keep the starter and continue to feed it and hope the yeast becomes happier. At the moment I have it in the fridge, as I am a little scared I will forget about it on the bench and it will mould again.

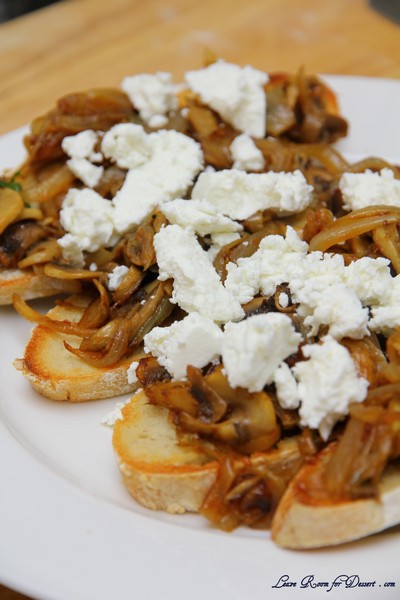
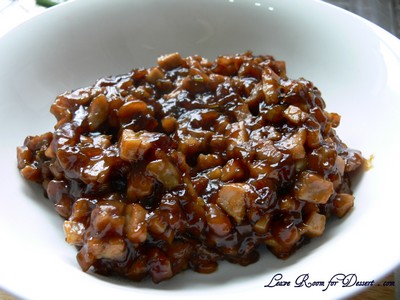
Even though the texture of this first bread was not so great, I still made the mushrooms from the given recipes and added some goats cheese on top, and you could hardly notice the bread’s heaviness once it was grilled and had a lovely topping on it.

Nick's sourdough - with a little yeast added

Thanks to our host (Jessica of My Recipe Project) for last month’s challenge – we are finally making sourdough – and I might just have the confidence to make more starter doughs…? 🙂

French Country Bread

Servings: 1 large loaf plus extra wheat starter for further baking

Wheat Starter – Day 1:
Ingredients
4 1/2 tablespoons (70 ml) (40 gm/1 ½ oz) stoneground breadmaking whole-wheat or graham flour
3 tablespoons (45 ml) water
Total scant ½ cup (115 ml) (3 oz/85 gm)

Directions:
1. In a Tupperware or plastic container, mix the flour and water into a paste.
2. Set the lid on top gently, cover with a plastic bag, to prevent messes in case it grows more than expected!
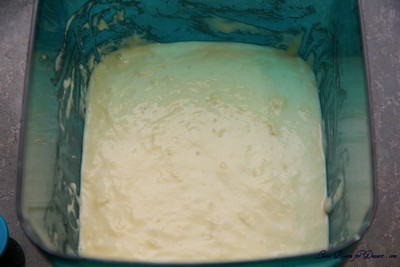
3. Set somewhere warm (around 86 F if possible). I sometimes put mine on a windowsill near a radiator, but even if it’s not that warm, you’ll still get a starter going – it might just take longer.

Wheat Starter – Day 2:
Ingredients
4 1/2 tablespoons (70 ml) (40 gm/1 ½ oz) stoneground breadmaking whole-wheat or graham flour
3 tablespoons (45 ml) water
scant 1/2 cup (115 ml) (3 oz/85 gm) starter from Day 1
Total scant cup (230 ml) (6 oz/170 gm)

Directions:
1. Stir the flour and water into the mixture from Day 1, cover, and return to its warm place.

Wheat Starter – Day 3:
Ingredients
4 1/2 tablespoons (70 ml) (40 gm/1 ½ oz) stoneground breadmaking whole-wheat or graham flour
4 teaspoons (20 ml) water
scant 1 cup (230 ml) (6 oz/170 gm) starter from Day 2
Total 1⅓ cup (320 ml) (230 gm/8-1/10 oz)

Directions:
1. Stir the flour and water into the mixture from Day 2, cover, and return to its warm place.

Wheat Starter – Day 4:
Ingredients
3/4 cup plus 1½ tablespoons (205 ml) (120 gm/4 ¼ oz) unbleached all-purpose flour
1/2 cup less 4 teaspoons (100 ml) water
1⅓ cup (320 ml) (230 gm/8 oz) starter from Day 3
Total scant 2⅔ cup (625 ml) (440 gm/15½ oz)

Directions:
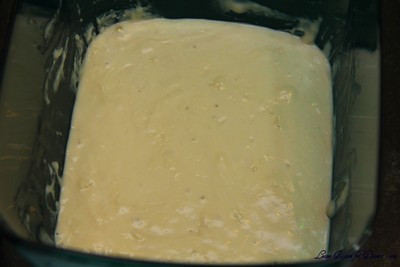
1. Stir the flour and water into the mixture from Day 3, cover, and return to its warm place. At this point it should be bubbling and smell yeasty. If not, repeat this process for a further day or so until it is!

French Country Bread
Stage 1: Refreshing the leaven
Ingredients
1 cup less 1 tablespoon (225 ml) (160 gm/5 ⅔ oz) wheat Leaven Starter
6 tablespoons less 1 teaspoon (85 ml) (50 gm/1¾ oz) stoneground bread making whole-wheat or graham flour
1 cup plus 2 teaspoons (250 ml) (150 gm/5 ⅓ oz) unbleached all purpose flour
1/2 cup (120 ml) water
Production Leaven Total 2¾ cups plus 4 teaspoons (680 ml) (480 gm /1 lb 1 oz)

Directions:
1. Mix everything into a sloppy dough. It may be fairly stiff at this stage. Cover and set aside for 4 hours, until bubbling and expanded slightly.

French Country Bread

Stage 2: Making the final dough
Ingredients
3/4 cup less 1 teaspoon (175 ml) (100 gm/3 ½ oz) stoneground breadmaking whole-wheat or graham flour, plus more for dusting
2 cups plus 2 tablespoons (510 ml) (300gm/10 ½ oz) unbleached all-purpose flour
1¼ teaspoons (7½ ml) (7 gm/¼ oz) sea salt or ⅔ teaspoon (3⅓ ml) (3 gm/⅛ oz) table salt
1 ¼ cups (300 ml) water
1 ¾ cups (425 ml) (300 gm/10 ½ oz) production leaven – this should leave some (1 cup) for your next loaf.
Total 6 cups less 2 tablespoons 1415 ml (1007 gm/35 ½ oz/2 lb 3½ oz)

Directions:
1. Mix the dough with all the ingredients except the production leaven. It will be a soft dough.
2. Knead on an UNFLOURED surface for about 8-10 minutes, getting the tips of your fingers wet if you need to. You can use dough scrapers to stretch and fold the dough at this stage, or air knead if you prefer. Basically, you want to stretch the dough and fold it over itself repeatedly until you have a smoother, more elastic dough.
See my demonstration here: http://www.youtube.com/watch?v=OqS3raEGdwk
3. Smooth your dough into a circle, then scoop your production leaven into the centre. You want to fold the edges of the dough up to incorporate the leaven, but this might be a messy process. Knead for a couple minutes until the leaven is fully incorporated in the dough. See my demonstration here: http://www.youtube.com/watch?v=UPO97R4iO4U

production leaven

4. Spread some water on a clean bit of your work surface and lay the dough on top. Cover with an upturned bowl, lining the rim of the bowl with a bit of water. Leave for an hour, so that the gluten can develop and the yeasts can begin to aerate the dough.
5. Once your dough has rested, you can begin to stretch and fold it. Using wet hands and a dough scraper, stretch the dough away from you as far as you can without breaking it and fold it back in on itself. Repeat this in each direction, to the right, towards you, and to the left. This will help create a more ‘vertical’ dough, ready for proofing. See my demonstration here: http://www.youtube.com/watch?v=rDoJRCMfclE
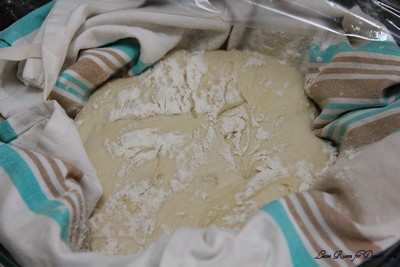
6. Heavily flour a banneton/proofing basket with whole wheat flour and rest your dough, seam side up, in the basket. Put the basket in a large plastic bag, inflate it, and seal it. Set aside somewhere warm for 3-5 hours, or until it has expanded a fair bit. It is ready to bake when the dough responds to a gently poke by slowly pressing back to shape.

7. Preheat the oven to hot 425°F/220°C/gas mark 7. Line a baking sheet with parchment, then carefully invert the dough onto the sheet. I like to put the baking sheet on top of the basket, then gently flip it over so as to disturb the dough as little as possible. Make 2-3 cuts on top of the loaf and bake for 40-50 minutes, reducing the temperature to moderately hot 400°F/200°C/gas mark 6 after 10 minutes.

8. Cool on a cooling rack.

Garlic and Oregano Roasted Mushrooms and Pancetta on Toasted Sourdough

Servings: 4

Ingredients
4 large or 8 medium field mushrooms, sliced
2 red onions, peeled and cut into wedges
2 garlic cloves, peeled and sliced
4 sprigs oregano, leaves only
100 gm (3 ½ oz) pancetta, cubed (optional)
2 tablespoons (30 ml) extra virgin olive oil
4 slices sourdough bread
butter, for spreading
freshly ground black pepper
sea salt

Directions:
1. Preheat the oven to moderately hot 400°F/200°C/gas mark 6. Place the mushrooms on an oiled baking sheet, with onion wedges scattered beneath them. Sprinkle over the garlic, oregano, and pancetta, drizzle with olive oil and season with black pepper and sea salt. Roast for 25 minutes until the mushrooms are tender.
2. Toast your bread in the toaster. Butter the toast, and then pile your mushroom mixture on top.

A Twist: Instead of roasting your mushrooms, you can also sauté them in a pan and, just before serving, stir in a dash of cream for a rich, warm treat!

Pizza Wheels

Thursday, June 17th, 2010

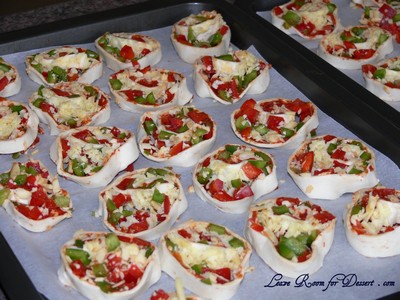
These pizza wheels go so fast at any party we’ve had.

They can be made non-vegetarian by adding some chopped ham or salami.

I love them, and there’s not much more I really have to say about these – except how can you go wrong with a mini “pizza”?

Pizza Wheels

Recipe by Anita @ Leave Room for Dessert

Makes more than 40

4 puff pastry sheets
6 tablespoons tomato paste
1 red capsicum, diced
1 green capsicum, diced
grated cheese

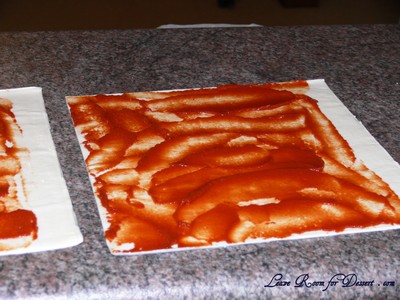
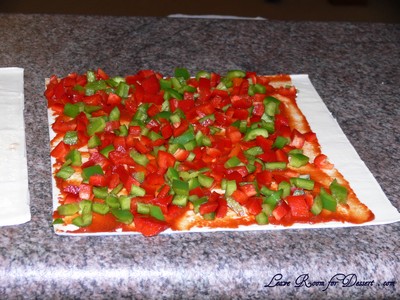
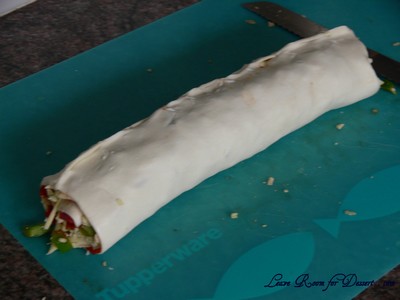
Spread the tomato paste over the puff pastry sheets, leaving a 1.5cm gap from one end. Sprinkle capsicums then cheese over the pastry leaving the gap. Roll the pastry toward the gap and then press the end onto the roll to join the pastry. This can be covered and placed in the refrigerator until needed.

Cut 1cm slices of the roll and place on baking paper on a baking tray. Cook in a moderate oven (180C) for approx 10 minutes or until cheese has melted and pizza wheels have browned. Serve when hot.

Vegetable Rolls

Thursday, May 20th, 2010

VegetableRolls1

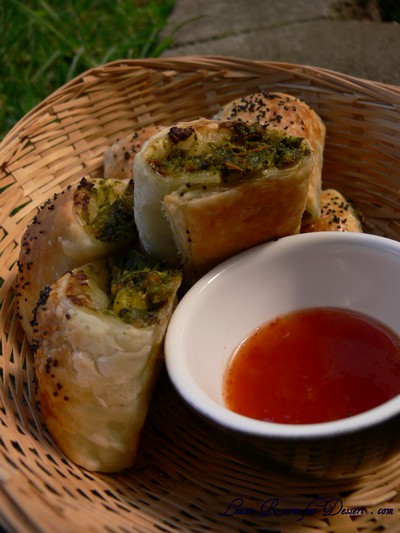
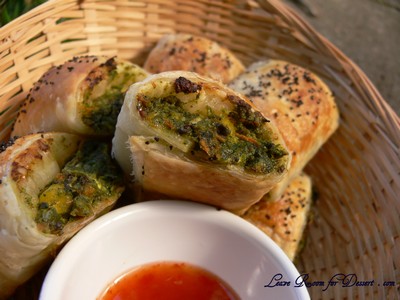
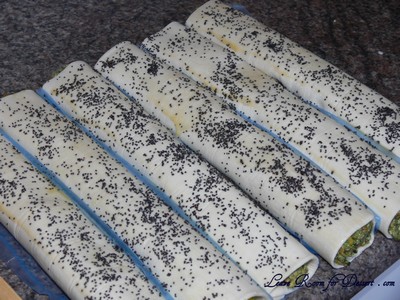
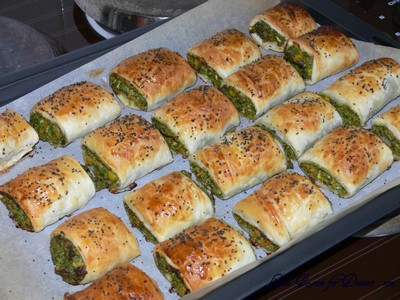
Now, I don’t suppose you could call anything with puff pastry healthy. Although, you could say this is healthier than the normal sausage roll. These vegie rolls are packed full of vegetables, most of which you might not be able to guess while eating them. So, unsuspecting kids (and adults) will get a vegie fill when they go for these rolls at a party.

VegetableRolls04

I decided to make this recipe combining many vegetables I had on hand, so I’m sure it can be altered to what you have lying around.

VegetableRolls07

Vegetables Rolls

Recipe by Anita @ Leave Room for Dessert

Makes: 50

250g spinach, fresh or frozen (thawed and water pressed out)
2 large carrots (300g), grated
1 zucchini (200g), grated
12 mushrooms (200g), grated
4 cloves garlic, crushed
200g corn kernels, drained
1 egg, lightly beaten
250g ricotta
1/4 cup sweet chili sauce
1/2 cup bread crumbs
5 sheets puff pastry

1 egg beaten for glazing (or milk)
poppy seeds for sprinkling on top

Mix all the vegetables in a large bowl. Add the ricotta, egg and sweet chili sauce, mix to combine. Add the breadcrumbs and mix until fully combined.

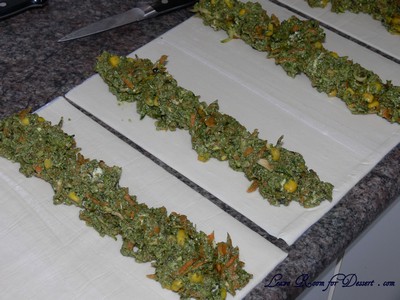
Cut the pastry sheets in half. Spoon equal amounts of the vegetable filling down the middle or side of the pastry sheet – to form an even roll. Place a small amount of egg wash down the length of the puff pastry. Roll the pastry up firmly and sealing with a little pinch on the edge. Brush some egg wash over the top and sprinkle with poppy seeds.

VegetableRolls01

VegetableRolls02

At this stage, either freeze as they are (with some baking paper or puff pastry plastic between the rolls) or, to eat straight away – preheat oven to 180°C. Cut each roll into 5 equal portions. Place on a baking paper lined tray and place in the preheated oven for 15 minutes or until they are browned and cooked through. Serve with sweet chili sauce.

For Frozen rolls, allow to thaw enough to cut through with a knife. Cook in a preheated oven (180°C) for 20 minutes or longer, depending on how much they have thawed.

VegetableRolls03

VegetableRolls06

Spinach and Sour Cream Dip

Wednesday, March 10th, 2010

SpinachDip08

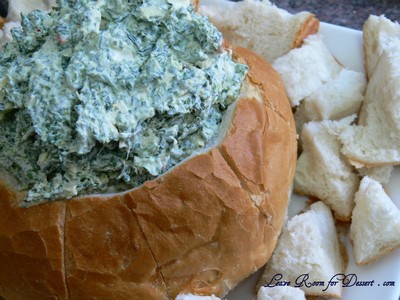
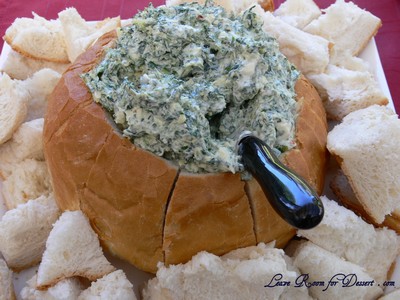
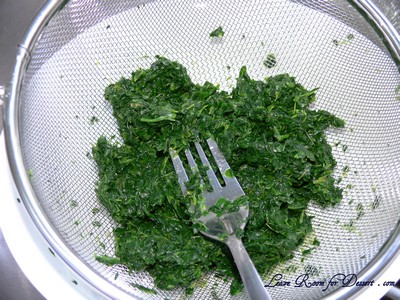
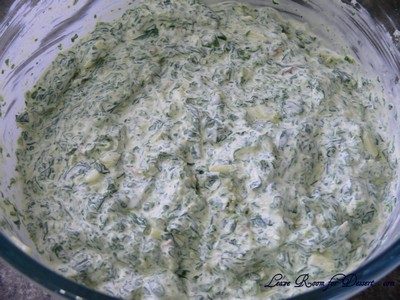
This dip is high on the list of dips we make for parties. Even though it may not sound the tastiest (with a packet of spinach in it) – it really is quite lovely. Even those who don’t like spinach will go back to more!

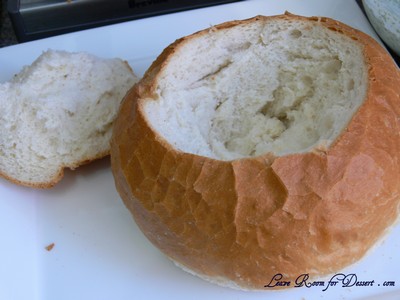
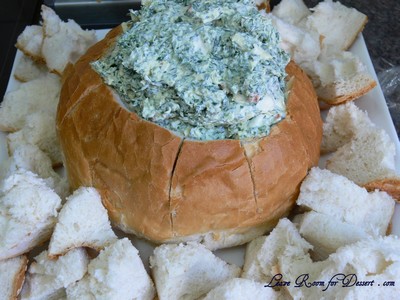
The dip can be served in a number of ways, with some Lebanese bread (which has been spread with a herb butter, cooked in the oven and then chopped up to biscuit size). Alternatively, you can scoop out cob of bread and serve the dip in the middle, with friends and family tearing off edges of the cob and dipping it into the dip. You can also heat the dip up in the cob for a few minutes in the oven.

SpinachDip09

And what’s even better is it can be made the night before, so it firms up a bit in the fridge. I love being able to have things organised – it takes out a lot of the hassle and stress which could have been felt on the party date, if you had to prepare everything that morning.

On another note – I can’t believe how busy this year has been (and is)!! I have weekends booked up until late April, with a heap of big birthdays, weddings, hen’s nights, the taste of Sydney (Thursday-Sunday, in case you haven’t heard), Easter, ANZAC day and a quick visit to Melbourne for a French cake cooking class (very exciting!!).

SpinachDip07

Spinach and Sour Cream Dip

Recipe source unknown (possibly a friend of a friend of the family?)

1 box (250g) finely chopped frozen spinach – thawed then excess water squeezed out with hands or a sieve.
1 carton (300g) sour cream
½ cup grated cheese
1 packet spring vegetable soup mix (Continental brand – we found this is nicer than some other brands)
2-3 tablespoons mayonnaise
1 small packet pine nuts (toasted) (optional)

SpinachDip01

Mix ingredients together, sprinkle pine nuts on top. Serve in a cob or on Pita/Lebanese bread.

SpinachDip04

Better made the day before and the dip stored in the fridge (but scooped into the cob just before serving).

SpinachDip06

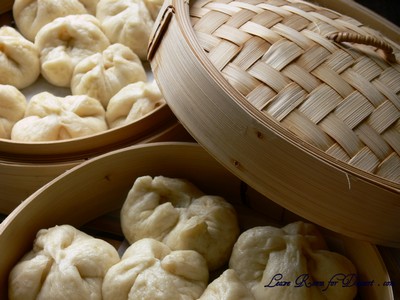
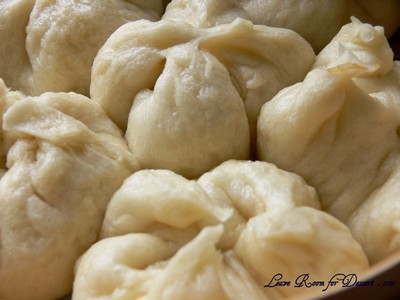
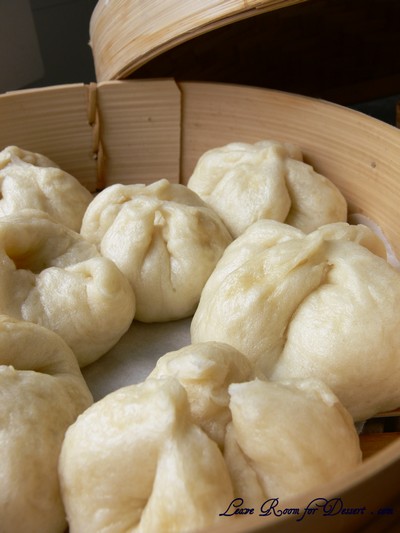
Steamed Barbecued Pork Buns – Char Siu Bao

Sunday, February 14th, 2010

PorkBuns18

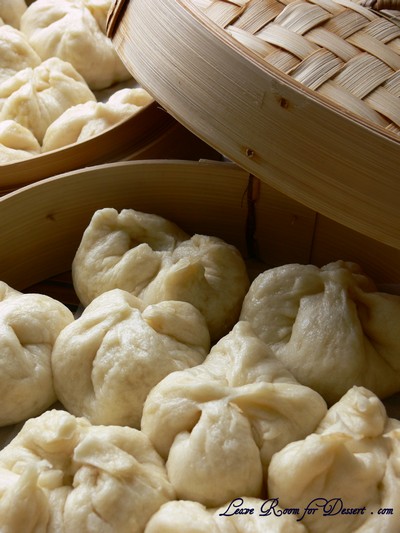
Happy Chinese New Year! The year of the Tiger has just begun and I decided to celebrate by making my first ever steamed barbeque pork buns.

PorkBuns20

The thing I love about barbecued pork buns is how sweet they are. I tend to add a tablespoon of sugar or more to most savoury dishes I make, although these go one step further – and I’m not complaining. 🙂

PorkBuns28

They do go well with other yum cha dishes as well, like some dumplings I recently made and I’ll have to post on them when I’ve perfected the recipes a bit more…

PorkBuns23

Enjoy! And Happy Chinese New Year! (I hope those who are celebrating Valentines Day also have a great day and weekend!)

PorkBuns25

Recipes altered by me from a number of websites.

Barbeque Pork

Makes enough for 48 buns, or Serves: 4

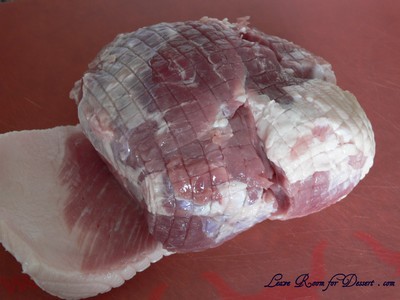
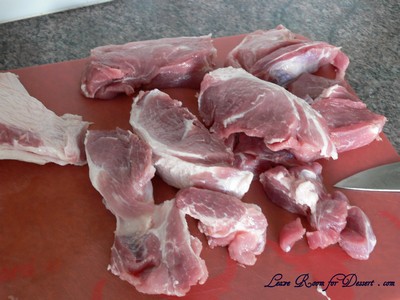
1 kg boned pork shoulder roast, large pieces of fat removed
½ cup hoisin sauce
½ cup soy sauce
1/ cup rice wine vinegar
1/3 cup honey
1 tablespoon sugar

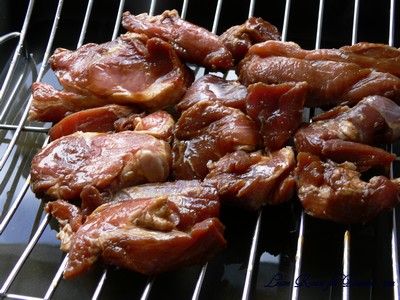
Slice the pork into 2-3 cm thick slices. Mix together all other ingredients and place in a bowl. Add the pork and marinate for a few hours, or preferably overnight.

PorkBuns30

PorkBuns32

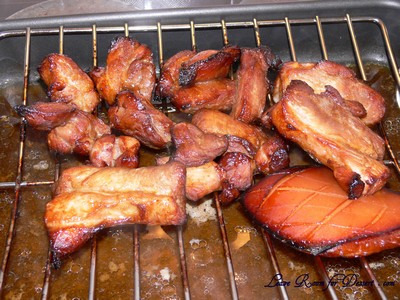
Preheat the oven to 200C and pour some water into a large roasting pan (not enough to reach the metal roasting rack). Place the pork on the roasting rack over the water. Cook for 10 minutes, then reduce the heat to 160C and cook for a further 30-40 minutes, turning and brushing on more marinade for a few times.

PorkBuns33

PorkBuns35

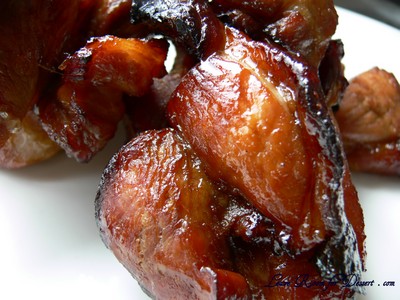
Once cooked, serve as is, or slice up. Alternatively, save it for pork buns, by allowing it to cool and using it once cooled or after storing in the fridge.

PorkBuns39

Barbeque Pork Filling

Makes enough for 24 buns

500g barbeque pork, (see recipe above) diced
1 spring onion/ shallot, finely sliced or chopped
1 garlic clove, crushed
1 tablespoon vegetable oil
1 tablespoon soy sauce
2 tablespoons hoisin sauce
2 tablespoons oyster sauce
2 tablespoons brown sugar
1 tablespoon honey
1½ tablespoons cornflour mixed with ¼ cup water

Mix together the soy sauce, hoisin sauce, oyster sauce, brown sugar and honey.

Heat a small saucepan or wok on medium/high heat. Add the oil, then the sliced spring onion. Cook for ½ minute, add the garlic and stir for 1 minute. Add the pork, stir for ½ minute, then add the sauce, mix, followed by the cornflour mixed with water.

Once the mixture comes together, about 1 minute. Remove from heat and allow to cool, for use in the pork buns later.

PorkBuns07

Bun Dough

Makes: 24

1 cup lukewarm water
1 teaspoon caster sugar
1 tablespoon yeast (~7g)
4 cups plain flour
1/3 cup white sugar
1½ teaspoons salt
2 tablespoons vegetable oil
½ cup boiling water

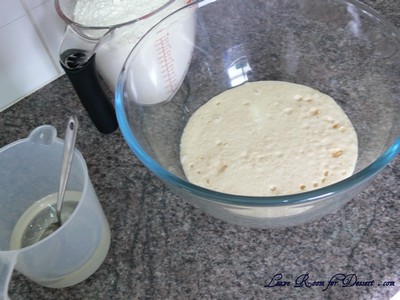
Mix together the lukewarm water, caster sugar and yeast in a large bowl. Leave for 10-20 minutes for the yeast to activate, while you get the rest of your ingredients ready.

PorkBuns05

Mix together the boiling water with the white sugar, salt and vegetable oil. Stir to dissolve the sugar and cool the water. Cool until lukewarm.

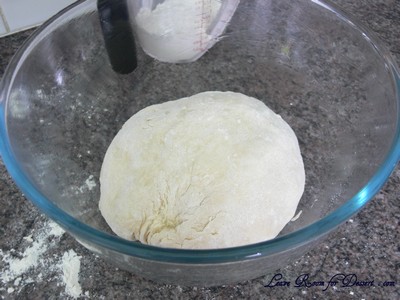
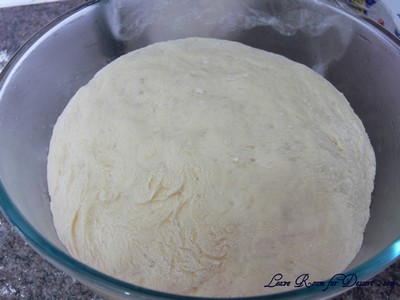
Add 3½ cups of the flour and the warm water to the yeast mixture. Mix to form a dough and then turn out onto a bench with the remaining ½ cup flour on it. Knead for a few minutes until the dough comes together nicely. Place in a large lightly oiled bowl and cover with plastic wrap or a tea towel. Leave for 1-2 hours in a warm place, until the dough has risen to double its size.

PorkBuns06

PorkBuns08

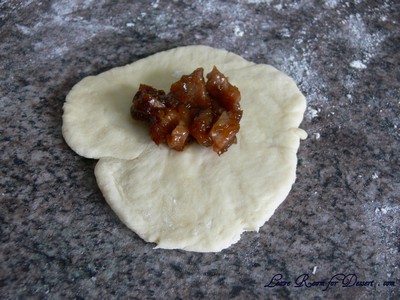
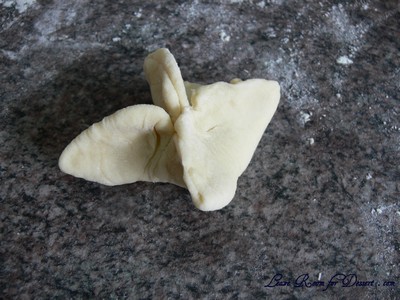
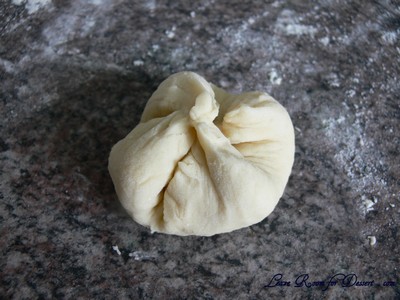
Tip the dough onto a lightly floured bench and lightly knead. Divide dough into 2 portions. Roll out one portion into a cylinder shape which is easy to divide. Divide into 12 portions. Roll out each portion into a small circle, large enough to fit a teaspoon of pork filling in the middle and to pull four sides of the circle, or pleat the edges to enclose the filling. Twist the top of the dough to seal the bun. Do the same with the remaining dough and mixture.

PorkBuns10

PorkBuns11

PorkBuns12

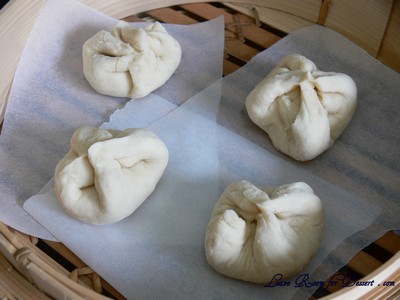
Place completed buns on pieces of baking paper in a bamboo steamer and cook straight away or leave for up to an hour before steaming over boiling water for 10 minutes. Serve.

PorkBuns09

PorkBuns15

PorkBuns29

Scones

Sunday, November 22nd, 2009

SconesMasterChef5

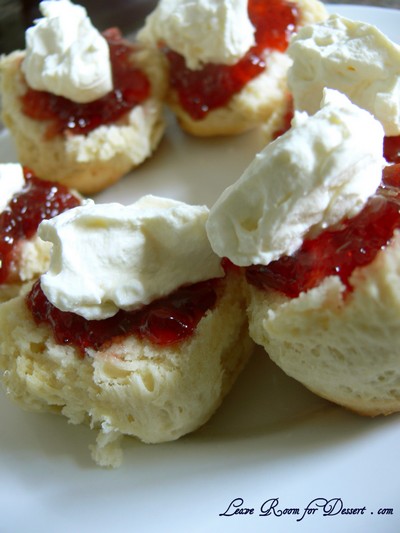
I love scones. Almost nothing is as good as jam and whipped cream on some fresh scones.

SconesMasterChef3

Even better is when they’re so quick and easy to make – and these ones surely are. They were seen on a masterclass show on MaterChef, although had dates and lemon. I’m sure this flavour combination would be great, but without them the recipe is lovely.

SconesMasterChef4

Scones

Recipe adapted from MasterChef’s Date and Lemon Scone recipe

150ml-175ml milk
150ml cream
1 egg
3 cups self-raising flour
2 tablespoons caster sugar
Cream & jam, to serve

Preheat oven 200°C fan forced. Line large flat oven tray with baking paper.

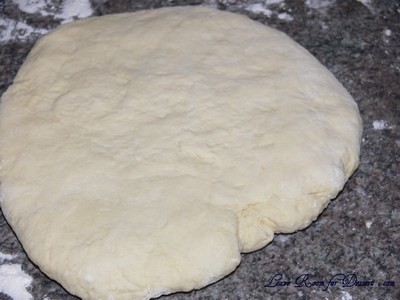
Whisk 150ml milk, cream and egg together until well combined. Combine flour and sugar in a large bowl. Add milk mixture and stir gently to a soft dough, adding remaining milk if necessary. Turn onto a lightly floured surface and knead gently until dough comes together.

Press dough out to 2cm-thick.

SconesMasterChef03

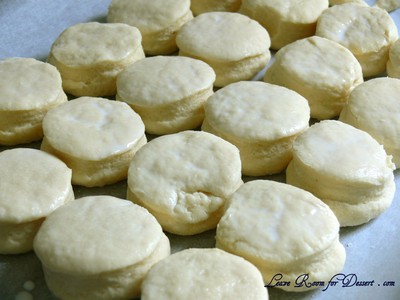
Cut scones from dough and place onto tray flat-side up. Press dough together gently and repeat using the remaining dough.

SconesMasterChef2

Brush the tops with milk and sprinkle with a little sugar. Bake 12-15 minutes until golden and well risen. Serve hot with jam and cream.

SconesMasterChef05

SconesMasterChef1

Vols-au-Vents – Daring Bakers Challenge September 2009

Sunday, September 27th, 2009

volauvonts22

The September 2009 Daring Bakers’ challenge was hosted by Steph of A Whisk and a Spoon. She chose the French treat, Vols-au-Vent based on the Puff Pastry recipe by Michel Richard from the cookbook Baking With Julia by Dorie Greenspan.

volauvonts05

I was a bit intimidated seeing puff pastry was one of the chosen recipes for this month’s Daring Bakers challenge, but also excited to finally be “pushed” into making it.

Steph, our lovely host for this month, provided a great video showing how to make the puff pastry and it was brilliant! I would strongly recommend anyone wanting to make this or any other puff pastry recipe, to first watch the video.

I was just amazed at how easy the puff pastry was to make and roll, it didn’t take as long as I expected either (maybe 2-3 hours – mostly consisting of resting). The pastry looked perfect, very similar to the one on the video – lovely and smooth.

volauvonts06

I think the biggest problem for me was doing the vol-au-vent cases on a busy day – and this made it feel like it was taking forever. Plus the fact that I was making three different fillings…

Apart from the restricted time, the vol-au-vents turned out very well. They looked just like bought vol-au-vents and all the fillings were thoroughly enjoyed (once I tweaked my chicken and mushroom filling – a request from a family member).

volauvonts09

I am definitely thinking of making some more puff pastry after being pleasantly surprised by this recipe, although I think it might have to involved custard this time… like perhaps my Portuguese Custard Tarts. Not many things can be more rewarding than custard with pastry.

Forming and Baking the Vols-au-Vent

Yield: 1/3 of the puff pastry recipe below will yield about 8-10 1.5” vols-au-vent or 4 4” vols-au-vent

-well-chilled puff pastry dough (recipe below)
-egg wash (1 egg or yolk beaten with a small amount of water)
-your filling of choice

Line a baking sheet with parchment and set aside.

Using a knife or metal bench scraper, divide your chilled puff pastry dough into three equal pieces. Work with one piece of the dough, and leave the rest wrapped and chilled. (If you are looking to make more vols-au-vent than the yield stated above, you can roll and cut the remaining two pieces of dough as well…if not, then leave refrigerated for the time being or prepare it for longer-term freezer storage. See the “Tips” section below for more storage info.)
volauvonts18

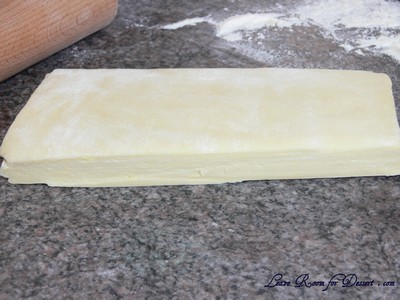
On a lightly floured surface, roll the piece of dough into a rectangle about 1/8 to 1/4-inch (3-6 mm) thick. Transfer it to the baking sheet and refrigerate for about 10 minutes before proceeding with the cutting.

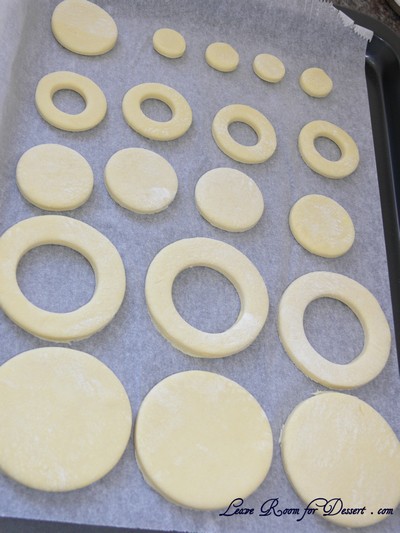
(This assumes you will be using round cutters, but if you do not have them, it is possible to cut square vols-au-vents using a sharp chef’s knife.) For smaller, hors d’oeuvre sized vols-au-vent, use a 1.5” round cutter to cut out 8-10 circles. For larger sized vols-au-vent, fit for a main course or dessert, use a 4” cutter to cut out about 4 circles. Make clean, sharp cuts and try not to twist your cutters back and forth or drag your knife through the dough. Half of these rounds will be for the bases, and the other half will be for the sides. (Save any scrap by stacking—not wadding up—the pieces…they can be re-rolled and used if you need extra dough. If you do need to re-roll scrap to get enough disks, be sure to use any rounds cut from it for the bases, not the ring-shaped sides.)

Using a ¾-inch cutter for small vols-au-vent, or a 2- to 2.5-inch round cutter for large, cut centers from half of the rounds to make rings. These rings will become the sides of the vols-au-vent, while the solid disks will be the bottoms. You can either save the center cut-outs to bake off as little “caps” for you vols-au-vent, or put them in the scrap pile.
volauvonts01

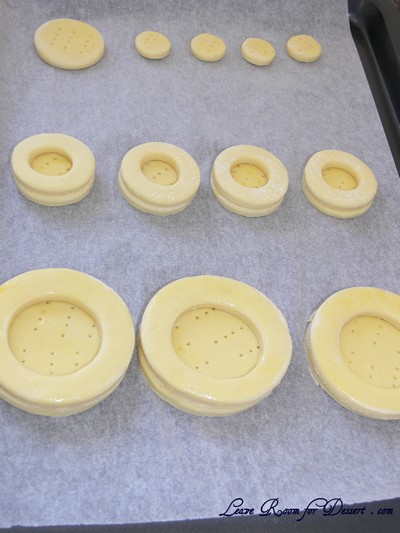
Dock the solid bottom rounds with a fork (prick them lightly, making sure not to go all the way through the pastry) and lightly brush them with egg wash. Place the rings directly on top of the bottom rounds and very lightly press them to adhere. Brush the top rings lightly with egg wash, trying not to drip any down the sides (which may inhibit rise). If you are using the little “caps,” dock and egg wash them as well.
volauvonts02

Refrigerate the assembled vols-au-vent on the lined baking sheet while you pre-heat the oven to 400ºF (200ºC). (You could also cover and refrigerate them for a few hours at this point.)

Once the oven is heated, remove the sheet from the refrigerator and place a silicon baking mat (preferred because of its weight) or another sheet of parchment over top of the shells. This will help them rise evenly. Bake the shells until they have risen and begin to brown, about 10-15 minutes depending on their size. Reduce the oven temperature to 350ºF (180ºC), and remove the silicon mat or parchment sheet from the top of the vols-au-vent. If the centers have risen up inside the vols-au-vent, you can gently press them down. Continue baking (with no sheet on top) until the layers are golden, about 15-20 minutes more. (If you are baking the center “caps” they will likely be finished well ahead of the shells, so keep an eye on them and remove them from the oven when browned.)

Remove to a rack to cool. Cool to room temperature for cold fillings or to warm for hot fillings.

volauvonts04

Fill and serve.

*For additional rise on the larger-sized vols-au-vents, you can stack one or two additional ring layers on top of each other (using egg wash to “glue”). This will give higher sides to larger vols-au-vents, but is not advisable for the smaller ones, whose bases may not be large enough to support the extra weight.

*Although they are at their best filled and eaten soon after baking, baked vols-au-vent shells can be stored airtight for a day.

*Shaped, unbaked vols-au-vent can be wrapped and frozen for up to a month (bake from frozen, egg-washing them first).

Michel Richard’s Puff Pastry Dough

From: Baking with Julia by Dorie Greenspan
Yield: 2-1/2 pounds dough

Steph’s note: This recipe makes more than you will need for the quantity of vols-au-vent stated above. While I encourage you to make the full recipe of puff pastry, as extra dough freezes well, you can halve it successfully if you’d rather not have much leftover.

There is a wonderful on-line video from the PBS show “Baking with Julia” that accompanies the book. In it, Michel Richard and Julia Child demonstrate making puff pastry dough (although they go on to use it in other applications). They do seem to give slightly different ingredient measurements verbally than the ones in the book…I listed the recipe as it appears printed in the book.

2-1/2 cups (12.2 oz/ 354 g) unbleached all-purpose flour
1-1/4 cups (5.0 oz/ 142 g) cake flour
1 tbsp. salt (you can cut this by half for a less salty dough or for sweet preparations)
1-1/4 cups (10 fl oz/ 300 ml) ice water
1 pound (16 oz/ 454 g) very cold unsalted butter

plus extra flour for dusting work surface

Mixing the Dough:

Check the capacity of your food processor before you start. If it cannot hold the full quantity of ingredients, make the dough into two batches and combine them.

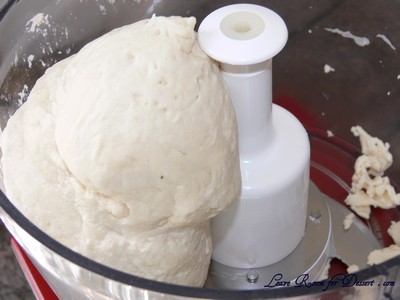
Put the all-purpose flour, cake flour, and salt in the work bowl of a food processor fitted with a metal blade and pulse a couple of times just to mix. Add the water all at once, pulsing until the dough forms a ball on the blade. The dough will be very moist and pliable and will hold together when squeezed between your fingers. (Actually, it will feel like Play-Doh.)
volauvonts10

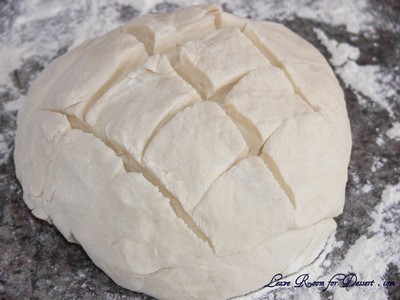
Remove the dough from the machine, form it into a ball, with a small sharp knife, slash the top in a tic-tac-toe pattern. Wrap the dough in a damp towel and refrigerate for about 5 minutes.
volauvonts11

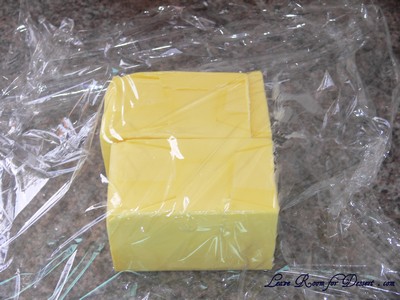
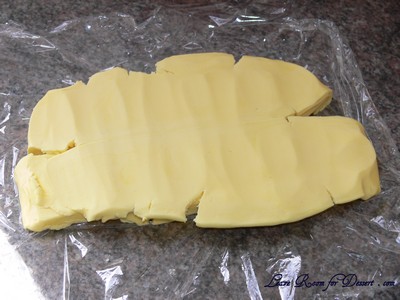
Meanwhile, place the butter between 2 sheets of plastic wrap and beat it with a rolling pin until it flattens into a square that’s about 1″ thick. Take care that the butter remains cool and firm: if it has softened or become oily, chill it before continuing.
volauvonts12

volauvonts13

Incorporating the Butter:

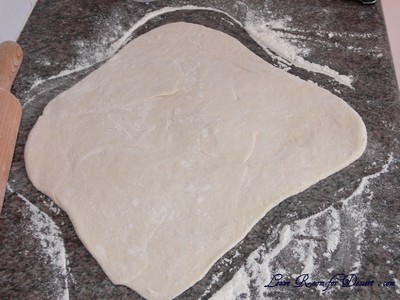
Unwrap the dough and place it on a work surface dusted with all-purpose flour (A cool piece of marble is the ideal surface for puff pastry) with your rolling pin (preferably a French rolling pin without handles), press on the dough to flatten it and then roll it into a 10″ square. Keep the top and bottom of the dough well floured to prevent sticking and lift the dough and move it around frequently. Starting from the center of the square, roll out over each corner to create a thick center pad with “ears,” or flaps.
volauvonts14

Place the cold butter in the middle of the dough and fold the ears over the butter, stretching them as needed so that they overlap slightly and encase the butter completely. (If you have to stretch the dough, stretch it from all over; don’t just pull the ends) you should now have a package that is 8″ square.
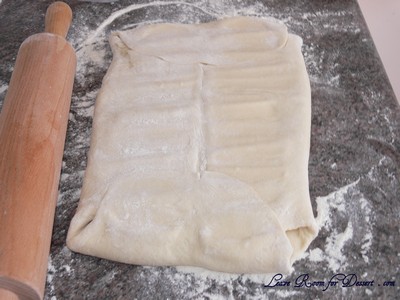
volauvonts15

To make great puff pastry, it is important to keep the dough cold at all times. There are specified times for chilling the dough, but if your room is warm, or you work slowly, or you find that for no particular reason the butter starts to ooze out of the pastry, cover the dough with plastic wrap and refrigerate it . You can stop at any point in the process and continue at your convenience or when the dough is properly chilled.

Making the Turns:

Gently but firmly press the rolling pin against the top and bottom edges of the square (this will help keep it square). Then, keeping the work surface and the top of the dough well floured to prevent sticking, roll the dough into a rectangle that is three times as long as the square you started with, about 24″ (don’t worry about the width of the rectangle: if you get the 24″, everything else will work itself out.) With this first roll, it is particularly important that the butter be rolled evenly along the length and width of the rectangle; check when you start rolling that the butter is moving along well, and roll a bit harder or more evenly, if necessary, to get a smooth, even dough-butter sandwich (use your arm-strength!).
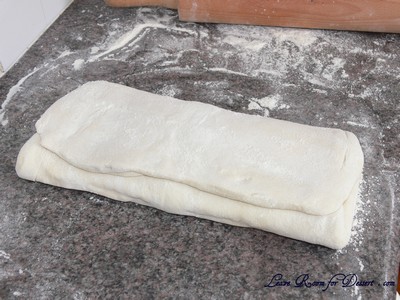
volauvonts16

With a pastry brush, brush off the excess flour from the top of the dough, and fold the rectangle up from the bottom and down from the top in thirds, like a business letter, brushing off the excess flour. You have completed one turn.

Rotate the dough so that the closed fold is to your left, like the spine of a book. Repeat the rolling and folding process, rolling the dough to a length of 24″ and then folding it in thirds. This is the second turn.
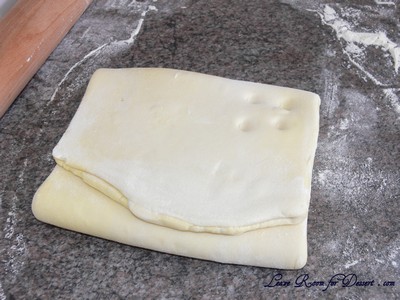
volauvonts17

Chilling the Dough:

If the dough is still cool and no butter is oozing out, you can give the dough another two turns now. If the condition of the dough is iffy, wrap it in plastic wrap and refrigerate it for at least 30 minutes. Each time you refrigerate the dough, mark the number of turns you’ve completed by indenting the dough with your fingertips. It is best to refrigerate the dough for 30 to 60 minutes between each set of two turns.

The total number of turns needed is six. If you prefer, you can give the dough just four turns now, chill it overnight, and do the last two turns the next day. Puff pastry is extremely flexible in this regard. However, no matter how you arrange your schedule, you should plan to chill the dough for at least an hour before cutting or shaping it.
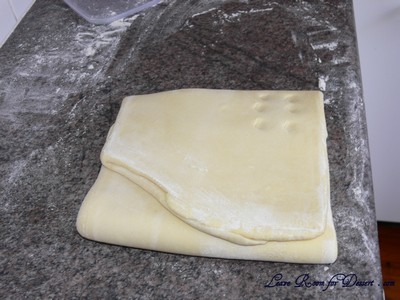
volauvonts20

Steph’s extra tips:

-While this is not included in the original recipe we are using (and I did not do this in my own trials), many puff pastry recipes use a teaspoon or two of white vinegar or lemon juice, added to the ice water, in the détrempe dough. This adds acidity, which relaxes the gluten in the dough by breaking down the proteins, making rolling easier. You are welcome to try this if you wish.

-Keep things cool by using the refrigerator as your friend! If you see any butter starting to leak through the dough during the turning process, rub a little flour on the exposed dough and chill straight away. Although you should certainly chill the dough for 30 to 60 minutes between each set of two turns, if you feel the dough getting to soft or hard to work with at any point, pop in the fridge for a rest.

-Not to sound contradictory, but if you chill your paton longer than the recommended time between turns, the butter can firm up too much. If this seems to be the case, I advise letting it sit at room temperature for 5-10 minutes to give it a chance to soften before proceeding to roll. You don’t want the hard butter to separate into chuncks or break through the dough…you want it to roll evenly, in a continuous layer.

-Roll the puff pastry gently but firmly, and don’t roll your pin over the edges, which will prevent them from rising properly. Don’t roll your puff thinner than about about 1/8 to 1/4-inch (3-6 mm) thick, or you will not get the rise you are looking for.

-Try to keep “neat” edges and corners during the rolling and turning process, so the layers are properly aligned. Give the edges of the paton a scooch with your rolling pin or a bench scraper to keep straight edges and 90-degree corners.

-Brush off excess flour before turning dough and after rolling.

-Make clean cuts. Don’t drag your knife through the puff or twist your cutters too much, which can inhibit rise.

-When egg washing puff pastry, try not to let extra egg wash drip down the cut edges, which can also inhibit rise.

-Extra puff pastry dough freezes beautifully. It’s best to roll it into a sheet about 1/8 to 1/4-inch thick (similar to store-bought puff) and freeze firm on a lined baking sheet. Then you can easily wrap the sheet in plastic, then foil (and if you have a sealable plastic bag big enough, place the wrapped dough inside) and return to the freezer for up to a few months. Defrost in the refrigerator when ready to use.

-You can also freeze well-wrapped, unbaked cut and shaped puff pastry (i.e., unbaked vols-au-vent shells). Bake from frozen, without thawing first.

-Homemade puff pastry is precious stuff, so save any clean scraps. Stack or overlap them, rather than balling them up, to help keep the integrity of the layers. Then give them a singe “turn” and gently re-roll. Scrap puff can be used for applications where a super-high rise is not necessary (such as palmiers, cheese straws, napoleons, or even the bottom bases for your vols-au-vent).

For My Fillings:

Try and fill vol-au-vents on the day they are made.

Salmon and Cream Cheese
120g cream cheese
50ml thickened cream
Juice of 1/2 a small lemon
1 sprig of dill
smoked salmon, cut into 3 x 3 cm squares or similar

Soften the cream-cheese by mixing vigorously with a spoon. When the cream-cheese has softened, add the lemon juice and cream and mix until combined. Once combined stir in 1/8 teaspoon dill. Spoon into vol-au-vent cases, top with a piece of smoked salmon and a small piece of dill.

volauvonts05

Creamy Chicken and Mushroom
1 small chicken breast, cut in 4 chunks
6 mushrooms, halved and sliced
1 lemon, juice and rind
250ml (1 cup) white wine
3 sprigs of thyme
50g butter
3 tablespoon plain flour
250ml (1 cup) milk
100ml thickened cream

Combine wine, lemon juice, lemon rind, thyme and ¼ cup water in a saucepan. Bring to the boil and add the chicken. Cook for 10 minutes or until cooked. Remove chicken, shred or cut into small pieces and strain juices from pan into a small bowl. Place the pan back onto medium heat and add the mushrooms. Add small amounts of juice to help the mushrooms cook. Once cooked (5-10 minutes), remove and place with chicken.

In a clean saucepan cook the butter on high until bubbling. Add flour and cook for a few minutes. Add the milk and whisk together. Continue to whisk on heat until mixture thickens. Add the cream and remove from stove. Stir in chicken and mushrooms.

Spoon chicken mixture into vol-au-vent cases and place in a 180C preheated oven for 10 minutes or until mixture and cases are heated through. Serve hot/warm.

volauvonts06


White Chocolate and Raspberry Cream

50g white chocolate, chopped finely
250ml (1 cup) thickened cream
20 raspberries (fresh or frozen), chopped

Pistachio Praline
50g pistachios
50g caster sugar
3 tablespoons water

Place cream in a saucepan and just bring to the boil. Pour over chopped white chocolate in a bowl and whisk until chocolate has melted. Cool at room temperature and then cool in the fridge for a few hours. Once cooled, beat the white chocolate cream mix until fluffy. Fold through raspberries. Spoon into vol-au-vent cases and sprinkle with chopped praline.

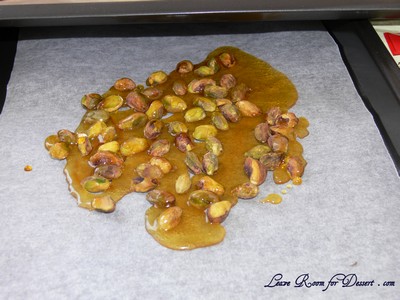
For praline: Roast pistachios in 180C preheated oven for 5-10minutes. Place sugar and water in a small saucepan. Heat on low, stirring until the sugar dissolves. Then turn the heat up to medium-high and cook until golden brown. Pour over pistachios on baking paper and leave to cool. Chop praline into pieces when cooled.

volauvonts03

volauvonts07

Caramelised Onion Tart

Sunday, September 6th, 2009

oniontart14

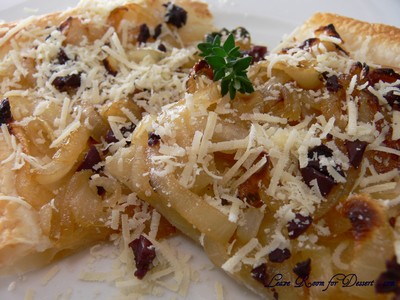
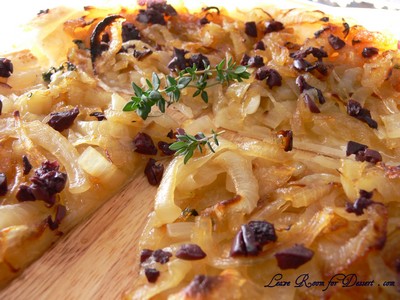
Now what am I supposed to do with 10kg of onions? Some may think it’s a little crazy to buy 10kg of onions – especially for me who really didn’t fancy them and used to pick them out of every meal (Sorry Mum).
Well, this is the second time we’ve bought a bag this big and we easily went through the last one. I wanted to make both a caramelised onion tart and French onion soup with the onions, but never got around to it. This time I made sure we made use of these onions and tried some new recipes.

oniontart01

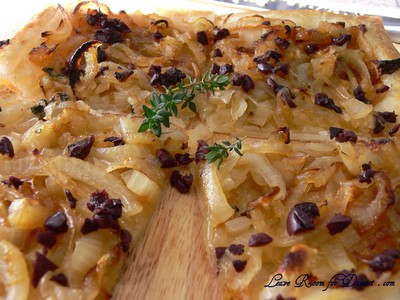
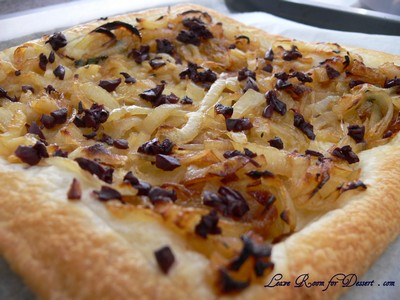
And we are so happy to have tried this recipe. I can’t wait to make it again. It was absolutely gorgeous, very easy and didn’t require many ingredients or steps. As long as you’ve got someone who doesn’t cry too much cutting onions, you’ll be fine and it’s easy. It even heated up quite well at work – an extra bonus!

oniontart12

Caramelised Onion Tart

Serves: 4 mains or 8 small entrees

2 tablespoons butter
2 tablespoons olive oil
4 brown onions, sliced
3 sprigs thyme
½ teaspoon salt
1 teaspoon sugar (optional)
1 tablespoon honey
14 Kalamata olives, chopped (pits removed)
2 sheets puff pastry

Preheat oven to 180ºC (160ºC fan forced).

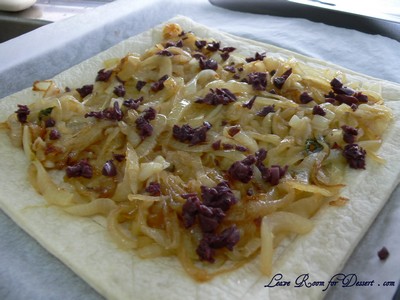
Heat a saucepan on medium heat. Add butter and oil, once bubbling add onions and thyme and continue to stir. After a few minutes add the salt, sugar and honey and continue to cook and stir until onions become translucent and eventually caramelise. This will take 10-20 minutes.

Place each sheet of puff pastry on a baking paper lined tray and cook in oven for 5-10minutes, until starting to brown very slightly. Remove from oven and place caramelised onions on top, leaving a 2cm border around the edges. Top with sliced olives and place back in the oven and cook for 10-20 minutes, until the pastry is nice a golden brown colour. (It may puff a little, but will deflate once taken out of the oven).

oniontart06

oniontart09