Archive for November, 2009

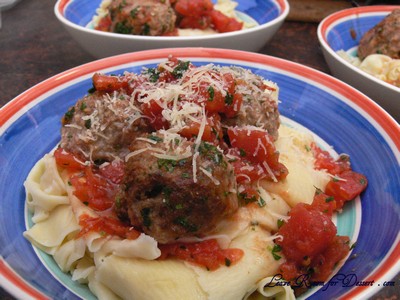
Baked Tomato Meatballs with Fresh Homemade Parpadelle Pasta – Cooking Class 12

Monday, November 30th, 2009

Please disregard the following code, it is so I can claim my blog on Technorati
ETFW4HDKSSXB

TomatoMeatballsHomemadePasta03

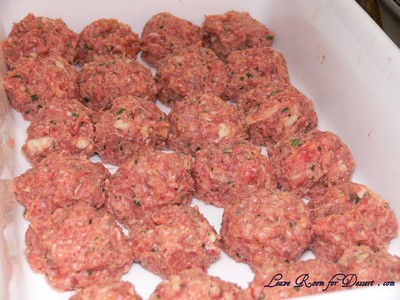
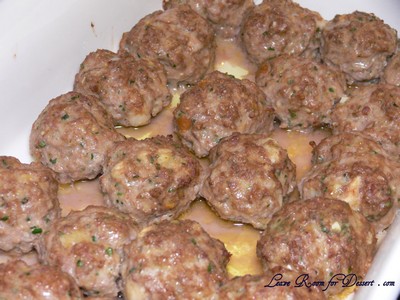
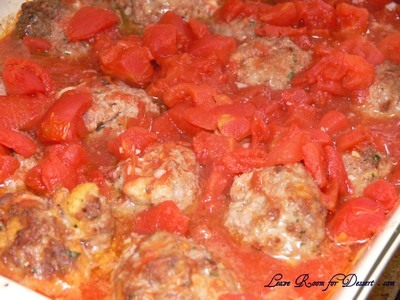
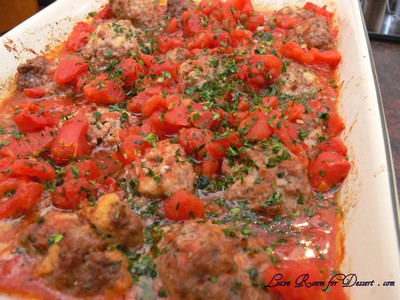
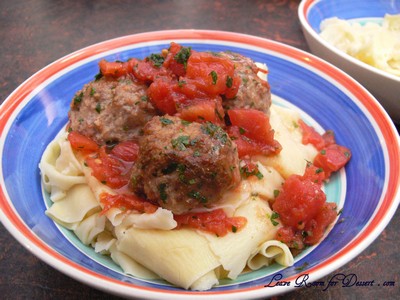
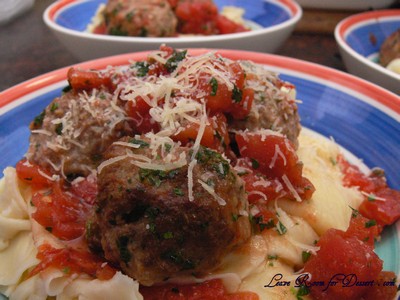
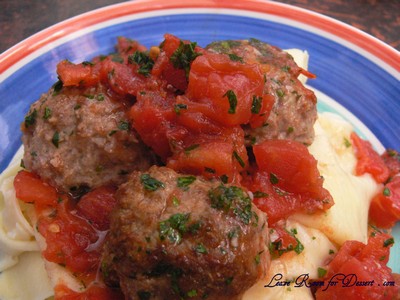
I reckon these meatballs are pretty great – especially that you just need to mix the ingredients together, roll in a ball then place in the oven and when they’re browned pour on some diced tomatoes.

TomatoMeatballsHomemadePasta01

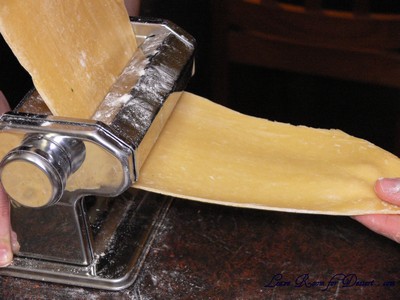
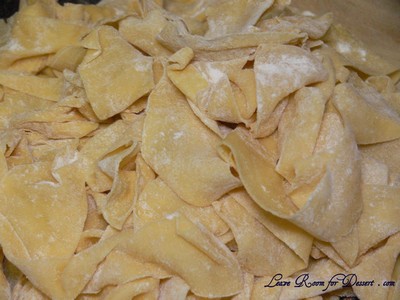
The pasta on the other hand was a bit of a handful… To be exact, we had a few problems with my pasta machine – catching the pasta and delaying the already time consuming activity. The other problem was the fact we were making fresh pasta for more than 12 people (including lunches).

TomatoMeatballsHomemadePasta02

Apart from the ordeal with the pasta, this cooking class went extremely well and everyone was pleased with the result.

Homemade Pasta

Served 12-14 in this dish

700 – 750g plain flour
7 -8 eggs
3 egg yolks
3 pinches salt
a few glugs of olive oil

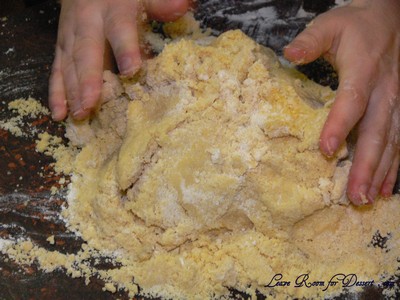
Place all ingredients in a food processor and process until it is crumbly. (With this quantity it was quite difficult and the bottom ingredients clumped quite a bit). Turn out onto a lightly floured clean bench and knead with the palm of your hand until it’s come together. Cover in plastic and refrigerate for 30mins to 1 hour.

TomatoMeatballsHomemadePasta04

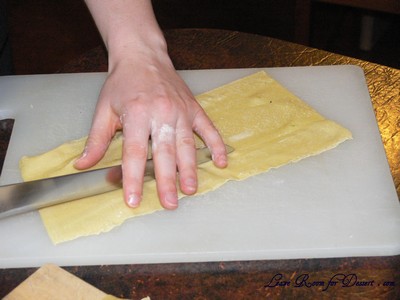
Remove from fridge and divide into 8 portions. Keep unused portions covered in plastic. Using one portion at a time, roll out with rolling pin until thin enough to go through thickest setting on pasta machine. Make sure you flour both the pasta and the rollers in the machine. Once rolled, fold over and roll with rolling pin again, continue to roll through the pasta machine for a few times. Then reduce the thickness setting on the pasta machine and pass though. Continue to reduce the setting by one each time and once the pasta is as thin as you’d like (one of the last few settings), dust in flour, slice into thick strips and continue with other pasta portions.

TomatoMeatballsHomemadePasta07

TomatoMeatballsHomemadePasta06

TomatoMeatballsHomemadePasta08

Once all the pasta is almost finished being prepared, boil a very large pot of water. Add some salt to the boiling water and cook the pasta (in batches if need be) until al dente (this won’t take very long with fresh made pasta).

Baked meatballs and tomato sauce

Recipe from the Donna Hay section in the Sunday Magazine

Serves: 8

4 slices white bread
¾ cup milk
500g pork mince
500g beef mince
2 eggs, lightly beaten
¼ cup finely grated parmesan cheese
½ cup chopped flat-leaf parsley leaves
5 garlic cloves, crushed
2 tablespoons olive oil
4 x 400g cans diced tomatoes

finely grated parmesan cheese, extra, to serve

Preheat oven to 220C. Place the bread in a bowl and pour over milk. Stand for 5 minutes to allow the milk to be absorbed. Tear the bread into pieces. Place bread in a large bowl with the pork mince, beef mince, eggs, parmesan, half the parsley and 3 garlic cloves. Mix well to combine.

Roll tablespoonfuls of the mixture into balls, place in two baking dishes and drizzle with oil.

TomatoMeatballsHomemadePasta05

TomatoMeatballsHomemadePasta09

Bake for 20-25 minutes or until browned. Add 2 cans of tomatoes and 1 garlic clove to each dish and stir to combine.

TomatoMeatballsHomemadePasta10

Bake for a further 5-8 minutes or until the sauce in warmed through. Sprinkle with the remaining parsley and parmesan to serve.

TomatoMeatballsHomemadePasta11

TomatoMeatballsHomemadePasta12

Cannoli – Daring Bakers Challenge November 2009

Friday, November 27th, 2009

CannoliDaringBakers09

The November 2009 Daring Bakers Challenge was chosen and hosted by Lisa Michele of Parsley, Sage, Desserts and Line Drives. She chose the Italian Pastry, Cannolo (Cannoli is plural), using the cookbooks Lidia’s Italian-American Kitchen by Lidia Matticchio Bastianich and The Sopranos Family Cookbook by Allen Rucker; recipes by Michelle Scicolone, as ingredient/direction guides. She added her own modifications/changes, so the recipe is not 100% verbatim from either book.
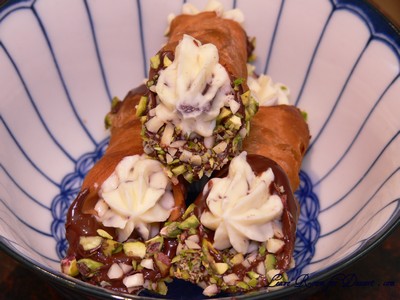
CannoliDaringBakers14

Yippee. I had plans to make some cannoli so long ago when I hosted my first cooking class with my family. Unfortunately I didn’t have any metal cannoli tubes/forms, plus – it was probably a bit difficult to make cannoli from scratch plus dinner on a work night.
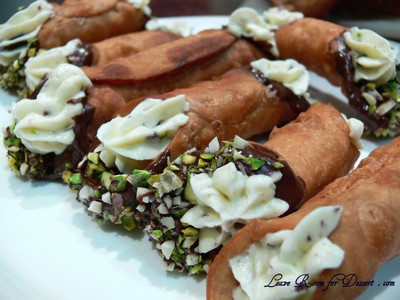
CannoliDaringBakers08

All I know is I was excited to finally be making cannoli from scratch, even though I had never eaten a bought cannoli before.

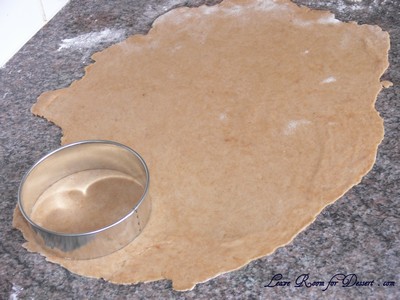
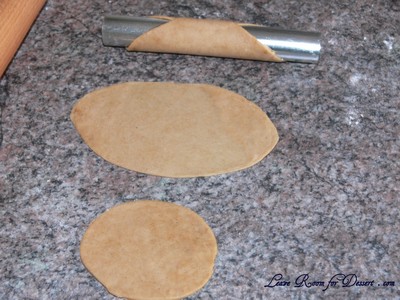
I found the dough a bit difficult to roll out, as it kept springing back. Even when it had been rolled out thinly, cut in a circle, rolled into an oval and wrapped around the cannoli tube, it still continued to shrink and resulted in a few quite small/thickish cannoli tubes. This didn’t change how they fried up, they were still great.

I also found they cooked very quickly – 30sec or less at 170-180C and they were perfectly cooked.
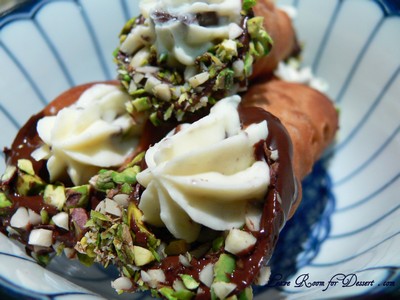
CannoliDaringBakers10

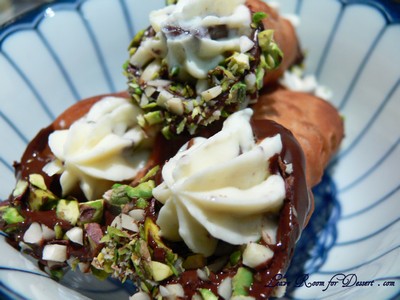
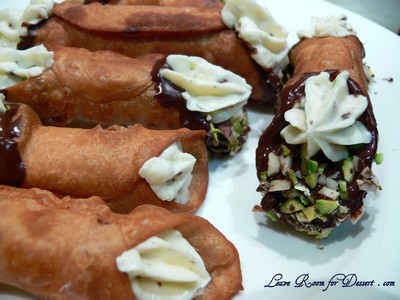
Overall, I was quite happy with the cannoli tubes. They went extremely well with the sweet ricotta, pistachio and chocolate filling and lasted very well (not filled) in a sealed container for a few days.

I don’t think it was quite up to the standard of the bought cannoli I tried a day after making these (for a friend’s birthday morning tea). But they were still fantastic. Would I make them again? I might look for a recipe that isn’t as hard to roll out or perhaps use the pasta machine to make it quite thin. I’d also only do it when I’m not in a rush (which I was this time when I was frying the shells, and it seemed to take ages).

CannoliDaringBakers16

Lidisano’s Cannoli

Makes 22-24 4-inch cannoli
Prep time:
Dough – 2 hours and 10-20 minutes, including resting time, and depending on whether you do it by hand or machine.
Filling – 5-10 minutes plus chilling time (about 2 hours or more)
Frying – 1-2 minutes per cannoli
Assemble – 20–30 minutes

CANNOLI SHELLS

2 cups (250 grams/16 ounces) all-purpose flour
2 tablespoons(28 grams/1 ounce) sugar
1 teaspoon (5 grams/0.06 ounces) unsweetened baking cocoa powder
1/2 teaspoon (1.15 grams/0.04 ounces) ground cinnamon
1/2 teaspoon (approx. 3 grams/0.11 ounces) salt
3 tablespoons (42 grams/1.5 ounces) vegetable or olive oil
1 teaspoon (5 grams/0.18 ounces) white wine vinegar
Approximately 1/2 cup (approx. 59 grams/approx. 4 fluid ounces/approx. 125 ml) sweet Marsala or any white or red wine you have on hand
1 large egg, separated (you will need the egg white but not the yolk)
Vegetable or any neutral oil for frying – about 2 quarts (8 cups/approx. 2 litres)
1/2 cup (approx. 62 grams/2 ounces) toasted, chopped pistachio nuts, mini chocolate chips/grated chocolate and/or candied or plain zests, fruits etc.. for garnish
Confectioners’ sugar

Note – If you want a chocolate cannoli dough, substitute a few tablespoons of the flour (about 25%) with a few tablespoons of dark, unsweetened cocoa powder (Dutch process) and a little more wine until you have a workable dough (Thanks to Audax).

CANNOLI FILLING
2 lbs (approx. 3.5 cups/approx. 1 kg/32 ounces) ricotta cheese, drained
1 2/3 cups cup (160 grams/6 ounces) confectioner’s sugar, (more or less, depending on how sweet you want it), sifted
1/2 teaspoon (1.15 grams/0.04 ounces) ground cinnamon
1 teaspoon (4 grams/0.15 ounces) pure vanilla extract or the beans from one vanilla bean
3 tablespoons (approx. 28 grams/approx. 1 ounce) finely chopped good quality chocolate of your choice
2 tablespoons (12 grams/0.42 ounces) of finely chopped, candied orange peel, or the grated zest of one small to medium orange (I added 2 tablespoons chopped slivered almonds)
3 tablespoons (23 grams/0.81 ounce) toasted, finely chopped pistachios

Note – If you want chocolate ricotta filling, add a few tablespoons of dark, unsweetened cocoa powder to the above recipe, and thin it out with a few drops of warm water if too thick to pipe.

DIRECTIONS FOR SHELLS:
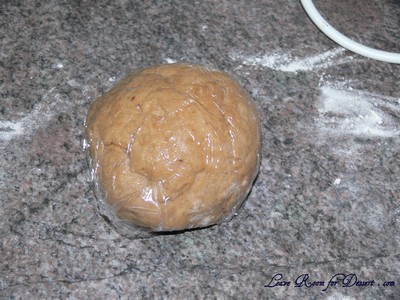
In the bowl of an electric stand mixer or food processor, combine the flour, sugar, cocoa, cinnamon, and salt. Stir in the oil, vinegar, and enough of the wine to make a soft dough. Turn the dough out onto a lightly floured surface and knead until smooth and well blended, about 2 minutes. Shape the dough into a ball. Cover with plastic wrap and let rest in the fridge from 2 hours to overnight.
CannoliDaringBakers18

Cut the dough into two pieces. Keep the remaining dough covered while you work. Lightly flour a large cutting or pastry board and roll the dough until super thin, about 1/16 to 1/8” thick (An area of about 13 inches by 18 inches should give you that). Cut out 3 to 5-inch circles (3-inch – small/medium; 4-inch – medium/large; 5-inch;- large. Your choice). Roll the cut out circle into an oval, rolling it larger and thinner if it’s shrunk a little.
CannoliDaringBakers01

CannoliDaringBakers02

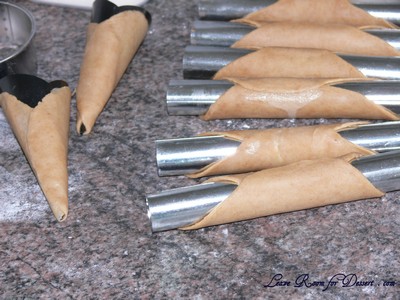
Oil the outside of the cannoli tubes (You only have to do this once, as the oil from the deep fry will keep them well, uhh, oiled..lol). Roll a dough oval from the long side (If square, position like a diamond, and place tube/form on the corner closest to you, then roll) around each tube/form and dab a little egg white on the dough where the edges overlap. (Avoid getting egg white on the tube, or the pastry will stick to it.) Press well to seal. Set aside to let the egg white seal dry a little.
CannoliDaringBakers03

In a deep heavy saucepan, pour enough oil to reach a depth of 3 inches, or if using an electric deep-fryer, follow the manufacturer’s directions. Heat the oil to 375°F (190 °C) on a deep fry thermometer, or until a small piece of the dough or bread cube placed in the oil sizzles and browns in 1 minute. Have ready a tray or sheet pan lined with paper towels or paper bags.

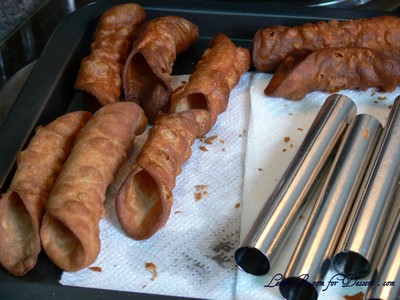
Carefully lower a few of the cannoli tubes into the hot oil. Do not crowd the pan. Fry the shells until golden, about 2 minutes (mine took less than 30sec @ 170-180 °C), turning them so that they brown evenly.

Lift a cannoli tube with a wire skimmer or large slotted spoon, out of the oil. Using tongs, grasp the cannoli tube at one end. Very carefully remove the cannoli tube with the open sides straight up and down so that the oil flows back into the pan. Place the tube on paper towels or bags to drain. Repeat with the remaining tubes. While they are still hot, grasp the tubes with a potholder and pull the cannoli shells off the tubes with a pair of tongs, or with your hand protected by an oven mitt or towel. Let the shells cool completely on the paper towels. Place shells on cooling rack until ready to fill.
CannoliDaringBakers04

Repeat making and frying the shells with the remaining dough. If you are reusing the cannoli tubes, let them cool before wrapping them in the dough.

Pasta Machine method:
Divide the dough into 4 equal pieces. Starting at the middle setting, run one of the pieces of dough through the rollers of a pasta machine. Lightly dust the dough with flour as needed to keep it from sticking. Pass the dough through the machine repeatedly, until you reach the highest or second highest setting. The dough should be about 4 inches wide and thin enough to see your hand through

Continue rolling out the remaining dough. If you do not have enough cannoli tubes for all of the dough, lay the pieces of dough on sheets of plastic wrap and keep them covered until you are ready to use them.

Roll, cut out and fry the cannoli shells as according to the directions above.

DIRECTIONS FOR FILLING:
Line a strainer with cheesecloth. Place the ricotta in the strainer over a bowl, and cover with plastic wrap and a towel. Weight it down with a heavy can, and let the ricotta drain in the refrigerator for several hours to overnight.

In a bowl with electric mixer, beat ricotta until smooth and creamy. Beat in confectioner’s sugar, cinnamon, vanilla and blend until smooth. Transfer to another bowl and stir in chocolate, zest and nuts. Chill until firm.(The filling can be made up to 24 hours prior to filling the shells. Just cover and keep refrigerated).

ASSEMBLE THE CANNOLI:
When ready to serve..fill a pastry bag fitted with a 1/2-inch plain or star tip, or a ziplock bag, with the ricotta cream. If using a ziplock bag, cut about 1/2 inch off one corner. Insert the tip in the cannoli shell and squeeze gently until the shell is half filled. Turn the shell and fill the other side. You can also use a teaspoon to do this, although it’s messier and will take longer.

Press or dip cannoli in chopped pistachios, grated chocolate/mini chocolate chips, candied fruit or zest into the cream at each end. Dust with confectioner’s sugar and/or drizzles of melted chocolate if desired.
CannoliDaringBakers06

TIPS AND NOTES:
– Dough must be stiff and well kneaded

– Rolling the dough to paper thinness, using either a rolling pin or pasta machine, is very important. If the dough is not rolled thin enough, it will not blister, and good cannoli should have a blistered surface.

– Initially, this dough is VERY stubborn, but keep rolling, it eventually gives in. Before cutting the shapes, let the dough rest a bit, covered, as it tends to spring back into a smaller shapes once cut. Then again, you can also roll circles larger after they’re cut, and/or into ovals, which gives you more space for filling.

– Your basic set of round cutters usually doesn’t contain a 5-inch cutter. Try a plastic container top, bowl etc, or just roll each circle to 5 inches. There will always be something in your kitchen that’s round and 5-inches if you want large cannoli.

– Oil should be at least 3 inches deep and hot – 360°F-375°F, or you’ll end up with greasy shells. I prefer 350°F – 360°F because I felt the shells darkened too quickly at 375°F.

– If using the cannoli forms, when you drop the dough on the form into the oil, they tend to sink to the bottom, resulting in one side darkening more. Use a slotted spoon or skimmer to gently lift and roll them while frying.

– DO NOT crowd the pan. Cannoli should be fried 2-4 at a time, depending on the width of your saucepan or deep fryer. Turn them once, and lift them out gently with a slotted spoon/wire skimmer and tongs. Just use a wire strainer or slotted spoon for flat cannoli shapes.

– When the cannoli turns light brown – uniform in color, watch it closely or remove it. If it’s already a deep brown when you remove it, you might end up with a really dark or slightly burnt shell.

– Depending on how much scrap you have left after cutting out all of your cannoli shapes, you can either fry them up and sprinkle with confectioner’s sugar for a crispy treat, or let the scraps rest under plastic wrap and a towel, then re-roll and cut more cannoli shapes.

– Push forms out of cannoli very gently, being careful not to break the shells as they are very delicate. DO NOT let the cannoli cool on the form, or you may never get it off without it breaking. Try to take it off while still hot. Hold it with a cloth in the center, and push the form out with a butter knife or the back of a spoon.

– When adding the confectioner’s sugar to the filling..TASTE. You may like it sweeter than what the recipe calls for, or less sweet, so add in increments.

– Fill cannoli right before serving! If you fill them an hour or so prior, you’ll end up with soggy cannoli shells.

– If you want to prepare the shells ahead of time, store them in an airtight container, then re-crisp in a 350°F (176 °C) oven for a few minutes, before filling.

– Practice makes perfect. My first batch of shells came out less than spectacular, and that’s an understatement. As you go along, you’ll see what will make them more aesthetically pleasing, and adjust accordingly when rolling. My next several batches turned out great. Don’t give up!!
Scones

Sunday, November 22nd, 2009

SconesMasterChef5

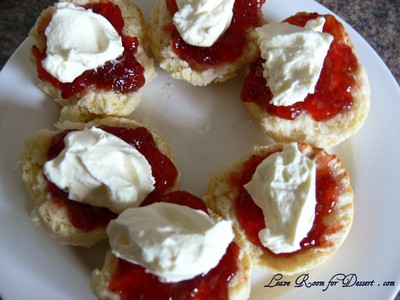
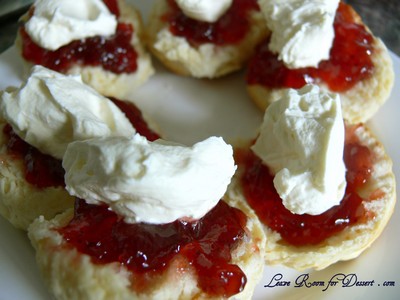
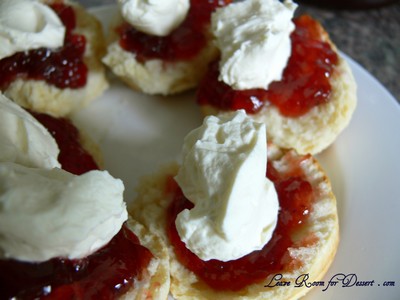
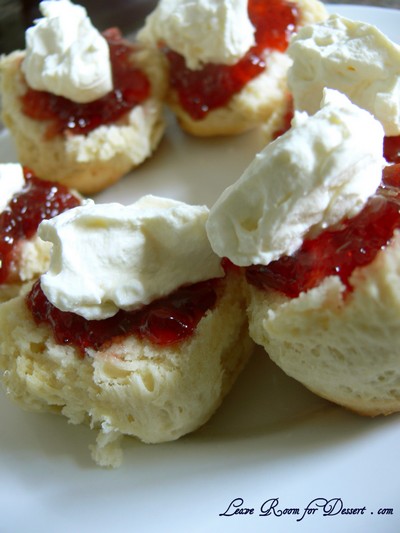
I love scones. Almost nothing is as good as jam and whipped cream on some fresh scones.

SconesMasterChef3

Even better is when they’re so quick and easy to make – and these ones surely are. They were seen on a masterclass show on MaterChef, although had dates and lemon. I’m sure this flavour combination would be great, but without them the recipe is lovely.

SconesMasterChef4

Scones

Recipe adapted from MasterChef’s Date and Lemon Scone recipe

150ml-175ml milk
150ml cream
1 egg
3 cups self-raising flour
2 tablespoons caster sugar
Cream & jam, to serve

Preheat oven 200°C fan forced. Line large flat oven tray with baking paper.

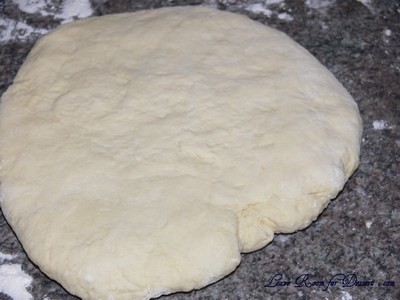
Whisk 150ml milk, cream and egg together until well combined. Combine flour and sugar in a large bowl. Add milk mixture and stir gently to a soft dough, adding remaining milk if necessary. Turn onto a lightly floured surface and knead gently until dough comes together.

Press dough out to 2cm-thick.

SconesMasterChef03

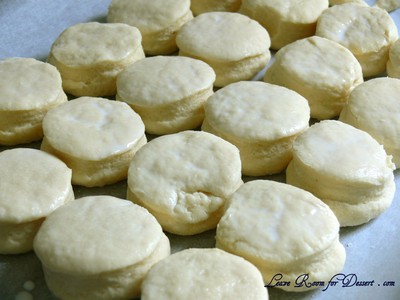
Cut scones from dough and place onto tray flat-side up. Press dough together gently and repeat using the remaining dough.

SconesMasterChef2

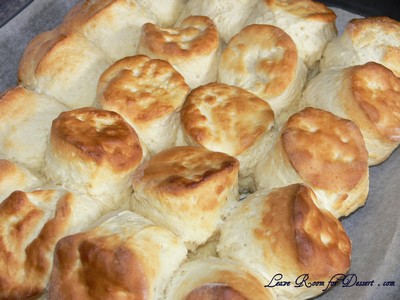
Brush the tops with milk and sprinkle with a little sugar. Bake 12-15 minutes until golden and well risen. Serve hot with jam and cream.

SconesMasterChef05

SconesMasterChef1

Feta and Ricotta Stuffed Tomatoes and Asparagus, Bacon and Parmesan Pasta – Cooking Class 11

Wednesday, November 18th, 2009

StuffedTomatoesAsparagusPasta11

Another cooking class, another new recipe (or two, possibly three – in this case).

Trying to fit quite a number of people in a small kitchen, all trying to find something to help with and space to actually do it, is quite a spectacle. Luckily the dessert for this cooking class was not too involved, as you will find out later…

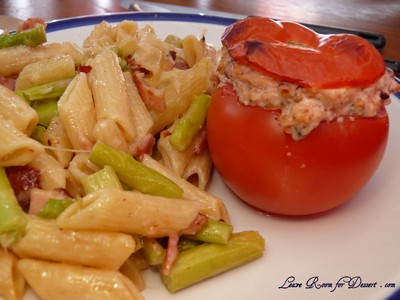
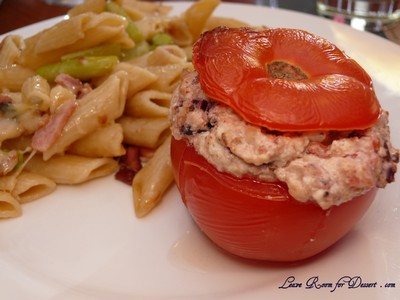
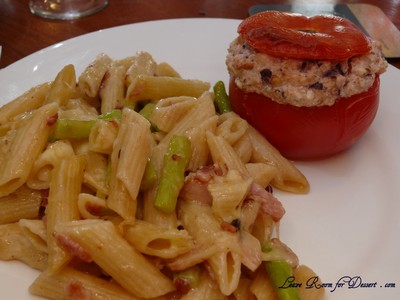
Not being a fan of asparagus or raw tomatoes, I was a bit concerned when I saw what we were making. Fortunately, both these dishes were great and most of us are looking forward to eating them again, either as separate dishes or together.

The pasta bake was lovely and flavoursome with the bacon, cheese and even the asparagus (I guess I do like asparagus). The stuffed tomatoes had a great combination of olives, pinenuts and herbs and of course the feta and ricotta.

StuffedTomatoesAsparagusPasta10

Dessert was described as a Jamie Oliver tried and tested, fantastic recipe. We were told it may take a while and could be quite involved… I was so intrigued as to what it could be and could not help but laugh when I saw the so-called “recipe”.

On the page was something I have made and eaten plenty of times before. At one stage I was eating it almost every night… it was…

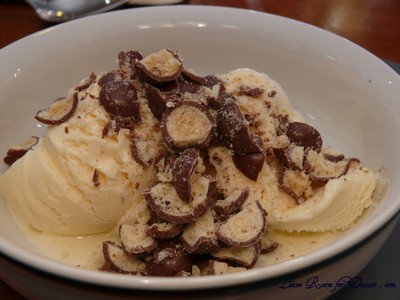
Maltesers on Ice cream!
StuffedTomatoesAsparagusPasta01

I kid you not. It was in Jamie’s book, with an understandably short recipe. Something like:
Ingredients: Ice cream and a bag of maltesers
Method: Crush maltesers, place on ice cream and serve.

Feta and Ricotta Stuffed Tomatoes

Recipes from Party & Snack Perfection

Serves: 6

6 large firm tomatoes
105g feta cheese, crumbled
150g ricotta cheese
60g pine nuts, chopped
10 black olives, pitted and chopped
1 ½ tablespoons chopped fresh oregano
3 tablespoons wholemeal breadcrumbs
freshly ground black pepper
6 block olives to garnish
extra oregano leaves to garnish

Preheat oven to 180C.

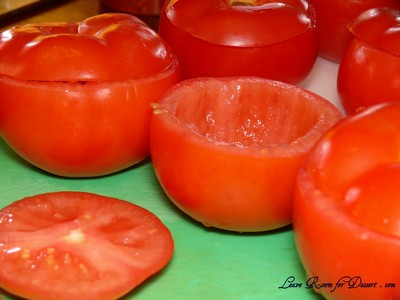
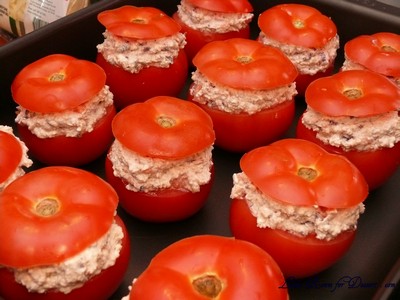
Cut a lid off the top of each tomatoes and set aside. Carefully scoop the centre of each tomatoes into and large bowl. Combine half the tomato mixture with the feta, ricotta, pine nuts, olives, oregano, breadcrumbs and pepper. Beat mixture together and spoon back into the cases (piling the tops high). Discard left over tomato flesh.

StuffedTomatoesAsparagusPasta02

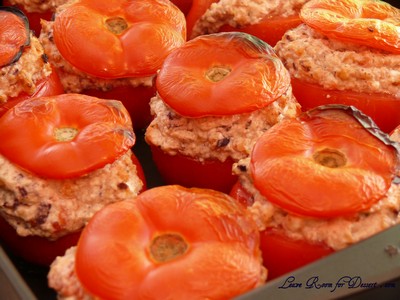
Place in a lightly greased shallow oven-proof dish and bake 20-25 minutes.

StuffedTomatoesAsparagusPasta05

Garnish with an olive and oregano (we left this bit out) and serve.

StuffedTomatoesAsparagusPasta07

Asparagus, Bacon and Parmesan Tortiglioni

Recipe from The Australian Women’s Weekly Eating in

Serves: 4

500g tortiglioni pasta (or another tube-pasta, if you can’t find this)
500g asparagus, chopped coarsely
2 teaspoons olive oil
5 bacon rashers, sliced thinly
1 clove garlic, crushed
100g butter, chopped
¼ cup coarsely chopped fresh flat-leaf parsley
½ cup (40g) grated parmesan cheese
½ cup (50g) grates mozzarella cheese

Cook pasta in a large saucepan of boiling water, uncovered, until just tender. Drain and return to pan.

Meanwhile, boil, steam or microwave asparagus until just tender, drain.

Heat oil in large frying pan, add bacon, cook, stirring, until crisp. Add garlic, cook until fragrant.

Add bacon mixture to drained pasta with butter, asparagus, parsley and a quarter of the combined cheeses, toss gently

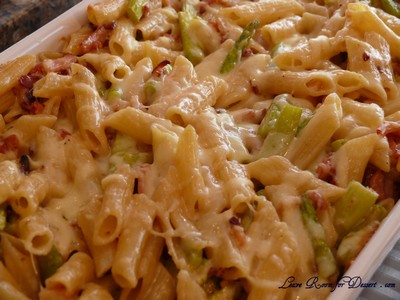
Preheat grill to hot. Transfer pasta mixture to shallow 2.5 litre ovenproof dish. Sprinkle top of pasta with remaining cheese. Place under grill until cheese has browned. (Alternatively place the dish in a moderate oven [180C] for 10-20 minutes until the cheese has browned)

StuffedTomatoesAsparagusPasta08

StuffedTomatoesAsparagusPasta09

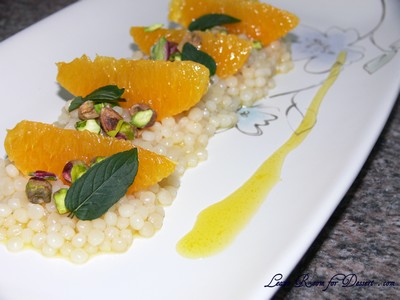
Bacon, Mushroom and Baby Spinach Pearl Couscous and Orange and Pistachio Cinnamon Pearl Couscous

Sunday, November 15th, 2009

OrangePearlCouscous01

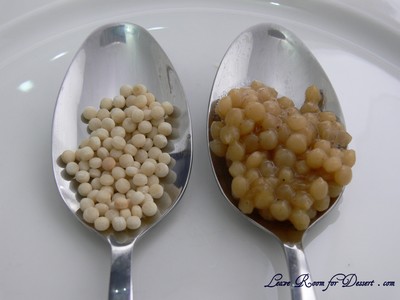
I was intrigued when I first saw pearl couscous and surprised by the lovely pearl shapes it formed. I was sent a packet of Blu’s pearl couscous soon after, and spent a bit of time looking for recipes that I thought would show off it’s shape.

PearlCouscousBacon02

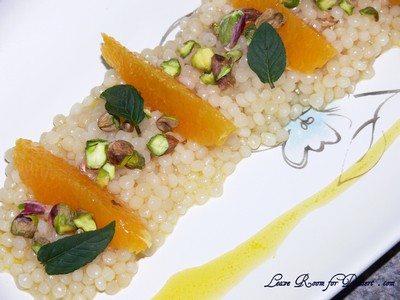
First of all, I wanted to make a pretty dessert. Although finding good desserts or sweet dishes with couscous was a bit difficult, but after a bit of research I came up with a recipe that would hopefully work.

OrangePearlCouscous12

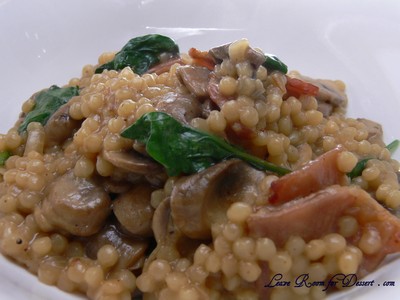
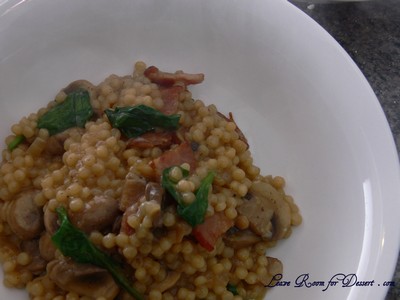
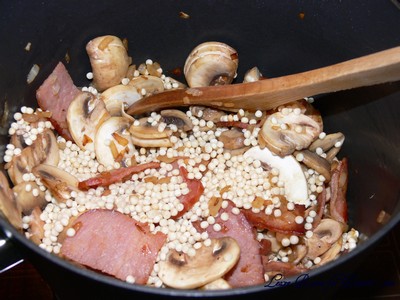
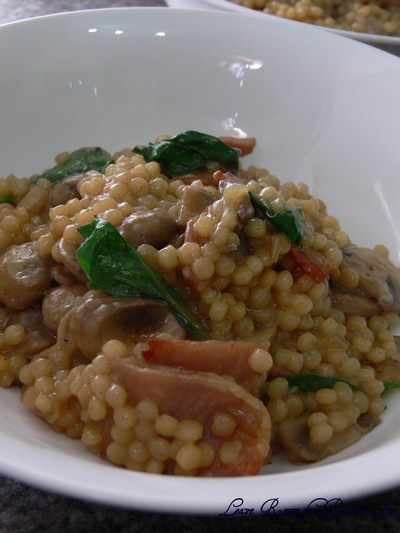
The second recipe I chose was a quick mushroom, bacon and spinach pearl couscous and sounded perfect for a lazy Friday night. (It’s funny how my second recipe was really our first dish… but as you probably already know – I always think about dessert first).

PearlCouscousBacon01

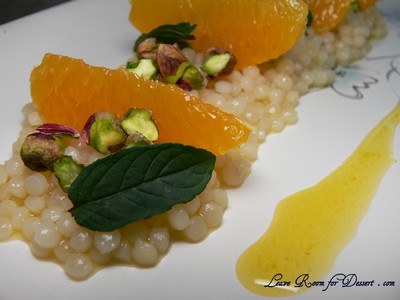
Although I loved the look of my dessert using the pearl couscous, it didn’t really work… the flavours and textures just didn’t work terribly well (so I won’t be supplying the recipe). I really did enjoy the savoury meal, the textures were quite interesting and the couscous itself was very filling. I would recommend using this pearl couscous for savoury foods, I would like to try and make a nice slow cooked lamb with a tomato and red wine flavoursome thick sauce on top of the couscous. It would look great and match perfectly.

OrangePearlCouscous09

Bacon, Mushroom and Baby Spinach Pearl Couscous

Serves: 2-3

1 tablespoon olive oil
1/2 onion, chopped finely
4 slices of bacon, chopped
12 mushrooms, sliced
2/3 cup Pearl Couscous
1 cup hot chicken or vegetable stock
a few handfuls of baby spinach leaves (I didn’t have as much on hand as I wanted)
4 tablespoons parmesan cheese, grated
salt and pepper to serve

Heat olive oil in a saucepan over medium/high heat. Add the onion and cook for 10 minutes until caramelising and becoming translucent.

Add the bacon and cook for 3-5 minutes, until the bacon has started to brown. Add the mushrooms and cook for 2 minutes. Add the couscous, stir well and then add the hot stock. Bring to the simmer, cover and cook for 10 minutes or until the couscous is cooked.

PearlCouscousBacon05

Add the spinach leaves and cook until wilted. Stir in cheese and serve sprinkled with some extra cheese.

PearlCouscousBacon06

PearlCouscousBacon09

Strawberries and Cream with White Chocolate Sponge and Ice Cream

Saturday, November 7th, 2009

StrawberryCreamMasterChef07

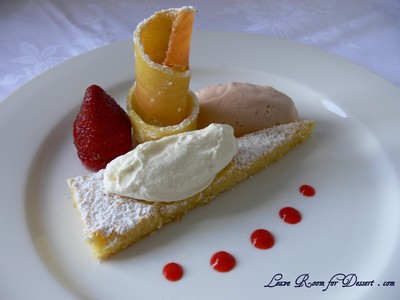
When I saw Katrina Kanetani from Pier walk into the MasterChef kitchen on Wednesday night I was so excited as I knew desserts would be on the menu. Katrina was named Chef of the Year in 2007 and is the head Pastry Chef at the three-hatted restaurant Pier, how could I not be excited to see what creations the celebrity contestants had to choose from.

StrawberryCreamMasterChef24

I thought both desserts Katrina revealed were gorgeous. How could you choose? Being a chocoholic I was obviously eager to get the recipe for the chocolate dessert – a chocolate brulee. But, after saying that, the strawberry, cream, sponge and tuile creation looked marvellous (this was the chosen dessert).

StrawberryCreamMasterChef08

Even better? I actually had most of the ingredients at home (couldn’t find sumac, though). So I had decided, printed the recipe off the day after the show and started planning how I would fit it in on the weekend, without making the whole day full of cooking and dirtying the kitchen, like I tend to do.

StrawberryCreamMasterChef16

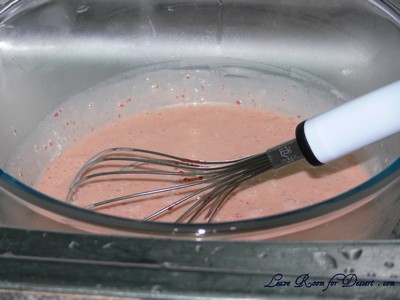
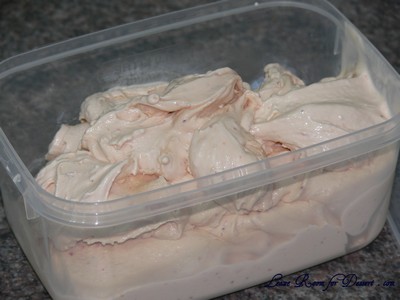
So I made the ice cream the night before, chilled the custard on ice and placed it in my ice cream maker. It looked gorgeous (and tasted beautiful). I placed it in the freezer overnight and left it out for 10 minutes or more for it to soften.

StrawberryCreamMasterChef18

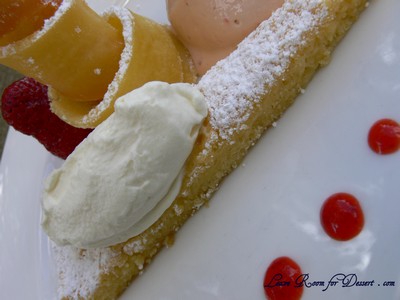
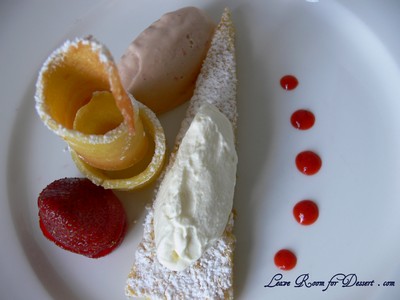
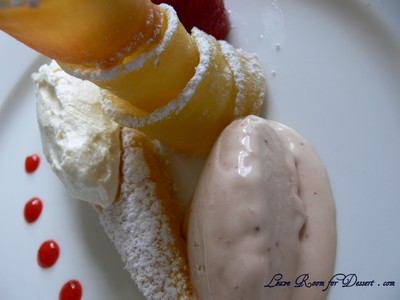
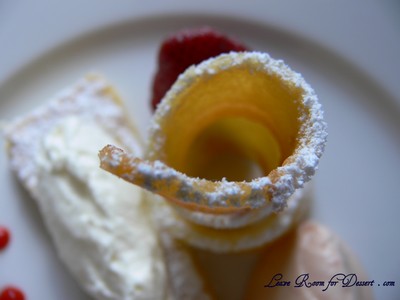
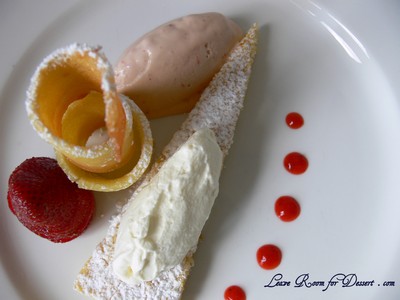
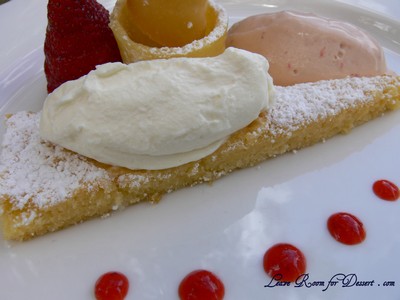
Everything on the plate worked fantastically together. It looked amazing too. I couldn’t believe I actually got it quite close to the actual dessert. I had a few problems with the tuile, mainly the fact my baking trays decided to buckle under the heat, causing the tuile mixture to be uneven. Overall I was very happy with my result.

StrawberryCreamMasterChef12

Aren’t my dinner guests tonight going to be happy? 😛

StrawberryCreamMasterChef15

Strawberries and Cream with White Chocolate Sponge and Ice Cream

Recipe by Katrina Kanetani as seen on Celebrity MasterChef 2009

Strawberry Ice-cream
180g strawberries, hulled, halved
360ml cream
5 egg yolks, reserve whites
120g caster sugar

White chocolate sponge cake

135g white coverture chocolate, broken up
125g unsalted butter, softened
5 egg yolks
4 egg whites
90g caster sugar
60g plain flour, sifted

Tuile
50g plain flour
60g caster sugar
35g icing sugar
Pinch salt
4 egg whites
65g butter, melted

Chantilly cream
200ml cream
1 tbs icing sugar
½ tsp vanilla bean extract

Strawberries

3 large strawberries, hulled
2 tsp icing sugar
½ tsp sumac (I left this out as I had none)

To serve
Icing sugar
Sumac (I left this out as I had none)
(Some of the strawberry puree – see method for ice cream)

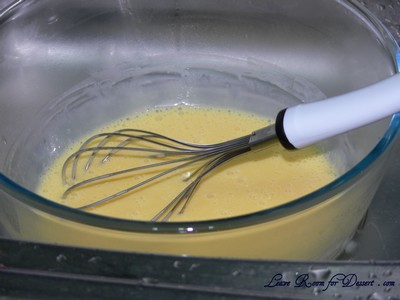
To make the strawberry ice-cream, puree the strawberries in a small food processor and pass through a sieve. Reserve 1 tablespoon of the puree for serving. Place the cream in a small saucepan and heat over medium heat to just below boiling point. Whisk the egg yolks and sugar together in a large bowl. Gradually pour the hot cream into the yolk mixture, while whisking continuously until all the cream is added. Transfer the mixture into a clean medium saucepan and cook over low heat, stirring until custard thickens and coats the back of a spoon (mixture will be about 84°C). Strain custard through a fine sieve and place over a bowl of iced water, whisking until cold.

StrawberryCreamMasterChef26

Stir through the remaining strawberry puree.

StrawberryCreamMasterChef27

Transfer ½ cup of the ice-cream base into a cream canister and charge twice, shaking vigorously after each charge (I didn’t do this part as I wasn’t sure where it should be used for serving, plus I didn’t have the equipment. I placed it all in the ice cream maker.). Refrigerate cream canister until ready to serve. Pour remaining ice-cream base into a chilled ice cream maker and churn for about 20 minutes. Remove from ice cream maker and place in the blast chiller for about 10 minutes or until firm. (I placed mine in the freezer overnight)

StrawberryCreamMasterChef29

To make the white chocolate sponge cake, preheat oven to 160°C fan forced. Grease and line a 4cm deep baking tray (mine was 4.5cm x 21cm x 31cm). Place the chocolate in a glass bowl and place over a saucepan of simmering water. Stir with a metal spoon until melted. Transfer to a large bowl and cool. Add the butter to the cooled chocolate and beat until smooth. Stir in egg yolks and mix until well combined.

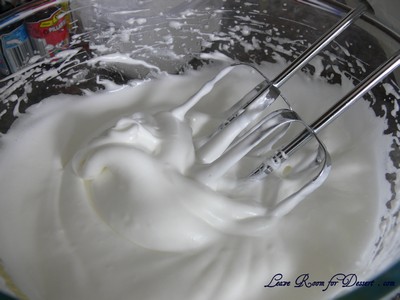
Using an electric hand beater, whip the egg whites to soft peaks. Add the sugar and continue beating until it forms stiff peaks.

StrawberryCreamMasterChef30

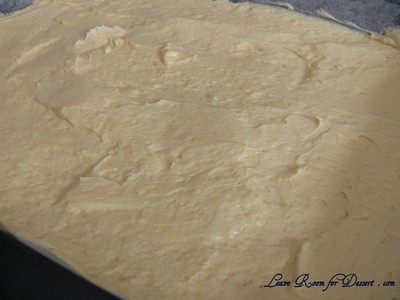
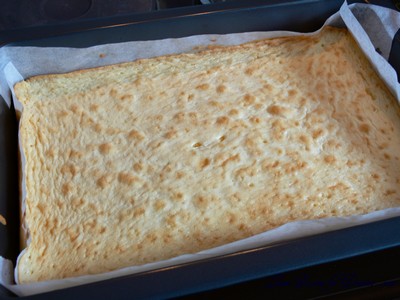
Fold the egg white mixture into the white chocolate and mix well. Gently fold in the flour. Spread the cake onto prepared baking tray until 2cm thick.

StrawberryCreamMasterChef01

Bake for 10 minutes or until cooked (until skewer comes outs clean)(mine took 20-25 minutes). Allow to cool in pan then turn cake onto a board and remove baking paper. Turn cake over, top side up. Cut out a 3cm x 15cm x 15cm triangle. Reserve sponge triange and off-cuts for serving.

StrawberryCreamMasterChef03

To make the tuile, grease and line 2 flat baking trays with baking paper. Sift the flour, sugars and salt into a bowl. Mix in the egg whites and butter. Place in the blast chiller for 10 minutes (I placed it in the freezer for 15 minutes). Spread a thin layer of batter onto one of the prepared trays and bake for 8 minutes (tuile should be set but not browned yet) (I did this at 160C fan forced). Using a sharp knife, cut the tuile, lengthways into 5cm wide strips. Turn onto the second prepared tray, separated slightly and return to oven until golden brown. While still hot, twist the tuiles and allow to cool to your desired shape.

To make the Chantilly cream, place the cream, icing sugar and vanilla in a bowl and beat with an electric beater until soft peaks form; refrigerate.

To prepare the strawberries, slice strawberries into 3mm thick rounds. Place the strawberry slices, sugar and sumac in a bowl and toss to coat all side of the strawberries.

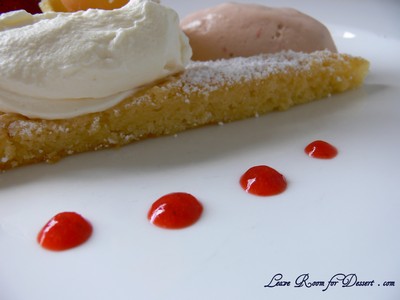
To serve, dust the sponge cake triangle with icing sugar and place in the centre of the serving plate. Place a quinell of Chantilly cream on top of sponge triangle and sprinkle the cream and some of the plate with a little sumac. Rebuild strawberry next to the sponge so bottom becomes the top. Place a small piece of squashed off cut sponge on the plate to stand the ice-cream on. With a warmed spoon, take a quinell of strawberry ice-cream and place it on top of the squashed sponge (squashed sponge should not be visible – it is just use to hold the ice-cream). Dust the tuile with icing sugar and place in the centre of the plate. (I used a piping bag to make the strawberry puree into smallish dots on the plate)

StrawberryCreamMasterChef21

Butterscotch Surprise Cake

Wednesday, November 4th, 2009

ButterscotchSurpriseCake09

In my family, we get to choose our own dinner and cake for our birthday. I tend to choose the same thing each year (most of us choose chicken schnitzel), although this year I decided on Beef Wellington (as we had chicken schnitzel a few days prior to my birthday dinner). For my cake I chose the cake I choose every year – a butterscotch surprise cake.

ButterscotchSurpriseCake07

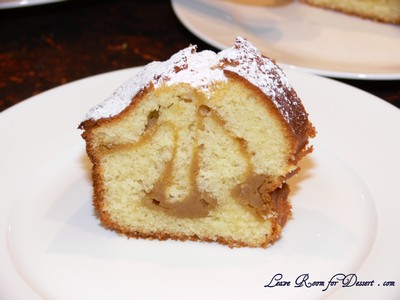
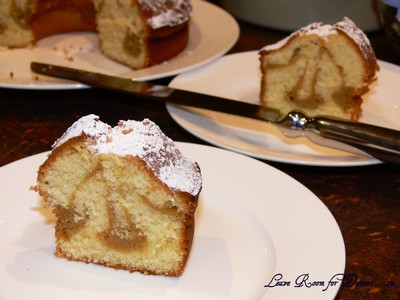
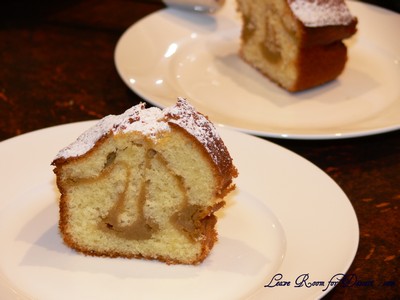
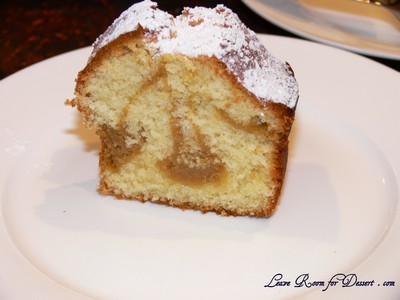
I love butterscotch, so this cake (as well as butterscotch puddings) are among my favourite. The cake consists of light and lovely vanilla cake, with a swirl or line of butterscotch in the middle.

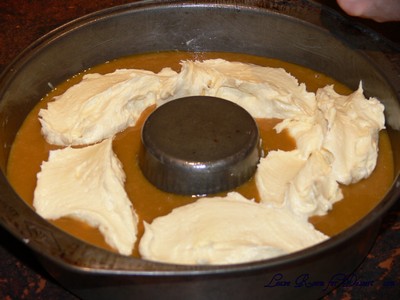
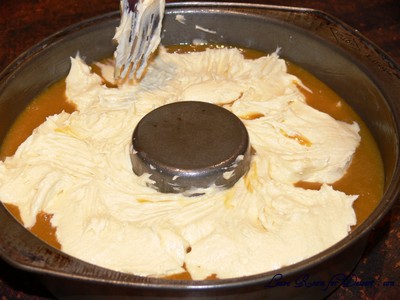
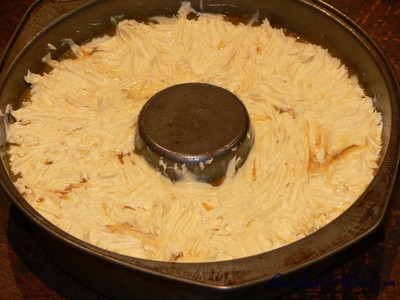
It’s a little more difficult than the recipe suggests and my mum had to do a bit of experimenting to get the layering right. If there’s not enough cake on the bottom, the butterscotch sinks, and if there’s not enough on top, you can’t cover the butterscotch. Trying to spread a thick cake mix over a reasonably liquid butterscotch is quite difficult. My mum’s trick is to place 2/3rds of the cake mix on the bottom and level the top, then add the butterscotch and spoon the remaining cake on top, spreading gently and cautiously with a fork.

ButterscotchSurpriseCake11

Let me know if you give it a go – it is my favourite!

Butterscotch Surprise Cake

Recipe from AWW Menu Planner No.5 1988

125g butter, softened
¾ cup castor sugar
2 eggs
¾ cup plain flour
½ cup self-raising flour
¼ cup milk
1 teaspoon vanilla essence

Butterscotch Filling
½ cup brown sugar, firmly packed
2 tablespoons custard powder
½ cup milk
2 teaspoons butter
1 egg

Note: Cake can be made up to 2 days ahead; store in an airtight container. This recipe is unsuitable to freeze or microwave.

Combine butter, sugar, eggs, sifted flours, milk and essence in large bowl of electric mixer, beat on low speed until combined, then on medium speed until smooth and lighter in colour.

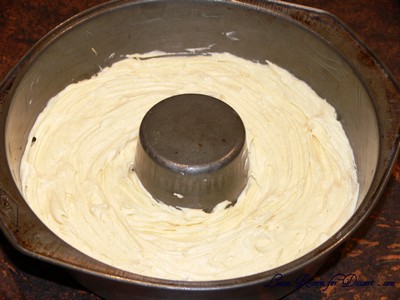
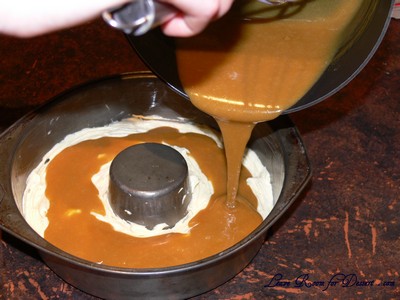
Spread half the cake mixture into greased 20cm ring pan, pour butterscotch filling evenly over mixture, top with remaining cake mixture.

ButterscotchSurpriseCake18

ButterscotchSurpriseCake19

ButterscotchSurpriseCake20

ButterscotchSurpriseCake01

ButterscotchSurpriseCake02

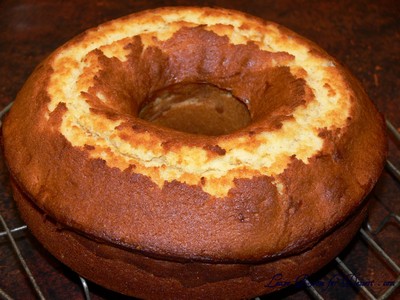
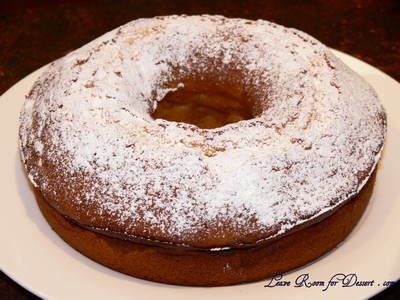
Bake in moderate oven 30 to 40 minutes, stand 10 minutes before turning onto wire rack to cool. Dust top with sifted icing sugar when cold.

ButterscotchSurpriseCake04

ButterscotchSurpriseCake05

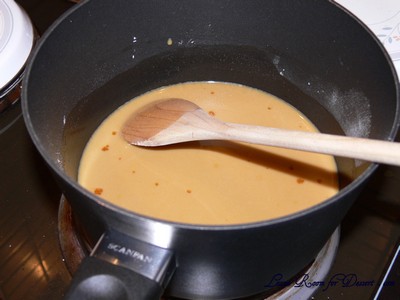
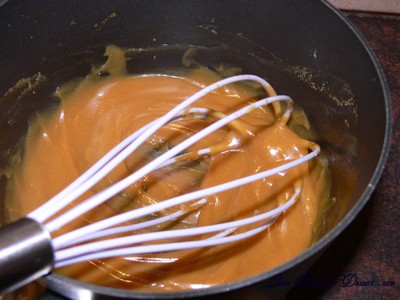
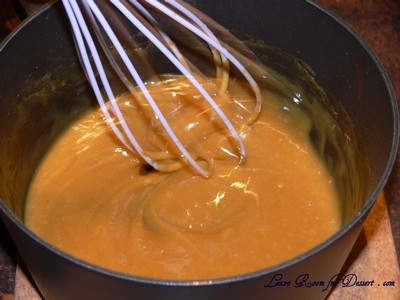
Butterscotch Filling: Combine brown sugar and custard powder in saucepan and gradually stir in milk. Stir constantly over heat until mixture boils and thickens, stir in butter, cool 5 minutes, stir in egg, use while warm.

ButterscotchSurpriseCake14

ButterscotchSurpriseCake15

ButterscotchSurpriseCake17

ButterscotchSurpriseCake08

Quay

Sunday, November 1st, 2009

Quay0905

For my recent birthday I was treated to dinner at Quay.

After deciding 6 months ago that I wanted to experience Quay, I asked to go there for my birthday, and couldn’t be happier with the choice.

Unfortunately our view of the Opera House was shielded for most of the night, as the Star Princess was docked and only left towards the end of the night. It was quite nice watching the ship leave and seeing everyone waving goodbye as they went on their holidays though.

Quay0914

There is nothing to fault Quay on, except that I couldn’t afford to go there other than very occasionally. When you see the beautiful location with the Harbour Bridge and Opera House in full view, the friendly attentive staff and of course, the exquisite creations designed by Peter Gilmore and created by chefs on the night, you understand the prices charged. ($155 for four courses, $210 for seven courses – the signature menu).

Quay0913

Nick and I decided to go with the four course menu, figuring we would try 8 different meals between us (although most were from Peter’s signature menu).

Quay0915

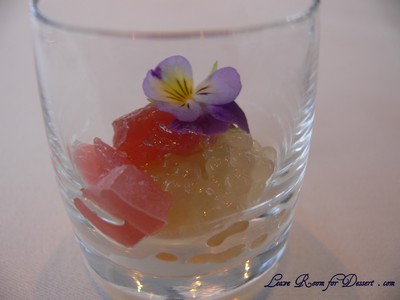
The bread with butter came out after a lovely appetizer (sashimi tuna, with tapioca and creamed-cheese – I think) with the favourite bread being the malted sourdough. Nick almost wanted to just eat bread all night :).

Quay0916

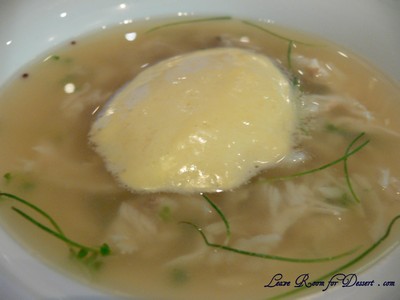
The first entrees came out. I chose the mud crab congee, which was lightly and beautifully flavoured, with nice pieces of crab and a very nice rice porridge which went surprisingly well in the congee.

Quay0917

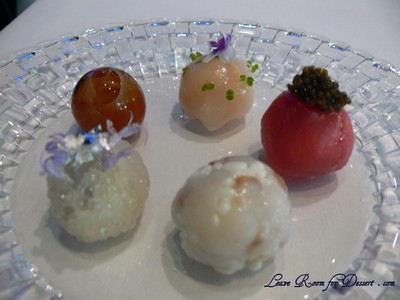
Nick chose the signature sea pearls for his first entrée (I really wanted to see them, but don’t like most sea food). They look amazing and we are both very intrigued how they are made to be (almost) perfectly spherical. Nick enjoyed most of the sea pearls, they contained sashimi tuna, aquaculture caviar, sea scallop, smoked eel, octopus, mud crab and abalone.

Quay0918

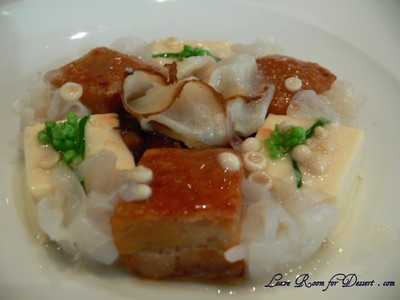
The second entrée came and it was difficult to choose who was going to have what, as we were both choosing between the same items. I got the crispy pork belly, with tofu. The pork belly was perfectly cooked, with a crispy top and the fat underneath being well rendered, and the meat was lovely and soft. It worked fantastically with the tofu, which was quite creamy, and the Japenese mushrooms.

Quay0920

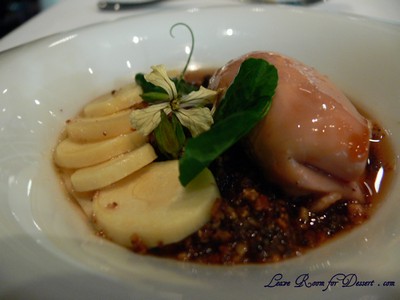
The other second entrée was the partridge-breast, which was delicately flavoured, although it did seem a bit on the rare side. Having never eaten partridge before we weren’t sure how it was meant to be cooked, but the flavours and textures were pleasant.

Quay0922

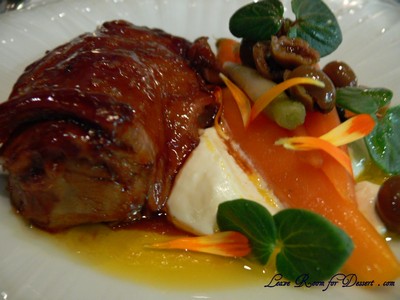
For the mains, we were also both choosing between the 24 hour slow cooked lamb and the special for the evening which was a slow roasted wagyu beef. I was very happy when the lamb was placed down in front of me. The meat fell apart with little force and was beautifully flavoured throughout, marrying well with the baby carrots and sheep’s milk fromage on the plate.

Quay0901

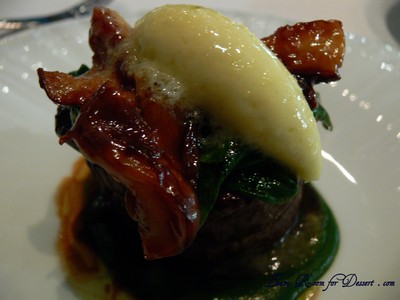
The Wagyu beef was also cooked perfectly, medium rare and with great accompaniments. The sauces and Shitake mushrooms worked beautifully with the beef.

Quay0902

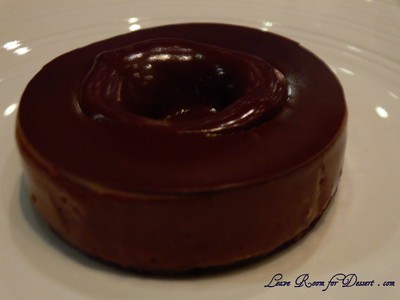
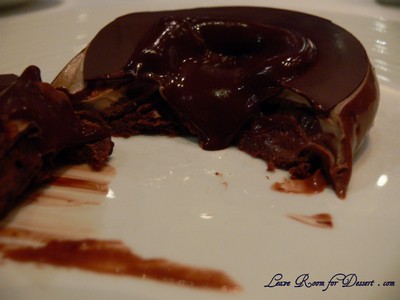
Now to dessert, and I did leave room for dessert 🙂 . Having chosen the 8 textured chocolate cake for dessert, I thought it best not filling up on the delicious bread to begin with, but rather waiting to savour dessert. The cake came out with a flat top, but when the waiter spooned on the 8th texture, a warm chocolate ganache, a well was formed in the cake. I’m not sure whether this is done by having some of the middle layers in donut shapes, with the chocolate on top being a disk which would melt with the heat of the chocolate ganache. Not sure and don’t care particularly, as this question only stayed in my thoughts until I had the first bite, then all I could think of was how great the cake was. I was especially loving the chocolate biscuits-type bits in the cake.

Quay0905

Quay0908

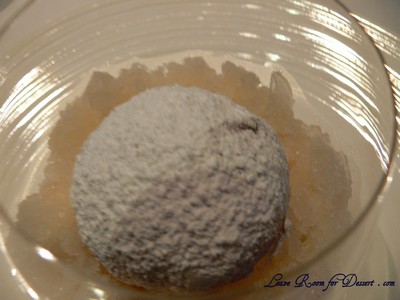
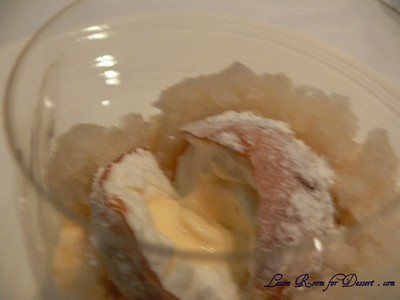
Nick chose the custard apple snow egg with jackfruit granita for his dessert, as we were both intrigued by what this would be like. The snow egg had a reasonably hard, thin toffee shell, which after cracking showed a well-made replica of an egg, with a white marshmallow next to the shell and a custard in the middle. The dessert as a whole worked very well together, and showed, along with the other meals, the dedication, time and thought that goes into these pieces of food-art.

Quay0907

Quay0909

What could top off the night better than a few fireworks 🙂

Quay09f01

P.S. I am waiting patiently for Peter Gilmore’s cookbook…