Breakfast

Acai Smoothie Bowl and Easy Muesli

Monday, November 5th, 2018

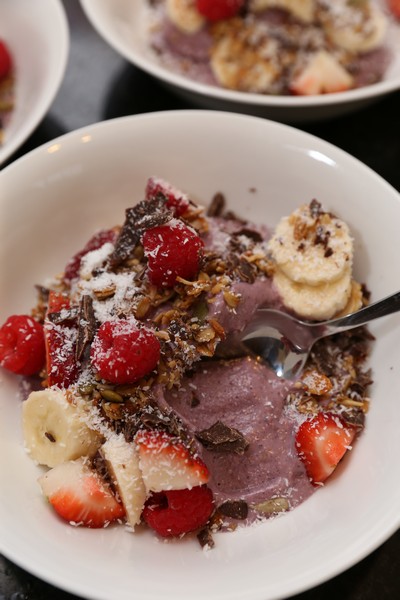
Acai Smoothie Bowl

The first time I tried an acai bowl was 4 or more years back at a Jiujitsu tournament. I wasn’t competing as I don’t do jiujitsu, but I was eating – as I’m really good at that. Since then I have seen it become super popular, with the acai puree now available frozen at supermarkets (I previously had to buy it from a frozen berry supplier). You can’t go past a café without them having some sort of acai smoothie bowl (or something similar) available as a change from your traditional bacon and egg big brekkies.

I also recently had an acai bowl at a children’s play centre. It was super tasty and I started craving it again. So we had to start experimenting. There’s never anything bad that can come from food experimentation. It’s almost always edible. Most recipes I looked up contained almost entirely fruit, although the one I had recently seemed to have oats of some sort mixed through, so I first tried adding some soaked oats (mix oats with milk overnight) to the blended fruit. It was nice, and reasonably close to what I had, although the method we are now making is much easier. The oats and almond meal help make the mixture thick, and I think would help keep you more full through the morning.

Acai Smoothie Bowl

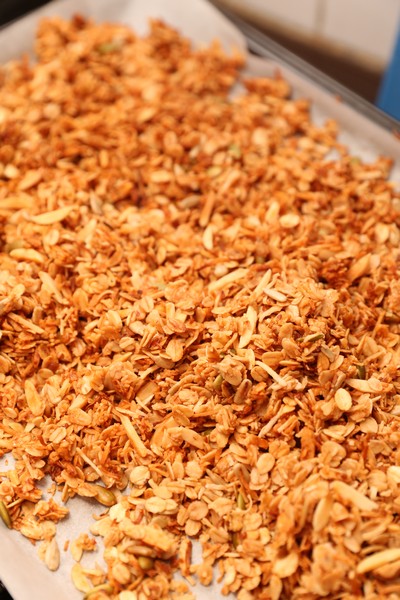
Some of the main things I found went well with the smoothie bowl was adding fresh fruit and quality muesli or granola (and a touch of dark chocolate). I am finding it very difficult to buy pre-packaged foods anymore. The additives or flavours are just not enjoyable. So I came up with an easier muesli to than my original granola. It doesn’t need chopping, doesn’t need an extra bake to get it crunchy and doesn’t use lots of expensive nuts.

Acai Smoothie Bowl

Recipe by Anita @ Leave Room for Dessert
Serves: 4 small bowls
(You can always increase or decrease amounts depending on what you have available. Just don’t add too much water to begin with)

95g frozen acai
130g frozen pineapple
160g frozen banana (approx. 2)
handful frozen blueberries (optional)
50g almond meal (or raw almonds – blend up to a powder before adding other ingredients)
80g oats
120g water (approx.)

To serve:
1-2 bananas, sliced
berries
1/2-1 cup (50g-100g) Muesli
4 pieces dark chocolate (30g), chopped
4 teaspoons desiccated coconut

Place the acai, pineapple, banana, almond meal and oats in a high powered blender. Blend on high (using spatula if needed – the Thermomix comes with a special spatula to help with this sort of thing). Add water to help it come together, making sure not to add too much. You want a thick consistency. Serve immediately with toppings.

Easy Muesli

Recipe by Anita @ Leave Room for Dessert

400g rolled oats
200g coconut, shredded
50g sunflower seeds
50g pepitas
100g slivered almonds (or chopped almonds)

120g honey
1 tablespoon cinnamon
1 tablespoon vanilla essence or extract
120g coconut oil, melted
salt

Preheat oven to 160C (fan-forced). Place baking paper on two trays.

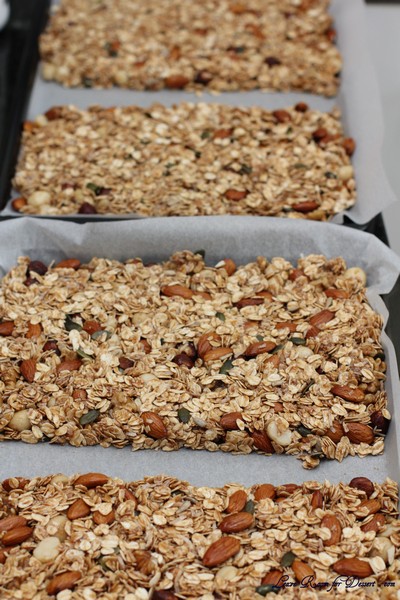
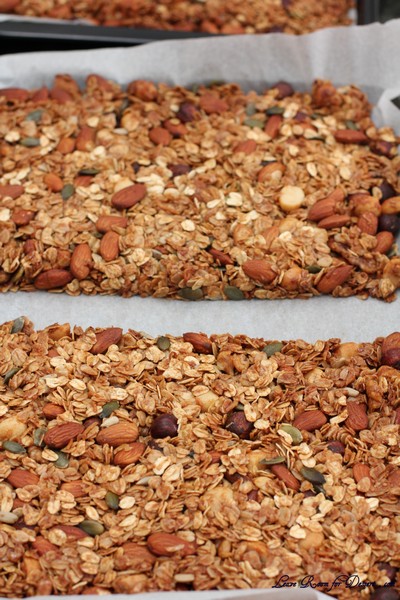
Mix together the oats, coconut, sunflower seeds, pepitas and almonds in a large bowl. Whisk together the honey, cinnamon, vanilla and coconut oil. Pour into oat mixture and stir to combine. Place on trays, spreading evenly. Cook for 15-20 minutes, stirring once or twice. Leave to cool and store in an airtight container.

Muesli

Dukkah encrusted Croissants with Bacon, Halloumi and Pumpkin

Wednesday, May 10th, 2017

Dukkah Croissants

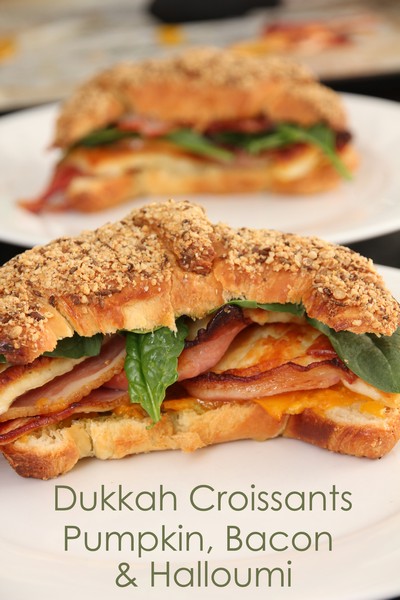
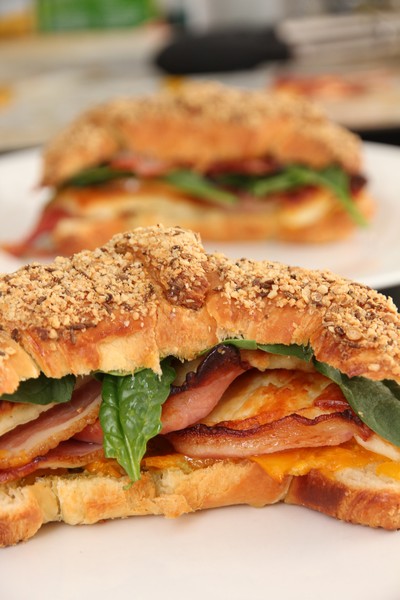
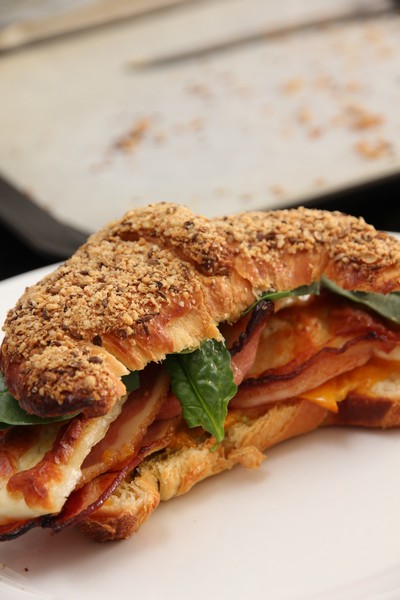
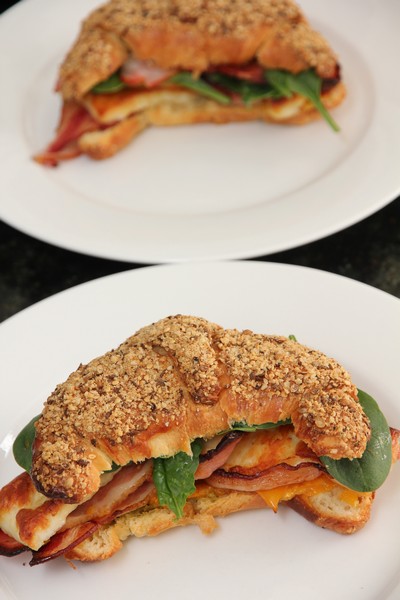
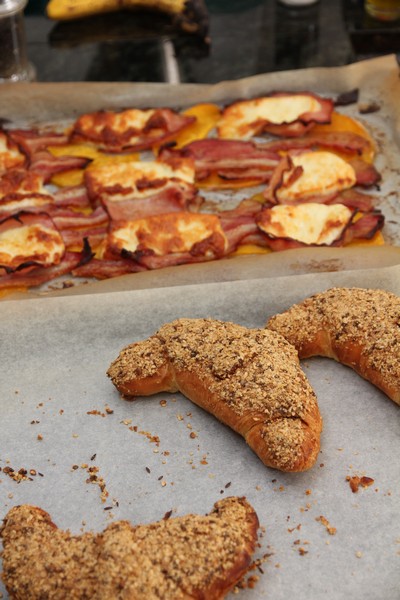
This has got to be one of the best brekkies I have had. I know that’s a big call – and probably sets expectations quite high. So maybe I should just say – give it a go, you’ll probably like it.

Dukkah Croissants Bacon Pumpkin Halloumi

I saw it in my Delicious magazine, and couldn’t wait to try it. It combines some of the most wonderful flavours, it’s sweet, salty, crispy, crunchy – a really amazing combination.

Dukkah Croissants

I had to post this now so it is easily available for Mother’s Day this weekend. I think this will be my request for Mother’s Day and my birthday every year from now on 🙂

Dukkah Croissants

Dukkah encrusted Croissants with Bacon, Halloumi and Pumpkin

Recipe adapted from Delicious magazine
Serves: 4

1/2 bunch oregano, leaves picked (optional)
400g Jap (kent) pumpkin, seeds removed, cut into 2mm-thick slices
200g halloumi, sliced
4-8 rashers streaky bacon – I used hickory smoked bacon
2 tsp olive oil
1/3 cup (40g) dukkah (bought or homemade – we used this recipe)
1 tbs dried chilli flakes (optional)
1 egg, lightly whisked
4 large croissants
2/3 cup (180g) basil pesto
100g baby kale leaves or a handful of baby spinach

Preheat the oven to 250°C. Line two baking trays with baking paper.

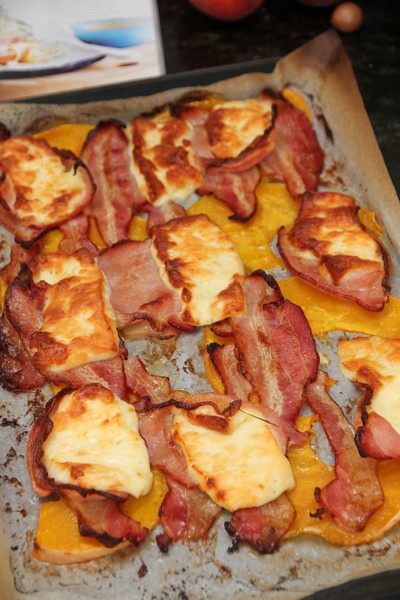
Place the oregano (if using), pumpkin, halloumi and bacon on one of the prepared trays. Drizzle over the oil and season. Roast for 15 minutes or until the pumpkin is cooked, halloumi is golden and the bacon is crisp. (I checked half way through, when I added the croissants to the oven – if the pumpkin/bacon has a lot of liquid on the tray, try and pour it off carefully).

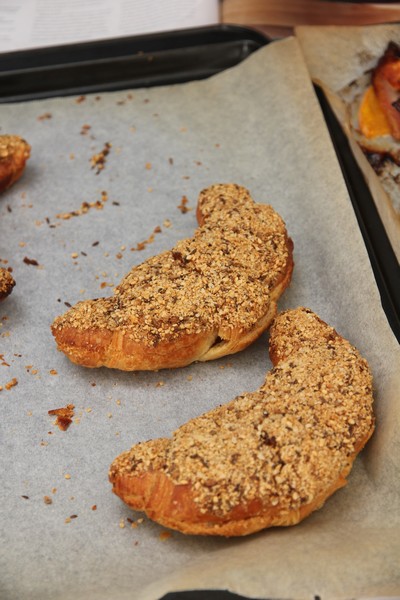
Meanwhile, combine dukkah and chilli flakes (if using) on a plate. Place the egg in a bowl and whisk. Dip each croissant into the egg mixture, then coat in dukkah mixture.

Transfer to prepared tray, then add to oven for the final 7 minutes of pumpkin cooking time and bake until crisp and golden.

To serve, slice the croissants horizontally and top with a spoon of pesto. Layer in the pumpkin, halloumi, oregano, bacon and kale/spinach leaves. Serve warm.

DukkahCroissants01

DukkahCroissants02

DukkahCroissants03

Pumpkin Fritters and South African Style Cooked Pumpkin

Tuesday, March 21st, 2017

Pumpkin Fritters

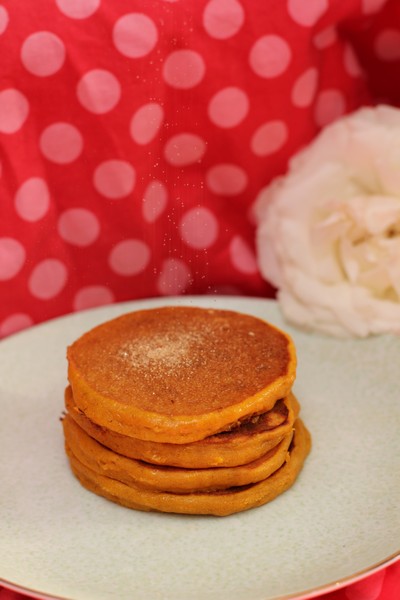
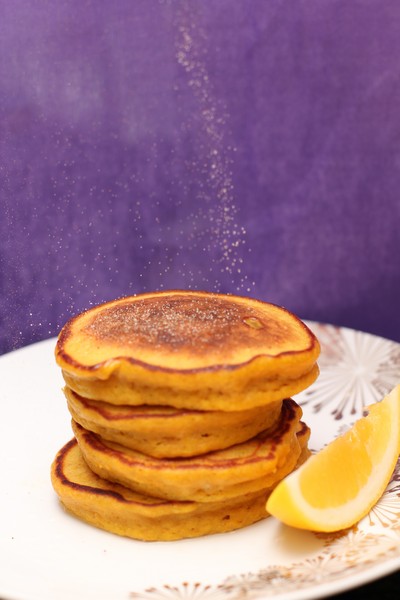
These sweet pumpkin fritters have been a real hit with my daughter and I. Growing up in South Africa, Nick was used to these delights as a breakfast, using up leftover South African style cooked pumpkin which they would have eaten the day prior with boerewors and putu pap with corn and tomato salsa. It’s taken a long time to introduce them to us though, and it makes for a great alternative to pikelets for breakfast.

Pumpkin Fritters

The combination of the sweet pumpkin and cinnamon is really lovely. The recipe is quite simple, I think the hardest thing about the fritters is making sure they are cooked through and don’t burn. We have recently just been making the cooked pumpkin solely for breakfast the next morning. As there is no stirring involved, it is easy to just set a timer for every 15 minutes to check it isn’t burning (it takes about an hour to cook the pumpkin, and you can always make less or more depending on how much pumpkin you have).

Pumpkin Fritters

Pumpkin Fritters

Makes: 18 pikelet sized fritters
Serves: 2-4

450-500g South African Style cooked pumpkin (recipe below)
1/2 cup self raising flour
1/2 cup plain flour
pinch salt
1/2 teaspoon cinnamon
2 eggs
butter, for pan
lemon juice and cinnamon sugar, to serve

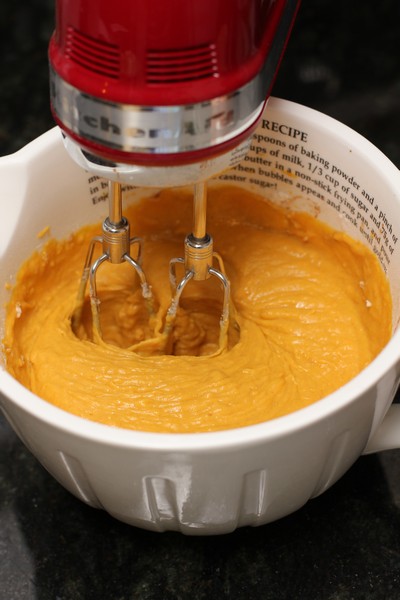
Mix the pumpkin, flours, salt, cinnamon and eggs in a medium bowl using an electric mixer until combined.

PumpkinFritters06

PumpkinFritters07

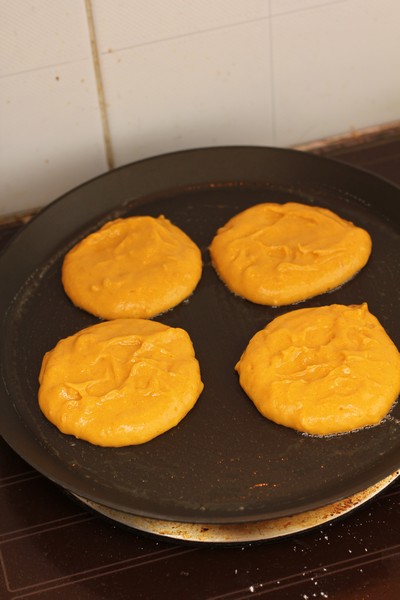
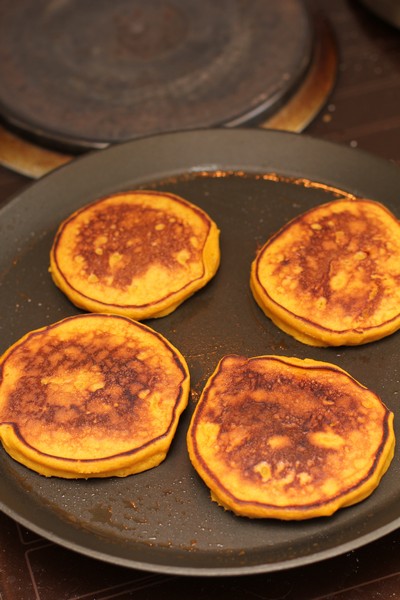
Heat a non stick crepe pan over medium heat. Place a small amount of butter in the pan and wipe with a paper towel. Place heaped spoonfuls of mixture onto the pan, cooking for a few minutes each side until cooked through. (The mixture is thicker than normal pikelets, so they take a bit longer to cook. Be careful not to burn the fritters, removing from heat or turning it down as necessary).

PumpkinFrittas08

PumpkinFrittas09

PumpkinFrittas11

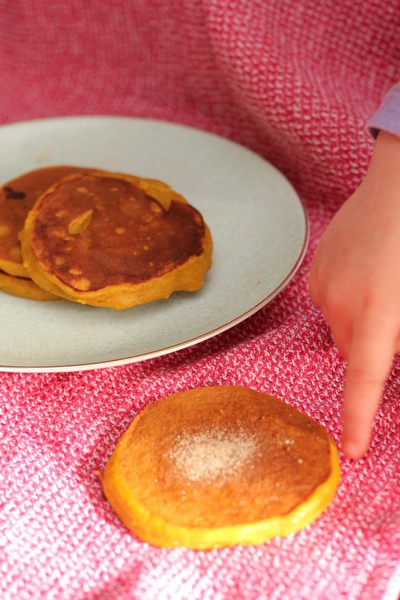
You may wish to keep the earlier fritters warm in a low oven whilst you cook the remaining fritters. Serve with generous amounts of lemon juice and cinnamon sugar

South African Style Cooked Pumpkin

Recipe by Nick and Anita @ Leave Room for Dessert

Cooking Time: 1 hour
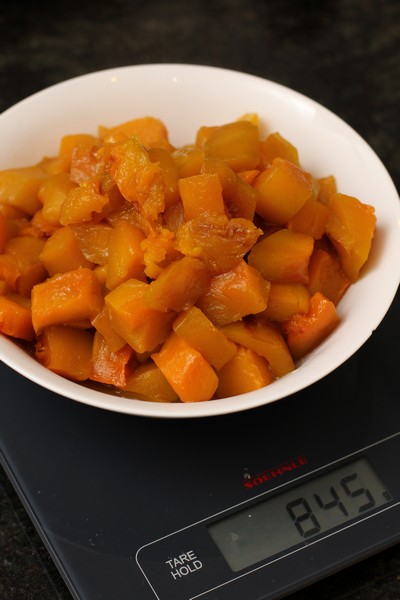
Makes approx 840g cooked pumpkin

1.1 kg jap pumpkin, cut into 2-3cm cubes
1/4 – 1/2 cup sugar
10g butter
pinch salt

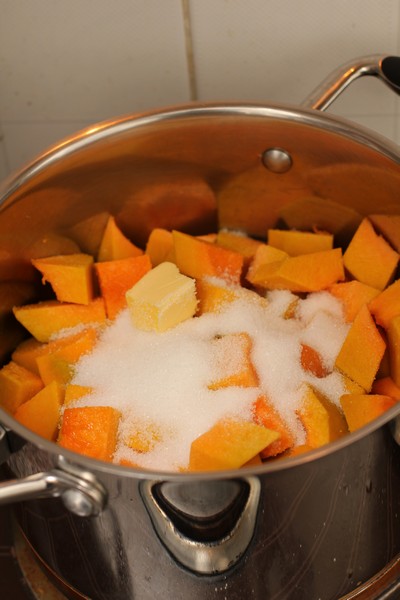
Place the pumpkin in a medium saucepan, followed by the sugar, butter and salt.
PumpkinFritters01

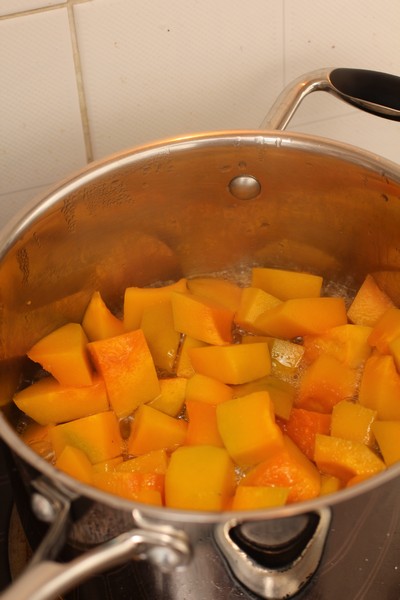
Cook over medium/high heat for approximately 15 minutes with the lid on. At this stage there should be liquid coming out of the pumpkin. Don’t stir.
PumpkinFritters02

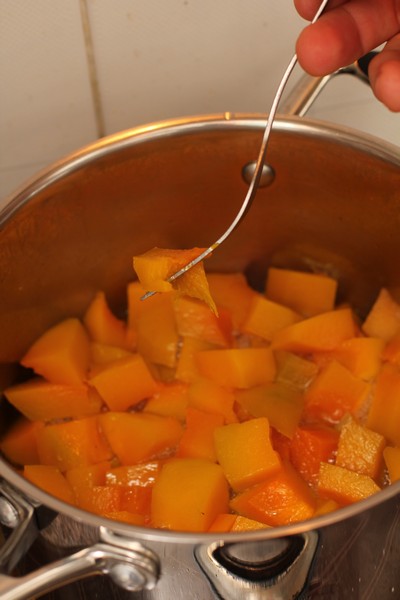
Turn down to just above low and cook for a further 15 minutes. Don’t stir.
The pumpkin should be soft at this stage.
PumpkinFritters03

Take lid off and cook for a further 15 minutes. Check. Don’t stir.
Cook a further 15 minutes to try and get the liquid absorbed or evaporated.
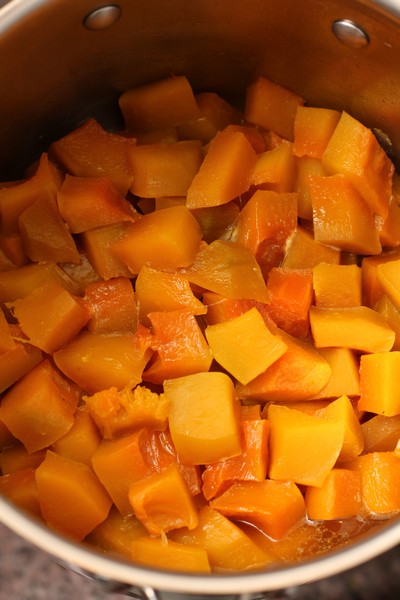
PumpkinFritters04

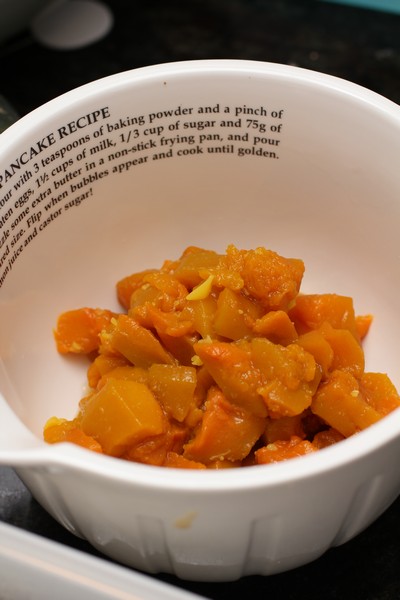
At this stage, most or all of the liquid should be gone.
Serve warm as a side dish, or cool and use for pumpkin fritters
PumpkinFritters05

Bircher Muesli

Tuesday, February 28th, 2017

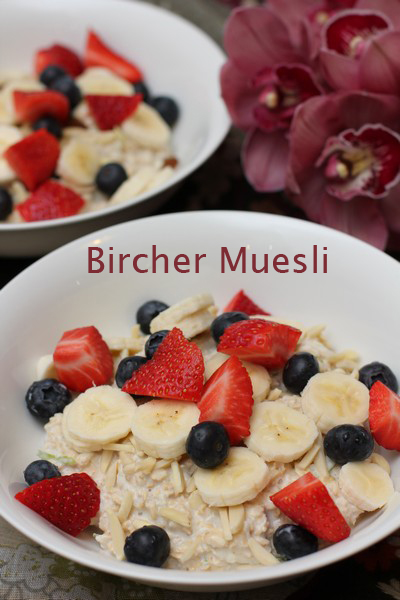
Bircher Muesli

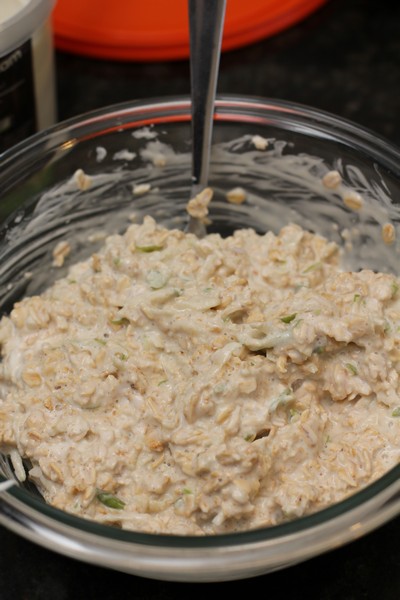
I’ve never been a huge fan of muesli or porridge, I think partly due to not liking dried fruits, which would add a lot of flavour. On a recent holiday I tried some bircher muesli that was being served at breakfast, and it was quite nice. So when I arrived home, I tried to find a recipe that tasted similar.

Bircher Muesli

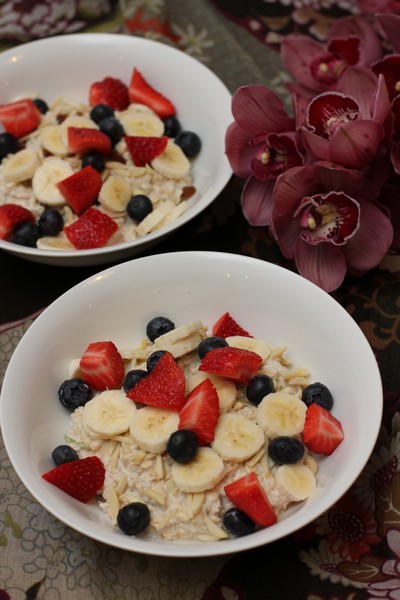
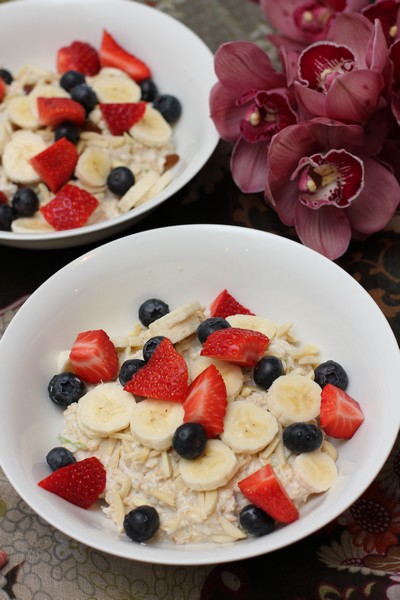
Most recipes contained some sort of juice, which wasn’t practical for me as I don’t have juice in the fridge much, but I do have milk, so this recipe worked well. I think the combination of banana and blueberries on top works wonderfully for making this a bit more interesting. Granola, poached fruit, stewed rhubarb or a berry sauce would also pair lovely with this healthy start to the day.

Bircher Muesli

Recipe adapted from Sanitarium

Serves: 3-4

1 1/2 cups rolled oats
1 green apple, grated
1 cup milk
2 tablespoons maple syrup
1 cup vanilla yoghurt (or yoghurt of your choosing)

Toppings to serve, as desired.
e.g. blueberries, banana, strawberries, almonds, raisins

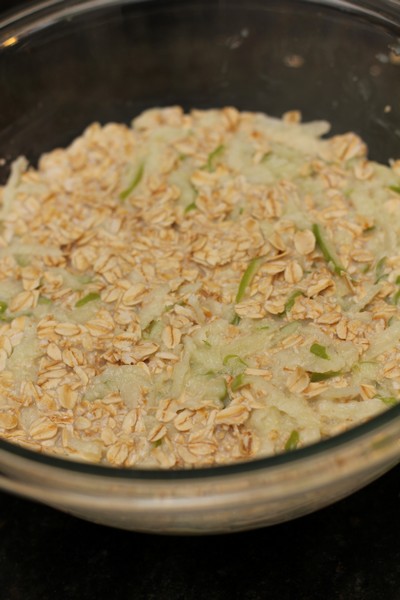
Combine oats, apple, milk and maple syrup. Refrigerate overnight. Stir in the yoghurt and serve with your choice of toppings.

BircherMuesli01

BircherMuesli02

BircherMuesli03

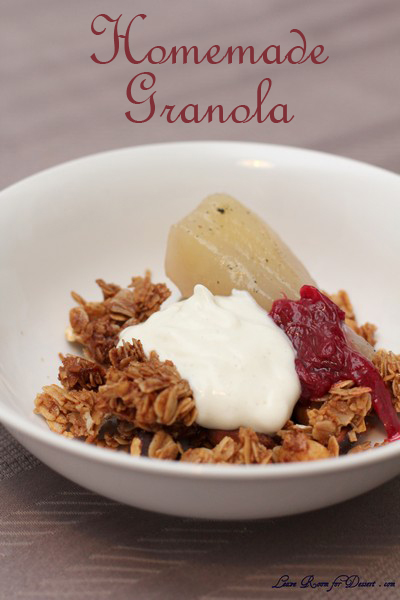
Anita’s Homemade Granola

Tuesday, July 15th, 2014

I’ve never been much of a fan of most breakfast type cereals, including muesli and porridge, but one day Thomas Dux was handing out little trials of granola and yoghurt. Both tasted amazing, and their marketing had worked brilliantly – I was in the door buying granola and yoghurt (the yoghurt I had liked is no longer being stocked, but I have now come across the FiveAM yoghurt which I love, and I am trying to make my own yoghurt as well).

The granola was Irrewarra Sourdough’s granola, and it is strangely addictive. So addictive that I was sad each time I finished a pack. So I decided it was time to make my own and I tried many different recipes on the internet. Many were not sweet enough, others fell apart easily, and some just lacked a bit of flavour.

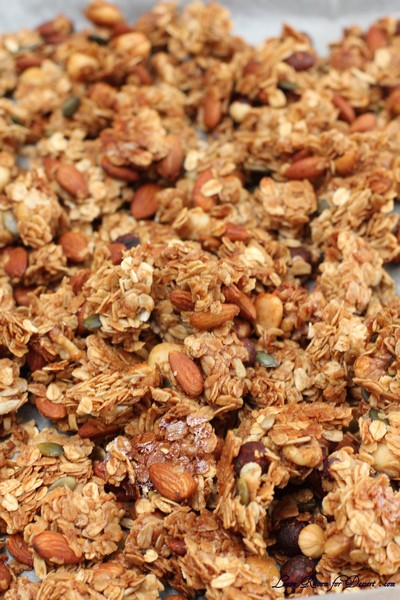
I ended up coming up with my own version, which is now loved by my family, so much, that when a batch is finished everyone gets sad…

Anita’s Homemade Granola

Recipe by Anita @ Leave Room for Dessert

150g honey
1 tablespoon ground cinnamon
1 tablespoon vanilla essence
1 vanilla bean, seeds scraped (optional)
1/4 teaspoon salt
140g (3/4 cup) vegetable oil

500g (5 cups) rolled oats
400g (3 cups) mixed nuts (I use what I have in the cupboard, almond, hazelnuts, macadamias, pecan, walnuts etc), chopped
40g (1/4 cup) sunflower seeds
40g (1/4 cup) pepitas (pumpkin seeds)
65g (1 cup) shredded coconut
40g (1/4 cup) hemp seeds

Preheat oven to 150C (fan forced). Line two baking trays with baking paper.

Mix together the oats, nuts, seeds and coconut in very large bowl.

Whisk together the honey, cinnamon, vanilla essence and vanilla bean seeds (if using) and salt in a bowl until well combined. Add the oil and whisk again until well combined.

Pour the honey mixture into the oat mixture and stir with a spoon or spatula until well combined.

Divide the mixture onto the two trays and push to fill the tray. Once the mixture has filled the tray, make a line in the centre of each (this helps make the cooking more even). Make sure to press the mixture down firmly.

If you want smaller pieces more like a muesli,

Bake for 15- 20 minutes, stirring the granola occasionally (every 5-10 minutes) to ensure even cooking. Once cooked to your liking, turn the temperature down to very low and allow the granola to dry in the oven 10min at 100C – this will make it store longer.

If you want large chunks:

Bake for 20-30 minutes or until the granola is nice and golden (checking and rotating trays after 10 minutes). Wait until the granola has cooled completely before breaking into edible sized pieces.

When breaking the pieces apart, you may find the edges break easily, but the centre portion may have some give or stickiness. If this is the case, put the broken pieces back in the oven for 5-10 minutes. Again, wait until completely cooled before transferring to a container for storage.

Poached Pears

Recipe adapted from Taste

4 brown pears, free from blemishes and bruises, peeled, cored and cut into quarters
lemon juice (optional)
1 cup sugar
3 cups water
1 vanilla bean, split, seeded

Place sugar and water in a saucepan over medium heat and stir until sugar has dissolved. Increase heat and simmer for 5 minutes.

Add pears and a split, seeded vanilla bean. Allow the pears to simmer, covered with a square of baking paper, in the liquid for 10-15 minutes or until tender. Turn occasionally to ensure even cooking. Serve pear warm or cooled with a little poaching liquid.

Stewed Rhubarb

This made quite a tart rhubarb, although when served with sweet granola and poached pears it was nice. It you are not serving with other sweet ingredients, more sugar will be required.

100g rhubarb
50g sugar (more may be required, it depends on the tartness of your rhubarb)

Cut rhubarb into 5cm lengths (approx), and place in a saucepan with sugar. Cook 5-10 minutes or medium heat until sugar is dissolved and rhubarb is tender.

Cinnamon Rolls – Daring Bakers Challenge June 2014

Friday, June 27th, 2014

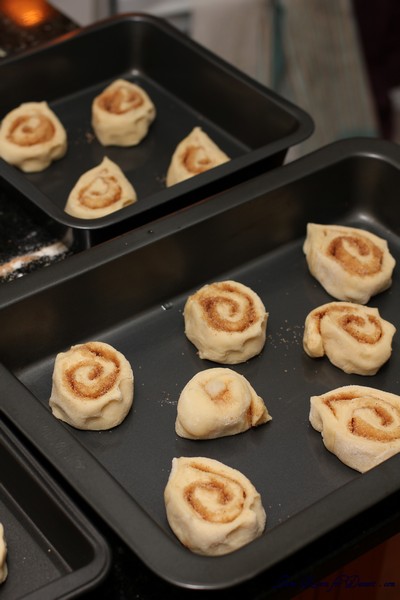
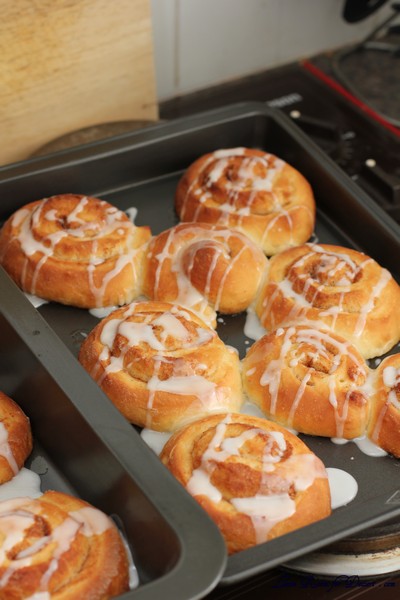
This month the Daring Bakers kept our creativity rolling with cinnamon bun inspired treats. Shelley from C Mom Cook dared us to create our own dough and fill it with any filling we wanted to craft tasty rolled treats, cinnamon not required!

Cinnamon rolls (or scrolls) have been a favourite treat for my family since I tried it a year or two ago. They come out at special holidays, or family breakfasts.

I’m very happy with my current recipe, although as past experiences would confirm, sometimes it does pay to try another recipe. I once tried a new banana bread recipe, only to be asked – Why would you try another one? Your one is great, we don’t need to try another recipe. Only to hear exclamations of happiness for the new recipe.

This recipe for cinnamon rolls differs slightly to my usual one, the dough is slightly more cake like, likely due to the addition of egg. There is also no butter in the middle of the scroll, although this doesn’t seem to make a huge difference to the overall flavour or consistency.

By the end of the day all the rolls were eaten, but I doubt they would have kept well, as some of the ones left to the afternoon had started losing their freshness. Overall the flavour and consistency were lovely. Although I am likely to stick to my original recipe for the future.

There were a few other recipes suggested for this months challenge, including a roasted banana cinnamon bun with maple glaze…. now that I have to try…

Cinnamon Buns

(from The Bread Baker’s Apprentice by Peter Reinhart)
Makes 8-12 large or 12-16 smaller buns

Ingredients
6½ tablespoons (100 ml) (3 oz) (90 gm) granulated sugar
1 teaspoon (5 ml) (6 gm) salt
5½ tablespoons (85 ml) (2¾ oz) (80 gm) shortening, unsalted butter or margarine, at room temperature
1 large egg, slightly beaten
1 teaspoon (5 ml) lemon extract OR 1 teaspoon (5 ml) grated lemon zest (I used vanilla essence)
3½ cups (840 ml) (16 oz) (450 gm) unbleached bread (or all-purpose/plain) flour
2 teaspoons (10 ml) (¼ oz) (6 gm) instant yeast (active dry worked as well)
1 1/8 – 1 ¼ cups (270-300 ml) whole milk or buttermilk, at room temperature
½ cup (120 ml) (3½ oz) (100 gm) cinnamon sugar (6½ tablespoons (100ml) (3 oz) (90 gm) granulated sugar plus 1½ tablespoons (20 ml) (1/3 oz) (10 gm) ground cinnamon)

Directions:

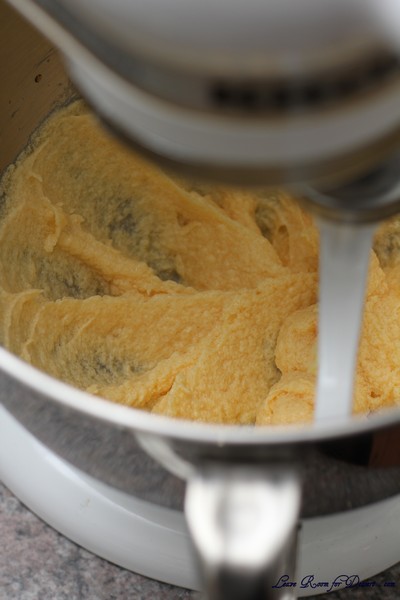
In a stand mixer fitted with the paddle attachment, cream together sugar, salt and shortening (though it is not difficult to do by hand, using a strong spoon).
Add the egg and lemon extract to the creamed sugar and shortening and mix together until smooth.

Add the flour, yeast and milk to the mixer and mix on low speed until the dough begins to form a ball.
At this point, switch to the dough hook attachment and knead for 10 minutes (if kneading by hand, you will probably need to do so for closer to 12 – 15 minutes). The dough will be silky and supple, but not overly sticky. You may need to add a touch of flour if your dough is too sticky – that is okay.

Lightly oil a bowl, turn the kneaded dough out into it, turning to coat, then cover the bowl with plastic wrap.
Allow the dough to rest (ferment) until it has doubled in size, approximately 2 hours.

Once the dough has rested and risen, you are ready to shape the cinnamon buns. Prepare your a sheet pan by lining it with parchment paper.
Spray your work surface lightly with cooking spray and turn the dough out onto the work surface.
Using a rolling pin, roll the dough, into a rectangle about 2/3 an inch (15 mm) thick, 14 inches (350 mm)wide and 12 inches (300 mm) long (for large buns) (or 18 inches (450 mm) wide by 9 inches (230 mm) long for smaller ones). You may need to sprinkle the dough and/or work surface with a bit of flour to keep the dough from sticking. This is okay.
Sprinkle the cinnamon sugar filling over the surface of the dough.

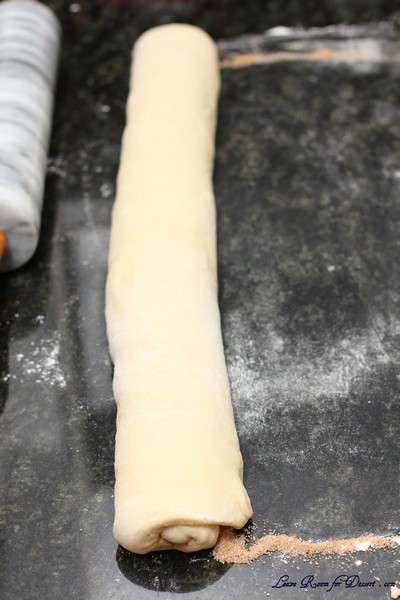
Starting with a long end, roll the dough, creating a spiral, into a log shape, making sure to end with the seam side down.

Cut the dough into pieces approximately 1¾ inches (45 mm) thick (for large buns) (1¼ inch (30 mm) for smaller buns).
Place buns approximately ½ inch (15 mm) apart on the prepared pan. They shouldn’t be touching at this time.

Allow the shaped buns to proof at room temperature for 75 – 90 minutes until they have nearly doubled in size. They will now be touching each other. If you are not planning on baking the buns the same day as you are preparing them, you can place them into the refrigerator after they are shaped (before this rise) for up to 2 days. If you do so, you will need to allow them to return to room temperature prior to baking, which means removing them from the refrigerator about 3 or 4 hours before baking.
Preheat the oven to moderate 350°F/180°C/gas mark 4 degrees at the end of this proofing time.
Bake the buns for 20 – 30 minutes, until golden brown
Allow the buns to cool for 10 minutes in the pan, then drizzle with glaze (recipe below). Remove the buns from the pan to a cooling rack and allow them to cool for at least 20 minutes before eating.

White fondant glaze for cinnamon buns:
(also from The Bread Bakers’ Apprentice)

Sift 4 cups (500 gm) (17½ oz) of confectioners’ (icing) sugar into a large bowl. Add 1 teaspoon (5 ml) of lemon or orange extract and between 6 tablespoons to ½ cup (90 to 120 ml) warm milk, whisking well until all of the sugar is dissolved. (Add the smaller amount of milk first, whisking briskly, then add slowly until you have the consistency you want for drizzling over the buns.)

Notes:
You can replace the lemon extract/zest with the extract/flavoring of your choice. I usually use vanilla extract.
This dough is silky, smooth and so lovely to work with, and the resulting buns are light and so incredibly easy to eat. I have made these several times, with traditional cinnamon-sugar filling and also with a fruit compote for a fresh, summery treat. Delicious!

Sourdough – Update from December Daring Bakers Challenge

Thursday, January 26th, 2012

I made the sourdough from the December Daring Bakers Challenge very soon after my last post about it. Although it did not really turn out particularly well, so I sort of held back on this post. And the next challenge is to be posted in tomorrow!

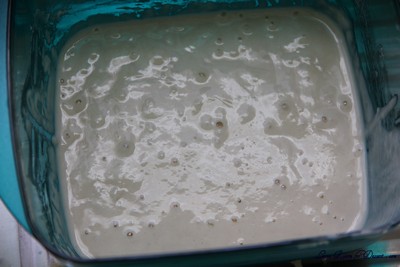
Back to the sourdough. After having the sourdough starter go mouldy whilst I was sick, I made sure this one didn’t. The starter was nice and bubbly and certainly smelt quite sour, so I was hoping I had nice active yeast in the mix.

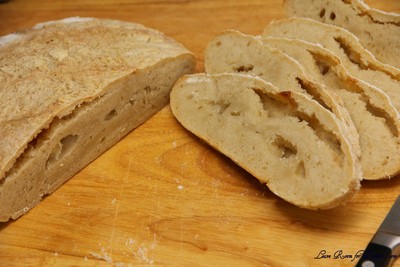
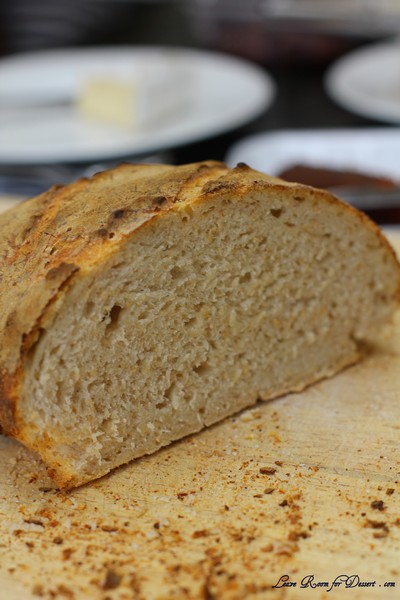
My First Sourdough - not so great looking

My first bread came out of the oven – and it hadn’t risen as much as I had hoped, I still crossed my fingers, although after cutting it through, we found it was still quite dough-y inside. Nice flavour, but texture was all wrong. I still have the starter dough though, and Nick has been making bread every weekend with it – although adding yeast to it – and it has been rising quite well. I wish I could part more information for you on troubleshooting, although as a newbie myself, I am just going to try and keep the starter and continue to feed it and hope the yeast becomes happier. At the moment I have it in the fridge, as I am a little scared I will forget about it on the bench and it will mould again.

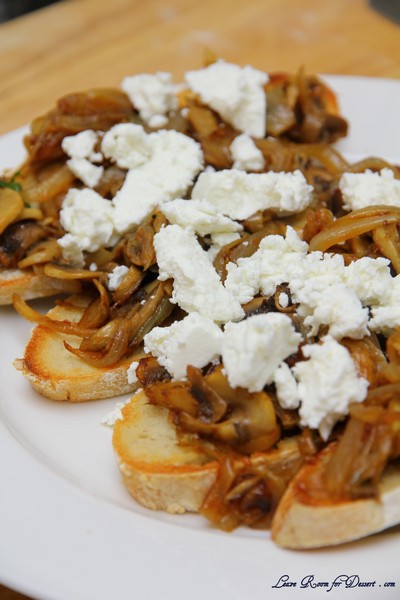
Even though the texture of this first bread was not so great, I still made the mushrooms from the given recipes and added some goats cheese on top, and you could hardly notice the bread’s heaviness once it was grilled and had a lovely topping on it.

Nick's sourdough - with a little yeast added

Thanks to our host (Jessica of My Recipe Project) for last month’s challenge – we are finally making sourdough – and I might just have the confidence to make more starter doughs…? 🙂

French Country Bread

Servings: 1 large loaf plus extra wheat starter for further baking

Wheat Starter – Day 1:
Ingredients
4 1/2 tablespoons (70 ml) (40 gm/1 ½ oz) stoneground breadmaking whole-wheat or graham flour
3 tablespoons (45 ml) water
Total scant ½ cup (115 ml) (3 oz/85 gm)

Directions:
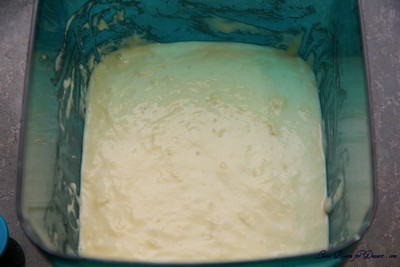
1. In a Tupperware or plastic container, mix the flour and water into a paste.
2. Set the lid on top gently, cover with a plastic bag, to prevent messes in case it grows more than expected!
3. Set somewhere warm (around 86 F if possible). I sometimes put mine on a windowsill near a radiator, but even if it’s not that warm, you’ll still get a starter going – it might just take longer.

Wheat Starter – Day 2:
Ingredients
4 1/2 tablespoons (70 ml) (40 gm/1 ½ oz) stoneground breadmaking whole-wheat or graham flour
3 tablespoons (45 ml) water
scant 1/2 cup (115 ml) (3 oz/85 gm) starter from Day 1
Total scant cup (230 ml) (6 oz/170 gm)

Directions:
1. Stir the flour and water into the mixture from Day 1, cover, and return to its warm place.

Wheat Starter – Day 3:
Ingredients
4 1/2 tablespoons (70 ml) (40 gm/1 ½ oz) stoneground breadmaking whole-wheat or graham flour
4 teaspoons (20 ml) water
scant 1 cup (230 ml) (6 oz/170 gm) starter from Day 2
Total 1⅓ cup (320 ml) (230 gm/8-1/10 oz)

Directions:
1. Stir the flour and water into the mixture from Day 2, cover, and return to its warm place.

Wheat Starter – Day 4:
Ingredients
3/4 cup plus 1½ tablespoons (205 ml) (120 gm/4 ¼ oz) unbleached all-purpose flour
1/2 cup less 4 teaspoons (100 ml) water
1⅓ cup (320 ml) (230 gm/8 oz) starter from Day 3
Total scant 2⅔ cup (625 ml) (440 gm/15½ oz)

Directions:
1. Stir the flour and water into the mixture from Day 3, cover, and return to its warm place. At this point it should be bubbling and smell yeasty. If not, repeat this process for a further day or so until it is!

French Country Bread
Stage 1: Refreshing the leaven
Ingredients
1 cup less 1 tablespoon (225 ml) (160 gm/5 ⅔ oz) wheat Leaven Starter
6 tablespoons less 1 teaspoon (85 ml) (50 gm/1¾ oz) stoneground bread making whole-wheat or graham flour
1 cup plus 2 teaspoons (250 ml) (150 gm/5 ⅓ oz) unbleached all purpose flour
1/2 cup (120 ml) water
Production Leaven Total 2¾ cups plus 4 teaspoons (680 ml) (480 gm /1 lb 1 oz)

Directions:
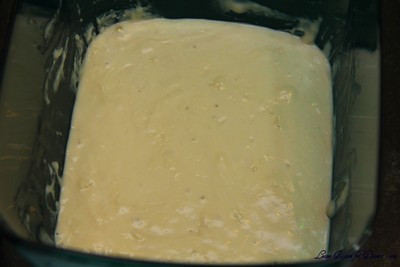
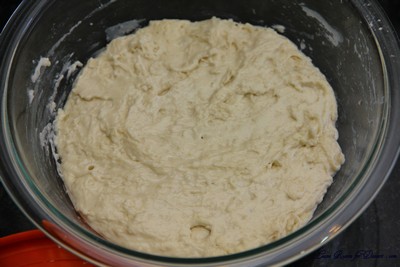
1. Mix everything into a sloppy dough. It may be fairly stiff at this stage. Cover and set aside for 4 hours, until bubbling and expanded slightly.

French Country Bread

Stage 2: Making the final dough
Ingredients
3/4 cup less 1 teaspoon (175 ml) (100 gm/3 ½ oz) stoneground breadmaking whole-wheat or graham flour, plus more for dusting
2 cups plus 2 tablespoons (510 ml) (300gm/10 ½ oz) unbleached all-purpose flour
1¼ teaspoons (7½ ml) (7 gm/¼ oz) sea salt or ⅔ teaspoon (3⅓ ml) (3 gm/⅛ oz) table salt
1 ¼ cups (300 ml) water
1 ¾ cups (425 ml) (300 gm/10 ½ oz) production leaven – this should leave some (1 cup) for your next loaf.
Total 6 cups less 2 tablespoons 1415 ml (1007 gm/35 ½ oz/2 lb 3½ oz)

Directions:
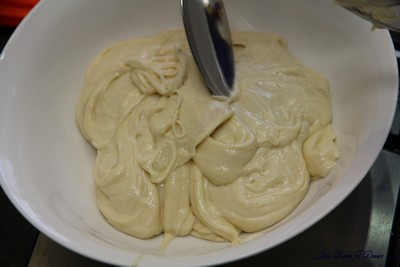
1. Mix the dough with all the ingredients except the production leaven. It will be a soft dough.
2. Knead on an UNFLOURED surface for about 8-10 minutes, getting the tips of your fingers wet if you need to. You can use dough scrapers to stretch and fold the dough at this stage, or air knead if you prefer. Basically, you want to stretch the dough and fold it over itself repeatedly until you have a smoother, more elastic dough.
See my demonstration here: http://www.youtube.com/watch?v=OqS3raEGdwk
3. Smooth your dough into a circle, then scoop your production leaven into the centre. You want to fold the edges of the dough up to incorporate the leaven, but this might be a messy process. Knead for a couple minutes until the leaven is fully incorporated in the dough. See my demonstration here: http://www.youtube.com/watch?v=UPO97R4iO4U

production leaven

4. Spread some water on a clean bit of your work surface and lay the dough on top. Cover with an upturned bowl, lining the rim of the bowl with a bit of water. Leave for an hour, so that the gluten can develop and the yeasts can begin to aerate the dough.
5. Once your dough has rested, you can begin to stretch and fold it. Using wet hands and a dough scraper, stretch the dough away from you as far as you can without breaking it and fold it back in on itself. Repeat this in each direction, to the right, towards you, and to the left. This will help create a more ‘vertical’ dough, ready for proofing. See my demonstration here: http://www.youtube.com/watch?v=rDoJRCMfclE
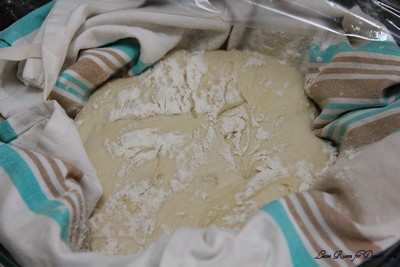
6. Heavily flour a banneton/proofing basket with whole wheat flour and rest your dough, seam side up, in the basket. Put the basket in a large plastic bag, inflate it, and seal it. Set aside somewhere warm for 3-5 hours, or until it has expanded a fair bit. It is ready to bake when the dough responds to a gently poke by slowly pressing back to shape.

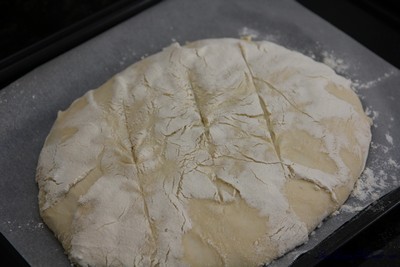
7. Preheat the oven to hot 425°F/220°C/gas mark 7. Line a baking sheet with parchment, then carefully invert the dough onto the sheet. I like to put the baking sheet on top of the basket, then gently flip it over so as to disturb the dough as little as possible. Make 2-3 cuts on top of the loaf and bake for 40-50 minutes, reducing the temperature to moderately hot 400°F/200°C/gas mark 6 after 10 minutes.

8. Cool on a cooling rack.

Garlic and Oregano Roasted Mushrooms and Pancetta on Toasted Sourdough

Servings: 4

Ingredients
4 large or 8 medium field mushrooms, sliced
2 red onions, peeled and cut into wedges
2 garlic cloves, peeled and sliced
4 sprigs oregano, leaves only
100 gm (3 ½ oz) pancetta, cubed (optional)
2 tablespoons (30 ml) extra virgin olive oil
4 slices sourdough bread
butter, for spreading
freshly ground black pepper
sea salt

Directions:
1. Preheat the oven to moderately hot 400°F/200°C/gas mark 6. Place the mushrooms on an oiled baking sheet, with onion wedges scattered beneath them. Sprinkle over the garlic, oregano, and pancetta, drizzle with olive oil and season with black pepper and sea salt. Roast for 25 minutes until the mushrooms are tender.
2. Toast your bread in the toaster. Butter the toast, and then pile your mushroom mixture on top.

A Twist: Instead of roasting your mushrooms, you can also sauté them in a pan and, just before serving, stir in a dash of cream for a rich, warm treat!

Croissants – Daring Bakers Challenge September 2011

Tuesday, September 27th, 2011

The Daring Bakers go retro this month! Thanks to one of our very talented non-blogging members, Sarah, the Daring Bakers were challenged to make Croissants using a recipe from the Queen of French Cooking, none other than Julia Child!

If I could eat croissants for breakfast (almost) every morning, I think that would be a great way to start the day.

Seeing as though this recipe was quite long and involved (with many rest periods), it meant I would have to settle for having fresh (you can’t get any more fresh) croissants for morning tea.

And what better way than with a picnic? Almost all other weekends this month have been lovely, and we have had a few family picnics out in the backyard. This last weekend, the rain poured down non-stop and the temperature dropped, so we set up picnic rugs in the lounge room in front of the fire and ate croissants indoors, appreciating the dry and the warmth.

The croissants were delicious. Absolutely amazing. The recipe was easy to follow, although was time consuming because of the resting periods for the dough/pastry.

I think I may have made the butter a little too warm while working it, causing a few butter chunks to be seen through the pastry, rather than a smooth layer, although you could not notice it once baked.

I will definitely be making these again, when my second-hand/new (new for me) large granite bench-top is installed – I’m super excited!

Here is a good video of Julia Child making croissants, it should help along with the photos below.

Thanks to our host for this month’s challenge, I’m so glad I have made croissants again – with a great recipe.

P.S. I made double quantity (didn’t really change the technique until I came to step 42, where I cut it into 4)

Croissants

Servings: 12 croissants

Ingredients
¼ oz (7 gm) of fresh yeast, or 1¼ teaspoon (6¼ ml/4 gm) of dry-active yeast (about ½ sachet)
3 tablespoons (45 ml) warm water (less than 100°F/38°C)
1 teaspoon (5 ml/4½ gm) sugar
1 3/4 cups (225 gm/½ lb) of strong plain flour (I used Polish all-purpose flour, which is 13% protein)
2 teaspoons (10 ml/9 gm) sugar
1½ teaspoon (7½ ml/9 gm) salt
½ cup (120 ml/¼ pint) milk (I am not sure if the fat content matters. I used 2%)
2 tablespoons (30 ml) tasteless oil (I used generic vegetable oil)
½ cup (120 ml/1 stick/115 gm/¼ lb) chilled, unsalted butter
1 egg, for egg wash

Directions:

1. Mix the yeast, warm water, and first teaspoon of sugar in a small bowl. Leave aside for the yeast and sugar to dissolve and the yeast to foam up a little.
2. Measure out the other ingredients
3. Heat the milk until tepid (either in the microwave or a saucepan), and dissolve in the salt and remaining sugar
4. Place the flour in a large bowl.
5. Add the oil, yeast mixture, and milk mixture to the flour
6. Mix all the ingredients together using the rubber spatula, just until all the flour is incorporated
7. Turn the dough out onto a floured surface, and let it rest a minute while you wash out the bowl
8. Knead the dough eight to ten times only. The best way is as Julia Child does it in the video (see below). It’s a little difficult to explain, but essentially involves smacking the dough on the counter (lots of fun if you are mad at someone) and removing it from the counter using the pastry scraper.
9. Place the dough back in the bowl, and place the bowl in the plastic bag
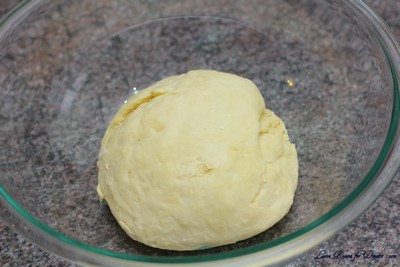
10. Leave the bowl at approximately 75°F/24°C for three hours, or until the dough has tripled in size.
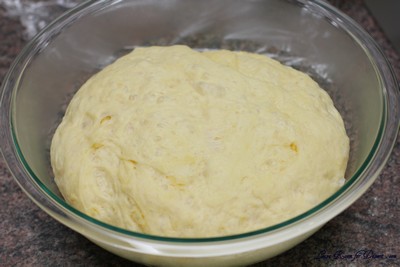
11. After the dough has tripled in size, remove it gently from the bowl, pulling it away from the sides of the bowl with your fingertips.
12. Place the dough on a lightly floured board or countertop, and use your hands to press it out into a rectangle about 8 by 12 inches (20cm by 30cm).
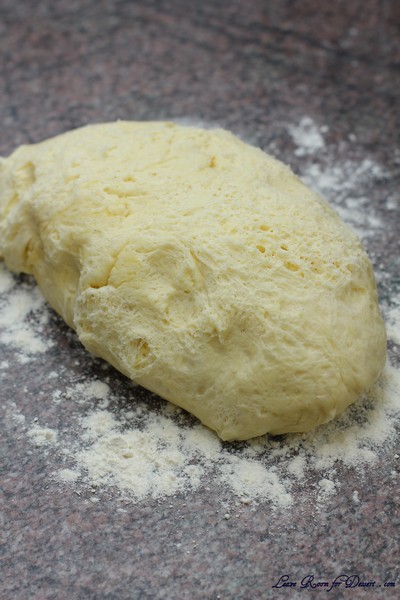
13. Fold the dough rectangle in three, like a letter (fold the top third down, and then the bottom third up)

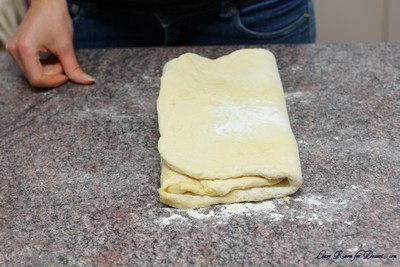
14. Place the dough letter back in the bowl, and the bowl back in the plastic bag.
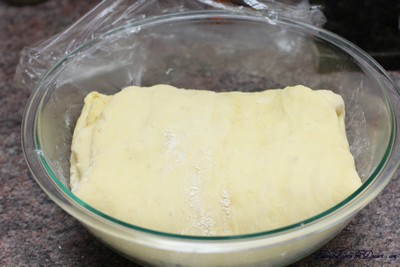

15. Leave the dough to rise for another 1.5 hours, or until it has doubled in size. This second rise can be done overnight in the fridge.

16. Place the double-risen dough onto a plate and cover tightly with plastic wrap. Place the plate in the fridge while you prepare the butter.
17. Once the dough has doubled, it’s time to incorporate the butter
18. Place the block of chilled butter on a chopping board.
19. Using the rolling pin, beat the butter down a little, till it is quite flat.
20. Use the heel of your hand to continue to spread the butter until it is smooth. You want the butter to stay cool, but spread easily. (I spread it onto plastic wrap when it was easy to spread to make it easier to get onto the dough)
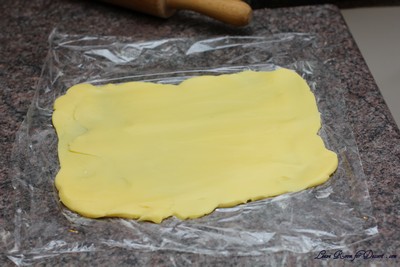
21. Remove the dough from the fridge and place it on a lightly floured board or counter. Let it rest for a minute or two.
22. Spread the dough using your hands into a rectangle about 14 by 8 inches (35 cm by 20 cm).
23. Remove the butter from the board, and place it on the top half of the dough rectangle.
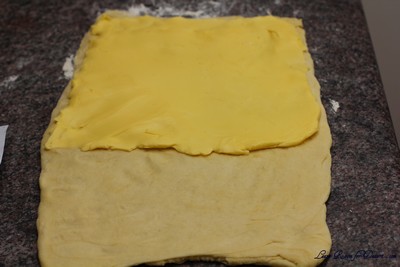

24. Spread the butter all across the top two-thirds of the dough rectangle, but keep it ¼ inch (6 mm) across from all the edges.
25. Fold the top third of the dough down, and the bottom third of the dough up. (I folded the bottom half up first)
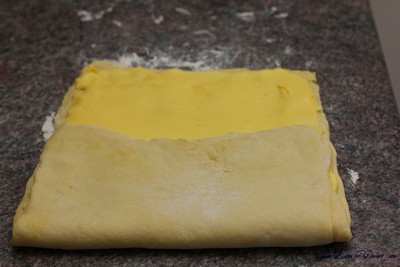

26. Turn the dough package 90 degrees, so that the top flap is to your right (like a book).
27. Roll out the dough package (gently, so you don’t push the butter out of the dough) until it is again about 14 by 8 inches (35 cm by 20 cm).
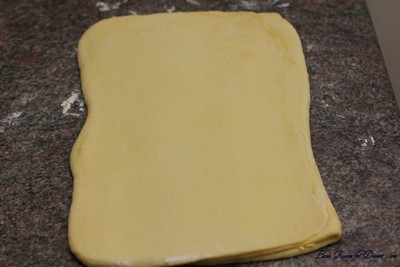
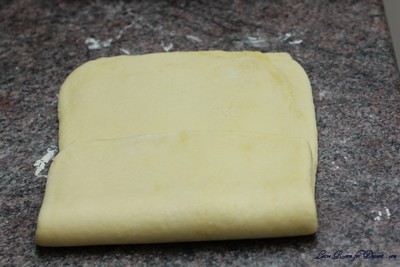
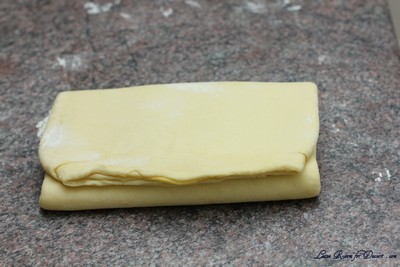
28. Again, fold the top third down and the bottom third up.
29. Wrap the dough package in plastic wrap, and place it in the fridge for 2 hours.

30. After two hours have passed, take the dough out of the fridge and place it again on the lightly floured board or counter.
31. Tap the dough with the rolling pin, to deflate it a little
32. Let the dough rest for 8 to 10 minutes
33. Roll the dough package out till it is 14 by 8 inches (35 cm by 20 cm).
34. Fold in three, as before
35. Turn 90 degrees, and roll out again to 14 by 8 inches (35 cm by 20 cm).
36. Fold in three for the last time, wrap in plastic, and return the dough package to the fridge for two more hours (or overnight, with something heavy on top to stop it from rising)

37. It’s now time to cut the dough and shape the croissants
38. First, lightly butter your baking sheet so that it is ready
39. Take the dough out of the fridge and let it rest for ten minutes on the lightly floured board or counter
40. Roll the dough out into a 20 by 5 inch rectangle (51 cm by 12½ cm).
41. Cut the dough into two rectangles (each 10 by 5 inches (25½ cm by 12½ cm))
42. Place one of the rectangles in the fridge, to keep the butter cold
43. Roll the second rectangle out until it is 15 by 5 inches (38 cm by 12½ cm).
44. Cut the rectangle into three squares (each 5 by 5 inches (12½ cm by 12½ cm))
45. Place two of the squares in the fridge
46. The remaining square may have shrunk up a little bit in the meantime. Roll it out again till it is nearly square
47. Cut the square diagonally into two triangles.
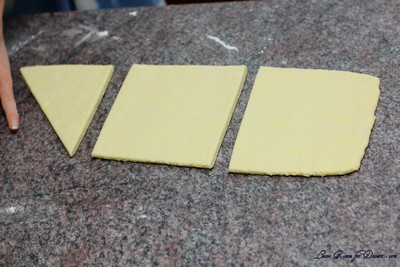
48. Stretch the triangle out a little, so it is not a right-angle triangle, but more of an isosceles.
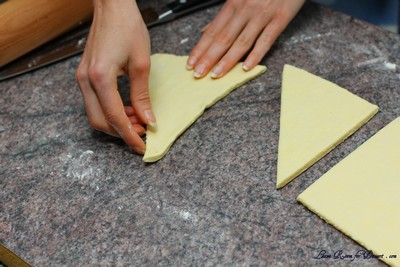

(or you can cut them like this to begin with: )

49. Starting at the wide end, roll the triangle up towards the point, and curve into a crescent shape.
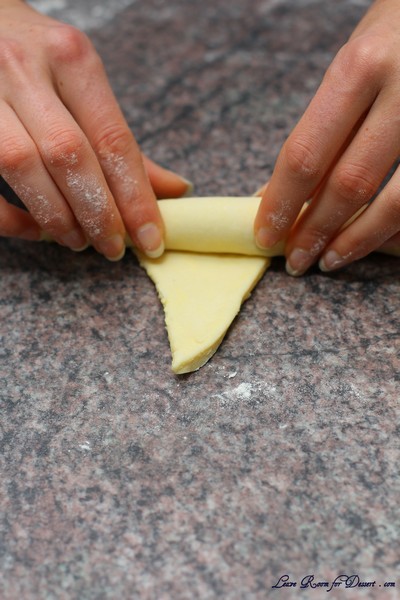

50. Place the unbaked croissant on the baking sheet

51. Repeat the process with the remaining squares of dough, creating 12 croissants in total.
52. Leave the tray of croissants, covered lightly with plastic wrap, to rise for 1 hour

53. Preheat the oven to very hot 475°F/240°C/gas mark 9.
54. Mix the egg with a teaspoon of water
55. Spread the egg wash across the tops of the croissants.
56. Put the croissants in the oven for 12 to 15 minutes, until the tops are browned nicely
57. Take the croissants out of the oven, and place them on a rack to cool for 10 minutes before serving.

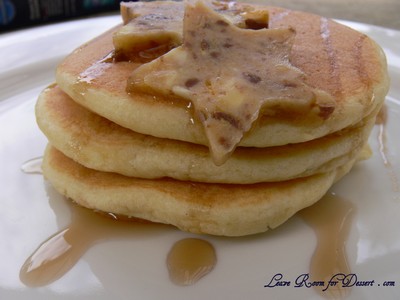
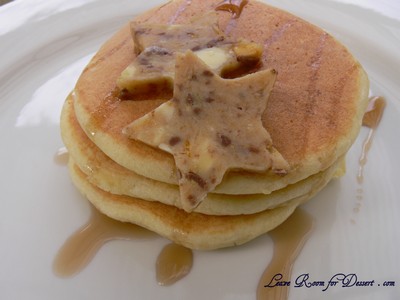
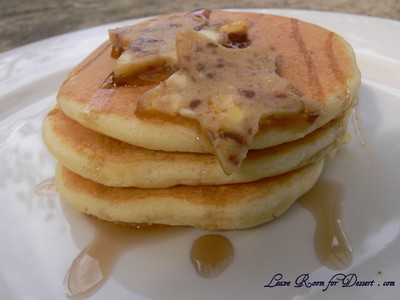
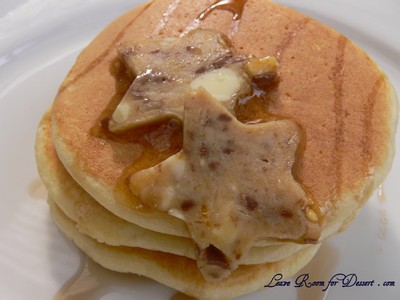
Ricotta Hotcakes with Honeycomb Butter by Bill Granger

Saturday, January 23rd, 2010

PancakeBillGranger09

Everyone probably knows by now that I love pancakes.

PancakeBillGranger08

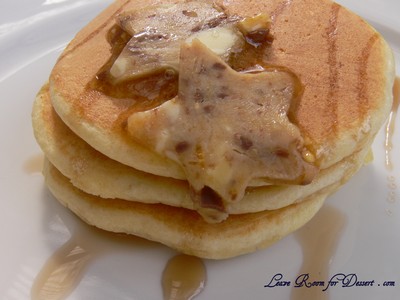
Many people have recommended I go and try Bill Granger’s pancakes/hotcakes at his restaurant (please disregard my use of the word pancake – it seems more natural for me to say pancake then hotcake). Bill’s pancakes are described as gorgeous fluffy soft ricotta pancakes with a beautiful honeycomb butter served with banana. I have been to Bill’s previously, although didn’t have enough room to fit in the pancakes after my meal. I’ll make sure I go back soon to try the pancakes.

PancakeBillGranger10

In the meantime, I decided to make some at home – good decision. These are absolutely wonderful pancakes, and the combination with the honeycomb butter and banana makes them one of the best ways to start the weekend. I’ve made them a number of times already, and continue to go back to the recipe.

PancakeBillGranger01

Ricotta Hotcakes with Honeycomb Butter by Bill Granger

Recipe from Bill Granger found on AWW Ninemsn

Serving size: Serves 6

1 1/3 cups (225g) ricotta
3/4 cup (170ml) milk
4 eggs, separated
1 cup (140g) plain flour
1 teaspoon baking powder
Pinch of salt
50g butter

banana
honeycomb butter, sliced (below)
icing sugar for dusting

Honeycomb Butter (You will need less than half of this)
250g unsalted butter, softened
100g sugar honeycomb, crushed with a rolling pin (I used a couple violet crumbles, chopped finely, which worked very well as you get bits of chocolate in the butter)
2 Tablespoons honey

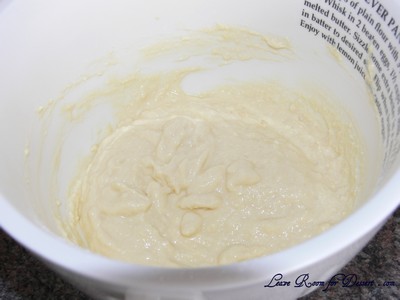
Place ricotta, milk and egg yolks in a mixing bowl and mix to combine. Sift the flour, baking powder and salt into a bowl. Add to the ricotta mixture and mix until just combined.

PancakeBillGranger03

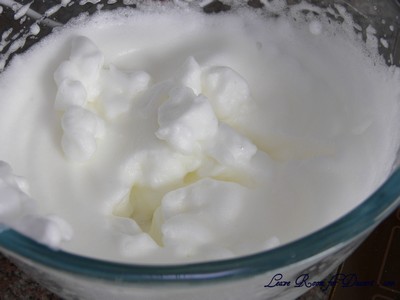
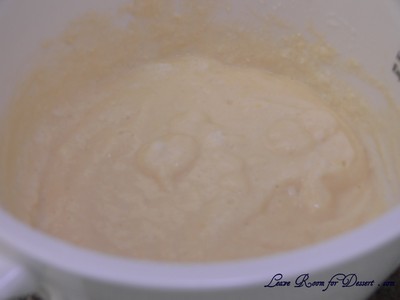
Place egg whites in a clean dry bowl and beat until stiff peaks form. Fold egg whites through batter in two batches, with a large metal spoon.

PancakeBillGranger04

PancakeBillGranger05

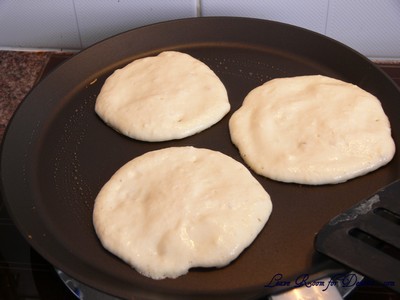
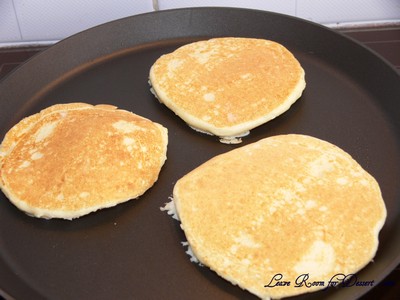
Lightly grease a large non-stick frying pan with a small portion of butter and drop 2 tablespoons of batter per hotcake into the pan (don’t cook more than 3 per batch).

PancakeBillGranger06

Cook over a low to medium heat for 2 minutes, or until hotcakes have golden undersides. Turn hotcakes and cook on the other side until golden and cooked through. Transfer to a plate and quickly assemble the other ingredients.

PancakeBillGranger07

Slice one banana lengthways onto a plate, stack three hotcakes on top with a slice of honeycomb butter. Dust with icing sugar.

Honeycomb butter
Place all ingredients in a food processor and blend until smooth. Shape into a log on plastic wrap, roll, seal and chill in a refrigerator for 2 hours.
Store any leftover honeycomb butter in the freezer, it’s great on toast.

PancakeBillGranger02

Almond and Vanilla Porridge

Monday, June 22nd, 2009

almondvanillaporridge01

We all know “someone”, who can’t go past a freebee. Who goes around and around to people handing around free samples just so they can collect as much as possible…

Well I know a couple of those people, and I can certainly relate to it, especially when I see something that looks particularly appealing. And let’s face it – it’s the best sort of bargain out there – you get something for nothing!

almondvanillaporridge02

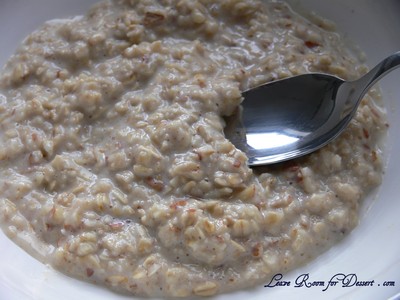
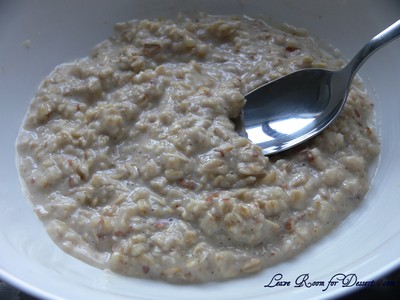
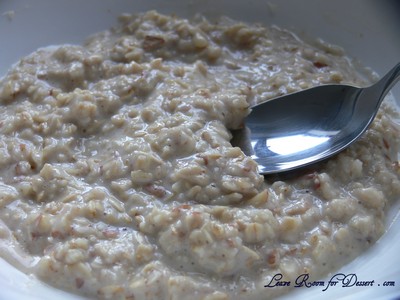
Even though I’ve never liked porridge that people have made (I’ve found they tend to be a bit plain, and since I don’t like dried fruit, it doesn’t even add an extra element that would entice me), I picked up a few samples of porridge in new flavours or a different brand being handed out. One had dried fruit, the other Vanilla and Almond Porridge. Well, the later actually sounds nice, so after trying it, I realised I would have it again. But samples don’t last long… they’re samples. And not finding them in the shops meant I would try and make it myself (and it’s likely to be both cheaper and healthier – as you know exactly what goes into it).
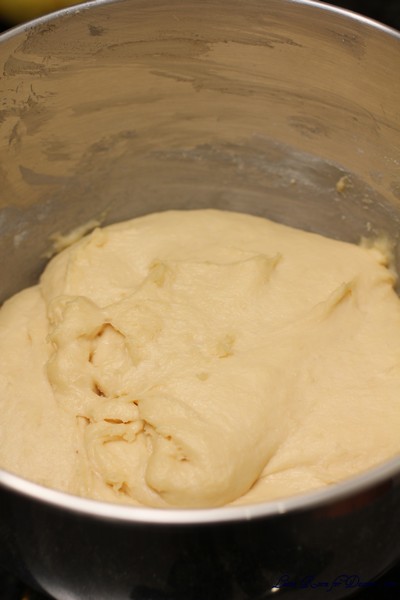
So, one trial for the recipe and I was pretty happy with the result (even more so than the original product, after being given another sample and doing a taste-test comparison)! This is great for our cold weather (and unfortunately weather that is going to get colder and rainier).

almondvanillaporridge06

Almond and Vanilla Porridge

Serves: 1 small serving, feel free to double the quantity

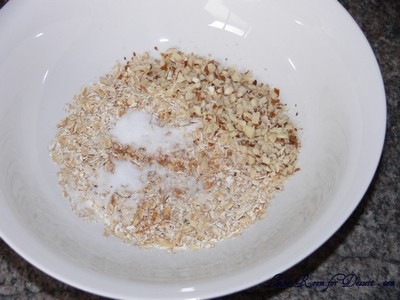
1/3 cup rolled oats, blitzed in a food processor until chopped slightly (or Quick Oats)
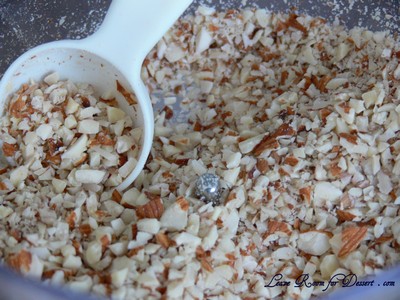
1 tablespoon blitzed roasted almonds
1 teaspoon caster sugar
A sprinkle of ground cinnamon
2/3 cup milk (approximately)
1/8 teaspoon vanilla

Mix the dry ingredients in a bowl. Mix the vanilla with the milk and pour into bowl. Mix together and microwave on high for 1 minute (Be careful, this will be hot). Stir mixture and cook on high for another 30sec – 1min, until as thick as you like. Add more milk depending on the consistency and temperature you like your porridge.

almondvanillaporridge03

almondvanillaporridge05

almondvanillaporridge07