Recipes

Turtle Cake and Under the Sea Party

Monday, November 19th, 2018

UndertTheSea07

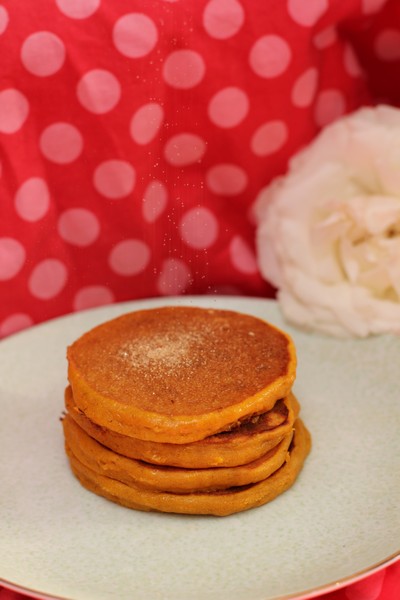
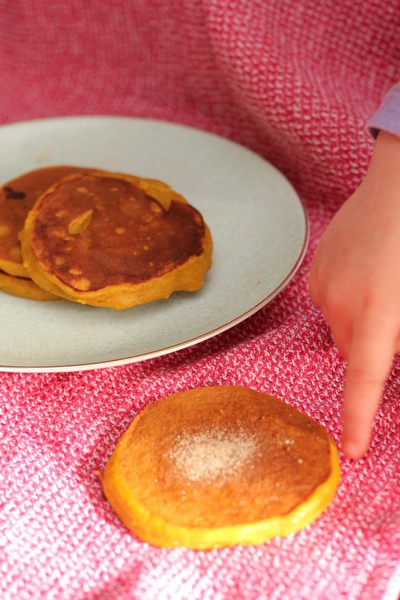
I always remember our lovely birthdays as children. We were able to choose any cake from the Women’s Weekly Cake Book. My mum made so many different cakes from the book over the years, I couldn’t help but buy the same cake book (and the new bumper book too) for my children to choose from. We already have lots of fun searching through all the lovely pictures.

UndertTheSea01

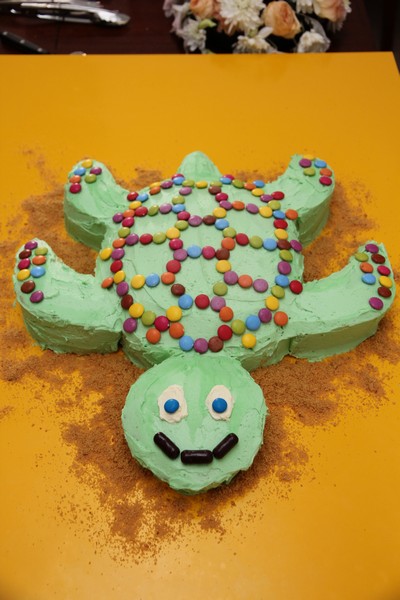
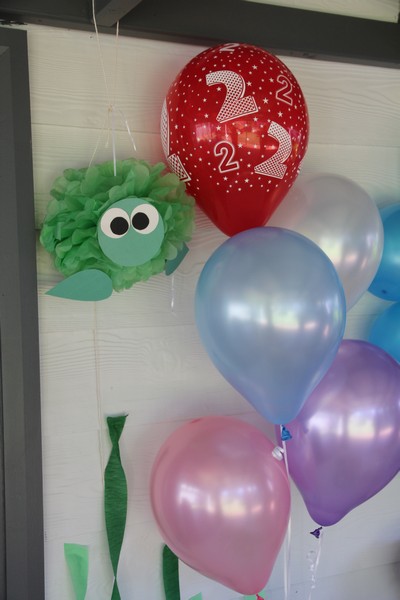
I searched for a turtle cake for my daughters 2nd birthday (a few years back now), and didn’t see anything that quite looked how I wanted it to look in either book or the internet. So I decided to design my own turtle cake and make an under the sea themed party.

UndertTheSea02

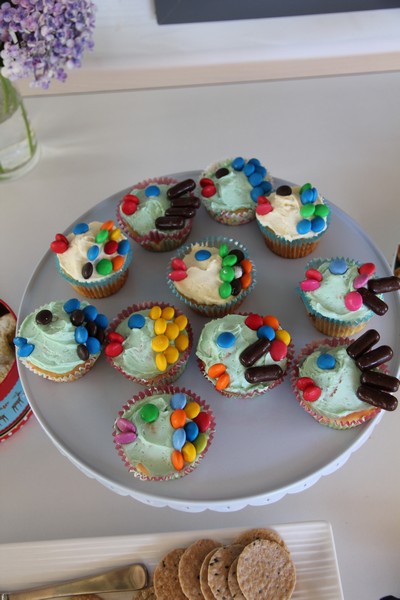
We generally prefer buttercream/Vienna icing to fondant, so I made it green and used smarties or mm’s for the design (liquorice could have been used as well). To make the shell I used a round tin and trimmed the sides to make it more oval. I made a template out of grease-proof paper for the body (using a round tin 22cm or 24cm), I then used it make an appropriate sized head and flippers, making sure they would fit in my lamington tray (or a larger tray). Cut out the pieces once the cake has been frozen.

UndertTheSea09

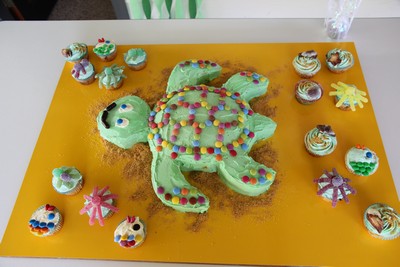
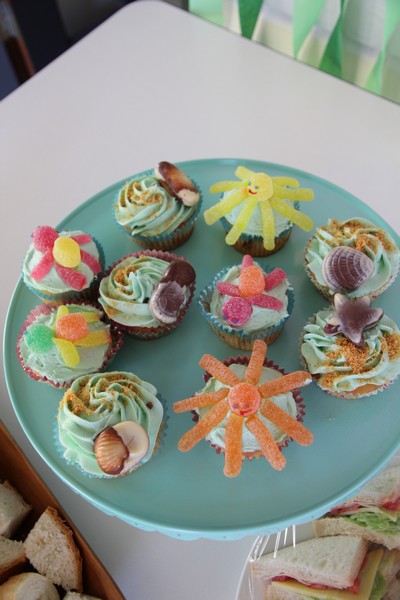
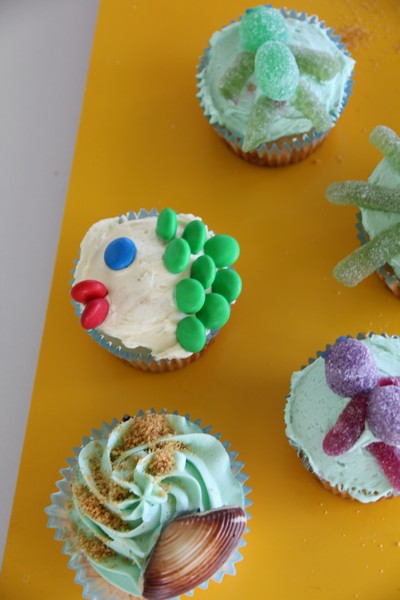
Cupcakes had blue icing for the sea, biscuit crumbs for sand and a sea shell chocolate on top. With other cupcakes having fish or other sea creatures made out of lollies.

UndertTheSea05

UndertTheSea04

UndertTheSea11

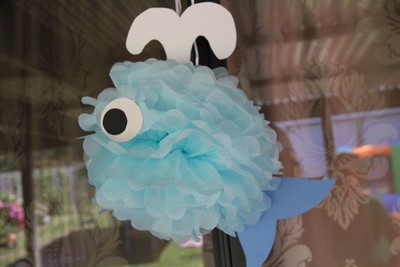
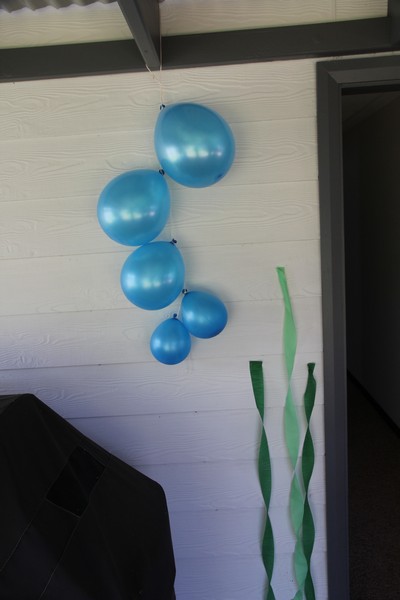
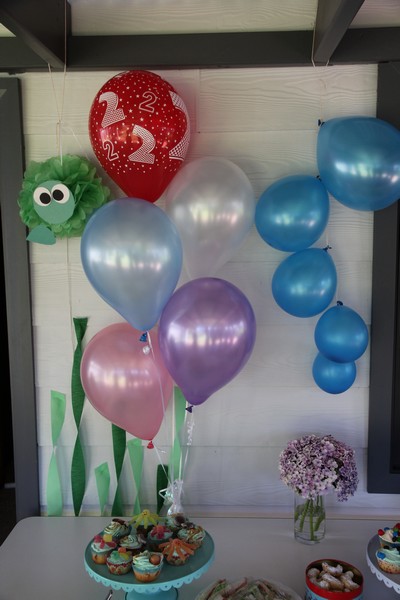
Decorations included seaweed out green crepe paper streamers, bubbles out of different sized balloons and sea creatures out of pom-poms.

UndertTheSea03

UndertTheSea06

UndertTheSea08

Acai Smoothie Bowl and Easy Muesli

Monday, November 5th, 2018

Acai Smoothie Bowl

The first time I tried an acai bowl was 4 or more years back at a Jiujitsu tournament. I wasn’t competing as I don’t do jiujitsu, but I was eating – as I’m really good at that. Since then I have seen it become super popular, with the acai puree now available frozen at supermarkets (I previously had to buy it from a frozen berry supplier). You can’t go past a café without them having some sort of acai smoothie bowl (or something similar) available as a change from your traditional bacon and egg big brekkies.

I also recently had an acai bowl at a children’s play centre. It was super tasty and I started craving it again. So we had to start experimenting. There’s never anything bad that can come from food experimentation. It’s almost always edible. Most recipes I looked up contained almost entirely fruit, although the one I had recently seemed to have oats of some sort mixed through, so I first tried adding some soaked oats (mix oats with milk overnight) to the blended fruit. It was nice, and reasonably close to what I had, although the method we are now making is much easier. The oats and almond meal help make the mixture thick, and I think would help keep you more full through the morning.

Acai Smoothie Bowl

Some of the main things I found went well with the smoothie bowl was adding fresh fruit and quality muesli or granola (and a touch of dark chocolate). I am finding it very difficult to buy pre-packaged foods anymore. The additives or flavours are just not enjoyable. So I came up with an easier muesli to than my original granola. It doesn’t need chopping, doesn’t need an extra bake to get it crunchy and doesn’t use lots of expensive nuts.

Acai Smoothie Bowl

Recipe by Anita @ Leave Room for Dessert
Serves: 4 small bowls
(You can always increase or decrease amounts depending on what you have available. Just don’t add too much water to begin with)

95g frozen acai
130g frozen pineapple
160g frozen banana (approx. 2)
handful frozen blueberries (optional)
50g almond meal (or raw almonds – blend up to a powder before adding other ingredients)
80g oats
120g water (approx.)

To serve:
1-2 bananas, sliced
berries
1/2-1 cup (50g-100g) Muesli
4 pieces dark chocolate (30g), chopped
4 teaspoons desiccated coconut

Place the acai, pineapple, banana, almond meal and oats in a high powered blender. Blend on high (using spatula if needed – the Thermomix comes with a special spatula to help with this sort of thing). Add water to help it come together, making sure not to add too much. You want a thick consistency. Serve immediately with toppings.

Easy Muesli

Recipe by Anita @ Leave Room for Dessert

400g rolled oats
200g coconut, shredded
50g sunflower seeds
50g pepitas
100g slivered almonds (or chopped almonds)

120g honey
1 tablespoon cinnamon
1 tablespoon vanilla essence or extract
120g coconut oil, melted
salt

Preheat oven to 160C (fan-forced). Place baking paper on two trays.

Mix together the oats, coconut, sunflower seeds, pepitas and almonds in a large bowl. Whisk together the honey, cinnamon, vanilla and coconut oil. Pour into oat mixture and stir to combine. Place on trays, spreading evenly. Cook for 15-20 minutes, stirring once or twice. Leave to cool and store in an airtight container.

Muesli

White Chocolate Raspberry Cheesecake Slice

Wednesday, June 20th, 2018

White Chocolate Raspberry Cheesecake Slice

This is a wonderful addition to any party. These yummy desserts have the perfect combination of sweet, tart, creamy and crunchy. Make them big or small depending on what else is on offer.

White Chocolate and Raspberry Cheesecake Slice

We have served this at a number of parties so far, and they are a great alternative to some of the other rich chocolate dense desserts. It is also very easy to make them very small, so they can be served to lots of people, and also made a day or two in advance.

White Chocolate and Raspberry Cheesecake Slice

White Chocolate Raspberry Cheesecake Slice

Recipe from Taste
Makes 16 (or up to 45-60 small pieces)

200g packet granita biscuits
100g butter, melted
375g cream cheese, softened
1/2 cup (125g) sour cream
1/2 cup (100g) caster sugar
2 eggs
100g white chocolate, coarsely chopped
1/2 cup (60g) frozen raspberries
Icing sugar, to dust

Grease and line the base and side of a 19 x 29cm slice pan with baking paper, allowing the sides to overhang. (I have used a larger pan 22cm x 31cm, it worked out fine, but you may need a touch less time for cooking).

Place the biscuits in the bowl of a food processor and process until finely crushed. Add the butter and process until well combined. Spoon into the prepared pan and use a glass to spread and press mixture firmly over the base of the pan. Place in the fridge for 30 minutes to chill. (If you need to leave it longer, no worries).

Preheat oven to 160°C. Place the cream cheese and sour cream in the bowl of a food processor and process until smooth. Add the sugar and eggs and process until smooth.

Sprinkle the biscuit base evenly with white chocolate and raspberries. Pour over the cream cheese mixture. Gently tap the pan to settle mixture. Bake in preheated oven for 20-25 minutes or until filling is just set. Turn oven off and leave the door ajar. Set aside to cool in oven. Place in the fridge to cool completely. Cut into squares to serve. Dust with icing sugar.
WhiteChocRaspberrySlice1

WhiteChocRaspberrySlice2

WhiteChocRaspberrySlice3

White Chocolate and Raspberry Cheesecake Slice

Anzac Biscuits

Wednesday, April 25th, 2018

Anzac Biscuits
We make these biscuits almost every ANZAC day (25th April, a day of national remembrance).

I do make them throughout the year as well, as they keep well made in advance and taste great. A great biscuit for those with egg allergies, and if you need a dairy-free alternative you could try and substitute coconut oil. (I haven’t yet tried this recipe with coconut oil, but tried a similar styled recipe which contained coconut oil and it turned out well).

Anzac Biscuits

I do find my biscuits turn out different to my mums though. Hers would always spread to make large biscuits, often almost touching, and she would cook some longer and some shorter to accommodate my siblings and my preferences. I enjoyed mine soft and chewy and others preferred hard and crunchy. When I make these, sometimes they don’t expand at all, and other times they spread a little – but never like mums (I think my oven is a bit hotter though, so that may have something to do with it).

Anzac Biscuits

Makes: about 25

1 cup rolled oats
1 cup plain flour
3/4 cup caster sugar (original recipe said 1 cup sugar)
3/4 cup coconut
125g (4oz) butter
2 Tablespoons golden syrup
½ teaspoon bicarbonate of soda
1 Tablespoon boiling water

Preheat oven to 160C. Combine oats, sifted flour, sugar and coconut in a large bowl.

Combine butter and golden syrup in a small saucepan, stir over medium heat until melted. Mix bi-carb soda with boiling water and add to the melted butter mixture, stir into dry ingredients. Place Tablespoonfuls of mixture on lightly greased oven trays, or on paper lined trays, allow room for spreading.

Cook in oven for 10 – 15 minutes, longer if you prefer them hard. Loosen while warm, then cool on trays.

Anzac Biscuits

Anzac Biscuits

Caramel Slice

Thursday, March 29th, 2018

Caramel Slice

I was looking for a recipe for caramel slice and came across one on the internet that claimed it was the best ever caramel slice. Well, it’s a big claim, but I think it’s pretty high up there. Easy to make, super tasty – I won’t be looking for another recipe. This will be my go-to from now on.

Caramel Slice

It’s great as it can be made in advance and I have had a lot of positive comments by people who have tried it. Most going back for a second (or third or fourth) piece. I’m sure you could easily make this gluten-free too by replacing the flour with gluten free flour.

It makes a wonderful addition to a dessert table, as they can be cut quite small so people can have a bite and try other desserts too.

Caramel Slice

Caramel Slice

Recipe from Bakers Corner

Makes 16-60 (The original says 16 slices, but you can make lots of little ones if there will be other sweets)

1 cup (150g) plain flour
1/2 cup (110g) brown sugar
1/2 cup (40g) desiccated coconut
125g butter, melted

100g butter, extra
2 x 395g cans NESTLÉ Sweetened Condensed Milk
1/3 cup (80mL) golden syrup

200g PLAISTOWE Premium Dark Chocolate, melted
1 tbsp vegetable oil

1. Preheat oven to 180°C/160°C fan forced. Lightly grease an 18cm x 28cm lamington pan and line with baking paper. (I used a slightly bigger pan 22cm x 31cm, but it still came out fine, if you do this, the cooking time may be a bit shorter)

Caramel Slice

Caramel Slice

2. In a medium bowl, combine flour, sugar and coconut. Add melted butter, mix well. Press mixture firmly into prepared pan. Bake for 15-20 minutes until lightly browned. Cool. (I didn’t let this cool. I cooked the condensed milk whilst this was in the oven and then poured it straight on and back in the oven.)
3. Place extra butter, NESTLÉ Sweetened Condensed Milk and syrup in a medium saucepan. Stir over low heat until smooth. Pour over base. Bake for 20-25 minutes until golden. Cool.

Caramel Slice

4. Combine PLAISTOWE Premium Dark Chocolate and oil, stir until smooth, pour evenly over slice. Place in fridge until set and then slice. (You may like to clean the knife between each or every couple of slices. a clean knife will give a cleaner edge).

Caramel Slice

Caramel Slice

Nutella and Berry Dessert Pizza

Sunday, July 16th, 2017

Nutella Dessert Pizza

Only recently I tried my first dessert pizza. It was so tasty I couldn’t wait to have it again and try it at home. Rather than making just one dessert pizza I figured it would be better to make savoury pizzas for dinner and with the same mix make the dessert pizza.

Nutella Dessert Pizza

I was very happy with how the pizza turned out and would definitely make it again. The addition of the berry sauce helps cut some of the sweetness from the nutella. I think it would also go very well with roasted hazelnuts on top.

Nutella Dessert Pizza

Nutella and Berry Dessert Pizza

Recipe by Anita @ Leave Room for Dessert

Serves: 6-8

1 pizza base (I used this recipe omitting the oregano, making four pizzas – three savoury and one for the dessert pizza)
10g butter, melted
2-4 heaped tablespoons nutella (choc hazelnut spread), to taste
1 Tim Tam biscuit, chopped (optional)
icing sugar to dust
vanilla ice cream, to serve

Berry Sauce
100g mixed frozen berries
1/4 cup water
1 tablespoon caster sugar

Brush melated butter on the pizza base and cook for 5-10 minutes at 200C, until browned.
While the pizza is cooking, mix the frozen berries with the water and sugar in a small saucepan. Cook on medium heat for 5-15 minutes until the sauce has reduced and thickened slightly.

NutellaDessertPizza02

NutellaDessertPizza03

NutellaDessertPizza04

Allow the pizza base to cool slightly or completely and then top with nutella. It may take a little while to get the nutella to spread properly. Top with chopped Tim Tam, berry sauce, icing sugar and ice cream.

NutellaDessertPizza01

NutellaDessertPizza07

Bacon Kaboom Meatloaf

Wednesday, July 12th, 2017

Bacon Kaboom Meatloaf
I first saw this recipe in my delicious magazine one month, and it turned out so well I decided to buy Billy Law’s book Man Food, as it had heaps of yummy looking recipes. The use of pork mince, with minimal additions and slow cooking produces a lovely moist meatloaf. The main highlight for me is the bacon lattice, followed closely by the filling and spices.

Bacon Kaboom Meatloaf Burger

Served with coleslaw on a fresh bun, it certainly is a tasty dinner or lunch option.

Bacon Kaboom Meatload

Recipe adapted from Billy Law’s recipe

1 kg minced pork
1 tablespoon salt
1 tablespoon ground white pepper
1 tablespoon garlic powder
1 tablespoon dried sage
1/2 -1 teaspoon cayenne pepper or chilli powder
15 bacon slices
2 tablespoons olive oil
80 ml smoky barbecue sauce
125 g shredded cheddar
1 gherkin, chopped finely
6 slices jalapeño chillies, chopped finely
Coleslaw and fresh rolls, for serving

Preheat oven to 140C.

Remove the rind from the bacon and trim the bacon to equal widths, about 2–3 cm. Cut the off-cuts into thin strips or squares.

Heat the oil in a large frying pan, cook the off-cut bacon pieces until browned and crisp, about 3 minutes (or longer). Drain on paper towel.

Place a large sheet of baking paper on a baking tray. Weave the bacon strips on the baking paper.

BaconKaboomMeatloaf01

Put the pork in a large bowl, add the salt, pepper, garlic powder, sage and cayenne pepper/chilli powder. Using both hands, mix until fully incorporated. Do not over mix.

Line another baking tray with baking paper, spread the meat mixture evenly to make a huge rectangle pattie, about 2.5 cm thick and just a little bit smaller than the bacon weave. Brush with the barbecue sauce, spread a line of cheese on top of the pork at the edge closest to you. Sprinkle bacon pieces on top of the cheese evenly, followed by the gherkin and jalapeño.

BaconKaboomMeatloaf03

Starting from the edge closest to you, roll the pork tightly away from you, making sure the roll is firm without any air pockets inside. Carefully lift the roll and place on top of the bacon weave at the edge closest to you. With the help of the baking paper, roll the bacon weave and wrap the mince inside tightly, making sure the roll is sitting on top of the seam to stop it from coming loose. Fold the bacon strips inwards on both sides and secure with bamboo skewers or tooth picks.

BaconKaboomMeatloaf04

Cook at 140C for approximately 2 hours. Check after the first hour and determine whether you need to turn up the heat. Test whether it is cooked by inserting a thermometer into the centre of the roll – it should be 73–77°C.

Remove the cooked meatloaf to a serving board and let it rest for 10 minutes before slicing. Serve with coleslaw and fresh rolls.

Serves 8

BaconKaboomMeatloaf05

BaconKaboomMeatloaf06

BaconKaboomMeatloaf07

Dukkah encrusted Croissants with Bacon, Halloumi and Pumpkin

Wednesday, May 10th, 2017

Dukkah Croissants

This has got to be one of the best brekkies I have had. I know that’s a big call – and probably sets expectations quite high. So maybe I should just say – give it a go, you’ll probably like it.

Dukkah Croissants Bacon Pumpkin Halloumi

I saw it in my Delicious magazine, and couldn’t wait to try it. It combines some of the most wonderful flavours, it’s sweet, salty, crispy, crunchy – a really amazing combination.

Dukkah Croissants

I had to post this now so it is easily available for Mother’s Day this weekend. I think this will be my request for Mother’s Day and my birthday every year from now on 🙂

Dukkah Croissants

Dukkah encrusted Croissants with Bacon, Halloumi and Pumpkin

Recipe adapted from Delicious magazine
Serves: 4

1/2 bunch oregano, leaves picked (optional)
400g Jap (kent) pumpkin, seeds removed, cut into 2mm-thick slices
200g halloumi, sliced
4-8 rashers streaky bacon – I used hickory smoked bacon
2 tsp olive oil
1/3 cup (40g) dukkah (bought or homemade – we used this recipe)
1 tbs dried chilli flakes (optional)
1 egg, lightly whisked
4 large croissants
2/3 cup (180g) basil pesto
100g baby kale leaves or a handful of baby spinach

Preheat the oven to 250°C. Line two baking trays with baking paper.

Place the oregano (if using), pumpkin, halloumi and bacon on one of the prepared trays. Drizzle over the oil and season. Roast for 15 minutes or until the pumpkin is cooked, halloumi is golden and the bacon is crisp. (I checked half way through, when I added the croissants to the oven – if the pumpkin/bacon has a lot of liquid on the tray, try and pour it off carefully).

Meanwhile, combine dukkah and chilli flakes (if using) on a plate. Place the egg in a bowl and whisk. Dip each croissant into the egg mixture, then coat in dukkah mixture.

Transfer to prepared tray, then add to oven for the final 7 minutes of pumpkin cooking time and bake until crisp and golden.

To serve, slice the croissants horizontally and top with a spoon of pesto. Layer in the pumpkin, halloumi, oregano, bacon and kale/spinach leaves. Serve warm.

DukkahCroissants01

DukkahCroissants02

DukkahCroissants03

Pumpkin Fritters and South African Style Cooked Pumpkin

Tuesday, March 21st, 2017

Pumpkin Fritters

These sweet pumpkin fritters have been a real hit with my daughter and I. Growing up in South Africa, Nick was used to these delights as a breakfast, using up leftover South African style cooked pumpkin which they would have eaten the day prior with boerewors and putu pap with corn and tomato salsa. It’s taken a long time to introduce them to us though, and it makes for a great alternative to pikelets for breakfast.

Pumpkin Fritters

The combination of the sweet pumpkin and cinnamon is really lovely. The recipe is quite simple, I think the hardest thing about the fritters is making sure they are cooked through and don’t burn. We have recently just been making the cooked pumpkin solely for breakfast the next morning. As there is no stirring involved, it is easy to just set a timer for every 15 minutes to check it isn’t burning (it takes about an hour to cook the pumpkin, and you can always make less or more depending on how much pumpkin you have).

Pumpkin Fritters

Pumpkin Fritters

Makes: 18 pikelet sized fritters
Serves: 2-4

450-500g South African Style cooked pumpkin (recipe below)
1/2 cup self raising flour
1/2 cup plain flour
pinch salt
1/2 teaspoon cinnamon
2 eggs
butter, for pan
lemon juice and cinnamon sugar, to serve

Mix the pumpkin, flours, salt, cinnamon and eggs in a medium bowl using an electric mixer until combined.

PumpkinFritters06

PumpkinFritters07

Heat a non stick crepe pan over medium heat. Place a small amount of butter in the pan and wipe with a paper towel. Place heaped spoonfuls of mixture onto the pan, cooking for a few minutes each side until cooked through. (The mixture is thicker than normal pikelets, so they take a bit longer to cook. Be careful not to burn the fritters, removing from heat or turning it down as necessary).

PumpkinFrittas08

PumpkinFrittas09

PumpkinFrittas11

You may wish to keep the earlier fritters warm in a low oven whilst you cook the remaining fritters. Serve with generous amounts of lemon juice and cinnamon sugar

South African Style Cooked Pumpkin

Recipe by Nick and Anita @ Leave Room for Dessert

Cooking Time: 1 hour
Makes approx 840g cooked pumpkin

1.1 kg jap pumpkin, cut into 2-3cm cubes
1/4 – 1/2 cup sugar
10g butter
pinch salt

Place the pumpkin in a medium saucepan, followed by the sugar, butter and salt.
PumpkinFritters01

Cook over medium/high heat for approximately 15 minutes with the lid on. At this stage there should be liquid coming out of the pumpkin. Don’t stir.
PumpkinFritters02

Turn down to just above low and cook for a further 15 minutes. Don’t stir.
The pumpkin should be soft at this stage.
PumpkinFritters03

Take lid off and cook for a further 15 minutes. Check. Don’t stir.
Cook a further 15 minutes to try and get the liquid absorbed or evaporated.
PumpkinFritters04

At this stage, most or all of the liquid should be gone.
Serve warm as a side dish, or cool and use for pumpkin fritters
PumpkinFritters05

Mango and Yoghurt Ice Blocks

Tuesday, March 14th, 2017

Mango Ice Block

Mangoes have been beautiful this past summer. I’m not a big mango fan, but have been buying 2 a week for Nick and my daughter. I do love these ice blocks though! They may be a little bit icy, but they are a wonderful alternative to many of the bought varieties, and you know children (and adults) are eating a nice healthy snack.

MangoIceBlock2

Mango and Yoghurt Ice Blocks

Makes 10-12 small (1/4 cup) ice blocks

2 medium/large mangoes, flesh (~400g)
3/4 cup (180g) yoghurt (vanilla, coconut or natural)

Blend mango flesh in a food processor until well blended. Place pureed mango and yoghurt in a bowl and mix to combine. Spoon into ice block moulds and freeze until frozen, or overnight.