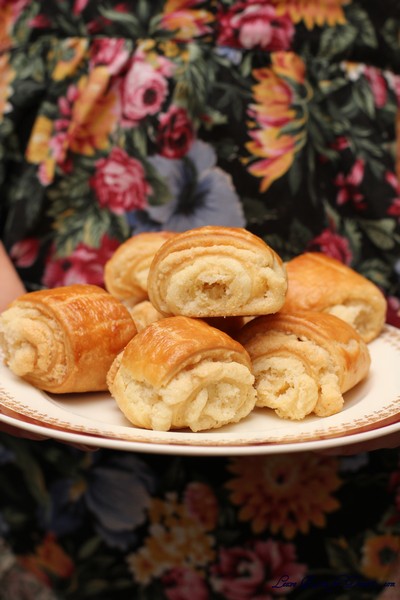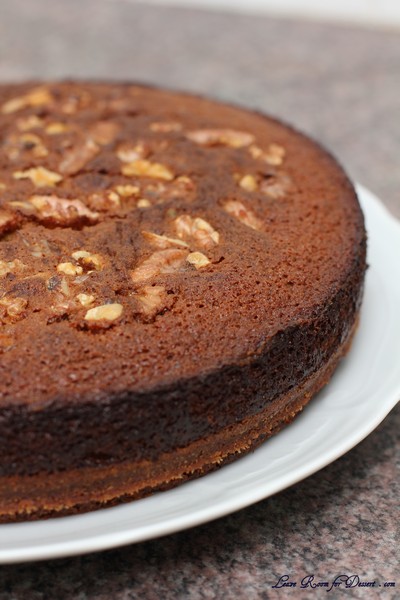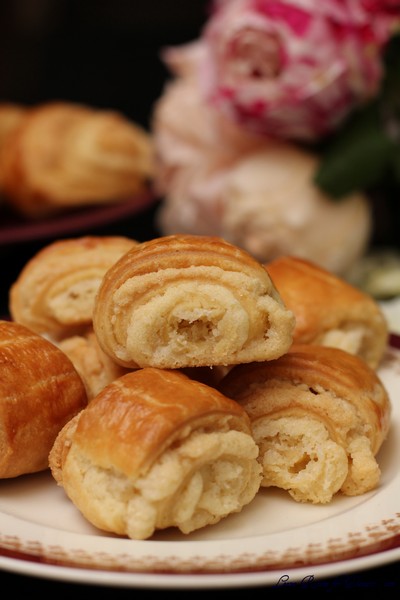
The Daring Bakers’ April 2012 challenge, hosted by Jason at Daily Candor, were two Armenian standards: nazook and nutmeg cake. Nazook is a layered yeasted dough pastry with a sweet filling, and nutmeg cake is a fragrant, nutty coffee-style cake.
I love a fragrant slice of Armenian nutmeg cake. My mum has been making it for years, since I was a child, and now I have also been making it (although can’t seem to get it as perfect as my Mum’s). Like most cakes, there are always changes people make to recipes, and our recipe differed from the one mentioned here in two ways that I can think of.
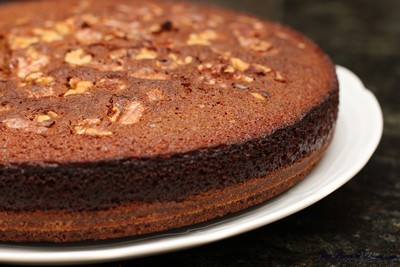
This cake has walnuts on top, whereas ours has slivered almonds. Both are a great addition to the cake. The other change my Mum made to the original recipe she was given by a friend, was only using 1/3 of the mixture for the base, making a thinner base (depending on your preference, this may be an improvement, or perhaps not), I’ll leave it up to you to decide. I enjoyed making the nutmeg cake to someone else’s recipe and obviously enjoyed eating it, as it has a lovely spiced flavour.
The Nazook was an exciting addition to this months challenge, and was the first of the two recipes for me to try. The pastry was quite easy to make, which I placed in the fridge overnight (it required quite a bit of work to get it soft enough to roll though as it was quite solid). The mixture for the inside and the assembly was also quite easy. When the pastries came out of the oven the fillings had come out a bit, and didn’t look as together as I had expected. The taste was lovely, and they were best eaten on the day of making.
Jason’s Recipe Source: The nazook is my Aunt Aida’s recipe. I’ve tried a LOT of nazook, and have to say hers is the best I’ve tried. The Armenian nutmeg cake is adapted from a recipe for the same in The Commonsense Cookery Book, by the NSW Cookery Teachers’ Scholarship Fund.
Nazook
Yields 40 pieces
Pastry dough
3 cups (720 ml) (420 gm/15 oz) all-purpose (plain) flour, sifted
2½ teaspoons (12½ ml) (7 gm) (¼ oz) (1 packet) active dry yeast
1 cup (240 ml) (225 gm/8 oz) sour cream
1 cup (2 sticks) (240 ml) (225 gm/8 oz) softened butter (room temperature)
Filling
1 1/2 cups (360 ml) (210 gm) (7½ oz) all-purpose (plain) flour, sifted
1 1/2 cups (360 ml) (340 gm/12 oz) sugar
3/4 cup (1½ sticks) (180 ml) (170 gm/6 oz) softened butter (room temperature)
2 teaspoons (10 ml) vanilla extract
Wash
1-2 egg yolks (for the wash; alternatively, some yogurt, egg whites, or a whole egg)
Directions:
Make the Pastry Dough
1. Place the sifted flour into a large bowl.
2. Add the dry yeast, and mix it in.
3. Add the sour cream, and the softened butter.
4. Use your hands, or a standing mixer with a paddle attachment, to work it into a dough.
5. If using a standing mixer, switch to a dough hook. If making manually, continue to knead for about 10 minutes, or until the dough no longer sticks to the bowl or your hands. If it remains very sticky, add some flour, a little at a time.
6. Cover the dough and refrigerate for 3-5 hours, or overnight if you like.
Make the filling
7. Mix the flour, sugar, and the softened butter in a medium bowl.
8. Add the vanilla extract.
9. Mix the filling until it looks like clumpy, damp sand. It should not take long. Set aside.
Make the nazook
10. Preheat the oven to moderate 350°F/175°C/gas mark 4.
11. Cut the refrigerated dough into quarters.
12. Form one of the quarters into a ball. Dust your working surface with a little flour.
13. Roll out the dough into a large rectangle or oval. The dough should be thin, but not
transparent.
14. Spread 1/4 of the filling mixture across the rolled-out dough in an even layer. Try to spread the filling as close as possible to the edges on the short sides, but keep some of pastry dough uncovered (1 inch/2.5 cm) along the long edges.
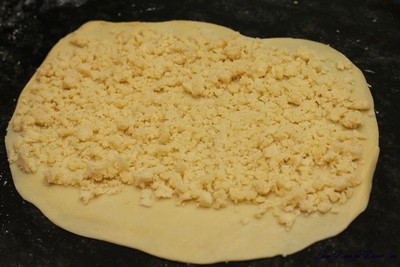
15. From one of the long sides, start slowly rolling the dough across. Be careful to make sure the filling stays evenly distributed. Roll all the way across until you have a long, thin loaf.
16. Pat down the loaf with your palm and fingers so that it flattens out a bit (just a bit).
17. Apply your egg yolk wash with a pastry brush.
18. Use your crinkle cutter (or knife) to cut the loaf into 10 equally-sized pieces. Put onto an ungreased cookie sheet.

19. Place in a preheated moderate oven for about 30 minutes, until the tops are a rich, golden brown.
20. Allow to cool and enjoy!
Armenian Nutmeg Cake
Makes one 9”/23cm cake which yields 12 servings
Ingredients
1 cup (240 ml) milk (I use whole, but nonfat or lowfat should be fine; non-dairy might work just fine, as well)
1 teaspoon (5 ml) (5 gm) baking soda
2 cups (480 ml) (280 gm/10 oz) all-purpose (plain) flour (I suspect pastry flour or another low-gluten flour might even work better to achieve a light, fluffy crumb)
2 teaspoons (10 ml) (10 gm) (⅓ oz) baking powder (I used single-acting, because it’s aluminum-free, and it turned out fantastic)
2 cups (480 ml) (400 gm/14 oz) brown sugar, firmly packed
3/4 cup (1½ sticks) (180 ml) (170 gm/6 oz) butter, preferably unsalted, cubed
1/2 cup (120 ml) (55 gm/2 oz) walnut pieces, may need a little more
1 to 1-1/2 teaspoons (5 to 7 ½ ml) (5 to 8 gm) ground nutmeg (try to grate it fresh yourself; the aroma is enchanting)
1 egg
Directions:
Directions – the Traditional Way (The Fast, Easy Way further down)
1. Preheat your oven to moderate 350°F/175°C/gas mark 4.
2. Mix the baking soda (not baking powder; that’s for the next step) into the milk. Set it aside.
3. Sift together the flour and the baking powder into a large bowl. One sift is fine
4. Add the brown sugar. Go ahead and mix the flour and brown sugar together. Or not.
5. Toss in the cubed butter.
6. Mash the butter with a fork into the dry ingredients (you can also use your fingers if you want). You’ll want to achieve a more-or-less uniform, tan-colored crumbly mixture.
7. Take HALF of this resulting crumbly mixture into your springform (9”/23cm) pan. Press a crust out of it using your fingers and knuckles. It will be easy.
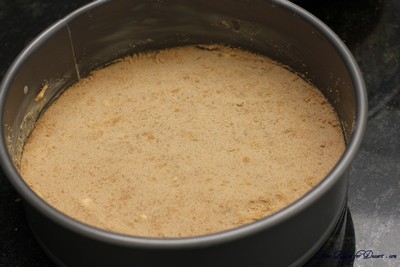
8. Crack an egg into a mixer or bowl.
9. Toss the nutmeg in with the egg.
10. Start mixing slowly with a whisk attachment and then increase to medium speed, or mix with a hand whisk if you’re doing it manually. Once it’s mixed well and frothy (about 1 minute using a standing mixer, or about 2-3 minutes of vigorous beating with a whisk), pour in the milk and baking soda mixture. Continue to mix until uniform.
11. Pour in the rest of the crumbly mixture. Mix that well, with either a paddle attachment, or a spatula. Or continue to use the whisk; it won’t make much of a difference, since the resulting batter is very liquidy.
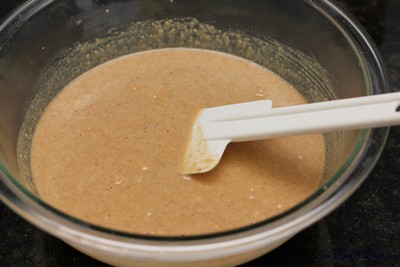
12. Pour the batter over the base in the springform pan.
13. Gently sprinkle the walnut pieces over the batter.
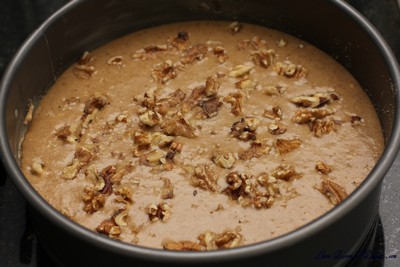
14. Bake in a preheated moderate oven for about 30-40 minutes. You’ll know it’s done when the top is a golden brown, and an inserted toothpick comes out clean.
15. Allow to cool in the pan, and then release. Enjoy!
An Even Easier Way…if you have a Food Processor
1. Preheat your oven to moderate 350°F/175°C/gas mark 4 .
2. Mix the baking soda (not baking powder) into the milk. Set aside.
3. Put the flour, baking powder, and the brown sugar into your food processor. Pulse until uniformly mixed.
4. Toss in the cubed butter. Pulse until uniformly mixed into tan-colored crumbs.
5. Pour HALF of the crumbs into your springform (9”/23cm) pan. Press out a crust using your fingers and knuckles.
6. Crack the egg into the food processor with the rest of the crumbs still in it.
7. Grate 1 to 1-1/2 teaspoon of nutmeg. Toss that into the food processor, too. Pulse until well-incorporated.
8. Pour in the milk and baking soda mixture. Continue to mix until a slightly lumpy tan batter is formed.
9. Pour the batter over the crust in the springform pan.
10. Gently sprinkle the walnut pieces over the batter.
11. Bake in a preheated moderate oven for 30-40 minutes. It’s ready when the top is golden brown, and when it passes the toothpick test (comes out clean).
12. Cool the cake in the pan, and then dig in. Yum yum!
Freezing/Storage Instructions/Tips: Nazook will keep in an airtight container at room temperature for a couple of weeks, and the Armenian nutmeg cake will keep (covered) at room temperature for 2-3 days. Both taste even better still warm from the oven.
Allow to cool completely before attempting to freeze. Nazook will freeze best if put in a freezer bag with all the air squeezed out. Armenian Nutmeg Cake will also freeze fairly well if completely sealed. Both can be frozen for up to 3 months.
Additional Information:
Both recipes might be able to be adapted to be gluten-free and/or vegan, although I have not tried myself. Gluten-free flour, coconut oil (instead of butter), pureed silken tofu (instead of sour cream), and nut milk (instead of egg yolk) might be useful starting points.

