Archive for December, 2012

Panettone – Daring Bakers Challenge December 2012

Thursday, December 27th, 2012

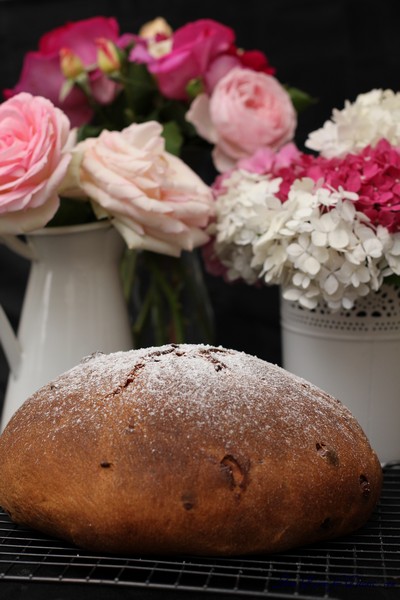
The December 2012 Daring Bakers’ challenge was hosted by the talented Marcellina of Marcellina in Cucina. Marcellina challenged us to create our own custom Panettone, a traditional Italian holiday bread!

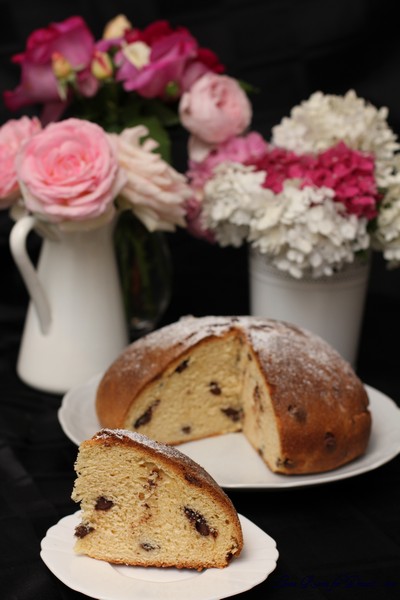
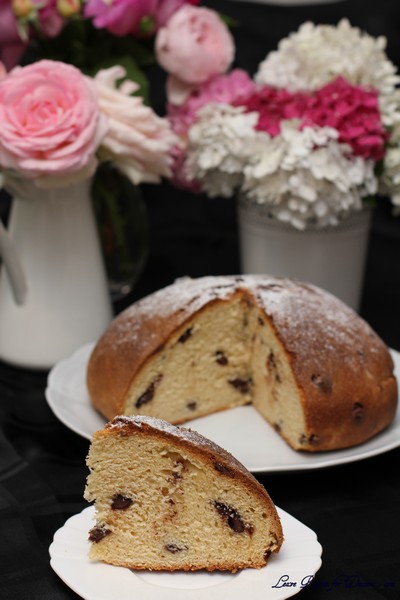
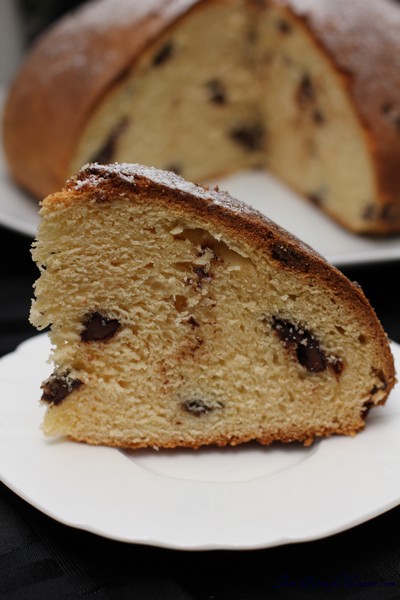
Like most recipes that require dried fruit, I always tend to substitute chocolate. I don’t normally get many complaints either, so no doubt you have already noticed that this isn’t your traditional panettone.

Honestly I have never tried a panettone before, and wasn’t sure what to expect. It was a mix between a cake and bread, and quite interesting – although due to my exclusions of this recipe, I doubt I have done it justice. The addition of the extra flavours would have made it more appealing to most.

A great suggestion I received only a few hours ago included using panettone in place of bread for French toast – it sounds splendid, and I might just give it ago on the weekend.

My panettone didn’t rise as much as I would have expected in the second and final rise, it’s quite possible I added too much flour – as I was trying to get a dough consistency. Due to this it looked more like a bun, causing Nick to name it “‘bun’-ettone”. I didn’t add the lemon or orange essence, and I changed the final ingredients for chocolate chips.

For a more detailed post on making the panettone see Marcellina’s post.

I hope everyone had a wonderful Christmas, and has an exciting New Year.

Panettone

Makes 2 Panettoni

Ingredients

Sponge
1 satchel (2¼ teaspoons) (7 gm) active dry yeast
1/3 cup (80 ml) warm water
½ cup (70 gm) unbleached all purpose flour

First Dough
1 satchel (2¼ teaspoons) (7 gm) active dry yeast
3 tablespoons (45 ml) warm water
2 large eggs, at room temp
1¼ cup (175 gm) unbleached all-purpose (plain) flour
¼ cup (55 gm) (2 oz) sugar
½ cup (1 stick) (115 gm) unsalted butter, at room temp

Second dough
2 large eggs
3 large egg yolks
2/3 cup (150 gm) (5-2/3 oz) sugar
3 tablespoons (45 ml) honey
1 tablespoon (15 ml) vanilla extract
1 teaspoon (5 ml) lemon essence/extract
1 teaspoon (5 ml) orange essence/extract
1 teaspoon (5 ml) (6 gm) salt
1 cup (2 sticks) (225 gm) unsalted butter, at room temp
3 cups (420 gm) (15 oz) unbleached all-purpose (plain) flour; plus up to (2/3 cup) 100 gm for kneading

Filling and final dough
1½ cups (250 gm) (9 oz) golden raisins or golden sultanas
½ cup (75 gm) (2-2/3 oz) candied citron ( I didn’t have this so I made it up with candied orange peel)
½ cup (75 gm) (2-2/3 oz) candied orange peel (try making your own; recipe below)
Grated zest of 1 orange
Grated zest of 1 lemon
2 to 3 tablespoons (30-45 ml) (15-25 gm) unbleached all-purpose (plain) flour

Directions:

Sponge

Mix the yeast and water in a small bowl and allow to stand until creamy. That’s about 10 minutes or so
Mix in the flour.
Cover with plastic wrap and allow to double in size for about 20 to 30 minutes

First Dough

By hand:

Mix the yeast and water in a large bowl and allow to stand until creamy. Again, about 10 minutes or so
Mix in the sponge and beat well with a wooden spoon
Stir in the eggs, flour and sugar.
Mix in the butter well
This should only take about 5 – 6 minutes
Cover with plastic wrap and allow double in size, about 1 – 1 ¼ hours

By Mixer:

In the mixer bowl, mix together the yeast and water and allow to stand until creamy. Again, about 10 minutes or so
With the paddle attached mix in the sponge, eggs, flour, and sugar.
Add in the butter and mix for 3 minutes until the dough is smooth and even.
Cover with plastic wrap and allow double in size, about 1 – 1 ¼ hours

Second dough

By Hand:

Be sure to have your dough in a large bowl as above.
With a wooden spoon mix in eggs, egg yolk, sugar, honey, vanilla, essences/extracts and salt.
Mix in the butter.
Then add the flour. Stir until smooth.
At this stage the dough will seem a little too soft, like cookie dough.
Turn it out and knead it on a well-floured surface until it sort of holds its shape. Don’t knead in too much flour but you may need as much as 2/3 cup (100 gm). Be careful the excess flour will affect the finished product.

By Mixer:

With the paddle mix in thoroughly the eggs, egg yolks, sugar, honey, vanilla, essences/extracts, and salt.
Mix in the butter until smooth.
Add the flour and slowly incorporate.
At this stage the dough will seem a little too soft, like cookie dough.
Replace the paddle with the dough hook and knead for about 2 minutes.
Turn out the dough and knead it on a well-floured surface until it sort of holds its shape.
Don’t knead in too much flour but you may need as much as 2/3 cup (100 gm). Be careful the excess flour will affect the finished product.

First Rise

Oil a large bowl lightly, plop in your dough and cover with plastic wrap
Now we need to let it rise until it has tripled in size. There are two ways to go about this.

Rise in a warm place for 2 – 4 hours
Or find a cool spot (64°F -68°F) (18°C – 20°C) and rise overnight
Or rise for 2 hours on your kitchen bench then slow the rise down and place in the refrigerator overnight. If you do this it will take some time to wake up the next morning but I preferred this method.

Filling and Final Rise:

Soak the raisin/sultanas in water 30 minutes before the end of the first rise. Drain and pat dry with paper towels.
Now take your dough and cut it in half. Remember we are making two panettoni.
Combine all your filling ingredients and mix well
Press out one portion of dough into an oval shape
Sprinkle over one quarter of the filling and roll up the dough into a log
Press out again into an oval shape and sprinkle over another quarter of the filling
Roll into a log shape again.
Repeat with the second portion of dough
Shape each into a ball and slip into your prepared pans, panettone papers or homemade panettone papers.
Cut an X into the top of each panettone and allow to double in size.
Rising time will vary according to method of first rise. If it has been in the refrigerator it could take 4 hours or more. If it has been rising on the kitchen bench in a warm place it should be doubled in about 2 hours.

Baking

When you think your dough has only about 30 minutes left to rise preheat your oven to moderately hot 400°F/200°C/gas mark 6 and adjust your oven racks
Just before baking carefully (don’t deflate it!) cut the X into the dough again and place in a knob (a nut) of butter.
Place your panettoni in the oven and bake for 10 minutes
Reduce the heat to moderate 350°F/180°C/gas mark 4 and bake for another 10 minutes
Reduce the heat again to moderate 325°F/160°C/gas mark 3 and bake for 30 minutes until the tops are well browned and a skewer inserted into the panettone comes out clean.
Cooling your panettone is also important. If you have use papers (commercial or homemade) lie your panettoni on their side cushioned with rolled up towels. Turn gently as they cool. If you have used pans cool in the pans for 30 minutes then remove and cushion with towels as above.
Panettone can also be cooled suspended. How to do this? Firstly you need to use papers (commercial or homemade), insert clean knitting needles into the bottom of the panettone in a X shape. Flip over and support the knitting needles on the edges of a large saucepan with the panettone suspended within the saucepan. Yep, a lot of trouble and I didn’t really find that much difference – maybe I took too long to insert the needles.
Dulce Luna Viennoiserie

Monday, December 10th, 2012

This post is sponsored by Nuffnang

I was fortunate enough to be asked along to the pre-launch of Dulce Luna, a new Viennoiserie in Sydney, on the corner or York and King Street. On arrival I saw a sign letting people know of the upcoming opening and specials to be had on the opening day Wednesday 5th December, including free dulce lunas. I also saw people already interested in trying out these yummy pastries. If you’d like to read more about the launch, check out this post by Jeroxie.

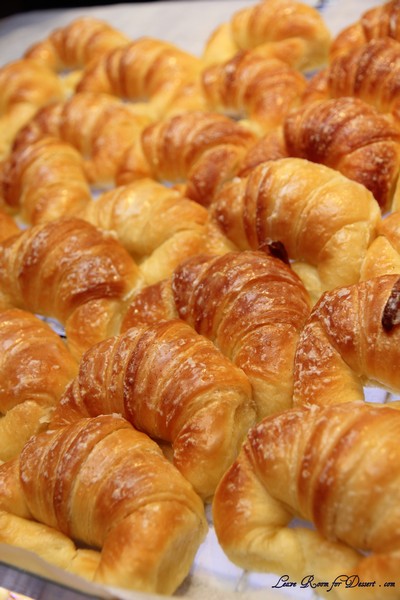
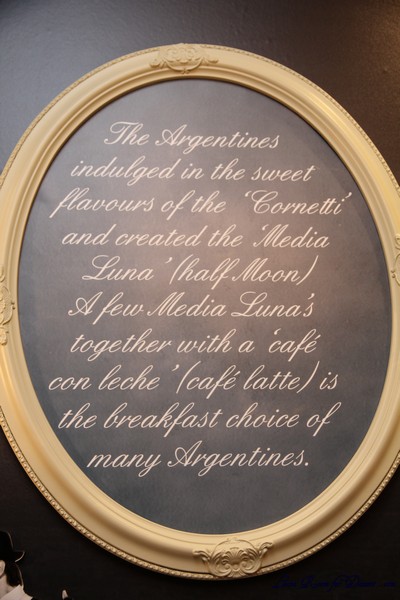
Dulce Luna means Sweet Moon in Spanish, and it is quite hard to describe these lovely pastries. Gus, the founder of the store, describes it as the combination of a croissant, cornetti and brioche. Having only tried croissants, I would describe it as not as flaky, with a more sweet and slightly softer filling. As it is hard to describe, it’s probably a good idea to try them 🙂

The cute store was beautifully decorated with white and black features, sayings about pastries, chandeliers and matching wall lights. The entrance featured a two piece band, close to the glass cabinets filled with dulce lunas. Following this was a large coffee machine across from some stools, this then flows straight into the kitchen which had a lovely long bench and some very special machinery – including one large “fridge” which could be set to change from fridge settings to warming settings, depending on what was required for the dough or the rolled pastries.

Nick loved the coffee

You could sense the excitement of everyone involved with the store, and their passion for making quality pastries and coffee was clearly evident. I was told that whilst trying to perfect the recipe for their dulce lunas they didn’t even allow family and friends to try the ones that weren’t quite perfect – something I think my family just wouldn’t have allowed.

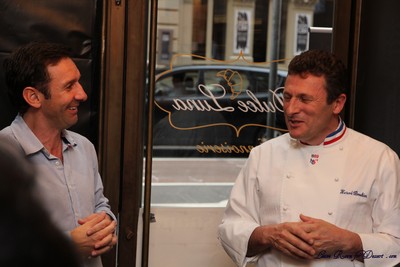
Gus and Herve sharing their passion for dulce lunas with us

We chatted with the founder Gus, head Chef Herve and manager Cory, and were delighted by their stories of how the product was perfected and how everyone contributed to overcoming the challenges of opening a new cafe. We discovered that there is certainly a possibility that more Viennoiseries will be opened around Sydney and Melbourne (I have fingers crossed for one in Darlinghurst, as I can imagine eating this for breakfast, morning tea, lunch or afternoon tea at work).

Gus Mendez told us how the idea for this cafe started and the process leading up to the launch. “The whole idea about dulce luna popped into my head about 15 years ago, when I was on honeymoon and having breakfast with my wife and had these amazing pastries in Buenos Aires, Argentina.” He thought they would be perfect for home, Australia, and just wanted to eat more of the pastries.

“After 15 years in finance, I sold my business 2 years ago and thought I would revisit that idea and start discovering a bit about pastries. I was lucky enough to visit Paris, New York, and then go back to Buenos Aires and also to sample a lot of product here in Australia, and thought there is definitely a gap in the market, for something that’s a bit different.” Gus baked for months on end in his kitchen, then showed Herve what he envisaged would be their product, which then resulted in more cooking and trialing of recipes. “We believe it’s an Australian product, because it is quite unique, and brings a lot out of each of those products.”

Head Chef Herve Boutin has been in Australia for more than 20 years and completed the Meilleur Ouvrier de France (MOF), which took 3 years of preparation, before coming to Australia. He met Gus 6 months ago and loved the idea. “We put our passion and knowledge into the product…This product can only be home made.” Herve sums it up nicely: “It’s a great story of passionate people.”

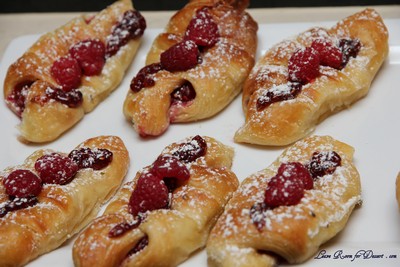
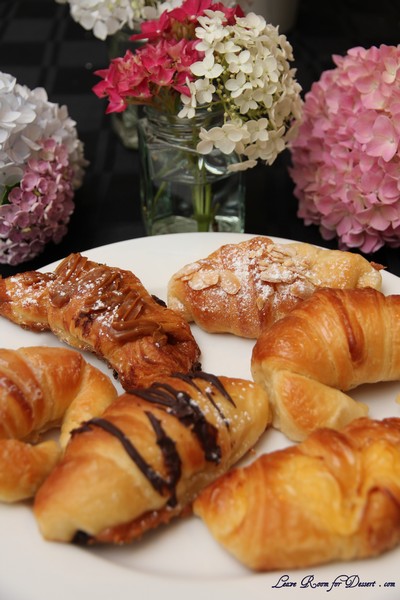
When the food was on its way out, I was glad Nick was there (he was also very happy I brought him along), as this meant I got to try all the dulce lunas available. I tried the traditional one to begin with to try and taste the difference between this and a croissant. It had a beautiful, light texture with a very slight vanilla glaze on top. Next came the raspberry dulce luna which had both an amazing raspberry jam and raspberries on top, and due to my love of raspberries, this would have to be one of my favourites. The pistachio was also a big favourite of mine. The freshly ground pistachio flavour works beautifully with the pasty.

Raspberry Dulce Lunas

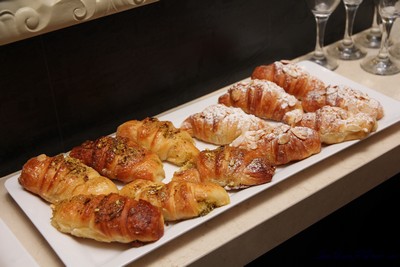
The almond dulce luna came out, and it was lovely, especially as it was made fresh and not with day old croissants which is what is usually done at most bakeries. The chocolate dulce luna was also a big hit – the chocolate was of great quality and being so fresh, it melted in your mouth. The quality and amount of chocolate in these is far better than your average chocolate croissant.

Pistachio and Almond Dulce Lunas

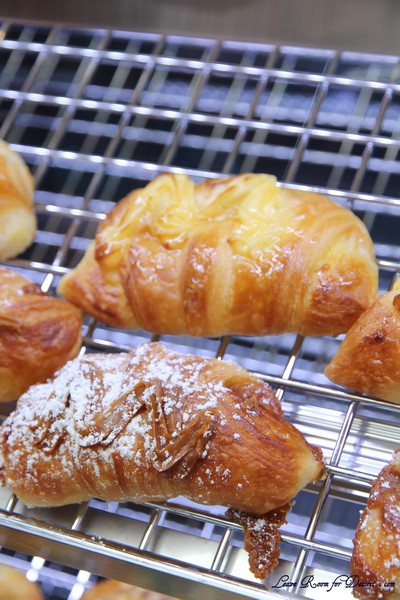
Two “dessert” dulce lunas also came out, luckily after some of the less rich ones (as otherwise I might not have managed to try them all). The first was the crème patisserie one, which had a beautiful vanilla custard-like filling, and the dulce de leche – well that can speak for itself, if you love caramel – you will love this

Dulce de leche and Creme Patisserie Dulce Lunas

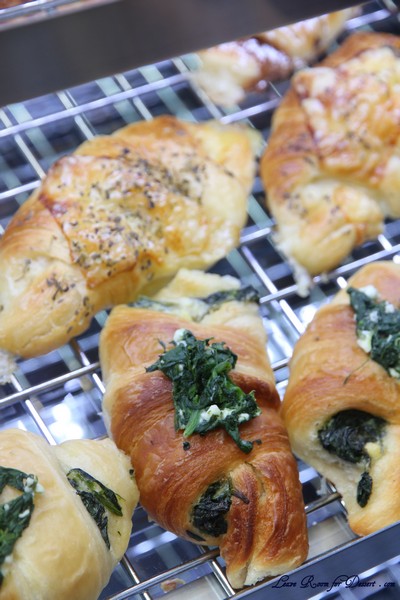
For those with a less sweet tooth, some savoury options are available and would be great for breakfast or lunch – including the ham, cheese and béchamel sauce, and the spinach and feta.

Ham, Cheese and Bechamel, and Spinach and Feta Dulce Lunas

After trying all the flavours, everyone shared their favourite flavours. Some preferred the ham and cheese, others the raspberry and many the dulce de leche. One of the things I found most enjoyable with all the dulce lunas we tried was their freshness and the natural flavours that came through, nothing tasted artificial – because nothing like that is added. We were told of how every day the product will be made fresh and is best eaten within about 8 hours of baking. If you don’t get a chance though, a quick reheat in the microwave will work a treat, which is what we did with our take-home sample package.

There are also going to be certain featured flavours only available for a week at a time, including lemon curd and Nutella.

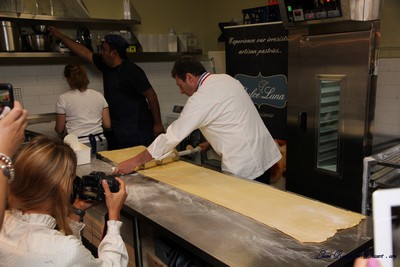
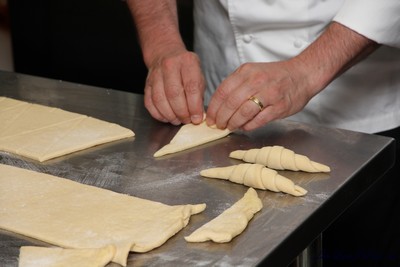
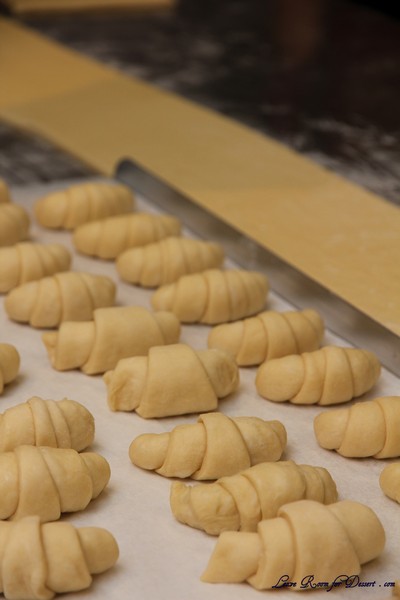
Lastly, we got to see the production of the dulce lunas, with dough that had been proving overnight. The proving process helps to develop a lot of the flavour. The dough then gets laminated with butter to form the working dough, which gets cut into triangles and rolled to the traditional moon shape. The filled lunas have to be done a bit more carefully to ensure the filling doesn’t come out.

The professional ones are on the right hand side - with our attempts making the rest...

I would like to thank both Nuffnang and Dulce Luna for this opportunity – attending the pre-launch was lovely, and it was great to meet so many vibrant and passionate people… and of course trying such amazing food. I am sure that customers will have a similar admiration when they try these quality, tasty dulce lunas, and meet the people who work in the store.

The ones we got to take home - and had for breakfast 🙂

Now… Nick – when will you have a chance to pick me up another box of them?

For updates or offers by Dulce Luna, follow them on Facebook or Twitter.

Facebook members & Twitter followers of Dulce Luna can get these discounts for a limited time:
$12.50 for mixed half dozen box ($2.50 discount or over 15%)
$24.00 for mixed dozen ($5.00 discount or over 15%) till 31st Mar 2013

Dulce Luna
Sydney CBD Shop 2C,
66 King St (corner York St)
http://dulceluna.com.au/index.html

Gingerbread House Template

Wednesday, December 5th, 2012

You may remember a few years ago I made this gingerbread house for a Daring Bakers Challenge – based on an image I found on the internet. I had to design the house from scratch, and there were quite a few difficulties.

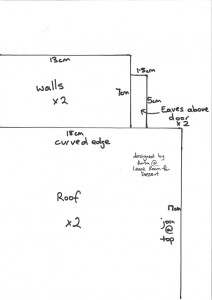
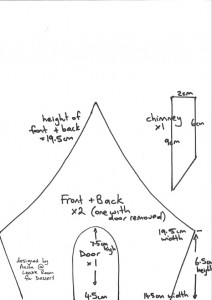
Over the years I have had many requests for the pattern, although it had been pushed away in a drawer, all cut up. I finally got a chance to trace it out nicely and have attached it to this post for you to use. Apologies to all those who have waited and missed out on making it in previous years.

Please note:
1. when printing – Do not scale to fit. (make sure there is no scaling)
2. Check the measurements with a ruler before cutting (the roof and walls seem to get cut off a bit – although as these are straight lines you can draw this in).
3. Make a demo house and check all the sizes match up and that the house and roof all work together – adjust if necessary.
4. Please see my original post for extra info and any troubles I had with the construction.

Click below link for a copy of the template in pdf.
LRfDGingerbreadHouse
(please note: the above link does not show some of the right hand measurement on the front of the house (which can be seen in the images below) – as it had to be cut off to allow printing margins)