Petit Fours

Passion Fruit Caramel Chocolates – Daring Bakers Challenge July 2013

Sunday, July 28th, 2013

In a “celebration” of past Daring Baker and Daring Cook challenges, Lisa challenged all of us to search through the Daring Kitchen archives and pick any one we’d like! The REAL challenge was picking which delicious recipe(s) to try!

I remember before I started the Daring Bakers, each month on some of my favourite food blogs I couldn’t wait to see what everyone had made. Seeing their wonderful creations and wishing I had made them was the reason I joined up to the Daring Bakers.

So when this challenge came up, I thought it was a great opportunity for me to try some of those dishes I had missed making. Some of the dishes I considered making were eclairs, a French Yule Log or tuiles. Although after I attended a chocolate tempering class last year (and received some silicone chocolate moulds for Christmas), I decided to go back to a challenge I had already done, although hadn’t made one of components I would have liked to make.

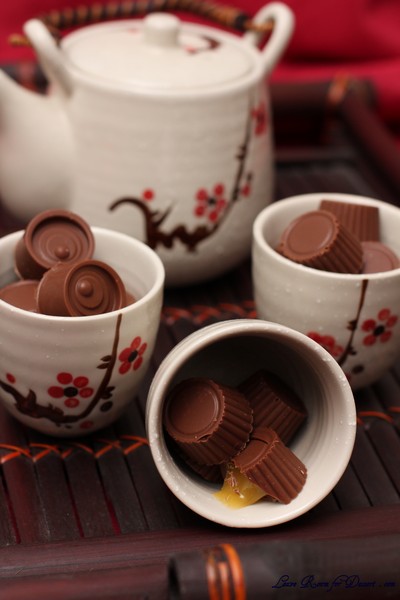
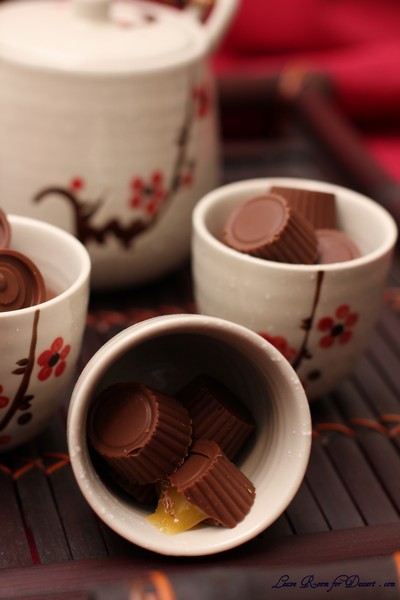
So, passion fruit caramel chocolates became my challenge for this month. The caramel just tasted divine, and some tips on chocolate tempering from the class came in handy too. When I handed out the chocolates I got a lot of great responses and comments that I could certainly make them again (which I will – because I loved them). They made quite a mess though, although to make yummy food, sometimes you need to spread chocolate over the counter and lots of utensils.

From Daring Bakers August 2011
Lisa’s Passion Fruit Caramel Bonbons was adapted from CandyBarLab.com

Passion Fruit Caramel Chocolates aka Bonbons

Servings: 16 large (1.5” – 2” molds) or 20 to 25 medium bonbons (would have made more than 30 small chocolates)

Painted passion fruit caramel filled bonbons
Ingredients, sans passion fruit, From CandyBarLab.com, with my revisions

Ingredients
Dark or milk chocolate melted, preferably tempered, about 1 lb / 450g
1 cup (225g / 8oz) Granulated White Sugar
1/2 cup (125ml / 4 fluid oz) Light Corn Syrup
1/2 cup (125ml / 4 fluid oz) Water
4 Tbsp (60g / 2 oz) Unsalted Butter
2 Tbsp (30ml / 1 fluid oz) Heavy Cream
1/4 cup (60ml / 2 fluid oz) Passion Fruit Puree (I purchased frozen passionfruit pulp, then thawed it and removed the seeds)
1/2 Tbsp salt

Equipment
2 or 3 quart, heavy-bottomed pot
Candy thermometer
Whisk

Directions:
1. Place the sugar, corn syrup and water in a medium saucepan.
2. Set over medium-high heat and stir to combine.
3. Bring the mixture to a boil and cook until dark amber in color 310°F-315°F / 155°C-158°C, about 5 minutes.
4. Use a pastry brush, dipped in water, to wash down sides of pan to prevent crystallization as the mixture boils.
5. Remove saucepan from the heat and gradually whisk in the passion fruit puree, heavy cream and butter.
6. Transfer to a medium bowl and let cool.
7. Transfer cooled caramel to a pastry bag fitted with a medium plain tip or a squeeze bottle.
8. Coat the molds with chocolate using the method mentioned above.
9. Fill chocolate coated molds with caramel. You can use a spoon too but it’s less messy and goes a lot quicker with either of the two aforementioned methods.
10. Finish off with a layer of chocolate as mentioned in the method above for making filled chocolates with molds
11. Once fully set, carefully knock the chocolates out of the mold

Tempering Methods

Method 1: On marble or granite

Marble slab, chocolate or bench scraper, dipping forks and chocolate thermometer

Tempering Ranges:

Celcius
Dark: 45°C-50°C > 27°C > 32°C
Milk: 45°C > 27°C > 30°C
White: 45°C > 27°C > 29°C

Fahrenheit
Dark: 113°F-122°F > 80.6°F > 89.6°F
Milk: 113°F > 80.6°F > 86°F
White: 113°F > 80.6°F > 84.2°F

Chocolate is melted and heated until it reaches 45°C / 113°F. It is then poured onto a marble surface and moved around the surface with a scraper until it has thickened and cools to 27°C / 80.6°F. Once cooled it is then put back into the bowl and over heat to bring it back up to 32°C/30°C/29°C /// 89.6°F/86°F/84.2°F depending on the chocolate you’re tempering. It is now ready for using in molds, dipping and coating.

Tempering using a marble surface

• Finely chop chocolate if in bar/slab form.
• Place chocolate in a heatproof bowl.
• Place bowl over a saucepan of simmering water (make sure the bowl does not touch the water).
Tip: Make sure that your bowl fits snuggly into the saucepan so that there’s no chance of steam forming droplets that
may fall into your chocolate. If water gets into your chocolate it will seize!
• Using a rubber spatula, gently stir the chocolate so that it melts evenly
• Once it’s melted, keep an eye on the thermometer, as soon as it reaches 45°C / 113°F remove from heat (between 45°C-50°C / 113°F-122°F for dark chocolate)
• Pour ¾ of the melted chocolate onto a marble or granite slab or worktop
• Using a scraper or large palette knife move the chocolate around the surface to help it cool
Tip: Keep the motions neat and tidy, if you’re not working with a lot of chocolate you don’t want to spread it too far otherwise you may end up with chocolate that begins to cool too quickly and start to set as well as drops below
• the necessary temperature. Use a motion that folds the chocolate on itself
• Check temperature regularly with a thermometer
• Once it reaches 27°C / 80°F put the chocolate back into the heatproof bowl with the remaining chocolate
• Gently stir together with a rubber spatula
• Check the temperature to see if it’s risen back up to the working temperature of the chocolate (milk, dark or white) as seen in the above chart
• If the temperature has not risen to its working temperature, put the bowl back over the simmering water, stirring gently
• IMPORTANT: You really need to keep an eye on the temperature as it can rise quicker than you think, so as soon as it’s up to its working temperature, remove from heat
• It’s now tempered and ready to use
Tip: If you’re using the chocolate to dip a lot of truffles etc. which means the chocolate will be sitting off heat for a while it will naturally start to thicken as it cools. To keep it at an ideal viscosity for even coating, put the bowl over steam for 30sec-1min every 5-10mins, just do not let the temperature go over the working temperature!
Tip: Having the chocolate in a warmed glass bowl and wrapped in hot kitchen towel can also help keep the chocolate at its working temperature for longer
Tip: It is also easier to keep the heat if you work with larger amounts of chocolate rather than small amounts. Any leftover chocolate can be kept to be used later and then re-tempered
Tip: Remember, don’t let any water get into your chocolate at any stage of the tempering process!
Method 2: With tempered chocolate pieces, also called “seeding”

Tempering Ranges:

Celsius
Dark: 45°C-50°C > 27°C > 32°C
Milk: 45°C > 27°C > 30°C
White: 45°C > 27°C > 29°C

Fahrenheit
Dark: 113°F-122°F > 80.6°F > 89.6°F
Milk: 113°F > 80.6°F > 86°F
White: 113°F > 80.6°F > 84.2°F

Chocolate is melted and heated until it reaches 45°C / 113°F. Tempered un-melted chocolate is then stirred and melted in until it brings the temperature down to 27°C/80.6°F. It is then put back over heat and brought up to its working temperature of 32°C/30°C/29°C /// 89.6°F/86°F/84.2°F depending on the chocolate you’re using. It is now ready for using in molds, dipping and coating.

Tempering using the seeding method with couverture callets

• Finely chop chocolate if in bar/slab form (about the size of almonds).
• Place about ⅔ of the chocolate in a heatproof bowl
• Set aside ⅓ of the chocolate pieces
• Place bowl over a saucepan of simmering water (make sure the bowl does not touch the water)
Tip: Make sure that your bowl fits snuggly into the saucepan so that there’s no chance of steam forming droplets that may fall into your chocolate. If water gets into your chocolate it will seize!
• Using a rubber spatula, gently stir the chocolate so that it melts evenly
• Once it’s melted, keep an eye on the thermometer, as soon as it reaches 45°C / 113°F remove from heat (between 45°C-50°C / 113°F-122°F for dark chocolate)
• Add small amounts of the remaining ⅓ un-melted chocolate (seeds) and stir in to melt
• Continue to add small additions of chocolate until you’ve brought the chocolate down to 27°C/80.6°F (You can bring the dark chocolate down to between 80°F and 82°F)
• Put it back on the double boiler and bring the temperature back up until it reaches its working temperature of the chocolate (milk, dark or white) as seen in the above chart. (32°C/89.6°F for dark, 30°C/86°F for milk and 29°C/84.2°F for white)
• If you still have a few un-melted bits of chocolate, put the bowl back over the simmering water, stirring gently and watching the thermometer constantly.
• IMPORTANT: You really need to keep an eye on the temperature so that it doesn’t go over its working temperature

It’s now tempered and ready to use

Tip: Another way of adding the “seed” is by dropping in one large chunk of tempered chocolate (the seed). That way you only need to fish out one piece of unmelted chocoalte and don’t need to fish out several small bits of unmelted chocolate once the chocolate has reached temper.
Other Tips

• If you’re using the chocolate to dip a lot of truffles etc. which means the chocolate will be sitting off heat for a while it will naturally start to thicken as it cools. To keep it at an ideal viscosity for even coating, put the bowl over steam for 30sec – 1min every 10 – 15mins, just do not let the temperature go over the working temperature!
• Having the chocolate in a warmed glass bowl and wrapped in hot kitchen towel can also help keep the chocolate at its working temperature for longer
• It is also easier to keep the heat if you work with larger amounts of chocolate rather than small amounts. Any leftover chocolate can be kept to be used later and then re-tempered
• Remember, don’t let any water get into your chocolate at any stage of the tempering process!
• Unless you’ve been working with chocolate for a while and have developed a feel for the tempering process and can tell the chocolate’s temperature by touching it to your lower lip like a pro, it’s imperative that you use a thermometer to determine the temperature, as going a few degrees either way can ruin the temper.
• If at any stage you do make a mistake with the tempering process you can simply start again from the beginning.
• While a marble or granite top is ideal for cooling the chocolate in the first method, you can also cool it on a countertop that’s laminated, glass or steel. It will take longer to cool, but it’s possible! (but I definitely wouldn’t recommend a wood or rough textured counter top Wink )
• Any chocolate left over after making your molded or dipped chocolate can be stored away in a cool place and then re-tempered before using again. There’s no need to ever waste good chocolate! Smile
• Wooden spoons can retain moisture so it’s best to use a rubber spatula while tempering

How to make filled chocolate with molds

Tempered Chocolate
Various Colored Cocoa Butters (optional)
OR Food Grade Cocoa Butter colored with powdered food coloring

Other Equipment:
A small brush
Chocolate molds
A Ladle
Bench or plastic scraper
OR
A small brush or spoon

Directions:

1. If using colored cocoa butter and plastic molds, paint designs at the bottom of the wells in each mold. Let dry. You can also use lustre dusts mixed with a bit of extract or vodka, instead of colored cocoa butters for a nice sheen. Let painted molds dry.

2. When coating the molds with the tempered chocolate, I like to do it how the chocolate pro’s do it (much faster and a lot less tedious). While holding mold over bowl of tempered chocolate, take a nice ladle of the chocolate and pour over the mold, making sure it cover and fills every well. Knock the mold a few times against a flat surface to get rid of air bubbles, then turn the mold upside down over the bowl of chocolate, and knock out the excess chocolate. Turn right side up and drag a bench or plastic scraper across so all the chocolate in between the wells is scraped off cleanly, leaving you with only chocolate filled wells. Put in the fridge to set, about 5 to 10 minutes. Alternatively, you could take a small brush and paint the tempered chocolate into each mold, or spoon it in if you’d like.

3. Remove from refrigerator and fill each well with the filling of your choice. Again take a ladle of chocolate and pour it on top of the filled chocolate wells, knocking against a flat surface to settle it in. Scrape excess chocolate off the mold with the bench scraper then refrigerate until set.

4. When set, pop your beautiful filled chocolates out of each well and enjoy!
Chocolate Truffles and Peanut Butter Fudge – Daring Bakers Challenge August 2011

Saturday, August 27th, 2011

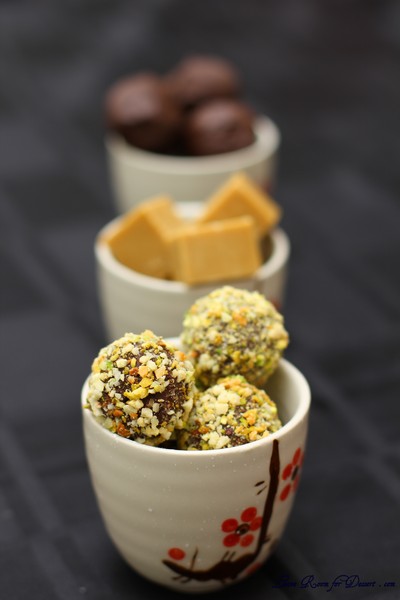
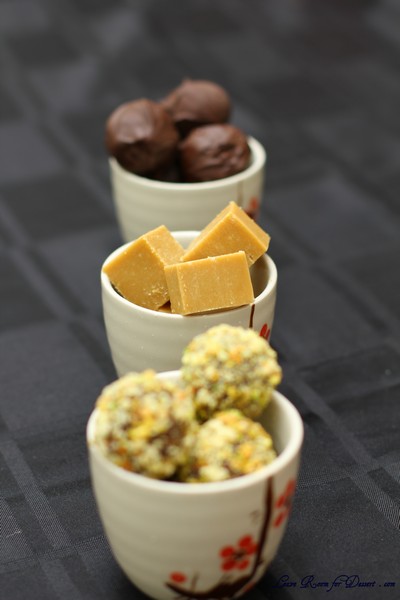
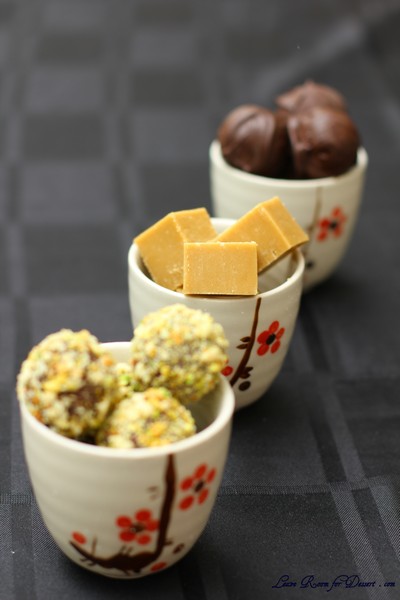
The August 2011 Daring Bakers’ Challenge was hosted by Lisa of Parsley, Sage, Desserts and Line Drive and Mandy of What the Fruitcake?!. These two sugar mavens challenged us to make sinfully delicious candies! This was a special challenge for the Daring Bakers because the good folks at http://www.chocoley.com offered an amazing prize for the winner of the most creative and delicious candy!

I have just been away for a fabulous 2 week holiday, leaving the rainy Sydney weather and enjoying beautiful 25 degree days in Port Douglas and the sand under my feet. I hope to give a short post on a few of my recommendations of restaurants and activities for those who are going there on a holiday soon.

We came home to lawn that needed mowing and the destruction of the first tulips I have planted in our garden, some fresias, irises, jonquils and snowflakes. We think it was either cockatoos, rabbits or a dog that destroyed some of the flowers and plants, but I am so excited about the flowers that weren’t destroyed and hope to post some of those pics soon as well.

I should get started talking about this month’s challenge though, and I must admit my delight at the array of recipes we were given to choose from for this challenge. We needed to make a chocolate and non-chocolate sweet, and were given methods for tempering chocolate, making truffles, chocolate coated sweets, filled chocolate, jellies and fudge.

Two of the recipes that I really wanted to make required specialised equipment and/or ingredients, which I did not have time to source before the challenge was due, although I am thinking of looking on the internet to find the moulds and ingredients so I can make these in the future.

Due to time constraints, I decided to make some of the easier looking recipes, and I have never made fudge before, so this was also an exciting new recipe to try. I found the truffle recipe a lot easier than a previous truffle recipe I have tried, and the fudge was easy as well, not needing a thermometer.

I woke up this morning and thought perhaps I would just coat my truffles in crushed nuts, but decided to push past my troubles with tempering chocolate, and tried to temper some of the nicest chocolate I have ever bought, using my marble slab. Unfortunately I still have some way to go before I manage to temper chocolate correctly, although I guess practice makes perfect…

Thanks to this month’s hosts. Everyone who has tried these sweets has loved the challenge, and loved that I’m a member of the Daring Bakers! 🙂

Milk Chocolate & Hazelnut Praline Truffles

Servings: Makes +- 30 truffles, recipe easily doubled or halved
Adapted from the Cook’s Academy Curriculum, Dublin
Active Time: 1 – 2hrs
Ganache Setting Time: 2 – 4hrs or Overnight

Praline Ingredients:
½ cup (120 ml/2 oz/60 gm) hazelnuts, shelled & skinned (or a combination of nuts, hazelnuts, almonds, pistachios)
½ cup (120 ml/4 oz/115 gm) granulated white sugar
2 tablespoons (30 ml) water

Making the praline and ganache. Once set, making balls of the set ganache then rolling in crushed hazelnuts

Directions:

1. Preheat oven to moderate 180°C / 160°C Fan Assisted (convection oven); 350°F / 320°F convection / Gas Mark 4
2. Place whole hazelnut on a non-stick baking tray and dry roast for 10mins
3. Allow to cool
4. Place hazelnuts in a clean dry kitchen towel and rub to remove the skins
5. Line a baking tray with parchment paper or a silicon mat
6. Place the skinned hazelnuts onto the prepared tray
7. Combine the sugar and water in a saucepan over medium low heat, stirring until the sugar is dissolved
8. Turn the heat up and bring to the boil (do not stir), brushing down the sides of the pot with a pastry brush dipped in water to remove any sugar crystals
9. Boil until the mixture turns amber (160°C – 170°C / 320°F- 340°F on a candy thermometer)
10. Remove from heat immediately and pour the syrup over the hazelnuts
11. Allow to cool completely
12. Break into small pieces
13. Transfer pieces to a food processor and process until desired texture, either fine or rough
14. Set aside

Ganache Ingredients
1¾ cup (9 oz. / 255 g) Milk chocolate, finely chopped
½ cup (4 oz. / 125 ml) Double/Heavy Cream (36% – 46% butterfat content)
2-3 Tablespoons (1-1 ½ oz. / 30ml – 45 ml) Frangelico Liqueur, optional

½ – 1 cup Crushed or Ground Roasted Hazelnuts for coating (I used pistachio and almonds)

Directions:
1. Finely chop the milk chocolate
2. Place into a heatproof medium sized bowl
3. Heat cream in a saucepan until just about to boil
4. Pour the cream over the chocolate and stir gently until smooth and melted
5. Allow to cool slightly, about 10 minutes
6. Stir in the praline and (optional) liqueur
7. Leave to cool and set overnight or for a few hours in the fridge
8. Bring to room temperature to use

Forming the truffles:
1. Using teaspoons or a melon baller, scoop round balls of ganache
2. Roll them between the palms of your hands to round them off
Tip: Handle them as little as possible to avoid melting
Tip: I suggest wearing food safe latex gloves, less messy and slightly less heat from your hands
3. Finish off by rolling the truffle in the crushed roasted hazelnuts
Tip: You can also roll them in hazelnut praline
4. Place on parchment paper and leave to set
Tip: They look great when put into small petit four cases and boxed up as a gift!

Peanut Butter Fudge

Prep Time: 15 mins
Total Time: 20 mins
Yield: 64 squares

Ingredients:
1/2 cup (120ml/115g / 4oz.) Unsalted Butter
2 1/4 cups (540ml/450g / 16oz.) firmly packed Brown Sugar
1/2 cup (120ml) Milk
3/4 cup (180ml/200g / 7oz.) smooth Peanut Butter
1 teaspoon (5ml) Vanilla Extract
3 1/2 cups (840ml/425g / 15oz.) Confectioners’ (Icing) Sugar

Directions:
1. Place butter into a medium saucepan and melt it over medium heat.
2. Add brown sugar and milk, stirring.
3. Boil for 2 minutes, stirring frequently.
4. Remove from heat.
5. Mix in peanut butter and vanilla.
6. Place confectioners’ sugar into a large mixing bowl.
7. Pour hot peanut butter mixture over confectioners’ sugar and beat until smooth.
8. Pour fudge into an 8 by 8 inch (20cm by 20cm) pan.
9. Chill until firm, about 1 hour.
10. Cut into 1-inch (25 mm) squares.

Baked Alaska and Ice Cream Petit Fours – Daring Bakers Challenge August 2010

Friday, August 27th, 2010

The August 2010 Daring Bakers’ challenge was hosted by Elissa of 17 and Baking. For the first time, The Daring Bakers partnered with Sugar High Fridays for a co-event and Elissa was the gracious hostess of both. Using the theme of beurre noisette, or browned butter, Elissa chose to challenge Daring Bakers to make a pound cake to be used in either a Baked Alaska or in Ice Cream Petit Fours. The sources for Elissa’s challenge were Gourmet magazine and David Lebovitz’s “The Perfect Scoop”.

Two sweets I have never made were chosen for this month’s Daring Bakers challenge. We could do both or just one, and as I had done neither previously and wanted to try them both. I went with both, especially considering that there were two common components between these desserts, meaning I just had to increase the cake and ice cream quantity, and not make too many extra components.

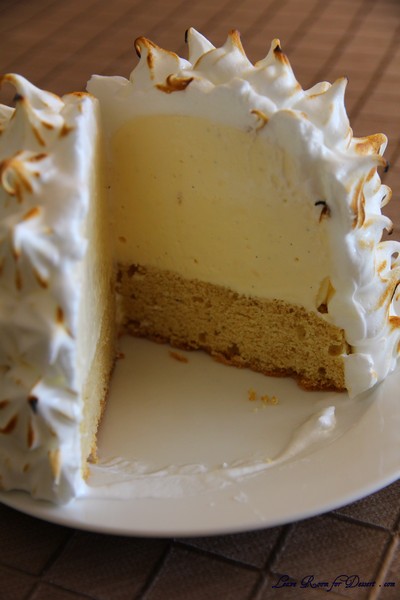
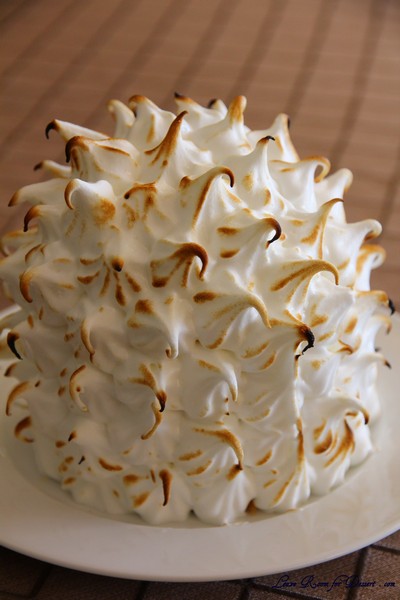
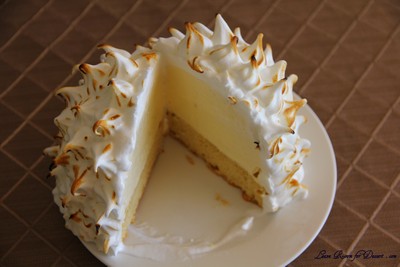
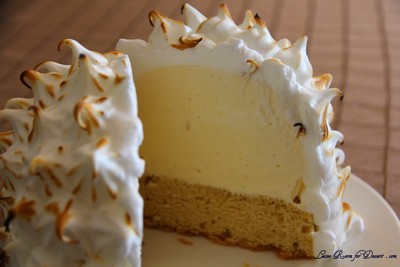
I was surprised by how many people one Baked Alaska from a reasonably small tea cup actually served. You could easily serve 2-4 people with one Baked Alaska, and with the petit fours being served up with them, I was cutting it into eight. This meant one of them stayed in the freezer (covered in plastic) for a week before my family got around to eating it. And it was still good.

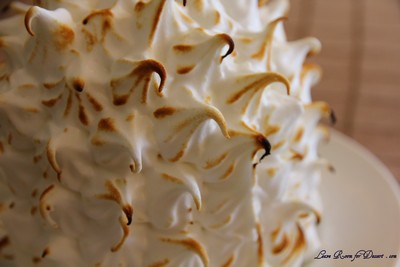
I tried both torching the meringue using a blow torch and placing it in a hot oven for 4 minutes. The torching was a heap of fun, although the oven actually made the meringue beautifully crispy on the outside. I’m not a huge fan of not-fully cooked meringue and this was a little off-putting for me, although others couldn’t get enough of it.

The cake was lovely the day it came out of the oven, the burnt butter flavour worked so well. I found as the days went on and refrigeration and freezing were required, it became a little staler than I would have preferred.

Although I was extremely looking forward to the petit fours, they didn’t turn out how I had hoped. They were too large, the cake kept coming away from the ice cream and they were too difficult to coat. Taste-wise they were great – but I wouldn’t bother doing them individually again…

Thanks again to our host this month – I always enjoy the challenges.

Baked Alaska and Ice Cream Petit Fours

Recipe Source: The brown butter pound cake recipe is adapted from the October 2009 edition of Gourmet. The vanilla ice cream is from ice cream genius David Lebovitz, adapted from The Perfect Scoop. The chocolate glaze for the petit fours is a larger adapted version of this ganache from Godiva Chocolate and the meringue for the Baked Alaska is a larger version of this meringue from Gourmet, May 1995.

Vanilla Ice Cream

1 cup (250ml) whole milk
A pinch of salt
3/4 cup (165g) sugar
1 vanilla bean, split lengthwise OR 2 teaspoons (10ml) pure vanilla extract
2 cups (500ml) heavy (approx 35% butterfat) cream
5 large egg yolks
1 teaspoon (5ml) pure vanilla extract

Heat the milk, salt, and sugar in a medium saucepan until the liquid steams. Scrape out the seeds of the vanilla bean with a paring knife and add to the milk, along with the bean pod. Cover, remove from heat, and let infuse for an hour. (If you do not have a vanilla bean, simply heat the milk, salt, and sugar in a medium saucepan until the liquid steams, then let cool to room temperature.)

Set up an ice bath by placing a 2-quart (2 litre) bowl inside a large bowl partially filled with water and ice. Put a strainer on top of the smaller bowl and pour in the cream.

In another bowl, lightly beat the egg yolks together. Reheat the milk in the medium saucepan until warmed, and then gradually pour ¼ cup warmed milk into the yolks, constantly whisking to keep the eggs from scrambling. Once the yolks are warmed, scrape the yolk and milk mixture back into the saucepan of warmed milk and cook over low heat. Stir constantly and scrape the bottom with a spatula until the mixture thickens into a custard which thinly coats the back of the spatula.

Strain the custard into the heavy cream and stir the mixture until cooled. Add the vanilla extract (1 teaspoon [5ml] if you are using a vanilla bean; 3 teaspoons [15ml] if you are not using a vanilla bean) and refrigerate until thoroughly chilled, preferably overnight.

Remove the vanilla bean and freeze in an ice cream maker. If you don’t have an ice cream maker, you can make it without a machine. See instructions from David Lebovitz: http://www.davidlebovitz.com/archives/2007/07/making_ice_crea_1.html

Brown Butter Pound Cake
The pound cake calls for cake flour. You can make 1 cup of cake flour by placing 2 tablespoons of corn starch in a 1 cup measure, and filling to the top with all purpose flour.

19 tablespoons (9.5 oz) (275g) unsalted (sweet) butter
2 cups (200g) sifted cake flour (not self-rising; sift before measuring) (See “Note” section for cake flour substitution)
1 teaspoon (5g) baking powder
1/2 teaspoon (3g) salt
1/2 cup (110g) packed light brown sugar
1/3 (75g) cup granulated sugar
4 large eggs
1/2 teaspoon pure vanilla extract

Preheat the oven to 325°F/160°C and put a rack in the center. Butter and flour a 9”x9” (23cmx23cm) square pan.

Place the butter in a 10” (25cm) skillet over medium heat. Brown the butter until the milk solids are a dark chocolate brown and the butter smells nutty. (Don’t take your eyes off the butter in case it burns.) Pour into a shallow bowl and chill in the freezer until just congealed, 15-30 minutes.

Whisk together cake flour, baking powder, and salt.

Beat the brown butter, light brown sugar, and granulated sugar in an electric mixer until light and fluffy, about 2 minutes. Beat in the eggs one at a time, mixing well, and then the vanilla extract.

Stir in the flour mixture at low speed until just combined.

Scrape the batter into the greased and floured 9”x9” (23cmx23cm) square pan. Smooth the top with a rubber spatula and rap the pan on the counter. Bake until golden brown on top and when a toothpick inserted into the center comes out clean, about 25 minutes.

Cool in the pan 10 minutes. Run a knife along the edge and invert right-side-up onto a cooling rack to cool completely.

Chocolate Glaze (For the Ice Cream Petit Fours)

9 ounces (250g) dark chocolate, finely chopped
1 cup (250 ml) heavy (approx 35% butterfat) cream
1 1/2 tablespoons (32g) light corn syrup, Golden syrup, or agave nectar
2 teaspoons (10ml) vanilla extract

Stir the heavy cream and light corn syrup in a small saucepan over medium heat until it comes to a boil. Remove from heat and add the dark chocolate. Let sit 30 seconds, then stir to completely melt the chocolate. Stir in the vanilla and let cool until tepid before glazing the petit fours.

Meringue (For the Baked Alaska)

8 large egg whites
½ teaspoon (3g) cream of tartar
½ teaspoon (3g) salt
1 cup (220g) sugar

Beat the egg whites, cream of tartar, and salt on high speed in an electric mixer until soft peaks form. Beat in the sugar gradually in a slow stream until stiff peaks form.

Assembly Instructions – Ice Cream Petit Fours

Line a 9”x9” (23cmx23cm) pan with plastic wrap, so that no sides of the pan are exposed and so there is some extra plastic wrap hanging off the sides. Spread 1 ¾ to 2 cups (450ml to 500ml) ice cream into the pan. Cover with more plastic wrap and freeze several hours.

Once the brown butter pound cake has completely cooled, level the top with a cake leveler or a serrated knife. Then split the cake in half horizontally to form two thin layers.

Unwrap the frozen ice cream. Flip out onto one of the layers of cake and top with the second layer of cake. Wrap well in plastic wrap and return to the freezer overnight.

Make the chocolate glaze (see above.)

While the glaze cools, trim ¾” (2cm) off each side of the ice cream cake to leave a perfectly square 7.5” (19cm) ice cream cake. Cut the cake into twenty five petit fours, each 1.5”x1.5” (4cmx4cm).

Glaze the petit fours one at a time: place a petit four on a fork and spoon chocolate glaze over it.

Place the petit fours on a parchment-lined baking sheet and return to the freezer for one hour.

Assembly Instructions – Baked Alaska

Line four 4” (10cm) diameter tea cups with plastic wrap, so that plastic wrap covers all the sides and hangs over the edge. Fill to the top with ice cream. Cover the top with the overhanging plastic wrap and freeze for several hours, or until solid.

Level the top of the brown butter pound cake with a serrated knife or with a cake leveler. Cut out four 4” (10cm) diameter circles from the cake. Discard the scraps or use for another purpose.

Make the meringue (see above.)

Unwrap the ice cream “cups” and invert on top of a cake round. Trim any extra cake if necessary.

Pipe the meringue over the ice cream and cake, or smooth it over with a spatula, so that none of the ice cream or cake is exposed. Freeze for one hour or up to a day.

Burn the tips of the meringue with a cooking blow torch. Or, bake the meringue-topped Baked Alaskas on a rimmed baking sheet in a 500°F/260°C oven for 5 minutes until lightly golden. Serve immediately.

Pistachio Macarons

Sunday, May 9th, 2010

PistachioMacaron03

Happy Mother’s Day!

PistachioMacaron07

Even though these lovely pistachio macarons weren’t made for Mother’s Day – they were made for my Mum – on her birthday. They were the decorations for the dessert I made for her (a while ago now), I hope to post it soon. For the main meal on her birthday, we made the most awesome beef bourguignon pie – using Julia Child’s recipe (here is the recipe, if you don’t have the book). It was AMAZING! It took a while to prepare, but was worth it – it doesn’t get any better.

PistachioMacaron01

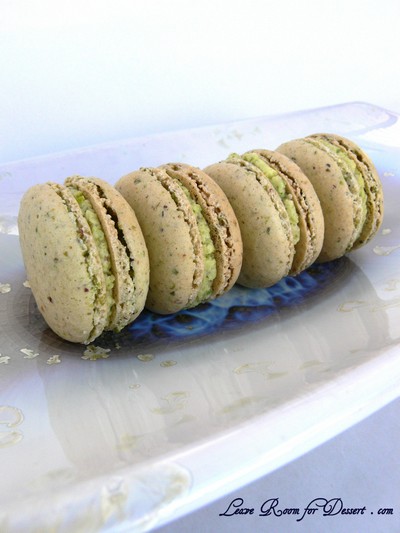
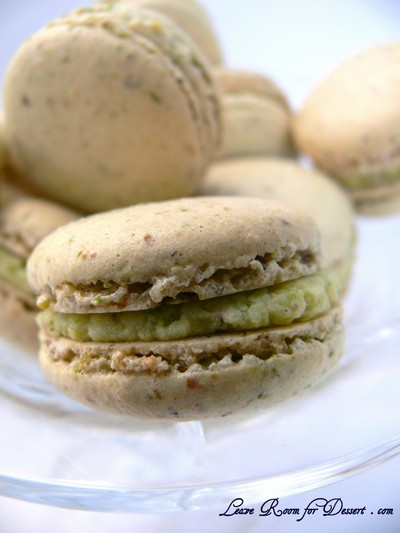
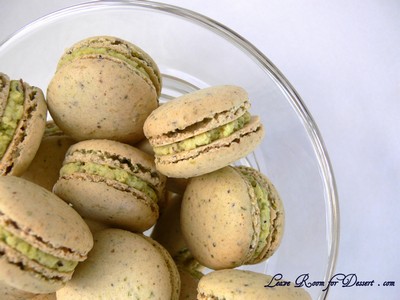
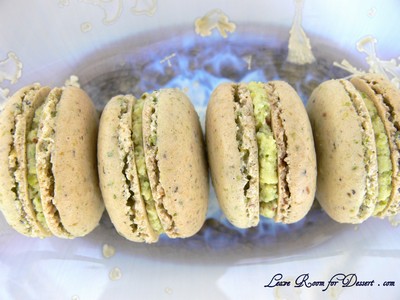
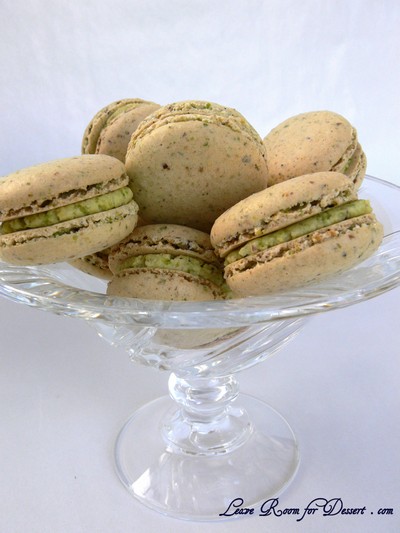
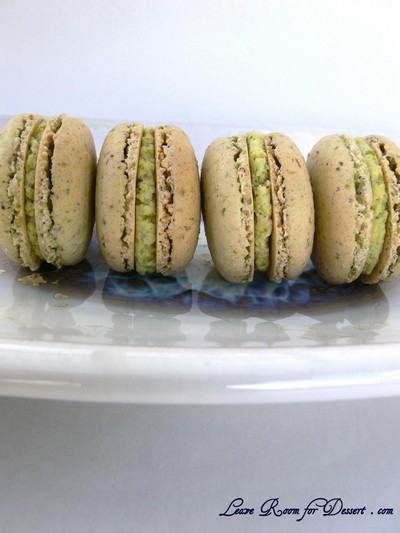
These home made pistachio macarons turned out just how I wanted. Cute little feet (the frill at the base of the macaron), slightly crisp on the outside, a lovely chewy centre and a wonderfully tasty pistachio flavour.

PistachioMacaron05

These would be perfect for a kitchen tea, high tea, baby shower or petit fours after a meal.

PistachioMacaron06

Pistachio Macarons

Recipe by Anita @ Leave Room for Dessert

Makes 46 sandwiched macarons

120g egg whites (aged for a day or two – covered in the fridge then brought to room temperature, or left at room temperature if the weather’s cool)
90g caster sugar
220g pure icing sugar
80g almond meal
80g pistachios

Pistachio butter cream
80g butter, at room temperature
160g icing sugar
50g pistachio

Process the icing sugar, pistachios and almond meal in a food processor until very finely ground, like dust. Sift and set aside.

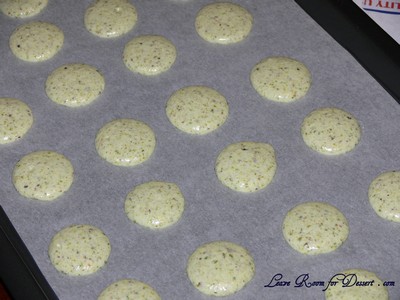
Beat egg whites until frothy, add the caster sugar whilst continuing to beat the egg whites on high until it forms a glossy thick meringue. Beat and fold the icing sugar and nut mixture into the meringue until the mixture flows and when the mixture is piped, any peaks sink back after a few minutes. Pipe 3-4cm circles on lined baking trays. Leave at room temperature for 30 minutes or more to form a skin.

PistachioMacaron02

Preheat oven to 150°C and cook macarons for 10 minutes or until slightly coloured, crisp on the outside and chewy on the inside. Allow to cool and then fill with the pistachio butter cream or another filling.

For the pistachio butter cream, cream the butter until light and fluffy. Process the pistachios with the icing sugar until finely ground. Beat the pistachio sugar into the butter in batches. When all the pistachio sugar is incorporated it is ready to fill the macarons. If it isn’t spreadable, add a touch of milk and mix until smooth.

PistachioMacaron04