Ice Cream

Mango and Yoghurt Ice Blocks

Tuesday, March 14th, 2017

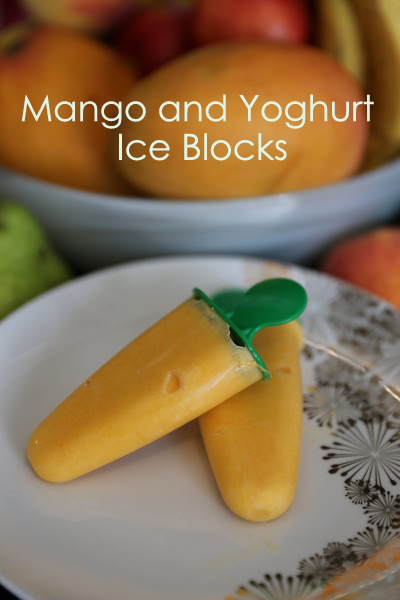
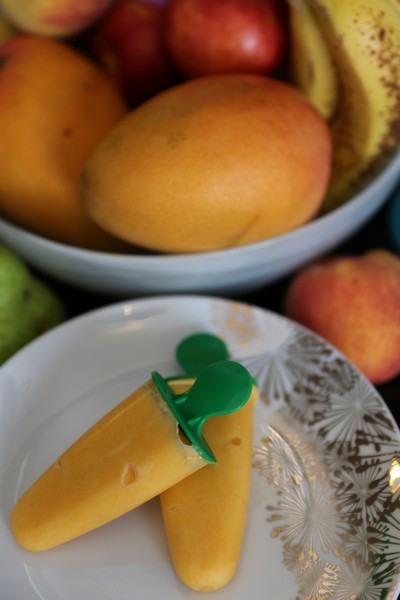
Mango Ice Block

Mangoes have been beautiful this past summer. I’m not a big mango fan, but have been buying 2 a week for Nick and my daughter. I do love these ice blocks though! They may be a little bit icy, but they are a wonderful alternative to many of the bought varieties, and you know children (and adults) are eating a nice healthy snack.

MangoIceBlock2

Mango and Yoghurt Ice Blocks

Makes 10-12 small (1/4 cup) ice blocks

2 medium/large mangoes, flesh (~400g)
3/4 cup (180g) yoghurt (vanilla, coconut or natural)

Blend mango flesh in a food processor until well blended. Place pureed mango and yoghurt in a bowl and mix to combine. Spoon into ice block moulds and freeze until frozen, or overnight.

Gaytime goes nuts

Sunday, July 29th, 2012

The wonderfully talented Christine Manfield featured on the season finale of MasterChef this year. I haven’t watched much MasterChef this year, but I always have to watch for the dessert in the finale. It never ceases to amaze and I always want to make it.

I watched the contestants eating the dessert with envy, and couldn’t stop saying – I want that dessert. Straight after the finale, I went searching the internet for the recipe, hoping it was featured in a book or magazine. Luckily it was featured on the MasterChef website the next day, and I set to task planning, buying and cooking.
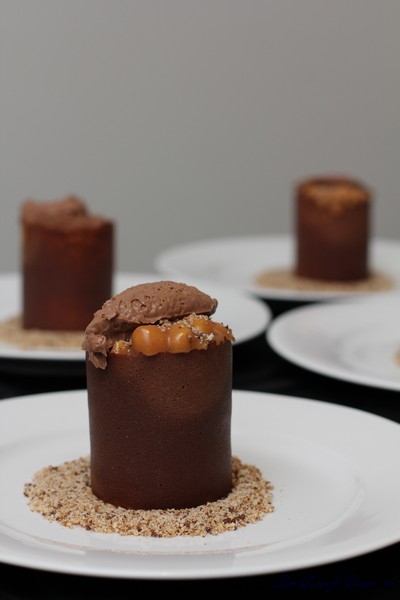
It took me a lot longer to make everything, as I had to cool the ice cream base for most of a day/ overnight before churning. I also had a lot of dishes to wash between making everything. Overall it probably took 1 1/2 – 2 days.

It certainly gives you an even greater appreciation for the beautiful desserts made at top end restaurants, and I am feeling excited at the thought of the next hatted restaurant I go to (I have yet to decide where to go). I can’t wait to go to Universal too. I have wanted to go there for dinner for at least a year or two. Maybe I’ll go there.

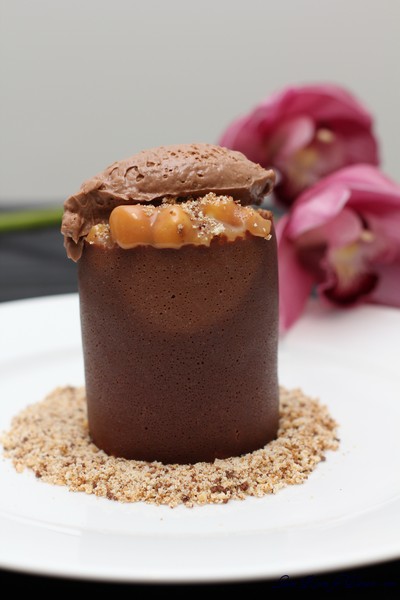
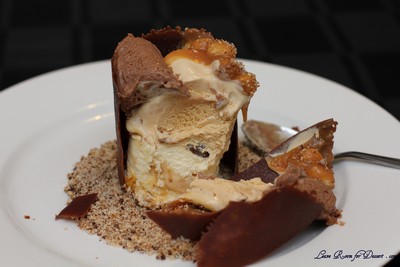
When it comes to this dessert, all I can say is it is wonderful (and quite rich). The components worked beautifully together and it looks gorgeous.
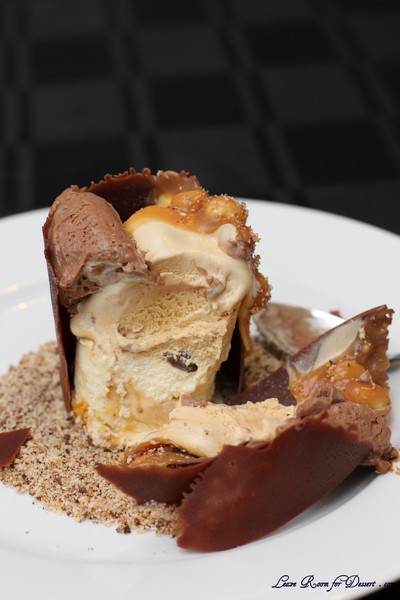
My notes on the recipe:
It makes a lot more than 4 serves. (Maybe 10-16?)

I needed to use my 2 ice cream makers twice! The honeycomb ice cream made around 2L of liquid before churning, and the caramel ice cream made a bit over 1L before churning. If you don’t have two ice cream makers, you may prefer to halve the honeycomb recipe, or be ready to mix the ice cream every hour or so in the freezer.

For the ice cream, I filled a 19cm square tin (approx 3-4cm height) for each ice cream. I could not have put the ice cream in half a tin as I think it wouldn’t have held its shape. Even with filling up the two tins, I had ice cream left over.

I made my own fondant icing using this recipe

I could not find wafer balls and had to use maltesers and honeycomb balls instead.

I did not have access to the 250g Valrhona gianduja hazelnut chocolate, so used 50g nutella + 100g milk chocolate + 100g dark chocolate. (I am sure the Valrhona gianduja hazelnut chocolate would have tasted amazing). The mousse ended up being quite chocolatey and not very hazelnut-y.

I also didn’t have Valrhona Caramelia chocolate, so used some Calebaut chocolate and milk cooking chocolate.

I am not sure of the strength of the gelatine leaves I had, so I used 1 1/2 leaves which weighed 6g.

I don’t have a thermomix, so made the anglaise the same way I made the ice cream base. (heat the cream, beat the egg yolks with the sugar, add the hot cream, pour this into the saucepan and heat until 80-84C.)

I cooked the ice cream bases in the saucepans rather than a bowl over water, as this is how I normally make ice cream.

Be careful with the caramel ice cream (I am not sure whether adding some of the ice cream base to the caramel would be a better idea, than adding the caramel to the ice cream base.) When I made it the way it said here, the caramel splattered out of the pot and a little bit landed on my arm. Be careful of your eyes and keep children away from hot caramel as it can cause nasty burns.

I made my own template out of paper – it was a bit flimsy though, cardboard might have been better.

I needed to sieve quite a lot of the chocolate caramel over the template, and place it in the oven for a while (1-2min) for it to completely melt.

Hopefully these tips will help anyone attempting to make this dessert at home.

Please enjoy the dessert if you make it, or if you go to Universal!

Gaytime goes nuts

Recipe by: Christine Manfield
Serves: 4 (I think it serves at least 10 people)
Recipe found on MasterChef website

Honeycomb
360g caster sugar
120g glucose
60ml water
15g bicarbonate of soda

Honeycomb ice cream
700ml pure cream
750ml milk
8 egg yolks
300g caster sugar
250g chopped honeycomb

Caramel ice cream

300g caster sugar
75ml water
750ml pure cream
375ml milk
9 egg yolks
90g caster sugar

Base anglaise
50g egg yolks
25g caster sugar
125ml pure cream
125ml milk

Hazelnut chocolate mousse

150g base anglaise
2 leaves gold-leaf gelatine, softened in cold water
250g Valrhona gianduja hazelnut chocolate, chopped
200ml pure cream, whipped to soft peaks

Hazelnut caramel
200ml pure cream
75g glucose
½ vanilla bean, split
100g caster sugar
25g unsalted butter, chopped
1½ cups hazelnuts, roasted and peeled, coarsely chopped
Vanilla salt, to taste

Chocolate collar wafers
240g liquid/pouring fondant sugar
160g glucose
160g Valrhona Caramelia chocolate, chopped

Gaytime Dust
50g chocolate ripple biscuits
150g sponge fingers (savoiardi)
30g hard nougat
20g honeycomb

chocolate wafer balls to serve

1. For honeycomb, line a deep large baking tray with baking paper.

2. Place sugar, glucose and water in large saucepan and cook, stirring occasionally over medium heat until sugar dissolves.

3. Bring to the boil, without stirring, then cook until mixture just begins to change colour. Agitate the pan to circulate the colour. You want a very pale yellow colour (as when the bi-carb is added the honeycomb will cook quickly and burn).

4. Remove the pan from the heat, add bi-carb and whisk quickly. Pour into prepared tray and leave to cool.

5. Break into large chunks and store in airtight container until required.

6. For honeycomb ice cream, place cream and milk in a saucepan and bring to a gentle boil.

7. Whisk yolks and sugar in a metal bowl until thicken and pale, gradually pour in hot cream and whisk constantly to combine.

8. Place the bowl over a saucepan of simmering water, ensuring water doesn’t touch the base of the bowl. Cook the custard, stirring with a wooden spoon until mixture coats the back of the spoon.

9. Cool over a bowl of iced water or in a shallow tray in the blast chiller until cold.

10. Pour into a pacojet cannister. N.B. Make sure it is not filled above the safety line. You need to allow room for the ice cream to expand. Place cannister in blast freezer until set solid in the centre, about 1 hour 30 minutes or overnight in a freezer. Churn in pacojet. N.B. Make sure you press the release button before removing from machine or you will damage the machine. If you don’t have a pacojet, churn in an ice-cream machine following manufacturer instructions.

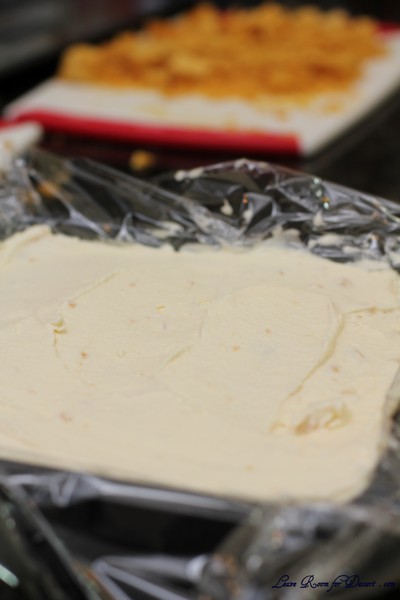
11. Line a 16x25cm base-measurement 3cm-deep slice tin with cling wrap or baking paper. Fold honeycomb through churned ice cream. Spread ice cream into one half of the tin. Make sure you have enough for 4 x 4.5cm disks. The caramel ice cream will fill the other half.

12. Place in blast freezer until firm. When firm, use a round cookie cutter to cut out 4.5cm discs, place on a tray and blast freeze discs until firm.
13. For caramel ice cream, place sugar and water in a saucepan over a medium heat and bring to the boil, agitating occasionally to ensure sugar is dissolved before mixture reaches the boil. Continue to boil until mixture reaches a deep caramel colour.

14. Meanwhile, place cream and milk in a saucepan and bring to a gentle boil.

15. Whisk yolks and sugar in a metal bowl until thicken and pale, gradually pour in hot cream and whisk constantly to combine.

16. Place the bowl over a saucepan of simmering water, ensuring water doesn’t touch the base of the bowl. Cook the custard, stirring with a wooden spoon until mixture coats the back of the spoon.

17. Pour in hot caramel and whisk until smooth and combined. Cool over a bowl of iced water or in a shallow tray in the blast chiller or freezer until cold.

18. Pour into a pacojet cannister. N.B. Make sure it is not filled above the safety line. You need to allow room for the ice cream to expand. Place cannister in blast freezer until set solid in the centre, about 1 hour 30 minutes or overnight in a freezer. Churn in pacojet. N.B. Make sure you press the release button before removing from machine or you will damage the machine. If you don’t have a pacojet churn in an ice-cream machine following manufacturer instructions.

19. Spread into the unfilled half of the 16 x 25cm base measurement 3cm-deep slice tin. Make sure you have enough for 4 x 4.5cm disks. When firm, use a round cookie cutter to cut out 4.5cm discs, place on a tray and blast freeze until firm.

20. For anglaise, to operate thermomix, press time first, then temperature, then speed. Place egg yolks and sugar in thermo jug, set 20 seconds, then speed 7.

21. Add cream and milk, and set for 7.5 minutes, then 80°C button and then speed 4. Light will stop flashing once anglaise comes up to temperature.

22. For hazelnut chocolate mousse, pour 80°C base anglaise into a large metal bowl, add softened gelatine, stirring to dissolve the gelatine, then cool over ice to 45°C.

23. While anglaise is cooling, place chocolate in a metal bowl over water bath and heat to 45°C.

24. Fold melted chocolate through anglaise until combined. Cool completely over a bowl of iced water, fold in whipped cream.

25. Divide into 2 plastic rectangle containers and refrigerate until firm. Do not blast freeze as it weakens the gelatine structure.

26. For hazelnut caramel, place cream, glucose and vanilla bean in a saucepan over a medium heat until simmering.

27. Make a dry caramel by melting sugar in a deep frying pan over a medium heat. Bring to the boil, and continue to cook, agitating the pan occasionally until sugar reaches a caramel colour.

28. Pour in warmed cream mixture, stir to combine and cook for 5 minutes until caramel dissolves.

29. Add butter and stir to combine. Remove from heat and cool, stirring occasionally.

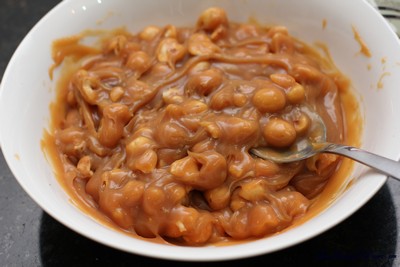
30. To serve, combine a few tablespoons of chopped nuts with a few tablespoons of caramel and season with vanilla salt to taste.
31. For chocolate collar wafers, preheat oven to 200°C. Place a silver oven tray upside down in oven and allow to become very hot.

32. Place fondant sugar and glucose in a saucepan and cook to 180°C. Add chocolate and mix until smooth, making a homogenous paste. Spread onto a silicone mat, roll to 5mm thick with a silicone rolling pin and leave to cool. Break set toffee into pieces and transfer to a bowl.

33. Take 1/3 of toffee and place in a mortar and pestle. Pound to rough 1cm pieces and transfer to a thermo mix or blender. Blitz to a fine powder. Tap jug on a bench to loosen and blitz for a further 10-15 seconds.

34. Spoon some of the powder into a fine sieve, place a rectangular 20 x 7.5cm stencil over a silicone mat on a flat baking tray that has one end open for easy transfer. Sieve mixture over stencil to 1-2mm thick. The powder should just be level with the thickness of the stencil.
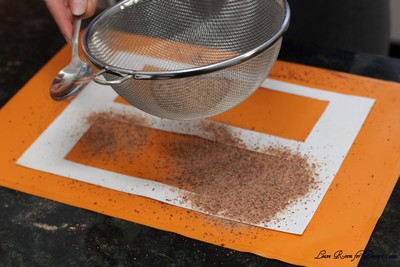
35. Place one finger at one end of the stencil to keep in place and gently lift the opposite end, ensuring not to indent the powder. Lift the stencil away completely.

36. Take the upside down oven tray from the oven and place upside down on a flat bench. Gently slide the powder-covered mat onto the tray and allow powder to melt completely, this will take 60-90 seconds. If the powder doesn’t melt together completely place in the oven for 15-30 seconds.

37. Run a small crank spatula over the wafer to check consistency. You want it to be set and cool enough to be pliable and easy to roll but not hot enough that it stretches easily.

38. Lift up one end by gently flicking it with the spatula, lay a 5.5cm base-diameter squeezy bottle over hot wafer and roll up around the bottle. Gently press the join to the hot mat to seal and gently ease off the bottle. Repeat until you have the desired amount of wafer cylinders.

39. For gaytime dust, blitz together to a fine crumb.

To assemble:

A bowl of gaytime dust
A tray of ice cream rounds, 4x honey comb and 4x caramel rounds
A small bowl or plate of chocolate wafer balls

Chocolate wafer collars
A small bowl of caramel
Chopped roasted hazelnuts
Vanilla salt
3 dessert spoons, for serving
A palette knife
A white cloth
A bowl of warm water, for quenelling

1. Place a spoonful of gaytime dust in the centre of a serving plate and flatten a central circle large enough to fit the chocolate collar wafer.

2. Take a round of honeycomb ice cream and place it in the centre. Dip the caramel ice cream in the chocolate wafer balls and place on top.

3. Gently ease the chocolate wafer collar over the ice cream to encase and fill with a little bit more ice cream if required to bring it to 1cm below the top of the collar.

4. Combine the hazelnuts and caramel and season to taste with vanilla salt. Spoon on to the ice cream to cover and bring to the top of the collar.
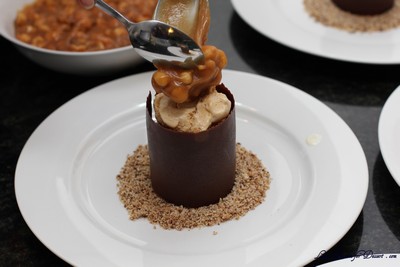
5. Place a spoonful of gay time dust over the caramel and top with a quenelle of mousse.

Pineapple Sorbet and Tropical Granita with Fruit Salad

Thursday, October 6th, 2011


Daylight savings has just begun, it is no longer dark when I get home from work (and only mildly darker when I leave). I am able to stop and smell the roses (and this is not just a saying in my case, as my first roses are opening for the season, and it just so happens to be a double delight rose).

It is starting to feel like summer, with the all the extra light, although I would not wish Spring gone too soon – as it is my favourite season.

More fruits are coming back in season, and we can start eating icy cold sorbets again.

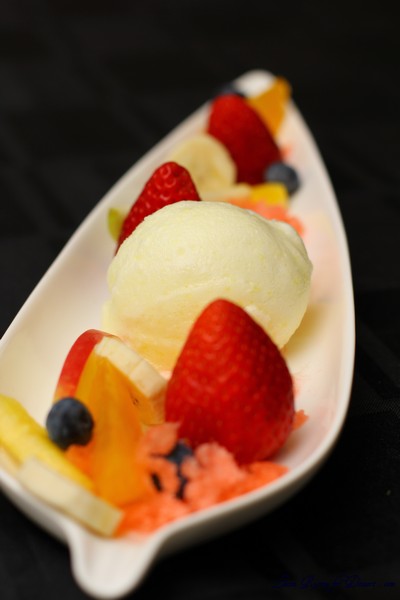
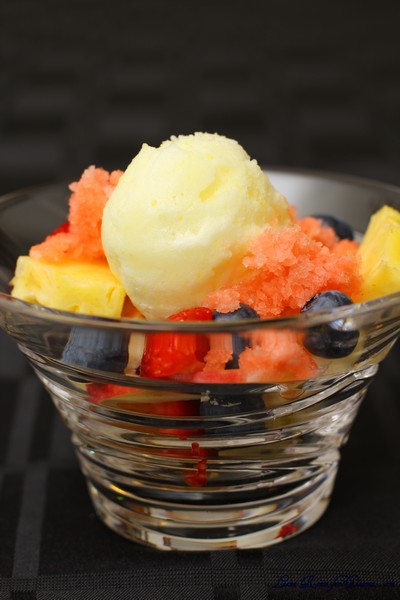
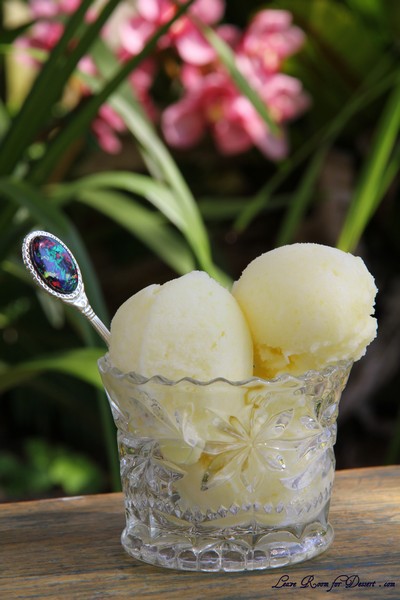
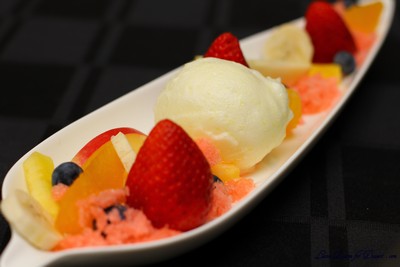
As pineapples are one of my favourite fruits, I started making this pineapple sorbet at least a year ago now. It can certainly be eaten by itself, although it also pairs perfectly with this refreshing tropical granita and the fruit salad.

This is certainly a great way to make a fruit salad stand out a bit more and grab attention.

I have tried to plate the fruit salad artistically. It is simpler to serve it in a bowl, but it looks very pretty this way.

I have only tried the sorbet using an ice cream maker and it becomes almost creamy in texture. It’s amazing how the colour changes too, lightening up and becoming whiter as the mixture thickens. I am sure you could make it using the alternate method of removing the mix from the freezer and mixing it every hour for 3 or more hours and returning to the freezer. Although I am unsure as to whether it will result in the same creamy texture.

I am entering this recipe into a competition held by King of Fruit, a Queensland based business that supplies fresh pineapple to most outlets in Australia. I was lucky enough to be sent 3 lovely pineapples to inspire some recipes. If you have a chance, please check it out and vote for me 🙂 ( I think you only get one vote per email address.)

I have also entered my Herb and Orange Chicken with Pineapple and Capsicum served with Pomegranate, Orange and Baby Spinach Salad recipe into the competition.

Pineapple Sorbet and Tropical Granita with Fruit Salad

Recipe by Anita @ Leave Room for Dessert

Serves: 4 (with some leftover sorbet and granita)

Pineapple Sorbet

Makes: 1-1.4L sorbet

650g pineapple, cut into pieces
200g sugar (white sugar or castor sugar) (1 cup)
200ml water

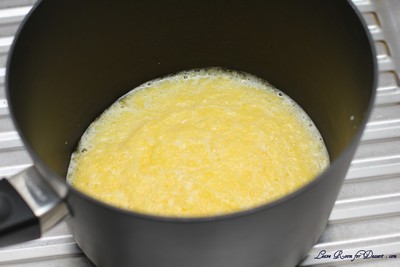
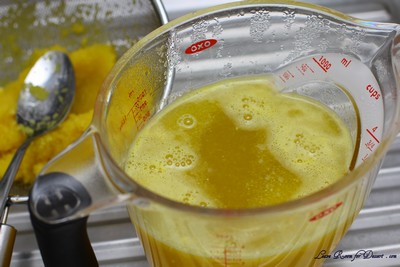
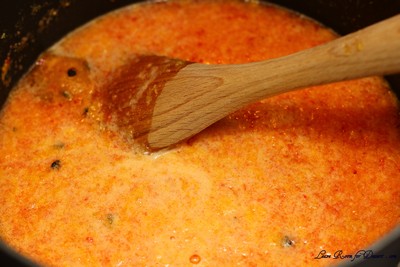
Process the pineapple in a food processor. Place the pureed pineapple, sugar and water into a medium saucepan and cook on medium/high heat until the sugar is dissolved and the mixture comes to the boil (this may be difficult to see as the pureed pineapple can create a layer at the top). Boil for 5minutes, then strain into a bowl or jug. Allow to cool and refrigerate for a few hours or preferably overnight until very chilled.

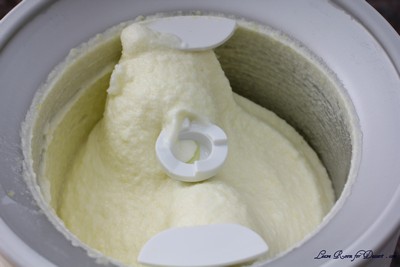
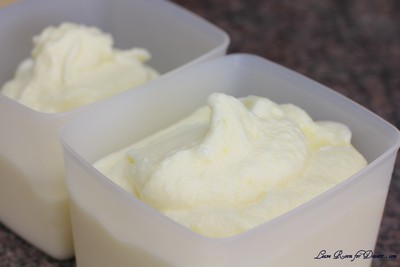
Churn in ice cream maker according to instructions of machine. Eat straight away or freeze in a sealable container until ready to serve. Lasts at least 2 weeks in the freezer.

Tropical Granita

150g caster sugar (3/4 cup)
500 ml water (2 cups)
150g pineapple, cut into pieces
100g strawberries, cut in half
100g passionfruit pulp, fresh or frozen

Process the pineapple and strawberries in a food processor. Place the sugar, water, passionfruit pulp and pureed pineapple and strawberries into a medium saucepan (you can use the saucepan that was used for the pineapple sorbet if you want to save on washing up). Bring to the boil on medium/high and continue to boil for 5min. Remove from heat and allow to cool.

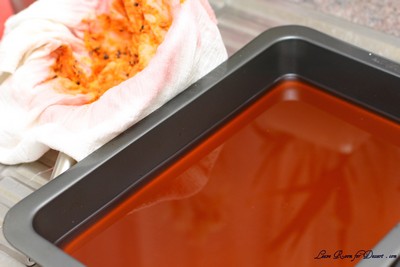
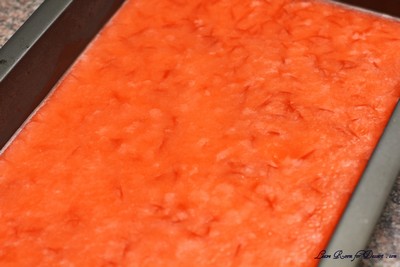
Place a piece of muslin cloth over a sieve, place this over a large pan that will take more than 1L of liquid (20cm x 30cm x 5cm). Pour the granita mix into the muslin cloth and allow the liquid to pass through. Use a spoon to help more liquid through, or use your hands to squeeze excess liquid out. If you don’t have muslin cloth, using a sieve on its own will work fine.

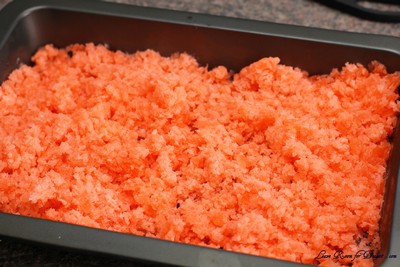
Place the pan in the freezer until solid (overnight). Use a fork to scratch the granita into fluffy ice crystals. Return to the freezer for another 2 hours (if longer, place in a sealed container) before serving.

Fruit Salad

2 slices pineapple, cut into wedges
1-2 apples (I used pink lady apples), cut into slices
2 oranges, peeled and cut into segments
1 punnet (125g) blueberries
1-2 punnets (250g – 500g) strawberries, cut in half or quarters
1-2 bananas, sliced

Mix all fruit together in a bowl or place artistically on a plate.

To serve the Pineapple Sorbet and Tropical Granita with Fruit Salad, prepare the fruit salad and place the pineapple sorbet on top. Place the granita on the fruit salad just before serving.

Any component of this dessert can be served independently.

Marquise on Meringue – Daring Bakers Challenge May 2011

Friday, May 27th, 2011

The May 2011 Daring Bakers’ challenge was hosted by Emma of CookCraftGrow and Jenny of Purple House Dirt. They chose to challenge everyone to make a Chocolate Marquise. The inspiration for this recipe comes from a dessert they prepared at a restaurant in Seattle.
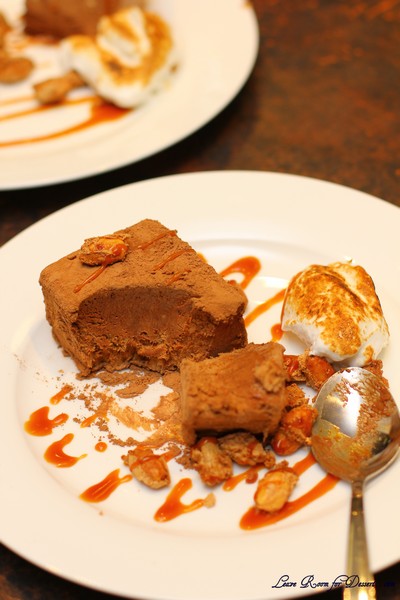
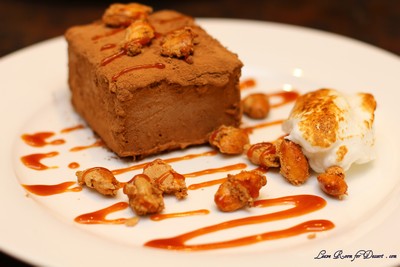
This challenge looked very time consuming at first, which is the main reason I put off making it until the last weekend. I was able to make the chocolate marquise the night before, then quickly make all three other components in 30 minutes (all the while making a huge mess in the kitchen).
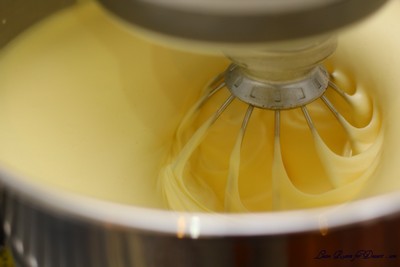
I thought I had a little trouble with the spiced nuts, although this was the component of the dessert that people liked most and commented on. (I had made the meringue and mixed in the nuts, poured and spread it on a lined tray, then halfway through thought the nuts wouldn’t crisp up, so I took to the meringue with a spoon to expose the almonds so they would brown) – sorry no pics – I couldn’t take photos as I needed one clean hand to feel the sugar dissolving for the torched meringue (check out the recipe below)… 🙂

I still have some of the chocolate marquise in the freezer, and look forward to serving it (although in smaller portions, and probably with more spiced almonds).

It was certainly a well liked challenge by all. Thanks Emma and Jenny!

Chocolate Marquise

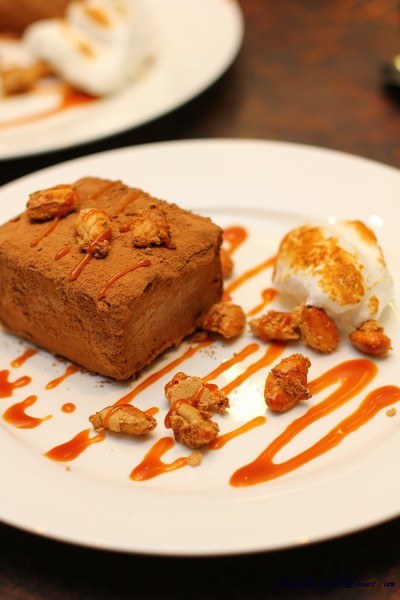
Plated marquise
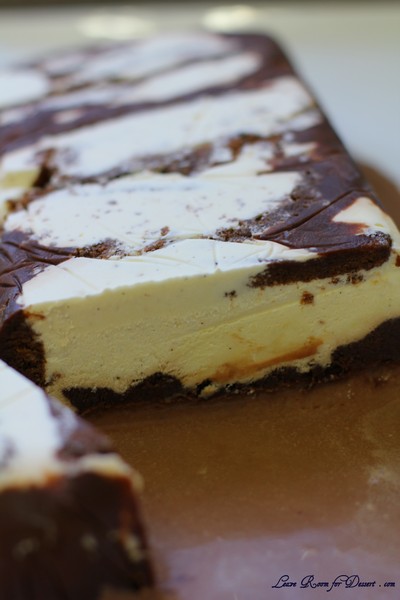
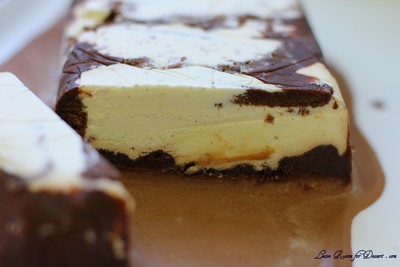
Servings: 18 2.5″x2.5″ cubes (I would say ~24-36)

11 large egg yolks at room temperature
4 large whole eggs
2/3 cup (150 grams/ 5.3 oz) sugar
1/3 cup (2⅔ fluid oz/ 80 ml.) water
Chocolate Base, barely warm (recipe follows)
2 cups (16 fluid oz./ 500 ml.) heavy cream
2 cups Dutch process cocoa powder (for rolling) (Note: We used extra brut, like Hershey’s Special Dark. Make sure it’s a Dutch processed cocoa, not a natural cocoa powder.)
Torched meringue (recipe follows)
Spiced almonds (recipe follows)
Cacao nibs (optional)

In the bowl of a stand mixer, combine the egg yolks and whole eggs. Whip on high speed until very thick and pale, about 10 – 15 minutes. (It probably only took 5 minutes in my KitchenAid)

When the eggs are getting close to finishing, make a sugar syrup by combining the sugar and water in a small saucepan. Bring the syrup to a boil and then cook to softball stage (235F/115C). If you have a cake tester with a metal loop for a handle, the right stage for the syrup is reached when you can blow a bubble through the loop (as seen in the following pictures).

With the mixer running on low speed, drizzle the sugar syrup into the fluffy eggs, trying to hit that magic spot between the mixing bowl and the whisk.

When all of the syrup has been added (do it fairly quickly), turn the mixer back on high and whip until the bowl is cool to the touch. This will take at least 10 minutes.

In a separate mixing bowl, whip the heavy cream to soft peaks. Set aside.
When the egg mixture has cooled, add the chocolate base to the egg mixture and whisk to combine. Try to get it as consistent as possible without losing all of the air you’ve whipped into the eggs. We used the stand mixer for this, and it took about 1 minute.

Fold 1/3 of the reserved whipped cream into the chocolate mixture to loosen it, and then fold in the remaining whipped cream.

Pour into the prepared pans and cover with plastic wrap (directly touching the mixture so it doesn’t allow in any air).

Freeze until very firm, at least 2 – 4 hours (preferably 6 – 8 hours).
When you’re ready to plate, remove the marquise from the freezer at least 15 minutes before serving. While it’s still hard, remove it from the pan by pulling on the parchment ‘handles’ or by flipping it over onto another piece of parchment. Unmold the frozen marquise

Cut it into cubes and roll the cubes in cocoa powder. These will start to melt almost immediately, so don’t do this step until all of your other plating components (meringue, caramel, spiced nuts, cocoa nibs) are ready. The cubes need to sit in the fridge to slowly thaw so plating components can be done during that time. They don’t need to be ready before the cubes are rolled in the cocoa powder.

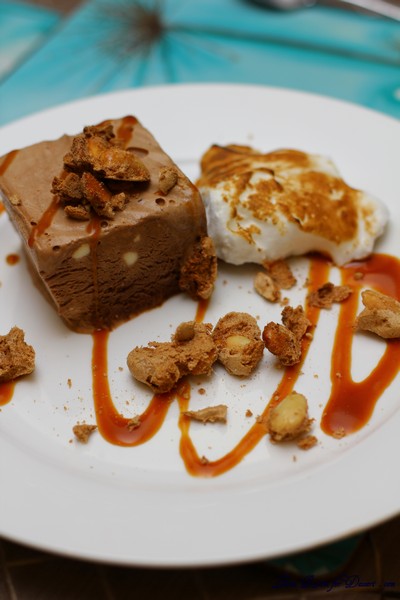
Plate with the torched meringue and drizzled caramel sauce, and toss spiced almonds and cocoa nibs around for garnish. You want to handle the cubes as little as possible because they get messy quickly and are difficult to move. However, you want to wait to serve them until they’ve softened completely. The soft pillows of chocolate are what make this dessert so unusual and when combined with the other elements, you’ll get creamy and crunchy textures with cool, spicy, salty, bitter, and sweet sensations on your palate.

Chocolate Base

Servings: n/a – this is an ingredient for the chocolate marquise, not meant to be used separately

12 oz (340 grams/ 1½ cups) bittersweet chocolate (about 70% cocoa)
12 oz (355 ml/ 1½ cups) heavy cream
1/2 teaspoon salt
1/4 teaspoon cayenne (I left this out and used 1/2 teaspoon cinnamon)
1/4 cup (60 ml/ 2 fluid oz.) tequila (I left this out)
1/4 cup (60 ml/ 2 fluid oz.) light corn syrup (I used glucose syrup)
3/4 teaspoon vanilla
1/4 cup (4 tablespoons/ less than an ounce) cocoa powder (we used extra brut, like Hershey’s Special Dark, but any Dutch-processed cocoa would be fine. Do not substitute natural cocoa powder.)
1/8 teaspoon freshly ground black pepper (I left this out)
1 oz unsalted butter (2 tbsps./30 grams), softened

Place the chocolate in a small mixing bowl.

In a double-boiler, warm the cream until it is hot to the touch (but is not boiling). Remove from the heat and pour over the chocolate.

Allow it to sit for a minute or two before stirring. Stir until the chocolate is melted completely and is smooth throughout.

Add the remaining ingredients and stir to combine.

Set aside until cooled to room temperature. Do not refrigerate, as the base needs to be soft when added to the marquise mixture. If you make it the day before, you may need to warm it slightly. Whisk it until it is smooth again before using it in the marquise recipe.

Torched Meringue

Servings: Makes about 4 – 5 cups of meringue. If you aren’t planning on serving *all* of the marquise at once, you might want to scale this recipe back a bit.

11 large egg whites
1 ¾ cups (14 oz or 395 gms) sugar
Splash of apple cider vinegar
1/2 teaspoon vanilla

Combine the egg whites, sugar and vinegar in the bowl of a stand mixer. Using your (clean, washed) hand, reach in the bowl and stir the three together, making sure the sugar is moistened evenly by the egg whites and they make a homogeneous liquid.

Over a saucepan of simmering water, warm the egg white mixture. Use one hand to stir the mixture continuously, feeling for grains of sugar in the egg whites. As the liquid heats up, the sugar will slowly dissolve and the egg whites will thicken. This step is complete when you don’t feel any more sugar crystals in the liquid and it is uniformly warm, nearly hot.

Remove the mixing bowl from the saucepan and return it to the stand mixer with the whisk attachment. Whisk until you reach soft peaks. In the last 10 seconds of mixing, add the vanilla to the meringue and mix thoroughly.

When you’re ready to plate the dessert, spoon the meringue onto a plate (or use a piping bag) and use a blowtorch to broil.

Tequila Caramel

Servings: Makes about 1 cup of caramel

1 cup (8 oz.) sugar
1/2 cup (4 fluid oz./ 120 ml.) water
1 cup (8 fluid oz./ 240 ml.) heavy cream
3/4 teaspoon salt
2 tablespoons tequila (I left this out and used 1 teaspoon vanilla)

In a heavy-bottomed saucepan, combine the sugar and water on medium-high heat. Boil until the water completely evaporates and the sugar caramelizes to a dark mahogany color.

Working quickly, add the cream to the darkened caramel. It will bubble and pop vigorously, so add only as much cream as you can without overflowing the pot.

Return the pot to the stove on low heat and whisk gently to break up any hardened sugar. Add any remaining cream and continue stirring. Gradually, the hard sugar will dissolve and the caramel sauce will continue to darken. When the caramel has darkened to the point you want it, remove it from the heat. Add the salt and tequila and stir to combine. Set aside until ready to serve.

Spiced Almonds

Servings: Makes about 1 cup of spiced almonds

1/2 cup (4 oz.) sugar
1 teaspoon cinnamon
1/4 teaspoon cayenne (I left this out)
1/2 teaspoon salt
1 large egg white
1 cup (145 grams/ 5 oz.) blanched whole almonds

Preheat the oven to 350F. Line a sheet pan with parchment paper or foil.

In a small bowl, combine the sugar, cinnamon, cayenne, and salt.

In a larger mixing bowl whisk the egg white until it’s frothy and thick.

Add the spice mix to the egg white and whisk to combine completely.

Add the nuts to the egg white mixture and toss with a spoon.

Spoon the coated nuts onto the parchment paper-lined baking sheet.

Bake the nuts for 30 minutes, or until they turn light brown. Allow the nuts to cool completely and they will get very crunchy. Set aside until ready to serve.

Baked Alaska and Ice Cream Petit Fours – Daring Bakers Challenge August 2010

Friday, August 27th, 2010

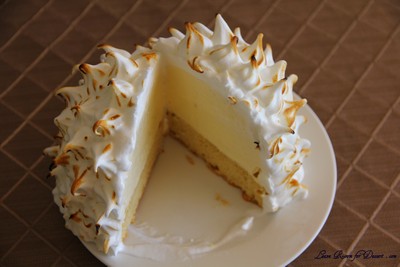
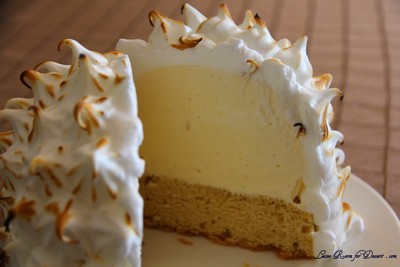
The August 2010 Daring Bakers’ challenge was hosted by Elissa of 17 and Baking. For the first time, The Daring Bakers partnered with Sugar High Fridays for a co-event and Elissa was the gracious hostess of both. Using the theme of beurre noisette, or browned butter, Elissa chose to challenge Daring Bakers to make a pound cake to be used in either a Baked Alaska or in Ice Cream Petit Fours. The sources for Elissa’s challenge were Gourmet magazine and David Lebovitz’s “The Perfect Scoop”.

Two sweets I have never made were chosen for this month’s Daring Bakers challenge. We could do both or just one, and as I had done neither previously and wanted to try them both. I went with both, especially considering that there were two common components between these desserts, meaning I just had to increase the cake and ice cream quantity, and not make too many extra components.

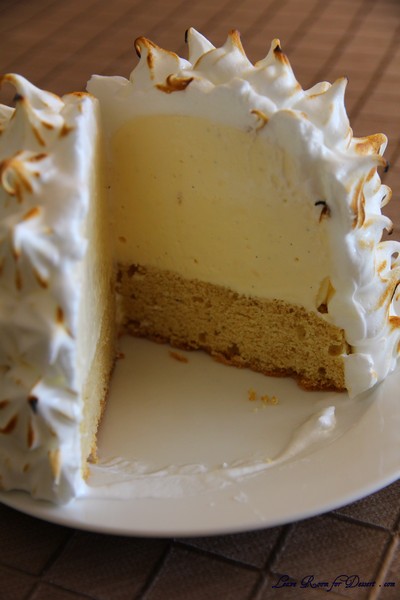
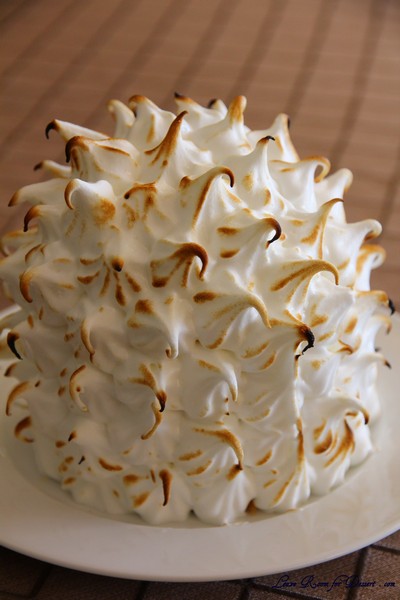
I was surprised by how many people one Baked Alaska from a reasonably small tea cup actually served. You could easily serve 2-4 people with one Baked Alaska, and with the petit fours being served up with them, I was cutting it into eight. This meant one of them stayed in the freezer (covered in plastic) for a week before my family got around to eating it. And it was still good.

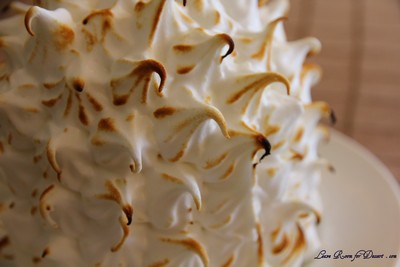
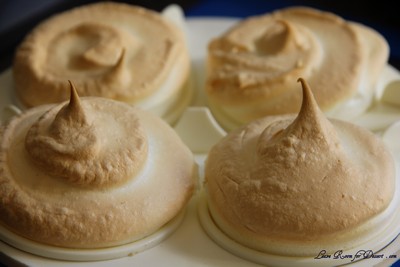
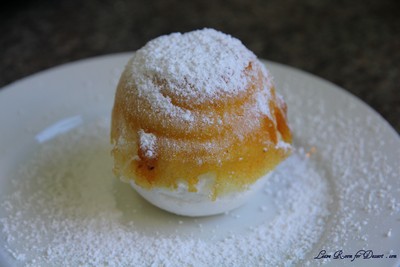
I tried both torching the meringue using a blow torch and placing it in a hot oven for 4 minutes. The torching was a heap of fun, although the oven actually made the meringue beautifully crispy on the outside. I’m not a huge fan of not-fully cooked meringue and this was a little off-putting for me, although others couldn’t get enough of it.

The cake was lovely the day it came out of the oven, the burnt butter flavour worked so well. I found as the days went on and refrigeration and freezing were required, it became a little staler than I would have preferred.

Although I was extremely looking forward to the petit fours, they didn’t turn out how I had hoped. They were too large, the cake kept coming away from the ice cream and they were too difficult to coat. Taste-wise they were great – but I wouldn’t bother doing them individually again…

Thanks again to our host this month – I always enjoy the challenges.

Baked Alaska and Ice Cream Petit Fours

Recipe Source: The brown butter pound cake recipe is adapted from the October 2009 edition of Gourmet. The vanilla ice cream is from ice cream genius David Lebovitz, adapted from The Perfect Scoop. The chocolate glaze for the petit fours is a larger adapted version of this ganache from Godiva Chocolate and the meringue for the Baked Alaska is a larger version of this meringue from Gourmet, May 1995.

Vanilla Ice Cream

1 cup (250ml) whole milk
A pinch of salt
3/4 cup (165g) sugar
1 vanilla bean, split lengthwise OR 2 teaspoons (10ml) pure vanilla extract
2 cups (500ml) heavy (approx 35% butterfat) cream
5 large egg yolks
1 teaspoon (5ml) pure vanilla extract

Heat the milk, salt, and sugar in a medium saucepan until the liquid steams. Scrape out the seeds of the vanilla bean with a paring knife and add to the milk, along with the bean pod. Cover, remove from heat, and let infuse for an hour. (If you do not have a vanilla bean, simply heat the milk, salt, and sugar in a medium saucepan until the liquid steams, then let cool to room temperature.)

Set up an ice bath by placing a 2-quart (2 litre) bowl inside a large bowl partially filled with water and ice. Put a strainer on top of the smaller bowl and pour in the cream.

In another bowl, lightly beat the egg yolks together. Reheat the milk in the medium saucepan until warmed, and then gradually pour ¼ cup warmed milk into the yolks, constantly whisking to keep the eggs from scrambling. Once the yolks are warmed, scrape the yolk and milk mixture back into the saucepan of warmed milk and cook over low heat. Stir constantly and scrape the bottom with a spatula until the mixture thickens into a custard which thinly coats the back of the spatula.

Strain the custard into the heavy cream and stir the mixture until cooled. Add the vanilla extract (1 teaspoon [5ml] if you are using a vanilla bean; 3 teaspoons [15ml] if you are not using a vanilla bean) and refrigerate until thoroughly chilled, preferably overnight.

Remove the vanilla bean and freeze in an ice cream maker. If you don’t have an ice cream maker, you can make it without a machine. See instructions from David Lebovitz: http://www.davidlebovitz.com/archives/2007/07/making_ice_crea_1.html

Brown Butter Pound Cake
The pound cake calls for cake flour. You can make 1 cup of cake flour by placing 2 tablespoons of corn starch in a 1 cup measure, and filling to the top with all purpose flour.

19 tablespoons (9.5 oz) (275g) unsalted (sweet) butter
2 cups (200g) sifted cake flour (not self-rising; sift before measuring) (See “Note” section for cake flour substitution)
1 teaspoon (5g) baking powder
1/2 teaspoon (3g) salt
1/2 cup (110g) packed light brown sugar
1/3 (75g) cup granulated sugar
4 large eggs
1/2 teaspoon pure vanilla extract

Preheat the oven to 325°F/160°C and put a rack in the center. Butter and flour a 9”x9” (23cmx23cm) square pan.

Place the butter in a 10” (25cm) skillet over medium heat. Brown the butter until the milk solids are a dark chocolate brown and the butter smells nutty. (Don’t take your eyes off the butter in case it burns.) Pour into a shallow bowl and chill in the freezer until just congealed, 15-30 minutes.

Whisk together cake flour, baking powder, and salt.

Beat the brown butter, light brown sugar, and granulated sugar in an electric mixer until light and fluffy, about 2 minutes. Beat in the eggs one at a time, mixing well, and then the vanilla extract.

Stir in the flour mixture at low speed until just combined.

Scrape the batter into the greased and floured 9”x9” (23cmx23cm) square pan. Smooth the top with a rubber spatula and rap the pan on the counter. Bake until golden brown on top and when a toothpick inserted into the center comes out clean, about 25 minutes.

Cool in the pan 10 minutes. Run a knife along the edge and invert right-side-up onto a cooling rack to cool completely.

Chocolate Glaze (For the Ice Cream Petit Fours)

9 ounces (250g) dark chocolate, finely chopped
1 cup (250 ml) heavy (approx 35% butterfat) cream
1 1/2 tablespoons (32g) light corn syrup, Golden syrup, or agave nectar
2 teaspoons (10ml) vanilla extract

Stir the heavy cream and light corn syrup in a small saucepan over medium heat until it comes to a boil. Remove from heat and add the dark chocolate. Let sit 30 seconds, then stir to completely melt the chocolate. Stir in the vanilla and let cool until tepid before glazing the petit fours.

Meringue (For the Baked Alaska)

8 large egg whites
½ teaspoon (3g) cream of tartar
½ teaspoon (3g) salt
1 cup (220g) sugar

Beat the egg whites, cream of tartar, and salt on high speed in an electric mixer until soft peaks form. Beat in the sugar gradually in a slow stream until stiff peaks form.

Assembly Instructions – Ice Cream Petit Fours

Line a 9”x9” (23cmx23cm) pan with plastic wrap, so that no sides of the pan are exposed and so there is some extra plastic wrap hanging off the sides. Spread 1 ¾ to 2 cups (450ml to 500ml) ice cream into the pan. Cover with more plastic wrap and freeze several hours.

Once the brown butter pound cake has completely cooled, level the top with a cake leveler or a serrated knife. Then split the cake in half horizontally to form two thin layers.

Unwrap the frozen ice cream. Flip out onto one of the layers of cake and top with the second layer of cake. Wrap well in plastic wrap and return to the freezer overnight.

Make the chocolate glaze (see above.)

While the glaze cools, trim ¾” (2cm) off each side of the ice cream cake to leave a perfectly square 7.5” (19cm) ice cream cake. Cut the cake into twenty five petit fours, each 1.5”x1.5” (4cmx4cm).

Glaze the petit fours one at a time: place a petit four on a fork and spoon chocolate glaze over it.

Place the petit fours on a parchment-lined baking sheet and return to the freezer for one hour.

Assembly Instructions – Baked Alaska

Line four 4” (10cm) diameter tea cups with plastic wrap, so that plastic wrap covers all the sides and hangs over the edge. Fill to the top with ice cream. Cover the top with the overhanging plastic wrap and freeze for several hours, or until solid.

Level the top of the brown butter pound cake with a serrated knife or with a cake leveler. Cut out four 4” (10cm) diameter circles from the cake. Discard the scraps or use for another purpose.
Make the meringue (see above.)

Unwrap the ice cream “cups” and invert on top of a cake round. Trim any extra cake if necessary.

Pipe the meringue over the ice cream and cake, or smooth it over with a spatula, so that none of the ice cream or cake is exposed. Freeze for one hour or up to a day.

Burn the tips of the meringue with a cooking blow torch. Or, bake the meringue-topped Baked Alaskas on a rimmed baking sheet in a 500°F/260°C oven for 5 minutes until lightly golden. Serve immediately.

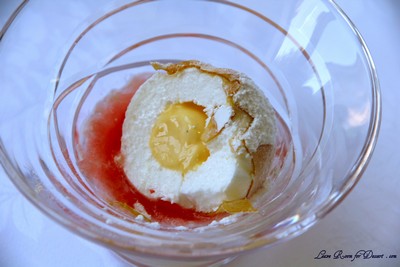
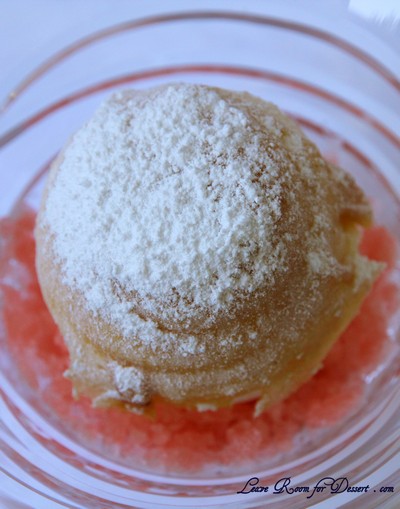
Tropical Snow Egg

Tuesday, August 3rd, 2010

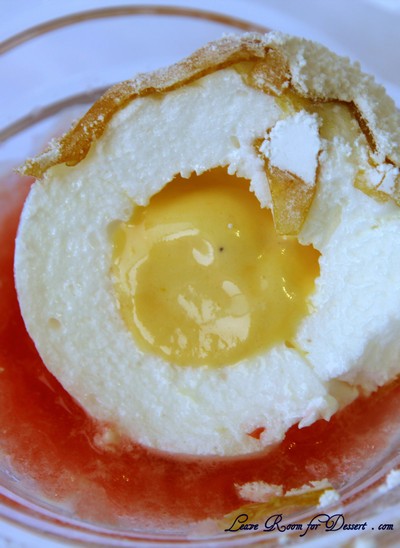
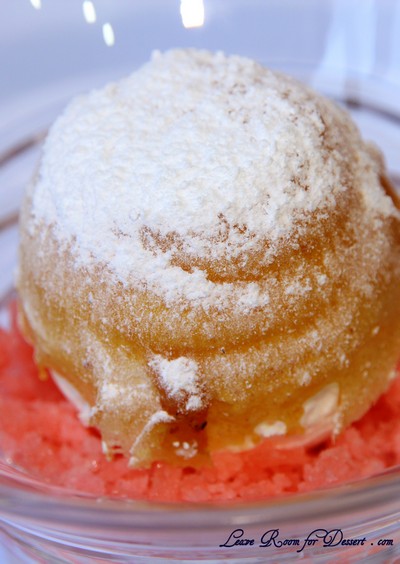
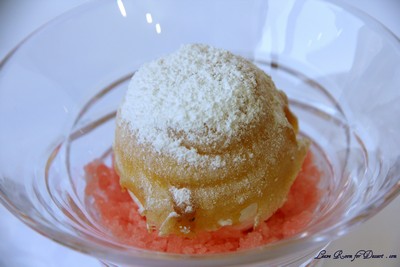
After our trip to Quay last year, I have wanted to replicate Peter Gilmore’s Snow egg. It never occurred to me again, until I saw Peter Gilmore in a Gourmet Traveller video, where he showed roughly how his two signature desserts (the eight-textured chocolate cake and the snow egg) were made, along with his inspiration behind them. I went searching for recipes for poached meringues, crispy tuilles and with terrible luck (and terrible search terms) it took me quite a few hours before I had found the actual recipe on the internet…

And then I saw it everywhere, even little searches brought me to his recipe, either posted by someone who went to Peter’s cooking class or even on a lifestyle website. Then it was the final dish to be prepared by MasterChef contestants in series 2.
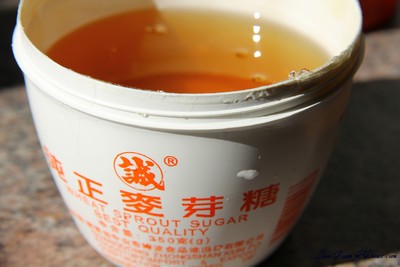
The best part of this dessert being on MasterChef were the comments by people below the recipe, as everyone was discussing where to buy maltose. Beforehand I tried looking in the shops and found rice malt – a brownish liquid maltose (+ carbohydrates and a little glucose). I decided to try it out, without trying any other parts of the recipe, to see if this would work. It didn’t. The tuilles melted into a terrible mess. After checking out the MasterChef website I found people suggesting going to Asian grocery stores. And with much luck, my local Asian grocery store had it. I had to ask for it though as it was too difficult to find, although the lovely staff member there found me some – it was labelled: Wheat Sprout Sugar, Ingredients: Rice, malt…

These tuilles were perfect! They worked very well on baking paper and hardly any broke. It also didn’t matter if they stayed on the paper a while.

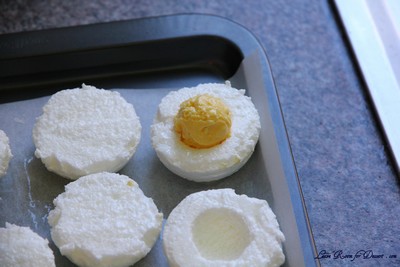
The other piece of equipment I was missing were the hemisphere moulds. Although my Mum came up with the brillant idea of using an egg poacher for the meringue moulds. Lucky my mum’s one had smooth hemispheres compared to mine with a flat base. These worked perfectly, with the only problem being that there were only 4 moulds, so I had to clean them between cooking each batch of 4 halves. I made a total of 8 snow eggs, so this part got tedious after the 2nd batch.

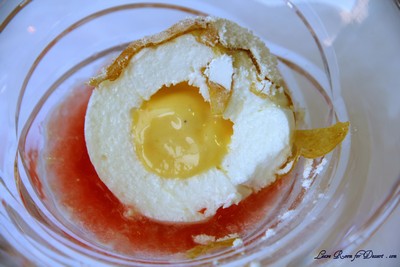
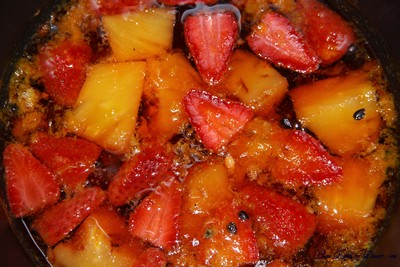
The flavours Peter uses are gorgeous, although trying to make this using seasonal fruits or frozen fruits I had on hand, made me change the recipe to suit the timing of the year. I decided on a passionfruit ice cream for the “yolk” of the egg, with a tropical, strawberry, pineapple and passion fruit granita along with a strawberry cream. I think most flavours worked wonderfully – although the strawberry cream was maybe a little overpowering in flavour.

I have learnt so much from this challenge – the maltose experience was extremely interesting, as were making the poached meringue and granita. I am so glad I have made this, and even more glad the extremely talented and incredibly gifted Peter Gilmore shared such a beautiful recipe of his. I would much like to go back to Quay at some point as the experience was just amazing. I am also greatly anticipating the launch of his book on 1st November this year!!! I tried to make my own version of Peter Gilmore’s eight textured chocolate cake as I could not find his recipe anywhere – although it didn’t turn out particularly well in the presentation department (and obviously didn’t compare to the flavours of Peter’s, but was still delicious). I’m not sure whether I should post it due to the bad photos… – although I have heard his actual recipe may be in his book – making me super excited!!

And to answer your questions, I think this dessert is worth making. Many components can be made the night or a few nights beforehand, the presentation is lovely, the flavours are beautiful, the concept is amazing. (Although, this is on the condition of getting some hemisphere moulds – as cleaning the egg poachers was too tedious. Please let me know if you find any in Sydney or on the internet?) {now that’s not a hint for a birthday present, if I ever did give one 🙂 }

Tropical Snow Egg

Recipe adapted from Peter Gilmore from Quay‘s Guava and Custard Apple Snow Egg

Passion fruit ice cream
100ml milk
3 egg yolks
100g caster sugar
100g passion fruit pulp
50ml pouring cream

Vanilla custard base
400ml pouring cream
2 vanilla beans, split and seeds scraped
1 whole egg
3 egg yolks
80g caster sugar

Tropical granita
100g caster sugar
500ml water
150g pineapple, diced
100g passion fruit pulp
100g fresh strawberries, hulled and halved

Poached meringue (I used all the left over egg whites from the ice cream and custard – making a meringue of ~200g egg whites and ~200g caster sugar)
Canola oil spray or vegetable oil
150g egg white
150g caster sugar

Maltose tuiles
200g liquid maltose
100g caster sugar
20g flaked almonds

Vanilla cream

100g vanilla custard base
100g double cream

Strawberry Cream
100g of strawberries, pureed and sieved
200g vanilla cream

1 cup icing sugar, to serve

Preheat oven to 150ºC and turn on ice cream machine to chill.

For the passion fruit ice cream, bring milk to the boil in a small saucepan. Whisk egg yolks and sugar together by hand, then pour boiling milk onto the egg yolk mixture while whisking. Pour into a stainless steel bowl and cook while whisking over a pot of simmering water for about 10 minutes or until it is thickened. Whisk sabayon until cool over ice, then whisk in the passion fruit pulp and the cream. Strain and then place the mixture into an ice cream machine and churn for about 40 minutes. Place in the freezer until set.

For the vanilla custard base, heat cream and vanilla seeds together in a small saucepan until it just begins to boil, and then remove from the heat. Whisk by hand the eggs, egg yolks and sugar together in a stainless steel bowl until combined. While whisking the eggs, slowly pour on the hot vanilla cream. Mix well and remove the vanilla pods. Pour this mixture into 4 dariole moulds to a depth of 5 cm, place the dariole moulds into a small baking dish with boiling water around the dariole moulds up to halfway to form a water bath. Place the water bath into a 150ºC oven and cook the custard 25 minutes or until the custard is just set. If the centre is still runny place in the freezer until set then place in refrigerator until needed.

For the granita, combine sugar and water in a large saucepan; bring to the boil then lower heat. Add diced fruit and gently simmer for 10 minutes. Take off the heat and allow to infuse at room temperature for 30 minutes. Pass the liquid through a muslin cloth and discard the solids. Pour the syrup into a lamington or slice tin to a depth of 5cm. Place in the freezer until solid. Scrape with a fork into crystals and then transfer to the freezer until required.

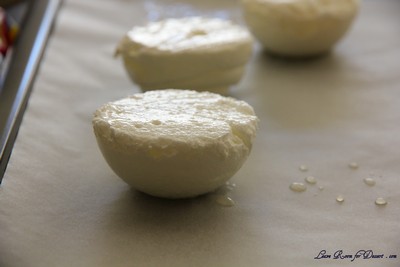
For the poached meringue, whisk the egg whites in an electric mixer until they form soft peaks and then slowly add the sugar bit by bit. Keep whisking until the meringue forms firm peaks and the sugar has dissolved. Spray hemisphere moulds lightly with canola oil spray. Spoon mixture into a piping bag fitted with a 1cm nozzle. Pipe mixture into moulds so it sits above the surface. Place the filled moulds into a large baking dish and pour boiling water into the baking dish to a depth of about 3cm. Bake at 150ºC for 15 minutes until just. Allow to cool for 2 minutes, then trim off tops so they are perfect hemispheres. Gently un-mould and place cut side up on a baking paper lined tray in the fridge until needed. Increase oven temperature to 180ºC.

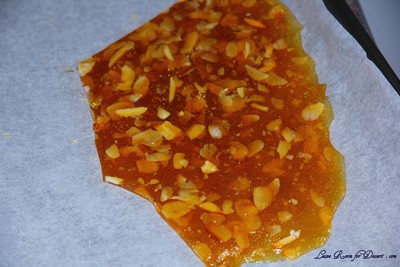
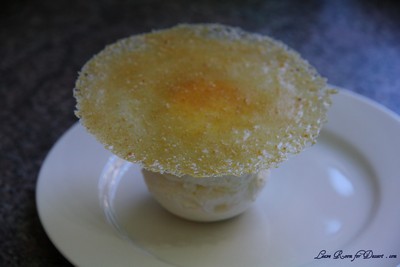
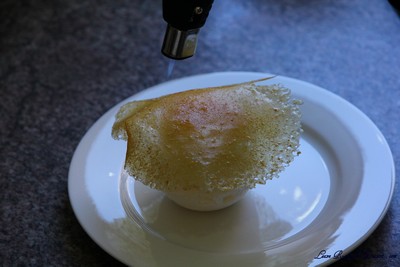
To make the maltose tuiles, stir maltose and sugar together in a small saucepan then bring to the boil until it reaches hard crack stage (until it caramelises) (this will occur at 160ºC or a little higher). Take care to brush down the sides with a pastry brush dipped in water so it doesn’t crystallise. Once golden add the flaked almonds and immediately pour the mixture onto a silicon mat, allow to cool completely. Process the cooled praline in the bowl of a hand blender to form a fine powder. Next sift a fine layer of the praline mixture through a drum sieve, over an acetate stencil with 11cm circles cut out of it onto a silicon mat on a baking sheet. Melt this mixture in a 180ºC oven for a few minutes until it forms a clear liquid paste. Cool tuiles slightly and peel off silicon sheet while still flexible. Store flat between sheets of baking paper until ready to use.

For the vanilla cream, whisk the cream and custard together to form soft peaks. Store in the fridge until ready to use.

For the strawberry cream, place the strawberry puree in a small bowl and fold through the vanilla cream gently to form a rippled effect. Do this just before you are ready to assemble the dessert.

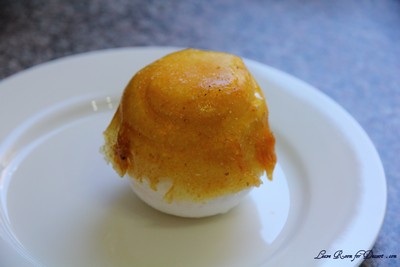
To assemble, take 8 of the half hemisphere poached meringues. Using a teaspoon or half teaspoon measure remove a small scoop from the centre of each half hemisphere being careful not to break through the outer edge. Then place a teaspoon or half teaspoon measure scoop of passion fruit ice cream in four of the hemispheres. Invert the other four hemispheres over the ice cream filled meringues to form a complete sphere. Use wet fingers to stick the two halves together. Place a tuile on top of each sphere and using a blow torch and an even motion, melt it over the sphere, patting it down if necessary. Dust spheres liberally with icing sugar. Next add a generous spoonful of the strawberry cream in the bottom of each serving glass. Top the cream with the tropical granita. Use two teaspoons to place the snow egg on top of the granita and serve.

Swiss Swirl Ice Cream Cake – Daring Bakers Challenge July 2010

Tuesday, July 27th, 2010

The July 2010 Daring Bakers’ challenge was hosted by Sunita of Sunita’s world – life and food. Sunita challenged everyone to make an ice-cream filled Swiss roll that’s then used to make a bombe with hot fudge. Her recipe is based on an ice cream cake recipe from Taste of Home.

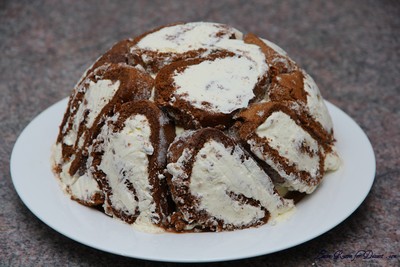
A crowd pleaser – on all accounts. Everyone loved this dessert – probably because it was composed of chocolate and vanilla components. Chocolate cake and a whole lot of cream sums up this dessert – as do the words ‘yum’ ‘that was great’ and ‘can I have some more’. And yes, people did go back for seconds.

I was a little concerned at the beginning as the ice cream recipes had no egg yolks, and the chocolate ice cream only had cocoa for flavouring, which I thought would impact greatly on flavour and texture – but I think it all worked wonderfully together and would happily make this again.

I had a little trouble with the chocolate swiss roll breaking a touch when I rolled the cream up in it, so I would probably use a different recipe if I were to serve the swiss roll by itself. My food processor couldn’t grind up the vanilla bean fine enough for my likings, so I used the seeds only. And I have learnt my lesson (for the final time). Don’t try and freeze two things in the ice cream machine on the same day! I left my chocolate ice cream too late and it didn’t freeze in the ice cream machine, so we had an ice cream cake with chocolate cream sauce for dessert and it was all too good.

I had leftovers from my 2.4L bowl, so I also made a loaf tin of the swiss roll ice cream cake – and eyes lit up when I said a week after the first one – “would anyone like ice cream cake for dessert?”

Thanks to our Daring Baker host this month, Sunita. I never would have thought or got around to making this if it weren’t on the Daring Bakers – and a big Thank you to all those who maintain and manage the website.

Swiss Swirl Ice Cream Cake

Recipe source- Inspired by the Swiss swirl ice cream cake from the Taste of Home website. The recipes for the cake, filling, eggless ice creams and the fudge topping have been developed by Sunita.

The Swiss rolls

6 medium sized eggs
1 C / 225 gms caster sugar /8 oz+ extra for rolling
6 tblsp / 45gms/ a pinch over 1.5 oz of all purpose (plain) flour + 5 tblsp/40gm /a pinch under 1.5 oz of natural unsweetened cocoa powder, sifted together
2 tblsp /30ml / 1 fl oz of boiling water
a little oil for brushing the pans

For the filling

2C / 500 mls/ 16 fl oz of whipping cream
1 vanilla pod, cut into small pieces of about ½ cm (or 1 tsp vanilla extract)
5 tblsp / 70gms/2.5oz of caster sugar

Pre heat the oven at 200 deg C /400 deg F approximately. Brush the baking pans ( 11 inches by 9 inches ) with a little oil and line with greaseproof baking paper. If you have just one pan, bake one cake and then let the pan cool completely before using it for the next cake.

In a large mixing bowl, add the eggs and sugar and beat till very thick; when the beaters are lifted, it should leave a trail on the surface for at least 10 seconds.

Add the flour mixture, in three batches and fold in gently with a spatula. Fold in the water.

Divide the mixture among the two baking pans and spread it out evenly, into the corners of the pans.
Place a pan in the centre of the pre heated oven and bake for about 10-12 minutes or till the centre is springy to the touch.

Spread a kitchen towel on the counter and sprinkle a little caster sugar over it.
Turn the cake on to the towel and peel away the baking paper. Trim any crisp edges.

Starting from one of the shorter sides, start to make a roll with the towel going inside. Cool the wrapped roll on a rack, seam side down.

Repeat the same for the next cake as well.
Grind together the vanilla pieces and sugar in a food processer till nicely mixed together. If you are using vanilla extract, just grind the sugar on its own and then add the sugar and extract to the cream.

In a large bowl, add the cream and vanilla-sugar mixture and beat till very thick.
Divide the cream mixture between the completely cooled cakes.
Open the rolls and spread the cream mixture, making sure it does not go right to the edges (a border of ½ an inch should be fine).

Roll the cakes up again, this time without the towel. Wrap in plastic wrap and chill in the fridge till needed, seam side down.

The vanilla ice cream

2 and ½ C / 625 ml / 20 fl oz of whipping cream
1 vanilla bean, minced or 1 tsp/ 5 ml/ .15 fl oz vanilla extract
½ C / 115gms/ 4 oz of granulated sugar

Grind together the sugar and vanilla in a food processor. In a mixing bowl, add the cream and vanilla –sugar mixture and whisk lightly till everything is mixed together. If you are using the vanilla extract, grind the sugar on its own and then and the sugar along with the vanilla extract to the cream.

Pour into a freezer friendly container and freeze till firm around the edges. Remove from the freezer, beat till smooth and return to the freezer. Do this 3-4 times and then set completely.

The Hot fudge sauce– I made this just after adding the layer of vanilla ice cream to the cake.

1 C / 230gms/ 8 oz of caster sugar
3 tblsp / 24gms/1.5 oz of natural unsweetened cocoa powder
2 tblsp /15gms/ 1 oz of cornflour/cornstarch
1 and ½ C /355ml /12 fl oz of water
1 tblsp /14gms/ 1 oz butter
1 tsp/5 ml / .15 fl oz vanilla extract

In a small saucepan, whisk together the sugar, cocoa powder, cornflour and water.

Place the pan over heat, and stir constantly, till it begins to thicken and is smooth (for about 2 minutes).
Remove from heat and mix in the butter and vanilla. Keep aside to cool .

The chocolate ice cream

2C/ 500 ml whipping cream
1 C/230gms/8 oz caster sugar
3 tblsp/ 24 gms/1.5 oz of natural unsweetened cocoa powder

Grind together the sugar and the cocoa powder in a food processor .
In a saucepan, add all the ingredients and whisk lightly.
Place the pan over heat and keep stirring till it begins to bubble around the edges.

Remove from heat and cool completely before transferring to a freezer friendly container till firm around the edges. If you are using an ice cream maker, churn the ice cream according to the manufacturer’s instruction, after the mixture has cooled completely.
Remove from the freezer, beat till smooth and return to the freezer. Do this 3-4 times and then set completely.

Assembly-

Cut the Swiss rolls into 20 equal slices ( approximately 2 cms each ).

Cover the bottom and sides of the bowl in which you are going to set the dessert with cling film/plastic wrap.

Arrange two slices at the bottom of the pan, with their seam sides facing each other. Arrange the Swiss roll slices up the bowl, with the seam sides facing away from the bottom, to cover the sides of the bowl. Cover the bowl with plastic wrap and freeze till the slices are firm (at least 30 minutes).

Soften the vanilla ice cream. Take the bowl out of the freezer, remove the cling film cover and add the ice cream on top of the cake slices. Spread it out to cover the bottom and sides of the bowl. Cover the bowl with plastic wrap and freeze till firm ( at least 1 hour)

Add the fudge sauce over the vanilla ice cream, cover and freeze till firm . ( at least an hour)

Soften the chocolate ice cream and spread it over the fudge sauce. Cover with plastic wrap and freeze for at least 4-5 hours till completely set .

Remove the plastic cover, and place the serving plate on top of the bowl. Turn it upside down and remove the bowl and the plastic lining. If the bowl does not come away easily, wipe the outsides of the bowl with a kitchen towel dampened with hot water. The bowl will come away easily.

Keep the cake out of the freezer for at least 10 minutes before slicing, depending on how hot your region is. Slice with a sharp knife, dipped in hot water.

Raspberry Sorbet

Tuesday, March 30th, 2010

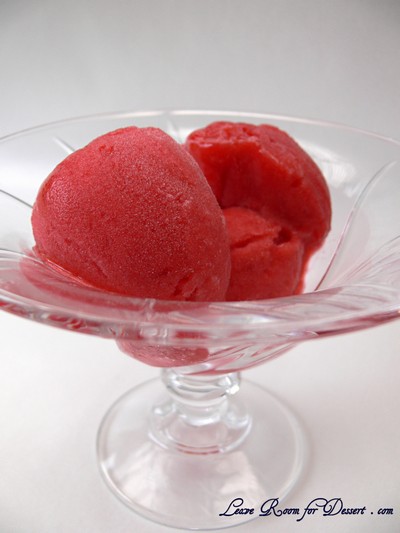
RaspberrySorbet05

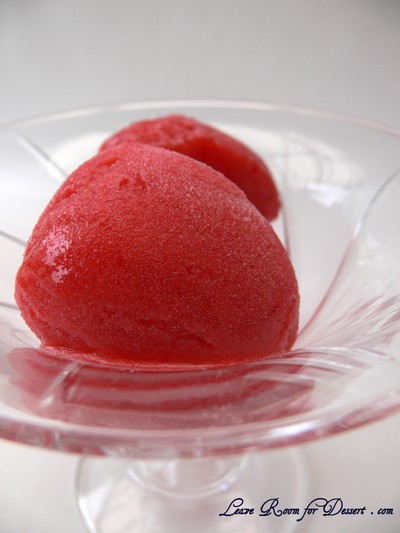
Is it too close to Winter for me to post this recipe? I say, no. At the moment in Sydney we are having very odd whether. It is surprisingly warm, a month into Autumn.

I had been wanting to make a sorbet for quite a while, when the opportunity came crashing through my door – a faulty freezer had caused a family members frozen raspberries to thaw (along with a range of other frozen goods). Rather than throwing them out – yes, that was their plan, I put up my hand and said “but I can make some raspberry sorbet with that”.

RaspberrySorbet01

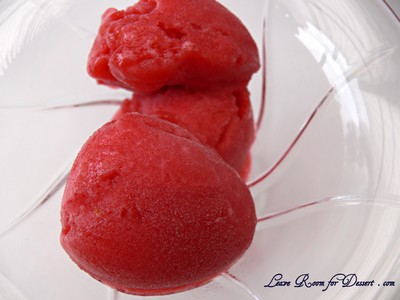
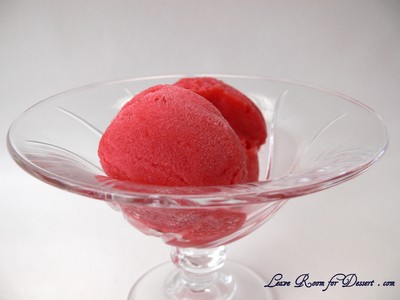
I was surprised at how lovely this sorbet was – sweet and full of flavour. Now time to expand my repertoire of sorbet flavours – well… maybe next summer…

RaspberrySorbet06

Raspberry Sorbet

Recipe from Anita @ Leave Room for Dessert

500g raspberries
1 orange, juiced
2/3 cup caster sugar
¾ cup water

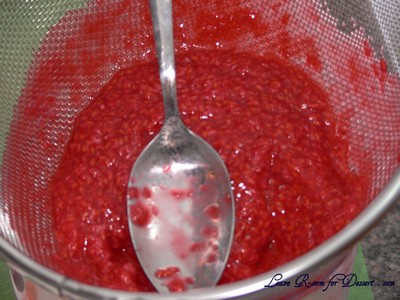
Puree the raspberries in a food processor, and then pass through a fine sieve into a large bowl, keeping the juice and discarding the seeds. Mix in the orange juice.

RaspberrySorbet02

Place the water and caster sugar in a saucepan and heat on medium/high heat until the sugar has dissolved. Bring the sugar water to the boil and boil for 3 minutes. Remove from the heat and allow to cool slightly.

Whisk the sugar mixture into the sieved raspberry puree and cool down in the sink with ice cubes and cold water. Once cooled, churn in an ice cream maker as per instruction manual and then freeze in a suitable container. If you don’t have an ice cream maker, place in a suitable freezer container and freeze for a few hours at a time, whisking or using a fork, to break up larger ice crystals. Continue to mix until it is too frozen to mix further.

5-10 minutes prior to serving, remove the sorbet from the freezer to allow easier dishing of the sorbet.

RaspberrySorbet03

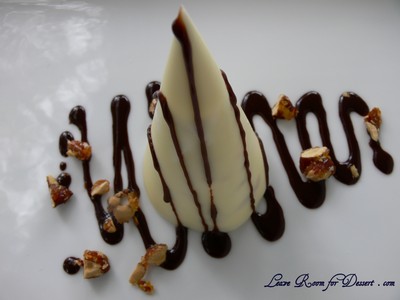
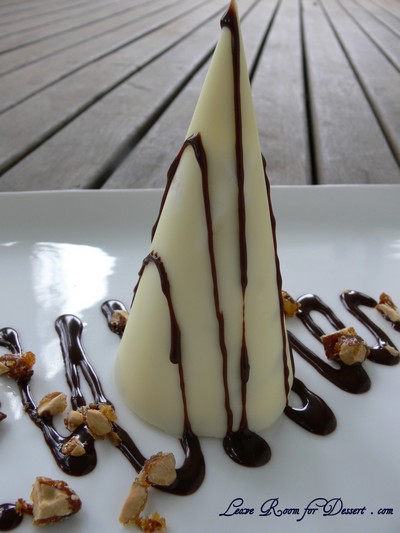
White Chocolate Cones with Nougat and Vienna Almond Semifreddo

Tuesday, February 23rd, 2010

SemifreddoViennaAlmond26

I am very excited to have come to the end of my first year of food blogging. What better way to celebrate, than by posting the recipe of the dessert in my header (at least the one at the moment – it may change in the future).

SemifreddoViennaAlmond29

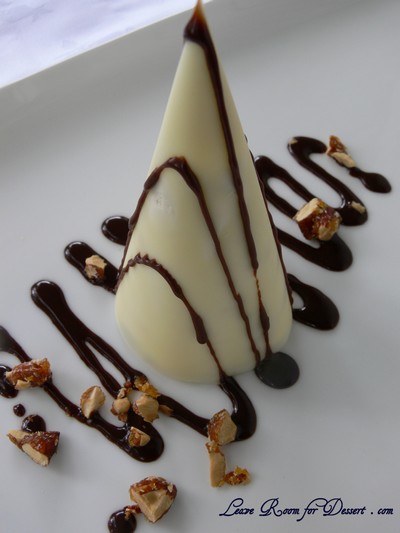
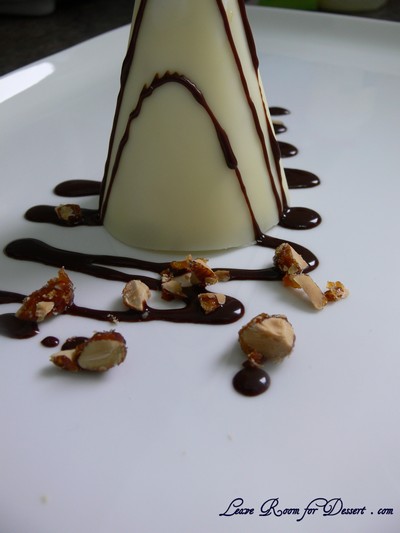
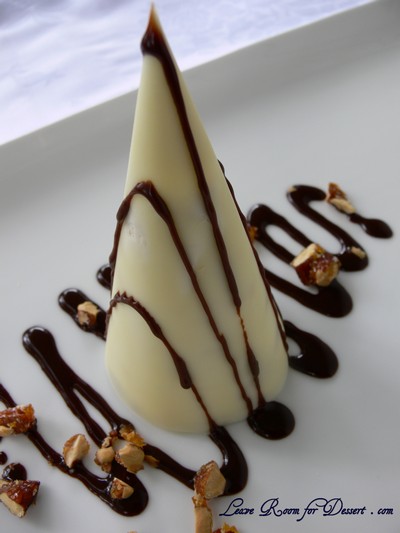
I love the look of this dessert. It looks like something that could be served in a restaurant and tastes like that’s where it belongs. Many people have asked for this recipe, so it’s about time I posted it.

SemifreddoViennaAlmond21

This recipe took me two nights to prepare, although each step was quite easy and little work is required on the night of a dinner party – which is exactly how I like it, more time spent with guests the better. I made the Vienna almonds the first night, although these could easily be bought. The second night involved making the chocolate cones and assembling everything, with only the chocolate sauce made on serving night.

SemifreddoViennaAlmond30

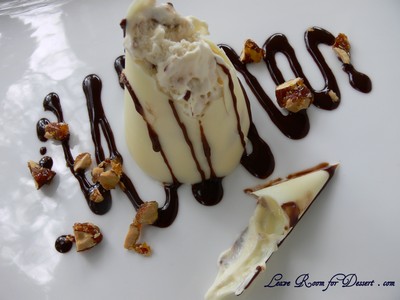
This dessert tastes lovely. Like a soft vanilla ice cream with crunches of toffee Vienna almonds and hits of nougat. It works so well. I hope you enjoy it.

SemifreddoViennaAlmond16

White Chocolate Cones with Nougat and Vienna Almond Semifreddo

Recipe adapted from a magazine tear-out

Serves: 10-12

300-370g white chocolate
2 eggs
1/3 cup caster sugar
400ml thickened cream
1 teaspoon vanilla
150g soft almond nougat, chopped or ripped finely
150g Vienna almonds, chopped
Chocolate sauce for serving:
50ml cream or thickened cream
60g dark chocolate, in pieces

To make cones:
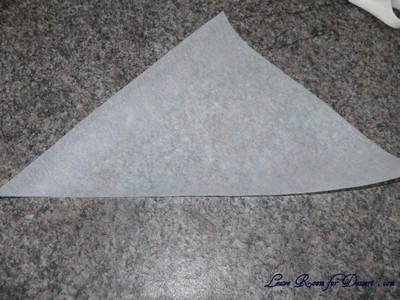
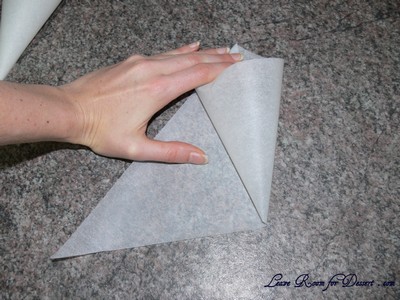
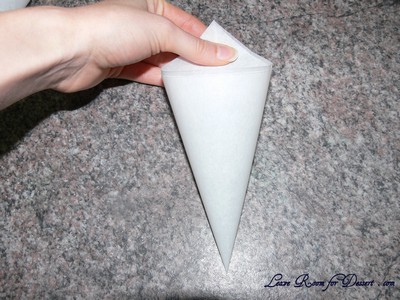
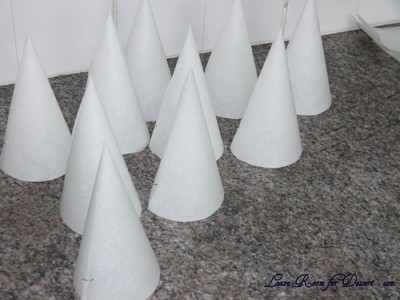
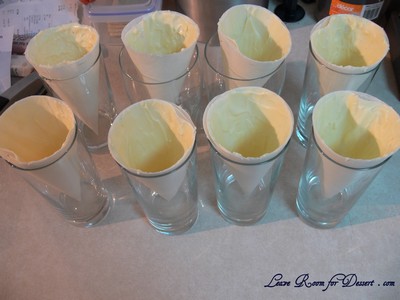
Cut five or six 25cm squares out of baking paper. Fold squares diagonally and cut to form 10-12 triangles. Place the triangle on the bench so the longest flat side is closest to you and the main point is facing away. Pull and twist the point on the right hand side up to join with the main point. Pull the left hand side point around the first twist to make the cone. Staple in place. Cut around on the bottom to make a smooth edge and ensure the cone stands upright. You may need some holders for your cones – either use glasses, if they will fit – or fold a piece of paper in half length ways and twist to form a cylinder, staple in place (it will look like a toilet roll holder).

SemifreddoViennaAlmond12

SemifreddoViennaAlmond13

SemifreddoViennaAlmond14

SemifreddoViennaAlmond15

Melt the white chocolate in a bowl over simmering water. Use the back of a spoon to coat the inside of the cones with an even layer of chocolate. (If it is too hot, make a smaller cone out of paper or cardboard to hold the baking paper cone). Stand cones in a glass or made holder.

SemifreddoViennaAlmond03

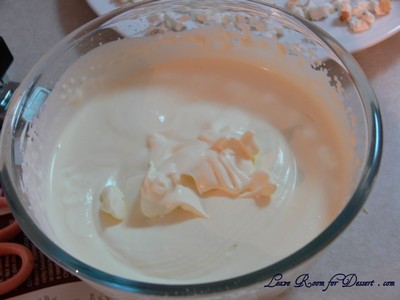
Beat thickened cream in a medium bowl until softly whipped. Beat the eggs with the sugar and vanilla in a large bowl until lighter in colour and thickened. Fold the cream lightly into the egg mixture, half way through, add the nougat and around 100g Vienna almonds and finish folding through.

SemifreddoViennaAlmond07

SemifreddoViennaAlmond08

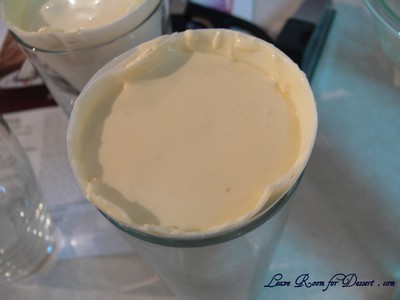
Scoop the mixture into each of the cones and place in the freezer for a few hours or overnight, until firm.

To serve:
Place the dark chocolate and cream in a bowl and heat in a microwave in 10sec 50% power bursts, stirring between each burst, until the chocolate has melted and combined with the cream. Place in a piping bag/squeeze bottle or make a piping bag by using a plastic zip lock bag or by making another cone out of baking paper and cutting off the end.

Remove baking paper from white chocolate cones and place on the plate. Drizzle with chocolate sauce and scatter the remaining Vienna almonds. Serve.

SemifreddoViennaAlmond27

Strawberries and Cream with White Chocolate Sponge and Ice Cream

Saturday, November 7th, 2009

StrawberryCreamMasterChef07

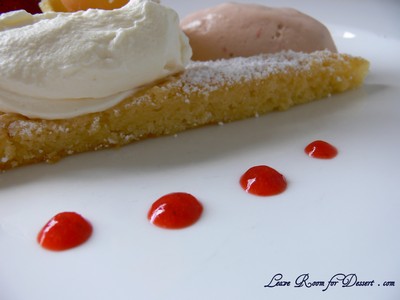
When I saw Katrina Kanetani from Pier walk into the MasterChef kitchen on Wednesday night I was so excited as I knew desserts would be on the menu. Katrina was named Chef of the Year in 2007 and is the head Pastry Chef at the three-hatted restaurant Pier, how could I not be excited to see what creations the celebrity contestants had to choose from.

StrawberryCreamMasterChef24

I thought both desserts Katrina revealed were gorgeous. How could you choose? Being a chocoholic I was obviously eager to get the recipe for the chocolate dessert – a chocolate brulee. But, after saying that, the strawberry, cream, sponge and tuile creation looked marvellous (this was the chosen dessert).

StrawberryCreamMasterChef08

Even better? I actually had most of the ingredients at home (couldn’t find sumac, though). So I had decided, printed the recipe off the day after the show and started planning how I would fit it in on the weekend, without making the whole day full of cooking and dirtying the kitchen, like I tend to do.

StrawberryCreamMasterChef16

So I made the ice cream the night before, chilled the custard on ice and placed it in my ice cream maker. It looked gorgeous (and tasted beautiful). I placed it in the freezer overnight and left it out for 10 minutes or more for it to soften.

StrawberryCreamMasterChef18

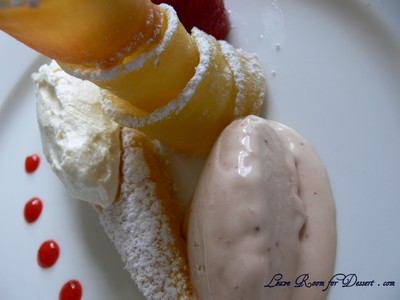
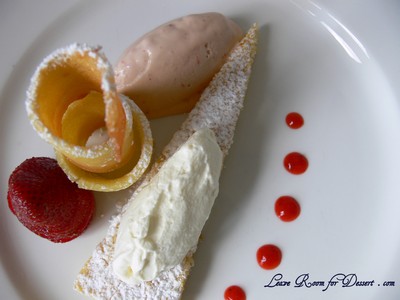
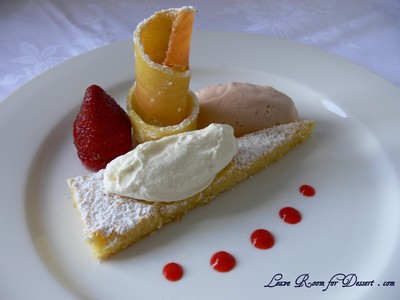
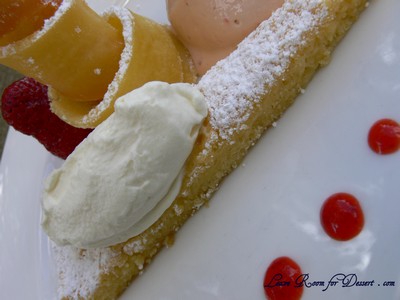
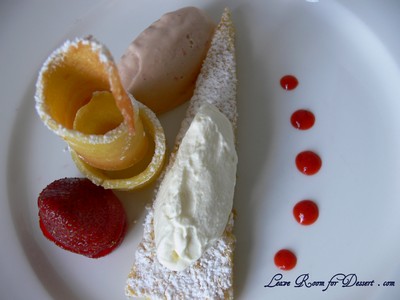
Everything on the plate worked fantastically together. It looked amazing too. I couldn’t believe I actually got it quite close to the actual dessert. I had a few problems with the tuile, mainly the fact my baking trays decided to buckle under the heat, causing the tuile mixture to be uneven. Overall I was very happy with my result.

StrawberryCreamMasterChef12

Aren’t my dinner guests tonight going to be happy? 😛

StrawberryCreamMasterChef15

Strawberries and Cream with White Chocolate Sponge and Ice Cream

Recipe by Katrina Kanetani as seen on Celebrity MasterChef 2009

Strawberry Ice-cream
180g strawberries, hulled, halved
360ml cream
5 egg yolks, reserve whites
120g caster sugar

White chocolate sponge cake

135g white coverture chocolate, broken up
125g unsalted butter, softened
5 egg yolks
4 egg whites
90g caster sugar
60g plain flour, sifted

Tuile
50g plain flour
60g caster sugar
35g icing sugar
Pinch salt
4 egg whites
65g butter, melted

Chantilly cream
200ml cream
1 tbs icing sugar
½ tsp vanilla bean extract

Strawberries

3 large strawberries, hulled
2 tsp icing sugar
½ tsp sumac (I left this out as I had none)

To serve
Icing sugar
Sumac (I left this out as I had none)
(Some of the strawberry puree – see method for ice cream)

To make the strawberry ice-cream, puree the strawberries in a small food processor and pass through a sieve. Reserve 1 tablespoon of the puree for serving. Place the cream in a small saucepan and heat over medium heat to just below boiling point. Whisk the egg yolks and sugar together in a large bowl. Gradually pour the hot cream into the yolk mixture, while whisking continuously until all the cream is added. Transfer the mixture into a clean medium saucepan and cook over low heat, stirring until custard thickens and coats the back of a spoon (mixture will be about 84°C). Strain custard through a fine sieve and place over a bowl of iced water, whisking until cold.

StrawberryCreamMasterChef26

Stir through the remaining strawberry puree.

StrawberryCreamMasterChef27

Transfer ½ cup of the ice-cream base into a cream canister and charge twice, shaking vigorously after each charge (I didn’t do this part as I wasn’t sure where it should be used for serving, plus I didn’t have the equipment. I placed it all in the ice cream maker.). Refrigerate cream canister until ready to serve. Pour remaining ice-cream base into a chilled ice cream maker and churn for about 20 minutes. Remove from ice cream maker and place in the blast chiller for about 10 minutes or until firm. (I placed mine in the freezer overnight)

StrawberryCreamMasterChef29

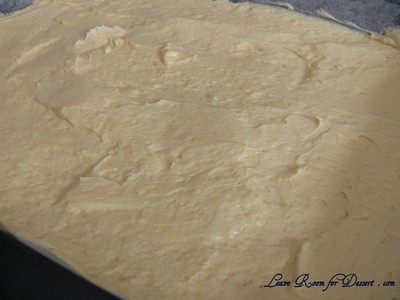
To make the white chocolate sponge cake, preheat oven to 160°C fan forced. Grease and line a 4cm deep baking tray (mine was 4.5cm x 21cm x 31cm). Place the chocolate in a glass bowl and place over a saucepan of simmering water. Stir with a metal spoon until melted. Transfer to a large bowl and cool. Add the butter to the cooled chocolate and beat until smooth. Stir in egg yolks and mix until well combined.

Using an electric hand beater, whip the egg whites to soft peaks. Add the sugar and continue beating until it forms stiff peaks.

StrawberryCreamMasterChef30

Fold the egg white mixture into the white chocolate and mix well. Gently fold in the flour. Spread the cake onto prepared baking tray until 2cm thick.

StrawberryCreamMasterChef01

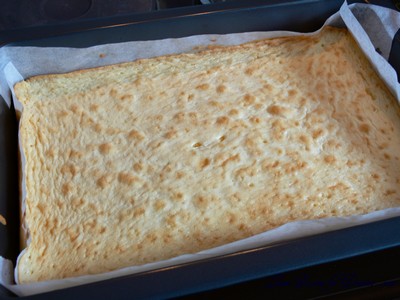
Bake for 10 minutes or until cooked (until skewer comes outs clean)(mine took 20-25 minutes). Allow to cool in pan then turn cake onto a board and remove baking paper. Turn cake over, top side up. Cut out a 3cm x 15cm x 15cm triangle. Reserve sponge triange and off-cuts for serving.

StrawberryCreamMasterChef03

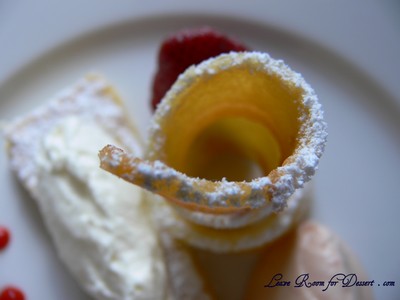
To make the tuile, grease and line 2 flat baking trays with baking paper. Sift the flour, sugars and salt into a bowl. Mix in the egg whites and butter. Place in the blast chiller for 10 minutes (I placed it in the freezer for 15 minutes). Spread a thin layer of batter onto one of the prepared trays and bake for 8 minutes (tuile should be set but not browned yet) (I did this at 160C fan forced). Using a sharp knife, cut the tuile, lengthways into 5cm wide strips. Turn onto the second prepared tray, separated slightly and return to oven until golden brown. While still hot, twist the tuiles and allow to cool to your desired shape.

To make the Chantilly cream, place the cream, icing sugar and vanilla in a bowl and beat with an electric beater until soft peaks form; refrigerate.

To prepare the strawberries, slice strawberries into 3mm thick rounds. Place the strawberry slices, sugar and sumac in a bowl and toss to coat all side of the strawberries.

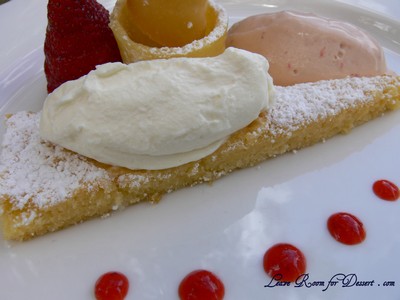
To serve, dust the sponge cake triangle with icing sugar and place in the centre of the serving plate. Place a quinell of Chantilly cream on top of sponge triangle and sprinkle the cream and some of the plate with a little sumac. Rebuild strawberry next to the sponge so bottom becomes the top. Place a small piece of squashed off cut sponge on the plate to stand the ice-cream on. With a warmed spoon, take a quinell of strawberry ice-cream and place it on top of the squashed sponge (squashed sponge should not be visible – it is just use to hold the ice-cream). Dust the tuile with icing sugar and place in the centre of the plate. (I used a piping bag to make the strawberry puree into smallish dots on the plate)

StrawberryCreamMasterChef21