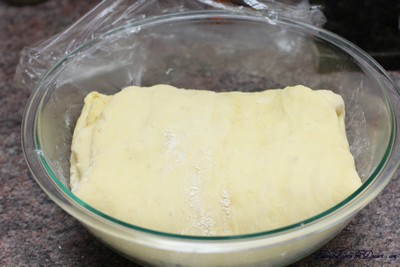
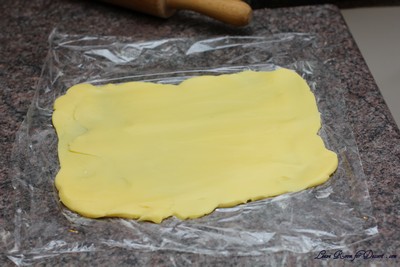
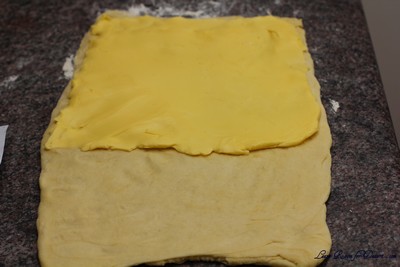
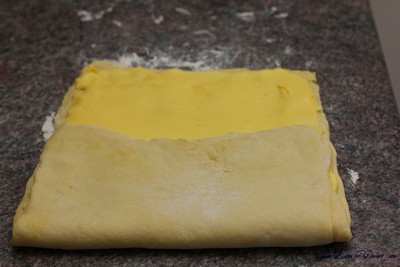
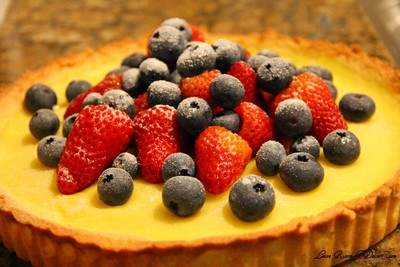
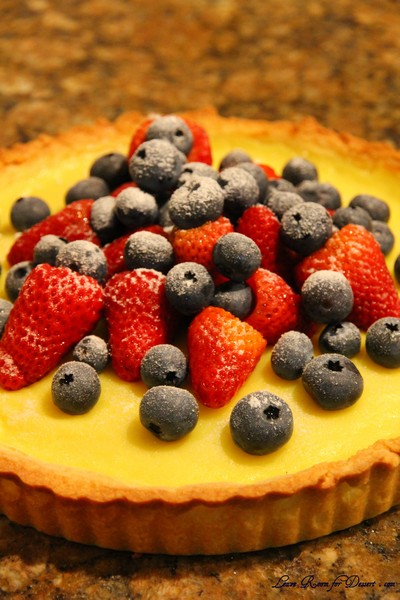
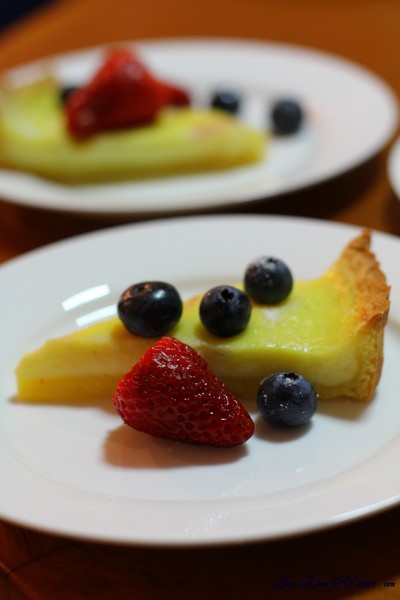
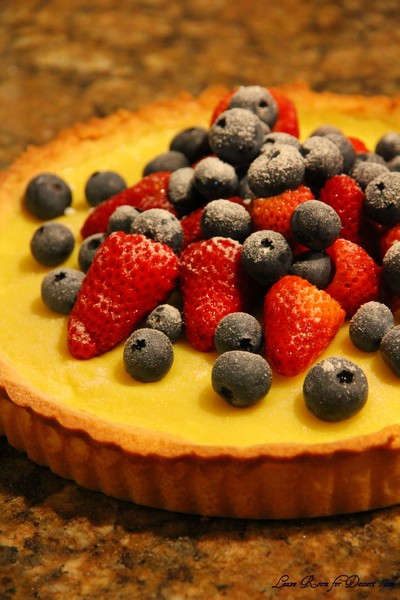
Pastry

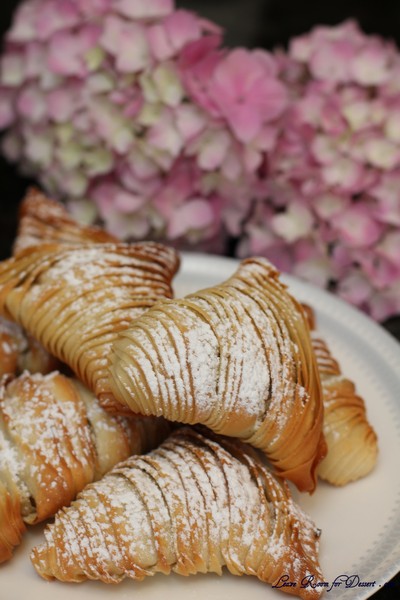
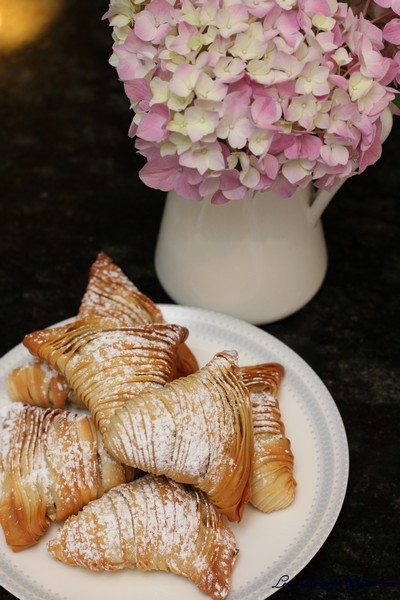
Sfogliatelle Ricci – Daring Bakers Challenge November 2013

Wednesday, November 27th, 2013

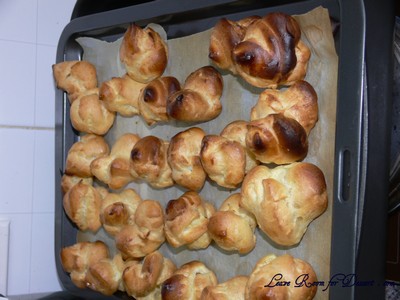
Sandie of the lovely blog, Crumbs of Love, was our November hostess. Sandie challenged us to make a traditional Italian dessert, along with its American version – Sfogliatelle (or better known in the US – lobster tails!) The flakey, 1000 layers of super thin dough, shaped into a horn and filled with a scrumptious filling. Così buono!

We were given a couple of choices this month for our challenge, and I chose the first one mentioned, Sfogliatelle Ricci (although after trouble with the pastry, I wish I had gone with the Sfogliatelle Frolle. Sandie mentions this recipe is a tender pastry, made with dough similar to pie crust (and much easier to make). Whereas the one I made was quite crispy indeed.

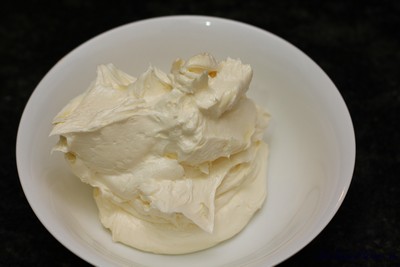
I enjoyed getting in and making some fresh ricotta, even though I found the lemon juice was not enough to make it curdle. Perhaps my lemon was not acidic enough? I recall once before I had tried making ricotta after being told how easy it was. I added the lemon juice, and very fine curds appeared. The website I had used said fine curds would make a lighter ricotta, although I tried to put it through my cheesecloth and there really wasn’t anything left. I searched troubleshooting for ricotta making, as some websites didn’t say to boil it, they said just to 94C, and others said to whisk, whereas some said to just let it sit. Well, it turns out that after boiling and whisking madly for this challenge, I looked up a youtube video and figured the only way I could save all this milk and cream was to start adding more acid. Two extra tablespoons of lemon juice and still nothing was happening. About 3 or 4 tablespoons of white vinegar, and I had curds! Very happy and now I know I can make ricotta without any hassle.

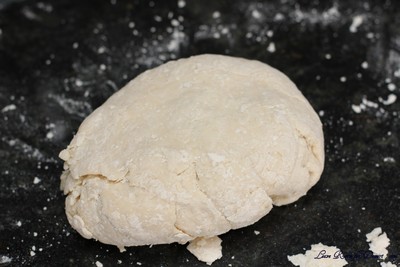
Then came the dough for this recipe. I tried hard not to add much more water than the recipe said, and ended up with a very solid dough. It was super hard for me to roll thin enough to fit into my pasta maker… When it came to the second round of rolling, I waited for Nick to return home, so I didn’t have to roll it.

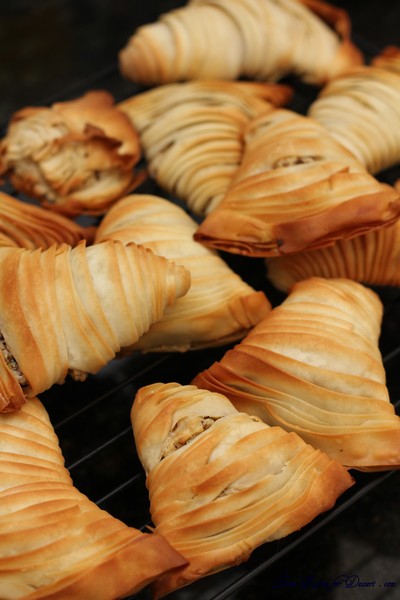
When adding the lard/butter mix onto the pastry, I couldn’t add more than a smear, and ended up with a lot left over. My pastry tore very easily when I tried to stretch it, but I continued on. To fill the pastries, I enlisted Nick’s help again to do the piping whilst I held the pastries. Once out of the oven they were lovely – very crispy (some said a little too crispy).

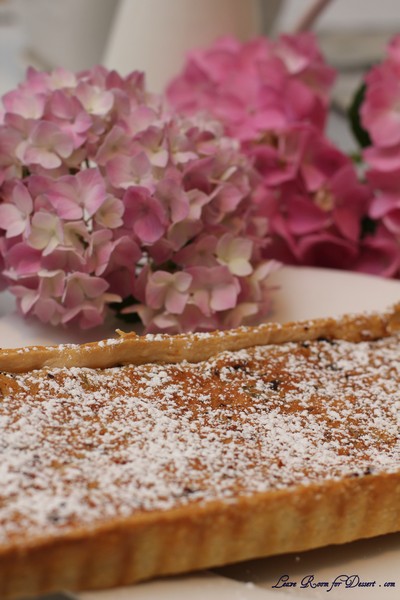
I had left over filling, which I put into a pie dish lined with shortcrust pastry, it was lovely and made the filling stand out a little more.

What a challenge! I’m very happy to have completed it in time before my bub arrives.

Best wishes
Anita

Recipe sources:
The pastry dough recipe is from Great Italian Desserts by Nick Malgieri. Unfortunately this book is out of print but you can still find used copies online or if your lucky, your local library. The Ricotta Cheese recipe is from Luscious Creamy Desserts by Lori Longbotham.

Fresh Ricotta Cheese

(makes 2 cups)

[Anita’s notes: I found once I had added the lemon juice, the curds were extremely small. I added about 2 more tablespoons of lemon juice and then about 3 tablespoons or more of white vinegar to make the curds really appear]

Servings: Makes 2 cups

8 cups (2 litres) whole milk (or goats milk)
1 cup (250 ml) heavy whipping cream (about 35%)
1/2 teaspoon (3 gm) salt
3 tablespoons (45 ml) fresh lemon juice – see my note above…

1. Line a large colander or strainer with 2 layers of lightly dampened cheesecloth over a large glass; set aside.

2. Pour the whole milk, heavy cream and salt into a large pot and bring to a boil over medium heat, whisking occasionally. Reduce the heat, add the fresh lemon juice and stir/whisk continuously for 2-3 minutes. The mixture will curdle, which is exactly what you want it to do. Pour this into the cheesecloth lined strainer and let it drain for about 1 hour or until it comes to room temperature. At this point you can scrape the ricotta from the cheesecloth into a container and refrigerate for up to 2 days.

3. The liquid in the bowl is the whey, a very nutritious and tasty leftover byproduct from making cheese. It is excellent to use instead of water when baking bread, or added to soup stock. I love the stuff and never discard it. Here is an excellent article on the wonders of whey!

Semolina-Ricotta Filling

This recipe is used for both the Ricci and the Frolle versions

[Anita’s notes: This filling was more than enough for the pastry, maybe only half was needed? I used the remainder for a tart lined with bought shortcurst pastry. I didn’t use the lemon flavours, and instead used 50g chopped dark chocolate, and 30g pistachios]

1 cup (250 ml) milk
1/2 cup (120 ml) (4 oz) (115 gm) granulated sugar
2/3 cup (160 ml) (4 oz) (115 gm) fine semolina or cream of wheat (I have tried both and personally like the semolina version)
1 1/2 cups (360 ml) (13-1/4 oz) (375 gm) whole milk ricotta, preferably fresh (see above)
2 large egg yolks
2 teaspoons (10 ml) pure vanilla extract (or the seeds of one pod and 1 teaspoon of extract)
1/4 teaspoon (1 gm) ground cinnamon
1/3 cup (80 ml) (2 oz) (60 gm) candied orange peel (commercial or home-made)
zest of 1 lemon

Combine the milk and the sugar in a medium saucepan. Bring to a boil, then lower the heat and slowly add the semolina (or cream of wheat), whisking quickly as to avoid any lumps. Cook, stirring often, until the mixture is smooth and thick, about 2 minutes. Spread the mixture onto a lined baking sheet, about 1/2 inch (15 mm), to cool. When cool, break into pieces and place into the bowl of your stand mixer, fitted with the paddle attachment (or a food processor), and add the ricotta cheese, egg yolks, vanilla and cinnamon. Beat until very smooth and creamy. Stir in the candied orange peel and lemon zest. (Maybe even some mini chocolate chips? Or pistachios?? mmmm…I can’t wait to see what you come up with)
Scrape into a container, place plastic wrap directly onto the surface and refrigerate until needed (up to 3 days).

Sfogliatelle Ricci

Servings: 14-18 pastries

[Anita’s notes: I used only half the lard/butter mix and thought this was more than enough.]

You will need a large/long workspace for this. I used my dining room table for this though I am sure someone will be more creative with limited space!

Dough

3 cups (750 ml) (15 oz) (420 gm) all-purpose (plain) flour
teaspoon (6 gm) salt
3/4 cup (180 ml) warm water (about 100°F/38°C)
4 oz (115 gm) lard (I used Crisco butter flavored shortening)
1/2 cup (1 stick/4 oz) (115 gm) unsalted butter, softened

Semolina-ricotta filling (see above)

1. Combine the flour and salt in a large mixing bowl and stir in the water, or use your standing mixer with the paddle attachment. The dough will be very dry. If you feel absolutely compelled, add an extra teaspoon of water but it is supposed to be very dry. Turn this out onto a clean work surface and knead the dough together, bringing in all the dry bits. At this point get your pasta roller out and ready. Roll out the dough to about 1/3 inch (10 mm) and pass through your pasta machine at the widest setting. I find it much easier to cut my dough in half and work 1/2 at a time for this step. Fold the dough in half after each pass also change the direction of the dough occasionally. After about 15 passes the dough should be very smooth. Knead the dough back into a ball and wrap in plastic wrap. Refrigerate and rest the dough for at 2 hours, or overnight.

2. Beat the lard/shortening and butter together in your mixing bowl until very fluffy. Make sure it is thoroughly combined. Place into a bowl and set on the workspace in easy reaching distance.

3. Remove the dough from the refrigerator and divide it into 4 equal pieces. Working with one piece of dough at a time (cover the other pieces with a towel or plastic wrap), lightly flour a piece pass it through the pasta roller set at the widest setting. Try to get the dough as even as possible, your goal is an even rectangle strip, about 4 inches (10 cm) in width. If needed, fold it over on itself a few times until you get an even strip. Once even, pass the dough through every setting, ending with the highest (mine is 7)

4. You should end up with a long 4 inch (10 cm) wide strip. Repeat with the other three remaining pieces of dough.

5. *For my own ease of use I made my own rolling pin contraption like you can see on many instructional videos. I turned 2 bowls upside down and placed them on my table where I was planning to work. I then took a rolling pin (with handles, not French) and taped the handles to the bowls. Every time that a piece of dough is finished and ready I lightly floured the dough and rolled it up onto the rolling pin. When all 4 pieces of dough were finished it made it much easier to pull out a section at a time to stretch the dough. If you are clumsy like me you might like to try this too!

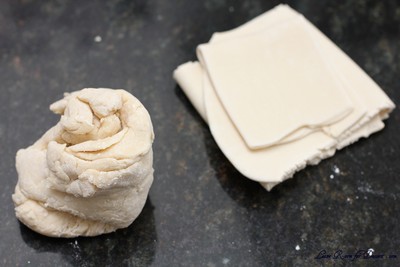
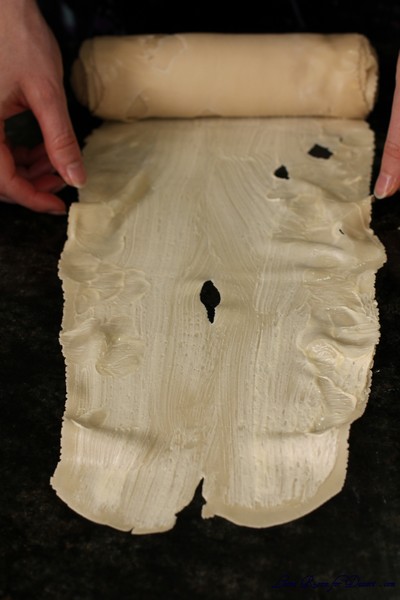
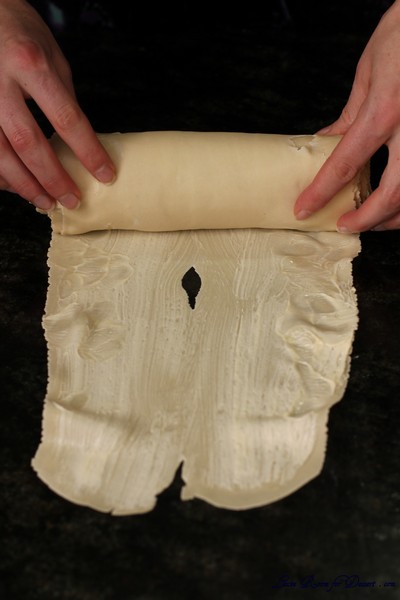
6. Place one piece of a strip on you clean work surface and paint (or smear) it liberally with the lard/butter mixture. I do about a 8 inch (20 cm) section at a time. Gently pull the sides of the dough and stretch it, starting from the middle and going out, until it is about 8 or 9 inches (20 or 23 cm) in width. Begin from the short end and start rolling the dough into a very tight roll. When you start to reach the end of your stretched section, stop and liberally grease up another section, stretching and rolling until all the dough is finished. When one strip of dough is finished, overlap the end of one to the beginning of the other; continue to pull, stretch and roll up.

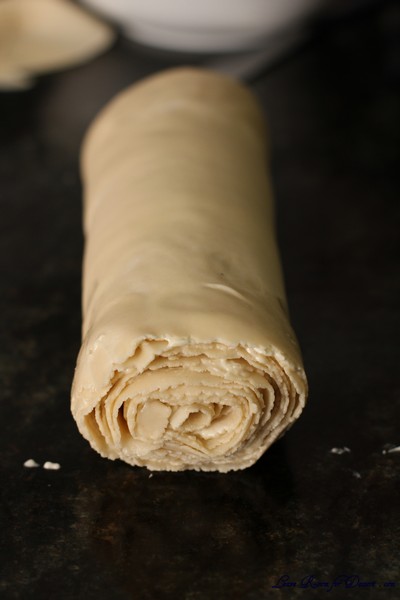
7. Spread the lard/butter mixture over the entire finished log and starting in the middle gently run the hands down the length to extend the length another inch (30 mm) or so. This will release any air pockets and tighten the roll. Your finished roll should be approximately 10 or 11 inches (25 or 28 cm).

8. Wrap in plastic wrap and chill for at least 2 hours or overnight. The dough may be frozen for up to 3 months, at this time. Defrost it in the refrigerator overnight before using.

9. Preheat your oven to moderately hot 400°F/200°C/gas mark 6

10. Line 2 baking sheets with parchment.

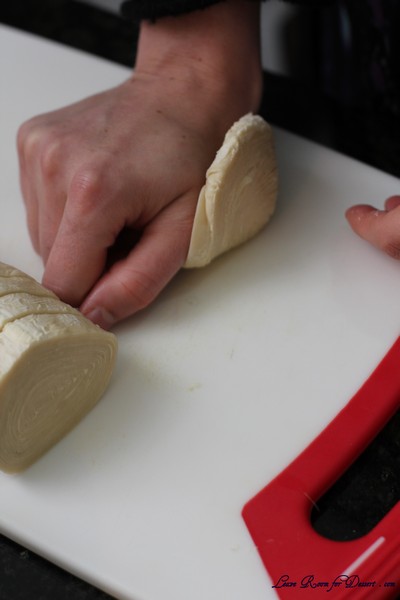
11. Remove the dough from the refrigerator, unwrap, and place on a cutting board. Slice off about an inch (30 mm) from each end so that they are straight and even. Cut the roll into 1/2 inch (15 mm) slices. Put the semolina-ricotta mixture into a pastry bag with a 3/4 inch (20 mm) opening (A disposable pastry bag or even a ziploc bag with the corner cut off is fine).

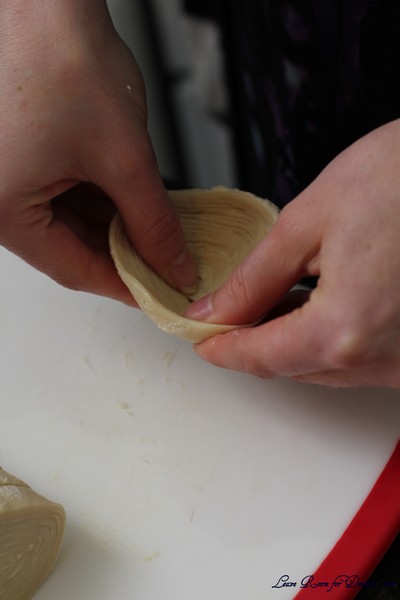
12. Take one slice of dough and place it on your workplace. With the heel of your hand, push out from the center in one direction. Rotate the dough and do this in all four directions. This forms the dough and opens up the layers. Pick up the piece and insert your thumbs on the inside with your forefingers on the outside meanwhile gently stretch the center to make it more into the shape of a cone. You don’t want the layers to actually separate. Holding the cone in one hand, squeeze some of the filling into the cavity so it is full. Lightly push the opening closed. You do not have to seal the opening as the filling is too thick to ooze out during baking.

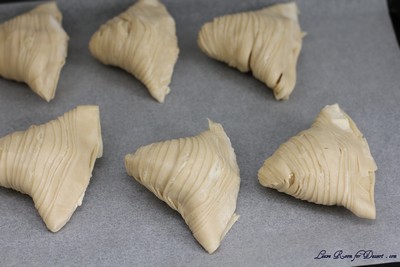
13. Place onto the prepared baking sheet and very lightly brush the outside of each completed pastry with the lard/butter mixture. Bake them in a preheated moderately hot 400°F/200°C/gas mark 6 oven for about 20 to 25 minutes or until they are a deep golden brown.

14. Remove from the oven and cool on a rack. These are best served warm with a sprinkling of confectioners’ sugar on the day they are made. To reheat them, just place them in a moderate 350°F/180°C/gas mark 4 oven for about 5 minutes.
Slow-Cooked Beef and Mushroom Pie – Daring Bakers Challenge October 2013

Sunday, October 27th, 2013

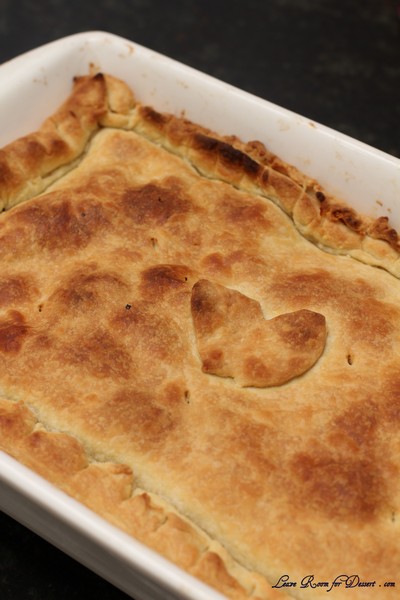
Hannah of Rise and Shine was our October 2013 Daring Bakers’ hostess and she challenged us to bake our own double crusted savory pot pies. Using any from-scratch crust and filling we choose, we were allowed to get completely creative with our recipe, showing off the savory flavors and fillings from our own home or region.

Pie, Pie, Me oh My, I love Pie!

Pie is definitely one of my favourite comfort foods. Pastry just works with anything and everything! It makes a casserole better, a curry better, not to mention custard or lemon curd! But sweet foods were off our list! Never mind, it doesn’t take much convincing for me to make a pie. My only issue was how long it takes to get a truly lovely beef pie.

Many times in the past, I have made recipes using beef that was easy to prepare – not much fat, because I tend to be a little too pedantic when it comes to removing the fat from my meat. Gravy beef often just looks like took much effort, and I go for something like rump. Although it is easier to prepare, it doesn’t have the same flavour, and doesn’t fall apart and stay moist like this gravy beef did.

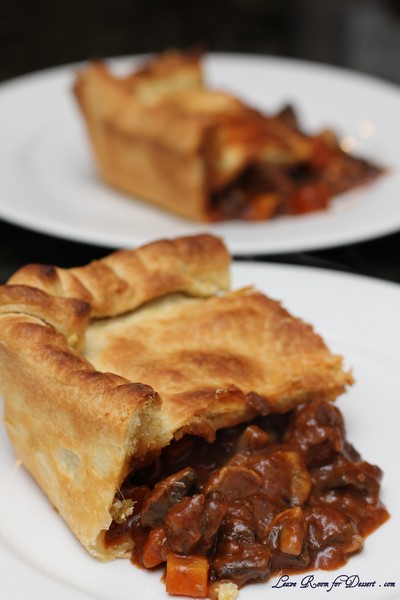
I had to be disciplined and only remove the major pieces of fat, leaving behind the fat running through the meat, and we were rewarded in the end. The rich gravy with wonderful flavours paired just beautifully with the buttery flaky pastry that was our challenge for this month. The pastry was super easy to make (I used a food processor, not sure if I was supposed to – but it made it that much more easy, and I needed to put my feet up and rest my back after the prep work for the casserole filling).

Thanks to our host, we sure were in the mood for comfort food last night. I had everyone commenting on how lovely the pie was.

Slow-Cooked Beef and Mushroom Casserole

Recipe by Anita @ Leave Room for Dessert

This mix can either be cooked and served with rice, veggie mash or in a pie casing (as is done here).

Serves 8 (fits into one lasagna dish)

Time: 2 hours of cooking, plus ~30min prep (+ 30 minutes, if making into a pie)

1 kg gravy beef, large pieces of sinew discarded, remaining meat cut into chunks 2-3cm diameter)
1/4 cup plain flour
1/2 teaspoon salt
1/4 teaspoon oregano
4 tablespoons olive oil (more or less, depending on your pan)
2 onions, chopped
1 celery stalk, chopped
1/2 teaspoon salt
4 cloves garlic, crushed, chopped or sliced
1 cup red wine
1 cup beef stock
4 tablespoons tomato paste
1 teaspoon mixed herbs
salt and pepper to taste
2 carrots, chopped
400g mushrooms, quartered (or cut into sixths or eighths if mushrooms are large)
1 tablespoon cornflour + 1 tablespoon water – optional, for thickening at the end if required

1 quantity of flaky pastry below – or 2 sheets shortcrust pastry + 2 sheets puff pasty

Combine the plain flour, 1/2 teaspoon salt and oregano. Lightly coat the beef pieces, removing excess flour. Discard remaining flour mix.

Heat a large saucepan over medium/ medium-high heat. Add a tablespoon of oil and fry about one third of the beef for a few minutes on each side. Remove, and repeat with remaining batches or meat. (depending on how much the meat sticks, may determine how much oil to add).

Once all the beef is seared and removed from the pan, add a tablespoon of oil and cook the onion, celery and 1/2 teaspoon salt together for a few minutes on medium until slightly translucent (it will cook for a long time, so don’t worry too much). Add the garlic and stir for a minute. Add the wine and allow it to come to the boil. Cook to remove anything stuck to the bottom of the pan, and reduce until there isn’t much liquid left in the saucepan.

Add the beef back into the saucepan along with the beef stock, tomato paste and mixed herbs. Cook on low, with the lid on for 1 1/2 hours (now is the stage to make the pastry if you haven’t already done so, and aren’t using pre-made shortcrust and/or puff pastry). Then add the carrots and mushrooms and cook, without the lid, for a further 30 minutes. (If you plan on serving without cooking in a pie, you may want to add the carrots earlier – maybe 45-60mins before cooking). While this is cooking, you can preheat the oven to 180C, and start to prepare for the pie (if making).
The beef should be falling apart by this stage. This is now ready to serve, or you can thicken the juices if it requires thickening. I removed all my mix, and left only the extra sauce in the saucepan. Combine the cornflour and water and whisk it into the juices, cooking it on medium heat. You may decide to cook for longer or add more cornflour if you like.

Flaky Pie Crust

This recipe was by our host this month, Hannah of Rise and Shine

(These instructions are for a round pie dish, if making a lasagna dish, roll out pastry into rectangles, both before chilling and after) I used a food processor for the whole process

Servings: about 8 (one 9 1/2 inch (24 cm) pie), or one lasagna dish

3 1/2 cups ( 840 ml)(17 ¼ oz)(490 gm) all-purpose (plain) flour
1 tablespoon (15 ml) (½ oz) (13 gm) brown sugar, firmly packed
1 1/2 teaspoons (9 gm) salt
1/2 cup (120 ml) (4 oz) (115 gm) cold shortening (I always use butter flavored), cut into pieces
3/4 cup (180 ml) (6 oz) (170 gm) cold unsalted butter (I didn’t use shortening, and used a total or 280 g butter)
1 cup (240 ml) ice water

1. Mix flour, sugar and salt in a large bowl. Drop in shortening and quickly grate butter directly into the bowl using a cheese grater.

2. Using your fingers, a fork or a pastry cutter, work butter and shortening into the flour mixture until it’s broken down into course, chunky crumbs. Stop mixing when the largest crumb is about the size of a pea.

3. Using a fork, quickly stir in very cold ice water. Turn the rough dough and crumbs onto a floured surface.

4. Knead just until dough starts to hold together in a rough mass, up to 10 times. Do not over mix! You will be able to see chunks of butter in the dough and this is a good thing.

5. Divide the dough in half and pat each half into a disk. Wrap each disk in plastic wrap and refrigerate for at least an hour before use. The dough will keep in the fridge for a full day, or you may freeze the dough for up to 3 months (and bring back to a thawed chill before rolling).

11. Roll out one half of the chilled dough about 1/4 inch (5 mm) thick using a floured rolling pin on a well-floured surface. Once your round of dough is about ten inches (25 cm) across, dust the top with flour, pick the round up from the counter and dust under the dough again before rolling out completely to about 15 inches (38 cm) across. Hold your pie plate up to the round of dough to ensure it is large enough to fit your pie plate.

12. To set the dough into your pie plate, fold the round of dough in half, then in half again to create a large triangle of dough. Point the tip of triangle of dough into the center of the pie plate and unfold. Be careful not to stretch the dough while you ensure that you have the dough tucked into all corners.

13. Pour the filling into the unbaked pie shell.

14. Roll out the top crust and cover the filling. Trim excess dough and seal the edge crust by folding the top dough layer under the bottom and pinching the dough together with your fingers or pressing with the tines of a fork.

15. Bake in the lower third of your oven until the pastry is golden brown, 45 to 50 minutes (Mine only took 30 minutes, so check after 15 minutes to get an idea). To ensure the bottom is browned, you may choose to prop an electric oven open using the handle of a wooden spoon for the last ten minutes of the baking time. If at any point you fear the top crust is over-browning, cover with foil for the remainder of the baking time. Serve immediately while warm.

Vanilla Slice – Daring Bakers Challenge October 2012

Saturday, October 27th, 2012

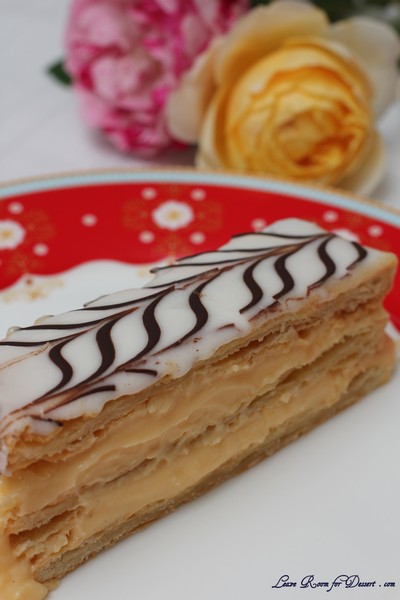
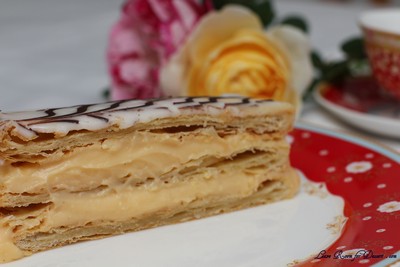
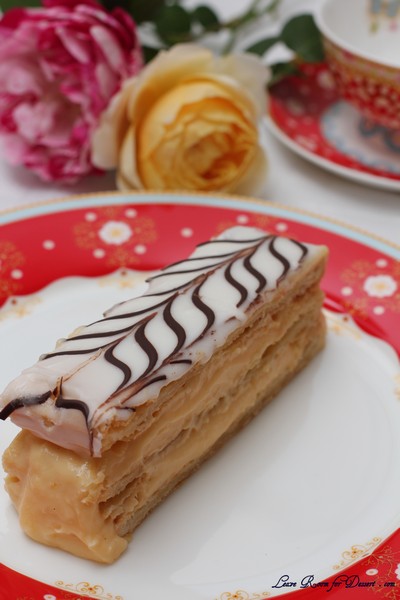
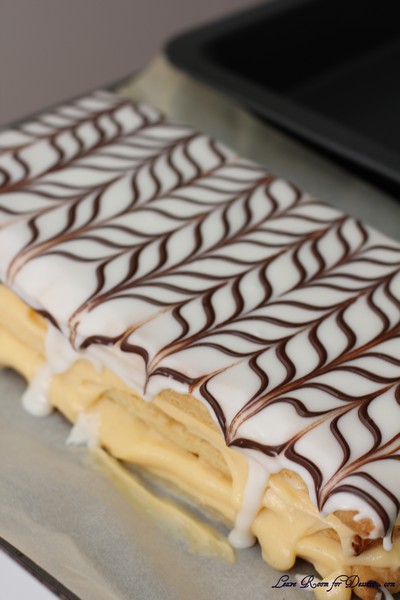
Our October 2012 Daring Bakers’ challenge was hosted by Suz of Serenely Full. Suz challenged us to not only tackle buttery and flaky puff pastry, but then take it step further and create a sinfully delicious Mille Feuille dessert with it!

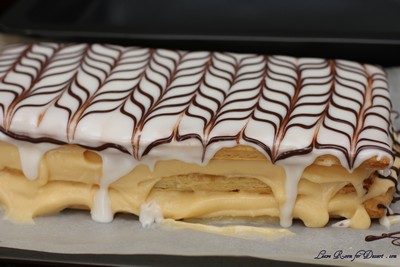
Anyone would have thought it was my Mum’s birthday – as I arrive with a large vanilla slice and a couple of roses in hand. It just so happens that my Mum has always wanted a vanilla slice made for her, as she will often buy them from bakeries. Although it was someone’s birthday, they certainly hadn’t asked for vanilla slice – and we didn’t need it after a large lunch of chicken schnitzel followed by cake. It did however almost all get eaten on the day I assembled it.

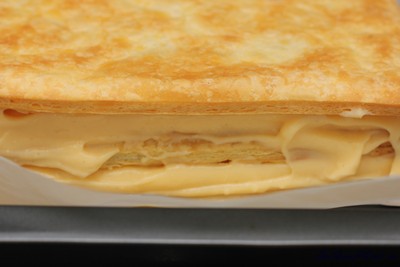
We have made puff pastry before in previous Daring Bakers Challenges, and I actually really enjoy making it. Finding time to make it is a little more difficult. I also had lots of fun making the decoration on top. The puff pastry and vanilla custard were both easy to make, the only difficulty I had with this challenge was cutting and presenting it nicely. I found the custard flowed out the sides quite a bit, so even neatening the pastry was difficult.

This certainly didn’t stop anyone from enjoying it though, and I even have a request to make it for my Mum’s birthday. The next time I make it I will probably try another custard recipe, to find one that will hopefully hold its shape whilst cutting.

If you don’t wish to make the icing with egg white, you are able to make it with some teaspoons or tablespoons of hot water instead.

Thanks to our host for providing an extremely yummy challenge this month 🙂

Pâte feuilletée /Puff Pastry

Servings: Makes 8-10 mille-feuille (yields: 675g pastry)

Ingredients
1¾ cup (250g) plain/all-purpose flour
Scant ¼ cup (55 ml) (1¾ oz)(50g) unsalted butter, chilled and cubed
1 teaspoon (5ml) (6 gm) salt
½ cup plus 2 tablespoons (5/8 cup)(150 ml) cold water

14 tablespoons (210 ml) (7 oz) (200g) butter (for the beurrage), room temperature
3½ tablespoons (55ml) (30g) plain flour (for the beurrage)

Additional flour for rolling/turning

Directions:

1. Cut the larger quantity of butter into smallish pieces and set aside at room temperature.
2. Put the larger quantity of flour into a bowl with the salt and the cold, cubed butter.
3. Lightly rub the butter and flour between your fingertips until it forms a mealy breadcrumb texture.

4. Add the cold water and bring together with a fork or spoon until the mixture starts to cohere and come away from the sides of the bowl.
5. As the dough begins to come together, you can use your hands to start kneading and incorporating all the remaining loose bits. If the dough’s a little dry, you can add a touch more water.
6. Knead for three minutes on a floured surface until the dough is smooth.
7. Wrap in clingfilm and refrigerate for at least 30 minutes.

8. While the dough is chilling, take your room temperature butter and mix with the smaller amount of plain flour until it forms a paste.
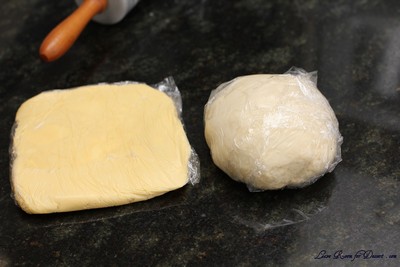
9. Place the butter paste between two sheets of clingfilm, and either with a rolling pin or your hands (I found hands easiest) shape it into a 4.5”/12cm square. You can use a ruler (or similar) to neaten the edges.

10. Refrigerate for about 10-15 minutes so the butter firms up slightly. If it’s still soft, leave it a bit longer. If it’s too hard and inflexible, leave it out to soften a touch. You want it to be solid but still malleable.
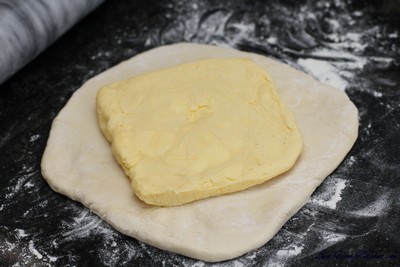
11. Once the dough has chilled, roll it out on a floured surface into a 6”/15cm square. Place the square of butter in the middle, with each corner touching the centre of the square’s sides (see photo below).


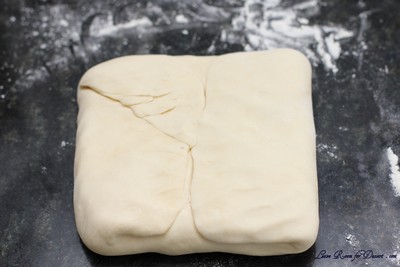
12. Fold each corner of dough over the butter so they meet the centre (you might have to stretch them a little) and it resembles an envelope, and seal up the edges with your fingers. You’ll be left with a little square parcel.

13. Turn the dough parcel over and tap the length of it with your rolling pan to flatten it slightly.
14. Keeping the work surface well floured, roll the dough carefully into a rectangle ¼ inch /6 mm in thickness.
15. With the longest side facing you, fold one third (on the right) inwards, so it’s covering the middle section, and ensure that it is lined up (see below).


16. Then, fold the remaining flap of dough (on the left) inwards, so you’re left with a narrow three-layered strip (see below).

17. Repeat steps 14, 15, 16.
18. Wrap up in clingfilm and chill for at least 30 minutes.
19. Repeat steps 14, 15, 16 twice.
20. Wrap up in clingfilm and chill again for at least 30 minutes.
21. Repeat steps 14, 15, 16 two final times.
22. Wrap up in clingfilm and refrigerate until needed. The dough keeps a couple of days in the fridge.

Pastry Cream / Crème Pâtissière:

(full batch; makes enough for 8-10 mille-feuille)

Ingredients

2 cups (450ml) whole milk
¼ cup (1¼ oz)(35 gm) cornflour/cornstarch
1 cup less 1 tablespoon (200gm) (7 oz) caster sugar
4 large egg yolks (if you’re making the royal icing, reserve two egg whites)
2 large eggs
¼ cup (2 oz) (60gm) unsalted butter, cubed
2 teaspoons (10 ml) vanilla essence

Directions:

1. Mix the cornflour/cornstarch with ½ cup of milk and stir until dissolved.

2. Heat the remaining milk in a saucepan with the sugar, dissolving the sugar and bringing the milk to the boil. Remove from heat.
3. Beat the whole eggs into the cornflour/milk mixture. Then beat in the egg yolks. Pour in 1/3 of the hot milk, stirring constantly to prevent the eggs from cooking.

4. Now, bring the remaining milk back to the boil, and add the eggy mixture, whisking as your pour. Keep whisking (don’t stop or it’ll solidify) on a medium heat until the mixture starts to thicken.

5. Remove the saucepan from the heat and thoroughly whisk the pastry cream. At this stage the pastry cream can look slightly lumpy, but a good whisking soon makes it smoother.
(N.B. If you’re worried about the pastry cream continuing to cook off the heat, you can transfer it to a stainless steel/ceramic bowl.)
6. Beat in the butter and vanilla until fully incorporated.
7. If you haven’t already, pour the pastry cream into a stainless steel or ceramic bowl, and then place clingfilm over the surface to stop a skin forming.
8. Refrigerate overnight to give the pastry cream time to further thicken.

Mille-Feuille/ Napoleon/ Custard Slice

Servings: Makes 8- 10

Ingredients
1 x batch pâte feuilletée/puff pastry (see above)
1 x batch crème pâtissière/pastry cream (see above)

2 ¾ cups (660 ml) (12⅓oz) (350gm) icing sugar
2 teaspoons (10 ml) lemon juice
2 large egg whites
½ cup (2¾ oz) (80gm) dark chocolate

Directions:

1. Preheat oven to moderately hot 200 °C /400°F/gas mark 6.
2. Lightly dust your work space with flour and remove your dough from the fridge.
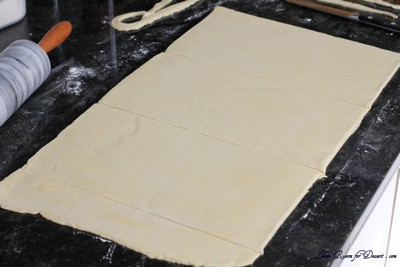
3. Roll into a large rectangle, the thickness of cardboard. The recipe I followed specified no other dimensions, but I rolled mine to about 12”/30cm x 18”/46cm.

(I found it easiest to start the rolling on the work surface, and finish it off on a large piece of greaseproof paper. That way it’s easier to move the sheets of pastry around.)

4. Cut into three equal pieces and place on a baking tray. If you don’t have space for all three, you can bake them separately.

(I baked mine in separate batches. See below.)

5. Prick the pastry sheets all over with a fork.
6. Place another sheet of greaseproof paper over the top and then a heavy baking tray. This will prevent the layers from puffing up too much.

(N.B. I found my baking trays weren’t heavy enough, so also used a pyrex dish to add more weight. Just ensure that the pastry sheets are evenly weighted down.)

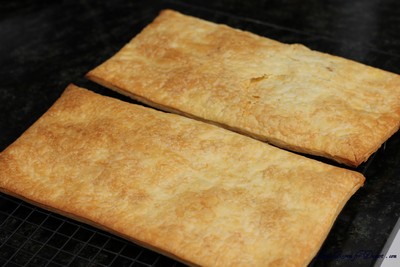
7. Bake each sheet for about 25 minutes in a moderately hot oven 200 °C /400°F/gas mark 6, removing the top layer of greaseproof paper/tray 10 minutes before the end for the tops to brown. Keep an eye on them and lower the temperature if you think they’re browning too much.
8. Remove the baked sheets from the oven and leave on a wire rack to cool.

9. Once the pastry has cooled, you’re ready to assemble your mille-feuille. Get a sturdy flat board, your pastry and the chilled crème pâtissière from the fridge.
10. Lay one sheet on the board and spread half the crème patisserie evenly over the top.
11. Take the second sheet and place it on top, pressing down lightly with your hands to ensure that it sticks to the filling.
12. Spread the remaining crème pâtissière and place the last sheet of pastry on top, pressing down again. (Don’t worry if there’s some oozing at the sides. That can be neatened later.)

13. Pop in the fridge while you prepare the icing / chocolate.
14. Melt the chocolate in a bain marie, stirring periodically. Once melted, transfer to a piping bag (or plastic bag with end snipped), resting nozzle side down in a glass or other tall container.

15. To make the icing, whisk 2 egg whites with 2 teaspoons lemon juice until lightly frothy.
16. Whisk in about (2 cups) 300gm of the icing sugar on a low setting until smooth and combined. The mixture should be thick enough to leave trails on the surface. If it’s too thin, whisk in a bit more icing sugar.

17. Once ready, immediately pour over the top of the mille-feuille and spread evenly. I found that I didn’t quite need all of the icing.
18. Still working quickly, pipe a row of thin chocolate lines along the widest length of your pastry sheet (see below). You can make them as far apart/close together as you like.

(Again, don’t worry if it looks messy. It can be neatened later on.)

19. STILL working quickly (phew), take a sharp knife and lightly draw it down (from top to bottom) through the rows of chocolate. A centimeter (½ inch) or so further across, draw the knife up the way this time, from bottom to top. Move along, draw it down again. Then up. And so on, moving along the rows of chocolate until the top is covered in a pretty swirly pattern.

20. Once you’ve decorated your mille-feuille (no doubt far more beautifully than I did), with a clean knife mark out where you’re going to cut your slices, depending on how big you want them to be and leaving space to trim the edges. I got ten out of mine – two rows of five.


21. Chill for a couple of hours to give the icing (etc.) time to set.
22. With a sharp knife, trim the edges and cut your slices.
23. Dig in!

Storage & Freezing Instructions/Tips:
The puff pastry dough will keep in the fridge for up to two days. Any leftovers can be well wrapped up & frozen for a year. Thaw for 30 minutes on the counter or overnight in the fridge.

The completed mille-feuille can be made a day or two in advance; it will last 2 or 3 days in an airtight container in the fridge, though will become less crisp.

Armenian Nazook & Nutmeg Cake – Daring Bakers Challenge April 2012

Saturday, April 28th, 2012


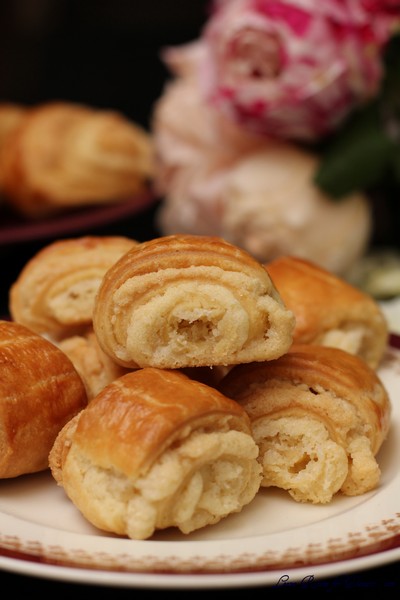
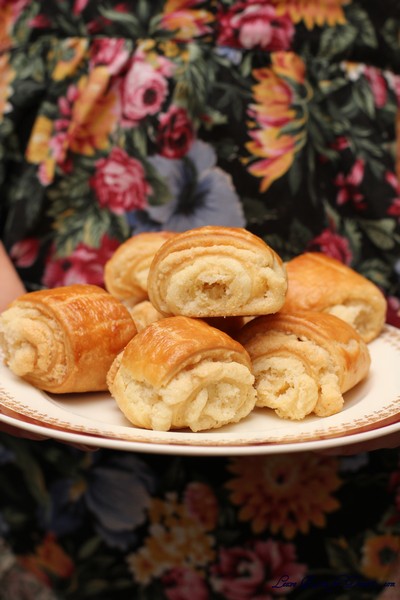
The Daring Bakers’ April 2012 challenge, hosted by Jason at Daily Candor, were two Armenian standards: nazook and nutmeg cake. Nazook is a layered yeasted dough pastry with a sweet filling, and nutmeg cake is a fragrant, nutty coffee-style cake.

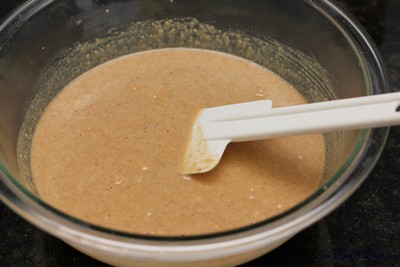
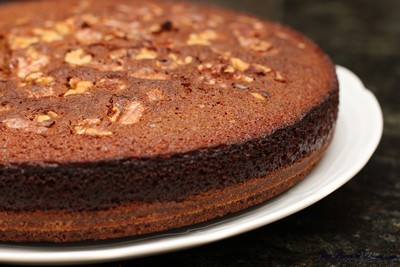
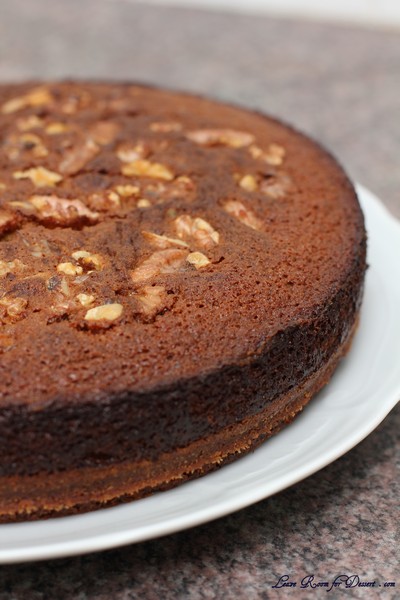
I love a fragrant slice of Armenian nutmeg cake. My mum has been making it for years, since I was a child, and now I have also been making it (although can’t seem to get it as perfect as my Mum’s). Like most cakes, there are always changes people make to recipes, and our recipe differed from the one mentioned here in two ways that I can think of.

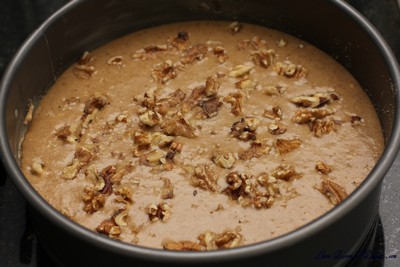
This cake has walnuts on top, whereas ours has slivered almonds. Both are a great addition to the cake. The other change my Mum made to the original recipe she was given by a friend, was only using 1/3 of the mixture for the base, making a thinner base (depending on your preference, this may be an improvement, or perhaps not), I’ll leave it up to you to decide. I enjoyed making the nutmeg cake to someone else’s recipe and obviously enjoyed eating it, as it has a lovely spiced flavour.

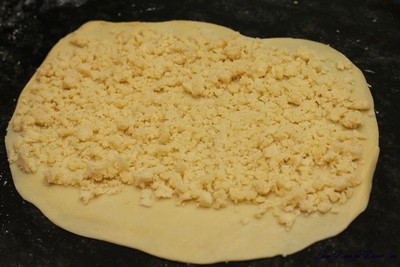
The Nazook was an exciting addition to this months challenge, and was the first of the two recipes for me to try. The pastry was quite easy to make, which I placed in the fridge overnight (it required quite a bit of work to get it soft enough to roll though as it was quite solid). The mixture for the inside and the assembly was also quite easy. When the pastries came out of the oven the fillings had come out a bit, and didn’t look as together as I had expected. The taste was lovely, and they were best eaten on the day of making.

Jason’s Recipe Source: The nazook is my Aunt Aida’s recipe. I’ve tried a LOT of nazook, and have to say hers is the best I’ve tried. The Armenian nutmeg cake is adapted from a recipe for the same in The Commonsense Cookery Book, by the NSW Cookery Teachers’ Scholarship Fund.

Nazook

Yields 40 pieces

Pastry dough

3 cups (720 ml) (420 gm/15 oz) all-purpose (plain) flour, sifted
2½ teaspoons (12½ ml) (7 gm) (¼ oz) (1 packet) active dry yeast
1 cup (240 ml) (225 gm/8 oz) sour cream
1 cup (2 sticks) (240 ml) (225 gm/8 oz) softened butter (room temperature)

Filling

1 1/2 cups (360 ml) (210 gm) (7½ oz) all-purpose (plain) flour, sifted
1 1/2 cups (360 ml) (340 gm/12 oz) sugar
3/4 cup (1½ sticks) (180 ml) (170 gm/6 oz) softened butter (room temperature)
2 teaspoons (10 ml) vanilla extract

Wash

1-2 egg yolks (for the wash; alternatively, some yogurt, egg whites, or a whole egg)

Directions:

Make the Pastry Dough
1. Place the sifted flour into a large bowl.
2. Add the dry yeast, and mix it in.
3. Add the sour cream, and the softened butter.
4. Use your hands, or a standing mixer with a paddle attachment, to work it into a dough.
5. If using a standing mixer, switch to a dough hook. If making manually, continue to knead for about 10 minutes, or until the dough no longer sticks to the bowl or your hands. If it remains very sticky, add some flour, a little at a time.
6. Cover the dough and refrigerate for 3-5 hours, or overnight if you like.

Make the filling
7. Mix the flour, sugar, and the softened butter in a medium bowl.
8. Add the vanilla extract.
9. Mix the filling until it looks like clumpy, damp sand. It should not take long. Set aside.

Make the nazook
10. Preheat the oven to moderate 350°F/175°C/gas mark 4.
11. Cut the refrigerated dough into quarters.
12. Form one of the quarters into a ball. Dust your working surface with a little flour.
13. Roll out the dough into a large rectangle or oval. The dough should be thin, but not
transparent.

14. Spread 1/4 of the filling mixture across the rolled-out dough in an even layer. Try to spread the filling as close as possible to the edges on the short sides, but keep some of pastry dough uncovered (1 inch/2.5 cm) along the long edges.

15. From one of the long sides, start slowly rolling the dough across. Be careful to make sure the filling stays evenly distributed. Roll all the way across until you have a long, thin loaf.

16. Pat down the loaf with your palm and fingers so that it flattens out a bit (just a bit).
17. Apply your egg yolk wash with a pastry brush.

18. Use your crinkle cutter (or knife) to cut the loaf into 10 equally-sized pieces. Put onto an ungreased cookie sheet.

19. Place in a preheated moderate oven for about 30 minutes, until the tops are a rich, golden brown.

20. Allow to cool and enjoy!

Armenian Nutmeg Cake

Makes one 9”/23cm cake which yields 12 servings

Ingredients

1 cup (240 ml) milk (I use whole, but nonfat or lowfat should be fine; non-dairy might work just fine, as well)
1 teaspoon (5 ml) (5 gm) baking soda
2 cups (480 ml) (280 gm/10 oz) all-purpose (plain) flour (I suspect pastry flour or another low-gluten flour might even work better to achieve a light, fluffy crumb)
2 teaspoons (10 ml) (10 gm) (⅓ oz) baking powder (I used single-acting, because it’s aluminum-free, and it turned out fantastic)
2 cups (480 ml) (400 gm/14 oz) brown sugar, firmly packed
3/4 cup (1½ sticks) (180 ml) (170 gm/6 oz) butter, preferably unsalted, cubed
1/2 cup (120 ml) (55 gm/2 oz) walnut pieces, may need a little more
1 to 1-1/2 teaspoons (5 to 7 ½ ml) (5 to 8 gm) ground nutmeg (try to grate it fresh yourself; the aroma is enchanting)
1 egg

Directions:

Directions – the Traditional Way (The Fast, Easy Way further down)
1. Preheat your oven to moderate 350°F/175°C/gas mark 4.
2. Mix the baking soda (not baking powder; that’s for the next step) into the milk. Set it aside.
3. Sift together the flour and the baking powder into a large bowl. One sift is fine
4. Add the brown sugar. Go ahead and mix the flour and brown sugar together. Or not.
5. Toss in the cubed butter.

6. Mash the butter with a fork into the dry ingredients (you can also use your fingers if you want). You’ll want to achieve a more-or-less uniform, tan-colored crumbly mixture.

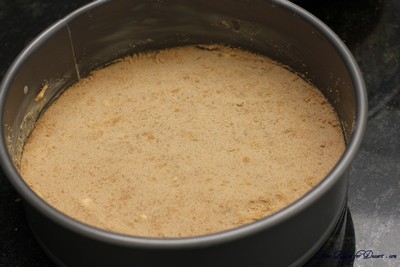
7. Take HALF of this resulting crumbly mixture into your springform (9”/23cm) pan. Press a crust out of it using your fingers and knuckles. It will be easy.

8. Crack an egg into a mixer or bowl.
9. Toss the nutmeg in with the egg.
10. Start mixing slowly with a whisk attachment and then increase to medium speed, or mix with a hand whisk if you’re doing it manually. Once it’s mixed well and frothy (about 1 minute using a standing mixer, or about 2-3 minutes of vigorous beating with a whisk), pour in the milk and baking soda mixture. Continue to mix until uniform.
11. Pour in the rest of the crumbly mixture. Mix that well, with either a paddle attachment, or a spatula. Or continue to use the whisk; it won’t make much of a difference, since the resulting batter is very liquidy.

12. Pour the batter over the base in the springform pan.

13. Gently sprinkle the walnut pieces over the batter.

14. Bake in a preheated moderate oven for about 30-40 minutes. You’ll know it’s done when the top is a golden brown, and an inserted toothpick comes out clean.
15. Allow to cool in the pan, and then release. Enjoy!

An Even Easier Way…if you have a Food Processor

1. Preheat your oven to moderate 350°F/175°C/gas mark 4 .
2. Mix the baking soda (not baking powder) into the milk. Set aside.
3. Put the flour, baking powder, and the brown sugar into your food processor. Pulse until uniformly mixed.
4. Toss in the cubed butter. Pulse until uniformly mixed into tan-colored crumbs.
5. Pour HALF of the crumbs into your springform (9”/23cm) pan. Press out a crust using your fingers and knuckles.
6. Crack the egg into the food processor with the rest of the crumbs still in it.
7. Grate 1 to 1-1/2 teaspoon of nutmeg. Toss that into the food processor, too. Pulse until well-incorporated.
8. Pour in the milk and baking soda mixture. Continue to mix until a slightly lumpy tan batter is formed.
9. Pour the batter over the crust in the springform pan.
10. Gently sprinkle the walnut pieces over the batter.
11. Bake in a preheated moderate oven for 30-40 minutes. It’s ready when the top is golden brown, and when it passes the toothpick test (comes out clean).
12. Cool the cake in the pan, and then dig in. Yum yum!

Freezing/Storage Instructions/Tips: Nazook will keep in an airtight container at room temperature for a couple of weeks, and the Armenian nutmeg cake will keep (covered) at room temperature for 2-3 days. Both taste even better still warm from the oven.

Allow to cool completely before attempting to freeze. Nazook will freeze best if put in a freezer bag with all the air squeezed out. Armenian Nutmeg Cake will also freeze fairly well if completely sealed. Both can be frozen for up to 3 months.

Additional Information:

Both recipes might be able to be adapted to be gluten-free and/or vegan, although I have not tried myself. Gluten-free flour, coconut oil (instead of butter), pureed silken tofu (instead of sour cream), and nut milk (instead of egg yolk) might be useful starting points.

Croissants – Daring Bakers Challenge September 2011

Tuesday, September 27th, 2011

The Daring Bakers go retro this month! Thanks to one of our very talented non-blogging members, Sarah, the Daring Bakers were challenged to make Croissants using a recipe from the Queen of French Cooking, none other than Julia Child!

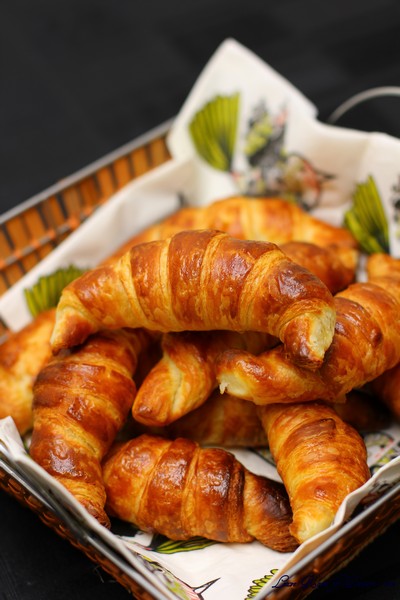
If I could eat croissants for breakfast (almost) every morning, I think that would be a great way to start the day.

Seeing as though this recipe was quite long and involved (with many rest periods), it meant I would have to settle for having fresh (you can’t get any more fresh) croissants for morning tea.

And what better way than with a picnic? Almost all other weekends this month have been lovely, and we have had a few family picnics out in the backyard. This last weekend, the rain poured down non-stop and the temperature dropped, so we set up picnic rugs in the lounge room in front of the fire and ate croissants indoors, appreciating the dry and the warmth.

The croissants were delicious. Absolutely amazing. The recipe was easy to follow, although was time consuming because of the resting periods for the dough/pastry.

I think I may have made the butter a little too warm while working it, causing a few butter chunks to be seen through the pastry, rather than a smooth layer, although you could not notice it once baked.

I will definitely be making these again, when my second-hand/new (new for me) large granite bench-top is installed – I’m super excited!

Here is a good video of Julia Child making croissants, it should help along with the photos below.

Thanks to our host for this month’s challenge, I’m so glad I have made croissants again – with a great recipe.

P.S. I made double quantity (didn’t really change the technique until I came to step 42, where I cut it into 4)

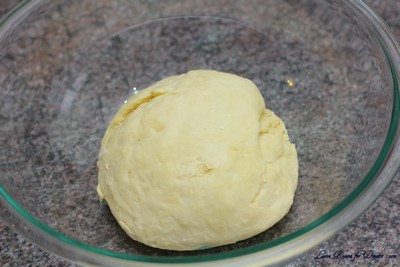
Croissants

Servings: 12 croissants

Ingredients
¼ oz (7 gm) of fresh yeast, or 1¼ teaspoon (6¼ ml/4 gm) of dry-active yeast (about ½ sachet)
3 tablespoons (45 ml) warm water (less than 100°F/38°C)
1 teaspoon (5 ml/4½ gm) sugar
1 3/4 cups (225 gm/½ lb) of strong plain flour (I used Polish all-purpose flour, which is 13% protein)
2 teaspoons (10 ml/9 gm) sugar
1½ teaspoon (7½ ml/9 gm) salt
½ cup (120 ml/¼ pint) milk (I am not sure if the fat content matters. I used 2%)
2 tablespoons (30 ml) tasteless oil (I used generic vegetable oil)
½ cup (120 ml/1 stick/115 gm/¼ lb) chilled, unsalted butter
1 egg, for egg wash

Directions:

1. Mix the yeast, warm water, and first teaspoon of sugar in a small bowl. Leave aside for the yeast and sugar to dissolve and the yeast to foam up a little.
2. Measure out the other ingredients
3. Heat the milk until tepid (either in the microwave or a saucepan), and dissolve in the salt and remaining sugar
4. Place the flour in a large bowl.
5. Add the oil, yeast mixture, and milk mixture to the flour
6. Mix all the ingredients together using the rubber spatula, just until all the flour is incorporated
7. Turn the dough out onto a floured surface, and let it rest a minute while you wash out the bowl
8. Knead the dough eight to ten times only. The best way is as Julia Child does it in the video (see below). It’s a little difficult to explain, but essentially involves smacking the dough on the counter (lots of fun if you are mad at someone) and removing it from the counter using the pastry scraper.
9. Place the dough back in the bowl, and place the bowl in the plastic bag

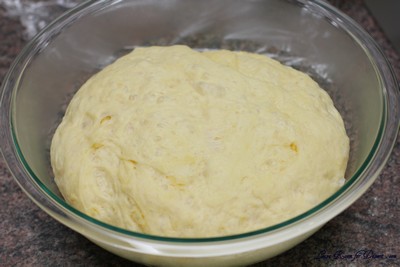
10. Leave the bowl at approximately 75°F/24°C for three hours, or until the dough has tripled in size.

11. After the dough has tripled in size, remove it gently from the bowl, pulling it away from the sides of the bowl with your fingertips.
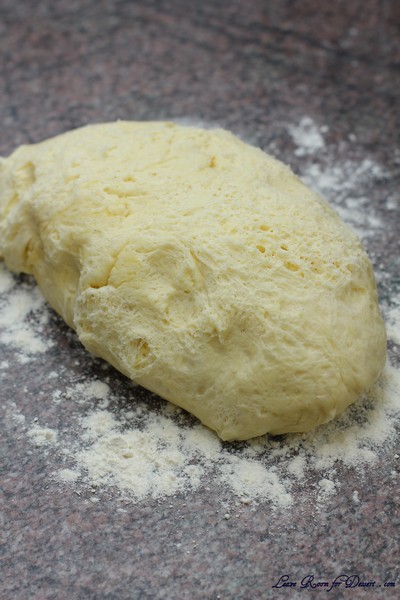
12. Place the dough on a lightly floured board or countertop, and use your hands to press it out into a rectangle about 8 by 12 inches (20cm by 30cm).

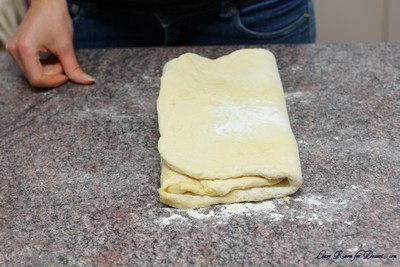
13. Fold the dough rectangle in three, like a letter (fold the top third down, and then the bottom third up)


14. Place the dough letter back in the bowl, and the bowl back in the plastic bag.


15. Leave the dough to rise for another 1.5 hours, or until it has doubled in size. This second rise can be done overnight in the fridge.

16. Place the double-risen dough onto a plate and cover tightly with plastic wrap. Place the plate in the fridge while you prepare the butter.
17. Once the dough has doubled, it’s time to incorporate the butter
18. Place the block of chilled butter on a chopping board.
19. Using the rolling pin, beat the butter down a little, till it is quite flat.
20. Use the heel of your hand to continue to spread the butter until it is smooth. You want the butter to stay cool, but spread easily. (I spread it onto plastic wrap when it was easy to spread to make it easier to get onto the dough)

21. Remove the dough from the fridge and place it on a lightly floured board or counter. Let it rest for a minute or two.
22. Spread the dough using your hands into a rectangle about 14 by 8 inches (35 cm by 20 cm).
23. Remove the butter from the board, and place it on the top half of the dough rectangle.


24. Spread the butter all across the top two-thirds of the dough rectangle, but keep it ¼ inch (6 mm) across from all the edges.
25. Fold the top third of the dough down, and the bottom third of the dough up. (I folded the bottom half up first)


26. Turn the dough package 90 degrees, so that the top flap is to your right (like a book).
27. Roll out the dough package (gently, so you don’t push the butter out of the dough) until it is again about 14 by 8 inches (35 cm by 20 cm).


28. Again, fold the top third down and the bottom third up.
29. Wrap the dough package in plastic wrap, and place it in the fridge for 2 hours.

30. After two hours have passed, take the dough out of the fridge and place it again on the lightly floured board or counter.
31. Tap the dough with the rolling pin, to deflate it a little
32. Let the dough rest for 8 to 10 minutes
33. Roll the dough package out till it is 14 by 8 inches (35 cm by 20 cm).
34. Fold in three, as before
35. Turn 90 degrees, and roll out again to 14 by 8 inches (35 cm by 20 cm).
36. Fold in three for the last time, wrap in plastic, and return the dough package to the fridge for two more hours (or overnight, with something heavy on top to stop it from rising)

37. It’s now time to cut the dough and shape the croissants
38. First, lightly butter your baking sheet so that it is ready
39. Take the dough out of the fridge and let it rest for ten minutes on the lightly floured board or counter
40. Roll the dough out into a 20 by 5 inch rectangle (51 cm by 12½ cm).
41. Cut the dough into two rectangles (each 10 by 5 inches (25½ cm by 12½ cm))
42. Place one of the rectangles in the fridge, to keep the butter cold
43. Roll the second rectangle out until it is 15 by 5 inches (38 cm by 12½ cm).
44. Cut the rectangle into three squares (each 5 by 5 inches (12½ cm by 12½ cm))
45. Place two of the squares in the fridge
46. The remaining square may have shrunk up a little bit in the meantime. Roll it out again till it is nearly square
47. Cut the square diagonally into two triangles.

48. Stretch the triangle out a little, so it is not a right-angle triangle, but more of an isosceles.


(or you can cut them like this to begin with: )

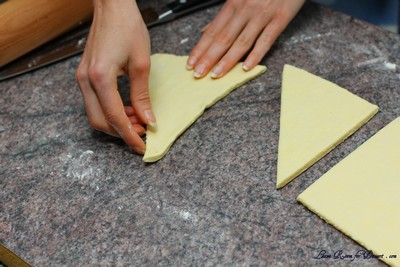
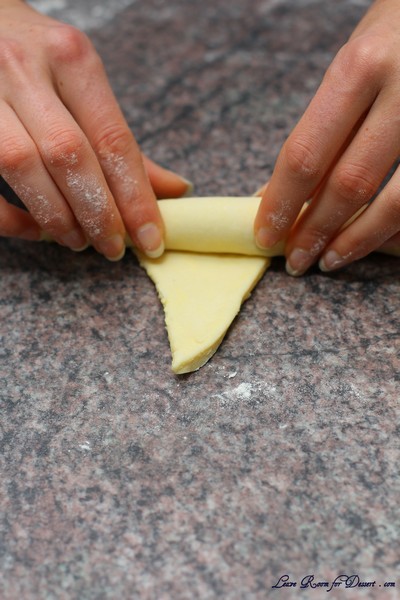
49. Starting at the wide end, roll the triangle up towards the point, and curve into a crescent shape.


50. Place the unbaked croissant on the baking sheet

51. Repeat the process with the remaining squares of dough, creating 12 croissants in total.
52. Leave the tray of croissants, covered lightly with plastic wrap, to rise for 1 hour

53. Preheat the oven to very hot 475°F/240°C/gas mark 9.
54. Mix the egg with a teaspoon of water
55. Spread the egg wash across the tops of the croissants.
56. Put the croissants in the oven for 12 to 15 minutes, until the tops are browned nicely
57. Take the croissants out of the oven, and place them on a rack to cool for 10 minutes before serving.

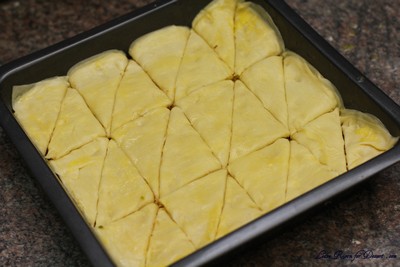
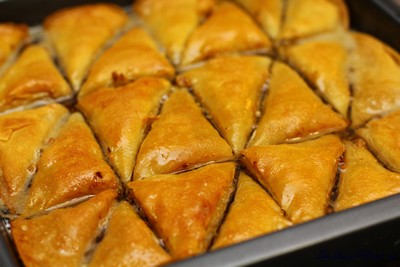
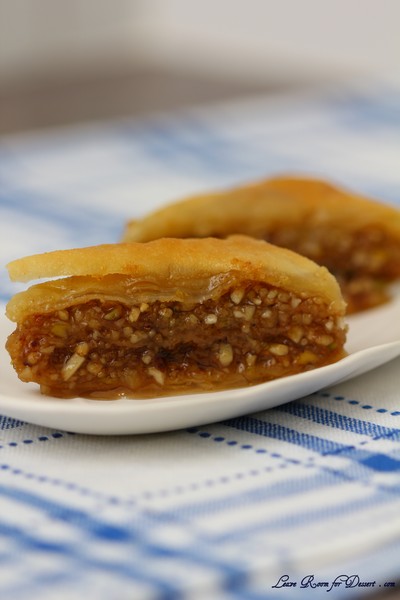
Baklava with Homemade Phyllo Pastry – Daring Bakers Challenge June 2011

Monday, June 27th, 2011

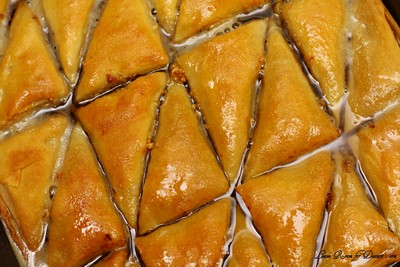
Erica of Erica’s Edibles was our host for the Daring Baker’s June challenge. Erica challenged us to be truly DARING by making homemade phyllo dough and then to use that homemade dough to make Baklava.

I remember first discovering baklava and its gorgeous sweetness. There used to be a very nice place that sold it near restaurants we used to visit often. Unfortunately (or perhaps fortunately), it isn’t as readily available where I live and work at the moment. Therefore, like most of the food I eat, I only get a chance to eat it – if I get the chance to make it (or someone else just happens to buy or bring some along).

I thought this would be an easy challenge for one of the days on the weekend in Winter. Little did I know that the weather would be beautiful – sunny and warm and much better than many of Spring and Autumn days we had. After making the lovely dough and leaving it in the fridge, out into the garden we went and spent most of the day.

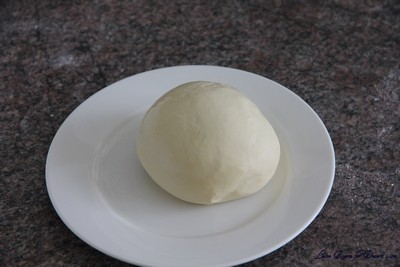
This meant I had the leave the dough until a week-night to finish off. So I placed it in the freezer, and forgot to take it out the morning of when I would make my baklava. After a few problems with the dough not thawing quickly, it actually rolled out very nicely and we were able to make 10 sheets from the one quantity of dough.

The rest of the recipe was made whilst the dough was thawing and those elements were completed very easily, especially with the help of the food processor.

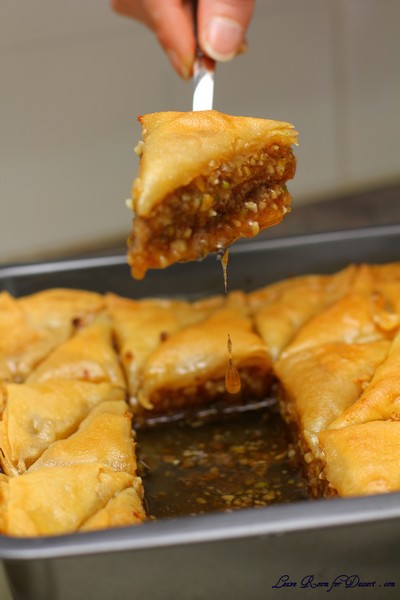
Once I poured the cooled syrup onto the baklava though, it was literally swimming in syrup. By the next morning… it was still swimming is syrup so I transferred the baklava to take-away containers to take in to work, and allow more of the syrup to drain.

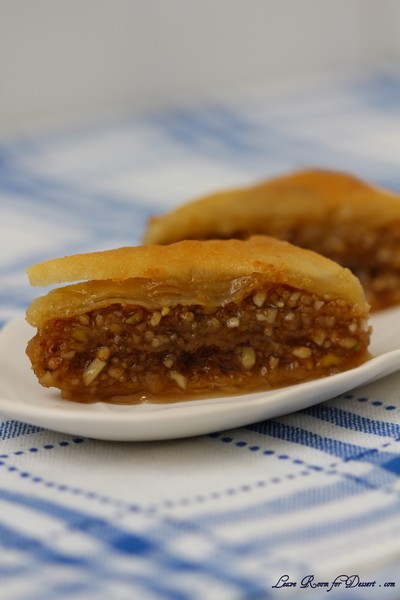
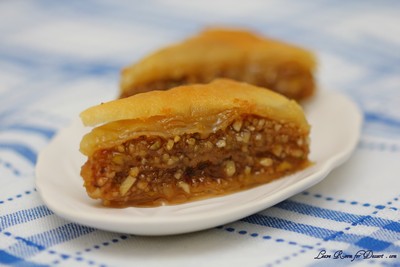
Flavour-wise this baklava was gorgeous. Absolutely lovely and I didn’t find it too sweet either, despite it swimming in syrup. The pastry turned out quite nicely and I am glad I made it (although can’t see myself making it many times in the future).

Thanks so much to our host for this months challenge, and making us step outside our comfort zone.

my notes: I made the single recipe and it made 10 sheets for my 20.5cm x 20.5cm x 4.5cm dish, the syrup was probably twice what was needed.

Phyllo Dough

*Note 1: To have enough to fill my 9” x 9” baking dish with 18 layers of phyllo I doubled this recipe.
*Note 2: Single recipe will fill a 8” x 5” baking dish.
*Note 3: Dough can be made a head of time and froze. Just remove from freezer and allow to thaw
and continue making your baklava

1 1/3 cups (320 ml) (185 gm/6½ oz) unbleached all purpose (plain) flour
1/8 teaspoon (2/3 ml) (¾ gm) salt
1/2 cup less 1 tablespoon (105 ml) water, plus more if needed
2 tablespoons (30 ml) vegetable oil, plus additional for coating the dough
1/2 teaspoon (2½ ml) cider vinegar, (could substitute white wine vinegar or red wine vinegar, but could affect the taste)

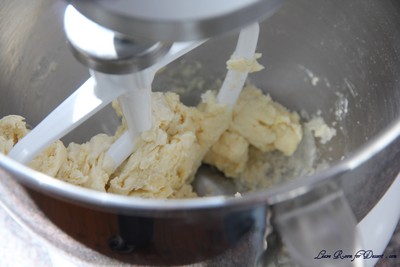
1. In the bowl of your stand mixer combine flour and salt.

2. Mix with paddle attachment.

3. Combine water, oil and vinegar in a small bowl.

4. Add water & oil mixture with mixer on low speed, mix until you get a soft dough, if it appears dry add a little more water (I had to add a tablespoon more)

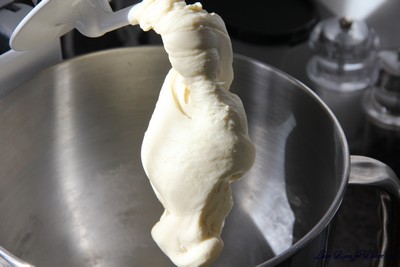
5. Change to the dough hook and let knead approximately 10 minutes. You will end up with beautiful smooth dough. If you are kneading by hand, knead approx. 20 minutes.
6. Remove the dough from mixer and continue to knead for 2 more minutes. Pick up the dough and through it down hard on the counter a few times during the kneading process.
7. Shape the dough into a ball and lightly cover with oil

8. Wrap tightly in plastic wrap and let rest 30-90 minutes, longer is best ( I let mine rest 2 hours and it was perfect)

Rolling your Phyllo

** Remove all rings and jewelry so it does not snag the dough**

Use whatever means you have to get the dough as thin as you can. I have included a fantastic video at the end of the post on how to roll out your phyllo dough, using a wooden dowel, which worked perfectly for me. You may also use a pasta machine if you have one, or a normal rolling pin whatever works for you.

1. Unwrap your dough and cut off a chunk slightly larger then a golf ball. While you are rolling be sure to keep the other dough covered so it doesn’t dry out.

2. Be sure to flour your hands, rolling pin and counter. As you roll you will need to keep adding, don’t worry, you can’t over-flour.

3. Roll out the dough a bit to flatten it out.

4. Wrap the dough around your rolling pin/dowel

5. Roll back and forth quickly with the dough remaining on the dowel (see attached video for a visual, its much easier then it sounds)

6. Remove; notice how much bigger it is!

7. Rotate and repeat until it is as thin as you can it. Don’t worry if you get rips in the dough, as long as you have one perfect one for the top you will never notice.

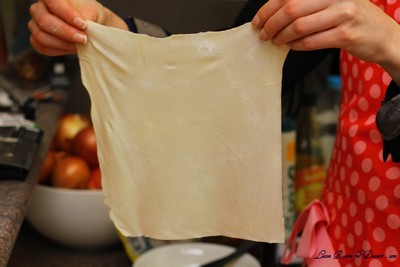
8. When you get it as thin as you can with the rolling pin, carefully pick it up with well floured hands and stretch it on the backs of your hands as you would a pizza dough, just helps make it that much thinner. Roll out your dough until it is transparent. NOTE: you will not get it as thin as the frozen phyllo dough you purchase at the store, it is made by machine

9. Set aside on a well-floured surface. Repeat the process until your dough is used up. Between each sheet again flower well. You will not need to cover your dough with a wet cloth, as you do with boxed dough, it is moist enough that it will not dry out.

Baklava Recipe

Adapted from Alton Brown, The Food Network
30 servings

For the syrup:
· 1 1/4 cups (300 ml) honey
· 1 1/4 cups (300ml) water
· 1 1/4 cups (300 ml) (280 gm/10 oz) sugar
· 1 cinnamon stick
· 1 (2-inch/50 mm) piece fresh citrus peel (lemon or orange work best)
· a few cloves or a pinch or ground clove

When you put your baklava in the oven start making your syrup. When you combine the two, one of them needs to be hot, I find it better when the baklava is hot and the syrup has cooled

1. Combine all ingredients in a medium pot over medium high heat. Stir occasionally until sugar has dissolved

2. Boil for 10 minutes, stir occasionally.

3. Once boiled for 10 minutes remove from heat and strain cinnamon stick and lemon, allow to cool as baklava cooks

Ingredients for the Filling:
1 (5-inch/125 mm piece) cinnamon stick, broken into 2 to 3 pieces or 2 teaspoons (10 ml) (8 gm) ground cinnamon
15 to 20 whole allspice berries ( I just used a few pinches)
3/4 cup (180 ml) (170 gm/6 oz) blanched almonds
3/4 cup (180 ml) (155 gm/5½ oz) raw or roasted walnuts
3/4 cup (180 ml) (140 gm/5 oz) raw or roasted pistachios
2/3 cup (160 ml) (150 gm/ 5 1/3 oz) sugar
phyllo dough (see recipe above)
1 cup (2 sticks) (240 ml) (225g/8 oz) melted butter ** I did not need this much, less then half**

1. Preheat oven to moderate 350°F/180°C/gas mark 4.

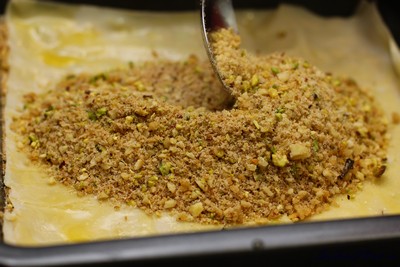
2. Combine nuts, sugar and spices in a food processor and pulse on high until finely chopped. If you do not have a food processor chop with a sharp knife as fine as you can. Set aside

3. Trim your phyllo sheets to fit in your pan

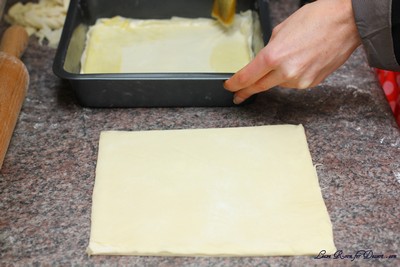
4. Brush bottom of pan with butter and place first phyllo sheet

5. Brush the first phyllo sheet with butter and repeat approximately 5 times ending with butter. (Most recipes say more, but homemade phyllo is thicker so it’s not needed)

6. Sprinkle 1/3 of the nut mixture on top

7. Continue layering phyllo and buttering repeating 4 times
8. Sprinkle 1/3 of the nut mixture on top
9. Continue layering phyllo and buttering repeating 4 times
10. Sprinkle 1/3 of the nut mixture on top

11. Continue layering and buttering phyllo 5 more times. On the top layer, make sure you have a piece of phyllo with no holes if possible, just looks better.
12. Once you have applied the top layer tuck in all the edges to give a nice appearance.

13. With a Sharp knife cut your baklava in desired shapes and number of pieces. If you can’t cut all the ways through don’t worry you will cut again later. A 9×9 pan cuts nicely into 30 pieces. Then brush with a generous layer of butter making sure to cover every area and edge

14. Bake for approximately 30 minutes; remove from oven and cut again this time all the way through. Continue baking for another 30 minutes. (Oven temperatures will vary, you are looking for the top to be a golden brown, take close watch yours may need more or less time in the oven) (Mine took about 40min in total)
15. When baklava is cooked remove from oven and pour the cooled (will still be warmish) syrup evenly over the top, taking care to cover all surfaces when pouring. It looks like it is a lot but over night the syrup will soak into the baklava creating a beautifully sweet and wonderfully textured baklava!

Next morning all syrup is absorbed (my syrup did not absorb much at all)

16. Allow to cool to room temperature. Once cooled cover and store at room temperature. Allow the baklava to sit overnight to absorb the syrup.

17. Serve at room temperature

Freezing/Storage Instructions/Tips: There are a few ways to store your Baklava. It is recommended that you store your baklava at room temperature in an airtight container. Stored at room temperature your baklava will last for up to 2 weeks. You will notice as the days pass it will get a little juicier and chewier. You may choose to store it in the fridge; this will make it a little harder and chewy, but does increase the shelf life. You can also freeze your baklava and then just set it out at room temperature to thaw.

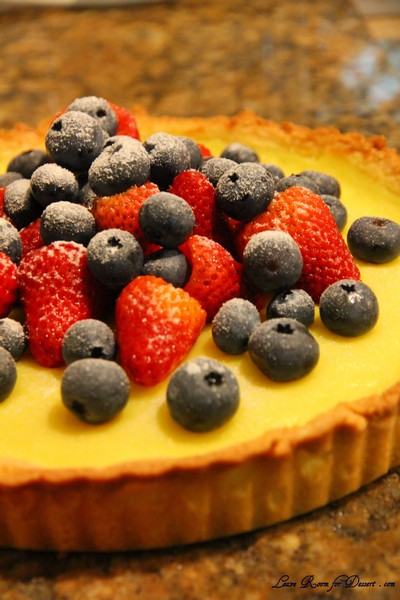
Crostata con la Crema – Daring Bakers Challenge November 2010

Saturday, November 27th, 2010

The 2010 November Daring Bakers’ challenge was hosted by Simona of briciole. She chose to challenge Daring Bakers’ to make pasta frolla for a crostata. She used her own experience as a source, as well as information from Pellegrino Artusi’s Science in the Kitchen and the Art of Eating Well.

Spring is almost over, before it even really begun. This year we had two lovely days of Spring weather at the beginning of September, followed by many days of rain, cold days and lots of windy days.

This last week has been beautiful. Quite warm, but not too hot (I say this, even though I work in an air-conditioned building). Our garden is going crazy – plants and weeds alike. Three plants in particular are quite exciting at the moment: our fig, blueberry and raspberry. All three plants are in their second Spring season and are very happy, we have a number of figs forming, quite a few blueberries and many raspberries.

One thing I didn’t understand when I bought the raspberry is the shop assistance’s advice: Watch out, the raspberry can take over… What? Isn’t that a good thing? Surely people aren’t unhappy about loads of raspberries.

What he should have said was: Watch out, the raspberry sends suckers through the lawn and new plants shoot up more than one metre away from the original plant meaning you have no control of where are how far it will travel… Whoops!! Luckily running the mower over them have stopped new plants forming in the middle of our yard – I hope!

Although my baking (and blogging) has been hindered by the lovely weather and constant maintenance of our yard, this recipe chosen for the daring bakers this month was great, as many components can be made the day or night before, and cooked while everyone is eating dinner.

My family are huge fans of Portuguese custard tarts, so I had no trouble picking pastry cream to fill my tart shell.

I must admit I used the food processor for the dough to make the tart shell. It seemed a bit dry and wasn’t coming together, so I added a touch more egg white (ok, accidentally – a bit more than a touch – making it a little too soft).

I didn’t blind bake my tart, I just added the pastry cream and cooked it for 40 minutes or more, until the pastry cream was set and the pastry golden. The pastry was lovely in texture and taste – very lovely. I thought I needed more pastry cream for the tart, although perhaps because the pastry was a little soft, it shrunk or fell a little at the sides, making it more level with the pastry cream when cooked.

I was very happy with the length of time required for this challenge and was more than happy to try out another pastry and pastry cream recipe – and my family was more than happy to have it for dessert 🙂

Thanks to our host for this month, for trialling so many recipes for people to choose from and be inspired from.

Crostata con la Crema (crostata with pastry cream filling)

Recipe Source: There are many recipes for pasta frolla and different ideas about how to make it. I will give you two versions that I have been using for some time. They have been inspired by those in the book La scienza in cucina e l’arte di mangiare bene by Pellegrino Artusi (1820-1911). The book was first published in 1891, and is available in English translation as Science in the Kitchen and the Art of Eating Well (further details are given in the Additional Information section).

Pasta frolla

1/2 c. minus 1 tablespoon [105 ml, 100 g, 3 ½ oz] superfine sugar (see Note 1) or a scant 3/4 cup [180ml, 90g, 3 oz] of powdered sugar
1 and 3/4 cup [420 ml, 235 g, 8 1/4 oz.] unbleached all-purpose flour
a pinch of salt
1 stick [8 tablespoons / 4 oz. / 115 g] cold unsalted butter, cut into small pieces
grated zest of half a lemon (you could also use vanilla sugar as an option, see Note 2) (I didn’t use this)
1 large egg and 1 large egg yolk, lightly beaten in a small bowl

Note 1: Superfine sugar is often also referred to as ultrafine, baker’s sugar or caster sugar. It’s available in most supermarkets. If you cannot find “superfine” sugar, you can make your own by putting some regular granulated sugar in a food processor or blender and letting it run until the sugar is finely ground.

Note 2: There are different ways of making vanilla sugar. I keep vanilla beans in a jar half-filled with sugar until I need to use them, for example, to make vanilla ice cream. After I remove the split bean from the custard that will go into the ice cream maker, I rinse it, dry it and put it back in the jar with sugar.

Making pasta frolla by hand:

Whisk together sugar, flour and salt in a bowl.

Rub or cut the butter into the flour until the mixture has the consistency of coarse crumbs. You can do this in the bowl or on your work surface, using your fingertips or an implement of choice.

Make a well in the center of the mounded flour and butter mixture and pour the beaten eggs into it (reserve about a teaspoon of the egg mixture for glazing purposes later on – place in the refrigerator, covered, until ready to use).

Add the lemon zest to your flour/butter/egg mixture.

Use a fork to incorporate the liquid into the solid ingredients, and then use your fingertips.

Knead lightly just until the dough comes together into a ball.

Shape the dough into a flat disk and wrap in plastic wrap. Place the dough in the refrigerator and chill for at least two hours. You can refrigerate the dough overnight.

Making pasta frolla with a food processor:

Put sugar, flour, salt, and lemon zest in the food processor and pulse a few times to mix.

Add butter and pulse a few times, until the mixture has the consistency of coarse meal.

Empty food processor’s bowl onto your work surface

See step 3 above and continue as explained in the following steps (minus the lemon zest, which you have already added).

Pastry Cream

2 eggs
1/2 cup caster sugar
500ml milk
1 teaspoon vanilla essence
3 tablespoons plain flour

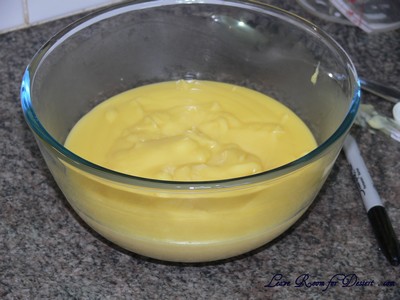
Heat milk in a saucepan until almost bubbling. Whisk eggs with caster sugar, then whisk in plain flour. Slowly pour half the warm milk over the egg sugar mixture, mixing well to stop the eggs cooking. Pass the egg mixture through a sieve back into the saucepan. Place the saucepan back over medium heat and continue stirring the mixture until it bubbles. Pour the pastry cream into a bowl and place the bowl in a sink or bowl with cold or icy water, add the vanilla essence and stir the pastry cream until cooled. Refrigerate until cool.


Assembling and baking the crostata con la crema:

Heat the oven to 350ºF [180ºC/gas mark 4].

Take the pasta frolla out of the fridge, unwrap it and cut away ¼ of the dough. Reserve this dough to make the lattice top of the crostata. Refrigerate this dough while you work on the tart base.

To help roll the crostata dough, keep the dough on top of the plastic wrap that you had it wrapped in. This can help rolling the dough and can also help when transferring the dough to your pan. You can also use parchment paper for this. However, you can also roll the dough directly on a work surface if you prefer.

Lightly dust the top of the dough and your work surface (if you’re rolling directly on a work surface) with flour. Keep some flour handy to dust the dough as you go along.

If the dough is very firm, start by pressing the dough with the rolling pin from the middle to each end, moving the rolling pin by a pin’s width each time; turn the dough 180 degrees and repeat; when it softens, start rolling.

Roll the dough into a circle about 1/8th inch (3 mm) thick.

If you used the plastic wrap or parchment paper as rolling surface, flip dough over the pan, centering it, and delicately press it all around so the corners are well covered. Peel away the plastic wrap.

Trim the excess dough hanging over the edges of the pan. Press the remaining dough around the border into the sides of the pan making sure the border is an even thickness all the way around.

Prick the bottom of the dough with a fork in several places.

Take out of the fridge the reserved pasta frolla you had cut away earlier. Roll it with your pin and cut into strips or use cookie cutters to make small shapes (this is not traditional, but it looks cute); or roll with your hands into ropes.

Instead of jam or fruit preserves, cover the bottom of the crostata crust evenly with the pastry cream.

Use the prepared strips or rolls of dough to make a lattice over the surface, or decorate with the cut shapes. (Note: You can use dough scraps to make cookies: see the Additional Information section for some pointers)

Brush the border and strips of dough with the reserved beaten eggs. You can add a drop or two of water to the beaten eggs if you don’t have enough liquid.

Put the tart in the oven and bake for 30 minutes.
After 35 minutes, check the tart, and continue baking until the tart is of a nice golden hue. (Note: Every oven is different. In my oven it took 45 minutes to bake the tart until golden.)

When done, remove the tart from the oven and let cool. If you have used a tart pan with a removable bottom, then release the tart base from the fluted tart ring. Make sure the tart is completely cool before slicing and serving.

Croquembouche (Piece Montée) – Daring Bakers Challenge May 2010

Thursday, May 27th, 2010

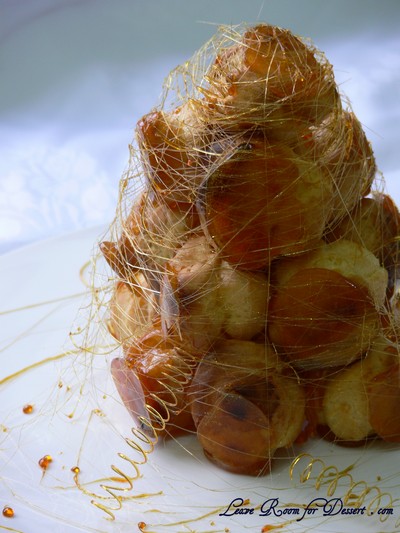
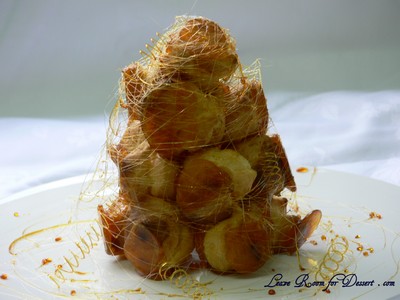
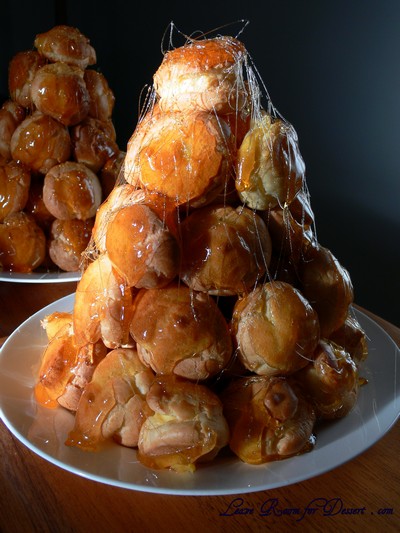
The May 2010 Daring Bakers’ challenge was hosted by Cat of Little Miss Cupcake. Cat challenged everyone to make a piece montée, or croquembouche, based on recipes from Peter Kump’s Baking School in Manhattan and Nick Malgieri.

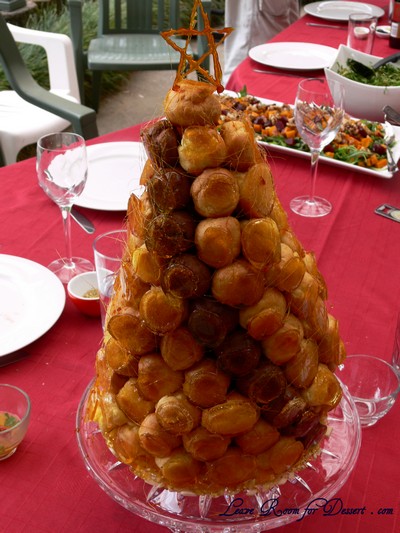
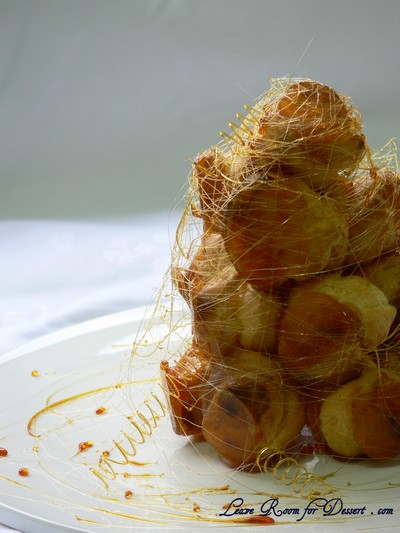
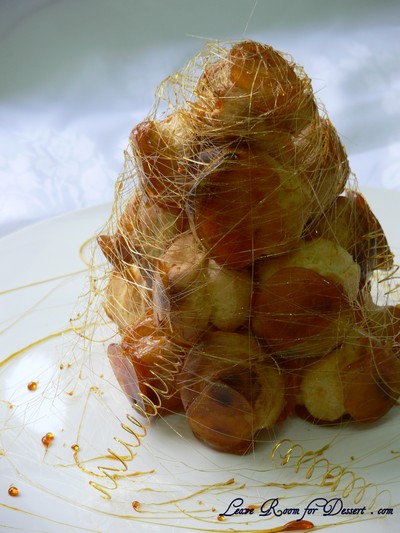
I’ve made two croquembouches’ so far, the original one from Masterchef and the chocolate swirl one, also from MasterChef. So, when I found out this month’s challenge was also a croquembouche I was both a bit indifferent, and also excited.

First of all, the slight disappointment was due to it not being something new. Although the excitement came from knowing how gorgeous the custard filled profiteroles with lovely crunchy toffee are. My family and I cannot resist croquembouche, although the next Christmas or event I make it for, I’ll just be pouring the caramel over the top and not building a cone shaped tower.

The other excitement came from trying the different recipes, I was hoping for a harder choux pastry, one which was a bit crunchy and kept its shape quite well. I think this choux pastry recipe may have succeeded in this, although I still need to learn my oven better, as they were cooked in 10-15 minutes, almost burning, so I couldn’t leave them in the oven to dry out longer, for fear of losing them.

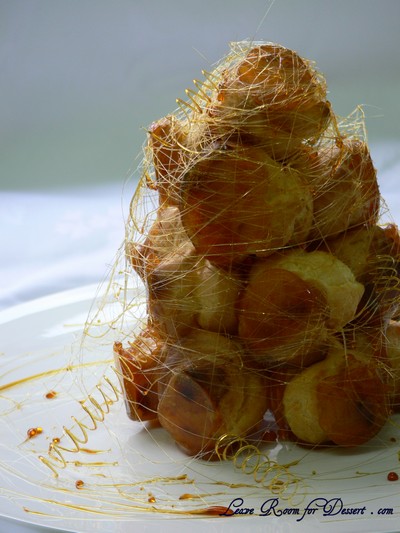
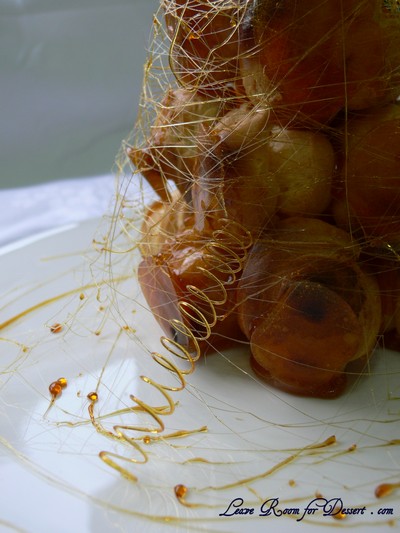
For my own challenge, I decided to try making cute little caramel corkscrews. Using a spoon, I spun the caramel around a clean knife (sharpening) steel. And they worked! I had to keep heating and cooling the caramel though to make it the right consistency – which was quite difficult to figure out.

Unfortunately for the presentation, the lovely caramel strands around the outside started beading within 20 minutes and by the time we ate the croquembouche, a few hours afterwards, there were no strands to be seen. I’m not sure whether this was due to the humidity we had here, or whether the glucose added to caramel contributes to the stability of the caramel.

Overall, I was very excited making this again, and I think it made the perfect quantity (even though people asked – where’s the rest of it?). The different components themselves are relatively easy, and I will consider making it more often, now that I won’t be making trays and trays worth of profiteroles, and a large lasagna dish filled with custard.

Croquembouche (Piece Montée)

Recipe Source: Peter Kump’s Baking School in Manhattan and were originally created by famed pastry chef, Nick Malgieri.

Vanilla Crème Patissiere (Half Batch) [I made a full batch – double this – although I think I could have made 1.5 batches – three times this]
1 cup (225 ml.) whole milk
2 Tbsp. cornstarch / cornflour
6 Tbsp. (100 g.) sugar – I used caster sugar
1 large egg
2 large egg yolks
2 Tbsp. (30 g.) unsalted butter
1 Tsp. Vanilla

Dissolve cornstarch in ¼ cup of milk. Combine the remaining milk with the sugar in a saucepan; bring to boil; remove from heat.

Beat the whole egg, then the yolks into the cornstarch mixture. Pour 1/3 of boiling milk into the egg mixture, whisking constantly so that the eggs do not begin to cook.

Return the remaining milk to boil. Pour in the hot egg mixture in a stream, continuing whisking.

Continue whisking (this is important – you do not want the eggs to solidify/cook) until the cream thickens and comes to a boil. Remove from heat and beat in the butter and vanilla.

Pour cream [Crème Patissiere] into a stainless steel/ceramic bowl. Press plastic wrap firmly against the surface. Chill immediately and until ready to use.

Pate a Choux (Yield: About 28) [Mine made more than 50]
¾ cup (175 ml.) water
6 Tbsp. (85 g.) unsalted butter
¼ Tsp. salt
1 Tbsp. sugar
1 cup (125 g.) all-purpose flour
4 large eggs

For Egg Wash: 1 egg and pinch of salt

Pre-heat oven to 425◦F/220◦C degrees. Line two baking sheets with parchment paper.

Preparing batter:
Combine water, butter, salt and sugar in a saucepan over medium heat. Bring to a boil and stir occasionally. At boil, remove from heat and sift in the flour, stirring to combine completely.

Return to heat and cook, stirring constantly until the batter dries slightly and begins to pull away from the sides of the pan.

Transfer to a bowl and stir with a wooden spoon 1 minute to cool slightly. [A KitchenAid works so well for this]

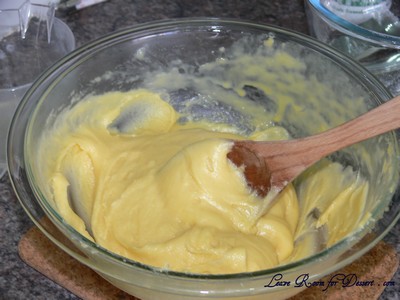
Add 1 egg. The batter will appear loose and shiny.

After mixing in the first egg

As you stir, the batter will become dry-looking like lightly buttered mashed potatoes.

It is at this point that you will add in the next egg. Repeat until you have incorporated all the eggs.

After mixing in the second egg

After mixing in the third egg

After the fourth and final egg

Piping:
Transfer batter to a pastry bag fitted with a large open tip (I piped directly from the bag opening without a tip). Pipe choux about 1 inch-part in the baking sheets. Choux should be about 1 inch high about 1 inch wide.

Using a clean finger dipped in hot water, gently press down on any tips that have formed on the top of choux when piping. You want them to retain their ball shape, but be smoothly curved on top.

Brush tops with egg wash (1 egg lightly beaten with pinch of salt).

Baking:
Bake the choux at 425◦F/220◦C degrees until well-puffed and turning lightly golden in color, about 10 minutes. [mine cooked in 15 minutes total]

Lower the temperature to 350◦F/180◦C degrees and continue baking until well-colored and dry, about 20 minutes more. Remove to a rack and cool.

Can be stored in a airtight box overnight.

Filling:
When you are ready to assemble your piece montée, using a plain pastry tip, pierce the bottom of each choux. Fill the choux with pastry cream using either the same tip or a star tip, and place on a paper-lined sheet. Choux can be refrigerated briefly at this point while you make your glaze.

Use one of these to top your choux and assemble your piece montée.

Hard Caramel Glaze: [I needed 1.5 – 2 times this recipe, as I stirred it too early]
1 cup (225 g.) sugar
½ teaspoon lemon juice

Combine sugar and lemon juice in a saucepan with a metal kitchen spoon stirring until the sugar resembles wet sand. Place on medium heat; heat without stirring until sugar starts to melt around the sides of the pan and the center begins to smoke. Begin to stir sugar. Continue heating, stirring occasionally until the sugar is a clear, amber color. Remove from heat immediately; place bottom of pan in ice water to stop the cooking. Use immediately.

Assembly of your Piece Montée:
You may want to lay out your unfilled, unglazed choux in a practice design to get a feel for how to assemble the final dessert. For example, if making a conical shape, trace a circle (no bigger than 8 inches) on a piece of parchment to use as a pattern. Then take some of the larger choux and assemble them in the circle for the bottom layer. Practice seeing which pieces fit together best.

Once you are ready to assemble your piece montée, dip the top of each choux in your glaze (careful it may be still hot!), and start assembling on your cake board/plate/sheet. Continue dipping and adding choux in levels using the glaze to hold them together as you build up.

When you have finished the design of your piece montée, you may drizzle with remaining glaze or use ribbons, sugar cookie cut-outs, almonds, flowers, etc. to decorate. Have fun and enjoy! Bon appétit!

Vanilla Mousse Tart with Strawberries and Macaron

Tuesday, April 13th, 2010

VanillaMousseTart11
In an effort to make sure I am fully prepared for my trip to Melbourne for a cooking class this weekend, I decided to make my own pâte sablée, mousse and macarons. The other things I was planning to make, like Italian meringue and glazes, were left behind due to time restrictions, so I hope I have enough experience to help and not hinder the others attending the class. I only mention this, as it is a level 2 class – and I haven’t done level 1. I look forward to telling everyone about the course when I get back and have some lovely photos.

VanillaMousseTart09

I was ecstatic with the results for my macarons. They had cute little “feet” (the little raised area on the bottom), they had a nice smooth top of the shell, there was no hole under the shell, and they came off the baking paper easily. (Well this is after I made the stupid mistake of trying to cook them in the oven with something else – I won’t tell you what it was [as it caused a very humid oven], but I would suggest cooking a tray at a time, with nothing else in the oven).

VanillaMousseTart07

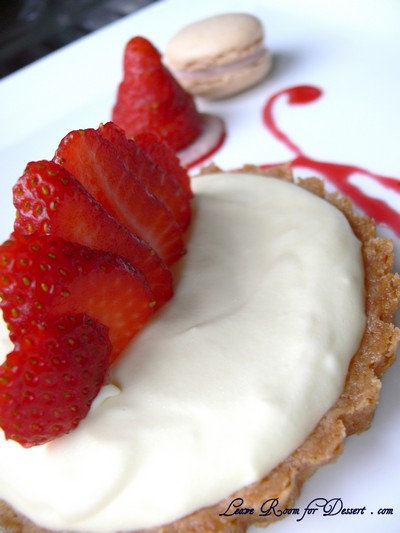
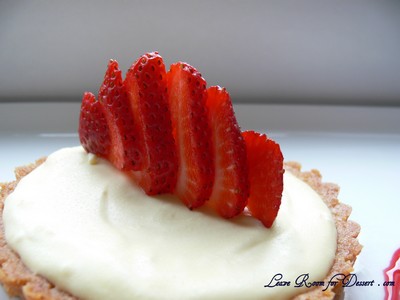
The vanilla mousse tart was lovely and paired very well with the fresh strawberries and mixed berry sauce.

VanillaMousseTart10

Vanilla Mousse Tart with Strawberries and Macaron

Recipe by Anita @ Leave Room for Dessert

Pâte Sablée:
1/4 cup plain flour
1/4 cup icing sugar
1/8 cup almond meal
62g butter, chilled and chopped
pinch salt
1 tablespoon milk (less or more may be required) (an egg is often used to bind the pastry, although with such a small amount, I thought it might be too sticky)

Vanilla Mousse:
1 egg yolk
1 1/2 tablespoons caster sugar
1/4 cup milk
1/3 teaspoon vanilla essence
1/2 teaspoon gelatin
2 tablespoons water
2/3 cup cream

Macarons:
1 egg white (30g) (I normally “age” my egg whites, covered at room temperature or in the fridge overnight)
2 tablespoons (22g) caster sugar
1/4 cup + 1 tablespoon (55g) pure icing sugar
1/4 cup + 1 teaspoon (40g) almond meal

Macaron filling:

a few tablespoons vanilla mousse mixed with a few teaspoons of mixed berry jus

Mixed Berry Sauce:
60g mixed berries (fresh or frozen, thawed)
1/3 cup caster sugar
1/2 cup water

Strawberries to serve

Pâte Sablée:
Process the flour, icing sugar, almonds and salt in a food processor. Place the butter in with the flour and process until it resembles fine breadcrumbs. Add enough milk for the mixture to just come together into a dough that just holds together. Form the dough into a disc and place in the fridge for 30 minutes. Remove from fridge and roll out to a few millimetres thickness (enough to fit two small round tart tins – around 12cm diameter). Place the dough in the tart tins, pressing lightly to fill the tin. Cut off excess dough. Place in the fridge for 30 minutes. Preheat oven to 180C. Cook pâte sablée for 10 minutes or until golden. Allow to cool before filling.
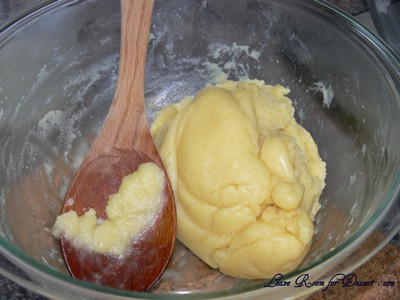
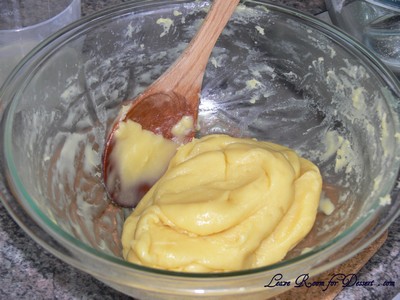
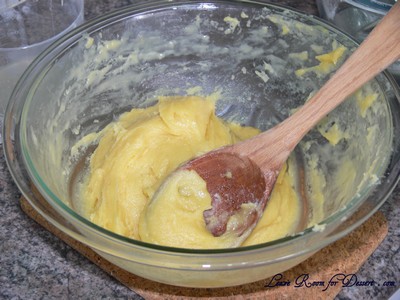
Vanilla Mousse:

Add gelatine to water. Bring the milk almost to the boil in a small saucepan. Whisk together the egg yolks, sugar and vanilla essence until lighter in colour. Pour the milk into the egg yolk mixture, whisking continuously. Pour the mixture back into the saucepan and cook on low/medium heat until the mixture coats the back of a spoon. Remove from heat and stir in gelatine. Allow to cool.

Whip the cream until light peaks form. Fold half of the cream into the cooled custard mixture. Fold lightly into the remaining cream. Spoon the mousse into the cooled tart shells and allow to set in the fridge for a few hours. (Leave some of the mousse for the macaron filling).

VanillaMousseTart05

Macarons:
Whisk the egg whites in a clean bowl with electric beaters on medium. Once the egg whites become frothy, slowly add the caster sugar, while continuously beating. Continue beating the egg whites until the mixture becomes a thick, glossy meringue, which holds it’s shape. Sift in the icing sugar combined with the almond meal on top of the meringue. Fold and beat the almond meal mixture into the meringue, just until any peaks you create in the mixture sink back. Don’t overbeat the mixture once it is flowing nicely (underbeating can also cause the biscuits to be too meringue like or have a peak on them).

Spoon mixture into a piping bag and pipe circles (3-4 cm diameter) onto a baking paper lined baking tray (make sure this is flat or the mixture will run). Let the macarons sit at room temperature for 30 min or more to allow the top to form a skin (this will help the macaron to rise from the bottom and not split the lovely shell).

Preheat oven to 150C (my oven is fan-forced, although you’ll need to check what temperature works for your oven). Place baking trays in the oven (one at a time, depending on your oven – if mine has two trays in there, the macarons do not colour evenly). Cook for approximately 10 minutes, or until lightly coloured, with a lightly crisp shell and soft on the inside.

Once cooled, you can fill them with the berry mousse filling.

Mixed Berry Sauce:
Puree the berries with some of the water. Strain through a sieve and add to a small saucepan with sugar and remaining water. Cook on medium or high heat until the mixture has become thicker and reduced to 1/2 or 1/3 cup. This may take 10 minutes (more or less depending on the size of your saucepan).

VanillaMousseTart04

Orange Tian – Daring Bakers Challenge March 2010

Saturday, March 27th, 2010

OrangeTian11

The 2010 March Daring Baker’s challenge was hosted by Jennifer of Chocolate Shavings. She chose Orange Tian as the challenge for this month, a dessert based on a recipe from Alain Ducasse’s Cooking School in Paris.

I don’t use oranges much in my desserts, except for fruit salads, so the concept of this dessert was difficult to grasp. I decided to make the dessert as written, along with adding chocolate to half the mix and serving with Jaffas to make choc orange dessert.

OrangeTian31

There were many components to this challenge, including the marmalade – which Nick was very excited that I would be making. He loves marmalade, especially chunky marmalade, so I decided to make it chunky – a little too chunky for me. The pate sable was lovely and easy to make, although I needed to cut the pieces again after cooking to ensure they fit in moulds.

I had a touch of trouble with the caramel, as it melted and caramelised at the same time, so when I added the orange juice it clumped a heap and I had to cook it until the clumps of sugar dissolved again.

OrangeTian24

I tried both the normal and chocolate version, although think I prefer other desserts and flavour combinations. The others who tried it thought it was quite nice – even prefering the original flavour over the chocolate version.

Thanks again to our host Jennifer for this challenge. I found the flavour combinations very interesting, and have learnt quite a bit from the experience.

OrangeTian17

Orange Tian

Dessert based on a recipe from Alain Ducasse’s Cooking School in Paris

For the Pate Sablee:

2 medium-sized egg yolks at room temperature
granulated sugar 6 tablespoons + 1 teaspoon; 2.8 oz; 80 grams
vanilla extract ½ teaspoon
Unsalted butter ¼ cup + 3 tablespoons; 3.5 oz; 100 grams ice cold, cubed
Salt 1/3 teaspoon; 2 grams
All-purpose flour 1.5 cup + 2 tablespoons; 7 oz; 200 grams
baking powder 1 teaspoon ; 4 grams

Put the flour, baking powder, ice cold cubed butter and salt in a food processor fitted with a steel blade.

In a separate bowl, add the eggs yolks, vanilla extract and sugar and beat with a whisk until the mixture is pale. Pour the egg mixture in the food processor.

Process until the dough just comes together. If you find that the dough is still a little too crumbly to come together, add a couple drops of water and process again to form a homogenous ball of dough. Form into a disc, cover with plastic wrap and leave to rest in the fridge for 30 minutes.
Preheat your oven to 350 degree Fahrenheit.

Roll out the dough onto a lightly floured surface until you obtain a ¼ inch thick circle.

Using your cookie cutter, cut out circles of dough and place on a parchment (or silicone) lined baking sheet. Bake for 20 minutes or until the circles of dough are just golden.

For the Marmalade:

Freshly pressed orange juice ¼ cup + 3 tablespoons; 3.5 oz; 100 grams
1 large orange used to make orange slices
cold water to cook the orange slices
pectin 5 grams
granulated sugar: use the same weight as the weight of orange slices once they are cooked

Finely slice the orange. Place the orange slices in a medium-sized pot filled with cold water. Simmer for about 10 minutes, discard the water, re-fill with cold water and blanch the oranges for another 10 minutes.

Blanch the orange slices 3 times. This process removes the bitterness from the orange peel, so it is essential to use a new batch of cold water every time when you blanch the slices.

Once blanched 3 times, drain the slices and let them cool.

Once they are cool enough to handle, finely mince them (using a knife or a food processor).

Weigh the slices and use the same amount of granulated sugar . If you don’t have a scale, you can place the slices in a cup measurer and use the same amount of sugar.

In a pot over medium heat, add the minced orange slices, the sugar you just weighed, the orange juice and the pectin. Cook until the mixture reaches a jam consistency (10-15 minutes).

Transfer to a bowl, cover with plastic wrap and put in the fridge.

OrangeTian03

For the Orange Segments:

For this step you will need 8 oranges.

Cut the oranges into segments over a shallow bowl and make sure to keep the juice. Add the segments to the bowl with the juice.

OrangeTian07

OrangeTian08

OrangeTian09

For the Caramel:

granulated sugar 1 cup; 7 oz; 200 grams
orange juice 1.5 cups + 2 tablespoons; 14 oz; 400 grams

Place the sugar in a pan on medium heat and begin heating it.

Once the sugar starts to bubble and foam, slowly add the orange juice. As soon as the mixture starts boiling, remove from the heat and pour half of the mixture over the orange segments.

Reserve the other half of the caramel mixture in a small bowl — you will use this later to spoon over the finished dessert. When the dessert is assembled and setting in the freezer, heat the kept caramel sauce in a small saucepan over low heat until it thickens and just coats the back of a spoon (about 10 minutes). You can then spoon it over the orange tians.

[Tip: Be very careful when making the caramel — if you have never made caramel before, I would suggest making this step while you don’t have to worry about anything else. Bubbling sugar is extremely, extremely hot, so make sure you have a bowl of ice cold water in the kitchen in case anyone gets burnt!]

For the Whipped Cream:

heavy whipping cream 1 cup; 7 oz; 200 grams
3 tablespoons of hot water
1 teaspoon Gelatine
1 tablespoon of confectioner’s sugar
orange marmalade (see recipe above) 1 tablespoon
I folded 50g melted and cooled dark chocolate to this whipped cream for my choc orange version

In a small bowl, add the gelatine and hot water, stirring well until the gelatine dissolves. Let the gelatine cool to room temperature while you make the whipped cream. Combine the cream in a chilled mixing bowl. Whip the cream using a hand mixer on low speed until the cream starts to thicken for about one minute. Add the confectioner sugar. Increase the speed to medium-high. Whip the cream until the beaters leave visible (but not lasting) trails in the cream, then add the cooled gelatine slowly while beating continuously. Continue whipping until the cream is light and fluffy and forms soft peaks. Transfer the whipped cream to a bowl and fold in the orange marmalade.
[Tip: Use an ice cold bowl to make the whipped cream in. You can do this by putting your mixing bowl, cream and beater in the fridge for 20 minutes prior to whipping the cream.]

Assembling the Dessert:

Make sure you have some room in your freezer. Ideally, you should be able to fit a small baking sheet or tray of desserts to set in the freezer.

Line a small tray or baking sheet with parchment paper or a silicone sheet. Lay out 6 cookie cutters onto the parchment paper/silicone.

Drain the orange segments on a kitchen towel.

Have the marmalade, whipped cream and baked circles of dough ready to use.

Arrange the orange segments at the bottom of each cookie cutter. Make sure the segments all touch either and that there are no gaps. Make sure they fit snuggly and look pretty as they will end up being the top of the dessert. Arrange them as you would sliced apples when making an apple tart.

OrangeTian18

Once you have neatly arranged one layer of orange segments at the bottom of each cookie cutter, add a couple spoonfuls of whipped cream and gently spread it so that it fills the cookie cutter in an even layer. Leave about 1/4 inch at the top so there is room for dough circle.

OrangeTian19

Using a butter knife or small spoon, spread a small even layer of orange marmalade on each circle of dough.

Carefully place a circle of dough over each ring (the side of dough covered in marmalade should be the side touching the whipping cream). Gently press on the circle of dough to make sure the dessert is compact.

OrangeTian10

Place the desserts to set in the freezer to set for 10 minutes. (I left mine in the freezer for a few hours, and stored leftover ones in there too)

Using a small knife, gently go around the edges of the cookie cutter to make sure the dessert will be easy to unmold. Gently place your serving plate on top of a dessert (on top of the circle of dough) and turn the plate over. Gently remove the cookie cutter, add a spoonful of caramel sauce and serve immediately.

OrangeTian29