Archive for January, 2012

Scones – Daring Bakers Challenge January 2012

Friday, January 27th, 2012

Audax Artifex was our January 2012 Daring Bakers’ host. Aud worked tirelessly to master light and fluffy scones (a/k/a biscuits) to help us create delicious and perfect batches in our own kitchens!

After News Years and Christmas, everyone wants a break from cooking don’t they? Well, not us, or at least that’s not what happened. We decided to have some friends over for a Garden Party so lots of cooking (and cleaning) happened in what was supposed to be a relaxing start to the New Year. Then some big birthdays came up, more desserts, Australia Day – I tried out a new lamington recipe, and of course the Daring Bakers Challenge.

Luckily for me, the challenge just happens to be easy, affordable, quick and extremely tasty. I love fresh scones, they are probably one of my favourite foods. They must have a large slathering of jam and cream on top too. Although I must admit, I could not resist the scones once they came out of the oven. I took a bite of the smallest scone and fell into buttery bliss.

Audax, did an amazing job with this recipe and had certainly done his research on the matter and how to make different textured and flavoured scones.

Thanks to Audax for a great (and thankfully quick) challenge this month. I always love seeing your creations from the challenges!

Basic Scones (a.k.a. Basic Biscuits)

Servings: about eight 2-inch (5 cm) scones or five 3-inch (7½ cm) scones
Recipe can be doubled – I doubled this recipe and would recommend doing so. I hope it can be tripled or quadrupled – as I loved the taste so much.

Ingredients:
1 cup (240 ml) (140 gm/5 oz) plain (all-purpose) flour
2 teaspoons (10 ml) (10 gm) (⅓ oz) fresh baking powder
¼ teaspoon (1¼ ml) (1½ gm) salt
2 tablespoons (30 gm/1 oz) frozen grated butter (or a combination of lard and butter)
approximately ½ cup (120 ml) cold milk
optional 1 tablespoon milk, for glazing the tops of the scones

Directions:
1. Preheat oven to very hot 475°F/240°C/gas mark 9.
2. Triple sift the dry ingredients into a large bowl. (If your room temperature is very hot refrigerate the sifted ingredients until cold.)
3. Rub the frozen grated butter (or combination of fats) into the dry ingredients until it resembles very coarse bread crumbs with some pea-sized pieces if you want flaky scones or until it resembles coarse beach sand if you want tender scones.
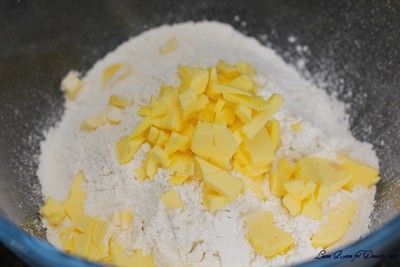
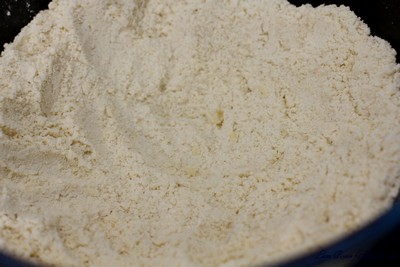
4. Add nearly all of the liquid at once into the rubbed-in flour/fat mixture and mix until it just forms a sticky dough (add the remaining liquid if needed). The wetter the dough the lighter the scones (biscuits) will be!
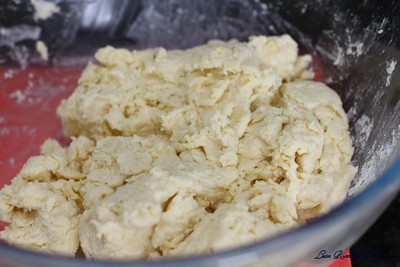

5. Turn the dough out onto a lightly floured board, lightly flour the top of the dough. To achieve an even homogeneous crumb to your scones knead very gently about 4 or 5 times (do not press too firmly) the dough until it is smooth. To achieve a layered effect in your scones knead very gently once (do not press too firmly) then fold and turn the kneaded dough about 3 or 4 times until the dough has formed a smooth texture. (Use a floured plastic scraper to help you knead and/or fold and turn the dough if you wish.)
6. Pat or roll out the dough into a 6 inch by 4 inch rectangle by about ¾ inch thick (15¼ cm by 10 cm by 2 cm thick). Using a well-floured 2-inch (5 cm) scone cutter (biscuit cutter), stamp out without twisting six 2-inch (5 cm) rounds, gently reform the scraps into another ¾ inch (2 cm) layer and cut two more scones (these two scones will not raise as well as the others since the extra handling will slightly toughen the dough). Or use a well-floured sharp knife to form squares or wedges as you desire.

7. Place the rounds just touching on a baking dish if you wish to have soft-sided scones or place the rounds spaced widely apart on the baking dish if you wish to have crisp-sided scones. Glaze the tops with milk if you want a golden colour on your scones or lightly flour if you want a more traditional look to your scones.
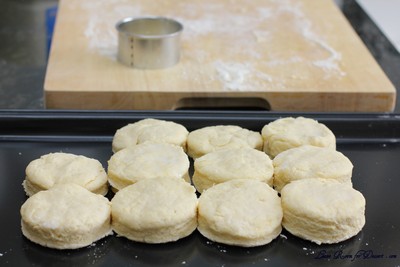
8. Bake in the preheated very hot oven for about 10 minutes (check at 8 minutes since home ovens at these high temperatures are very unreliable) until the scones are well risen and are lightly coloured on the tops. The scones are ready when the sides are set.

9. Immediately place onto cooling rack to stop the cooking process, serve while still warm.

Variations on the Basic recipe
Buttermilk – follow the Basic recipe above but replace the milk with buttermilk, add ¼ teaspoon of baking soda, increase the fat to 4 tablespoons, in Step 3 aim of pea-sized pieces of fat coated in flour, in Step 5 fold and turn the dough, rounds are just touching in the baking dish, glaze with buttermilk.
Australian Scone Ring (Damper Ring) – follow the Basic recipe above but decrease the fat to 1 tablespoon, in Step 3 aim of fine beach sand sized pieces of fat coated in flour, in Step 5 knead the dough, in Step 7 form seven rounds into a ring shape with the eighth round as the centre, glaze with milk.
Cream – follow the Basic recipe above but replace the milk with cream, add ¼ teaspoon of baking soda, in Step 3 aim of beach sand sized pieces of fat coated in flour, in Step 5 knead the dough, rounds are just touching in the baking dish, glaze with cream.
Cheese and Chive – follow the Basic recipe above but add ¼ teaspoon of baking soda, after Step 2 add ½ teaspoon sifted mustard powder, ¼ teaspoon sifted cayenne pepper (optional), ½ cup (60 gm/2 oz) grated cheese and 2 tablespoons finely chopped chives into the sifted ingredients, in Step 3 aim of beach sand sized pieces of fat coated in flour, in Step 5 knead the dough, rounds are widely spaced in the baking dish, sprinkle the rounds with cracked pepper.
Fresh Herb – follow the Basic recipe above but after Step 3 add 3 tablespoons finely chopped herbs (such as parsley, dill, chives etc).
Sweet Fruit – follow the Basic recipe above but after Step 3 add ¼ cup (45 gm) dried fruit (e.g. sultanas, raisins, currents, cranberries, cherries etc) and 1 tablespoon (15 gm) sugar.
Wholemeal – follow the Basic recipe above but replace half of the plain flour with wholemeal flour.
Wholemeal and date – follow the Basic recipe above but replace half of the plain flour with wholemeal flour and after Step 3 add ¼ cup (45 gm) chopped dates and 1 tablespoon (15 gm) sugar.

Sourdough – Update from December Daring Bakers Challenge

Thursday, January 26th, 2012

I made the sourdough from the December Daring Bakers Challenge very soon after my last post about it. Although it did not really turn out particularly well, so I sort of held back on this post. And the next challenge is to be posted in tomorrow!

Back to the sourdough. After having the sourdough starter go mouldy whilst I was sick, I made sure this one didn’t. The starter was nice and bubbly and certainly smelt quite sour, so I was hoping I had nice active yeast in the mix.

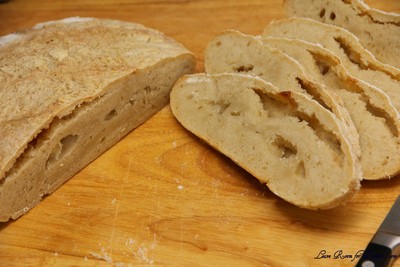
My First Sourdough - not so great looking

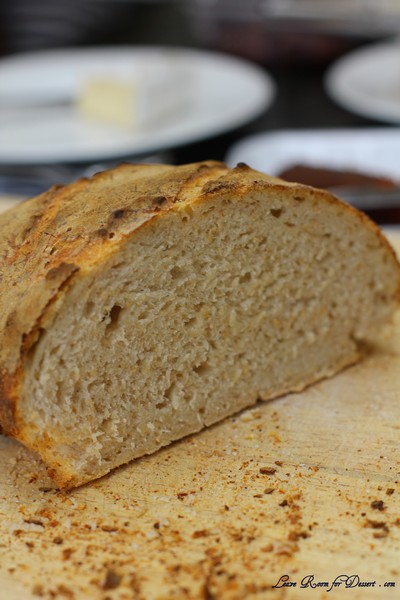
My first bread came out of the oven – and it hadn’t risen as much as I had hoped, I still crossed my fingers, although after cutting it through, we found it was still quite dough-y inside. Nice flavour, but texture was all wrong. I still have the starter dough though, and Nick has been making bread every weekend with it – although adding yeast to it – and it has been rising quite well. I wish I could part more information for you on troubleshooting, although as a newbie myself, I am just going to try and keep the starter and continue to feed it and hope the yeast becomes happier. At the moment I have it in the fridge, as I am a little scared I will forget about it on the bench and it will mould again.

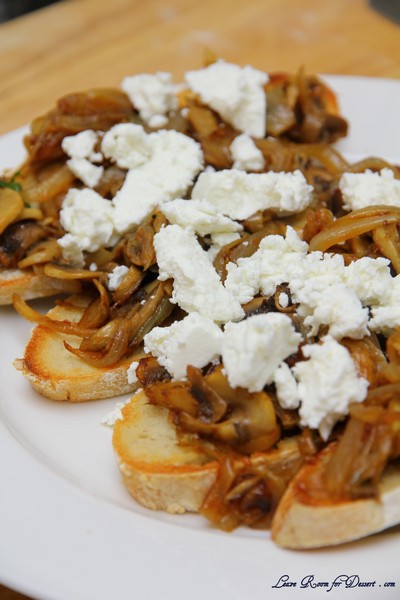
Even though the texture of this first bread was not so great, I still made the mushrooms from the given recipes and added some goats cheese on top, and you could hardly notice the bread’s heaviness once it was grilled and had a lovely topping on it.

Nick's sourdough - with a little yeast added

Thanks to our host (Jessica of My Recipe Project) for last month’s challenge – we are finally making sourdough – and I might just have the confidence to make more starter doughs…? 🙂

French Country Bread

Servings: 1 large loaf plus extra wheat starter for further baking

Wheat Starter – Day 1:
Ingredients
4 1/2 tablespoons (70 ml) (40 gm/1 ½ oz) stoneground breadmaking whole-wheat or graham flour
3 tablespoons (45 ml) water
Total scant ½ cup (115 ml) (3 oz/85 gm)

Directions:
1. In a Tupperware or plastic container, mix the flour and water into a paste.
2. Set the lid on top gently, cover with a plastic bag, to prevent messes in case it grows more than expected!
3. Set somewhere warm (around 86 F if possible). I sometimes put mine on a windowsill near a radiator, but even if it’s not that warm, you’ll still get a starter going – it might just take longer.

Wheat Starter – Day 2:
Ingredients
4 1/2 tablespoons (70 ml) (40 gm/1 ½ oz) stoneground breadmaking whole-wheat or graham flour
3 tablespoons (45 ml) water
scant 1/2 cup (115 ml) (3 oz/85 gm) starter from Day 1
Total scant cup (230 ml) (6 oz/170 gm)

Directions:
1. Stir the flour and water into the mixture from Day 1, cover, and return to its warm place.

Wheat Starter – Day 3:
Ingredients
4 1/2 tablespoons (70 ml) (40 gm/1 ½ oz) stoneground breadmaking whole-wheat or graham flour
4 teaspoons (20 ml) water
scant 1 cup (230 ml) (6 oz/170 gm) starter from Day 2
Total 1⅓ cup (320 ml) (230 gm/8-1/10 oz)

Directions:
1. Stir the flour and water into the mixture from Day 2, cover, and return to its warm place.

Wheat Starter – Day 4:
Ingredients
3/4 cup plus 1½ tablespoons (205 ml) (120 gm/4 ¼ oz) unbleached all-purpose flour
1/2 cup less 4 teaspoons (100 ml) water
1⅓ cup (320 ml) (230 gm/8 oz) starter from Day 3
Total scant 2⅔ cup (625 ml) (440 gm/15½ oz)

Directions:
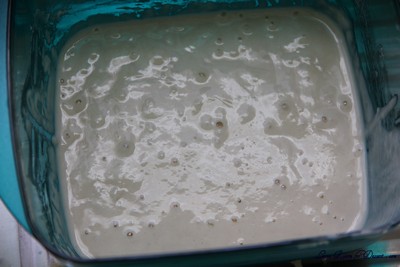
1. Stir the flour and water into the mixture from Day 3, cover, and return to its warm place. At this point it should be bubbling and smell yeasty. If not, repeat this process for a further day or so until it is!

French Country Bread
Stage 1: Refreshing the leaven
Ingredients
1 cup less 1 tablespoon (225 ml) (160 gm/5 ⅔ oz) wheat Leaven Starter
6 tablespoons less 1 teaspoon (85 ml) (50 gm/1¾ oz) stoneground bread making whole-wheat or graham flour
1 cup plus 2 teaspoons (250 ml) (150 gm/5 ⅓ oz) unbleached all purpose flour
1/2 cup (120 ml) water
Production Leaven Total 2¾ cups plus 4 teaspoons (680 ml) (480 gm /1 lb 1 oz)

Directions:
1. Mix everything into a sloppy dough. It may be fairly stiff at this stage. Cover and set aside for 4 hours, until bubbling and expanded slightly.

French Country Bread

Stage 2: Making the final dough
Ingredients
3/4 cup less 1 teaspoon (175 ml) (100 gm/3 ½ oz) stoneground breadmaking whole-wheat or graham flour, plus more for dusting
2 cups plus 2 tablespoons (510 ml) (300gm/10 ½ oz) unbleached all-purpose flour
1¼ teaspoons (7½ ml) (7 gm/¼ oz) sea salt or ⅔ teaspoon (3⅓ ml) (3 gm/⅛ oz) table salt
1 ¼ cups (300 ml) water
1 ¾ cups (425 ml) (300 gm/10 ½ oz) production leaven – this should leave some (1 cup) for your next loaf.
Total 6 cups less 2 tablespoons 1415 ml (1007 gm/35 ½ oz/2 lb 3½ oz)

Directions:
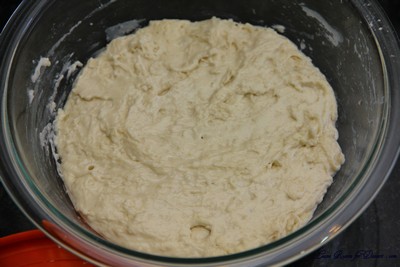
1. Mix the dough with all the ingredients except the production leaven. It will be a soft dough.
2. Knead on an UNFLOURED surface for about 8-10 minutes, getting the tips of your fingers wet if you need to. You can use dough scrapers to stretch and fold the dough at this stage, or air knead if you prefer. Basically, you want to stretch the dough and fold it over itself repeatedly until you have a smoother, more elastic dough.
See my demonstration here: http://www.youtube.com/watch?v=OqS3raEGdwk
3. Smooth your dough into a circle, then scoop your production leaven into the centre. You want to fold the edges of the dough up to incorporate the leaven, but this might be a messy process. Knead for a couple minutes until the leaven is fully incorporated in the dough. See my demonstration here: http://www.youtube.com/watch?v=UPO97R4iO4U

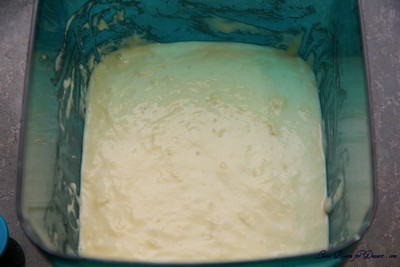
production leaven

4. Spread some water on a clean bit of your work surface and lay the dough on top. Cover with an upturned bowl, lining the rim of the bowl with a bit of water. Leave for an hour, so that the gluten can develop and the yeasts can begin to aerate the dough.
5. Once your dough has rested, you can begin to stretch and fold it. Using wet hands and a dough scraper, stretch the dough away from you as far as you can without breaking it and fold it back in on itself. Repeat this in each direction, to the right, towards you, and to the left. This will help create a more ‘vertical’ dough, ready for proofing. See my demonstration here: http://www.youtube.com/watch?v=rDoJRCMfclE
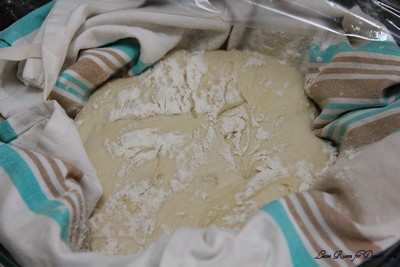
6. Heavily flour a banneton/proofing basket with whole wheat flour and rest your dough, seam side up, in the basket. Put the basket in a large plastic bag, inflate it, and seal it. Set aside somewhere warm for 3-5 hours, or until it has expanded a fair bit. It is ready to bake when the dough responds to a gently poke by slowly pressing back to shape.

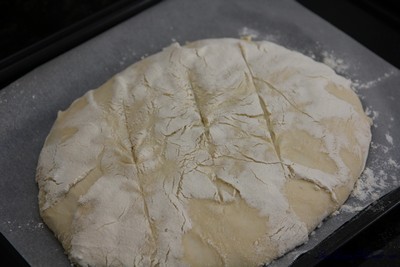
7. Preheat the oven to hot 425°F/220°C/gas mark 7. Line a baking sheet with parchment, then carefully invert the dough onto the sheet. I like to put the baking sheet on top of the basket, then gently flip it over so as to disturb the dough as little as possible. Make 2-3 cuts on top of the loaf and bake for 40-50 minutes, reducing the temperature to moderately hot 400°F/200°C/gas mark 6 after 10 minutes.

8. Cool on a cooling rack.

Garlic and Oregano Roasted Mushrooms and Pancetta on Toasted Sourdough

Servings: 4

Ingredients
4 large or 8 medium field mushrooms, sliced
2 red onions, peeled and cut into wedges
2 garlic cloves, peeled and sliced
4 sprigs oregano, leaves only
100 gm (3 ½ oz) pancetta, cubed (optional)
2 tablespoons (30 ml) extra virgin olive oil
4 slices sourdough bread
butter, for spreading
freshly ground black pepper
sea salt

Directions:
1. Preheat the oven to moderately hot 400°F/200°C/gas mark 6. Place the mushrooms on an oiled baking sheet, with onion wedges scattered beneath them. Sprinkle over the garlic, oregano, and pancetta, drizzle with olive oil and season with black pepper and sea salt. Roast for 25 minutes until the mushrooms are tender.
2. Toast your bread in the toaster. Butter the toast, and then pile your mushroom mixture on top.

A Twist: Instead of roasting your mushrooms, you can also sauté them in a pan and, just before serving, stir in a dash of cream for a rich, warm treat!