Egg Yolks

Crack Pie – Daring Bakers Challenge June 2013

Thursday, June 27th, 2013

Rachael from pizzarossa was our lovely June 2013 Daring Bakers’ host and she had us whipping up delicious pies in our kitchens! Cream pies, fruit pies, chocolate pies, even crack pies! There’s nothing like pie!

What a range of pies we were able to choose from this month! I absolutely love my mum’s apple crumble, and love anything with pastry, so was extremely excited. The only difficulty was choosing.

I had never heard about a “Crack Pie” before, although the description certainly sold it, and when I started researching I found out the recipe was from Christina Tosi from Momofuku Milk Bar in New York (although I did find other recipes also saying it was from Monofuku, with some differences in quantities, so I am unsure which is correct).

I made the oat cookie base the night before making the pie, and when I was crumbling it by hand the next night, I wished I had taken out my food processor – it would have sped up the process (which is important when you are making pizza for dinner at the same time).

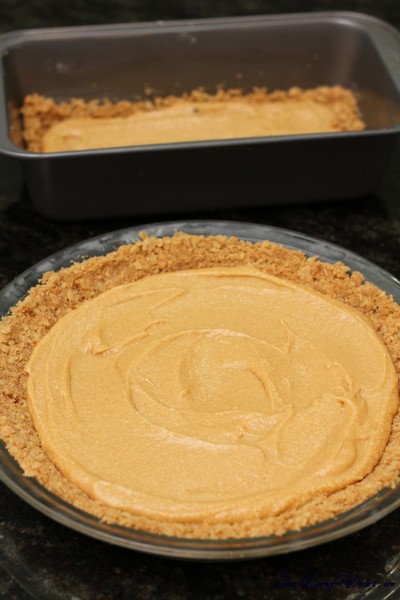
When pressing the cookie mixture into my pie dish, I thought it looked like too much mixture, so split the mixture and placed some of it in a loaf tin. When I started added the filling, I thought I probably could have fit it all in the pie dish – although added it to the loaf tin as well. Make sure you double check the temperature of your oven and check very regularly (I left mine in for 25 minutes and burnt part of the edge of the pie – plus the one in the loaf tin). I had turned my oven down after cooking the pizza, although it held the heat more than expected.

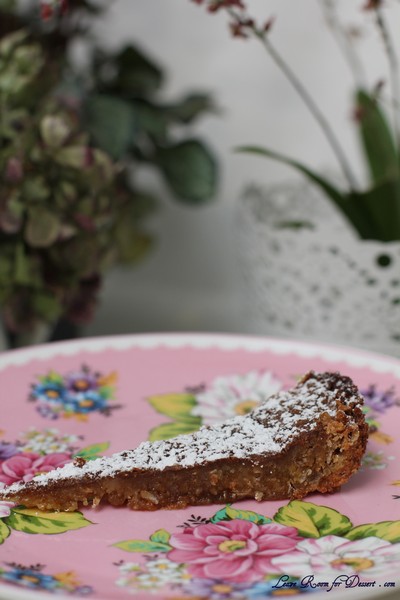
Now for the taste – a very rich and caramel flavour with a lovely texture. Very moreish, although a bit sweet to eat too much. I wish it had been a bit higher, perhaps I should have used all the crust and filling – even when I thought it was too much – or perhaps I need a higher pie dish 🙂

Crack Pie

Recipe from Bon Appetit

Servings:12
Preparation time: 20 + 20 minutes
Baking time: 18 + 50 minutes
Cooling time: 1 hour + 2 hours, approx.
Chilling time: overnight

Oat Cookie Crust

9 tablespoons (1 stick + 1 tbsp) (135 ml) (4½ oz) (125g) unsalted butter, room temperature, divided (6 & 3 tbsp; 85gm & 40gm)
5 1/2 tablespoons (85 ml)(2½ oz) (70 gm) (packed) light brown sugar, divided (4 & 1½ tbsp; 50 gm & 20 gm)
2 tablespoons (30 ml) (30 gm) (1 oz) white sugar
1 large egg
3/4 cup plus 2 tablespoons (210 ml) (80 gm) (2¾ oz) old-fashioned oats
1/2 cup (120 ml) (2½ oz) (70 gm) all-purpose flour
1/8 teaspoon (2/3 gm) baking powder
1/8 teaspoon (2/3 gm) baking soda
1/4 teaspoon (1½ gm) salt

1. Position rack in center of oven and preheat to moderate 350°F/180°C/gas mark 4. Line a 13x9x2 inch/33x22x5cm metal baking pan with parchment (baking) paper. Lightly spray or butter a 9 inch/22cm diameter glass or ceramic pie dish.

2. Combine 6 tablespoons (85 gm) of the softened butter, 4 tablespoons (50 gm) of the brown sugar and the white sugar in medium bowl. Using an electric mixer, beat until light and fluffy, about 2 minutes.

3. Add egg and beat until pale and fluffy, about 1 minute.

4. Add oats, flour, baking powder, baking soda, and salt and beat until well blended, about 1 minute.

5. Dump oat mixture into prepared baking pan and press out evenly to edges of pan.

6. Bake until light golden, 18 minutes. Transfer baking pan to wire rack and cool cookie completely, about an hour.

7. Using your fingertips, crumble the cookie a into large bowl – there should be no identifiable pieces of cookie remaining. Add the remaining 3 tablespoons (45 gm) butter and 1-1/2 tablespoons (20 gm) brown sugar. Rub in with your fingertips until the mixture is moist and sticks together when pressed between your fingers.

8. Transfer cookie crust mixture to pie dish. Using your fingers, press mixture evenly onto bottom and up sides of pie dish (about 1 inch/2.5cm up the sides if your pie dish is deep). If your pie dish is shallow, place it on a baking sheet in case of overflow.

Filling

3/4 cup (160 ml) (170 gm) (6 oz) white sugar
1/2 cup (packed) (120 ml) (100 gm) (3½ oz) light brown sugar
1 tablespoon (15 ml) (8 gm) (¼ oz) dry milk powder
1/4 teaspoon (1½ gm) salt
1/2 cup (1 stick) (120mlk) (4 oz) (115gm) unsalted butter, melted, cooled slightly
6 1/2 tablespoons (100ml) heavy whipping cream
4 large egg yolks
1 teaspoon vanilla extract
Powdered sugar for dusting

1. Position rack in center of oven and preheat to moderate 350°F/180°C/gas mark 4. If possible, use bottom-only heat, or the filling may brown too quickly.

2. Whisk both sugars, milk powder, and salt together in a medium bowl.

3. Add melted butter and whisk until blended.

4. Add cream, then egg yolks and vanilla and whisk until well blended.

5. Pour filling into crust.

6. Bake 30 minutes (filling may begin to bubble up). Reduce oven temperature to 325°F/160°C/gas mark 3. Continue to bake until filling is brown on top and set around edges but center still jiggles slightly, about 20 minutes longer.

7. Cool pie completely in pie dish on wire rack. Chill uncovered overnight.

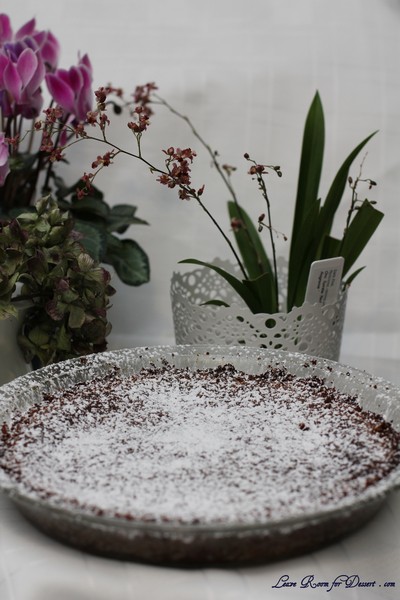
8. Sift powdered sugar lightly over top of pie. Cut pie into thin wedges and serve cold.

Vanilla Slice – Daring Bakers Challenge October 2012

Saturday, October 27th, 2012

Our October 2012 Daring Bakers’ challenge was hosted by Suz of Serenely Full. Suz challenged us to not only tackle buttery and flaky puff pastry, but then take it step further and create a sinfully delicious Mille Feuille dessert with it!

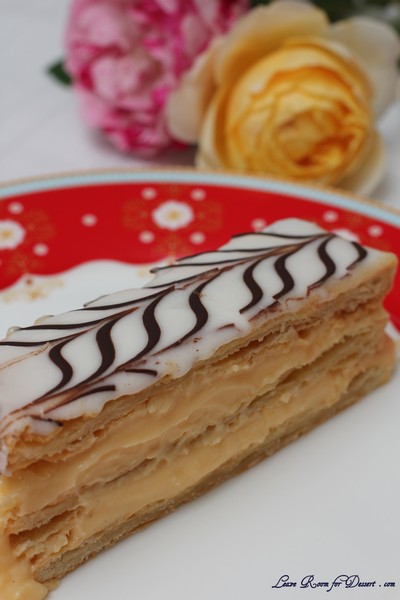
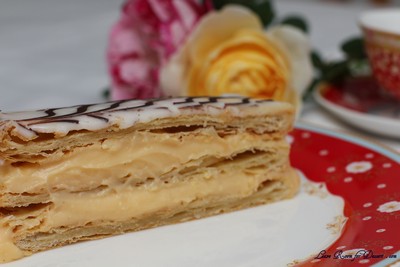
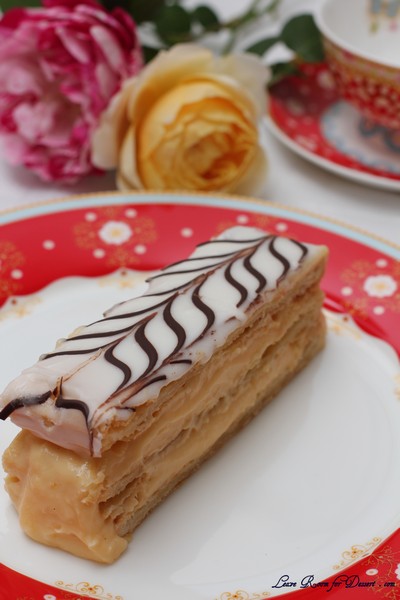
Anyone would have thought it was my Mum’s birthday – as I arrive with a large vanilla slice and a couple of roses in hand. It just so happens that my Mum has always wanted a vanilla slice made for her, as she will often buy them from bakeries. Although it was someone’s birthday, they certainly hadn’t asked for vanilla slice – and we didn’t need it after a large lunch of chicken schnitzel followed by cake. It did however almost all get eaten on the day I assembled it.

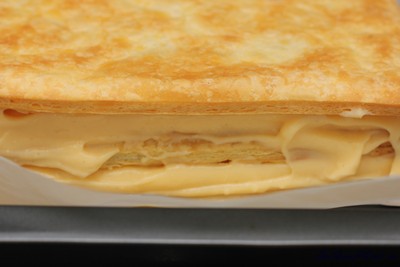
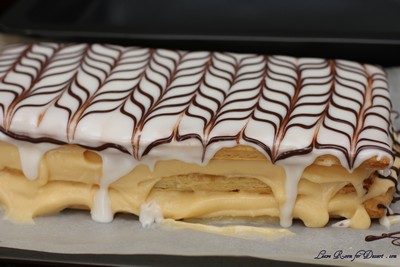
We have made puff pastry before in previous Daring Bakers Challenges, and I actually really enjoy making it. Finding time to make it is a little more difficult. I also had lots of fun making the decoration on top. The puff pastry and vanilla custard were both easy to make, the only difficulty I had with this challenge was cutting and presenting it nicely. I found the custard flowed out the sides quite a bit, so even neatening the pastry was difficult.

This certainly didn’t stop anyone from enjoying it though, and I even have a request to make it for my Mum’s birthday. The next time I make it I will probably try another custard recipe, to find one that will hopefully hold its shape whilst cutting.

If you don’t wish to make the icing with egg white, you are able to make it with some teaspoons or tablespoons of hot water instead.

Thanks to our host for providing an extremely yummy challenge this month 🙂

Pâte feuilletée /Puff Pastry

Servings: Makes 8-10 mille-feuille (yields: 675g pastry)

Ingredients
1¾ cup (250g) plain/all-purpose flour
Scant ¼ cup (55 ml) (1¾ oz)(50g) unsalted butter, chilled and cubed
1 teaspoon (5ml) (6 gm) salt
½ cup plus 2 tablespoons (5/8 cup)(150 ml) cold water

14 tablespoons (210 ml) (7 oz) (200g) butter (for the beurrage), room temperature
3½ tablespoons (55ml) (30g) plain flour (for the beurrage)

Additional flour for rolling/turning

Directions:

1. Cut the larger quantity of butter into smallish pieces and set aside at room temperature.
2. Put the larger quantity of flour into a bowl with the salt and the cold, cubed butter.
3. Lightly rub the butter and flour between your fingertips until it forms a mealy breadcrumb texture.

4. Add the cold water and bring together with a fork or spoon until the mixture starts to cohere and come away from the sides of the bowl.
5. As the dough begins to come together, you can use your hands to start kneading and incorporating all the remaining loose bits. If the dough’s a little dry, you can add a touch more water.
6. Knead for three minutes on a floured surface until the dough is smooth.
7. Wrap in clingfilm and refrigerate for at least 30 minutes.

8. While the dough is chilling, take your room temperature butter and mix with the smaller amount of plain flour until it forms a paste.
9. Place the butter paste between two sheets of clingfilm, and either with a rolling pin or your hands (I found hands easiest) shape it into a 4.5”/12cm square. You can use a ruler (or similar) to neaten the edges.

10. Refrigerate for about 10-15 minutes so the butter firms up slightly. If it’s still soft, leave it a bit longer. If it’s too hard and inflexible, leave it out to soften a touch. You want it to be solid but still malleable.
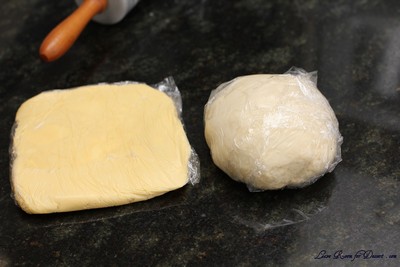
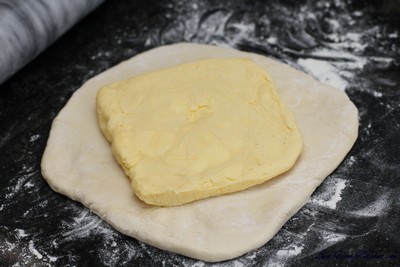
11. Once the dough has chilled, roll it out on a floured surface into a 6”/15cm square. Place the square of butter in the middle, with each corner touching the centre of the square’s sides (see photo below).


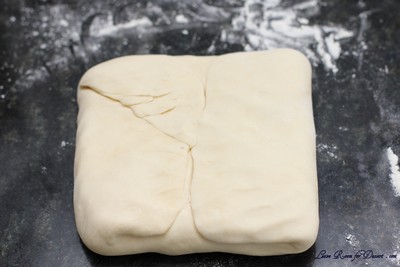
12. Fold each corner of dough over the butter so they meet the centre (you might have to stretch them a little) and it resembles an envelope, and seal up the edges with your fingers. You’ll be left with a little square parcel.

13. Turn the dough parcel over and tap the length of it with your rolling pan to flatten it slightly.
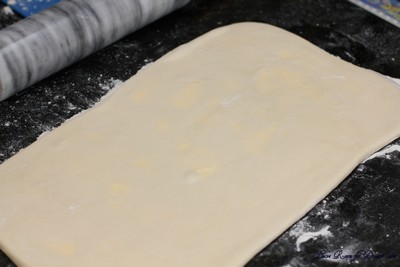
14. Keeping the work surface well floured, roll the dough carefully into a rectangle ¼ inch /6 mm in thickness.
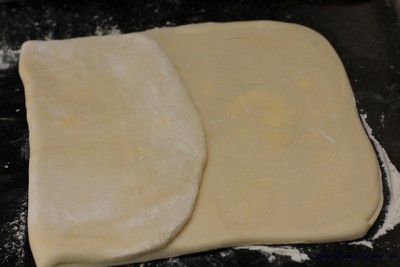
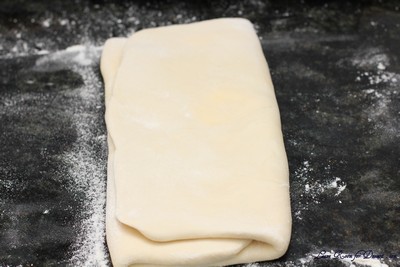
15. With the longest side facing you, fold one third (on the right) inwards, so it’s covering the middle section, and ensure that it is lined up (see below).


16. Then, fold the remaining flap of dough (on the left) inwards, so you’re left with a narrow three-layered strip (see below).

17. Repeat steps 14, 15, 16.
18. Wrap up in clingfilm and chill for at least 30 minutes.
19. Repeat steps 14, 15, 16 twice.
20. Wrap up in clingfilm and chill again for at least 30 minutes.
21. Repeat steps 14, 15, 16 two final times.
22. Wrap up in clingfilm and refrigerate until needed. The dough keeps a couple of days in the fridge.

Pastry Cream / Crème Pâtissière:

(full batch; makes enough for 8-10 mille-feuille)

Ingredients

2 cups (450ml) whole milk
¼ cup (1¼ oz)(35 gm) cornflour/cornstarch
1 cup less 1 tablespoon (200gm) (7 oz) caster sugar
4 large egg yolks (if you’re making the royal icing, reserve two egg whites)
2 large eggs
¼ cup (2 oz) (60gm) unsalted butter, cubed
2 teaspoons (10 ml) vanilla essence

Directions:

1. Mix the cornflour/cornstarch with ½ cup of milk and stir until dissolved.

2. Heat the remaining milk in a saucepan with the sugar, dissolving the sugar and bringing the milk to the boil. Remove from heat.
3. Beat the whole eggs into the cornflour/milk mixture. Then beat in the egg yolks. Pour in 1/3 of the hot milk, stirring constantly to prevent the eggs from cooking.

4. Now, bring the remaining milk back to the boil, and add the eggy mixture, whisking as your pour. Keep whisking (don’t stop or it’ll solidify) on a medium heat until the mixture starts to thicken.

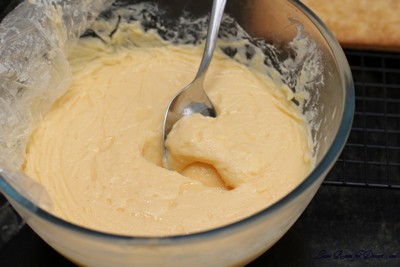
5. Remove the saucepan from the heat and thoroughly whisk the pastry cream. At this stage the pastry cream can look slightly lumpy, but a good whisking soon makes it smoother.
(N.B. If you’re worried about the pastry cream continuing to cook off the heat, you can transfer it to a stainless steel/ceramic bowl.)
6. Beat in the butter and vanilla until fully incorporated.
7. If you haven’t already, pour the pastry cream into a stainless steel or ceramic bowl, and then place clingfilm over the surface to stop a skin forming.
8. Refrigerate overnight to give the pastry cream time to further thicken.

Mille-Feuille/ Napoleon/ Custard Slice

Servings: Makes 8- 10

Ingredients
1 x batch pâte feuilletée/puff pastry (see above)
1 x batch crème pâtissière/pastry cream (see above)

2 ¾ cups (660 ml) (12⅓oz) (350gm) icing sugar
2 teaspoons (10 ml) lemon juice
2 large egg whites
½ cup (2¾ oz) (80gm) dark chocolate

Directions:

1. Preheat oven to moderately hot 200 °C /400°F/gas mark 6.
2. Lightly dust your work space with flour and remove your dough from the fridge.
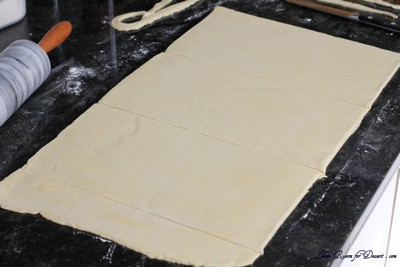
3. Roll into a large rectangle, the thickness of cardboard. The recipe I followed specified no other dimensions, but I rolled mine to about 12”/30cm x 18”/46cm.

(I found it easiest to start the rolling on the work surface, and finish it off on a large piece of greaseproof paper. That way it’s easier to move the sheets of pastry around.)

4. Cut into three equal pieces and place on a baking tray. If you don’t have space for all three, you can bake them separately.

(I baked mine in separate batches. See below.)

5. Prick the pastry sheets all over with a fork.
6. Place another sheet of greaseproof paper over the top and then a heavy baking tray. This will prevent the layers from puffing up too much.

(N.B. I found my baking trays weren’t heavy enough, so also used a pyrex dish to add more weight. Just ensure that the pastry sheets are evenly weighted down.)

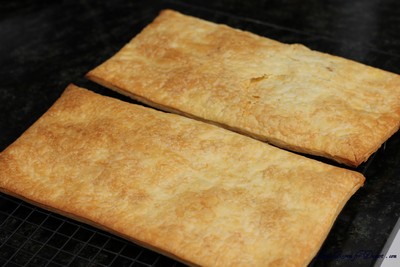
7. Bake each sheet for about 25 minutes in a moderately hot oven 200 °C /400°F/gas mark 6, removing the top layer of greaseproof paper/tray 10 minutes before the end for the tops to brown. Keep an eye on them and lower the temperature if you think they’re browning too much.
8. Remove the baked sheets from the oven and leave on a wire rack to cool.

9. Once the pastry has cooled, you’re ready to assemble your mille-feuille. Get a sturdy flat board, your pastry and the chilled crème pâtissière from the fridge.
10. Lay one sheet on the board and spread half the crème patisserie evenly over the top.
11. Take the second sheet and place it on top, pressing down lightly with your hands to ensure that it sticks to the filling.
12. Spread the remaining crème pâtissière and place the last sheet of pastry on top, pressing down again. (Don’t worry if there’s some oozing at the sides. That can be neatened later.)

13. Pop in the fridge while you prepare the icing / chocolate.
14. Melt the chocolate in a bain marie, stirring periodically. Once melted, transfer to a piping bag (or plastic bag with end snipped), resting nozzle side down in a glass or other tall container.

15. To make the icing, whisk 2 egg whites with 2 teaspoons lemon juice until lightly frothy.
16. Whisk in about (2 cups) 300gm of the icing sugar on a low setting until smooth and combined. The mixture should be thick enough to leave trails on the surface. If it’s too thin, whisk in a bit more icing sugar.

17. Once ready, immediately pour over the top of the mille-feuille and spread evenly. I found that I didn’t quite need all of the icing.
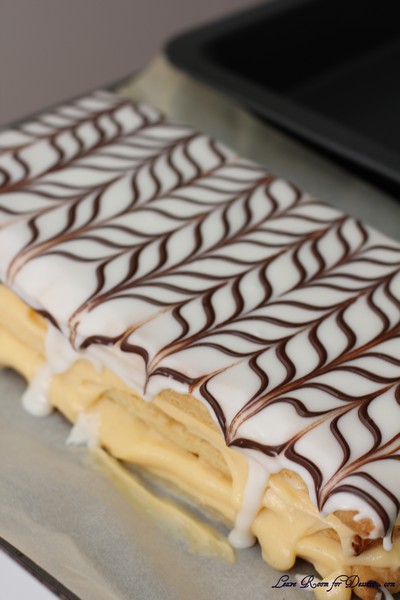
18. Still working quickly, pipe a row of thin chocolate lines along the widest length of your pastry sheet (see below). You can make them as far apart/close together as you like.

(Again, don’t worry if it looks messy. It can be neatened later on.)

19. STILL working quickly (phew), take a sharp knife and lightly draw it down (from top to bottom) through the rows of chocolate. A centimeter (½ inch) or so further across, draw the knife up the way this time, from bottom to top. Move along, draw it down again. Then up. And so on, moving along the rows of chocolate until the top is covered in a pretty swirly pattern.

20. Once you’ve decorated your mille-feuille (no doubt far more beautifully than I did), with a clean knife mark out where you’re going to cut your slices, depending on how big you want them to be and leaving space to trim the edges. I got ten out of mine – two rows of five.


21. Chill for a couple of hours to give the icing (etc.) time to set.
22. With a sharp knife, trim the edges and cut your slices.
23. Dig in!

Storage & Freezing Instructions/Tips:
The puff pastry dough will keep in the fridge for up to two days. Any leftovers can be well wrapped up & frozen for a year. Thaw for 30 minutes on the counter or overnight in the fridge.

The completed mille-feuille can be made a day or two in advance; it will last 2 or 3 days in an airtight container in the fridge, though will become less crisp.

Filled Pate a Choux Swans – Daring Bakers Challenge August 2012

Monday, August 27th, 2012

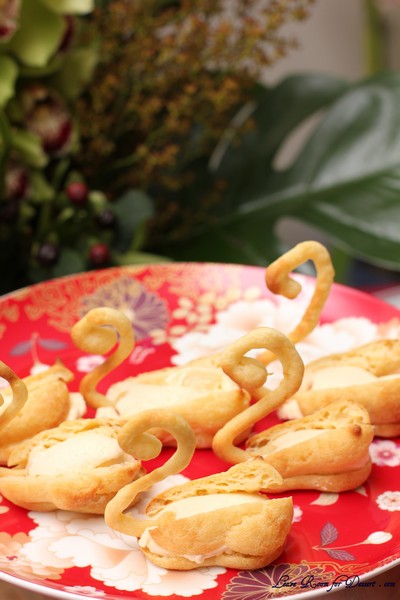
Kat of The Bobwhites was our August 2012 Daring Baker hostess who inspired us to have fun in creating pate a choux shapes, filled with crème patisserie or Chantilly cream. We were encouraged to create swans or any shape we wanted and to go crazy with filling flavors allowing our creativity to go wild!

I have made a tower of profiteroles before, but never a Swan (or other animal). One of the things I love about the croquembouche is the toffee and custard combination, and I think these swans would have looked lovely with toffee on their wings (but I didn’t have time to try it).

When I started this challenge, last night, I didn’t have many people to share the dessert with, so decided to halve the recipe for the choux pastry, as I find they don’t last very well overnight – and this recipe didn’t have any toffee (like the croquembouche), which helps disguise day old choux pastry. I found this recipe did not turn out how it should. The flour added to the butter/water mix didn’t form a solid enough dough. I am not sure if this is due to the amount of water or that it wasn’t boiling (the butter was just melted). This in turn made the final choux pastry quite liquidy. I placed it back on low/medium heat and whisked vigorously, it eventually became solid enough to pipe – although didn’t cook as nicely as it should.

I made the full amount of the vanilla creme, as I always love custards, although this is much lighter and creamier than the normal custard I would make, so after filling the few swans I made, I placed the vanilla creme in the freezer to see how it goes 🙂

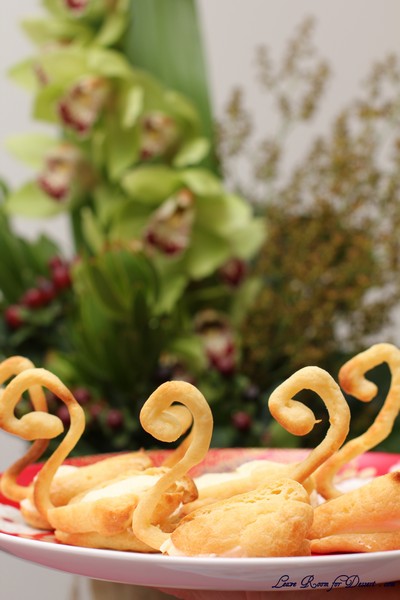
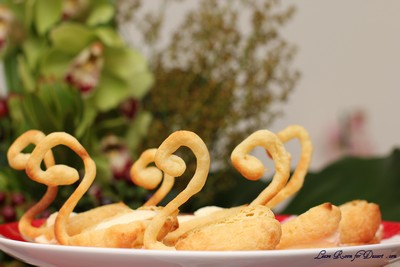
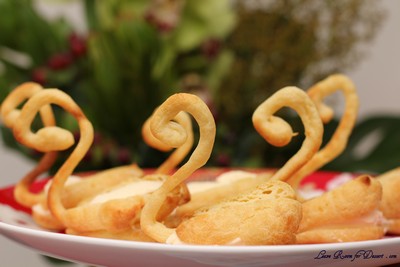
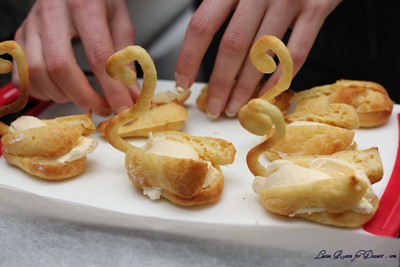
I was surprised at how the swans turned out, when I had made the different sections I thought it would look nothing like a swan, but I was happy with the look and taste (and short time required by) the challenge.

Recipe Source: Good Housekeeping Illustrated Guide to Cooking, 1980 edition.

Vanilla Creme

1 tablespoon (15 ml) (7 gm) (1/4 oz) (1 envelope) unflavored gelatin
½ cup (120 ml) (115 gm) (4 oz) sugar
2 tablespoons (30 ml) (18 gm) (2/3 oz) all-purpose (plain) flour
4 large egg yolks, well beaten
1 cup (240 ml) milk
1 teaspoon (5 ml) vanilla extract
1 cup (240 ml) heavy (whipping) cream (about 35% butterfat)

In a medium saucepan combine gelatin, flour, and sugar. Mix very well.
Add milk and egg yolks and turn heat to medium-low. Stir almost constantly until mixture is thick enough to cover the back of your spatula or spoon. This should take about 10 minutes.
Once thick, immediately dump into a bowl, straining the mixture if you are concerned about lumps of cooked egg.
Add the vanilla, and mix in well.
Cover the surface to prevent a skin from forming, and chill for about 45 minutes. You do not want the mixture to set, just to continue thickening.
Now is a good time to begin your choux paste.
In a large bowl, beat cream until light peaks form. Carefully fold the vanilla mixture into the whipped cream until the mixture is well-blended and fairly smooth.
Refrigerate mixture if not using immediately.

Pate a choux

(cannot be doubled)

½ cup (120 ml) (115 gm) (4 oz) butter
1 cup (240 ml) water
¼ teaspoon (1½ gm) salt
1 cup (240 ml) (140 gm) (5 oz) all-purpose flour
4 large eggs

Line at least two baking sheets with silicone mats or parchment paper, or grease pans well.
Preheat oven to moderately hot 375°F/190°C/gas mark 5 .
In a small saucepot, combine butter, water, and salt. Heat over until butter melts, then remove from stove.
Add flour all at once and beat, beat, beat the mixture until the dough pulls away from the sides of the pot.
Add one egg, and beat until well combined. Add remaining eggs individually, beating vigorously after each addition. Resulting mixture should be somewhat glossy, very smooth, and somewhat thick.
Using a ¼” (6 mm) tip on a pastry bag, pipe out about 36 swan heads. You’re aiming for something between a numeral 2 and a question mark, with a little beak if you’re skilled and/or lucky.
Remove the tip from the bag and pipe out 36 swan bodies. These will be about 1.5” (40 mm) long, and about 1” (25 mm) wide. One end should be a bit narrower than the other.
Bake the heads and bodies until golden and puffy. The heads will be done a few minutes before the bodies, so keep a close eye on the baking process.
Remove the pastries to a cooling rack, and let cool completely before filling.

Assembly

Take a swan body and use a very sharp knife to cut off the top 1/3rd to ½.
Cut the removed top down the center to make two wings.
Dollop a bit of filling into the body, insert head, and then add wings.


Your first attempt will probably not look like much, but the more you make, the more your bevy of swans will become a beautiful work of swan art.

Gaytime goes nuts

Sunday, July 29th, 2012

The wonderfully talented Christine Manfield featured on the season finale of MasterChef this year. I haven’t watched much MasterChef this year, but I always have to watch for the dessert in the finale. It never ceases to amaze and I always want to make it.

I watched the contestants eating the dessert with envy, and couldn’t stop saying – I want that dessert. Straight after the finale, I went searching the internet for the recipe, hoping it was featured in a book or magazine. Luckily it was featured on the MasterChef website the next day, and I set to task planning, buying and cooking.
It took me a lot longer to make everything, as I had to cool the ice cream base for most of a day/ overnight before churning. I also had a lot of dishes to wash between making everything. Overall it probably took 1 1/2 – 2 days.

It certainly gives you an even greater appreciation for the beautiful desserts made at top end restaurants, and I am feeling excited at the thought of the next hatted restaurant I go to (I have yet to decide where to go). I can’t wait to go to Universal too. I have wanted to go there for dinner for at least a year or two. Maybe I’ll go there.

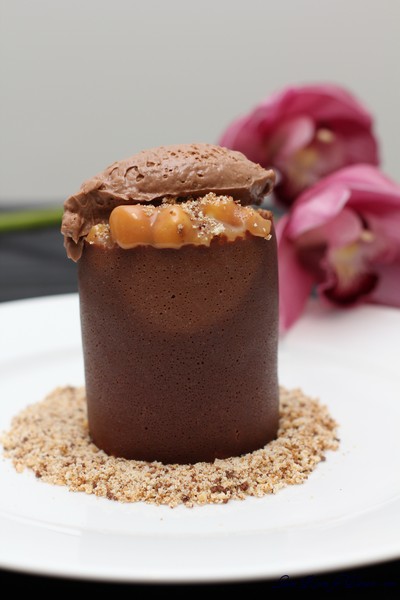
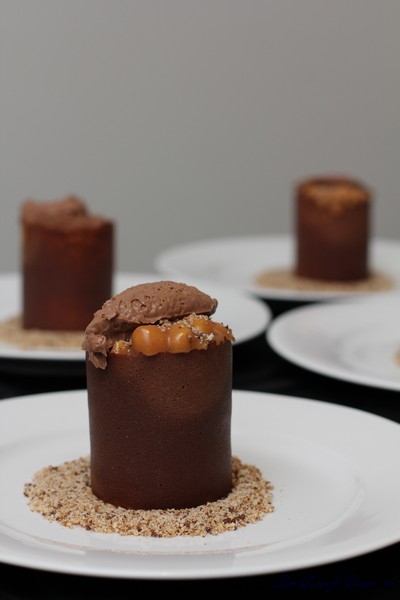
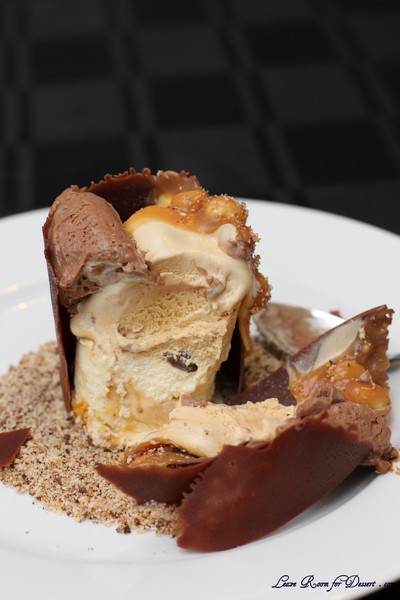
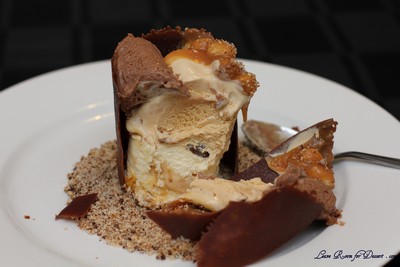
When it comes to this dessert, all I can say is it is wonderful (and quite rich). The components worked beautifully together and it looks gorgeous.
My notes on the recipe:
It makes a lot more than 4 serves. (Maybe 10-16?)

I needed to use my 2 ice cream makers twice! The honeycomb ice cream made around 2L of liquid before churning, and the caramel ice cream made a bit over 1L before churning. If you don’t have two ice cream makers, you may prefer to halve the honeycomb recipe, or be ready to mix the ice cream every hour or so in the freezer.

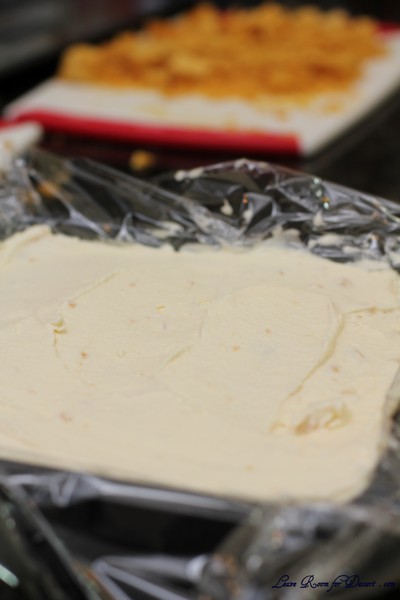
For the ice cream, I filled a 19cm square tin (approx 3-4cm height) for each ice cream. I could not have put the ice cream in half a tin as I think it wouldn’t have held its shape. Even with filling up the two tins, I had ice cream left over.

I made my own fondant icing using this recipe

I could not find wafer balls and had to use maltesers and honeycomb balls instead.

I did not have access to the 250g Valrhona gianduja hazelnut chocolate, so used 50g nutella + 100g milk chocolate + 100g dark chocolate. (I am sure the Valrhona gianduja hazelnut chocolate would have tasted amazing). The mousse ended up being quite chocolatey and not very hazelnut-y.

I also didn’t have Valrhona Caramelia chocolate, so used some Calebaut chocolate and milk cooking chocolate.

I am not sure of the strength of the gelatine leaves I had, so I used 1 1/2 leaves which weighed 6g.

I don’t have a thermomix, so made the anglaise the same way I made the ice cream base. (heat the cream, beat the egg yolks with the sugar, add the hot cream, pour this into the saucepan and heat until 80-84C.)

I cooked the ice cream bases in the saucepans rather than a bowl over water, as this is how I normally make ice cream.

Be careful with the caramel ice cream (I am not sure whether adding some of the ice cream base to the caramel would be a better idea, than adding the caramel to the ice cream base.) When I made it the way it said here, the caramel splattered out of the pot and a little bit landed on my arm. Be careful of your eyes and keep children away from hot caramel as it can cause nasty burns.

I made my own template out of paper – it was a bit flimsy though, cardboard might have been better.

I needed to sieve quite a lot of the chocolate caramel over the template, and place it in the oven for a while (1-2min) for it to completely melt.

Hopefully these tips will help anyone attempting to make this dessert at home.

Please enjoy the dessert if you make it, or if you go to Universal!

Gaytime goes nuts

Recipe by: Christine Manfield
Serves: 4 (I think it serves at least 10 people)
Recipe found on MasterChef website

Honeycomb
360g caster sugar
120g glucose
60ml water
15g bicarbonate of soda

Honeycomb ice cream
700ml pure cream
750ml milk
8 egg yolks
300g caster sugar
250g chopped honeycomb

Caramel ice cream

300g caster sugar
75ml water
750ml pure cream
375ml milk
9 egg yolks
90g caster sugar

Base anglaise
50g egg yolks
25g caster sugar
125ml pure cream
125ml milk

Hazelnut chocolate mousse

150g base anglaise
2 leaves gold-leaf gelatine, softened in cold water
250g Valrhona gianduja hazelnut chocolate, chopped
200ml pure cream, whipped to soft peaks

Hazelnut caramel
200ml pure cream
75g glucose
½ vanilla bean, split
100g caster sugar
25g unsalted butter, chopped
1½ cups hazelnuts, roasted and peeled, coarsely chopped
Vanilla salt, to taste

Chocolate collar wafers
240g liquid/pouring fondant sugar
160g glucose
160g Valrhona Caramelia chocolate, chopped

Gaytime Dust
50g chocolate ripple biscuits
150g sponge fingers (savoiardi)
30g hard nougat
20g honeycomb

chocolate wafer balls to serve

1. For honeycomb, line a deep large baking tray with baking paper.

2. Place sugar, glucose and water in large saucepan and cook, stirring occasionally over medium heat until sugar dissolves.

3. Bring to the boil, without stirring, then cook until mixture just begins to change colour. Agitate the pan to circulate the colour. You want a very pale yellow colour (as when the bi-carb is added the honeycomb will cook quickly and burn).

4. Remove the pan from the heat, add bi-carb and whisk quickly. Pour into prepared tray and leave to cool.

5. Break into large chunks and store in airtight container until required.

6. For honeycomb ice cream, place cream and milk in a saucepan and bring to a gentle boil.

7. Whisk yolks and sugar in a metal bowl until thicken and pale, gradually pour in hot cream and whisk constantly to combine.

8. Place the bowl over a saucepan of simmering water, ensuring water doesn’t touch the base of the bowl. Cook the custard, stirring with a wooden spoon until mixture coats the back of the spoon.

9. Cool over a bowl of iced water or in a shallow tray in the blast chiller until cold.

10. Pour into a pacojet cannister. N.B. Make sure it is not filled above the safety line. You need to allow room for the ice cream to expand. Place cannister in blast freezer until set solid in the centre, about 1 hour 30 minutes or overnight in a freezer. Churn in pacojet. N.B. Make sure you press the release button before removing from machine or you will damage the machine. If you don’t have a pacojet, churn in an ice-cream machine following manufacturer instructions.

11. Line a 16x25cm base-measurement 3cm-deep slice tin with cling wrap or baking paper. Fold honeycomb through churned ice cream. Spread ice cream into one half of the tin. Make sure you have enough for 4 x 4.5cm disks. The caramel ice cream will fill the other half.

12. Place in blast freezer until firm. When firm, use a round cookie cutter to cut out 4.5cm discs, place on a tray and blast freeze discs until firm.
13. For caramel ice cream, place sugar and water in a saucepan over a medium heat and bring to the boil, agitating occasionally to ensure sugar is dissolved before mixture reaches the boil. Continue to boil until mixture reaches a deep caramel colour.

14. Meanwhile, place cream and milk in a saucepan and bring to a gentle boil.

15. Whisk yolks and sugar in a metal bowl until thicken and pale, gradually pour in hot cream and whisk constantly to combine.

16. Place the bowl over a saucepan of simmering water, ensuring water doesn’t touch the base of the bowl. Cook the custard, stirring with a wooden spoon until mixture coats the back of the spoon.

17. Pour in hot caramel and whisk until smooth and combined. Cool over a bowl of iced water or in a shallow tray in the blast chiller or freezer until cold.

18. Pour into a pacojet cannister. N.B. Make sure it is not filled above the safety line. You need to allow room for the ice cream to expand. Place cannister in blast freezer until set solid in the centre, about 1 hour 30 minutes or overnight in a freezer. Churn in pacojet. N.B. Make sure you press the release button before removing from machine or you will damage the machine. If you don’t have a pacojet churn in an ice-cream machine following manufacturer instructions.

19. Spread into the unfilled half of the 16 x 25cm base measurement 3cm-deep slice tin. Make sure you have enough for 4 x 4.5cm disks. When firm, use a round cookie cutter to cut out 4.5cm discs, place on a tray and blast freeze until firm.

20. For anglaise, to operate thermomix, press time first, then temperature, then speed. Place egg yolks and sugar in thermo jug, set 20 seconds, then speed 7.

21. Add cream and milk, and set for 7.5 minutes, then 80°C button and then speed 4. Light will stop flashing once anglaise comes up to temperature.

22. For hazelnut chocolate mousse, pour 80°C base anglaise into a large metal bowl, add softened gelatine, stirring to dissolve the gelatine, then cool over ice to 45°C.

23. While anglaise is cooling, place chocolate in a metal bowl over water bath and heat to 45°C.

24. Fold melted chocolate through anglaise until combined. Cool completely over a bowl of iced water, fold in whipped cream.

25. Divide into 2 plastic rectangle containers and refrigerate until firm. Do not blast freeze as it weakens the gelatine structure.

26. For hazelnut caramel, place cream, glucose and vanilla bean in a saucepan over a medium heat until simmering.

27. Make a dry caramel by melting sugar in a deep frying pan over a medium heat. Bring to the boil, and continue to cook, agitating the pan occasionally until sugar reaches a caramel colour.

28. Pour in warmed cream mixture, stir to combine and cook for 5 minutes until caramel dissolves.

29. Add butter and stir to combine. Remove from heat and cool, stirring occasionally.

30. To serve, combine a few tablespoons of chopped nuts with a few tablespoons of caramel and season with vanilla salt to taste.
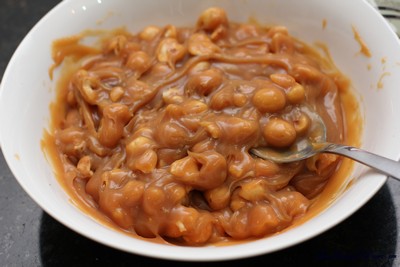
31. For chocolate collar wafers, preheat oven to 200°C. Place a silver oven tray upside down in oven and allow to become very hot.

32. Place fondant sugar and glucose in a saucepan and cook to 180°C. Add chocolate and mix until smooth, making a homogenous paste. Spread onto a silicone mat, roll to 5mm thick with a silicone rolling pin and leave to cool. Break set toffee into pieces and transfer to a bowl.

33. Take 1/3 of toffee and place in a mortar and pestle. Pound to rough 1cm pieces and transfer to a thermo mix or blender. Blitz to a fine powder. Tap jug on a bench to loosen and blitz for a further 10-15 seconds.

34. Spoon some of the powder into a fine sieve, place a rectangular 20 x 7.5cm stencil over a silicone mat on a flat baking tray that has one end open for easy transfer. Sieve mixture over stencil to 1-2mm thick. The powder should just be level with the thickness of the stencil.
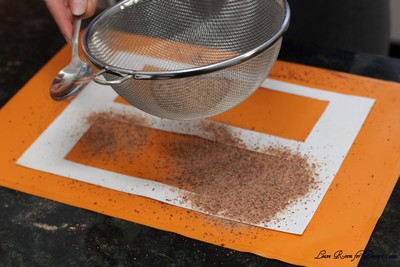
35. Place one finger at one end of the stencil to keep in place and gently lift the opposite end, ensuring not to indent the powder. Lift the stencil away completely.

36. Take the upside down oven tray from the oven and place upside down on a flat bench. Gently slide the powder-covered mat onto the tray and allow powder to melt completely, this will take 60-90 seconds. If the powder doesn’t melt together completely place in the oven for 15-30 seconds.

37. Run a small crank spatula over the wafer to check consistency. You want it to be set and cool enough to be pliable and easy to roll but not hot enough that it stretches easily.

38. Lift up one end by gently flicking it with the spatula, lay a 5.5cm base-diameter squeezy bottle over hot wafer and roll up around the bottle. Gently press the join to the hot mat to seal and gently ease off the bottle. Repeat until you have the desired amount of wafer cylinders.

39. For gaytime dust, blitz together to a fine crumb.

To assemble:

A bowl of gaytime dust
A tray of ice cream rounds, 4x honey comb and 4x caramel rounds
A small bowl or plate of chocolate wafer balls

Chocolate wafer collars
A small bowl of caramel
Chopped roasted hazelnuts
Vanilla salt
3 dessert spoons, for serving
A palette knife
A white cloth
A bowl of warm water, for quenelling

1. Place a spoonful of gaytime dust in the centre of a serving plate and flatten a central circle large enough to fit the chocolate collar wafer.

2. Take a round of honeycomb ice cream and place it in the centre. Dip the caramel ice cream in the chocolate wafer balls and place on top.

3. Gently ease the chocolate wafer collar over the ice cream to encase and fill with a little bit more ice cream if required to bring it to 1cm below the top of the collar.

4. Combine the hazelnuts and caramel and season to taste with vanilla salt. Spoon on to the ice cream to cover and bring to the top of the collar.
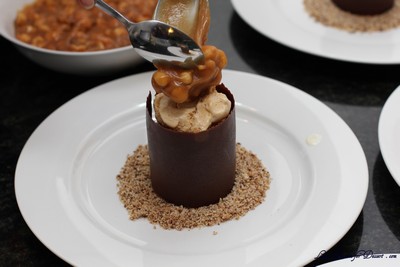
5. Place a spoonful of gay time dust over the caramel and top with a quenelle of mousse.

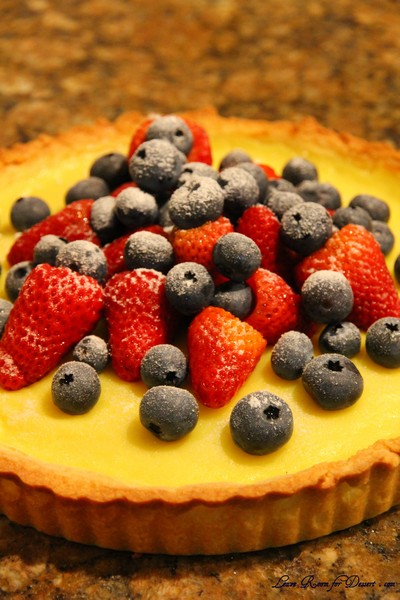
Pear and Custard Tart

Thursday, March 29th, 2012

Pears have come into season, and are ripening beautifully on the kitchen counter.

This tart is quite easy to make, with the custard being able to be prepared far in advance, and just cut the pear up soon before baking (to prevent browning of the pear).

The pear is not pre-cooked, so retains the fresh pear flavour, so make sure it is a nice ripe and firm pear you choose for your dessert.

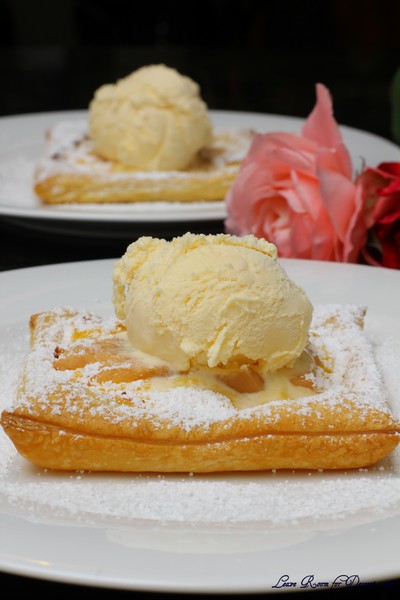
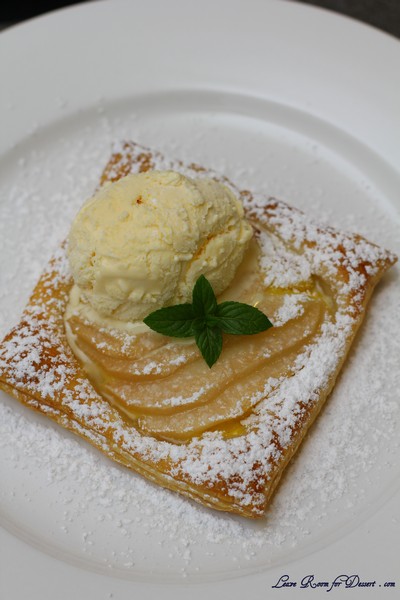
The dessert combines crispy pastry, creamy rich hot custard, fresh pear and cold ice cream. I hope you enjoy.

I have entered this into the “What can you pear with a pear” challenge run by the Australian Pear Industry. Although I may not have gone far out of the box (or out of the box at all), I am certainly happy with how this recipe turned out, and managed to make it three times this month. I hope you enjoy this recipe and the others that have been entered into the competition.

Pear and Custard Tart

Recipe by Anita @ Leave Room for Dessert

Serves: 4

1 sheet puff pastry, cut into 4 squares
1 ripe (and still firm) pear, peeled, cored, quartered and thinly sliced
1 cup milk
3 egg yolks
1/4 cup (50g) caster sugar
1 1/2 Tablespoons (~13g) cornflour
1/2 vanilla bean, seeds scraped (or 1 teaspoon vanilla essence)
Vanilla ice cream, home-made or store-bought
Icing sugar or icing sugar mixture, to serve

To prepare custard, heat milk and vanilla bean pod and seeds in a small saucepan over medium heat until warmed (if using vanilla essence, add at the very end of the custard recipe). Whisk together the egg yolks, sugar and cornflour in a small/medium bowl, until lightened in colour and thickened. Slowly pour in the warm milk while whisking the yolk mixture. Strain this mixture back into the saucepan, removing the vanilla pod. Heat over medium heat, whisking constantly until the custard has thickened. Remove from heat and pour into a bowl (add essence at this point if you are not using a vanilla bean). Place plastic cling film over the custard, touching the custard to prevent a skin forming. Refrigerate until required. (The custard can be made 1/2 hour, or even a few days, before using).

Preheat oven to 180C.

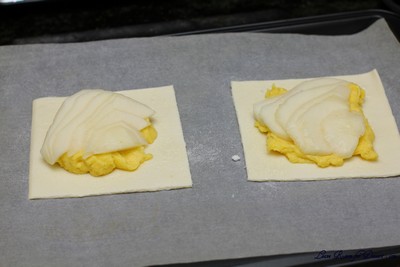
Place squares of puff pastry on one or two baking trays with baking paper. Place the custard in the middle of the pastry squares, leaving an edge of 2cm. Fan out the thinly cut pear slices over the custard.

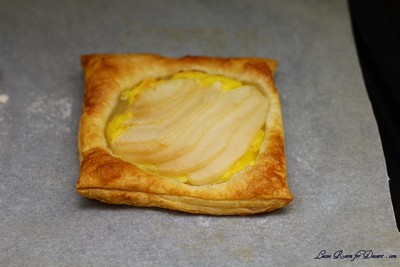
Bake for 20-25 minutes (checking after 10-15 minutes, and rotating if necessary). Remove from oven and allow to cool for 5 minutes, place on plate and dust with icing sugar and serve with a scoop of vanilla ice cream.

Strawberry Fraisier – Daring Bakers Challenge July 2011

Wednesday, July 27th, 2011


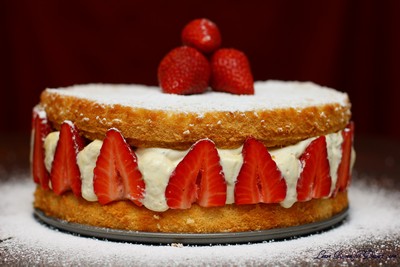
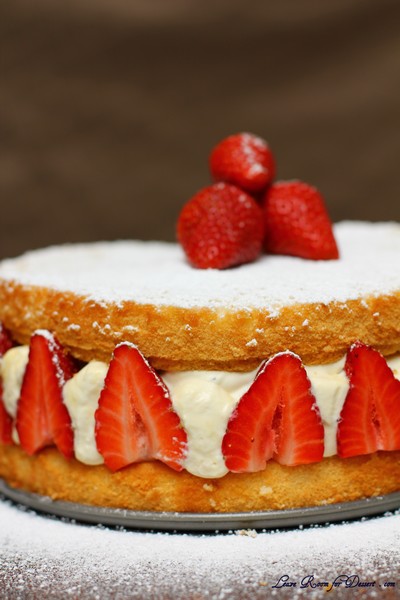
Jana of Cherry Tea Cakes was our July Daring Bakers’ host and she challenges us to make Fresh Frasiers inspired by recipes written by Elisabeth M. Prueitt and Chad Robertson in the beautiful cookbook Tartine.

I’m glad this challenge came this month and not the previous month, as we have just started getting beautiful strawberries back into the fruit stores.

The challenge was quite good, especially being able to make all three components after work, then assemble it the morning, for a lovely weekend dessert.

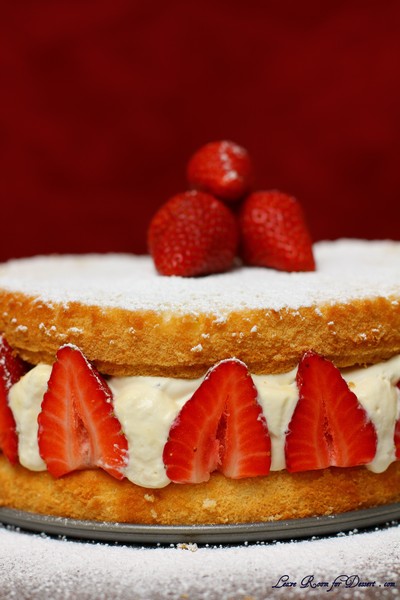
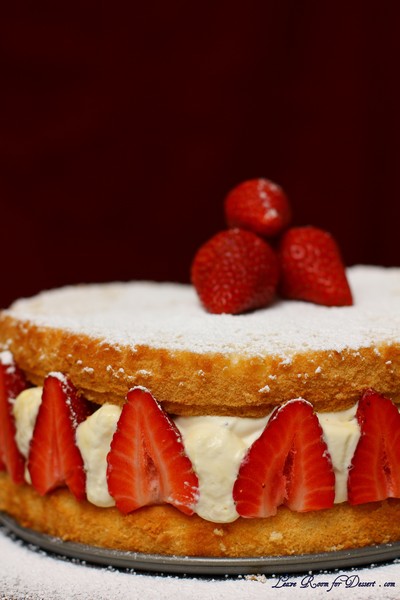
I had my fingers crossed that the fraisier would stay up by itself once the plastic wrap was removed, but unfortunately it collapsed quite a lot when the first cut was made. I’m not entirely sure where I went wrong, so I may have to do a bit more research.

I used a bigger tin than the one used in the recipe (22cm vs 20cm) and found the cake sunk a bit in the middle once it cooled.
I also needed at least double the pastry cream filling – although only figured this out once it was too late to make more – so I used whipped cream in the middle of the filling. (this extra may have been needed because I used a bigger tin, or very large strawberries.) I didn’t use the almond paste either, as I had none.

It was a beautiful dessert that everyone enjoyed and I would consider making again, although trialling out the filling, to make sure it stayed together more when serving.

Basic Chiffon Cake

1 cup + 2 tablespoons (270 ml) (5½ oz/155 gm) all-purpose flour
1 teaspoon (5 ml) (4 gm) baking powder
3/4 cups (180 ml) (6 oz /170 gm) sugar
1/2 teaspoon (2½ ml) (1½ gm) salt, preferably kosher
1/4 cup (2 fl oz/60 ml) vegetable oil
3 large egg yolks
⅓ cup + 1 tablespoon (3.17 fl oz/95 ml) water
1 teaspoon (5 ml) pure vanilla extract
3/4 teaspoon (3¾ ml) (3 gm) lemon zest, grated
5 large egg whites
¼ teaspoon (1¼ ml) (1 gm) cream of tartar

Directions:

Preheat the oven to moderate 325°F (160°C/gas mark 3).
Line the bottom of an 8-inch (20 cm) spring form pan with parchment paper. Do not grease the sides of the pan.
In a large mixing bowl, stir together the flour and baking powder. Add in all but 3 tablespoons (45 ml.) of sugar, and all of the salt. Stir to combine.
In a small bowl combine the oil, egg yolks, water, vanilla and lemon zest. Whisk thoroughly.
Combine with the dry ingredients and mix thoroughly for about one minute, or until very smooth.
Put the egg whites into a stand mixer, and beat on medium speed using a whisk attachment on a medium speed, until frothy. Add cream of tartar and beat on a medium speed until the whites hold soft peaks. Slowly add the remaining sugar and beat on a medium-high speed until the whites hold firm and form shiny peaks.
Using a grease free rubber spatula, scoop about ⅓ of the whites into the yolk mixture and fold in gently. Gently fold in the remaining whites just until combined.
Pour the batter into the prepared pan. Bake for 45 to 55 minutes or until toothpick inserted into the center comes out clean.
Removed the cake from the oven and allow to cool in the pan on a wire rack.
To unmold, run a knife around the sides to loosen the cake from the pan and remove the spring form sides. Invert the cake and peel off the parchment paper. Refrigerate for up to four days.

Pastry Cream Filling

1 cup (8 fl oz/250 ml) whole milk
1/2 teaspoon (2½ ml) pure vanilla extract
1/8 teaspoon (1/2 ml) (¼ gm) salt, preferably kosher
2 tablespoons (30 ml) (10 gm)cornstarch
1/4 cup (60 ml) (2 oz/55 gm) sugar
1 large egg (I used 2 egg yolks – as there were extra from the cake)
2 tablespoons (30 ml) (1 oz/30 gm) unsalted butter
3/4 teaspoon (3¾ ml) (4 gm) gelatin
1/2 tablespoon (7½ ml) water
1 cup (8 fl oz/250 ml) heavy cream

Directions:

Pour the milk, vanilla, and salt into a heavy sauce pan. Place over medium-high heat and scald, bringing it to a near boiling point. Stir occasionally.
Meanwhile, in a stand mixer add the cornstarch and sugar. Whisk to combine
Add the eggs to the sugar and cornstarch and whisk until smooth.
When the milk is ready, gently and slowly while the stand mixer is whisking, pour the heated milk down the side of the bowl into the egg mixture.
Pour the mixture back into the warm pot and continue to cook over a medium heat until the custard is thick, just about to boil and coats the back of a spoon.
Remove from heat and pass through a fine mesh sieve into a large mixing bowl. Allow to cool for ten minutes stirring occasionally.
Cut the butter into four pieces and whisk into the pastry cream a piece at a time until smooth.
Cover the cream with plastic wrap, pressing the plastic wrap onto the top of the cream to prevent a skin from forming. Chill in the refrigerator for up to five days.
In a small dish, sprinkle the gelatin over the water and let stand for a few minutes to soften.
Put two inches (55 mm) of water into a small sauce pan and bring to a simmer over a medium heat.
Measure 1/4 cup (2 oz/60 ml) of the chilled pastry cream into a small stainless steel bowl that will sit across the sauce pan with the simmering water, without touching the water.
Heat the cream until it is 120 F (48.8 C). Add the gelatin and whisk until smooth. Remove from the water bath, and whisk the remaining cold pastry cream in to incorporate in two batches.
In a stand mixer, fitted with the whisk attachment, whip the cream until it holds medium-stiff peaks. Immediately fold the whipped cream into the pastry cream with a rubber spatula.

Simple Syrup

1/3 cup (2⅔ fl oz/80 ml) (2⅔ oz/75 gm) of sugar, flavored or white
1/3 cup (2⅔ fl oz/80 ml) of water
+ 1 teaspoon vanilla essence

Directions:

Combine the water and sugar in a medium saucepan.
Bring the mixture to a boil and let the sugar dissolve. Stirring is not necessary, but will not harm the syrup.
Remove the syrup from the heat and cool slightly.
Transfer syrup to a lidded container or jar that can be stored in the refrigerator. Simple syrup can be stored for up to one month.

Fraisier Assembly

Components:
1 baked 8 inch (20 cm) chiffon cake
1 recipe pastry cream filling
⅓ cup (80 ml) simple syrup or flavored syrup
2 lbs (900 g) strawberries
confectioners’ sugar for dusting
½ cup (120 ml) (5 oz/140 gm) almond paste

Directions:

Line the sides of a 8-inch (20 cm) spring form pan with plastic wrap. Do not line the bottom of the pan.
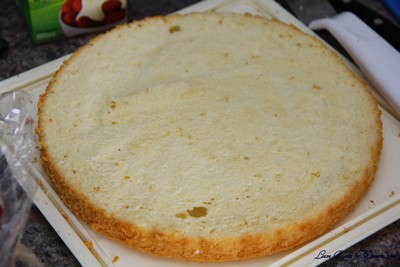
Cut the cake in half horizontally to form two layers.


Fit the bottom layer into the prepared spring form pan. Moisten the layer evenly with the simple syrup. When the cake has absorbed enough syrup to resemble a squishy sponge, you have enough.
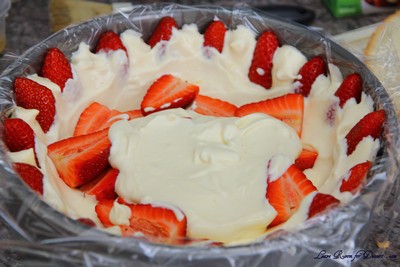
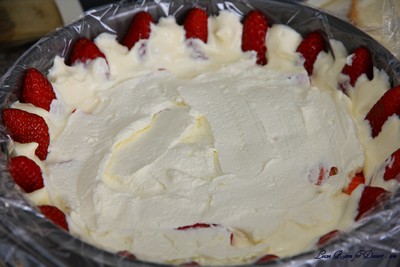
Hull and slice in half enough strawberries to arrange around the sides of the cake pan. Place the cut side of the strawberry against the sides of the pan, point side up forming a ring.
Pipe cream in-between strawberries and a thin layer across the top of the cake.
Hull and quarter your remaining strawberries and place them in the middle of the cake. Cover the strawberries and entirely with the all but 1 tbsp. (15 ml) of the pastry cream.


Place the second cake layer on top and moisten with the simple syrup.
Lightly dust a work surface with confectioners’ sugar and roll out the almond paste to a 10-inch (25 cm) round 1/16 inch (1.5 mm) thick. Spread the remaining 1 tablespoon (15 ml) of pastry cream on the top of the cake and cover with the round of almond paste.
Cover with plastic wrap and refrigerate for at least 4 hours.
To serve release the sides of the spring form pan and peel away the plastic wrap.
Serve immediately or store in the refrigerator for up to 3 days.

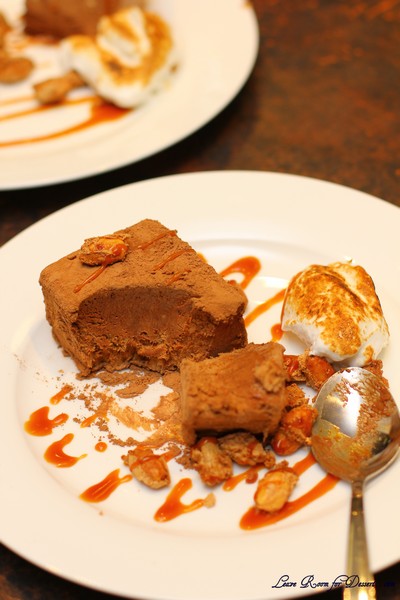
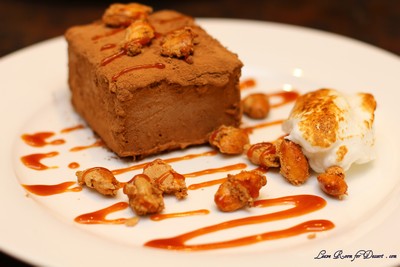
Marquise on Meringue – Daring Bakers Challenge May 2011

Friday, May 27th, 2011

The May 2011 Daring Bakers’ challenge was hosted by Emma of CookCraftGrow and Jenny of Purple House Dirt. They chose to challenge everyone to make a Chocolate Marquise. The inspiration for this recipe comes from a dessert they prepared at a restaurant in Seattle.

This challenge looked very time consuming at first, which is the main reason I put off making it until the last weekend. I was able to make the chocolate marquise the night before, then quickly make all three other components in 30 minutes (all the while making a huge mess in the kitchen).

I thought I had a little trouble with the spiced nuts, although this was the component of the dessert that people liked most and commented on. (I had made the meringue and mixed in the nuts, poured and spread it on a lined tray, then halfway through thought the nuts wouldn’t crisp up, so I took to the meringue with a spoon to expose the almonds so they would brown) – sorry no pics – I couldn’t take photos as I needed one clean hand to feel the sugar dissolving for the torched meringue (check out the recipe below)… 🙂

I still have some of the chocolate marquise in the freezer, and look forward to serving it (although in smaller portions, and probably with more spiced almonds).

It was certainly a well liked challenge by all. Thanks Emma and Jenny!

Chocolate Marquise

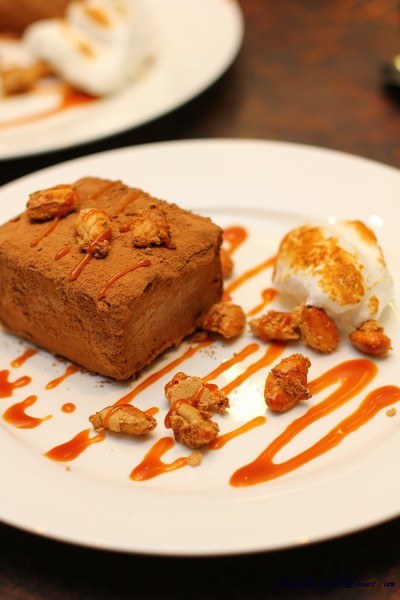
Plated marquise
Servings: 18 2.5″x2.5″ cubes (I would say ~24-36)

11 large egg yolks at room temperature
4 large whole eggs
2/3 cup (150 grams/ 5.3 oz) sugar
1/3 cup (2⅔ fluid oz/ 80 ml.) water
Chocolate Base, barely warm (recipe follows)
2 cups (16 fluid oz./ 500 ml.) heavy cream
2 cups Dutch process cocoa powder (for rolling) (Note: We used extra brut, like Hershey’s Special Dark. Make sure it’s a Dutch processed cocoa, not a natural cocoa powder.)
Torched meringue (recipe follows)
Spiced almonds (recipe follows)
Cacao nibs (optional)

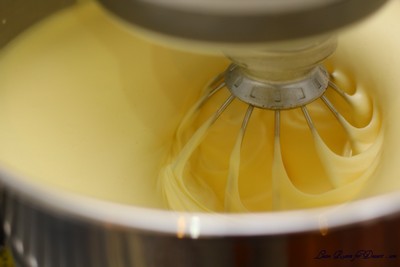
In the bowl of a stand mixer, combine the egg yolks and whole eggs. Whip on high speed until very thick and pale, about 10 – 15 minutes. (It probably only took 5 minutes in my KitchenAid)

When the eggs are getting close to finishing, make a sugar syrup by combining the sugar and water in a small saucepan. Bring the syrup to a boil and then cook to softball stage (235F/115C). If you have a cake tester with a metal loop for a handle, the right stage for the syrup is reached when you can blow a bubble through the loop (as seen in the following pictures).

With the mixer running on low speed, drizzle the sugar syrup into the fluffy eggs, trying to hit that magic spot between the mixing bowl and the whisk.

When all of the syrup has been added (do it fairly quickly), turn the mixer back on high and whip until the bowl is cool to the touch. This will take at least 10 minutes.

In a separate mixing bowl, whip the heavy cream to soft peaks. Set aside.
When the egg mixture has cooled, add the chocolate base to the egg mixture and whisk to combine. Try to get it as consistent as possible without losing all of the air you’ve whipped into the eggs. We used the stand mixer for this, and it took about 1 minute.

Fold 1/3 of the reserved whipped cream into the chocolate mixture to loosen it, and then fold in the remaining whipped cream.

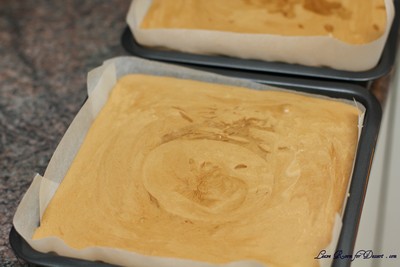
Pour into the prepared pans and cover with plastic wrap (directly touching the mixture so it doesn’t allow in any air).

Freeze until very firm, at least 2 – 4 hours (preferably 6 – 8 hours).
When you’re ready to plate, remove the marquise from the freezer at least 15 minutes before serving. While it’s still hard, remove it from the pan by pulling on the parchment ‘handles’ or by flipping it over onto another piece of parchment. Unmold the frozen marquise

Cut it into cubes and roll the cubes in cocoa powder. These will start to melt almost immediately, so don’t do this step until all of your other plating components (meringue, caramel, spiced nuts, cocoa nibs) are ready. The cubes need to sit in the fridge to slowly thaw so plating components can be done during that time. They don’t need to be ready before the cubes are rolled in the cocoa powder.

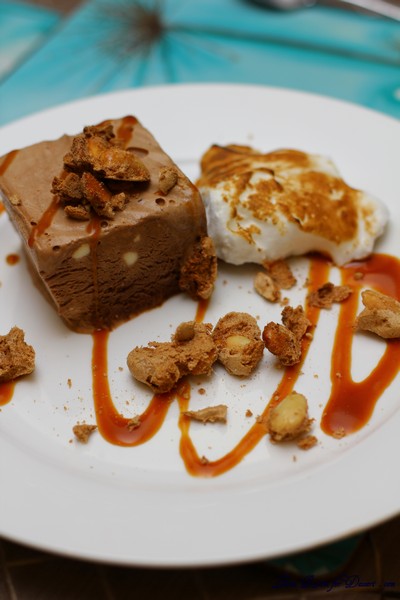
Plate with the torched meringue and drizzled caramel sauce, and toss spiced almonds and cocoa nibs around for garnish. You want to handle the cubes as little as possible because they get messy quickly and are difficult to move. However, you want to wait to serve them until they’ve softened completely. The soft pillows of chocolate are what make this dessert so unusual and when combined with the other elements, you’ll get creamy and crunchy textures with cool, spicy, salty, bitter, and sweet sensations on your palate.

Chocolate Base

Servings: n/a – this is an ingredient for the chocolate marquise, not meant to be used separately

12 oz (340 grams/ 1½ cups) bittersweet chocolate (about 70% cocoa)
12 oz (355 ml/ 1½ cups) heavy cream
1/2 teaspoon salt
1/4 teaspoon cayenne (I left this out and used 1/2 teaspoon cinnamon)
1/4 cup (60 ml/ 2 fluid oz.) tequila (I left this out)
1/4 cup (60 ml/ 2 fluid oz.) light corn syrup (I used glucose syrup)
3/4 teaspoon vanilla
1/4 cup (4 tablespoons/ less than an ounce) cocoa powder (we used extra brut, like Hershey’s Special Dark, but any Dutch-processed cocoa would be fine. Do not substitute natural cocoa powder.)
1/8 teaspoon freshly ground black pepper (I left this out)
1 oz unsalted butter (2 tbsps./30 grams), softened

Place the chocolate in a small mixing bowl.

In a double-boiler, warm the cream until it is hot to the touch (but is not boiling). Remove from the heat and pour over the chocolate.

Allow it to sit for a minute or two before stirring. Stir until the chocolate is melted completely and is smooth throughout.

Add the remaining ingredients and stir to combine.

Set aside until cooled to room temperature. Do not refrigerate, as the base needs to be soft when added to the marquise mixture. If you make it the day before, you may need to warm it slightly. Whisk it until it is smooth again before using it in the marquise recipe.

Torched Meringue

Servings: Makes about 4 – 5 cups of meringue. If you aren’t planning on serving *all* of the marquise at once, you might want to scale this recipe back a bit.

11 large egg whites
1 ¾ cups (14 oz or 395 gms) sugar
Splash of apple cider vinegar
1/2 teaspoon vanilla

Combine the egg whites, sugar and vinegar in the bowl of a stand mixer. Using your (clean, washed) hand, reach in the bowl and stir the three together, making sure the sugar is moistened evenly by the egg whites and they make a homogeneous liquid.

Over a saucepan of simmering water, warm the egg white mixture. Use one hand to stir the mixture continuously, feeling for grains of sugar in the egg whites. As the liquid heats up, the sugar will slowly dissolve and the egg whites will thicken. This step is complete when you don’t feel any more sugar crystals in the liquid and it is uniformly warm, nearly hot.

Remove the mixing bowl from the saucepan and return it to the stand mixer with the whisk attachment. Whisk until you reach soft peaks. In the last 10 seconds of mixing, add the vanilla to the meringue and mix thoroughly.

When you’re ready to plate the dessert, spoon the meringue onto a plate (or use a piping bag) and use a blowtorch to broil.

Tequila Caramel

Servings: Makes about 1 cup of caramel

1 cup (8 oz.) sugar
1/2 cup (4 fluid oz./ 120 ml.) water
1 cup (8 fluid oz./ 240 ml.) heavy cream
3/4 teaspoon salt
2 tablespoons tequila (I left this out and used 1 teaspoon vanilla)

In a heavy-bottomed saucepan, combine the sugar and water on medium-high heat. Boil until the water completely evaporates and the sugar caramelizes to a dark mahogany color.

Working quickly, add the cream to the darkened caramel. It will bubble and pop vigorously, so add only as much cream as you can without overflowing the pot.

Return the pot to the stove on low heat and whisk gently to break up any hardened sugar. Add any remaining cream and continue stirring. Gradually, the hard sugar will dissolve and the caramel sauce will continue to darken. When the caramel has darkened to the point you want it, remove it from the heat. Add the salt and tequila and stir to combine. Set aside until ready to serve.

Spiced Almonds

Servings: Makes about 1 cup of spiced almonds

1/2 cup (4 oz.) sugar
1 teaspoon cinnamon
1/4 teaspoon cayenne (I left this out)
1/2 teaspoon salt
1 large egg white
1 cup (145 grams/ 5 oz.) blanched whole almonds

Preheat the oven to 350F. Line a sheet pan with parchment paper or foil.

In a small bowl, combine the sugar, cinnamon, cayenne, and salt.

In a larger mixing bowl whisk the egg white until it’s frothy and thick.

Add the spice mix to the egg white and whisk to combine completely.

Add the nuts to the egg white mixture and toss with a spoon.

Spoon the coated nuts onto the parchment paper-lined baking sheet.

Bake the nuts for 30 minutes, or until they turn light brown. Allow the nuts to cool completely and they will get very crunchy. Set aside until ready to serve.

Maple Mousse in Bacon Cup – Daring Bakers Challenge April 2011

Wednesday, April 27th, 2011


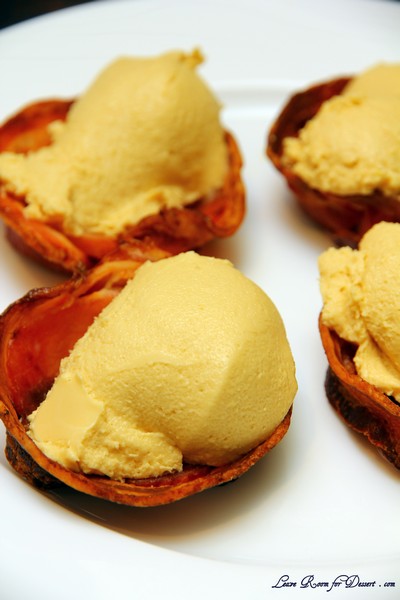
The April 2011 Daring Bakers’ challenge was hosted by Evelyne of the blog Cheap Ethnic Eatz. Evelyne chose to challenge everyone to make a maple mousse in an edible container. Prizes are being awarded to the most creative edible container and filling, so vote on your favorite from April 27th to May 27th at http://thedaringkitchen.com!

Yes, you read the title correctly. This month’s challenge did in fact involve maple syrup mousse in an edible container. If it were any flavoured mousse in any type of container – I already had a few ideas in mind. Although we have a few compulsory items each month for our Daring Bakers challenge and this month we had to make the maple mousse.

When I told others about this months challenge I must admit I didn’t get too many people saying it sounded like a lovely dish we had to make this month. Many people screwed up their faces at the thought of such a large maple syrup to cream ratio plus the addition of bacon (if you chose that type of edible cup).

There were many suggestions on how to make this beautifully presented and a good flavour combination, although I kept putting off the challenge until the day before it was due – the last day of our long weekend. And by that stage I was drained of cooking – hot cross buns, sorbets, honey comb, ice cream, lamb shoulder, pork belly and a few other experiments in the kitchen.

I decided to go by the recipe which said to use real maple syrup rather than maple flavoured syrup – although here in Australia a good quality real maple syrup costs about $10 for a cup. Yep – a little too expensive for a mousse that I didn’t think I would like that much. So I decided to halve the quantity of mousse.

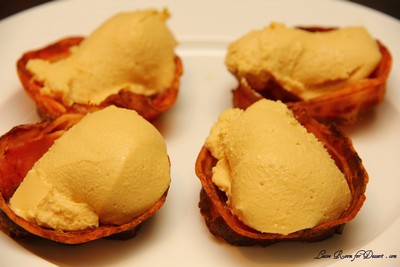
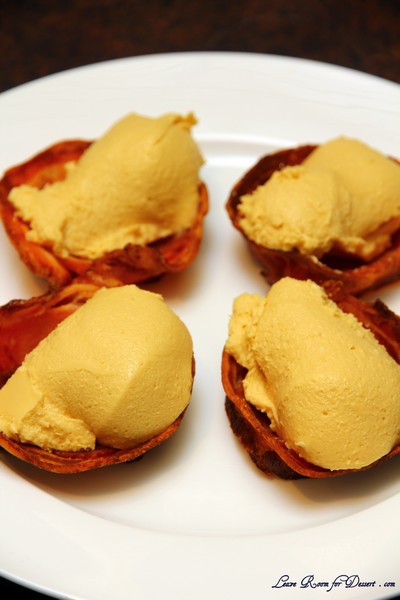
After tasting the maple mousse (which I had a few troubles with, as I let the maple syrup + gelatine mix cool too much and had to gently re-heat it), we decided to go ahead with the bacon cups, hoping it would cut some of the sweetness.

Unfortunately I don’t think the mousse was for my tastes, although others that tried it, said it was better than they expected. It is quite unlikely I will make this again.

I will have to find time to make my own mousse and edible cups – although I think they will have a chocolate theme.

Thanks to our host this month for making me try something different.

Bacon Cups

Ingredients:
• 24 thin slices good quality bacon (I used 4 slices)

Directions:
1. Pre-heat the oven to 400 degrees F/200 degrees C.
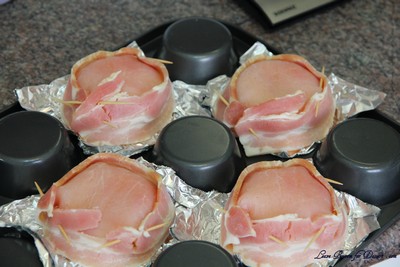
2. Take a muffin pan or 6 small ½ cup capacity heat-proof bowls, turn upside down and carefully form aluminum foil covers on the back of 6 muffin cups or the bowls.
3. Taking 2 strips of bacon at a time crisscross the strips over the backs of the muffin cups and cut to size a tad longer then the bottom part of the cup. Now use 1 to 2 more strips to cover the sides of the muffin cups in a weaving fashion. You want a full tight weave because bacon shrinks a lot. For smaller cups I used a shot glass with a square of bacon for the bottom and I wrapped 1 strip around the side.
4. Tuck the ends of the bacon strips inside otherwise they will curl while cooking. A good idea is to insert 4 toothpicks where the crisscrossed bacon meets in the weave.

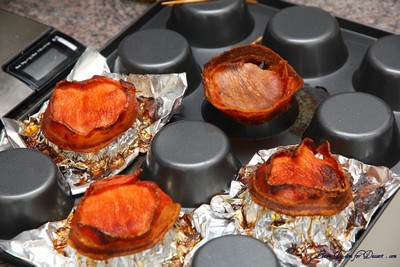
5. Place muffin pan in a cookie tray to catch drippings. Bake in oven for about 25 to 40 minutes, or until the bacon is golden and crisp but not burned.


6. Cool completely, a good hour, before removing your cups delicately from the foil.

Maple Mousse

(I halved this recipe)
Ingredients:
• 1 cup (240 ml/ 8 fluid oz.) pure maple syrup (not maple-flavoured syrup)
• 4 large egg yolks
• 1 package (7g/1 tbsp.) unflavoured gelatine
• 1 1/2 cups (360 ml. g/12 fluid oz) whipping cream (35% fat content)

Directions:
1. Bring maple syrup to a boil then remove from heat.
2. In a large bowl, whisk egg yolks and pour a little bit of the maple syrup in while whisking (this is to temper your egg yolks so they don’t curdle).
3. Add warmed egg yolks to hot maple syrup until well mixed.
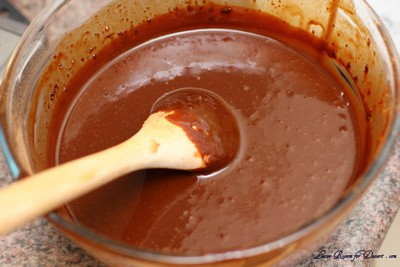
4. Measure 1/4 cup of whipping cream in a bowl and sprinkle it with the gelatine. Let it rest for 5 minutes. Place the bowl in a microwave for 45 seconds (microwave for 10 seconds at a time and check it in between) or place the bowl in a pan of barely simmering water, stir to ensure the gelatine has completely dissolved.
5. Whisk the gelatine/whipping cream mixture into the maple syrup mixture and set aside.
6. Whisk occasionally for approximately an hour or until the mixture has the consistency of an unbeaten raw egg white.
7. Whip the remaining cream. Stir 1/4 of the whipped cream into the maple syrup mixture. Fold in the remaining cream and refrigerate for at least an hour.
8. Remove from the fridge and divide equally among your edible containers.

Crostata con la Crema – Daring Bakers Challenge November 2010

Saturday, November 27th, 2010

The 2010 November Daring Bakers’ challenge was hosted by Simona of briciole. She chose to challenge Daring Bakers’ to make pasta frolla for a crostata. She used her own experience as a source, as well as information from Pellegrino Artusi’s Science in the Kitchen and the Art of Eating Well.

Spring is almost over, before it even really begun. This year we had two lovely days of Spring weather at the beginning of September, followed by many days of rain, cold days and lots of windy days.

This last week has been beautiful. Quite warm, but not too hot (I say this, even though I work in an air-conditioned building). Our garden is going crazy – plants and weeds alike. Three plants in particular are quite exciting at the moment: our fig, blueberry and raspberry. All three plants are in their second Spring season and are very happy, we have a number of figs forming, quite a few blueberries and many raspberries.

One thing I didn’t understand when I bought the raspberry is the shop assistance’s advice: Watch out, the raspberry can take over… What? Isn’t that a good thing? Surely people aren’t unhappy about loads of raspberries.

What he should have said was: Watch out, the raspberry sends suckers through the lawn and new plants shoot up more than one metre away from the original plant meaning you have no control of where are how far it will travel… Whoops!! Luckily running the mower over them have stopped new plants forming in the middle of our yard – I hope!

Although my baking (and blogging) has been hindered by the lovely weather and constant maintenance of our yard, this recipe chosen for the daring bakers this month was great, as many components can be made the day or night before, and cooked while everyone is eating dinner.

My family are huge fans of Portuguese custard tarts, so I had no trouble picking pastry cream to fill my tart shell.

I must admit I used the food processor for the dough to make the tart shell. It seemed a bit dry and wasn’t coming together, so I added a touch more egg white (ok, accidentally – a bit more than a touch – making it a little too soft).

I didn’t blind bake my tart, I just added the pastry cream and cooked it for 40 minutes or more, until the pastry cream was set and the pastry golden. The pastry was lovely in texture and taste – very lovely. I thought I needed more pastry cream for the tart, although perhaps because the pastry was a little soft, it shrunk or fell a little at the sides, making it more level with the pastry cream when cooked.

I was very happy with the length of time required for this challenge and was more than happy to try out another pastry and pastry cream recipe – and my family was more than happy to have it for dessert 🙂

Thanks to our host for this month, for trialling so many recipes for people to choose from and be inspired from.

Crostata con la Crema (crostata with pastry cream filling)

Recipe Source: There are many recipes for pasta frolla and different ideas about how to make it. I will give you two versions that I have been using for some time. They have been inspired by those in the book La scienza in cucina e l’arte di mangiare bene by Pellegrino Artusi (1820-1911). The book was first published in 1891, and is available in English translation as Science in the Kitchen and the Art of Eating Well (further details are given in the Additional Information section).

Pasta frolla

1/2 c. minus 1 tablespoon [105 ml, 100 g, 3 ½ oz] superfine sugar (see Note 1) or a scant 3/4 cup [180ml, 90g, 3 oz] of powdered sugar
1 and 3/4 cup [420 ml, 235 g, 8 1/4 oz.] unbleached all-purpose flour
a pinch of salt
1 stick [8 tablespoons / 4 oz. / 115 g] cold unsalted butter, cut into small pieces
grated zest of half a lemon (you could also use vanilla sugar as an option, see Note 2) (I didn’t use this)
1 large egg and 1 large egg yolk, lightly beaten in a small bowl

Note 1: Superfine sugar is often also referred to as ultrafine, baker’s sugar or caster sugar. It’s available in most supermarkets. If you cannot find “superfine” sugar, you can make your own by putting some regular granulated sugar in a food processor or blender and letting it run until the sugar is finely ground.

Note 2: There are different ways of making vanilla sugar. I keep vanilla beans in a jar half-filled with sugar until I need to use them, for example, to make vanilla ice cream. After I remove the split bean from the custard that will go into the ice cream maker, I rinse it, dry it and put it back in the jar with sugar.

Making pasta frolla by hand:

Whisk together sugar, flour and salt in a bowl.

Rub or cut the butter into the flour until the mixture has the consistency of coarse crumbs. You can do this in the bowl or on your work surface, using your fingertips or an implement of choice.

Make a well in the center of the mounded flour and butter mixture and pour the beaten eggs into it (reserve about a teaspoon of the egg mixture for glazing purposes later on – place in the refrigerator, covered, until ready to use).

Add the lemon zest to your flour/butter/egg mixture.

Use a fork to incorporate the liquid into the solid ingredients, and then use your fingertips.

Knead lightly just until the dough comes together into a ball.

Shape the dough into a flat disk and wrap in plastic wrap. Place the dough in the refrigerator and chill for at least two hours. You can refrigerate the dough overnight.

Making pasta frolla with a food processor:

Put sugar, flour, salt, and lemon zest in the food processor and pulse a few times to mix.

Add butter and pulse a few times, until the mixture has the consistency of coarse meal.

Empty food processor’s bowl onto your work surface

See step 3 above and continue as explained in the following steps (minus the lemon zest, which you have already added).

Pastry Cream

2 eggs
1/2 cup caster sugar
500ml milk
1 teaspoon vanilla essence
3 tablespoons plain flour

Heat milk in a saucepan until almost bubbling. Whisk eggs with caster sugar, then whisk in plain flour. Slowly pour half the warm milk over the egg sugar mixture, mixing well to stop the eggs cooking. Pass the egg mixture through a sieve back into the saucepan. Place the saucepan back over medium heat and continue stirring the mixture until it bubbles. Pour the pastry cream into a bowl and place the bowl in a sink or bowl with cold or icy water, add the vanilla essence and stir the pastry cream until cooled. Refrigerate until cool.


Assembling and baking the crostata con la crema:

Heat the oven to 350ºF [180ºC/gas mark 4].

Take the pasta frolla out of the fridge, unwrap it and cut away ¼ of the dough. Reserve this dough to make the lattice top of the crostata. Refrigerate this dough while you work on the tart base.

To help roll the crostata dough, keep the dough on top of the plastic wrap that you had it wrapped in. This can help rolling the dough and can also help when transferring the dough to your pan. You can also use parchment paper for this. However, you can also roll the dough directly on a work surface if you prefer.

Lightly dust the top of the dough and your work surface (if you’re rolling directly on a work surface) with flour. Keep some flour handy to dust the dough as you go along.

If the dough is very firm, start by pressing the dough with the rolling pin from the middle to each end, moving the rolling pin by a pin’s width each time; turn the dough 180 degrees and repeat; when it softens, start rolling.

Roll the dough into a circle about 1/8th inch (3 mm) thick.

If you used the plastic wrap or parchment paper as rolling surface, flip dough over the pan, centering it, and delicately press it all around so the corners are well covered. Peel away the plastic wrap.

Trim the excess dough hanging over the edges of the pan. Press the remaining dough around the border into the sides of the pan making sure the border is an even thickness all the way around.

Prick the bottom of the dough with a fork in several places.

Take out of the fridge the reserved pasta frolla you had cut away earlier. Roll it with your pin and cut into strips or use cookie cutters to make small shapes (this is not traditional, but it looks cute); or roll with your hands into ropes.

Instead of jam or fruit preserves, cover the bottom of the crostata crust evenly with the pastry cream.

Use the prepared strips or rolls of dough to make a lattice over the surface, or decorate with the cut shapes. (Note: You can use dough scraps to make cookies: see the Additional Information section for some pointers)

Brush the border and strips of dough with the reserved beaten eggs. You can add a drop or two of water to the beaten eggs if you don’t have enough liquid.

Put the tart in the oven and bake for 30 minutes.

After 35 minutes, check the tart, and continue baking until the tart is of a nice golden hue. (Note: Every oven is different. In my oven it took 45 minutes to bake the tart until golden.)

When done, remove the tart from the oven and let cool. If you have used a tart pan with a removable bottom, then release the tart base from the fluted tart ring. Make sure the tart is completely cool before slicing and serving.

Baked Alaska and Ice Cream Petit Fours – Daring Bakers Challenge August 2010

Friday, August 27th, 2010

The August 2010 Daring Bakers’ challenge was hosted by Elissa of 17 and Baking. For the first time, The Daring Bakers partnered with Sugar High Fridays for a co-event and Elissa was the gracious hostess of both. Using the theme of beurre noisette, or browned butter, Elissa chose to challenge Daring Bakers to make a pound cake to be used in either a Baked Alaska or in Ice Cream Petit Fours. The sources for Elissa’s challenge were Gourmet magazine and David Lebovitz’s “The Perfect Scoop”.

Two sweets I have never made were chosen for this month’s Daring Bakers challenge. We could do both or just one, and as I had done neither previously and wanted to try them both. I went with both, especially considering that there were two common components between these desserts, meaning I just had to increase the cake and ice cream quantity, and not make too many extra components.

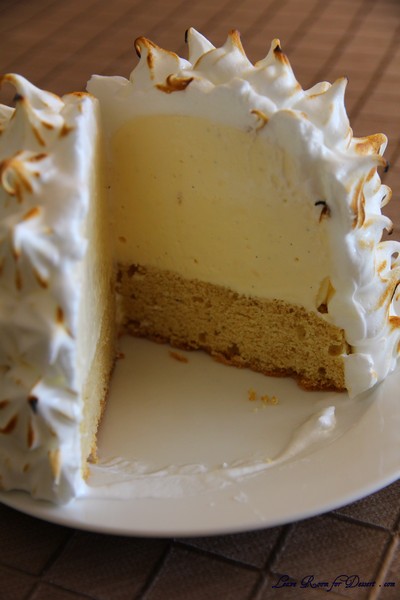
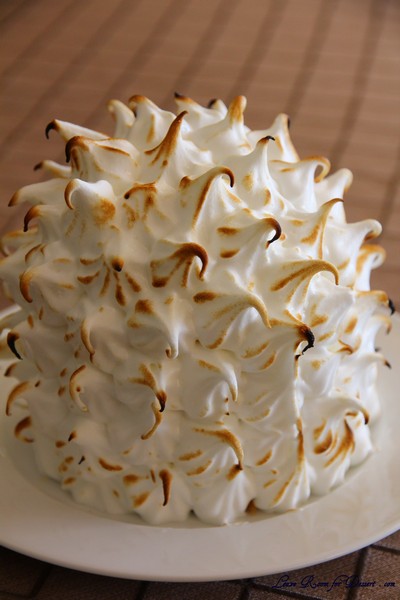
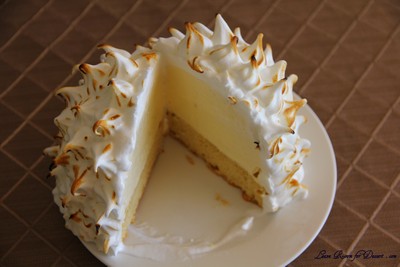
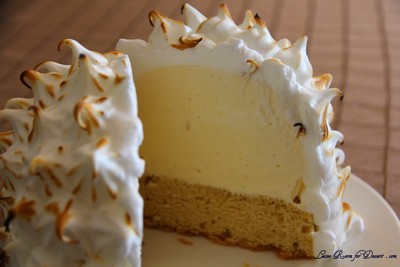
I was surprised by how many people one Baked Alaska from a reasonably small tea cup actually served. You could easily serve 2-4 people with one Baked Alaska, and with the petit fours being served up with them, I was cutting it into eight. This meant one of them stayed in the freezer (covered in plastic) for a week before my family got around to eating it. And it was still good.

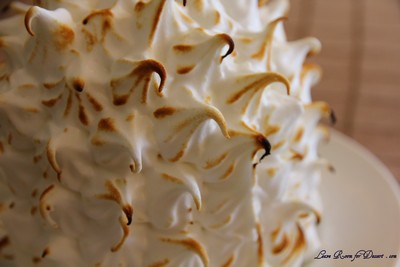
I tried both torching the meringue using a blow torch and placing it in a hot oven for 4 minutes. The torching was a heap of fun, although the oven actually made the meringue beautifully crispy on the outside. I’m not a huge fan of not-fully cooked meringue and this was a little off-putting for me, although others couldn’t get enough of it.

The cake was lovely the day it came out of the oven, the burnt butter flavour worked so well. I found as the days went on and refrigeration and freezing were required, it became a little staler than I would have preferred.

Although I was extremely looking forward to the petit fours, they didn’t turn out how I had hoped. They were too large, the cake kept coming away from the ice cream and they were too difficult to coat. Taste-wise they were great – but I wouldn’t bother doing them individually again…

Thanks again to our host this month – I always enjoy the challenges.

Baked Alaska and Ice Cream Petit Fours

Recipe Source: The brown butter pound cake recipe is adapted from the October 2009 edition of Gourmet. The vanilla ice cream is from ice cream genius David Lebovitz, adapted from The Perfect Scoop. The chocolate glaze for the petit fours is a larger adapted version of this ganache from Godiva Chocolate and the meringue for the Baked Alaska is a larger version of this meringue from Gourmet, May 1995.

Vanilla Ice Cream

1 cup (250ml) whole milk
A pinch of salt
3/4 cup (165g) sugar
1 vanilla bean, split lengthwise OR 2 teaspoons (10ml) pure vanilla extract
2 cups (500ml) heavy (approx 35% butterfat) cream
5 large egg yolks
1 teaspoon (5ml) pure vanilla extract

Heat the milk, salt, and sugar in a medium saucepan until the liquid steams. Scrape out the seeds of the vanilla bean with a paring knife and add to the milk, along with the bean pod. Cover, remove from heat, and let infuse for an hour. (If you do not have a vanilla bean, simply heat the milk, salt, and sugar in a medium saucepan until the liquid steams, then let cool to room temperature.)

Set up an ice bath by placing a 2-quart (2 litre) bowl inside a large bowl partially filled with water and ice. Put a strainer on top of the smaller bowl and pour in the cream.

In another bowl, lightly beat the egg yolks together. Reheat the milk in the medium saucepan until warmed, and then gradually pour ¼ cup warmed milk into the yolks, constantly whisking to keep the eggs from scrambling. Once the yolks are warmed, scrape the yolk and milk mixture back into the saucepan of warmed milk and cook over low heat. Stir constantly and scrape the bottom with a spatula until the mixture thickens into a custard which thinly coats the back of the spatula.

Strain the custard into the heavy cream and stir the mixture until cooled. Add the vanilla extract (1 teaspoon [5ml] if you are using a vanilla bean; 3 teaspoons [15ml] if you are not using a vanilla bean) and refrigerate until thoroughly chilled, preferably overnight.

Remove the vanilla bean and freeze in an ice cream maker. If you don’t have an ice cream maker, you can make it without a machine. See instructions from David Lebovitz: http://www.davidlebovitz.com/archives/2007/07/making_ice_crea_1.html

Brown Butter Pound Cake
The pound cake calls for cake flour. You can make 1 cup of cake flour by placing 2 tablespoons of corn starch in a 1 cup measure, and filling to the top with all purpose flour.

19 tablespoons (9.5 oz) (275g) unsalted (sweet) butter
2 cups (200g) sifted cake flour (not self-rising; sift before measuring) (See “Note” section for cake flour substitution)
1 teaspoon (5g) baking powder
1/2 teaspoon (3g) salt
1/2 cup (110g) packed light brown sugar
1/3 (75g) cup granulated sugar
4 large eggs
1/2 teaspoon pure vanilla extract

Preheat the oven to 325°F/160°C and put a rack in the center. Butter and flour a 9”x9” (23cmx23cm) square pan.

Place the butter in a 10” (25cm) skillet over medium heat. Brown the butter until the milk solids are a dark chocolate brown and the butter smells nutty. (Don’t take your eyes off the butter in case it burns.) Pour into a shallow bowl and chill in the freezer until just congealed, 15-30 minutes.

Whisk together cake flour, baking powder, and salt.

Beat the brown butter, light brown sugar, and granulated sugar in an electric mixer until light and fluffy, about 2 minutes. Beat in the eggs one at a time, mixing well, and then the vanilla extract.

Stir in the flour mixture at low speed until just combined.

Scrape the batter into the greased and floured 9”x9” (23cmx23cm) square pan. Smooth the top with a rubber spatula and rap the pan on the counter. Bake until golden brown on top and when a toothpick inserted into the center comes out clean, about 25 minutes.

Cool in the pan 10 minutes. Run a knife along the edge and invert right-side-up onto a cooling rack to cool completely.

Chocolate Glaze (For the Ice Cream Petit Fours)

9 ounces (250g) dark chocolate, finely chopped
1 cup (250 ml) heavy (approx 35% butterfat) cream
1 1/2 tablespoons (32g) light corn syrup, Golden syrup, or agave nectar
2 teaspoons (10ml) vanilla extract

Stir the heavy cream and light corn syrup in a small saucepan over medium heat until it comes to a boil. Remove from heat and add the dark chocolate. Let sit 30 seconds, then stir to completely melt the chocolate. Stir in the vanilla and let cool until tepid before glazing the petit fours.

Meringue (For the Baked Alaska)

8 large egg whites
½ teaspoon (3g) cream of tartar
½ teaspoon (3g) salt
1 cup (220g) sugar

Beat the egg whites, cream of tartar, and salt on high speed in an electric mixer until soft peaks form. Beat in the sugar gradually in a slow stream until stiff peaks form.

Assembly Instructions – Ice Cream Petit Fours

Line a 9”x9” (23cmx23cm) pan with plastic wrap, so that no sides of the pan are exposed and so there is some extra plastic wrap hanging off the sides. Spread 1 ¾ to 2 cups (450ml to 500ml) ice cream into the pan. Cover with more plastic wrap and freeze several hours.

Once the brown butter pound cake has completely cooled, level the top with a cake leveler or a serrated knife. Then split the cake in half horizontally to form two thin layers.

Unwrap the frozen ice cream. Flip out onto one of the layers of cake and top with the second layer of cake. Wrap well in plastic wrap and return to the freezer overnight.

Make the chocolate glaze (see above.)

While the glaze cools, trim ¾” (2cm) off each side of the ice cream cake to leave a perfectly square 7.5” (19cm) ice cream cake. Cut the cake into twenty five petit fours, each 1.5”x1.5” (4cmx4cm).

Glaze the petit fours one at a time: place a petit four on a fork and spoon chocolate glaze over it.

Place the petit fours on a parchment-lined baking sheet and return to the freezer for one hour.

Assembly Instructions – Baked Alaska

Line four 4” (10cm) diameter tea cups with plastic wrap, so that plastic wrap covers all the sides and hangs over the edge. Fill to the top with ice cream. Cover the top with the overhanging plastic wrap and freeze for several hours, or until solid.

Level the top of the brown butter pound cake with a serrated knife or with a cake leveler. Cut out four 4” (10cm) diameter circles from the cake. Discard the scraps or use for another purpose.

Make the meringue (see above.)

Unwrap the ice cream “cups” and invert on top of a cake round. Trim any extra cake if necessary.

Pipe the meringue over the ice cream and cake, or smooth it over with a spatula, so that none of the ice cream or cake is exposed. Freeze for one hour or up to a day.

Burn the tips of the meringue with a cooking blow torch. Or, bake the meringue-topped Baked Alaskas on a rimmed baking sheet in a 500°F/260°C oven for 5 minutes until lightly golden. Serve immediately.