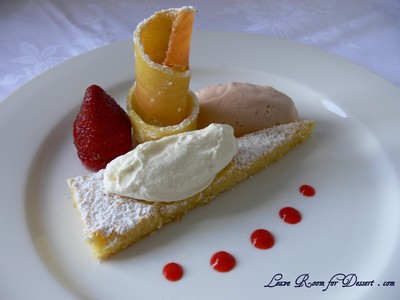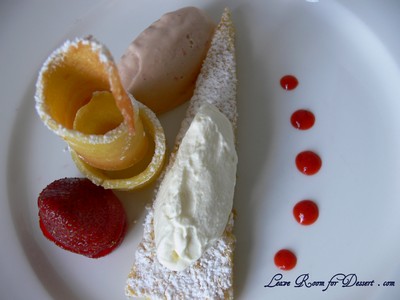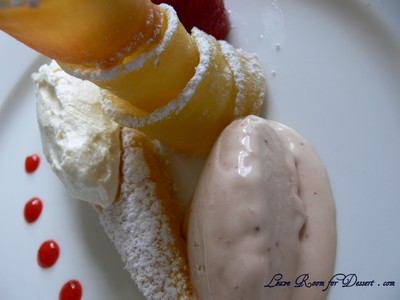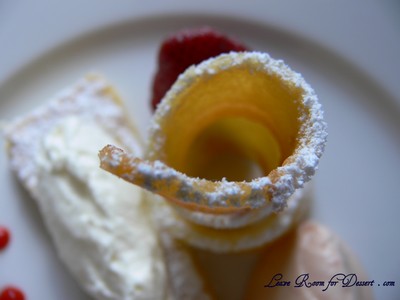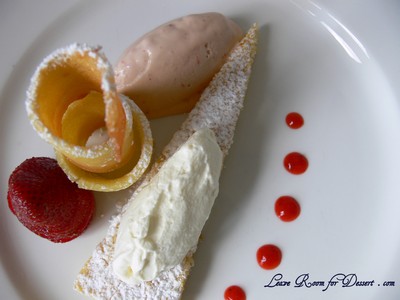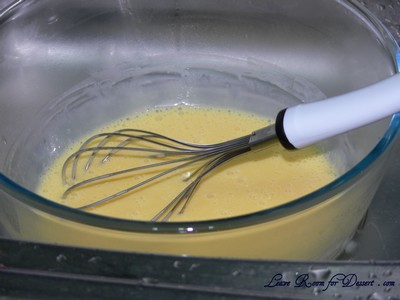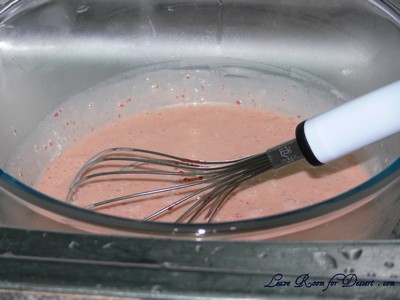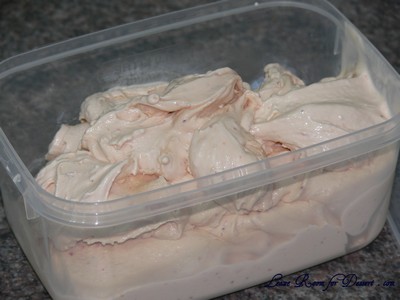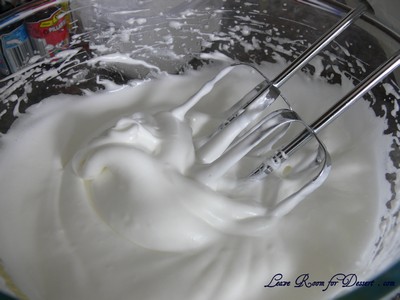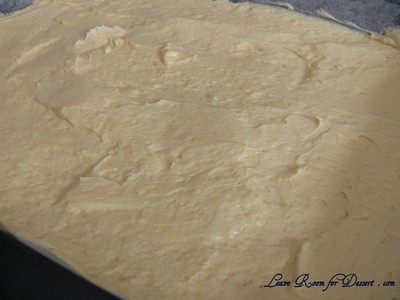
Egg Whites

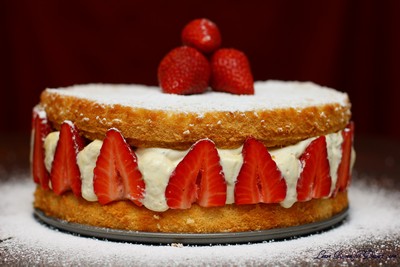
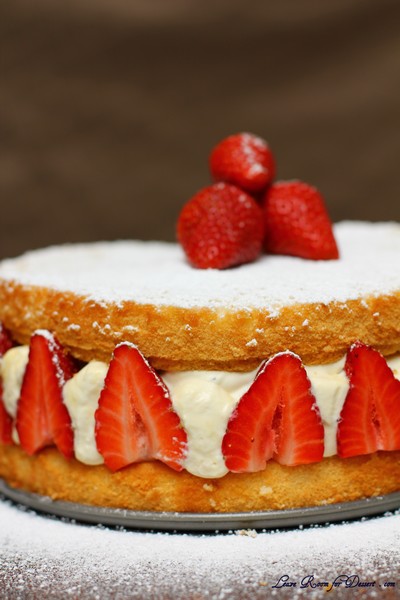
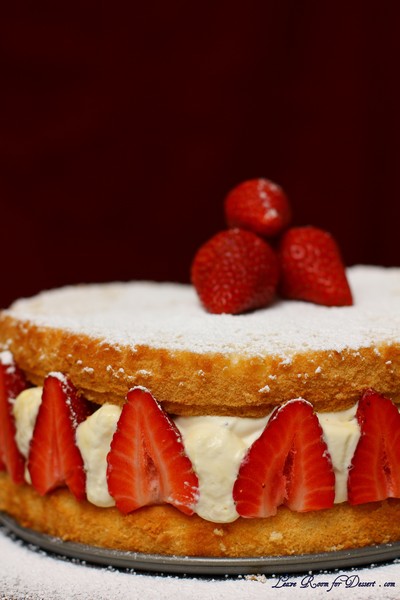
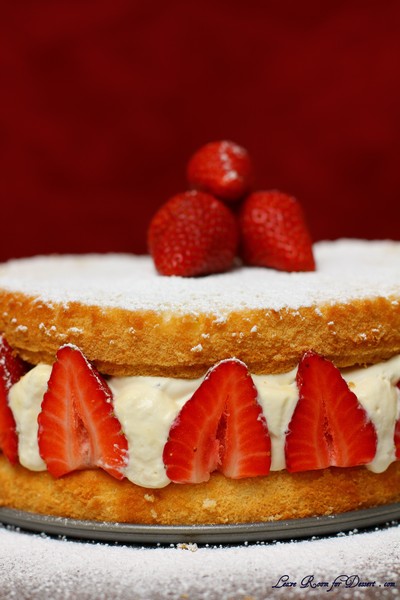
Strawberry Fraisier – Daring Bakers Challenge July 2011

Wednesday, July 27th, 2011


Jana of Cherry Tea Cakes was our July Daring Bakers’ host and she challenges us to make Fresh Frasiers inspired by recipes written by Elisabeth M. Prueitt and Chad Robertson in the beautiful cookbook Tartine.

I’m glad this challenge came this month and not the previous month, as we have just started getting beautiful strawberries back into the fruit stores.

The challenge was quite good, especially being able to make all three components after work, then assemble it the morning, for a lovely weekend dessert.

I had my fingers crossed that the fraisier would stay up by itself once the plastic wrap was removed, but unfortunately it collapsed quite a lot when the first cut was made. I’m not entirely sure where I went wrong, so I may have to do a bit more research.

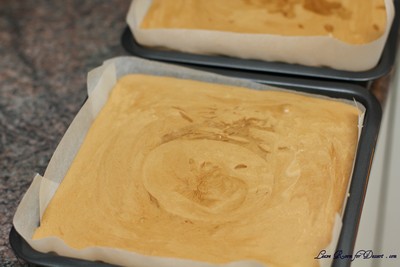
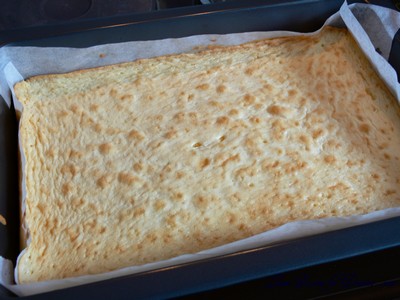
I used a bigger tin than the one used in the recipe (22cm vs 20cm) and found the cake sunk a bit in the middle once it cooled.
I also needed at least double the pastry cream filling – although only figured this out once it was too late to make more – so I used whipped cream in the middle of the filling. (this extra may have been needed because I used a bigger tin, or very large strawberries.) I didn’t use the almond paste either, as I had none.

It was a beautiful dessert that everyone enjoyed and I would consider making again, although trialling out the filling, to make sure it stayed together more when serving.

Basic Chiffon Cake

1 cup + 2 tablespoons (270 ml) (5½ oz/155 gm) all-purpose flour
1 teaspoon (5 ml) (4 gm) baking powder
3/4 cups (180 ml) (6 oz /170 gm) sugar
1/2 teaspoon (2½ ml) (1½ gm) salt, preferably kosher
1/4 cup (2 fl oz/60 ml) vegetable oil
3 large egg yolks
⅓ cup + 1 tablespoon (3.17 fl oz/95 ml) water
1 teaspoon (5 ml) pure vanilla extract
3/4 teaspoon (3¾ ml) (3 gm) lemon zest, grated
5 large egg whites
¼ teaspoon (1¼ ml) (1 gm) cream of tartar

Directions:

Preheat the oven to moderate 325°F (160°C/gas mark 3).
Line the bottom of an 8-inch (20 cm) spring form pan with parchment paper. Do not grease the sides of the pan.
In a large mixing bowl, stir together the flour and baking powder. Add in all but 3 tablespoons (45 ml.) of sugar, and all of the salt. Stir to combine.
In a small bowl combine the oil, egg yolks, water, vanilla and lemon zest. Whisk thoroughly.
Combine with the dry ingredients and mix thoroughly for about one minute, or until very smooth.
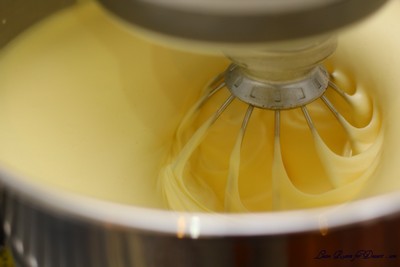
Put the egg whites into a stand mixer, and beat on medium speed using a whisk attachment on a medium speed, until frothy. Add cream of tartar and beat on a medium speed until the whites hold soft peaks. Slowly add the remaining sugar and beat on a medium-high speed until the whites hold firm and form shiny peaks.
Using a grease free rubber spatula, scoop about ⅓ of the whites into the yolk mixture and fold in gently. Gently fold in the remaining whites just until combined.
Pour the batter into the prepared pan. Bake for 45 to 55 minutes or until toothpick inserted into the center comes out clean.
Removed the cake from the oven and allow to cool in the pan on a wire rack.
To unmold, run a knife around the sides to loosen the cake from the pan and remove the spring form sides. Invert the cake and peel off the parchment paper. Refrigerate for up to four days.

Pastry Cream Filling

1 cup (8 fl oz/250 ml) whole milk
1/2 teaspoon (2½ ml) pure vanilla extract
1/8 teaspoon (1/2 ml) (¼ gm) salt, preferably kosher
2 tablespoons (30 ml) (10 gm)cornstarch
1/4 cup (60 ml) (2 oz/55 gm) sugar
1 large egg (I used 2 egg yolks – as there were extra from the cake)
2 tablespoons (30 ml) (1 oz/30 gm) unsalted butter
3/4 teaspoon (3¾ ml) (4 gm) gelatin
1/2 tablespoon (7½ ml) water
1 cup (8 fl oz/250 ml) heavy cream

Directions:

Pour the milk, vanilla, and salt into a heavy sauce pan. Place over medium-high heat and scald, bringing it to a near boiling point. Stir occasionally.
Meanwhile, in a stand mixer add the cornstarch and sugar. Whisk to combine
Add the eggs to the sugar and cornstarch and whisk until smooth.
When the milk is ready, gently and slowly while the stand mixer is whisking, pour the heated milk down the side of the bowl into the egg mixture.
Pour the mixture back into the warm pot and continue to cook over a medium heat until the custard is thick, just about to boil and coats the back of a spoon.
Remove from heat and pass through a fine mesh sieve into a large mixing bowl. Allow to cool for ten minutes stirring occasionally.
Cut the butter into four pieces and whisk into the pastry cream a piece at a time until smooth.
Cover the cream with plastic wrap, pressing the plastic wrap onto the top of the cream to prevent a skin from forming. Chill in the refrigerator for up to five days.
In a small dish, sprinkle the gelatin over the water and let stand for a few minutes to soften.
Put two inches (55 mm) of water into a small sauce pan and bring to a simmer over a medium heat.
Measure 1/4 cup (2 oz/60 ml) of the chilled pastry cream into a small stainless steel bowl that will sit across the sauce pan with the simmering water, without touching the water.
Heat the cream until it is 120 F (48.8 C). Add the gelatin and whisk until smooth. Remove from the water bath, and whisk the remaining cold pastry cream in to incorporate in two batches.
In a stand mixer, fitted with the whisk attachment, whip the cream until it holds medium-stiff peaks. Immediately fold the whipped cream into the pastry cream with a rubber spatula.

Simple Syrup

1/3 cup (2⅔ fl oz/80 ml) (2⅔ oz/75 gm) of sugar, flavored or white
1/3 cup (2⅔ fl oz/80 ml) of water
+ 1 teaspoon vanilla essence

Directions:

Combine the water and sugar in a medium saucepan.
Bring the mixture to a boil and let the sugar dissolve. Stirring is not necessary, but will not harm the syrup.
Remove the syrup from the heat and cool slightly.
Transfer syrup to a lidded container or jar that can be stored in the refrigerator. Simple syrup can be stored for up to one month.

Fraisier Assembly

Components:
1 baked 8 inch (20 cm) chiffon cake
1 recipe pastry cream filling
⅓ cup (80 ml) simple syrup or flavored syrup
2 lbs (900 g) strawberries
confectioners’ sugar for dusting
½ cup (120 ml) (5 oz/140 gm) almond paste

Directions:

Line the sides of a 8-inch (20 cm) spring form pan with plastic wrap. Do not line the bottom of the pan.
Cut the cake in half horizontally to form two layers.
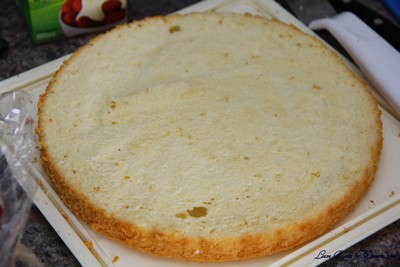

Fit the bottom layer into the prepared spring form pan. Moisten the layer evenly with the simple syrup. When the cake has absorbed enough syrup to resemble a squishy sponge, you have enough.
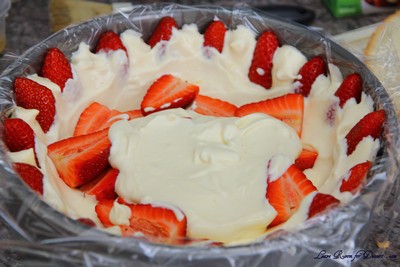
Hull and slice in half enough strawberries to arrange around the sides of the cake pan. Place the cut side of the strawberry against the sides of the pan, point side up forming a ring.
Pipe cream in-between strawberries and a thin layer across the top of the cake.
Hull and quarter your remaining strawberries and place them in the middle of the cake. Cover the strawberries and entirely with the all but 1 tbsp. (15 ml) of the pastry cream.
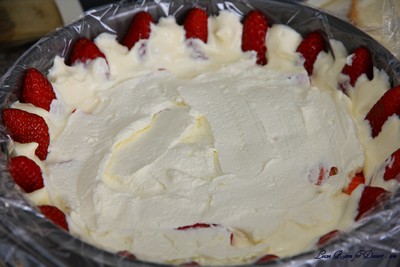

Place the second cake layer on top and moisten with the simple syrup.
Lightly dust a work surface with confectioners’ sugar and roll out the almond paste to a 10-inch (25 cm) round 1/16 inch (1.5 mm) thick. Spread the remaining 1 tablespoon (15 ml) of pastry cream on the top of the cake and cover with the round of almond paste.
Cover with plastic wrap and refrigerate for at least 4 hours.
To serve release the sides of the spring form pan and peel away the plastic wrap.
Serve immediately or store in the refrigerator for up to 3 days.

Marquise on Meringue – Daring Bakers Challenge May 2011

Friday, May 27th, 2011

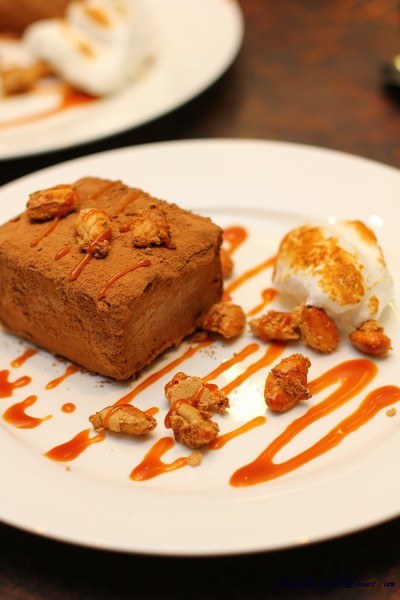
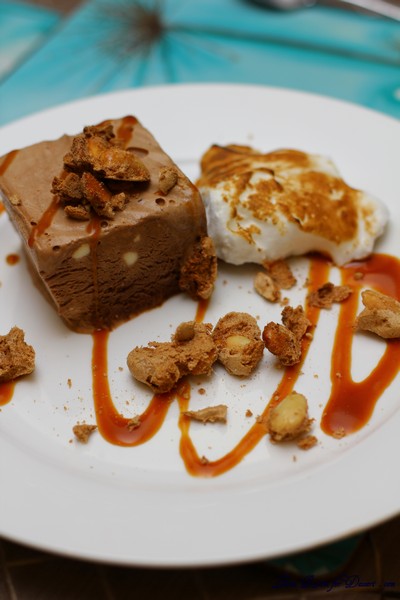
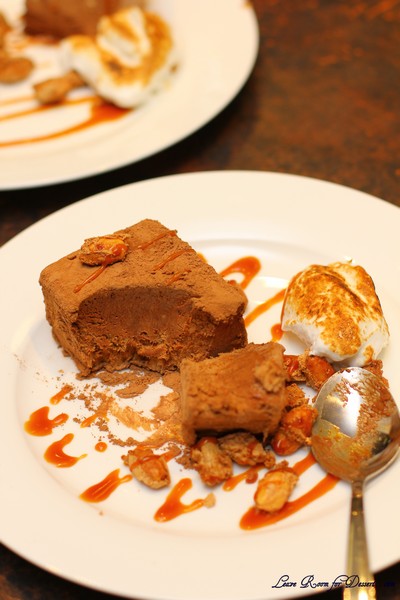
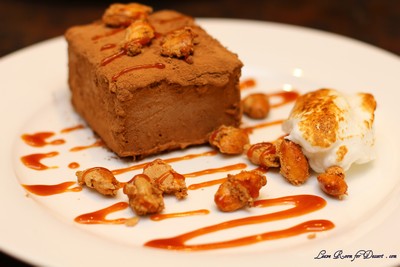
The May 2011 Daring Bakers’ challenge was hosted by Emma of CookCraftGrow and Jenny of Purple House Dirt. They chose to challenge everyone to make a Chocolate Marquise. The inspiration for this recipe comes from a dessert they prepared at a restaurant in Seattle.

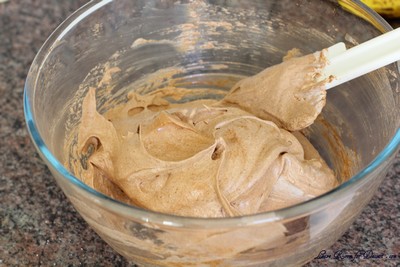
This challenge looked very time consuming at first, which is the main reason I put off making it until the last weekend. I was able to make the chocolate marquise the night before, then quickly make all three other components in 30 minutes (all the while making a huge mess in the kitchen).

I thought I had a little trouble with the spiced nuts, although this was the component of the dessert that people liked most and commented on. (I had made the meringue and mixed in the nuts, poured and spread it on a lined tray, then halfway through thought the nuts wouldn’t crisp up, so I took to the meringue with a spoon to expose the almonds so they would brown) – sorry no pics – I couldn’t take photos as I needed one clean hand to feel the sugar dissolving for the torched meringue (check out the recipe below)… 🙂

I still have some of the chocolate marquise in the freezer, and look forward to serving it (although in smaller portions, and probably with more spiced almonds).

It was certainly a well liked challenge by all. Thanks Emma and Jenny!

Chocolate Marquise

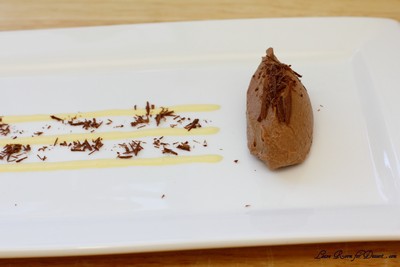
Plated marquise
Servings: 18 2.5″x2.5″ cubes (I would say ~24-36)

11 large egg yolks at room temperature
4 large whole eggs
2/3 cup (150 grams/ 5.3 oz) sugar
1/3 cup (2⅔ fluid oz/ 80 ml.) water
Chocolate Base, barely warm (recipe follows)
2 cups (16 fluid oz./ 500 ml.) heavy cream
2 cups Dutch process cocoa powder (for rolling) (Note: We used extra brut, like Hershey’s Special Dark. Make sure it’s a Dutch processed cocoa, not a natural cocoa powder.)
Torched meringue (recipe follows)
Spiced almonds (recipe follows)
Cacao nibs (optional)

In the bowl of a stand mixer, combine the egg yolks and whole eggs. Whip on high speed until very thick and pale, about 10 – 15 minutes. (It probably only took 5 minutes in my KitchenAid)

When the eggs are getting close to finishing, make a sugar syrup by combining the sugar and water in a small saucepan. Bring the syrup to a boil and then cook to softball stage (235F/115C). If you have a cake tester with a metal loop for a handle, the right stage for the syrup is reached when you can blow a bubble through the loop (as seen in the following pictures).

With the mixer running on low speed, drizzle the sugar syrup into the fluffy eggs, trying to hit that magic spot between the mixing bowl and the whisk.

When all of the syrup has been added (do it fairly quickly), turn the mixer back on high and whip until the bowl is cool to the touch. This will take at least 10 minutes.

In a separate mixing bowl, whip the heavy cream to soft peaks. Set aside.
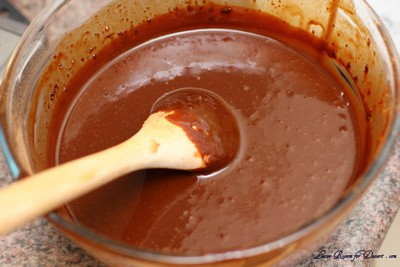
When the egg mixture has cooled, add the chocolate base to the egg mixture and whisk to combine. Try to get it as consistent as possible without losing all of the air you’ve whipped into the eggs. We used the stand mixer for this, and it took about 1 minute.

Fold 1/3 of the reserved whipped cream into the chocolate mixture to loosen it, and then fold in the remaining whipped cream.

Pour into the prepared pans and cover with plastic wrap (directly touching the mixture so it doesn’t allow in any air).

Freeze until very firm, at least 2 – 4 hours (preferably 6 – 8 hours).
When you’re ready to plate, remove the marquise from the freezer at least 15 minutes before serving. While it’s still hard, remove it from the pan by pulling on the parchment ‘handles’ or by flipping it over onto another piece of parchment. Unmold the frozen marquise

Cut it into cubes and roll the cubes in cocoa powder. These will start to melt almost immediately, so don’t do this step until all of your other plating components (meringue, caramel, spiced nuts, cocoa nibs) are ready. The cubes need to sit in the fridge to slowly thaw so plating components can be done during that time. They don’t need to be ready before the cubes are rolled in the cocoa powder.

Plate with the torched meringue and drizzled caramel sauce, and toss spiced almonds and cocoa nibs around for garnish. You want to handle the cubes as little as possible because they get messy quickly and are difficult to move. However, you want to wait to serve them until they’ve softened completely. The soft pillows of chocolate are what make this dessert so unusual and when combined with the other elements, you’ll get creamy and crunchy textures with cool, spicy, salty, bitter, and sweet sensations on your palate.

Chocolate Base

Servings: n/a – this is an ingredient for the chocolate marquise, not meant to be used separately

12 oz (340 grams/ 1½ cups) bittersweet chocolate (about 70% cocoa)
12 oz (355 ml/ 1½ cups) heavy cream
1/2 teaspoon salt
1/4 teaspoon cayenne (I left this out and used 1/2 teaspoon cinnamon)
1/4 cup (60 ml/ 2 fluid oz.) tequila (I left this out)
1/4 cup (60 ml/ 2 fluid oz.) light corn syrup (I used glucose syrup)
3/4 teaspoon vanilla
1/4 cup (4 tablespoons/ less than an ounce) cocoa powder (we used extra brut, like Hershey’s Special Dark, but any Dutch-processed cocoa would be fine. Do not substitute natural cocoa powder.)
1/8 teaspoon freshly ground black pepper (I left this out)
1 oz unsalted butter (2 tbsps./30 grams), softened

Place the chocolate in a small mixing bowl.

In a double-boiler, warm the cream until it is hot to the touch (but is not boiling). Remove from the heat and pour over the chocolate.

Allow it to sit for a minute or two before stirring. Stir until the chocolate is melted completely and is smooth throughout.

Add the remaining ingredients and stir to combine.

Set aside until cooled to room temperature. Do not refrigerate, as the base needs to be soft when added to the marquise mixture. If you make it the day before, you may need to warm it slightly. Whisk it until it is smooth again before using it in the marquise recipe.

Torched Meringue

Servings: Makes about 4 – 5 cups of meringue. If you aren’t planning on serving *all* of the marquise at once, you might want to scale this recipe back a bit.

11 large egg whites
1 ¾ cups (14 oz or 395 gms) sugar
Splash of apple cider vinegar
1/2 teaspoon vanilla

Combine the egg whites, sugar and vinegar in the bowl of a stand mixer. Using your (clean, washed) hand, reach in the bowl and stir the three together, making sure the sugar is moistened evenly by the egg whites and they make a homogeneous liquid.

Over a saucepan of simmering water, warm the egg white mixture. Use one hand to stir the mixture continuously, feeling for grains of sugar in the egg whites. As the liquid heats up, the sugar will slowly dissolve and the egg whites will thicken. This step is complete when you don’t feel any more sugar crystals in the liquid and it is uniformly warm, nearly hot.

Remove the mixing bowl from the saucepan and return it to the stand mixer with the whisk attachment. Whisk until you reach soft peaks. In the last 10 seconds of mixing, add the vanilla to the meringue and mix thoroughly.

When you’re ready to plate the dessert, spoon the meringue onto a plate (or use a piping bag) and use a blowtorch to broil.

Tequila Caramel

Servings: Makes about 1 cup of caramel

1 cup (8 oz.) sugar
1/2 cup (4 fluid oz./ 120 ml.) water
1 cup (8 fluid oz./ 240 ml.) heavy cream
3/4 teaspoon salt
2 tablespoons tequila (I left this out and used 1 teaspoon vanilla)

In a heavy-bottomed saucepan, combine the sugar and water on medium-high heat. Boil until the water completely evaporates and the sugar caramelizes to a dark mahogany color.

Working quickly, add the cream to the darkened caramel. It will bubble and pop vigorously, so add only as much cream as you can without overflowing the pot.

Return the pot to the stove on low heat and whisk gently to break up any hardened sugar. Add any remaining cream and continue stirring. Gradually, the hard sugar will dissolve and the caramel sauce will continue to darken. When the caramel has darkened to the point you want it, remove it from the heat. Add the salt and tequila and stir to combine. Set aside until ready to serve.

Spiced Almonds

Servings: Makes about 1 cup of spiced almonds

1/2 cup (4 oz.) sugar
1 teaspoon cinnamon
1/4 teaspoon cayenne (I left this out)
1/2 teaspoon salt
1 large egg white
1 cup (145 grams/ 5 oz.) blanched whole almonds

Preheat the oven to 350F. Line a sheet pan with parchment paper or foil.

In a small bowl, combine the sugar, cinnamon, cayenne, and salt.

In a larger mixing bowl whisk the egg white until it’s frothy and thick.

Add the spice mix to the egg white and whisk to combine completely.

Add the nuts to the egg white mixture and toss with a spoon.

Spoon the coated nuts onto the parchment paper-lined baking sheet.

Bake the nuts for 30 minutes, or until they turn light brown. Allow the nuts to cool completely and they will get very crunchy. Set aside until ready to serve.

Decorated Sugar Cookies – Daring Bakers Challenge September 2010

Monday, September 27th, 2010

The September 2010 Daring Bakers’ challenge was hosted by Mandy of “What the Fruitcake?!” Mandy challenged everyone to make Decorated Sugar Cookies based on recipes from Peggy Porschen and The Joy of Baking.

This challenge came at the perfect time, right before a High Tea that was being held at work. And just before my two week holiday – during which I would certainly not get these made. So I made these cookies right at the beginning of the month (and left it to the last minute to post it).

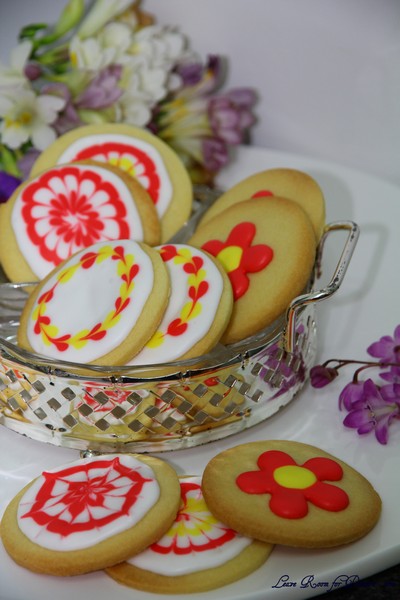
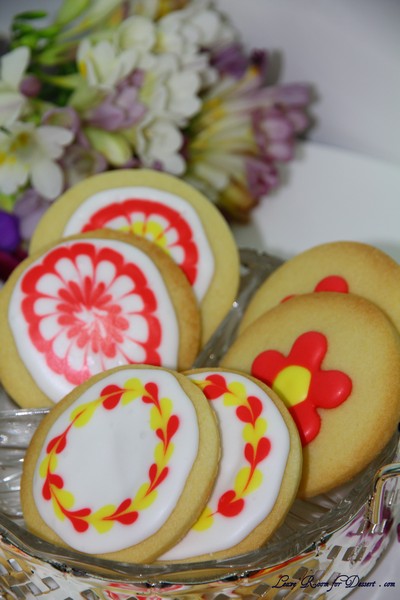
I tried to do a few different designs on my cookies, although not many turned out as pretty as I would have liked.

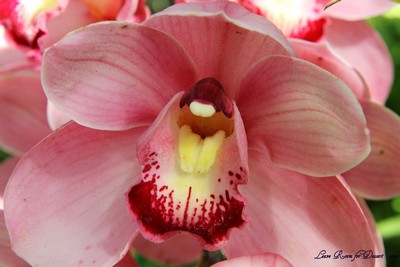
One of the mandatory elements for this month’s challenge was that it had to be the theme of September, whatever it means to each of us. For me, September is the start of Spring – my favourite season of the year. We have just had gorgeous flowers appearing in our garden. I recently bought three orchids, and after buying these, we found one in our garden which we had never noticed before. Then I was given oodles of them from both my Grandma and my Mum’s neighbour.

My sweet peas have flowered themselves silly. Last year I found my favourite one and once the seeds dried, I threw them around the garden, without Nick knowing and they have formed a jungle – and I love it.

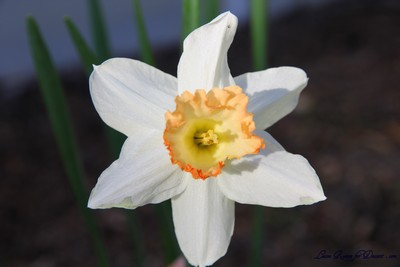
I also discovered that previous owners have planted daffodils and although they didn’t flower last year, I’m so glad they did this year.

With such fantastic inspiration for this challenge, I tried to make flower inspired cookies. Most of which didn’t turn out as well as planned. Although the love heart ones will just have to symbolise my love of Spring.

The biscuits themselves were quite plain, as expected. For the time, effort and taste I probably won’t make these again, although I always enjoy trying something new.

Thanks again to our host for this month and the daring kitchen team!

Basic Sugar Cookies

Makes Approximately 36x 10cm / 4″ Cookies

200g / 7oz / ½ cup + 6 Tbsp Unsalted Butter, at room temperature
400g / 14oz / 3 cups + 3 Tbsp All Purpose / Plain Flour
200g / 7oz / 1 cup Caster Sugar / Superfine Sugar
1 Large Egg, lightly beaten
5ml / 1 tsp Vanilla Extract / Or seeds from 1 vanilla bean

Cream together the butter, sugar and any flavourings you’re using. Beat until just becoming creamy in texture.
• Tip: Don’t over mix otherwise you’ll incorporate too much air and the cookies will spread during baking, losing their shape.

Beat in the egg until well combined, make sure to scrape down the sides of the bowl. Add the sifted flour and mix on low until a non sticky dough forms.
• Tip: I don’t have a stand mixer so I find it easier to switch to dough hooks at this stage to avoid flour flying everywhere.

Knead into a ball and divide into 2 or 3 pieces.

Roll out each portion between parchment paper to a thickness of about 5mm/1/5 inch (0.2 inch)

Refrigerate for a minimum of 30mins.
• Tip: Recipes commonly just wrap the whole ball of dough in clingwrap and then refrigerate it for an hour or overnight, but by rolling the dough between parchment, this shortens the chilling time and then it’s also been rolled out while still soft making it easier and quicker.

Once chilled, peel off parchment and place dough on a lightly floured surface.

Cut out shapes with cookie cutters or a sharp knife.

Arrange shapes on parchment lined baking sheets and refrigerate for another 30mins to an hour.
• Tip: It’s very important you chill them again otherwise they’ll spread while baking.

Re-roll scraps and follow the above process until all scraps are used up.

Preheat oven to 180°C (160°C Fan Assisted) / 350°F / Gas Mark 4.

Bake until golden around the edges, about 8-15mins depending on the size of the cookies.
• Tip: Bake same sized cookies together otherwise mixing smaller with larger cookies could result in
some cookies being baked before others are done.
• Tip: Rotate baking sheets half way through baking if your oven bakes unevenly.

Leave to cool on cooling racks.

Once completely cooled, decorate as desired.
• Tip: If wrapped in tinfoil/cling wrap or kept in airtight containers in a cool place, un-decorated cookies can last up to a month.

Royal Icing

315g – 375g / 11oz – 13oz / 2½ – 3 cups Icing / Confectioner’s / Powdered Sugar, unsifted
2 Large Egg Whites
10ml / 2 tsp Lemon Juice
5ml / 1 tsp Almond Extract, optional

Beat egg whites with lemon juice until combined.
• Tip: It’s important that the bowls/spoons/spatulas and beaters you use are thoroughly cleaned and grease free.

Sift the icing sugar to remove lumps and add it to the egg whites.
• Tip: I’ve listed 2 amounts of icing sugar, the lesser amount is good for a flooding consistency, and the larger amount is for outlining, but you can add even more for a much thicker consistency good for writing. If you add too much icing sugar or would like to make a thinner consistency, add very small amounts of water, a few drops at a time, until you reach the consistency you need.

Beat on low until combined and smooth.

Use immediately or keep in an airtight container.
• Tip: Royal Icing starts to harden as soon as it’s in contact with air so make sure to cover containers with plastic wrap while not in use.

Decorating Your Cookies: Flooding
“Flooding” a cookie is a technique used when covering a cookie with Royal Icing.
1. You outline the area you want to flood which helps create a dam
2. Then fill or flood inside the area you’ve outlined

Decorating Your Cookies: Royal Icing
The most important thing when it comes to decorating with Royal Icing is the consistency.

There are two ways of flooding your cookies. Some like to do the outline with a thicker icing and then flood with a thinner icing. Some like to use the same icing to do both which saves time and you don’t have to have two different piping bags for each colour you’re using.

The Same Consistency Method
Consistency:

Mix your royal icing according to the recipe/instructions

Drag a knife through the surface of the Royal Icing and count to 10

If the surface becomes smooth between 5 & 10 seconds, the icing is at the correct consistency
• Tip: If your icing is too thick, thin it by adding a few drops of water. Mix, do the 10 second test, then if it’s still too thick, add a few more drops of water, repeat, etc.
• Tip: To thicken your icing, add small amounts of icing sugar until thick enough for the 10 second test


Two Different Consistencies Method

Consistency:

Mix your royal icing according to the recipe/instructions.

Separate into 2 different bowls, one lot of icing for outlining, the other for flooding.

For the outlining icing, drag a knife through the surface of the Royal Icing.

If the surface becomes smooth at around 10 seconds, the icing is at the correct consistency.
• Tip: If your icing is too thick, thin it by adding a few drops of water. Mix, count to 10 seconds, then if it’s still too thick, add a few more drops of water, repeat, etc.
• Tip: To thicken your icing, add small amounts of icing sugar until thick enough for the 10 second test.

For the flooding/filling icing, drag a knife through the surface of the Royal Icing.

If the surface becomes smooth at around 3-4 seconds, the icing is at the correct consistency.
• Tip: If your icing is too thick, thin it by adding a few drops of water. Mix, count to 3-4 seconds, then if it’s still too thick, add a few more drops of water, repeat, etc.
• Tip: To thicken your icing, add small amounts of icing sugar until thick enough for the 3-4 second test.

Colouring
Separate Royal Icing into separate bowls for each colour you plan on using.
• Tip: Make sure to cover the bowls with cling film or a damp cloth to prevent the top from setting and then making lumps

Using a toothpick, add gel or paste colouring to each bowl and mix thoroughly until desired colour is reached
• Tip: You can use liquid food colouring but you might not be able to get the desired strength of colour, liquid colouring will also thin out the icing so you’ll need to add more icing sugar to thicken it again.

Prepping and Filling Your Bag
Attach your icing tips to the piping bags using couplers
• Tip: You don’t need to use a coupler but it makes it easier if you want to change tip sizes
• Tip: A size 1 tip is best for doing intricate details. A size 2 tip is good for some details and outlining. Fill or flood with sizes 2 – 5.
• Tip: You don’t need a piping bag, you can use a parchment cone or ziplock bag with a tiny bit snipped off the corner. I would however recommend getting a piping set if you don’t have one as it will be much easier and more precise.

Stand the piping bags in glasses with the tops of the bags folded over the top of the glass.

Fill your icing bags with each coloured icing.

Tie the ends of the piping bags with elastic bands.

Decorating: Outlining

Fit the piping bag with a size 2 or 3 tip.
• Tip: Or snip a very small bit of the corner off of a parchment cone or Ziploc bag

Hold the piping bag at a 45 degree angle above the cookie where you want to start the outline.

Gently squeeze the piping bag and start moving in the direction you want to outline the cookie.

Start lifting the piping bag away from the cookie so that the flow of icing falls onto the cookie, making it an even and neater outline.

As you start to reach the beginning of the outline, bring the piping tip closer to the surface of the cookie to meet the start of the icing outline.
• Tip: If you’re doing an intricate cookie, like a snow flake, you won’t be able to lift the tip as far away from the cookie.

If you’re doing a different colour border, eg a black border, let the outline dry before flooding. If using the same colour for the outline as you’re flooding with, begin flooding after doing the outline.

Decorating: Flooding
Fit the piping bag with a size 2-5 tip, the bigger the area being filled, the bigger the tip.
• Tip: Or cut slightly more off the corner of a Ziploc bag to create a slightly larger opening.

Quickly zigzag back and forth over the area you want to fill.
• Tip: You need to be quick when flooding the cookie so don’t worry too much if it’s not filled in neatly.

Using a toothpick or clean paintbrush, push the icing around into the gaps that are still remaining.

Either pick up the cookie and tip it from side to side to even out the filling, or lightly bang the cookie down on your kitchen counter.

Decorating: Melding Colours

If you would like to add lines or dots to the base colour that you flooded the cookie with so that they meld and dry as a smooth surface, you need to add the lines/dots/patterns as quickly as possible after flooding and smoothing the surface of the cookie.
• Tip: Make sure to have all the colours you’re planning on using ready and close by so that you can switch between colours quickly

Simply pipe other colours onto the flooded surface in patterns or lines which you can either leave as that or then drag a toothpick through to make marbling patterns.

Decorating: On top of flooding

If you’d like to do other patterns/outlines or writing on top of the flooded surface so that they are raised above the flooded background, simply allow the icing to dry, preferably over night.

Fit the piping bag with tip sizes 1-3.

Pipe patterns or write on top of the dry icing
• Tip: For writing, the consistency of your icing should be thicker rather than thinner, drag a knife through your icing and when the surface smoothes around 12-15 seconds, the consistency is correct.

Packaging and Storing
Once fully decorated, allow cookies to dry for 24 hours in a cool and dry area.

Stack cookies in an airtight container, from largest cookies at the bottom, to smallest and more intricate at the top, with parchment or wax free paper in between the layers.

Store in a cool and dry area with the container’s lid firmly sealed.

Will last for about a month if stored this way.

General Baking Tips
When measuring by volume (cup) always shift/aerate your flour/icing sugar in the container/bag before measuring because it settles as it sits and so you end up with more flour/icing sugar in your cup. I do this by moving the ingredient around with a spoon, whisk or fork.

When measuring flour or icing sugar by volume (cup) never scoop the flour/icing sugar up with the cup otherwise you compress the contents and this can make a big difference in the amount you’re using. Rather, spoon the ingredient into the cup until level with the top.

When measuring baking powder or baking soda, always level off the top of the measuring spoon with something flat (like the back of a knife) as these ingredients need to be accurately measured.

When mixing your ingredients, always follow the recipe instructions, especially when it comes to beating in eggs and flour, so if it specifies to mix until just combined or to beat for 4 minutes, follow the instructions to get best results.

Unless otherwise specified, always have your ingredients at room temperature.

It’s always best to invest in an oven thermometer so that you know exactly the temperature you’re baking at then you can also find out if you have cold or hot spots in your oven.

If you need to rotate your trays midst baking, always allow at least half the baking time to lapse before opening your oven to move baking trays around, this allows time for your baked goods to form a good structure so that they won’t flop.

General Royal Icing Tips
Keep a damp cloth handy while decorating your cookies so that if you’re switching between different icing bags, you can keep the tips covered with the damp cloth so that the icing doesn’t dry and clog them.

If your icing tips do clog, use a toothpick or pin to unclog them.

Always pipe a little bit of royal icing onto a board/paper towel before you begin to make sure there are no air bubbles.

Remember to always cover bowls containing royal icing wither cling wrap, a damp cloth or sealable lid so that the surface doesn’t dry.

Don’t store anything decorated with royal icing in the fridge otherwise the royal icing will become tacky.

Baked Alaska and Ice Cream Petit Fours – Daring Bakers Challenge August 2010

Friday, August 27th, 2010

The August 2010 Daring Bakers’ challenge was hosted by Elissa of 17 and Baking. For the first time, The Daring Bakers partnered with Sugar High Fridays for a co-event and Elissa was the gracious hostess of both. Using the theme of beurre noisette, or browned butter, Elissa chose to challenge Daring Bakers to make a pound cake to be used in either a Baked Alaska or in Ice Cream Petit Fours. The sources for Elissa’s challenge were Gourmet magazine and David Lebovitz’s “The Perfect Scoop”.

Two sweets I have never made were chosen for this month’s Daring Bakers challenge. We could do both or just one, and as I had done neither previously and wanted to try them both. I went with both, especially considering that there were two common components between these desserts, meaning I just had to increase the cake and ice cream quantity, and not make too many extra components.

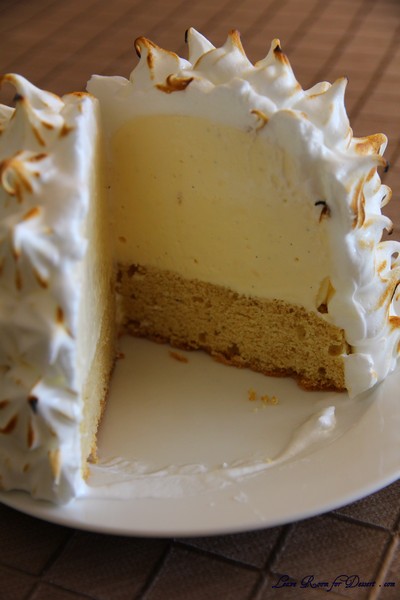
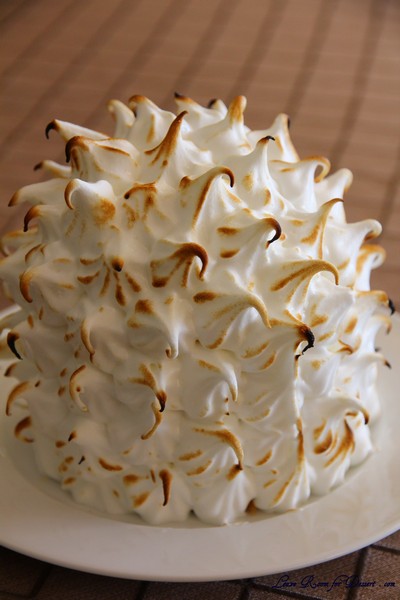
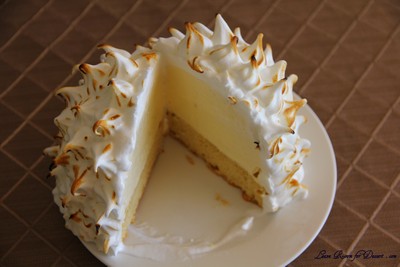
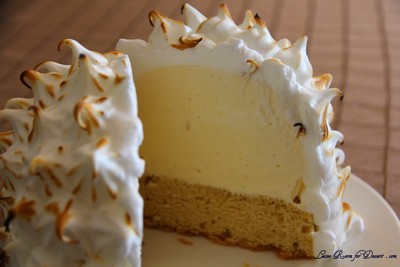
I was surprised by how many people one Baked Alaska from a reasonably small tea cup actually served. You could easily serve 2-4 people with one Baked Alaska, and with the petit fours being served up with them, I was cutting it into eight. This meant one of them stayed in the freezer (covered in plastic) for a week before my family got around to eating it. And it was still good.

I tried both torching the meringue using a blow torch and placing it in a hot oven for 4 minutes. The torching was a heap of fun, although the oven actually made the meringue beautifully crispy on the outside. I’m not a huge fan of not-fully cooked meringue and this was a little off-putting for me, although others couldn’t get enough of it.

The cake was lovely the day it came out of the oven, the burnt butter flavour worked so well. I found as the days went on and refrigeration and freezing were required, it became a little staler than I would have preferred.

Although I was extremely looking forward to the petit fours, they didn’t turn out how I had hoped. They were too large, the cake kept coming away from the ice cream and they were too difficult to coat. Taste-wise they were great – but I wouldn’t bother doing them individually again…

Thanks again to our host this month – I always enjoy the challenges.

Baked Alaska and Ice Cream Petit Fours

Recipe Source: The brown butter pound cake recipe is adapted from the October 2009 edition of Gourmet. The vanilla ice cream is from ice cream genius David Lebovitz, adapted from The Perfect Scoop. The chocolate glaze for the petit fours is a larger adapted version of this ganache from Godiva Chocolate and the meringue for the Baked Alaska is a larger version of this meringue from Gourmet, May 1995.

Vanilla Ice Cream

1 cup (250ml) whole milk
A pinch of salt
3/4 cup (165g) sugar
1 vanilla bean, split lengthwise OR 2 teaspoons (10ml) pure vanilla extract
2 cups (500ml) heavy (approx 35% butterfat) cream
5 large egg yolks
1 teaspoon (5ml) pure vanilla extract

Heat the milk, salt, and sugar in a medium saucepan until the liquid steams. Scrape out the seeds of the vanilla bean with a paring knife and add to the milk, along with the bean pod. Cover, remove from heat, and let infuse for an hour. (If you do not have a vanilla bean, simply heat the milk, salt, and sugar in a medium saucepan until the liquid steams, then let cool to room temperature.)

Set up an ice bath by placing a 2-quart (2 litre) bowl inside a large bowl partially filled with water and ice. Put a strainer on top of the smaller bowl and pour in the cream.

In another bowl, lightly beat the egg yolks together. Reheat the milk in the medium saucepan until warmed, and then gradually pour ¼ cup warmed milk into the yolks, constantly whisking to keep the eggs from scrambling. Once the yolks are warmed, scrape the yolk and milk mixture back into the saucepan of warmed milk and cook over low heat. Stir constantly and scrape the bottom with a spatula until the mixture thickens into a custard which thinly coats the back of the spatula.

Strain the custard into the heavy cream and stir the mixture until cooled. Add the vanilla extract (1 teaspoon [5ml] if you are using a vanilla bean; 3 teaspoons [15ml] if you are not using a vanilla bean) and refrigerate until thoroughly chilled, preferably overnight.

Remove the vanilla bean and freeze in an ice cream maker. If you don’t have an ice cream maker, you can make it without a machine. See instructions from David Lebovitz: http://www.davidlebovitz.com/archives/2007/07/making_ice_crea_1.html

Brown Butter Pound Cake
The pound cake calls for cake flour. You can make 1 cup of cake flour by placing 2 tablespoons of corn starch in a 1 cup measure, and filling to the top with all purpose flour.

19 tablespoons (9.5 oz) (275g) unsalted (sweet) butter
2 cups (200g) sifted cake flour (not self-rising; sift before measuring) (See “Note” section for cake flour substitution)
1 teaspoon (5g) baking powder
1/2 teaspoon (3g) salt
1/2 cup (110g) packed light brown sugar
1/3 (75g) cup granulated sugar
4 large eggs
1/2 teaspoon pure vanilla extract

Preheat the oven to 325°F/160°C and put a rack in the center. Butter and flour a 9”x9” (23cmx23cm) square pan.

Place the butter in a 10” (25cm) skillet over medium heat. Brown the butter until the milk solids are a dark chocolate brown and the butter smells nutty. (Don’t take your eyes off the butter in case it burns.) Pour into a shallow bowl and chill in the freezer until just congealed, 15-30 minutes.

Whisk together cake flour, baking powder, and salt.

Beat the brown butter, light brown sugar, and granulated sugar in an electric mixer until light and fluffy, about 2 minutes. Beat in the eggs one at a time, mixing well, and then the vanilla extract.

Stir in the flour mixture at low speed until just combined.

Scrape the batter into the greased and floured 9”x9” (23cmx23cm) square pan. Smooth the top with a rubber spatula and rap the pan on the counter. Bake until golden brown on top and when a toothpick inserted into the center comes out clean, about 25 minutes.

Cool in the pan 10 minutes. Run a knife along the edge and invert right-side-up onto a cooling rack to cool completely.

Chocolate Glaze (For the Ice Cream Petit Fours)

9 ounces (250g) dark chocolate, finely chopped
1 cup (250 ml) heavy (approx 35% butterfat) cream
1 1/2 tablespoons (32g) light corn syrup, Golden syrup, or agave nectar
2 teaspoons (10ml) vanilla extract

Stir the heavy cream and light corn syrup in a small saucepan over medium heat until it comes to a boil. Remove from heat and add the dark chocolate. Let sit 30 seconds, then stir to completely melt the chocolate. Stir in the vanilla and let cool until tepid before glazing the petit fours.

Meringue (For the Baked Alaska)

8 large egg whites
½ teaspoon (3g) cream of tartar
½ teaspoon (3g) salt
1 cup (220g) sugar

Beat the egg whites, cream of tartar, and salt on high speed in an electric mixer until soft peaks form. Beat in the sugar gradually in a slow stream until stiff peaks form.

Assembly Instructions – Ice Cream Petit Fours

Line a 9”x9” (23cmx23cm) pan with plastic wrap, so that no sides of the pan are exposed and so there is some extra plastic wrap hanging off the sides. Spread 1 ¾ to 2 cups (450ml to 500ml) ice cream into the pan. Cover with more plastic wrap and freeze several hours.

Once the brown butter pound cake has completely cooled, level the top with a cake leveler or a serrated knife. Then split the cake in half horizontally to form two thin layers.

Unwrap the frozen ice cream. Flip out onto one of the layers of cake and top with the second layer of cake. Wrap well in plastic wrap and return to the freezer overnight.

Make the chocolate glaze (see above.)

While the glaze cools, trim ¾” (2cm) off each side of the ice cream cake to leave a perfectly square 7.5” (19cm) ice cream cake. Cut the cake into twenty five petit fours, each 1.5”x1.5” (4cmx4cm).

Glaze the petit fours one at a time: place a petit four on a fork and spoon chocolate glaze over it.

Place the petit fours on a parchment-lined baking sheet and return to the freezer for one hour.

Assembly Instructions – Baked Alaska

Line four 4” (10cm) diameter tea cups with plastic wrap, so that plastic wrap covers all the sides and hangs over the edge. Fill to the top with ice cream. Cover the top with the overhanging plastic wrap and freeze for several hours, or until solid.

Level the top of the brown butter pound cake with a serrated knife or with a cake leveler. Cut out four 4” (10cm) diameter circles from the cake. Discard the scraps or use for another purpose.

Make the meringue (see above.)

Unwrap the ice cream “cups” and invert on top of a cake round. Trim any extra cake if necessary.

Pipe the meringue over the ice cream and cake, or smooth it over with a spatula, so that none of the ice cream or cake is exposed. Freeze for one hour or up to a day.

Burn the tips of the meringue with a cooking blow torch. Or, bake the meringue-topped Baked Alaskas on a rimmed baking sheet in a 500°F/260°C oven for 5 minutes until lightly golden. Serve immediately.

Tropical Snow Egg

Tuesday, August 3rd, 2010

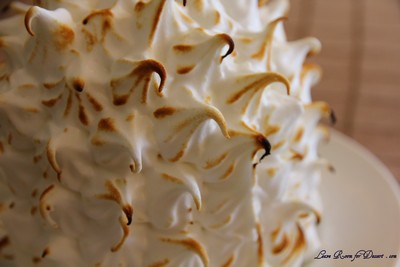
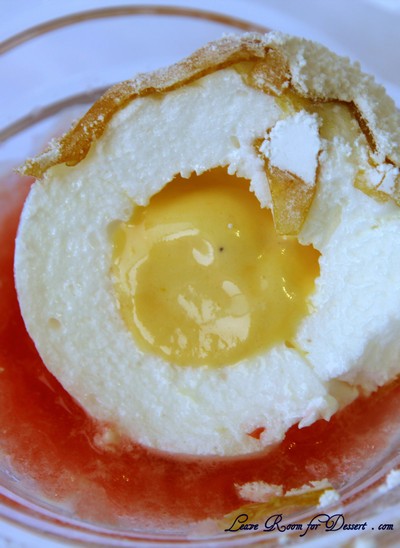
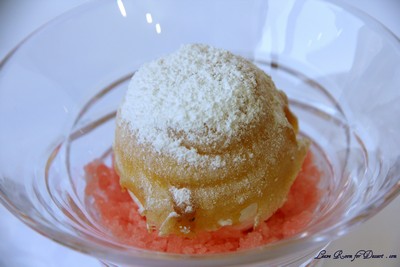
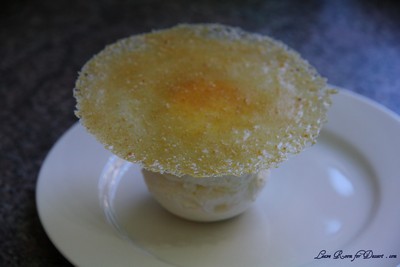
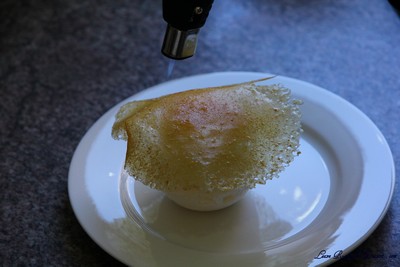
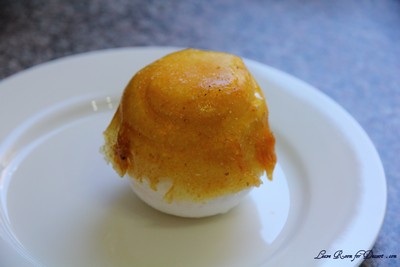
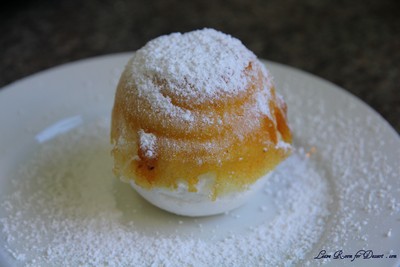
After our trip to Quay last year, I have wanted to replicate Peter Gilmore’s Snow egg. It never occurred to me again, until I saw Peter Gilmore in a Gourmet Traveller video, where he showed roughly how his two signature desserts (the eight-textured chocolate cake and the snow egg) were made, along with his inspiration behind them. I went searching for recipes for poached meringues, crispy tuilles and with terrible luck (and terrible search terms) it took me quite a few hours before I had found the actual recipe on the internet…

And then I saw it everywhere, even little searches brought me to his recipe, either posted by someone who went to Peter’s cooking class or even on a lifestyle website. Then it was the final dish to be prepared by MasterChef contestants in series 2.

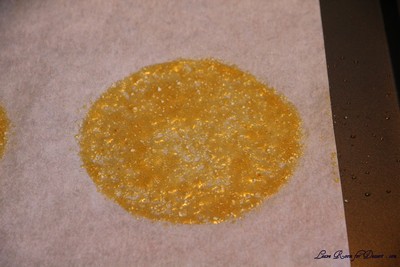
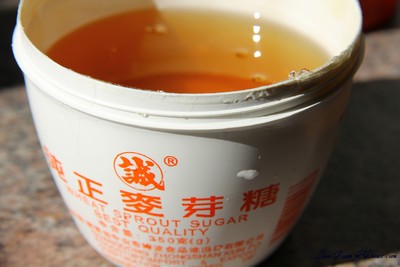
The best part of this dessert being on MasterChef were the comments by people below the recipe, as everyone was discussing where to buy maltose. Beforehand I tried looking in the shops and found rice malt – a brownish liquid maltose (+ carbohydrates and a little glucose). I decided to try it out, without trying any other parts of the recipe, to see if this would work. It didn’t. The tuilles melted into a terrible mess. After checking out the MasterChef website I found people suggesting going to Asian grocery stores. And with much luck, my local Asian grocery store had it. I had to ask for it though as it was too difficult to find, although the lovely staff member there found me some – it was labelled: Wheat Sprout Sugar, Ingredients: Rice, malt…

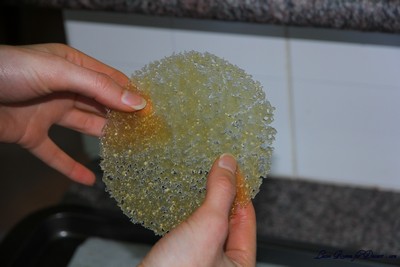
These tuilles were perfect! They worked very well on baking paper and hardly any broke. It also didn’t matter if they stayed on the paper a while.

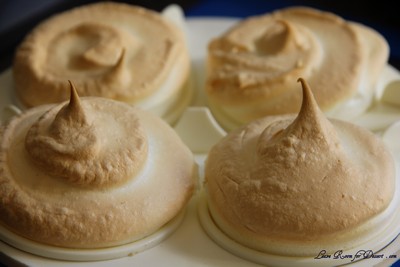
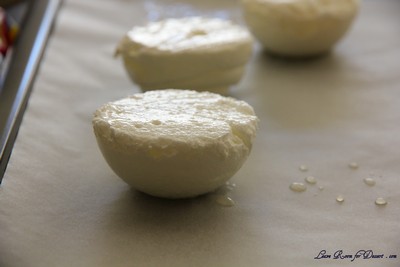
The other piece of equipment I was missing were the hemisphere moulds. Although my Mum came up with the brillant idea of using an egg poacher for the meringue moulds. Lucky my mum’s one had smooth hemispheres compared to mine with a flat base. These worked perfectly, with the only problem being that there were only 4 moulds, so I had to clean them between cooking each batch of 4 halves. I made a total of 8 snow eggs, so this part got tedious after the 2nd batch.

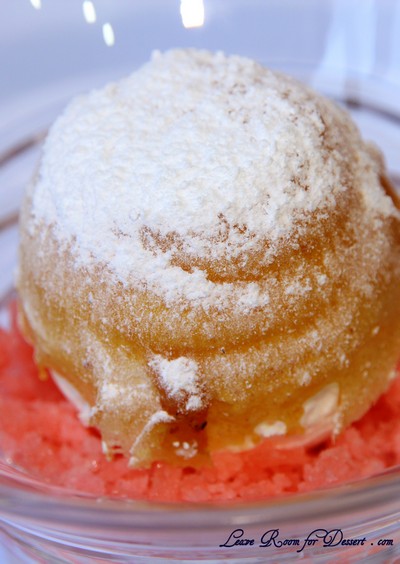
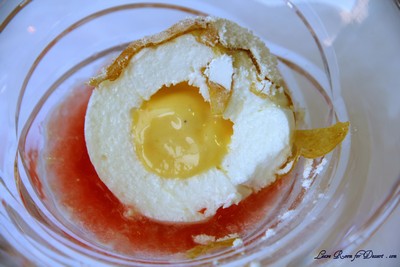
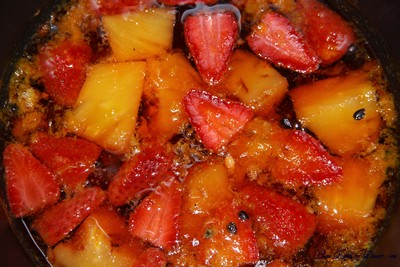
The flavours Peter uses are gorgeous, although trying to make this using seasonal fruits or frozen fruits I had on hand, made me change the recipe to suit the timing of the year. I decided on a passionfruit ice cream for the “yolk” of the egg, with a tropical, strawberry, pineapple and passion fruit granita along with a strawberry cream. I think most flavours worked wonderfully – although the strawberry cream was maybe a little overpowering in flavour.

I have learnt so much from this challenge – the maltose experience was extremely interesting, as were making the poached meringue and granita. I am so glad I have made this, and even more glad the extremely talented and incredibly gifted Peter Gilmore shared such a beautiful recipe of his. I would much like to go back to Quay at some point as the experience was just amazing. I am also greatly anticipating the launch of his book on 1st November this year!!! I tried to make my own version of Peter Gilmore’s eight textured chocolate cake as I could not find his recipe anywhere – although it didn’t turn out particularly well in the presentation department (and obviously didn’t compare to the flavours of Peter’s, but was still delicious). I’m not sure whether I should post it due to the bad photos… – although I have heard his actual recipe may be in his book – making me super excited!!

And to answer your questions, I think this dessert is worth making. Many components can be made the night or a few nights beforehand, the presentation is lovely, the flavours are beautiful, the concept is amazing. (Although, this is on the condition of getting some hemisphere moulds – as cleaning the egg poachers was too tedious. Please let me know if you find any in Sydney or on the internet?) {now that’s not a hint for a birthday present, if I ever did give one 🙂 }

Tropical Snow Egg

Recipe adapted from Peter Gilmore from Quay‘s Guava and Custard Apple Snow Egg

Passion fruit ice cream
100ml milk
3 egg yolks
100g caster sugar
100g passion fruit pulp
50ml pouring cream

Vanilla custard base
400ml pouring cream
2 vanilla beans, split and seeds scraped
1 whole egg
3 egg yolks
80g caster sugar

Tropical granita
100g caster sugar
500ml water
150g pineapple, diced
100g passion fruit pulp
100g fresh strawberries, hulled and halved

Poached meringue (I used all the left over egg whites from the ice cream and custard – making a meringue of ~200g egg whites and ~200g caster sugar)
Canola oil spray or vegetable oil
150g egg white
150g caster sugar

Maltose tuiles
200g liquid maltose
100g caster sugar
20g flaked almonds

Vanilla cream

100g vanilla custard base
100g double cream

Strawberry Cream
100g of strawberries, pureed and sieved
200g vanilla cream

1 cup icing sugar, to serve

Preheat oven to 150ºC and turn on ice cream machine to chill.

For the passion fruit ice cream, bring milk to the boil in a small saucepan. Whisk egg yolks and sugar together by hand, then pour boiling milk onto the egg yolk mixture while whisking. Pour into a stainless steel bowl and cook while whisking over a pot of simmering water for about 10 minutes or until it is thickened. Whisk sabayon until cool over ice, then whisk in the passion fruit pulp and the cream. Strain and then place the mixture into an ice cream machine and churn for about 40 minutes. Place in the freezer until set.

For the vanilla custard base, heat cream and vanilla seeds together in a small saucepan until it just begins to boil, and then remove from the heat. Whisk by hand the eggs, egg yolks and sugar together in a stainless steel bowl until combined. While whisking the eggs, slowly pour on the hot vanilla cream. Mix well and remove the vanilla pods. Pour this mixture into 4 dariole moulds to a depth of 5 cm, place the dariole moulds into a small baking dish with boiling water around the dariole moulds up to halfway to form a water bath. Place the water bath into a 150ºC oven and cook the custard 25 minutes or until the custard is just set. If the centre is still runny place in the freezer until set then place in refrigerator until needed.

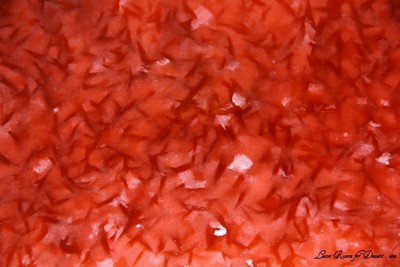
For the granita, combine sugar and water in a large saucepan; bring to the boil then lower heat. Add diced fruit and gently simmer for 10 minutes. Take off the heat and allow to infuse at room temperature for 30 minutes. Pass the liquid through a muslin cloth and discard the solids. Pour the syrup into a lamington or slice tin to a depth of 5cm. Place in the freezer until solid. Scrape with a fork into crystals and then transfer to the freezer until required.

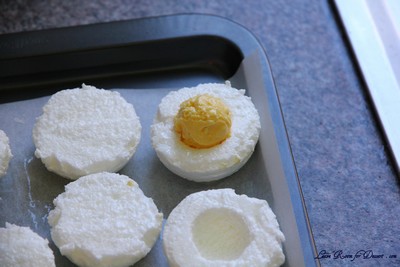
For the poached meringue, whisk the egg whites in an electric mixer until they form soft peaks and then slowly add the sugar bit by bit. Keep whisking until the meringue forms firm peaks and the sugar has dissolved. Spray hemisphere moulds lightly with canola oil spray. Spoon mixture into a piping bag fitted with a 1cm nozzle. Pipe mixture into moulds so it sits above the surface. Place the filled moulds into a large baking dish and pour boiling water into the baking dish to a depth of about 3cm. Bake at 150ºC for 15 minutes until just. Allow to cool for 2 minutes, then trim off tops so they are perfect hemispheres. Gently un-mould and place cut side up on a baking paper lined tray in the fridge until needed. Increase oven temperature to 180ºC.

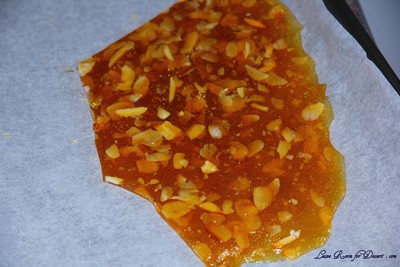
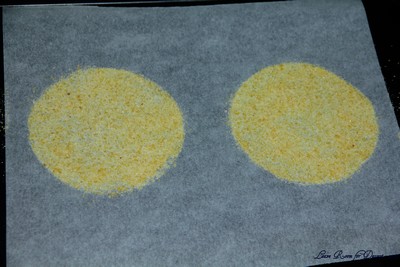
To make the maltose tuiles, stir maltose and sugar together in a small saucepan then bring to the boil until it reaches hard crack stage (until it caramelises) (this will occur at 160ºC or a little higher). Take care to brush down the sides with a pastry brush dipped in water so it doesn’t crystallise. Once golden add the flaked almonds and immediately pour the mixture onto a silicon mat, allow to cool completely. Process the cooled praline in the bowl of a hand blender to form a fine powder. Next sift a fine layer of the praline mixture through a drum sieve, over an acetate stencil with 11cm circles cut out of it onto a silicon mat on a baking sheet. Melt this mixture in a 180ºC oven for a few minutes until it forms a clear liquid paste. Cool tuiles slightly and peel off silicon sheet while still flexible. Store flat between sheets of baking paper until ready to use.

For the vanilla cream, whisk the cream and custard together to form soft peaks. Store in the fridge until ready to use.

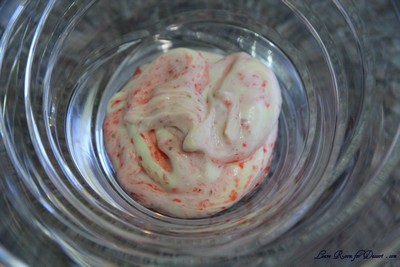
For the strawberry cream, place the strawberry puree in a small bowl and fold through the vanilla cream gently to form a rippled effect. Do this just before you are ready to assemble the dessert.

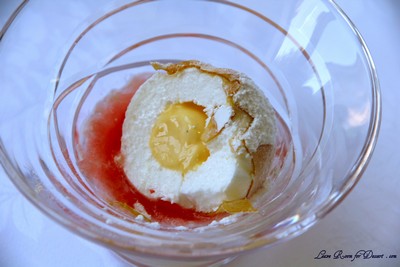
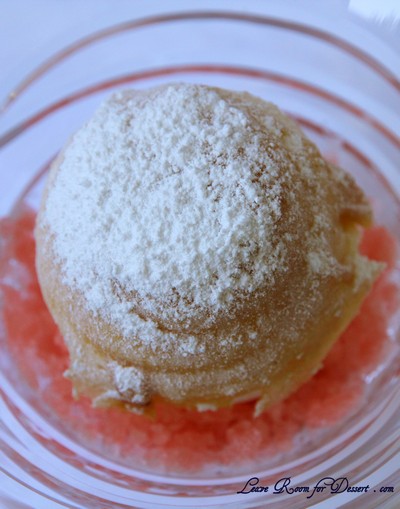
To assemble, take 8 of the half hemisphere poached meringues. Using a teaspoon or half teaspoon measure remove a small scoop from the centre of each half hemisphere being careful not to break through the outer edge. Then place a teaspoon or half teaspoon measure scoop of passion fruit ice cream in four of the hemispheres. Invert the other four hemispheres over the ice cream filled meringues to form a complete sphere. Use wet fingers to stick the two halves together. Place a tuile on top of each sphere and using a blow torch and an even motion, melt it over the sphere, patting it down if necessary. Dust spheres liberally with icing sugar. Next add a generous spoonful of the strawberry cream in the bottom of each serving glass. Top the cream with the tropical granita. Use two teaspoons to place the snow egg on top of the granita and serve.

Chocolate Pavlova with Chocolate Mascarpone Mousse – Daring Bakers Challenge June 2010

Sunday, June 27th, 2010

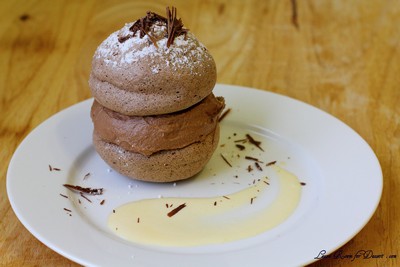
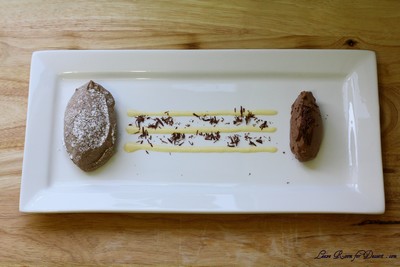
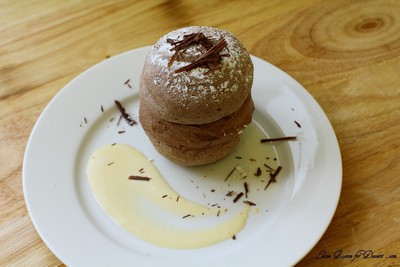
The June 2010 Daring Bakers’ challenge was hosted by Dawn of Doable and Delicious. Dawn challenged the Daring Bakers’ to make Chocolate Pavlovas and Chocolate Mascarpone Mousse. The challenge recipe is based on a recipe from the book Chocolate Epiphany by Francois Payard.

Even though I end up with loads of egg whites after my cooking escapades, I never tend to make meringues out of them. I end up trialling out some macarons and other egg white based goodies like souffles.

I was really excited to try chocolate meringues though and these were a big winner with everyone, especially Nick – who just loved them and wants more (I guess I know what I may be making with any more egg whites).

The mousse was quite nice and a bit rich – I think it would be a great recipe for those who want an eggless mousse.

I decided to make half the mascarpone cream and crème anglaise, as I didn’t think I would need such a large volume, especially considering I had seen most people only do a light drizzle over there meringue and mousse. After plating and taking photos I poured a whole lot over the meringue and mousse as an ice cream substitute with its lovely vanilla flavour (even if I did over cook the crème anglaise – whoops).

What a great challenge (Thanks Dawn!) Even though I had a bit of trouble finding the time, I had no trouble finding people to help eat the dessert.

Chocolate Pavlova with Chocolate Mascarpone Mousse

Recipe Source: Chocolate Epiphany by Francois Payard

Chocolate Meringue (for the chocolate Pavlova):

3 large egg whites
½ cup plus 1 tbsp (110 grams) white granulated sugar
¼ cup (30 grams) confectioner’s (icing) sugar
1/3 cup (30 grams) cocoa powder

Place a rack in the center of the oven and preheat to 200º F (95º C) degrees. Line two baking sheets with silpat or parchment and set aside.

Put the egg whites in a bowl and whip until soft peaks form. Increase speed to high and gradually add granulated sugar about 1 tbsp at a time until stiff peaks form. (The whites should be firm but moist.)

Sift the confectioner’s sugar and cocoa powder over the egg whites and fold the dry ingredients into the white. (This looks like it will not happen. Fold gently and it will eventually come together.)

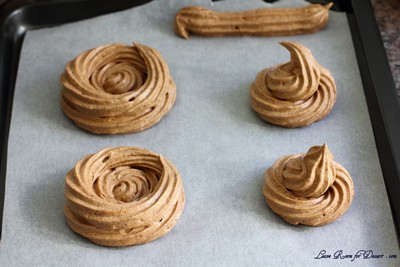
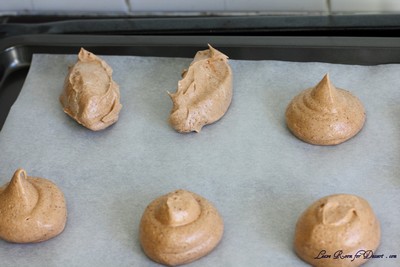
Fill a pastry bag with the meringue. Pipe the meringue into whatever shapes you desire. Alternatively, you could just free form your shapes and level them a bit with the back of a spoon. (Class made rounds, hearts, diamonds and an attempt at a clover was made!)

Bake for 2-3 hours until the meringues become dry and crisp. Cool and store in an airtight container for up to 3 days.
Chocolate Mascarpone Mousse (for the top of the Pavlova base): (I left out the lemon and orange juice/ Grand Marnier)

1 ½ cups (355 mls) heavy cream (cream with a milk fat content of between 36 and 40 percent)
grated zest of 1 average sized lemon
9 ounces (255 grams) 72% chocolate, chopped
1 2/3 cups (390 mls) mascarpone (we made this for the Tiramisu Daring bakers challenge – see the recipe here)
pinch of nutmeg
2 tbsp (30 mls) Grand Marnier (or orange juice)

Put ½ cup (120 mls) of the heavy cream and the lemon zest in a saucepan over medium high heat. Once warm, add the chocolate and whisk until melted and smooth. Transfer the mixture to a bowl and let sit at room temperature until cool.

Place the mascarpone, the remaining cup of cream and nutmeg in a bowl. Whip on low for a minute until the mascarpone is loose. Add the Grand Marnier and whip on medium speed until it holds soft peaks. (DO NOT OVERBEAT AS THE MASCARPONE WILL BREAK.)

Mix about ¼ of the mascarpone mixture into the chocolate to lighten. Fold in the remaining mascarpone until well incorporated. Fill a pastry bag with the mousse. Again, you could just free form mousse on top of the pavlova.

Mascarpone Cream (for drizzling): ( I made half this quantity)

1 recipe crème anglaise
½ cup (120 mls) mascarpone
2 tbsp (30 mls) Sambucca (optional)
½ cup (120 mls) heavy cream

Prepare the crème anglaise. Slowly whisk in the mascarpone and the Sambucca and let the mixture cool. Put the cream in a bowl and beat with electric mixer until very soft peaks are formed. Fold the cream into the mascarpone mixture.

Crème Anglaise (a component of the Mascarpone Cream above): (I made half this quantity)

1 cup (235 mls) whole milk
1 cup (235 mls) heavy cream
1 vanilla bean, split or 1 tsp pure vanilla extract
6 large egg yolks
6 tbsp (75 grams) sugar

In a bowl, whisk together the egg yolks and sugar until the mixture turns pale yellow.
Combine the milk, cream and vanilla in a saucepan over medium high heat, bringing the mixture to a boil. Take off the heat.

Pour about ½ cup of the hot liquid into the yolk mixture, whisking constantly to keep from making scrambled eggs. Pour the yolk mixture into the pan with the remaining cream mixture and put the heat back on medium. Stir constantly with a wooden spoon until the mixture thickens enough to lightly coat the back of a wooden spoon. DO NOT OVERCOOK.

Remove the mixture from the heat and strain it through a fine mesh sieve into a bowl. Cover and refrigerate until the mixture is thoroughly chilled, about 2 hours or overnight.

Assembly:
Pipe the mousse onto the pavlovas and drizzle with the mascarpone cream over the top. Dust with confectioner’s sugar and fresh fruit if desired.

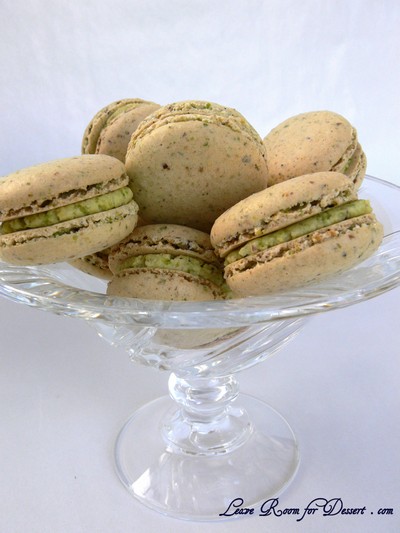
Pistachio Macarons

Sunday, May 9th, 2010

PistachioMacaron03

Happy Mother’s Day!

PistachioMacaron07

Even though these lovely pistachio macarons weren’t made for Mother’s Day – they were made for my Mum – on her birthday. They were the decorations for the dessert I made for her (a while ago now), I hope to post it soon. For the main meal on her birthday, we made the most awesome beef bourguignon pie – using Julia Child’s recipe (here is the recipe, if you don’t have the book). It was AMAZING! It took a while to prepare, but was worth it – it doesn’t get any better.

PistachioMacaron01

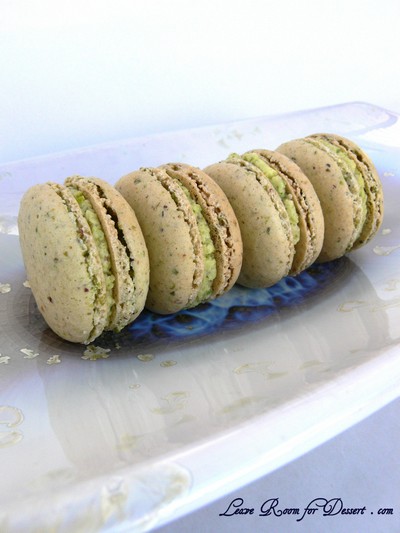
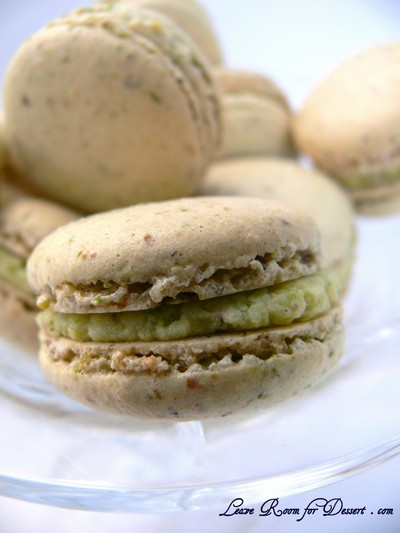
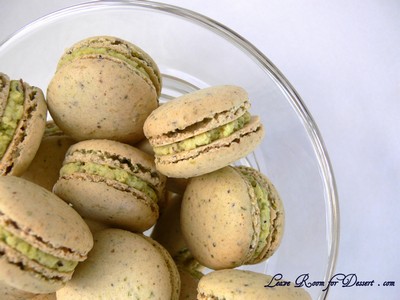
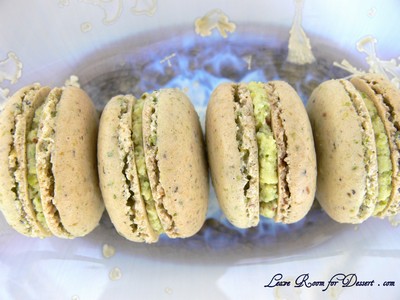
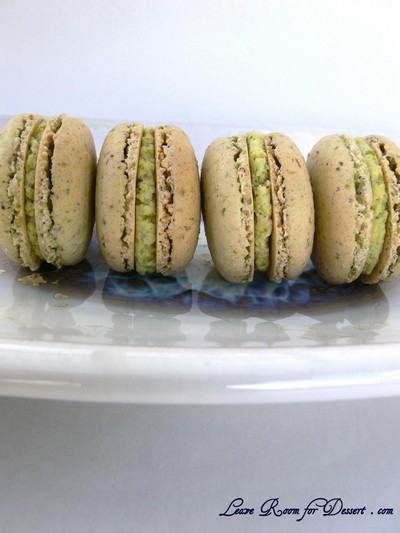
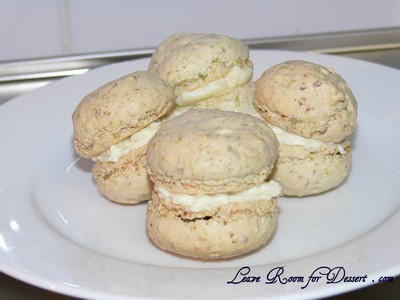
These home made pistachio macarons turned out just how I wanted. Cute little feet (the frill at the base of the macaron), slightly crisp on the outside, a lovely chewy centre and a wonderfully tasty pistachio flavour.

PistachioMacaron05

These would be perfect for a kitchen tea, high tea, baby shower or petit fours after a meal.

PistachioMacaron06

Pistachio Macarons

Recipe by Anita @ Leave Room for Dessert

Makes 46 sandwiched macarons

120g egg whites (aged for a day or two – covered in the fridge then brought to room temperature, or left at room temperature if the weather’s cool)
90g caster sugar
220g pure icing sugar
80g almond meal
80g pistachios

Pistachio butter cream
80g butter, at room temperature
160g icing sugar
50g pistachio

Process the icing sugar, pistachios and almond meal in a food processor until very finely ground, like dust. Sift and set aside.

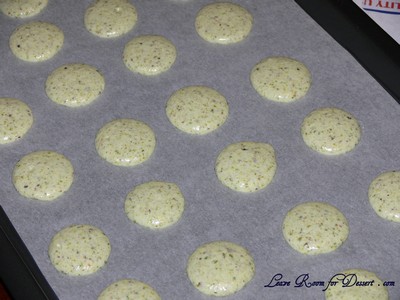
Beat egg whites until frothy, add the caster sugar whilst continuing to beat the egg whites on high until it forms a glossy thick meringue. Beat and fold the icing sugar and nut mixture into the meringue until the mixture flows and when the mixture is piped, any peaks sink back after a few minutes. Pipe 3-4cm circles on lined baking trays. Leave at room temperature for 30 minutes or more to form a skin.
PistachioMacaron02

Preheat oven to 150°C and cook macarons for 10 minutes or until slightly coloured, crisp on the outside and chewy on the inside. Allow to cool and then fill with the pistachio butter cream or another filling.

For the pistachio butter cream, cream the butter until light and fluffy. Process the pistachios with the icing sugar until finely ground. Beat the pistachio sugar into the butter in batches. When all the pistachio sugar is incorporated it is ready to fill the macarons. If it isn’t spreadable, add a touch of milk and mix until smooth.
PistachioMacaron04

Gingerbread House – Daring Bakers Challenge December 2009

Sunday, December 27th, 2009

GingerbreadHouse31

GingerbreadHouse32

The December 2009 Daring Bakers’ challenge was brought to you by Anna of Very Small Anna and Y of Lemonpi. They chose to challenge Daring Bakers’ everywhere to bake and assemble a gingerbread house from scratch. They chose recipes from Good Housekeeping and from The Great Scandinavian Baking Book as the challenge recipes.
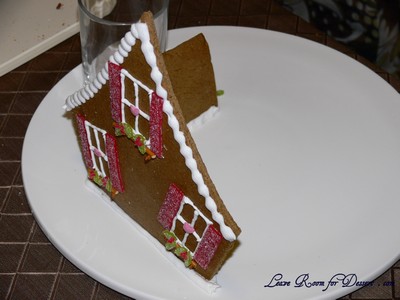
GingerbreadHouse18

I hadn’t planned on making a gingerbread house in December, for Christmas or for any other occasion. It just seemed like I already had enough on my plate around this time of year, without complicating it even further with making a gingerbread house.
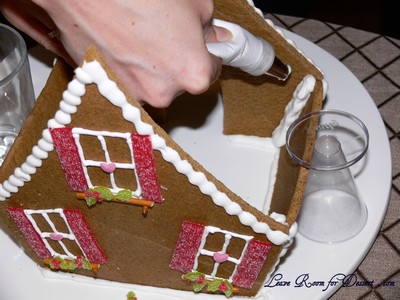
GingerbreadHouse26

This didn’t stop my enthusiasm when I found out what we were making. I’d never made a gingerbread house before – not even plain gingerbread… So I went straight to the internet to get ideas (I even asked a friend from work about the structural plans her husband had used last year – as that was an awesome gingerbread house!)

GingerbreadHouse30

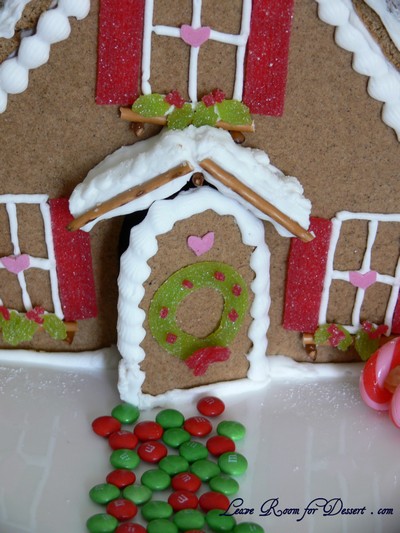
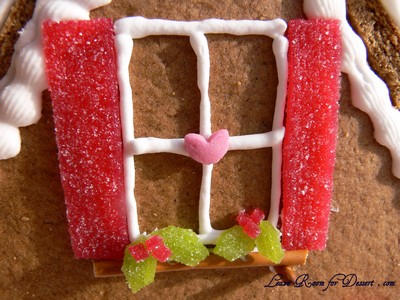
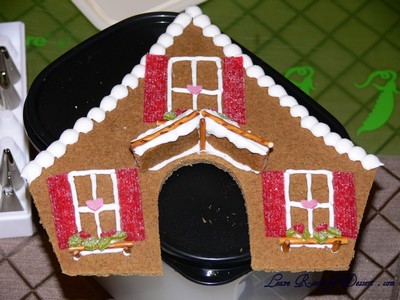
I decided to scale it down and not attempt the two storey magnificent house and found a cute (what I thought would be relatively easy and not too time consuming) gingerbread house with very cute decorations.

GingerbreadHouse20

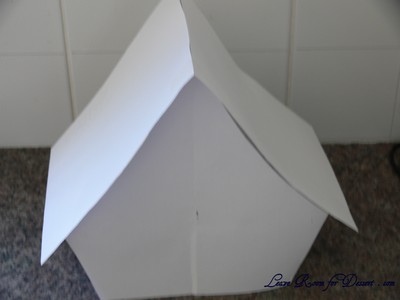
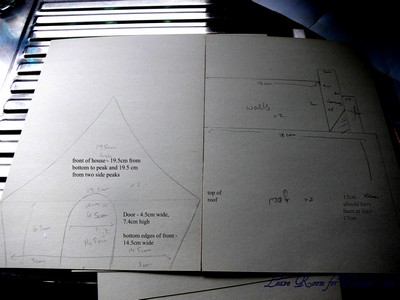
I’m not particularly good with my estimations, as everything seemed to take a lot longer than I had intended (everything except my plans for the house I drew up, along with a cardboard contraption to ensure the roof had a curve to it). The dough was very easy to make (except – I ran out of plain flour – who does that?) plus I think the conversion we were given may have been wrong, as it says 5 cups of flour was 875g not 625g, which is what other internet resources say.

GingerbreadHouse21

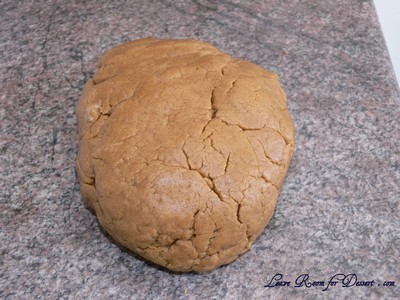
I left the dough in the fridge overnight, as I was having a busy weekend. The next morning it took ages (more than an hour) for the dough to come to a workable consistency – I had to bring in the big guns to roll it out for me.

GingerbreadHouse33

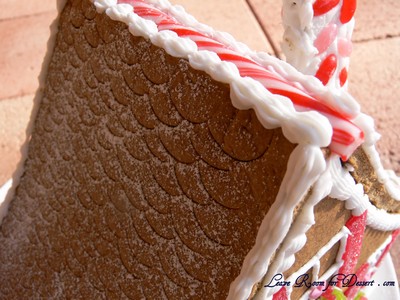
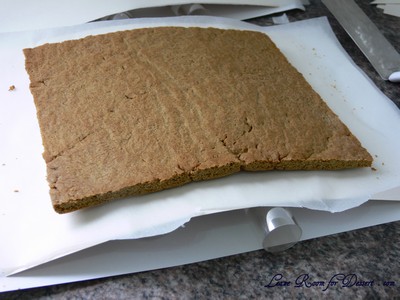
I had been given a hint, that you should cut out your gingerbread pieces once the gingerbread is baked and still warm – as it tends to shrink and warp while cooking, giving uneven walls etc. That was very useful in making sure I had the correct shapes. I just cut out the dough a bit bigger than my templates and cut out the templates from my cooked gingerbread while it was still warm – leaving the roof to set on my curved cardboard (a 24cm long piece of cardboard stuck to a piece of paper to measure 23.7cm on the paper.) I stabilised it with two rolled up overhead projector transparency sheets.

GingerbreadHouse22

Once it was all cooked and cooled, I had to find my decorations. Why is it that every time you’re looking for something in particular, you can never find it?? This happened with a few of my items, although in the end, I couldn’t really fit anything else on the large pavlova plate I was using.

GingerbreadHouse34

The royal icing was a first for me, and I found that 330g icing sugar seemed a bit too much for the amount of egg white (maybe I had to mix it more). I used some reasonably runny icing for the decorations, although it wasn’t great for holding up the walls of the house. So I added more icing sugar and eventually got quite a hard icing, which worked well for stabilising the walls and roof. All a part of learning, I guess.

GingerbreadHouse05

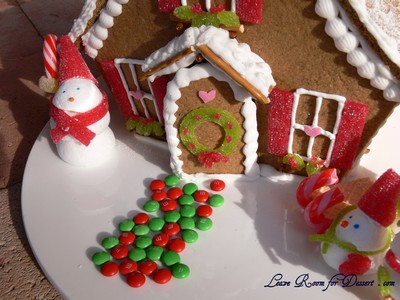
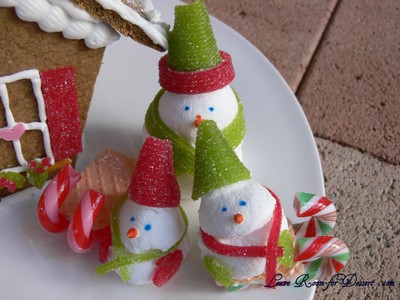
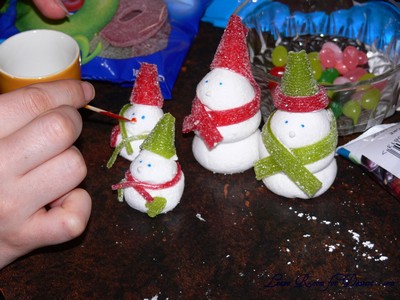
I had help with all the decorating and holding of pieces from my mum and sister (thanks ladies), with them making the very cute snow men out of marshmallows, royal icing and sour strips. (How cute are the scarves and gloves? 🙂 )

GingerbreadHouse19

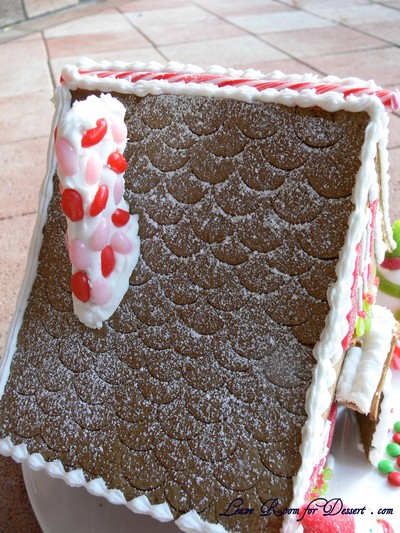
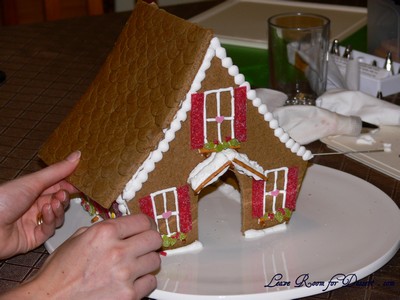
Holding the leaning side walls, chimney and especially the large roof were a bit nerve racking, although with a bit of icing and patience, it held together.

GingerbreadHouse23

The gingerbread was quite flavoursome (with everyone eating the off cuts and lollies while working), although I think I would put less ground cloves in next time (most people loved the strong flavours, but it was a bit strong for me).

GingerbreadHouse24

Now…. To transfer it to my place for Christmas… why didn’t I do it at my home?

GingerbreadHouse25

Thanks again to both our hosts. I really enjoyed this challenge (even though I am unlikely to make a gingerbread house as elaborate again).

GingerbreadHouse29

I used Y’s chosen recipe:

Scandinavian Gingerbread (Pepparkakstuga)

from The Great Scandinavian Baking Book by Beatrice Ojakangas http://astore.amazon.com/thedarkit-20/detail/0816634963

1 cup butter, room temperature [226g]
1 cup brown sugar, well packed [220g]
2 tablespoons cinnamon
4 teaspoons ground ginger
3 teaspoons ground cloves
2 teaspoons baking soda
½ cup boiling water
5 cups all-purpose flour [875g] (I found this to be 625g)

In a large bowl, cream the butter and sugar until blended. Add the cinnamon, ginger and cloves. Mix the baking soda with the boiling water and add to the dough along with the flour.

GingerbreadHouse38

Mix to make a stiff dough. If necessary add more water, a tablespoon at a time. Chill 2 hours or overnight. (Mine went very hard after chilling overnight).

Cut patterns for the house, making patterns for the roof, front walls, gabled walls, chimney and door out of cardboard.

Update: Click my link for my template

GingerbreadHouse39

GingerbreadTemplate01

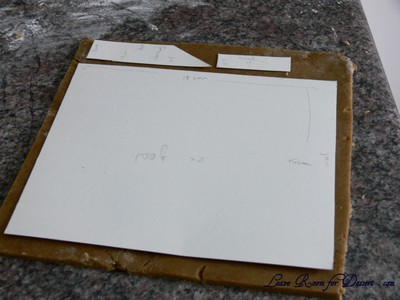
Roll the dough out on a large, ungreased baking sheet and place the patterns on the dough. Mark off the various pieces with a knife, but leave the pieces in place.

GingerbreadHouse45

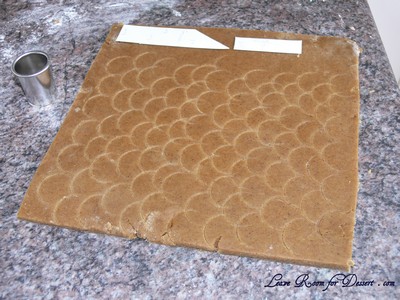
For the tiles on the roof - Use a small circle cutter to make semi circle indents in the dough before backing

For the tiles on the roof - Use a small circle cutter to make semi circle indents in the dough before baking

Y’s notes: [I rolled out the dough on a floured bench, roughly 1/8 inch thick (which allows for fact that the dough puffs a little when baked), cut required shapes and transferred these to the baking sheet. Any scraps I saved and rerolled at the end.]

Preheat the oven to 375’F (190’C). Bake for 12 to 15 minutes until the cookie dough feels firm. After baking, again place the pattern on top of the gingerbread and trim the shapes, cutting the edges with a straight-edged knife. Leave to cool on the baking sheet.

I quickly cut out the roof when the gingerbread was cooked and placed it on a curved piece of carboard to get the curve

For the roof I quickly cut out the roof when the gingerbread was cooked and placed it on a curved piece of carboard to get the curve for the roof

Royal Icing:

1 large egg white
3 cups (330g) powdered sugar (I used a little less)
1 teaspoon white vinegar
1 teaspoon almond extract

Beat all ingredients until smooth, adding the powdered sugar gradually to get the desired consistency. Pipe on pieces and allow to dry before assembling. If you aren’t using it all at once you can keep it in a small bowl, loosely covered with a damp towel for a few hours until ready to use. You may have to beat it slightly to get it an even consistency if the top sets up a bit. Piped on the house, this will set up hard over time.

Simple Syrup:(I didn’t use this, and assembled everything with the royal icing)
2 cups (400g) sugar

Place in a small saucepan and heat until just boiling and the sugar dissolves. Dredge or brush the edges of the pieces to glue them together. If the syrup crystallizes, remake it.

My photos of the assembly: (using lots of royal icing)

Place all decorations and piping on before assembling

Place all decorations and piping on before assembling

I did one wall first (held up by a glas as it is a leaning wall) then the back of the house.

I did one wall first (held up by a glass as it is a leaning wall) then the back of the house.

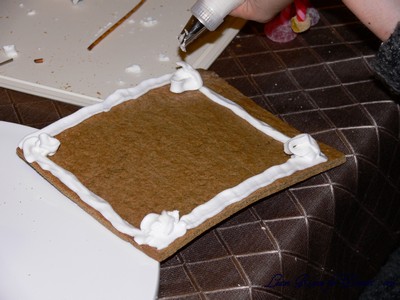
Pipe royal icing on the plate and the sides of the wall before placing walls in place. Pipe extra royal icing in the inside of the house. Make sure the walls are stable before attempting to put the roof on.

Pipe royal icing on the plate and the sides of the wall before placing walls in place. Pipe extra royal icing in the inside of the house. Make sure the walls are stable before attempting to put the roof on.

Pipe royal icing on all the edges the roof will attach to. Place roof on top and hold in place until stable.

Pipe royal icing on all the edges the roof will attach to. Place roof on top and hold in place until stable.

Pipe lots of royal icing on the remaining piece of roof, as you won't be able to pipe any more on the inside. Hold in place until stable.

Pipe lots of royal icing on the remaining piece of roof, as you won't be able to pipe any more on the inside. Hold in place until stable.

GingerbreadHouse28

Strawberries and Cream with White Chocolate Sponge and Ice Cream

Saturday, November 7th, 2009

StrawberryCreamMasterChef07

When I saw Katrina Kanetani from Pier walk into the MasterChef kitchen on Wednesday night I was so excited as I knew desserts would be on the menu. Katrina was named Chef of the Year in 2007 and is the head Pastry Chef at the three-hatted restaurant Pier, how could I not be excited to see what creations the celebrity contestants had to choose from.

StrawberryCreamMasterChef24

I thought both desserts Katrina revealed were gorgeous. How could you choose? Being a chocoholic I was obviously eager to get the recipe for the chocolate dessert – a chocolate brulee. But, after saying that, the strawberry, cream, sponge and tuile creation looked marvellous (this was the chosen dessert).

StrawberryCreamMasterChef08

Even better? I actually had most of the ingredients at home (couldn’t find sumac, though). So I had decided, printed the recipe off the day after the show and started planning how I would fit it in on the weekend, without making the whole day full of cooking and dirtying the kitchen, like I tend to do.

StrawberryCreamMasterChef16

So I made the ice cream the night before, chilled the custard on ice and placed it in my ice cream maker. It looked gorgeous (and tasted beautiful). I placed it in the freezer overnight and left it out for 10 minutes or more for it to soften.

StrawberryCreamMasterChef18

Everything on the plate worked fantastically together. It looked amazing too. I couldn’t believe I actually got it quite close to the actual dessert. I had a few problems with the tuile, mainly the fact my baking trays decided to buckle under the heat, causing the tuile mixture to be uneven. Overall I was very happy with my result.

StrawberryCreamMasterChef12

Aren’t my dinner guests tonight going to be happy? 😛

StrawberryCreamMasterChef15

Strawberries and Cream with White Chocolate Sponge and Ice Cream

Recipe by Katrina Kanetani as seen on Celebrity MasterChef 2009

Strawberry Ice-cream
180g strawberries, hulled, halved
360ml cream
5 egg yolks, reserve whites
120g caster sugar

White chocolate sponge cake

135g white coverture chocolate, broken up
125g unsalted butter, softened
5 egg yolks
4 egg whites
90g caster sugar
60g plain flour, sifted

Tuile
50g plain flour
60g caster sugar
35g icing sugar
Pinch salt
4 egg whites
65g butter, melted

Chantilly cream
200ml cream
1 tbs icing sugar
½ tsp vanilla bean extract

Strawberries

3 large strawberries, hulled
2 tsp icing sugar
½ tsp sumac (I left this out as I had none)

To serve
Icing sugar
Sumac (I left this out as I had none)
(Some of the strawberry puree – see method for ice cream)

To make the strawberry ice-cream, puree the strawberries in a small food processor and pass through a sieve. Reserve 1 tablespoon of the puree for serving. Place the cream in a small saucepan and heat over medium heat to just below boiling point. Whisk the egg yolks and sugar together in a large bowl. Gradually pour the hot cream into the yolk mixture, while whisking continuously until all the cream is added. Transfer the mixture into a clean medium saucepan and cook over low heat, stirring until custard thickens and coats the back of a spoon (mixture will be about 84°C). Strain custard through a fine sieve and place over a bowl of iced water, whisking until cold.

StrawberryCreamMasterChef26

Stir through the remaining strawberry puree.

StrawberryCreamMasterChef27

Transfer ½ cup of the ice-cream base into a cream canister and charge twice, shaking vigorously after each charge (I didn’t do this part as I wasn’t sure where it should be used for serving, plus I didn’t have the equipment. I placed it all in the ice cream maker.). Refrigerate cream canister until ready to serve. Pour remaining ice-cream base into a chilled ice cream maker and churn for about 20 minutes. Remove from ice cream maker and place in the blast chiller for about 10 minutes or until firm. (I placed mine in the freezer overnight)

StrawberryCreamMasterChef29

To make the white chocolate sponge cake, preheat oven to 160°C fan forced. Grease and line a 4cm deep baking tray (mine was 4.5cm x 21cm x 31cm). Place the chocolate in a glass bowl and place over a saucepan of simmering water. Stir with a metal spoon until melted. Transfer to a large bowl and cool. Add the butter to the cooled chocolate and beat until smooth. Stir in egg yolks and mix until well combined.

Using an electric hand beater, whip the egg whites to soft peaks. Add the sugar and continue beating until it forms stiff peaks.

StrawberryCreamMasterChef30

Fold the egg white mixture into the white chocolate and mix well. Gently fold in the flour. Spread the cake onto prepared baking tray until 2cm thick.

StrawberryCreamMasterChef01

Bake for 10 minutes or until cooked (until skewer comes outs clean)(mine took 20-25 minutes). Allow to cool in pan then turn cake onto a board and remove baking paper. Turn cake over, top side up. Cut out a 3cm x 15cm x 15cm triangle. Reserve sponge triange and off-cuts for serving.

StrawberryCreamMasterChef03

To make the tuile, grease and line 2 flat baking trays with baking paper. Sift the flour, sugars and salt into a bowl. Mix in the egg whites and butter. Place in the blast chiller for 10 minutes (I placed it in the freezer for 15 minutes). Spread a thin layer of batter onto one of the prepared trays and bake for 8 minutes (tuile should be set but not browned yet) (I did this at 160C fan forced). Using a sharp knife, cut the tuile, lengthways into 5cm wide strips. Turn onto the second prepared tray, separated slightly and return to oven until golden brown. While still hot, twist the tuiles and allow to cool to your desired shape.

To make the Chantilly cream, place the cream, icing sugar and vanilla in a bowl and beat with an electric beater until soft peaks form; refrigerate.

To prepare the strawberries, slice strawberries into 3mm thick rounds. Place the strawberry slices, sugar and sumac in a bowl and toss to coat all side of the strawberries.

To serve, dust the sponge cake triangle with icing sugar and place in the centre of the serving plate. Place a quinell of Chantilly cream on top of sponge triangle and sprinkle the cream and some of the plate with a little sumac. Rebuild strawberry next to the sponge so bottom becomes the top. Place a small piece of squashed off cut sponge on the plate to stand the ice-cream on. With a warmed spoon, take a quinell of strawberry ice-cream and place it on top of the squashed sponge (squashed sponge should not be visible – it is just use to hold the ice-cream). Dust the tuile with icing sugar and place in the centre of the plate. (I used a piping bag to make the strawberry puree into smallish dots on the plate)

StrawberryCreamMasterChef21

Macarons – Daring Bakers Challenge October 2009

Tuesday, October 27th, 2009

Macarons04

The 2009 October Daring Bakers’ challenge was brought to us by Ami S. She chose macarons from Claudia Fleming’s The Last Course: The Desserts of Gramercy Tavern as the challenge recipe.

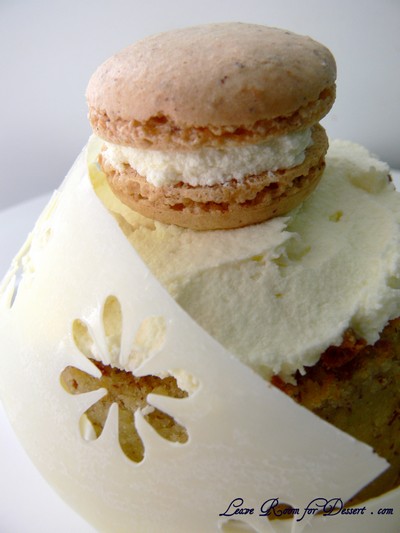
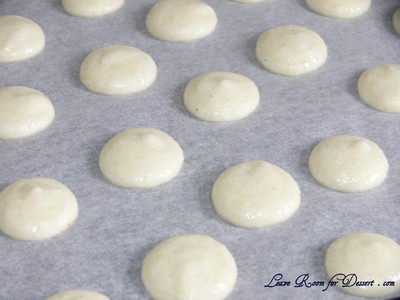
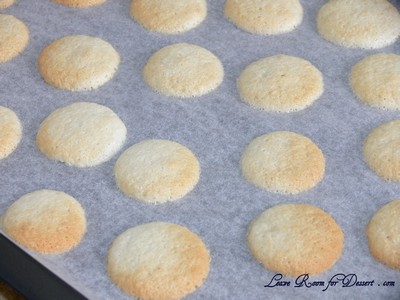
Unfortunately, my two attempts at this recipe were quite disappointing. I had made macarons a few times before (not having perfected them…yet), so I thought I would manage quite well and hoped that this would be the perfect recipe and the macarons would look gorgeous. This was not the case. My macarons looked worse than all other trials – including my first one, when I didn’t even know what they should look like. The macarons didn’t form “feet”, didn’t have a nice crisp top – they just puffed a bit in the oven then the top dried a bit and they sunk back down. Fortunately they were still moist and tasted quite good.

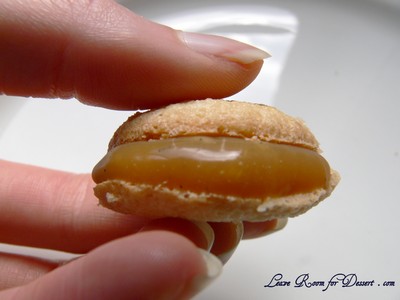
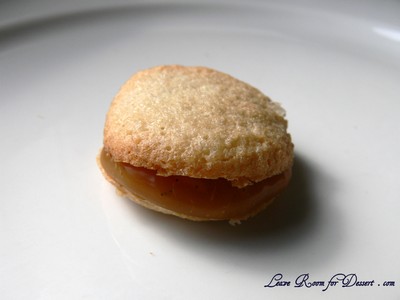
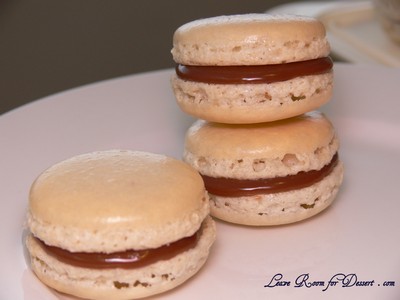
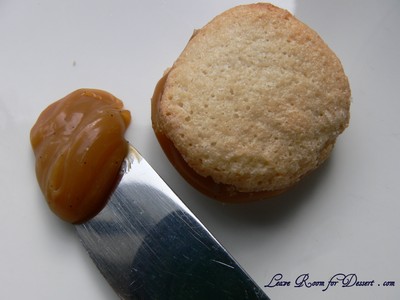
For the filling, I made salted caramel which had mixed reviews. Most people enjoyed it immensely, others found it extra sweet, and I just found the taste a bit strange, I think I’m just not a caramel liking person, unfortunately. I like butterscotch, flavours, so I’m not sure why I don’t like caramel?

Macarons03

I made two batches of this recipe, as I thought the first time it mustn’t have worked because, perhaps I didn’t beat my meringue mixture enough (as it says stiff peaks and other recipes state glossy meringue), or that drying them out in the oven caused the problems that occurred. Neither seemed to be the cause, I decided to keep beating the meringue, but it just would not form a glossy meringue. Either I put my KitchenAid on too fast and over beat the meringue, added my sugar too late or there may not have been enough sugar to form the meringue, although I’m not totally sure.

I have decided to share all my previous macaron experiences with you all, to give you an idea of problems I have had through each recipe, as well as give everyone suggestions for recipes they may or may not like to try. I never got around to posting these (apart from the latest one), as each had something slightly wrong with it (not necessarily the recipe, most are my mistakes while learning and trying to achieve the perfect macaron, inside and out).

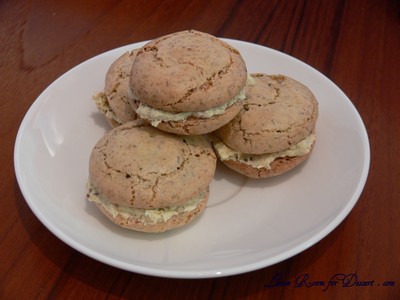
The following photo was my first ever attempt at macarons and was Nigella Lawson’s pistachio macarons from How to be a domestic goddess. The recipe did not state to leave the macarons to form a skin, resulting in biscuit looking macarons. This flavour was beautiful and as I recall the inside texture was also lovely, with the only problem being the look. They had half the recipes’ pistachio buttercream in them (the full amount is way too much, like stated on many other blogs).

Macarons06

After reading many more macaron tips, I had decided to trial out the pistachio macarons using Syrup and Tang’s French meringue method (replacing the almond meal for pistachio meal). After leaving them to sit for half and hour the formed quite lovely macarons that probably could have been beaten a few more times, for a better look and because they were a bit meringue-y still. Also – half almond, half pistachio may have worked better. I filled these with a rosewater buttercream. (For the buttercream: 25g butter, 1/4 cup cream, 1/2 cup icing sugar and 1/8 teaspoon rose water – beat the butter till soft and lightened in colour. Beat in the cream, then the sifted icing sugar or mixture with the rose water).

Macarons08

I had heard that the Italian meringue method was by far the most reliable and best around, I used Syrup and Tang’s Italian meringue method for these macarons. The two problems I had (apart from my enthusiasm with the pink food colouring) were the sugar syrup forming large chunks when drizzled into the egg white mix, as well as bumpy tops. The first problem may have occurred as my sugar thermometer didn’t reach into the sugar syrup, so I had to keep tipping the saucepan up to read the temperature. This disruption may be the cause of the sugar lumps. The second problem may have been able to be fixed by beating the mix a few more times. I would like to try this again as the inside was lovely and moist, filled the entire shell and seemed the perfect consistency. These were filled with white chocolate and raspberry ganache from Gourmet Traveller.

Macarons09

The recipe that produced the most beautiful macaron was Helen’s from Tartlette. Helen’s recipe produced a gorgeous glossy smooth top with pretty feet. My only problem with these were a bit of a hole under the shell of the macaron – could this be an oven problem? I filled these with a simple chocolate ganache.

Macarons12

My latest trial were hazelnut macarons, which had a beautiful flavour, although were lacking slightly in appearance.

WhiteChocHazelnut09

Macarons

Recipe adapted by Ami S from Claudia Felming’s The Last Course.

Confectioners’ (Icing) sugar: 2 ¼ cups (225 g, 8 oz.)
Almond flour: 2 cups (190 g, 6.7 oz.)
Granulated sugar: 2 tablespoons (25 g , .88 oz.) (I used castor sugar)
Egg whites: 5 (Have at room temperature) (I aged mine overnight at room temperature, covered in a paper towel)

Preheat the oven to 200°F (93°C). Combine the confectioners’ sugar and almond flour in a medium bowl. If grinding your own nuts, combine nuts and a cup of confectioners’ sugar in the bowl of a food processor and grind until nuts are very fine and powdery.

Beat the egg whites in the clean dry bowl of a stand mixer until they hold soft peaks. Slowly add the granulated sugar and beat until the mixture holds stiff peaks.

Sift a third of the almond flour mixture into the meringue and fold gently to combine. If you are planning on adding zest or other flavorings to the batter, now is the time. Sift in the remaining almond flour in two batches. Be gentle! Don’t overfold, but fully incorporate your ingredients.

Spoon the mixture into a pastry bag fitted with a plain half-inch tip (Ateco #806). You can also use a Ziploc bag with a corner cut off. It’s easiest to fill your bag if you stand it up in a tall glass and fold the top down before spooning in the batter.

Pipe one-inch-sized (2.5 cm) mounds of batter onto baking sheets lined with nonstick liners (or parchment paper).

Macarons13

Bake the macaroon for 5 minutes. Remove the pan from the oven and raise the temperature to 375°F (190°C). Once the oven is up to temperature, put the pans back in the oven and bake for an additional 7 to 8 minutes, or lightly colored. (I also tried leaving them at room temperature for 30 mins at room temperature, bu they still didn’t rise like they should).

Macarons01

Cool on a rack before filling.

I filled my macarons with salted caramel

Salted Caramel

Recipe from Chef Pang Kok Keong on Chubby Hubby’s blog

200g sugar
1 vanilla pod
200g cream
3.75g fleur de sel (I used salt flakes, as that’s all I had 🙁 )
140g butter, chilled

In a 1 litre heavy based pot, cook the sugar, stirring all the time to get an even caramel. Then add in the vanilla pod, scraped. Add in the warm cream a bit at a time as it will bubble up and splatter. Then add in the fleur de sel. Stir to make sure all the caramel has dissolved. Cool the mixture to approximately 40 degrees Celsius. Add in the well chilled butter, cut into cubes. Using an immersion blender, blend in the butter till you achieve a smooth glossy paste. Line the surface of the caramel with plastic wrap or greaseproof paper to prevent a skin from forming and chill in the fridge until needed.

Macarons05