Cakes, Slices and Biscuits

White Chocolate Raspberry Cheesecake Slice

Wednesday, June 20th, 2018

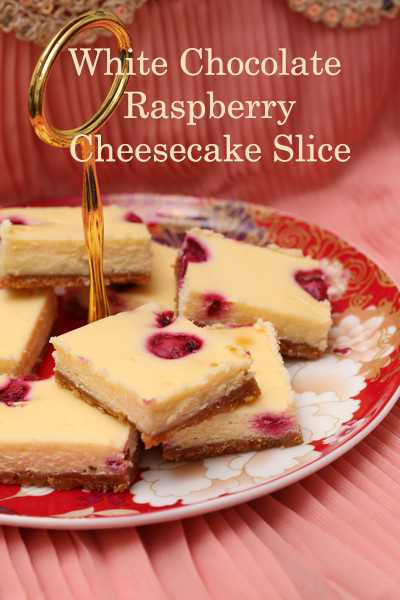
White Chocolate Raspberry Cheesecake Slice

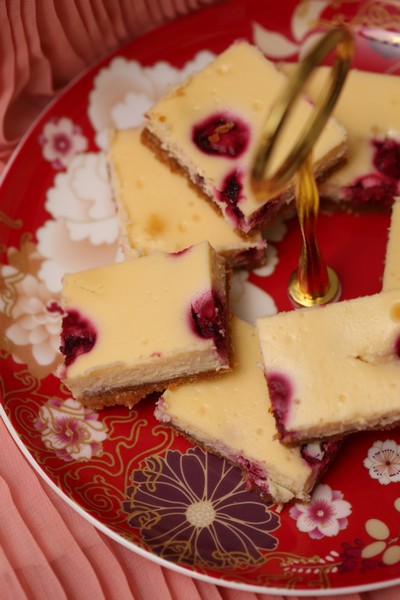
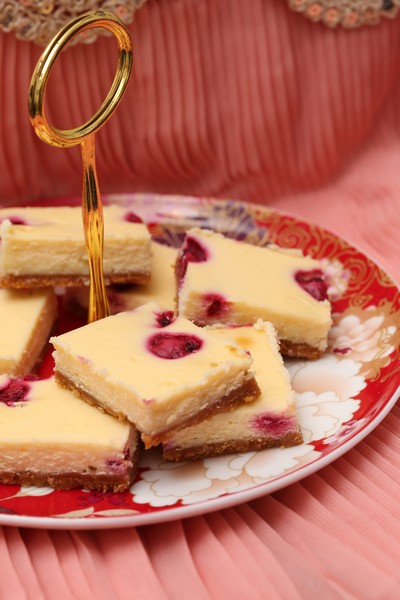
This is a wonderful addition to any party. These yummy desserts have the perfect combination of sweet, tart, creamy and crunchy. Make them big or small depending on what else is on offer.

White Chocolate and Raspberry Cheesecake Slice

We have served this at a number of parties so far, and they are a great alternative to some of the other rich chocolate dense desserts. It is also very easy to make them very small, so they can be served to lots of people, and also made a day or two in advance.

White Chocolate and Raspberry Cheesecake Slice

White Chocolate Raspberry Cheesecake Slice

Recipe from Taste
Makes 16 (or up to 45-60 small pieces)

200g packet granita biscuits
100g butter, melted
375g cream cheese, softened
1/2 cup (125g) sour cream
1/2 cup (100g) caster sugar
2 eggs
100g white chocolate, coarsely chopped
1/2 cup (60g) frozen raspberries
Icing sugar, to dust

Grease and line the base and side of a 19 x 29cm slice pan with baking paper, allowing the sides to overhang. (I have used a larger pan 22cm x 31cm, it worked out fine, but you may need a touch less time for cooking).

Place the biscuits in the bowl of a food processor and process until finely crushed. Add the butter and process until well combined. Spoon into the prepared pan and use a glass to spread and press mixture firmly over the base of the pan. Place in the fridge for 30 minutes to chill. (If you need to leave it longer, no worries).

Preheat oven to 160°C. Place the cream cheese and sour cream in the bowl of a food processor and process until smooth. Add the sugar and eggs and process until smooth.

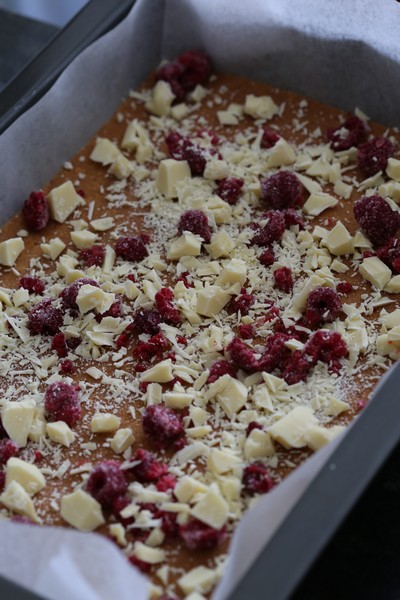
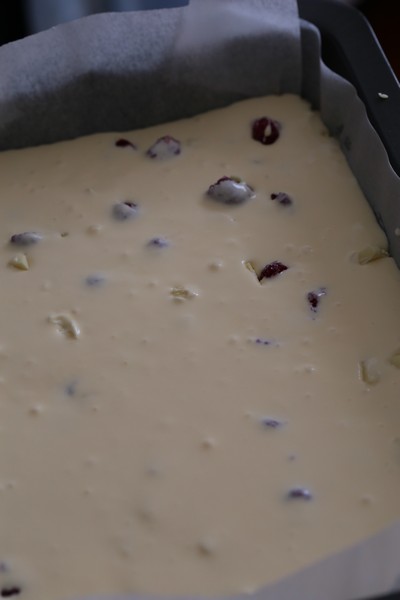
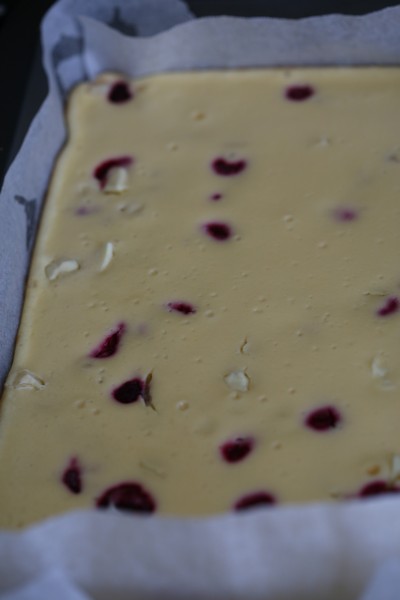
Sprinkle the biscuit base evenly with white chocolate and raspberries. Pour over the cream cheese mixture. Gently tap the pan to settle mixture. Bake in preheated oven for 20-25 minutes or until filling is just set. Turn oven off and leave the door ajar. Set aside to cool in oven. Place in the fridge to cool completely. Cut into squares to serve. Dust with icing sugar.
WhiteChocRaspberrySlice1

WhiteChocRaspberrySlice2

WhiteChocRaspberrySlice3

White Chocolate and Raspberry Cheesecake Slice

Anzac Biscuits

Wednesday, April 25th, 2018

Anzac Biscuits
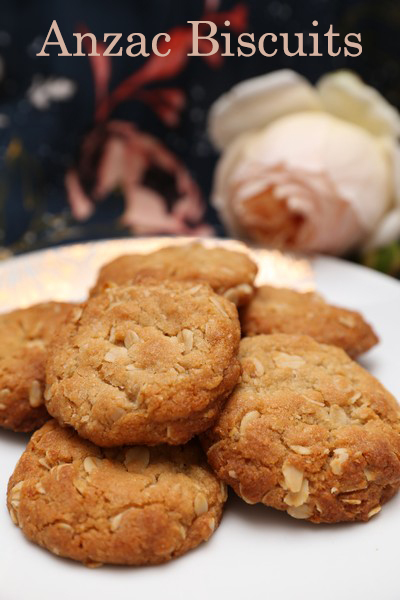
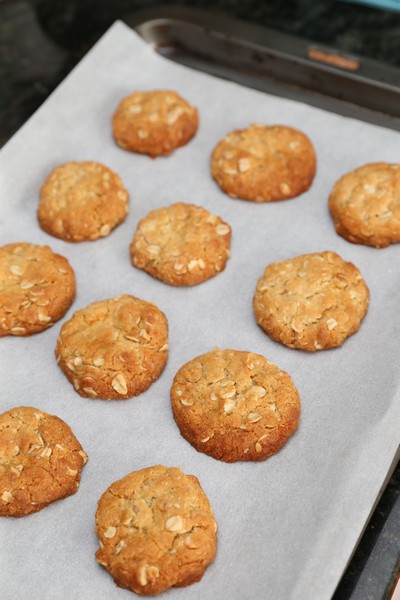
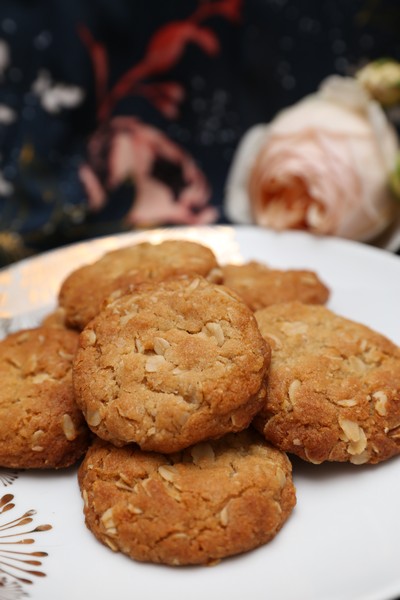
We make these biscuits almost every ANZAC day (25th April, a day of national remembrance).

I do make them throughout the year as well, as they keep well made in advance and taste great. A great biscuit for those with egg allergies, and if you need a dairy-free alternative you could try and substitute coconut oil. (I haven’t yet tried this recipe with coconut oil, but tried a similar styled recipe which contained coconut oil and it turned out well).

Anzac Biscuits

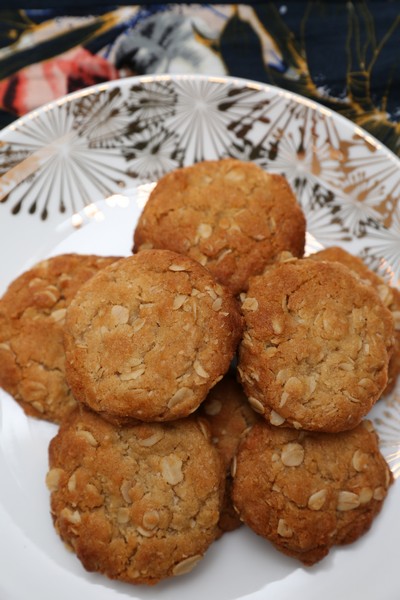
I do find my biscuits turn out different to my mums though. Hers would always spread to make large biscuits, often almost touching, and she would cook some longer and some shorter to accommodate my siblings and my preferences. I enjoyed mine soft and chewy and others preferred hard and crunchy. When I make these, sometimes they don’t expand at all, and other times they spread a little – but never like mums (I think my oven is a bit hotter though, so that may have something to do with it).

Anzac Biscuits

Makes: about 25

1 cup rolled oats
1 cup plain flour
3/4 cup caster sugar (original recipe said 1 cup sugar)
3/4 cup coconut
125g (4oz) butter
2 Tablespoons golden syrup
½ teaspoon bicarbonate of soda
1 Tablespoon boiling water

Preheat oven to 160C. Combine oats, sifted flour, sugar and coconut in a large bowl.

Combine butter and golden syrup in a small saucepan, stir over medium heat until melted. Mix bi-carb soda with boiling water and add to the melted butter mixture, stir into dry ingredients. Place Tablespoonfuls of mixture on lightly greased oven trays, or on paper lined trays, allow room for spreading.

Cook in oven for 10 – 15 minutes, longer if you prefer them hard. Loosen while warm, then cool on trays.

Anzac Biscuits

Anzac Biscuits

Caramel Slice

Thursday, March 29th, 2018

Caramel Slice

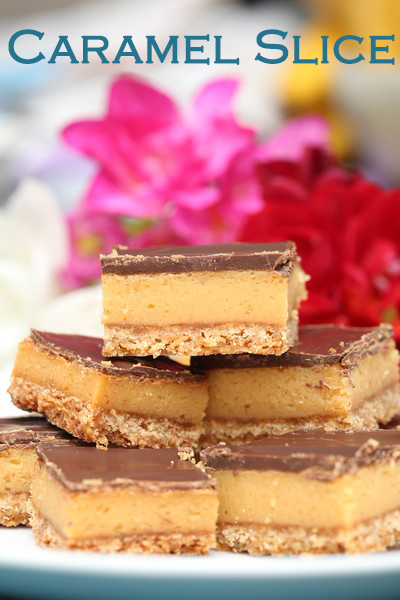
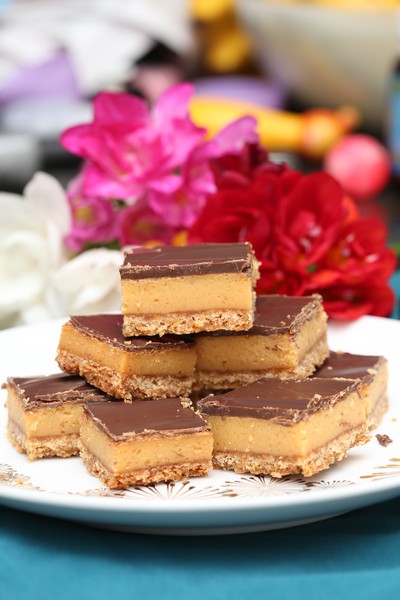
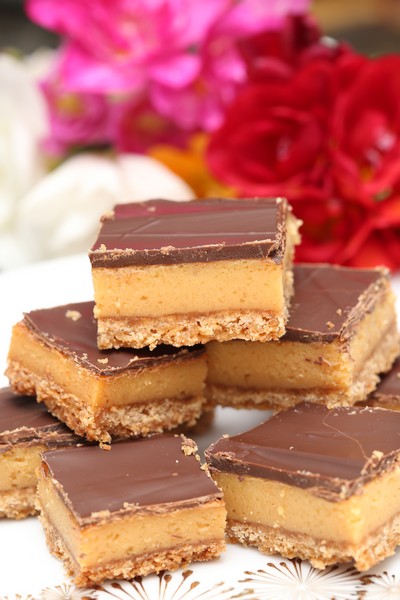
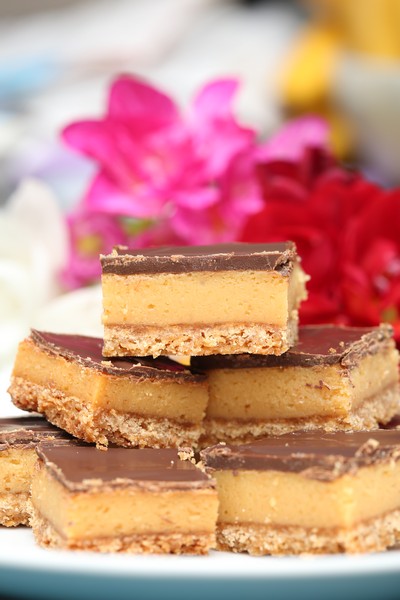
I was looking for a recipe for caramel slice and came across one on the internet that claimed it was the best ever caramel slice. Well, it’s a big claim, but I think it’s pretty high up there. Easy to make, super tasty – I won’t be looking for another recipe. This will be my go-to from now on.

Caramel Slice

It’s great as it can be made in advance and I have had a lot of positive comments by people who have tried it. Most going back for a second (or third or fourth) piece. I’m sure you could easily make this gluten-free too by replacing the flour with gluten free flour.

It makes a wonderful addition to a dessert table, as they can be cut quite small so people can have a bite and try other desserts too.

Caramel Slice

Caramel Slice

Recipe from Bakers Corner

Makes 16-60 (The original says 16 slices, but you can make lots of little ones if there will be other sweets)

1 cup (150g) plain flour
1/2 cup (110g) brown sugar
1/2 cup (40g) desiccated coconut
125g butter, melted

100g butter, extra
2 x 395g cans NESTLÉ Sweetened Condensed Milk
1/3 cup (80mL) golden syrup

200g PLAISTOWE Premium Dark Chocolate, melted
1 tbsp vegetable oil

1. Preheat oven to 180°C/160°C fan forced. Lightly grease an 18cm x 28cm lamington pan and line with baking paper. (I used a slightly bigger pan 22cm x 31cm, but it still came out fine, if you do this, the cooking time may be a bit shorter)

Caramel Slice

Caramel Slice

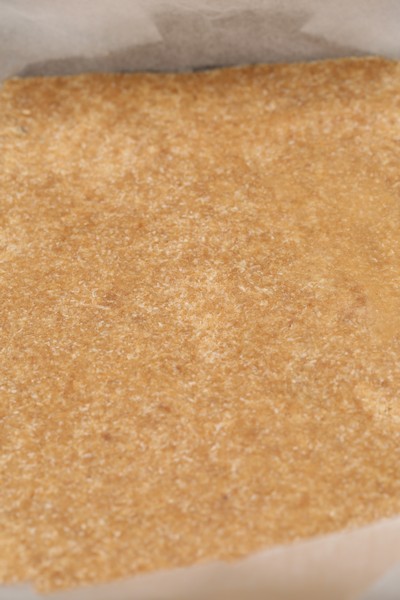
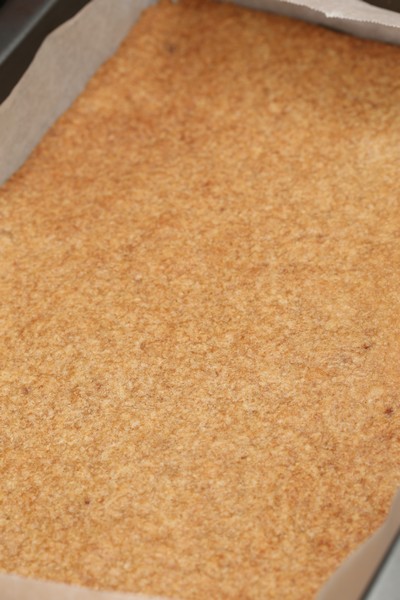
2. In a medium bowl, combine flour, sugar and coconut. Add melted butter, mix well. Press mixture firmly into prepared pan. Bake for 15-20 minutes until lightly browned. Cool. (I didn’t let this cool. I cooked the condensed milk whilst this was in the oven and then poured it straight on and back in the oven.)
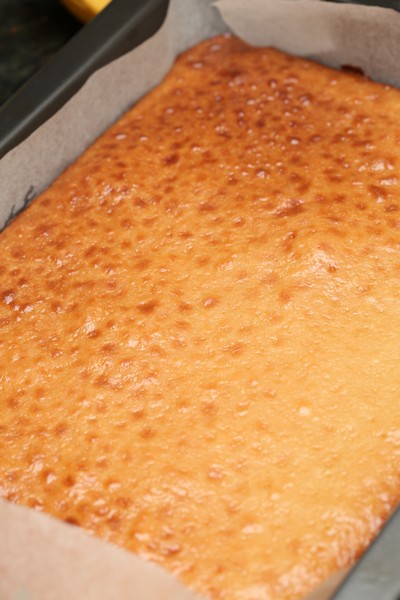
3. Place extra butter, NESTLÉ Sweetened Condensed Milk and syrup in a medium saucepan. Stir over low heat until smooth. Pour over base. Bake for 20-25 minutes until golden. Cool.

Caramel Slice

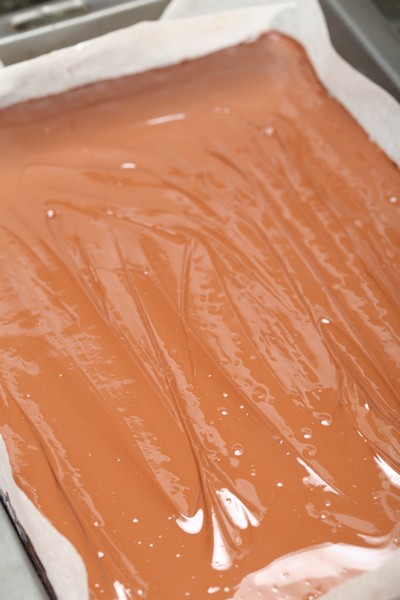
4. Combine PLAISTOWE Premium Dark Chocolate and oil, stir until smooth, pour evenly over slice. Place in fridge until set and then slice. (You may like to clean the knife between each or every couple of slices. a clean knife will give a cleaner edge).

Caramel Slice

Caramel Slice

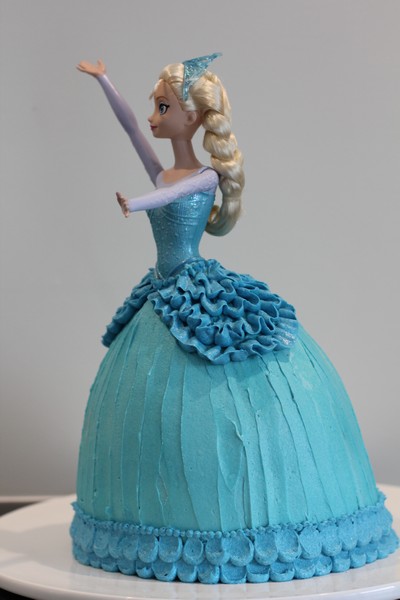
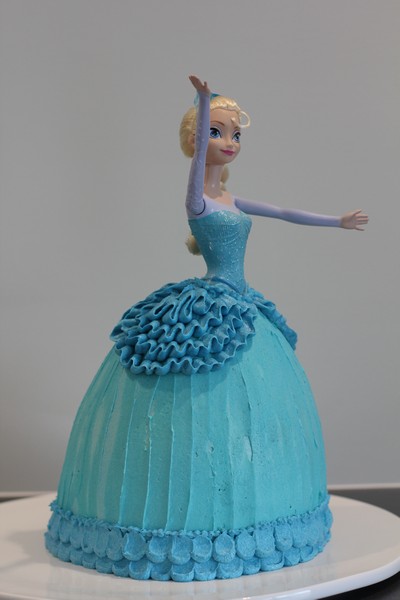
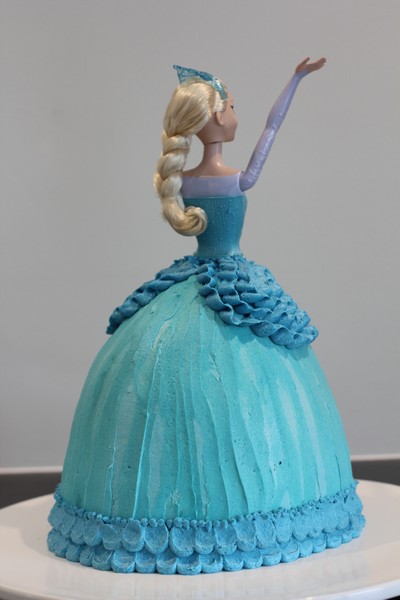
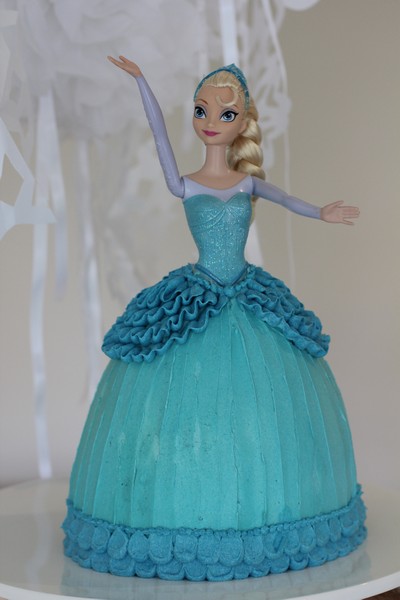
Elsa Cake (Buttercream tutorial) and an Ice-themed Birthday Party

Tuesday, December 13th, 2016

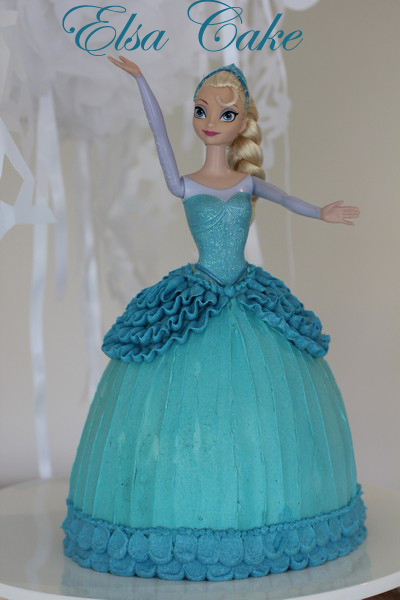
Elsa Cake Buttercream tutorial

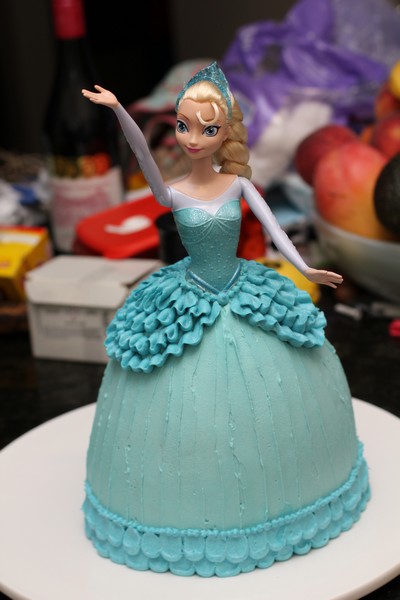
I had a request for a very special birthday this year. An Elsa cake. I’m sure many parents out there have had the same request after the much loved Frozen movie was released back in December 2013.

Elsa Cake

There are some amazing tutorials out there for both buttercream and fondant for Elsa cakes. Although, as my family are not huge fondant fans (and I am not hugely confident with fondant), our cakes are always decorated in Vienna/Buttercream icing. It does limit some of the effects you are able to create, but I (almost) always love a challenge and a bit of problem-solving.

Elsa Cake

Elsa Cake

Elsa Cake

Elsa Cake

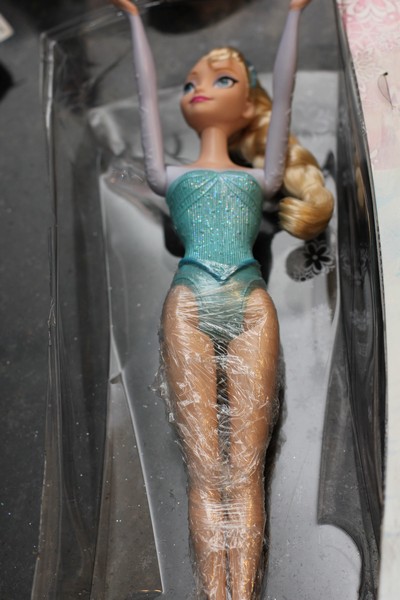
To start with, I needed an Elsa whose clothes could come off, and even better – the one I chose had a printed on bodice. I bought mine online here – you may find something similar by searching Elsa sparkle doll. I found the ones in store didn’t look as pretty as the one I ordered.

Elsa doll

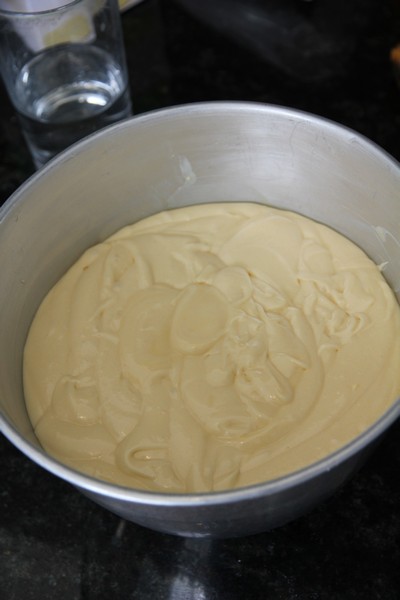
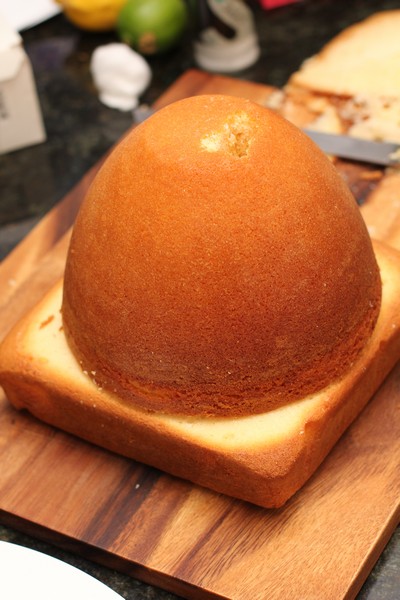
To make the cake, I used a combination of my mum’s Dolly Varden tin as well as a square 20cm tin (you could probably use a round 20 or 22cm tin). For the Dolly Varden tin I used 2 x packet cake mixes (I used Green’s Golden Butter Cake, with a dash of vanilla added to it). This took about 1 hour 20 minutes at 170C (check every 20 minutes, and 10 minutes toward the end). I wrapped the tin in foil/damp newspaper wrap to try and make the cooking a bit more even. Here is a good tutorial to make one. I also made another 2 x packet cake mixes for the square tin + 18 patty cakes. I made the additional cake, as didn’t want to take the legs off a doll I had bought as a present.

Elsa Cake

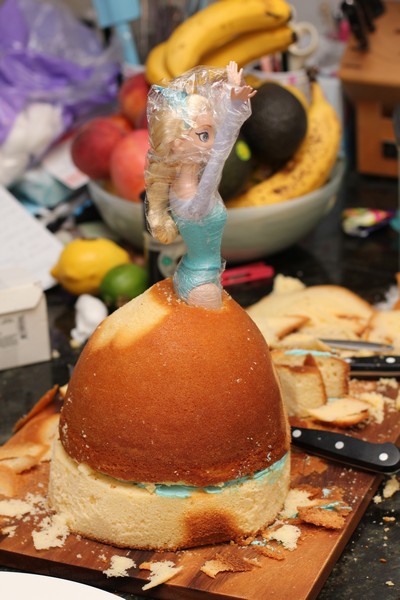
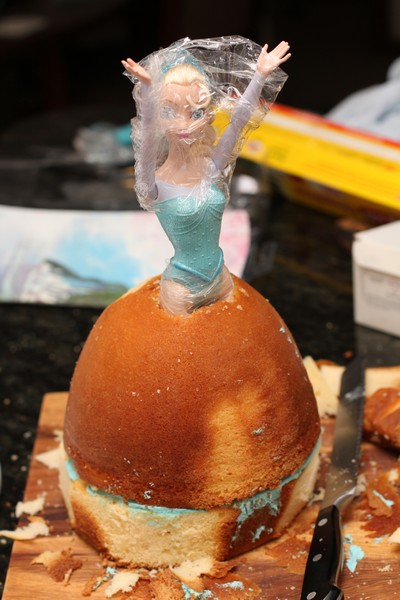
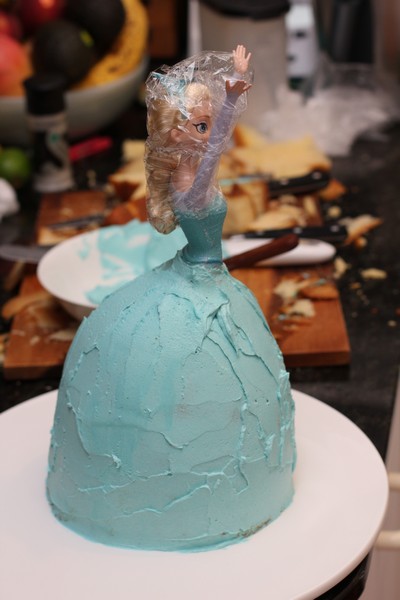
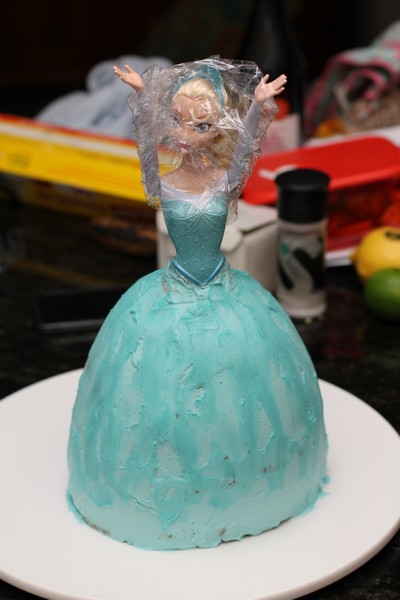
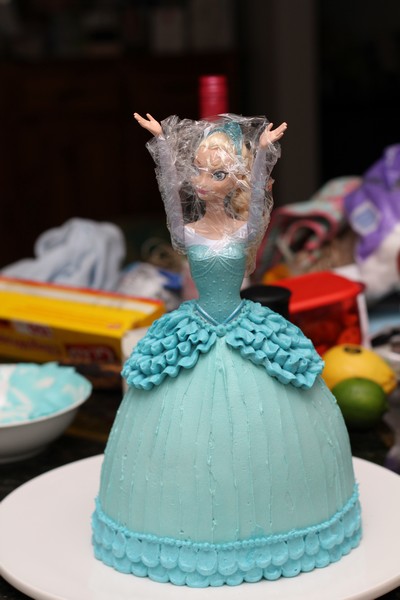
Once the cakes were cooled, I cut out a rectangle toward the front of the dolly Varden cake big enough for Elsa to fit in, scooping out the cake with a fork. I then placed her into the cake, making sure her bottom half was covered with plastic wrap. Here is a good fondant tutorial for an Elsa cake, which i based some of the carving from. Once the rectangle was cut out (and both cakes reasonably flattened), I froze both the cakes – to make carving easier and less messy later – and it’s much easier not having to make the cakes the day before the party.

The day before the party I decorated the cake, using 3 x quantity Vienna cream. (There was more than enough for the cake and some of the patty cakes as well).
375g butter, room temperature
4 1/2 cups icing sugar (I used icing mixutre)
3-6 Tablespoons milk
Beat butter until fluffy and very light in colour. Gradually add the icing sugar and milk alternatively until nice and fluffy. Add colour pastes as required, mix well.

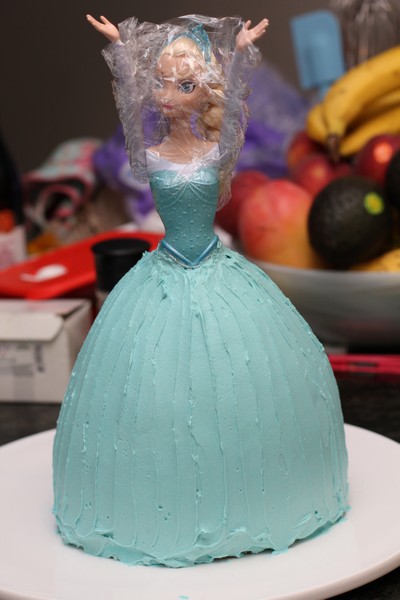
To get the right colour I kept adding a combination of Wilton Icing colours (pastes) – Sky Blue and Royal Blue, until I was happy with the colour of the main part of the dress.

Remove the cakes from the freezer, add some icing between the two layers (you may need to add more icing here, depending how high your cakes rose and where they come up to on Elsa’s legs) and start to carve. The main carving is needed from the square cake, although i made the front of the skirt a little flatter, and took a little off the back as well.

Elsa Cake carving

Elsa Cake carving

Elsa Cake carving

Elsa Cake carving

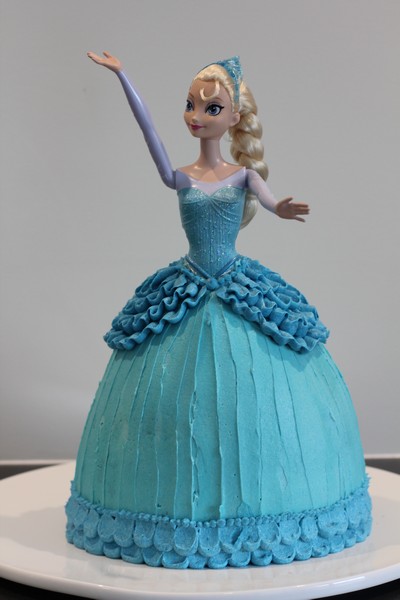
I iced the skirt with a crumb coat (place some icing in a bowl and coat – this way you don’t need to worry about crumbs getting into the small bit of icing in the bowl). Smooth the skirt and place in the fridge for 5-10 minutes. Remove from the fridge and smooth well with a slightly warmed palate knife. Next ice on top of the skirt with another layer of icing. To get the striped look, use the small offset palate knife to stroke down evenly along the skirt.

Elsa Cake Crumb Coat

Elsa Cake smoothed

elsacake10

Elsa Cake smoothed

Here is a Wilton tutorial of the cake I was basing my one off.

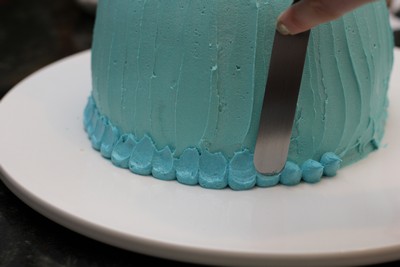
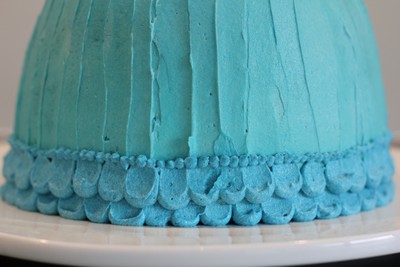
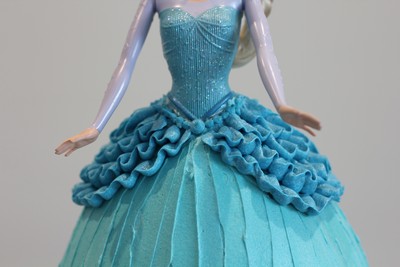
Once you are happy with the main part of the skirt, you can add more of those two coloured pastes until you have a darker and nicely contrasted blue. This is then used for the base decorations and the ruffles. For the base I used 1cm nozzle in a piping bag and piped 5 rounds of icing, then use the small offset palate knife to pull some of the icing upwards (not too far though). Continue around the skirt until it is complete. Do the same pattern offset above this pattern.

Elsa Cake

Elsa Cake Skirt base

For the ruffles at the top, I used my Wilton tip 104. There are many tutorials on how to use these tips to make beautiful ruffles. My suggestion would be to do a rough outline (either using a template or freehand) to mark where to do the ruffles. My original ones were too small and looked silly, so I had to wipe them off and start again. I’m also not sure whether they were totally even.

Elsa Cake Ruffles

For the piping at the top and bottom, I used a size 4 Bakers Secret nozzle. I just used what I had on hand and what I thought would suit this size skirt – as the cake ended up being quite big (without looking out of proportion).

Elsa Cake

Elsa Cake

I hope this tutorial has helped anyone planning to make a lovely cake for a special someone in their life.

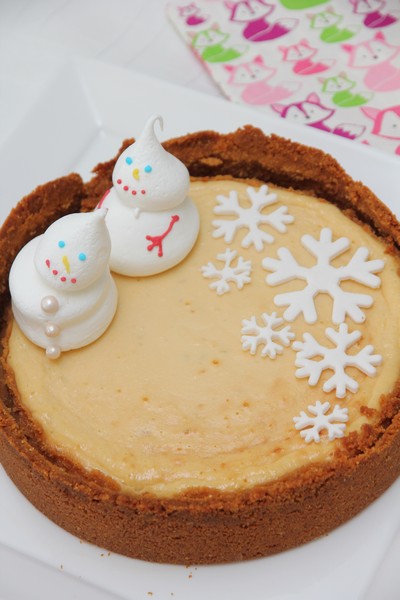
Some of the other things I made for the party included meringue snowmen and a lime pie (topped with snowflake icing decorations). These snowflake decorations were just made using some flower paste and using cutters that are available on ebay.

Elsa Cake Lime Pie

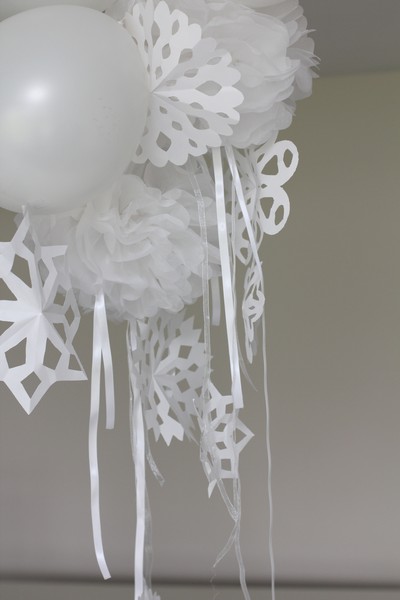
The decorations in the centre of the room were a combination of balloons, tissue paper pom poms and hand made snowflakes – always a fun craft to do!

Decorations

Elsa Cake

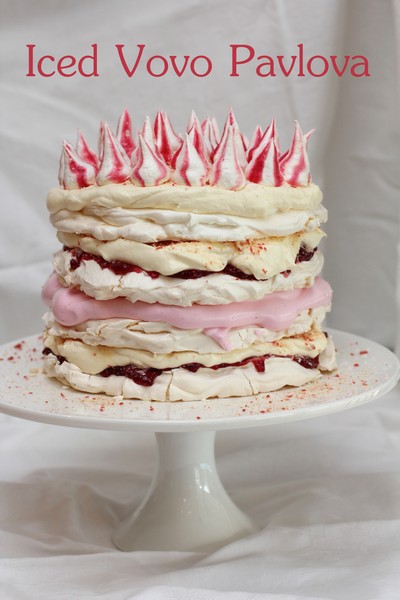
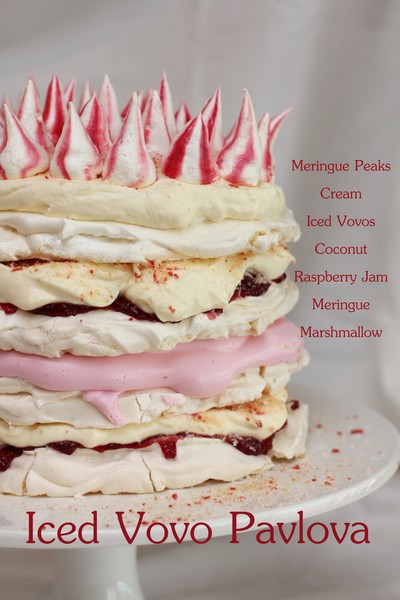
Iced Vovo Pavlova

Monday, June 15th, 2015

Iced Vovo Pavlova

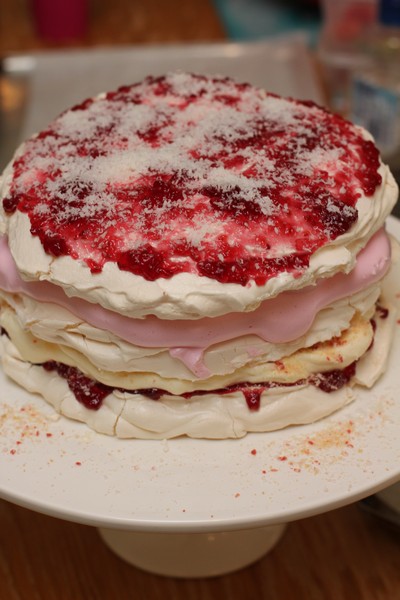
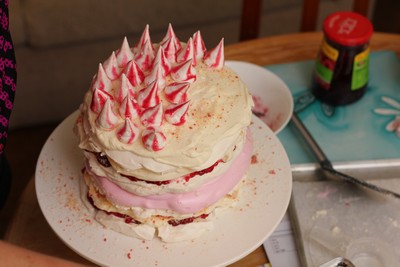
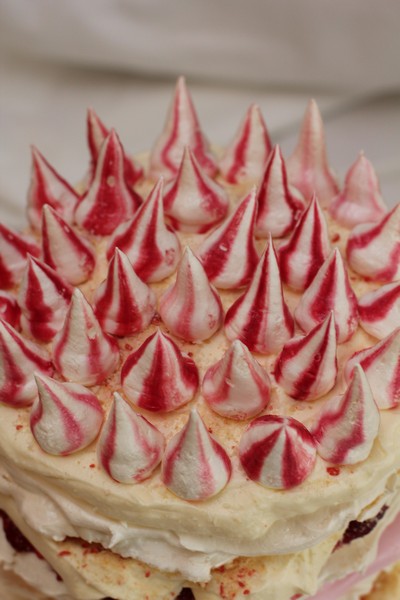
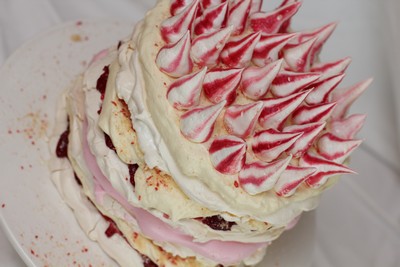
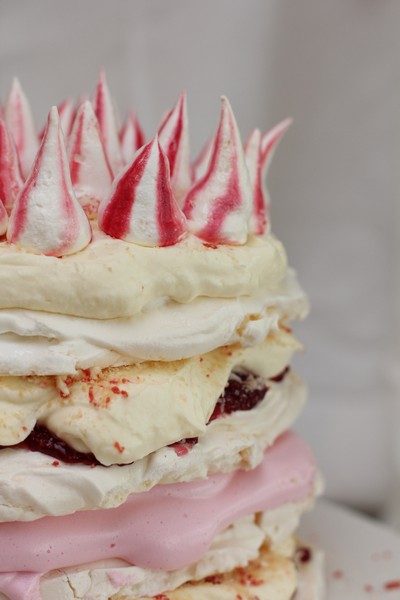
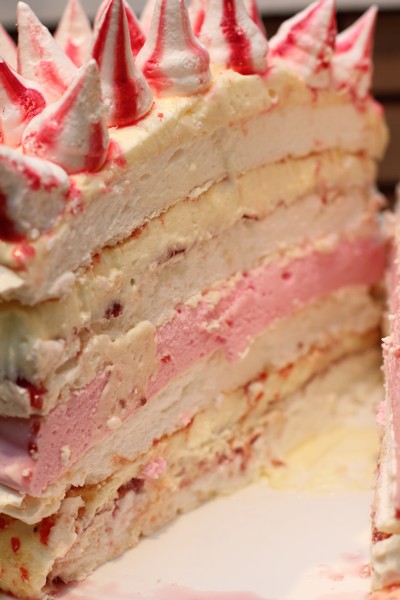
I saw the January Taste Magazine’s Cover whilst looking over a number of my food-related emails – it was an Iced Vovo Pavlova – it looked amazing! I made sure I bought the magazine as I thought this would be lovely to make for Australia Day celebrations.

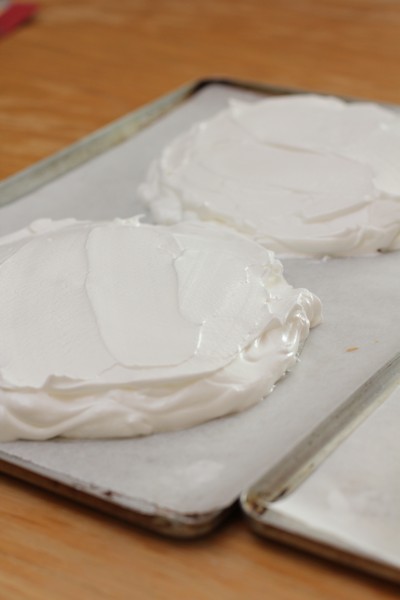
I didn’t choose the best day to make meringue though, a hot and steamy 30C+ day in Sydney. So sweating in the kitchen I persevered and managed to get it all done. Luckily I took the photos straight away, as it starting weeping and melting in the heat (as it was a lot taller than I expected, and didn’t fit in the fridge).

Iced Vovo Pavlova

As for taste, I was surprised at how similar to the Iced Vovo biscuit it tasted – due to the combination of coconut, raspberry jam and marshmallow, with lovely cream layers and crunchy pavlova. My only issue, I found it a bit too sweet. I would have liked a cake/sponge/biscuit layer and less meringue, but that’s just me – maybe something to create in the future.

You can find the recipe on Taste if you wish to try it yourself 🙂

Iced Vovo Pavlova

Iced Vovo Pavlova

Iced Vovo Pavlova

Iced Vovo Pavlova

Iced Vovo Pavlova

Iced Vovo Pavlova

Iced Vovo Pavlova

Iced Vovo Pavlova

Iced Vovo Pavlova

Iced Vovo Pavlova

Iced Vovo Pavlova

Ferrero Rocher Cake

Sunday, January 18th, 2015

Ferrero Rocher Cake

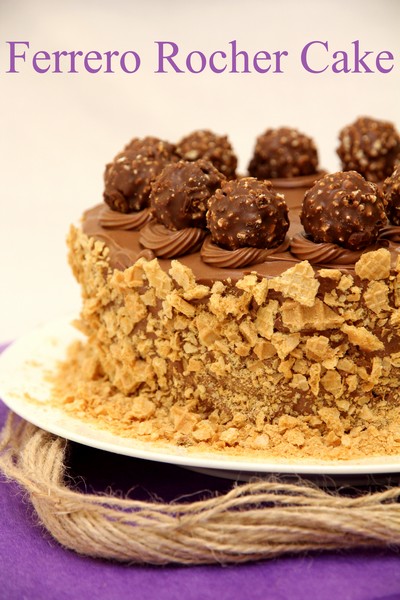
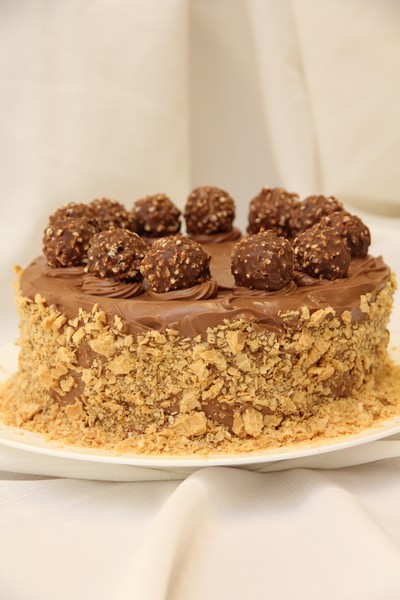
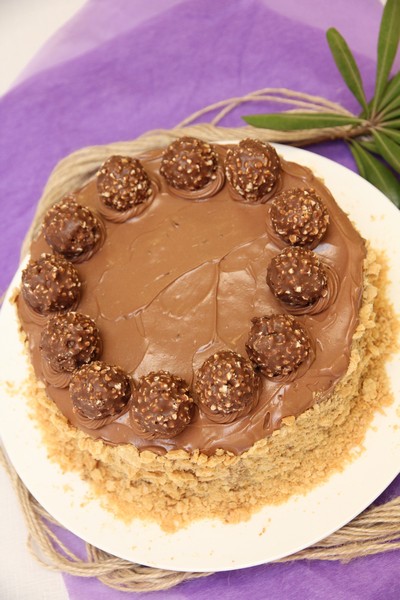
We had an amazing cake tonight to celebrate my sisters birthday. It is called a Ferrero Rocher Cake, and it certainly captured the lovely flavours of one of my favourite chocolates.

Ferrero Rocher Cake

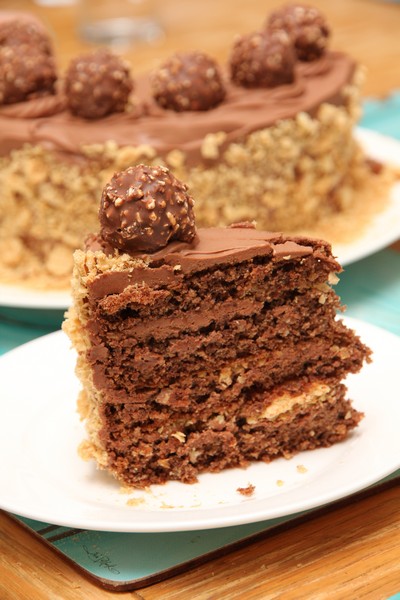
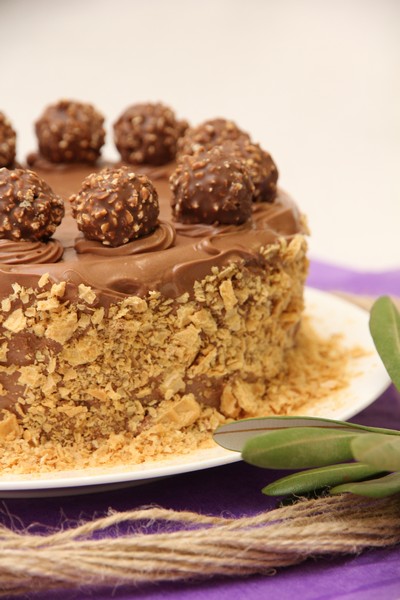
The cake was a lovely hazelnut sponge, light and fluffy and not too rich, with layers of hazelnut chocolate cream/icing and wafers. It was decorated with Ferrero Rochers and wafers (hazelnuts on the outside would have also worked very well, although the heat was affecting the icing and time was running out for us, so we decided against using the hazelnuts).

Ferrero Rocher Cake

We made the cake the day before, and had a bit of a failed attempt on our first batch, as the eggs were not beaten for long enough – causing the mixture to split and not rise. The second attempt, we used the whisk attachment and whisked it for a long time and it worked very well.

Ferrero Rocher Cake

We kept the cake in the fridge after decorating, which helped reduce some of the sweetness. I’m not sure how long you could keep it in the fridge before it affects the crunchiness of the wafers. I would definitely make this again.

Ferrero Rocher Cake

Ferrero Rocher Cake

Recipe from Let the Baking Begin

Cake Layers

7 large eggs, room temperature
½ cups sugar, granulated
2 cups finely ground hazelnuts or hazelnut flour
3 Tbsp all purpose flour
3 Tbsp cocoa powder
3 tsp baking powder

Frosting

300 grams unsalted butter, room temperature
2¼ cups (360g) chopped chocolate or chocolate chips
½ cup (120g) Nutella

Also

1.5 cup (40g approx) wafers, crushed

Decorating

10 Ferrero Rocher Candies
¾ cups hazelnuts, chopped / or ¾ cups wafers, crushed

Instructions
Cake Layers

Preheat oven to 180C. Grease and line 2 x 20cm round pans with baking paper.
Sift flour, cocoa & baking powder. Stir in ground nuts.
Whip eggs on high speed (in a stand mixer with whisk attachment), until frothy. Slowly add the sugar and continue whipping until tripled in volume, about 5 minutes.
Fold dry ingredients into the eggs , in 3 additions.
Divide the batter evenly between 2 x 20cm pans and bake at 180C for approximately 20-30minutes, turning half way, until a toothpick inserted in the center comes out clean.
Once baked, leave in the pan for 5 minutes, then transfer to a cooling rack.

Make the Frosting

Melt chocolate in microwave, on low heat, in short intervals, stirring each between each time. Bring to room temperature.
Whip chocolate, butter & Nutella until thoroughly combined. (I used a stand mixer with beater attachment)

Assembly

Once the cake is cool, split each cake in 2 even layers.
Crush wafers by putting in a ziplock bag, then going over them with a rolling pin or something heavy.
Reserve ¾ cup frosting for decorating.
Place a dab of frosting onto a serving platter.
Put 1 cake layer on top and press to adhere.
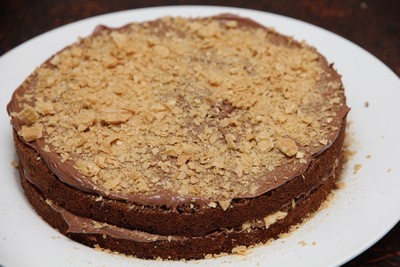
Put ¼ of the remaining frosting onto the cake and spread around evenly. Sprinkle with ⅓ of the crushed wafers.
Repeat above 2 steps with the remaining cake layers.

Ferrero Rocher Cake
Ferrero Rocher Cake
Ferrero Rocher Cake

Pipe 8 stars on top of the cake.
Cover the cake sides with reserved frosting.
Press the crushed wafers or chopped hazelnuts onto the sides of the cake.
Place 1 Ferrero Rocher candy on top of each piped star.

Notes
Keep refrigerated if not serving right away. Bring to room temperature before serving.

Malteser Cake

Sunday, January 11th, 2015

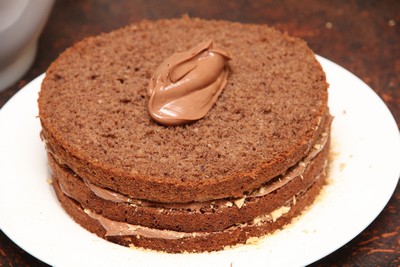
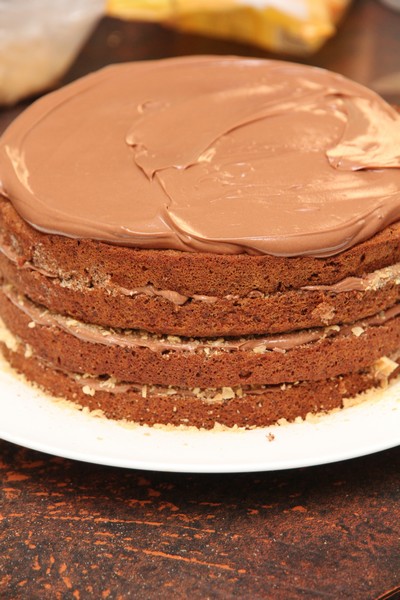
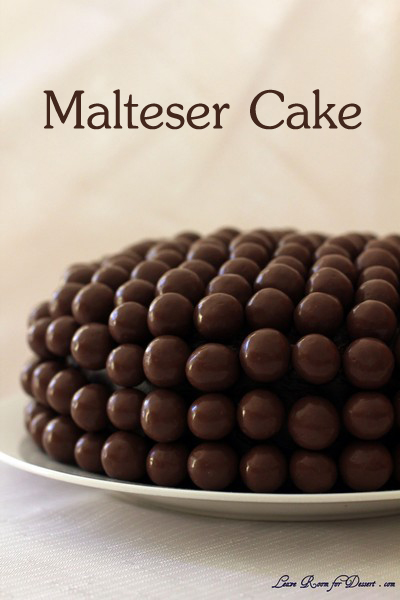
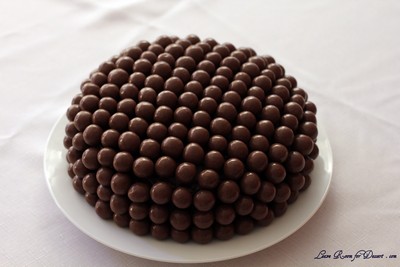
Malteser Cake

After seeing a cake covered in maltesers, how could you NOT make it? And what better excuse than a birthday.

It looked lovely and tasted lovely – only very very rich. I couldn’t get through my piece, and neither could a number of other family members. The cake was rich and the icing, very sweet and there was lots of it.

I would definitely consider decorating another cake in maltesers, as it looks lovely – and I love maltesers…. but I wouldn’t make this recipe again unfortunately. Just too rich for me and my family.

If you would like to try it, I used this recipe from Taste.

Pražský koláč (Prague Kolache) – Daring Bakers Challenge September 2014

Saturday, September 27th, 2014

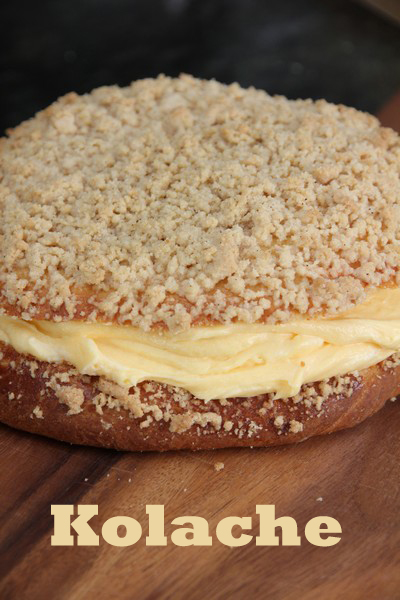
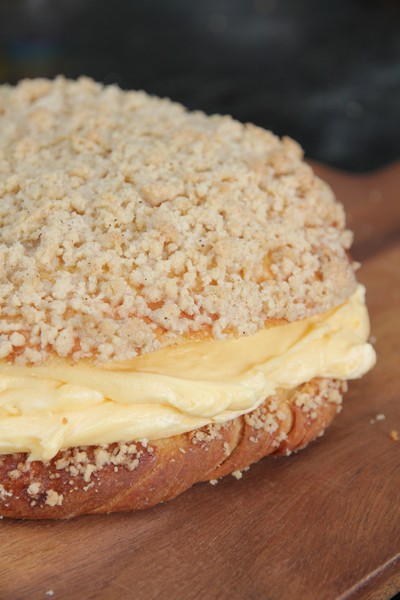
Kolache

The September Daring Bakers’ challenge was brought to us by Lucie from ChezLucie. She challenged us to make a true Czech treat –Kolaches!

The challenge this month looked like lots of fun. (I missed out on last months challenge, but hope to make it up soon). A bready-cake topped with a crunchy cinnamon topping and filled with custard was highly likely to taste great.

Kolache07

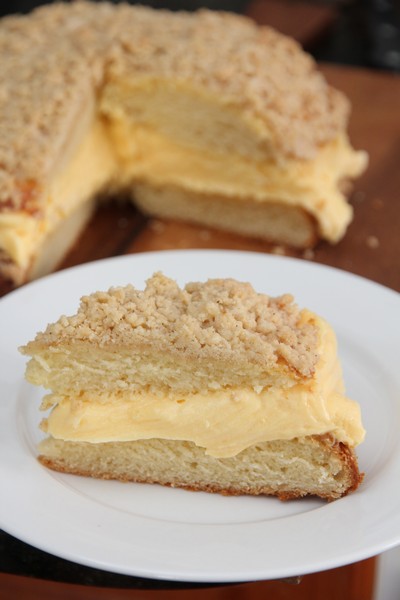
All components were quite easy, although I was a little concerned when my cake didn’t rise much in either of the resting periods. It all turned out in the end and was so lovely, after eating our first slice, Nick and I went back for a second slice. This probably wasn’t the best idea, as it was a little rich as the custard wasn’t very cold.

There was a little bit of cake left over the next day, and it was devoured very quickly. The topping stayed surprisingly crunchy and everything was still lovely. I do enjoy trying new dishes, it’s so much fun!

Kolache09

Pražský koláč (Prague Kolache)

Servings: 8 – 10 (original recipe in metric)

for cake:
1¾ cups (420 ml) (9 oz) (250 gm) all-purpose (plain) flour
½ cup (120 ml) (125 gm) mayonnaise (store-bought or home-made), room temperature
2 tablespoons (30 ml) (1 oz) (30 gm) granulated sugar
1 small egg, room temperature
15 gm (½ oz) fresh yeast or 1 packet (2 teaspoons) (7gm) dry active yeast
5 tablespoons (75 ml) milk, warm
½ teaspoon (3 gm) salt
for cream:
2 cups (500 ml) milk, divided
½ cup (120 ml) (3½ oz) (100 gm) granulated sugar plus 1 tablespoon (½ oz) (15 gm)vanilla sugar
½ cup (120 ml) (2-2/3 oz) (75 gm) vanilla pastry cream powder
1 stick (½ cup) (4 oz) (125 gm) butter, room temperature
5 tablespoons (75 ml) double cream, chilled
for streusel topping:
1/3 cup (1¾ oz) (50 gm) plain flour
¼ cup (60 ml) (1¾ oz) (50 gm) butter, chilled and diced
¼ cup (60 ml) (1¾ oz) (50 gm) caster (or granulated) sugar
½ teaspoon (2 gm) ground cinnamon
for finishing:
1 small egg, lightly beaten

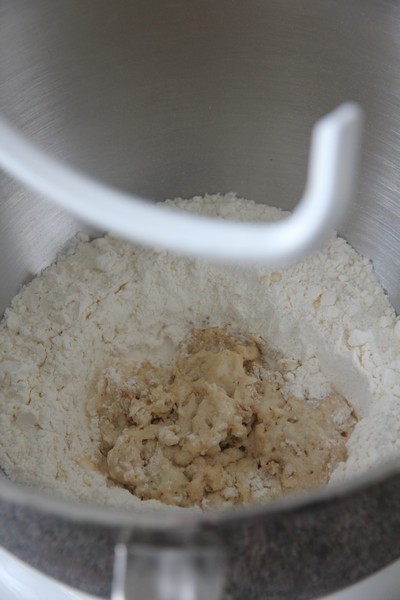
In a bowl of your stand mixer, sift flour and make a hole in the middle. Crumb the yeast into the hole, add 1 teaspoon sugar and about 3 teaspoons warm milk. Mix yeast, sugar and milk with fork and lightly sprinkle the surface with flour. Cover the bowl with towel and let rise for 10-15 minutes.

Kolache01

Add rest ingredients (mayonnaise, sugar, milk, egg and salt) and knead with dough hook on low speed for 10 minutes, until you have smooth dough.

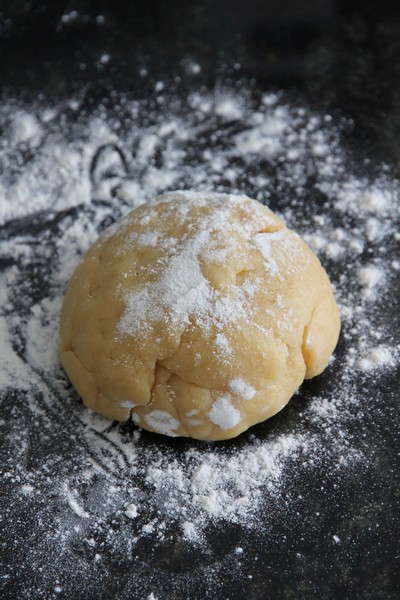
Turn the dough onto a lightly floured surface. Cover with towel or clingfilm and let rise for about an hour to double its volume.

Kolache02

Form the dough into a ball and place it onto the baking sheet lined with parchment paper. With your palms and fingers press the dough and shape it to disc about 20–25 cm (8-10 inch) in diameter and 2–3 cm (¾-1 inch)thick. Let rise for 30 minutes.

Meanwhile preheat your oven to moderate 320°F/160°C/gas mark 3 and make streusel topping. In a medium bowl, mix together sugar, flour and cinnamon. Add cold butter and with your fingers, mix all ingredients until crumbly.

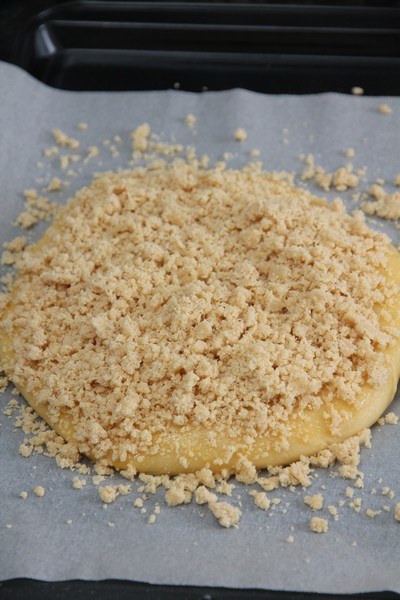
Brush the cake with eggwash and sprinkle with generous amount of streusel topping.

Kolache04

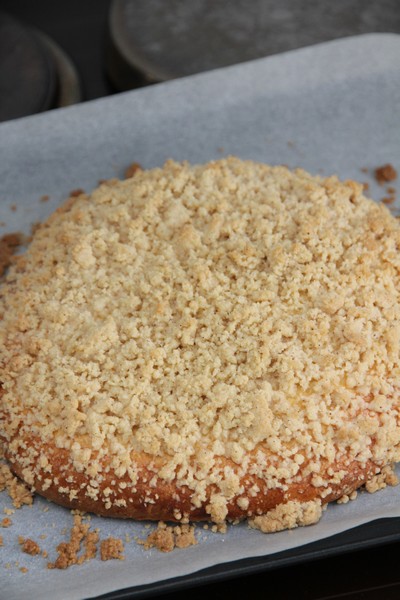
Bake for 20 minutes until golden brown. Let cool on a wire rack.

Kolache05

Prepare the cream.
In a small bowl, mix well ½ cup (125ml) milk with the vanilla pastry cream powder. Set aside. In a saucepan, mix the rest of the milk 1½ cup (375ml) with the sugar and vanilla sugar and bring it to boil, stir occasionally. Add the milk-pasty cream powder mixture and boil for 3 – 5 minutes, stirring constantly.
Transfer the mixture into a bowl of your standing mixer fitted with paddle attachment and let cool completely, while stirring constantly on a low speed. Add diced butter and mix together.
Separately whip the double cream until stiff. Mix with vanilla cream.

Kolache03

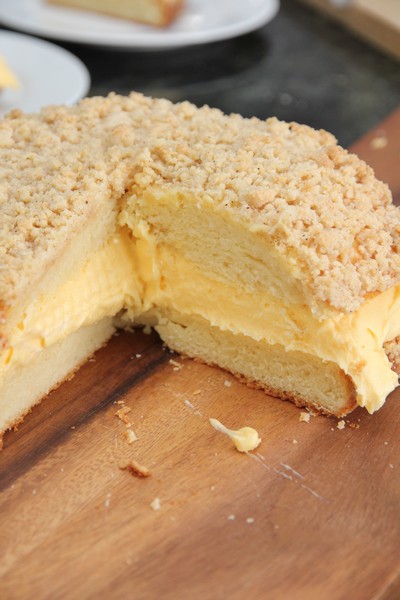
Cut cooled cake lengthwise and spread the cream onto the bottom part. Cover with upper part. Cut into 8 to 10 pieces.

Kolache08

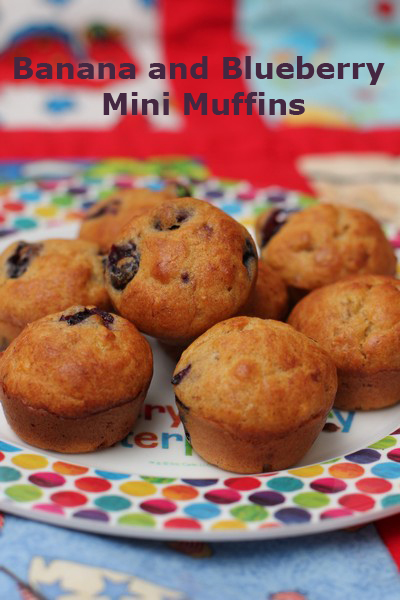
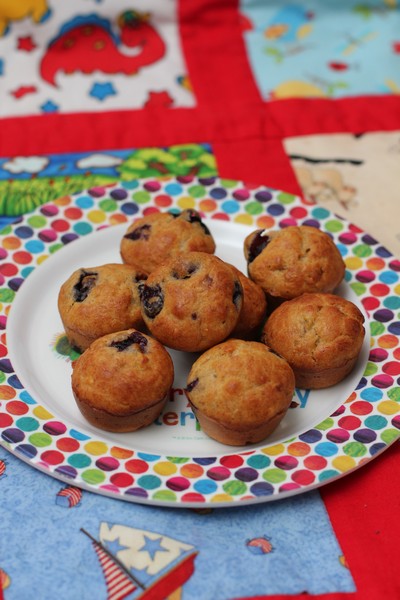
Banana and Blueberry Mini Muffins

Thursday, August 28th, 2014

Banana and Blueberry Mini Muffins

When I first decided to make some mini muffins for my bub, I didn’t want to add extra sugar (whatever was already present in fruit would be sweet enough), so I came up with an easy recipe that I am super happy with (as are the bubs and adults who have tried it).

I doubt this recipe would make fantastic normal sized muffins (as I do have a sweet tooth, and find them a little on the low-sweet side), but they are perfect mini muffins.

Banana and Blueberry Mini Muffins

I hope you and your kids or bubs enjoy this recipe.

Banana and Blueberry Mini Muffins

Recipe from Anita @ Leave Room for Dessert
Makes 16 mini muffins

1 banana, mashed
3 Tablespoons vegetable oil (plus a touch extra for the mini muffin pan)
1 egg
1/2 teaspoon vanilla extract (or seeds from half a vanilla pod)
1/2 teaspoon cinnamon powder
1/2 cup (70g) self-raising flour, sifted (you could probably use self raising wholemeal flour)
1/2 cup (70g) blueberries, fresh or frozen, washed

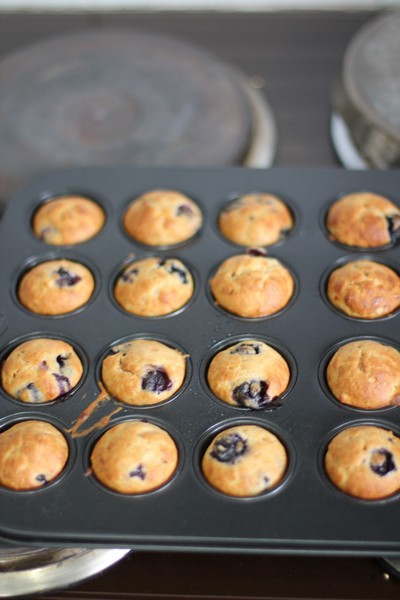
Preheat oven to 170C. Lightly grease 16 holes of a mini muffin tin with a little oil (using a pastry brush).

In a medium bowl, whisk together the egg and oil. Once well mixed, add banana, vanilla and cinnamon and whisk well.
Add self-raising flour and fold through with a spatula, followed by the blueberries. Mix until just incorporated, try not to over-mix.

Spoon the mixture into 16 mini muffin holes and bake for approximately 15 minutes. (check at 5 and 10 minutes to gauge how long they will take). Allow to cool slightly in the tin for a few minutes, then remove and cool on a cooling rack.

Mini muffins are best eaten on the day of making, but can be kept in an airtight container for 2 days, or frozen and allowed to thaw on the day of eating.

Banana and Blueberry Mini Muffins

Eve

Friday, February 14th, 2014

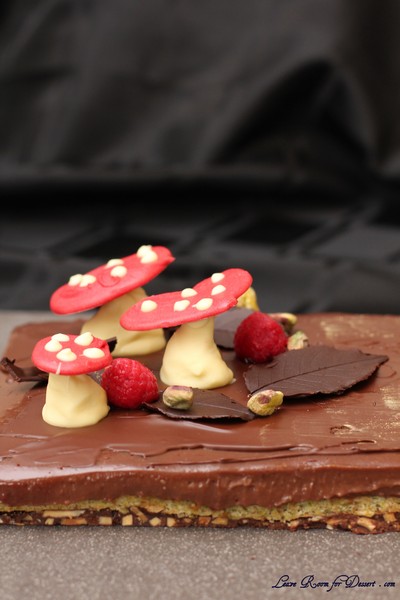
One of my biggest cooking challenges since giving birth, was this cake, but I had desperately wanted to make it for Valentines day (as I knew Nick would probably prefer a different cake for his birthday), so the next best excuse was today (even though we don’t normally celebrate the day).
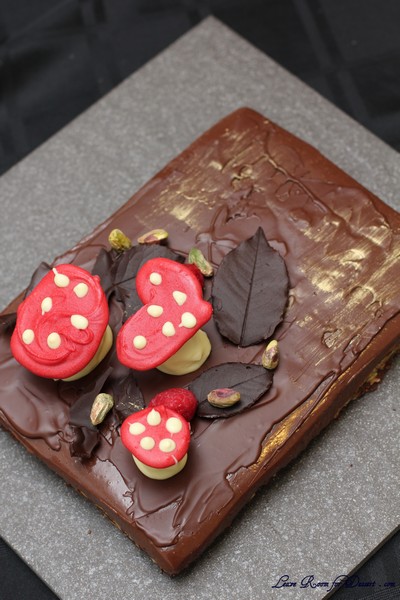
Eve was made by Kirsten Tibballs from Savour Chocolate and Patessiere School on one of the MasterChef episodes in their “Love” week last year. Having been lucky enough to do a short course at Savour a while ago, and tasting their wonderful creations, I was looking forward to making this cake. I have also noticed Kirsten has a cookbook released recently which looks lovely and one day I would like to get my hands on it.

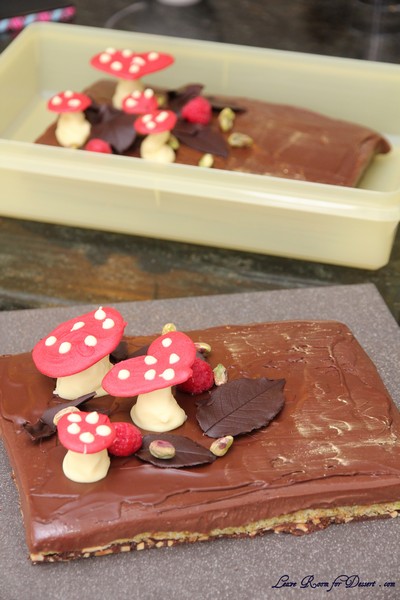
The cake turned out extremely well, and it was extremely rich (you only need a small slice). I was happy with all three components, although a number of people thought a little less cremeux would be good. It looked quite impressive once put together and I was super happy with the result.
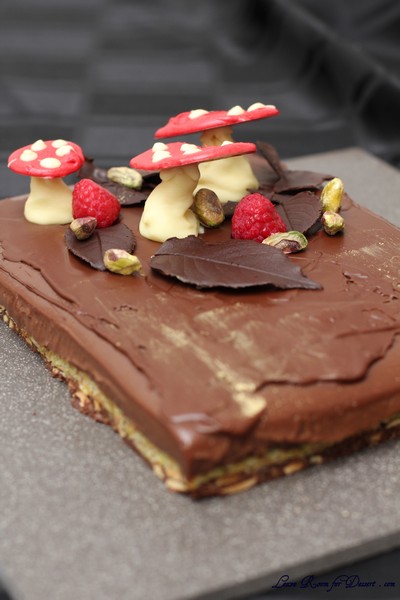
My notes and troubleshooting:

I had trouble with the red colouring for the mushrooms. The powder I used wasn’t turning the chocolate red, more of a brown colour, so then I added some of my Wilton colouring gel, and although it turned it a maroon colour (and not vibrant red initially), it also seized the chocolate, meaning it was hard to pipe – I had to pipe it best I could and then use a spoon or knife to spread it into a shape.

For the stems of the mushrooms, I ended up seizing the chocolate too much, so couldn’t pipe it – it was so solid I ended up just moulding it with my hands (like fondant).

I cut the cake into two, as it was quite large and I thought the decorations wouldn’t look in proportion if the cake was left its original size.

I used less chocolate for many aspects (mushrooms and toppings), as I didn’t want much left over. I also just used what chocolate I had available, e.g. cooking chocolate that didn’t require tempering

For the hazelnut praline paste I halved this recipe from Sweet as Honey. I added a bit of water, but it didn’t really get as liquidy as the photos on that website. Therefore for the crispy almond layer I needed to add more melted chocolate and some hazelnut spread.
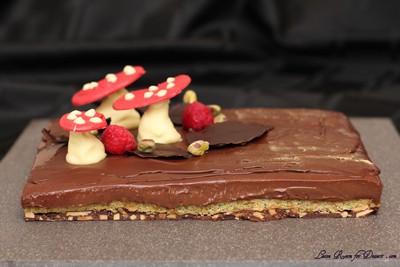
Eve Cake

Recipe by Kirsten Tibballs
*You will need a 33cm x 23cm cake pan for this recipe

Pistachio dacquoise
145g egg whites, at room temperature
2g cream of tartar
64g caster sugar
2 drops green food colouring
128g ground pistachios, sifted
100g icing sugar, sifted
24g plain flour, sifted
Good quality raspberry jam, for brushing

Crispy almond layer
70g Callebaut dark chocolate, broken into pieces
180g Hazelnut praline paste, or increase chocolate by 40g and add 1 tablespoon almond oil (I made my own hazelnut praline, but also added 50g more chocolate and 1 tablespoon Nutella)
172g slivered almonds, roasted
30g Callebaut cocoa nibs or almonds (I used the almonds)

Chocolate cremeux
690g thickened cream
156g egg yolks
76g caster sugar
265g Callebaut milk chocolate (33.6% cocoa), broken into pieces
265g Callebaut dark chocolate (60% cocoa), broken into pieces

Chocolate leaves and bark
100g good quality dark chocolate (57.8% cocoa) (I used only about 30-50g)
Assorted fresh leaves, washed and dried with paper towel

Chocolate mushrooms
150g Callebaut W2 white chocolate (28% cocoa) (I used only 50-100g)

Red chocolate heart tops
200g Callebaut velvet white chocolate (I used only 50-100g)
20g red soluble oil based powder

Edible pebbles
30g pistachios, roughly chopped
Edible green metallic (I used gold)

Pistachio dacquoise
1. For the pistachio dacquoise, preheat oven to 170C.
2. Whisk egg whites and cream of tartar in the bowl of an electric mixer to soft peaks, on medium speed.
3. Increase speed to high, then gradually add caster sugar while mixing continuously to allow sugar to dissolve. Add food colouring, whisking to combine.

4. Meanwhile, combine pistachios, icing sugar and flour in a bowl.

5. Gently fold meringue into bowl with pistachio mixture until just combined.

6. Using a palette knife, evenly spread mixture into a 35 x 25cm Flexipat or same-size tray lined with baking paper. Bake in oven for 15-18 minutes, then remove, and set aside to cool completely.
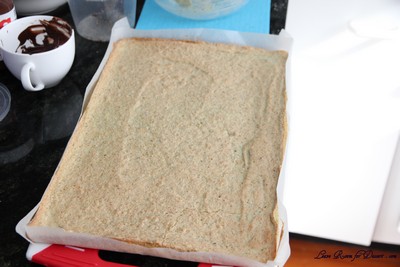
7. Trim dacquoise to 33cm x 23cm rectangle.

Crispy almond layer
1. For the crispy almond layer, grease and line the cake pan with baking paper.

2. Melt chocolate to 36°C in a microwave in 30 second increments. Add remaining ingredients and stir to combine.

3. Evenly press mixture into cake pan. Set aside until just before the almond layer sets, then place dacquoise layer on top.

4. Brush a thin layer of jam over the top of the pistachio dacquoise.

Chocolate cremeux
1. For the chocolate cremeux, bring cream to the boil in a saucepan over medium heat.

2. Meanwhile, whisk egg yolks and sugar in a bowl until well combined. Whisking constantly, slowly add half of the warm cream to bowl with egg yolk mixture until combined.

3. Pour egg yolk mixture into pan with remaining cream, and place over low heat. Using a wooden spoon, stir constantly until mixture reaches 80°C, and coats the back of the wooden spoon.

4. Meanwhile, place chocolate in a medium bowl. Strain cream mixture through a fine sieve over the chocolate, and stir until melted and combined.

5. Pour crémeux over the raspberry jam layer.

6. Refrigerate for 4 hours or until set. You can freeze for up to 1 month in the freezer.

Chocolate leaves and bark
1. For the chocolate leaves and bark, temper dark chocolate as per instructions below.

2. For the bark, brush a thin layer of chocolate onto a piece of baking paper and roll up and set aside.

3. For the leaves, brush a thin layer on each leaf, until you can’t see the leaf. Once the chocolate has set, carefully remove the leaf.

Chocolate mushrooms
1. For the chocolate mushrooms, temper chocolate as per instructions below. Add a few drops of water at a time, stirring until the chocolate thickens to a piping consistency. With a disposable piping bag fitted with a 1cm nozzle, pipe 3 mushroom bases onto a tray lined with baking paper. Set aside until firm.

Red chocolate heart tops
1. For the heart tops, temper chocolate as per instructions below. Sift the red powder into ¾ of the white chocolate and mix until combined. Transfer red chocolate to a piping bag made of baking paper. Pipe red chocolate into heart shapes, using a template as a guide underneath a sheet of baking paper. (see last page) Set the chocolate for 20-30 minutes before removing from the paper.

2. Use the remaining white chocolate to pipe white dots onto the mushroom tops, and to stick the tops and stems together.

Edible pebbles
1. Place pistachios in a bowl and add green metallic, tossing to coat.

To Assemble
1. To assemble, temper the dark chocolate as per instructions below. Brush a thin layer of chocolate onto the surface of the cake to create a rough texture. Brush with gold metallic once set.

2. Garnish with chocolate leaves, bark, chocolate mushrooms, pebbles, raspberries and hazelnuts.
Tempering chocolate
1. Place required chocolate in a plastic bowl (glass retains too much heat).

2. Melt chocolate in a microwave for no more than 30-second increments, stirring in between.

3. Melt chocolate until you have 50% solid chocolate and 50% melted chocolate. Continue stirring without applying any additional heat. It may take a few minutes for all of the solid chocolate to melt. Stir continuously during this time.
4. If the chocolate does not melt completely, apply gentle heat with a hair drier. Do a test by spreading a small amount of chocolate onto a piece of baking paper, in a room at a temperature no higher than 22C. The chocolate should set at room temperature in 5-10 minutes.

a. Dark couverture should set in approximately 5 minutes.

b. Milk couverture should set in approximately 7 minutes.

c. White chocolate should set in approximately 10 minutes.

5. It is necessary to maintain the chocolate in a liquid state by reheating if necessary. Be sure to take a new test every time you reheat.

6. To test if your chocolate is tempered correctly, dip a teaspoon or a square of acetate in the couverture and leave it to set. This should take around 5-10 minutes at room temperature. If the couverture does not set after 10 minutes, it is not tempered correctly. If it sets but there are streaks on the surface, you will need to continue stirring the couverture, then take another test.