Party Food

Turtle Cake and Under the Sea Party

Monday, November 19th, 2018

UndertTheSea07

I always remember our lovely birthdays as children. We were able to choose any cake from the Women’s Weekly Cake Book. My mum made so many different cakes from the book over the years, I couldn’t help but buy the same cake book (and the new bumper book too) for my children to choose from. We already have lots of fun searching through all the lovely pictures.

UndertTheSea01

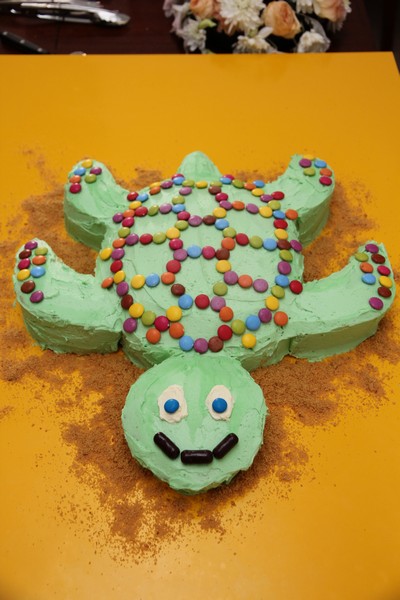
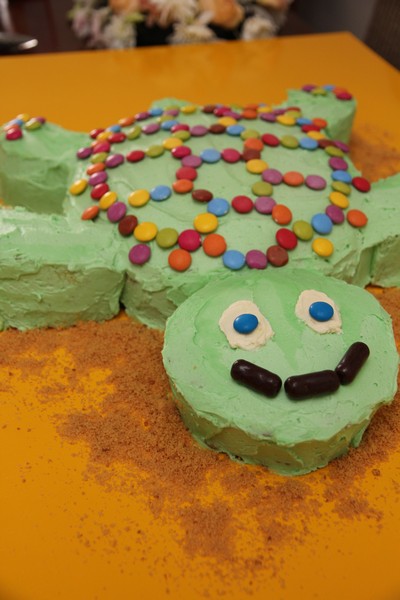
I searched for a turtle cake for my daughters 2nd birthday (a few years back now), and didn’t see anything that quite looked how I wanted it to look in either book or the internet. So I decided to design my own turtle cake and make an under the sea themed party.

UndertTheSea02

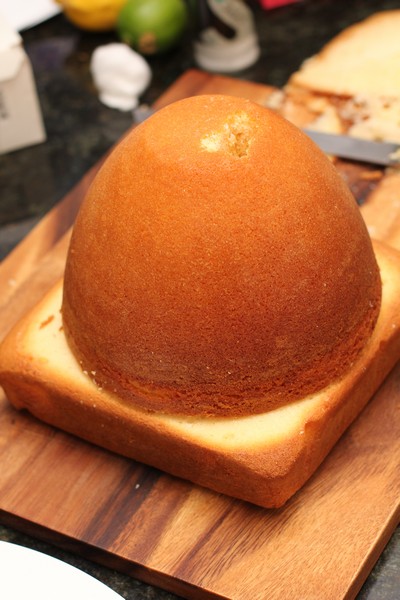
We generally prefer buttercream/Vienna icing to fondant, so I made it green and used smarties or mm’s for the design (liquorice could have been used as well). To make the shell I used a round tin and trimmed the sides to make it more oval. I made a template out of grease-proof paper for the body (using a round tin 22cm or 24cm), I then used it make an appropriate sized head and flippers, making sure they would fit in my lamington tray (or a larger tray). Cut out the pieces once the cake has been frozen.

UndertTheSea09

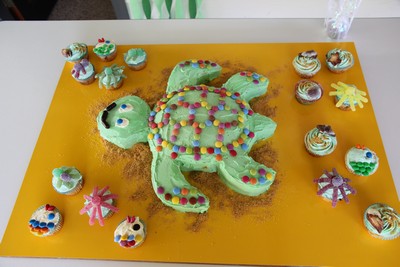
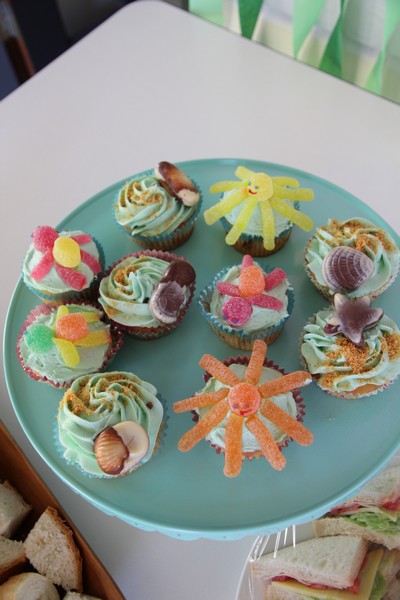
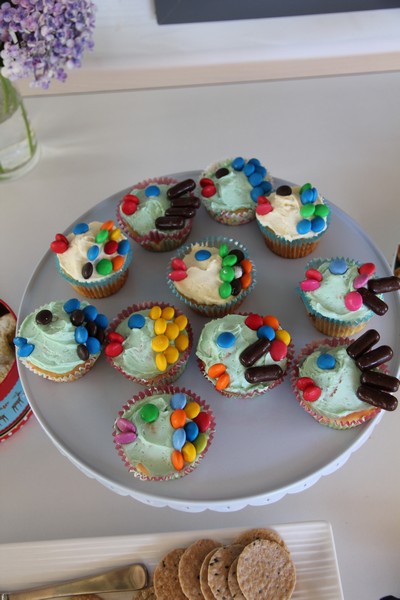
Cupcakes had blue icing for the sea, biscuit crumbs for sand and a sea shell chocolate on top. With other cupcakes having fish or other sea creatures made out of lollies.

UndertTheSea05

UndertTheSea04

UndertTheSea11

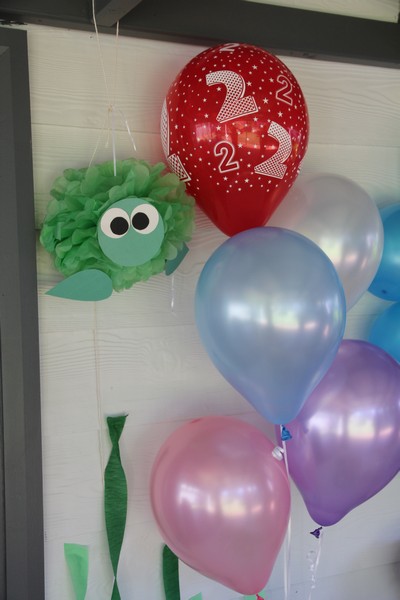
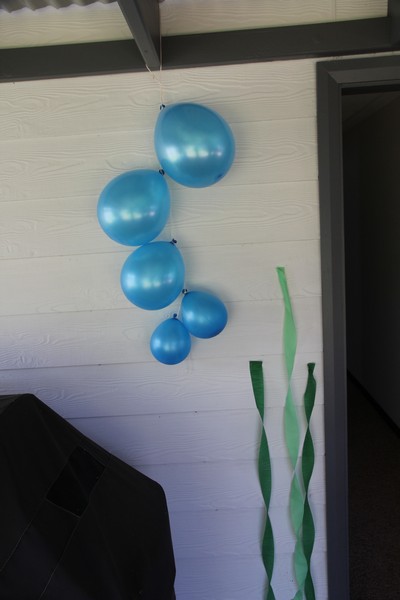
Decorations included seaweed out green crepe paper streamers, bubbles out of different sized balloons and sea creatures out of pom-poms.

UndertTheSea03

UndertTheSea06

UndertTheSea08

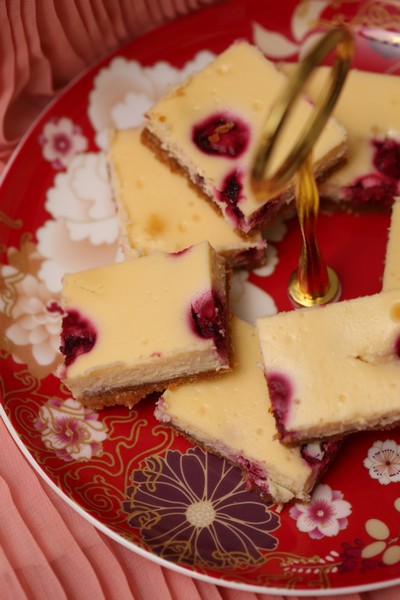
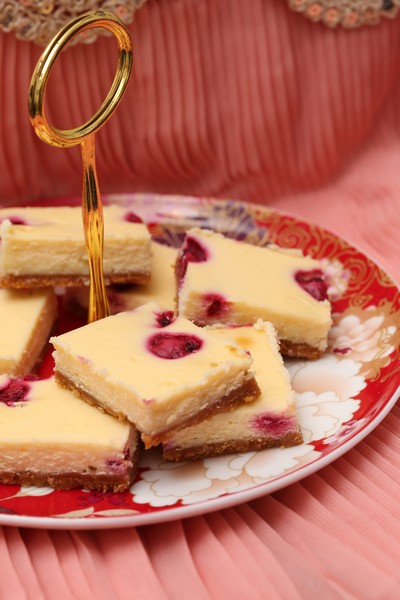
White Chocolate Raspberry Cheesecake Slice

Wednesday, June 20th, 2018

White Chocolate Raspberry Cheesecake Slice

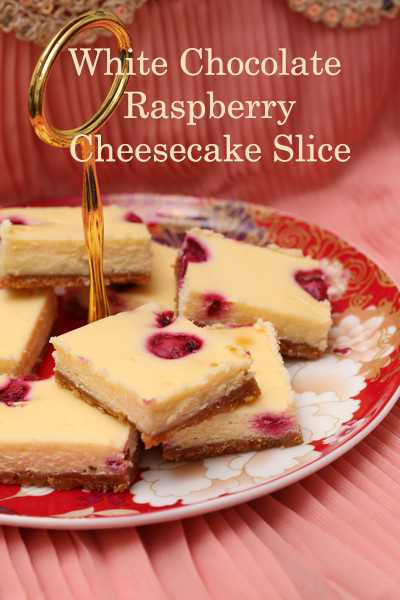
This is a wonderful addition to any party. These yummy desserts have the perfect combination of sweet, tart, creamy and crunchy. Make them big or small depending on what else is on offer.

White Chocolate and Raspberry Cheesecake Slice

We have served this at a number of parties so far, and they are a great alternative to some of the other rich chocolate dense desserts. It is also very easy to make them very small, so they can be served to lots of people, and also made a day or two in advance.

White Chocolate and Raspberry Cheesecake Slice

White Chocolate Raspberry Cheesecake Slice

Recipe from Taste
Makes 16 (or up to 45-60 small pieces)

200g packet granita biscuits
100g butter, melted
375g cream cheese, softened
1/2 cup (125g) sour cream
1/2 cup (100g) caster sugar
2 eggs
100g white chocolate, coarsely chopped
1/2 cup (60g) frozen raspberries
Icing sugar, to dust

Grease and line the base and side of a 19 x 29cm slice pan with baking paper, allowing the sides to overhang. (I have used a larger pan 22cm x 31cm, it worked out fine, but you may need a touch less time for cooking).

Place the biscuits in the bowl of a food processor and process until finely crushed. Add the butter and process until well combined. Spoon into the prepared pan and use a glass to spread and press mixture firmly over the base of the pan. Place in the fridge for 30 minutes to chill. (If you need to leave it longer, no worries).

Preheat oven to 160°C. Place the cream cheese and sour cream in the bowl of a food processor and process until smooth. Add the sugar and eggs and process until smooth.

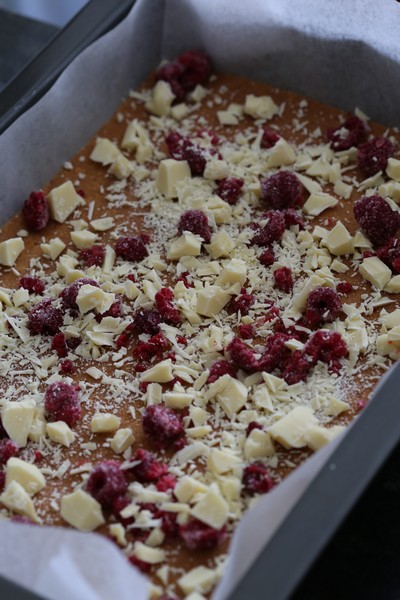
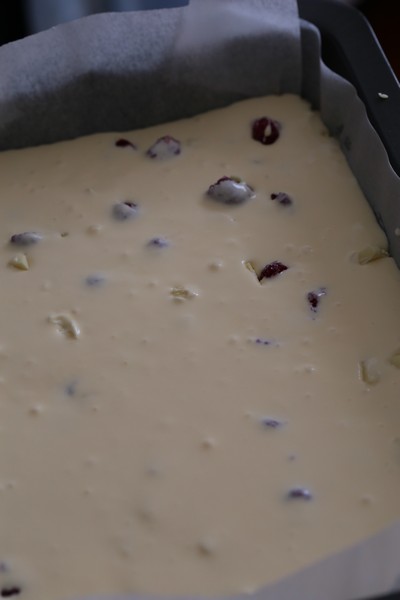
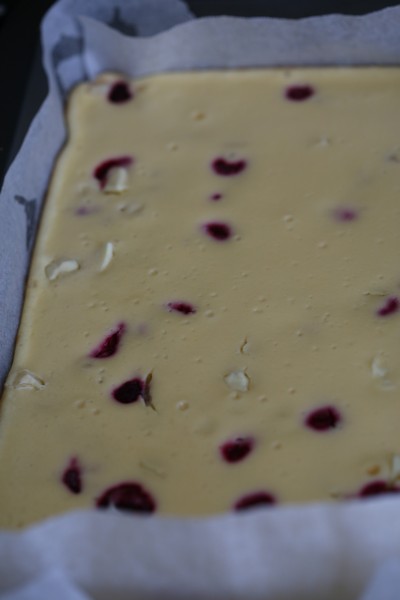
Sprinkle the biscuit base evenly with white chocolate and raspberries. Pour over the cream cheese mixture. Gently tap the pan to settle mixture. Bake in preheated oven for 20-25 minutes or until filling is just set. Turn oven off and leave the door ajar. Set aside to cool in oven. Place in the fridge to cool completely. Cut into squares to serve. Dust with icing sugar.
WhiteChocRaspberrySlice1

WhiteChocRaspberrySlice2

WhiteChocRaspberrySlice3

White Chocolate and Raspberry Cheesecake Slice

Anzac Biscuits

Wednesday, April 25th, 2018

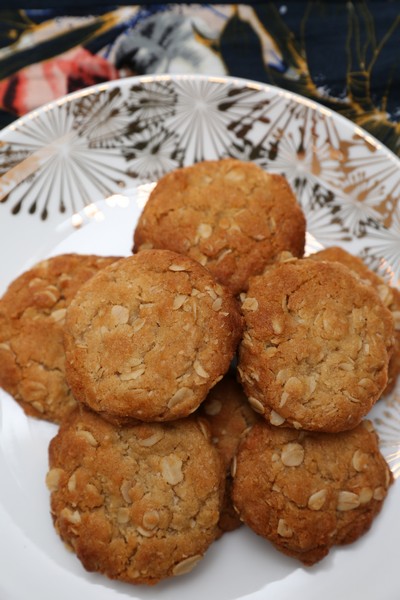
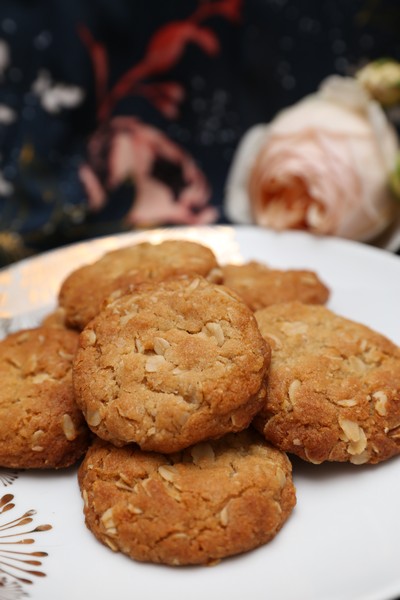
Anzac Biscuits
We make these biscuits almost every ANZAC day (25th April, a day of national remembrance).

I do make them throughout the year as well, as they keep well made in advance and taste great. A great biscuit for those with egg allergies, and if you need a dairy-free alternative you could try and substitute coconut oil. (I haven’t yet tried this recipe with coconut oil, but tried a similar styled recipe which contained coconut oil and it turned out well).

Anzac Biscuits

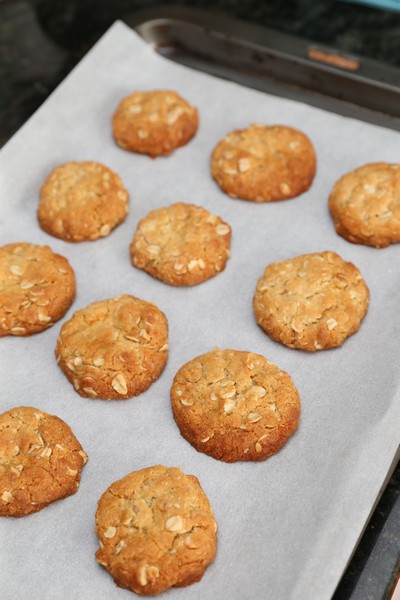
I do find my biscuits turn out different to my mums though. Hers would always spread to make large biscuits, often almost touching, and she would cook some longer and some shorter to accommodate my siblings and my preferences. I enjoyed mine soft and chewy and others preferred hard and crunchy. When I make these, sometimes they don’t expand at all, and other times they spread a little – but never like mums (I think my oven is a bit hotter though, so that may have something to do with it).

Anzac Biscuits

Makes: about 25

1 cup rolled oats
1 cup plain flour
3/4 cup caster sugar (original recipe said 1 cup sugar)
3/4 cup coconut
125g (4oz) butter
2 Tablespoons golden syrup
½ teaspoon bicarbonate of soda
1 Tablespoon boiling water

Preheat oven to 160C. Combine oats, sifted flour, sugar and coconut in a large bowl.

Combine butter and golden syrup in a small saucepan, stir over medium heat until melted. Mix bi-carb soda with boiling water and add to the melted butter mixture, stir into dry ingredients. Place Tablespoonfuls of mixture on lightly greased oven trays, or on paper lined trays, allow room for spreading.

Cook in oven for 10 – 15 minutes, longer if you prefer them hard. Loosen while warm, then cool on trays.

Anzac Biscuits

Anzac Biscuits

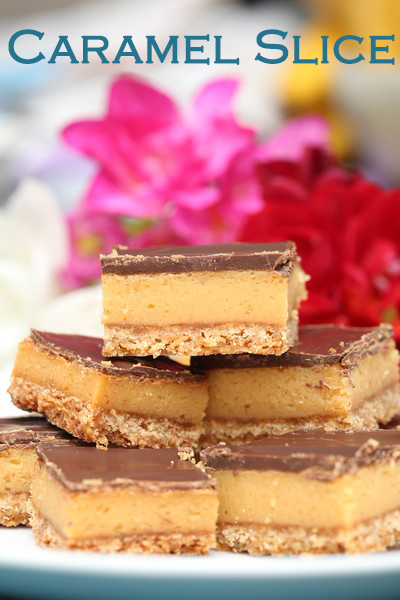
Caramel Slice

Thursday, March 29th, 2018

Caramel Slice

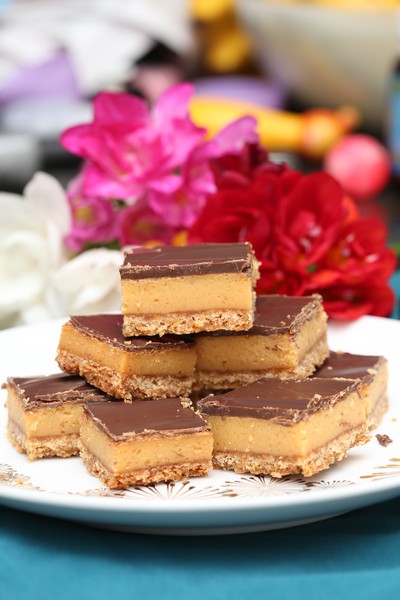
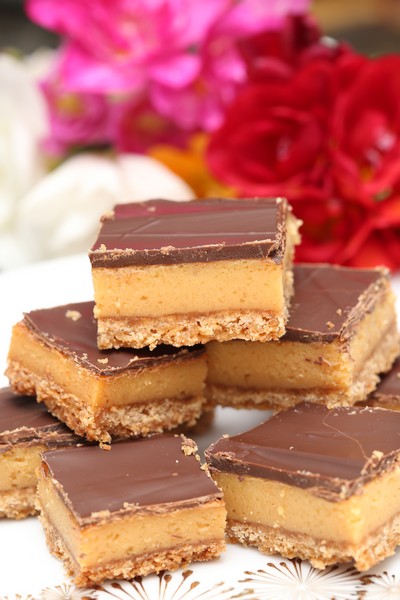
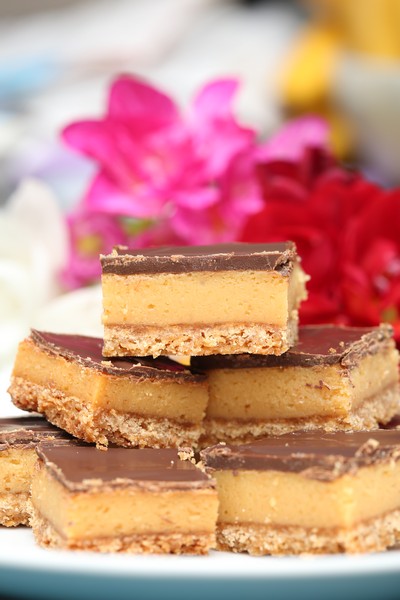
I was looking for a recipe for caramel slice and came across one on the internet that claimed it was the best ever caramel slice. Well, it’s a big claim, but I think it’s pretty high up there. Easy to make, super tasty – I won’t be looking for another recipe. This will be my go-to from now on.

Caramel Slice

It’s great as it can be made in advance and I have had a lot of positive comments by people who have tried it. Most going back for a second (or third or fourth) piece. I’m sure you could easily make this gluten-free too by replacing the flour with gluten free flour.

It makes a wonderful addition to a dessert table, as they can be cut quite small so people can have a bite and try other desserts too.

Caramel Slice

Caramel Slice

Recipe from Bakers Corner

Makes 16-60 (The original says 16 slices, but you can make lots of little ones if there will be other sweets)

1 cup (150g) plain flour
1/2 cup (110g) brown sugar
1/2 cup (40g) desiccated coconut
125g butter, melted

100g butter, extra
2 x 395g cans NESTLÉ Sweetened Condensed Milk
1/3 cup (80mL) golden syrup

200g PLAISTOWE Premium Dark Chocolate, melted
1 tbsp vegetable oil

1. Preheat oven to 180°C/160°C fan forced. Lightly grease an 18cm x 28cm lamington pan and line with baking paper. (I used a slightly bigger pan 22cm x 31cm, but it still came out fine, if you do this, the cooking time may be a bit shorter)

Caramel Slice

Caramel Slice

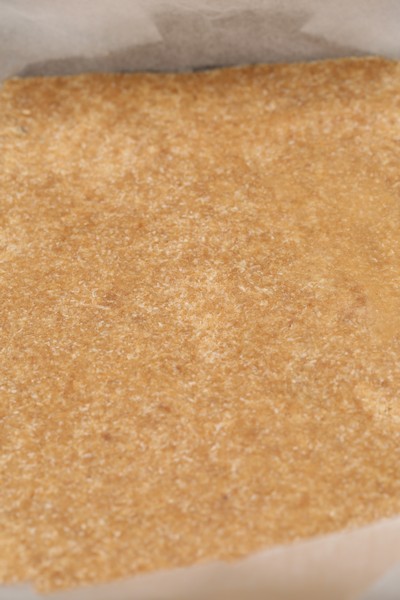
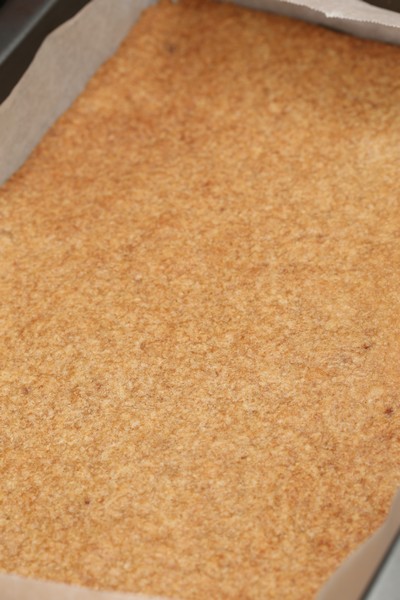
2. In a medium bowl, combine flour, sugar and coconut. Add melted butter, mix well. Press mixture firmly into prepared pan. Bake for 15-20 minutes until lightly browned. Cool. (I didn’t let this cool. I cooked the condensed milk whilst this was in the oven and then poured it straight on and back in the oven.)
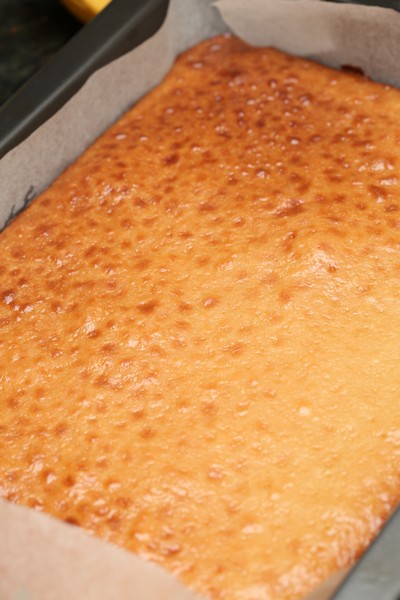
3. Place extra butter, NESTLÉ Sweetened Condensed Milk and syrup in a medium saucepan. Stir over low heat until smooth. Pour over base. Bake for 20-25 minutes until golden. Cool.

Caramel Slice

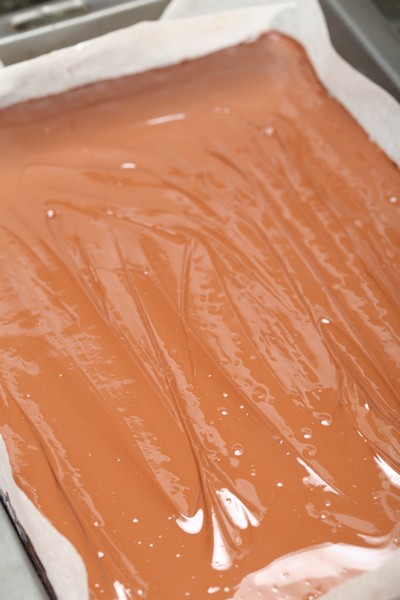
4. Combine PLAISTOWE Premium Dark Chocolate and oil, stir until smooth, pour evenly over slice. Place in fridge until set and then slice. (You may like to clean the knife between each or every couple of slices. a clean knife will give a cleaner edge).

Caramel Slice

Caramel Slice

Elsa Cake (Buttercream tutorial) and an Ice-themed Birthday Party

Tuesday, December 13th, 2016

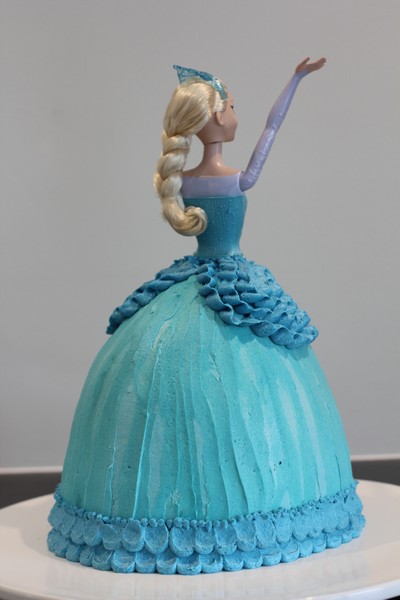
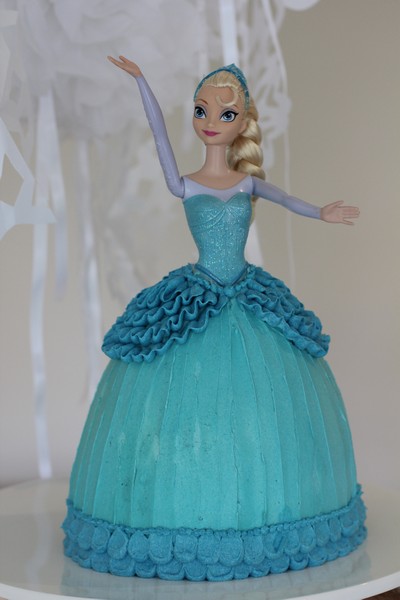
Elsa Cake Buttercream tutorial

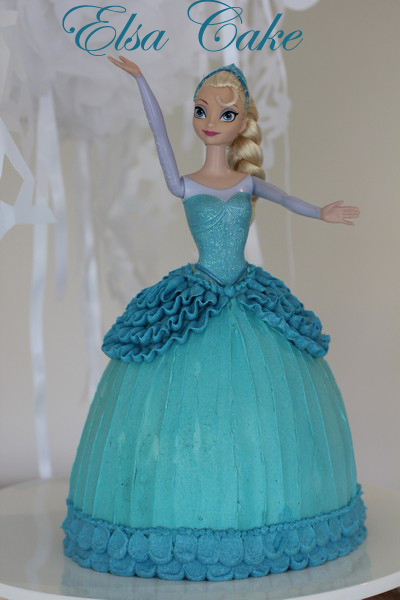
I had a request for a very special birthday this year. An Elsa cake. I’m sure many parents out there have had the same request after the much loved Frozen movie was released back in December 2013.

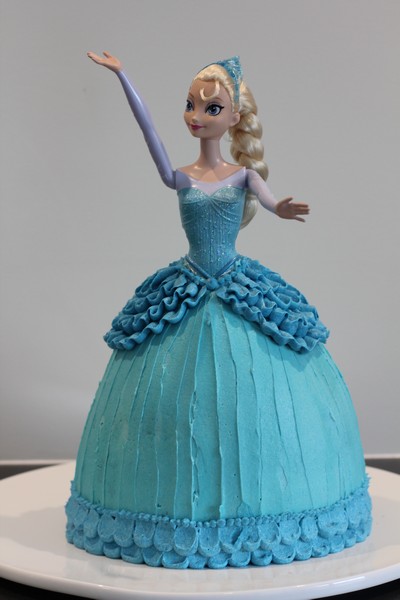
Elsa Cake

There are some amazing tutorials out there for both buttercream and fondant for Elsa cakes. Although, as my family are not huge fondant fans (and I am not hugely confident with fondant), our cakes are always decorated in Vienna/Buttercream icing. It does limit some of the effects you are able to create, but I (almost) always love a challenge and a bit of problem-solving.

Elsa Cake

Elsa Cake

Elsa Cake

Elsa Cake

To start with, I needed an Elsa whose clothes could come off, and even better – the one I chose had a printed on bodice. I bought mine online here – you may find something similar by searching Elsa sparkle doll. I found the ones in store didn’t look as pretty as the one I ordered.

Elsa doll

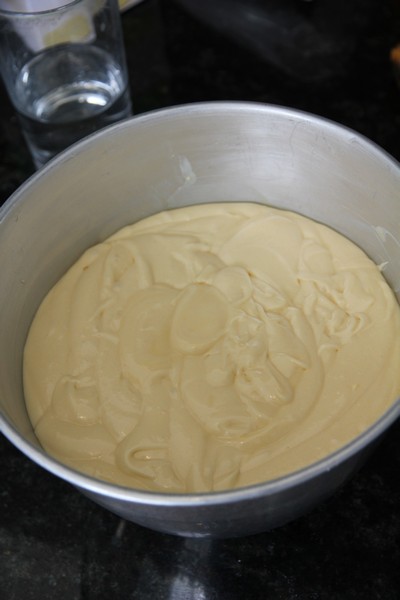
To make the cake, I used a combination of my mum’s Dolly Varden tin as well as a square 20cm tin (you could probably use a round 20 or 22cm tin). For the Dolly Varden tin I used 2 x packet cake mixes (I used Green’s Golden Butter Cake, with a dash of vanilla added to it). This took about 1 hour 20 minutes at 170C (check every 20 minutes, and 10 minutes toward the end). I wrapped the tin in foil/damp newspaper wrap to try and make the cooking a bit more even. Here is a good tutorial to make one. I also made another 2 x packet cake mixes for the square tin + 18 patty cakes. I made the additional cake, as didn’t want to take the legs off a doll I had bought as a present.

Elsa Cake

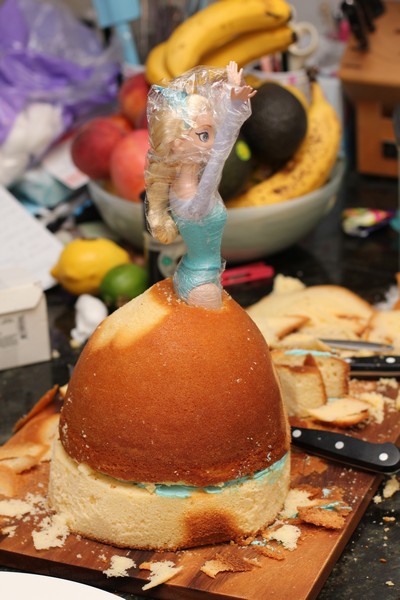
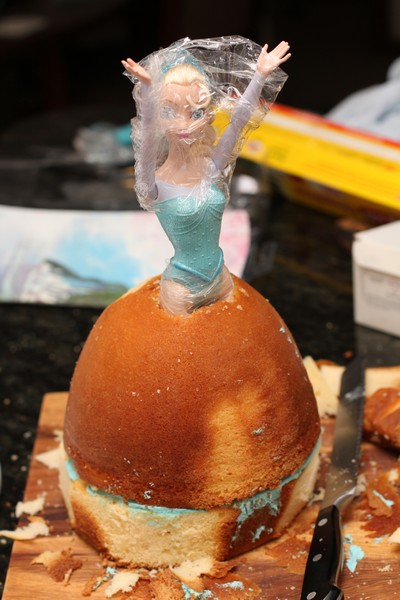
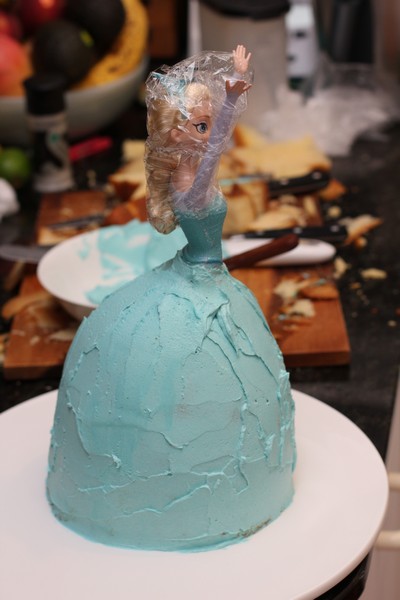
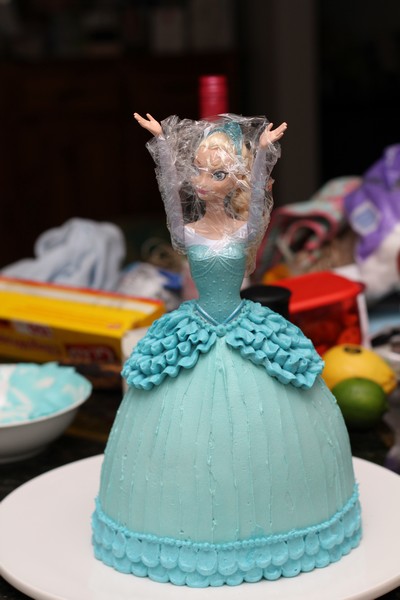
Once the cakes were cooled, I cut out a rectangle toward the front of the dolly Varden cake big enough for Elsa to fit in, scooping out the cake with a fork. I then placed her into the cake, making sure her bottom half was covered with plastic wrap. Here is a good fondant tutorial for an Elsa cake, which i based some of the carving from. Once the rectangle was cut out (and both cakes reasonably flattened), I froze both the cakes – to make carving easier and less messy later – and it’s much easier not having to make the cakes the day before the party.

The day before the party I decorated the cake, using 3 x quantity Vienna cream. (There was more than enough for the cake and some of the patty cakes as well).
375g butter, room temperature
4 1/2 cups icing sugar (I used icing mixutre)
3-6 Tablespoons milk
Beat butter until fluffy and very light in colour. Gradually add the icing sugar and milk alternatively until nice and fluffy. Add colour pastes as required, mix well.

To get the right colour I kept adding a combination of Wilton Icing colours (pastes) – Sky Blue and Royal Blue, until I was happy with the colour of the main part of the dress.

Remove the cakes from the freezer, add some icing between the two layers (you may need to add more icing here, depending how high your cakes rose and where they come up to on Elsa’s legs) and start to carve. The main carving is needed from the square cake, although i made the front of the skirt a little flatter, and took a little off the back as well.

Elsa Cake carving

Elsa Cake carving

Elsa Cake carving

Elsa Cake carving

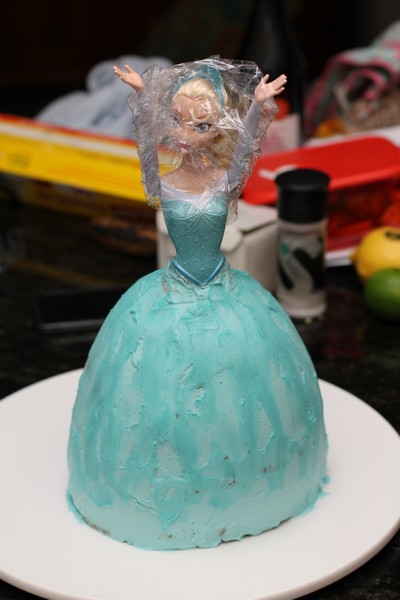
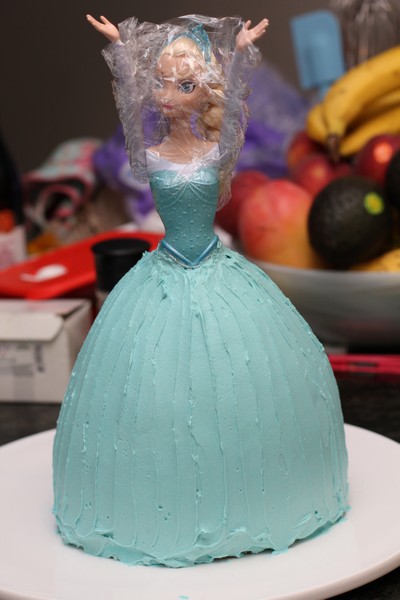
I iced the skirt with a crumb coat (place some icing in a bowl and coat – this way you don’t need to worry about crumbs getting into the small bit of icing in the bowl). Smooth the skirt and place in the fridge for 5-10 minutes. Remove from the fridge and smooth well with a slightly warmed palate knife. Next ice on top of the skirt with another layer of icing. To get the striped look, use the small offset palate knife to stroke down evenly along the skirt.

Elsa Cake Crumb Coat

Elsa Cake smoothed

elsacake10

Elsa Cake smoothed

Here is a Wilton tutorial of the cake I was basing my one off.

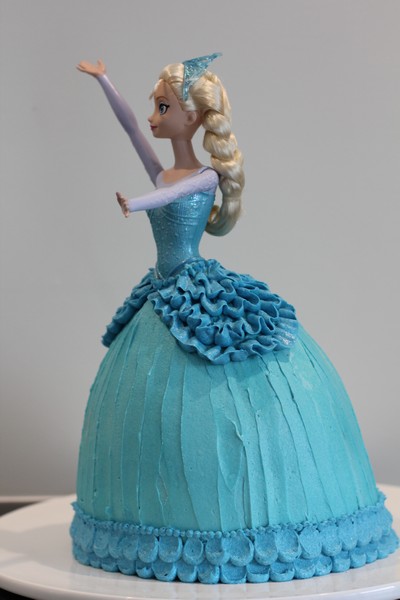
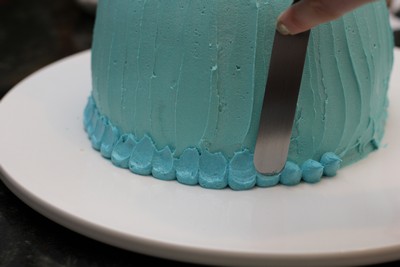
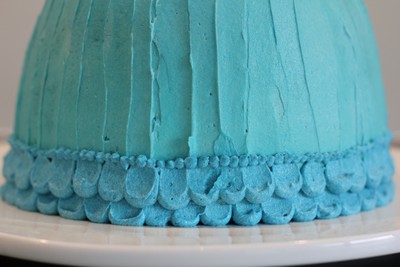
Once you are happy with the main part of the skirt, you can add more of those two coloured pastes until you have a darker and nicely contrasted blue. This is then used for the base decorations and the ruffles. For the base I used 1cm nozzle in a piping bag and piped 5 rounds of icing, then use the small offset palate knife to pull some of the icing upwards (not too far though). Continue around the skirt until it is complete. Do the same pattern offset above this pattern.

Elsa Cake

Elsa Cake Skirt base

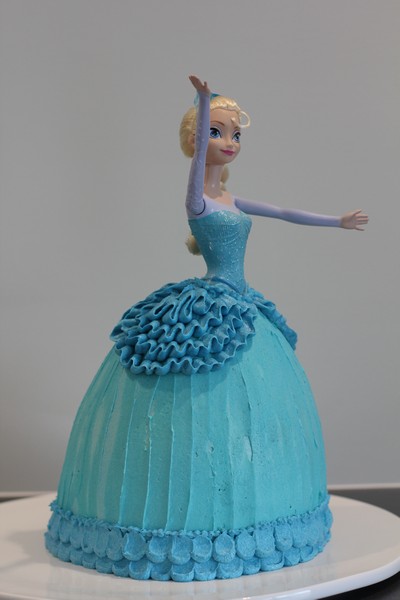
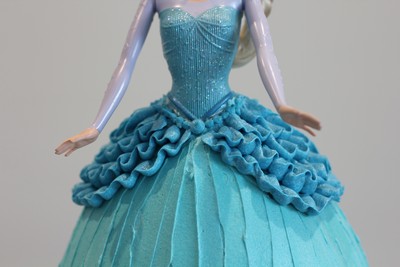
For the ruffles at the top, I used my Wilton tip 104. There are many tutorials on how to use these tips to make beautiful ruffles. My suggestion would be to do a rough outline (either using a template or freehand) to mark where to do the ruffles. My original ones were too small and looked silly, so I had to wipe them off and start again. I’m also not sure whether they were totally even.

Elsa Cake Ruffles

For the piping at the top and bottom, I used a size 4 Bakers Secret nozzle. I just used what I had on hand and what I thought would suit this size skirt – as the cake ended up being quite big (without looking out of proportion).

Elsa Cake

Elsa Cake

I hope this tutorial has helped anyone planning to make a lovely cake for a special someone in their life.

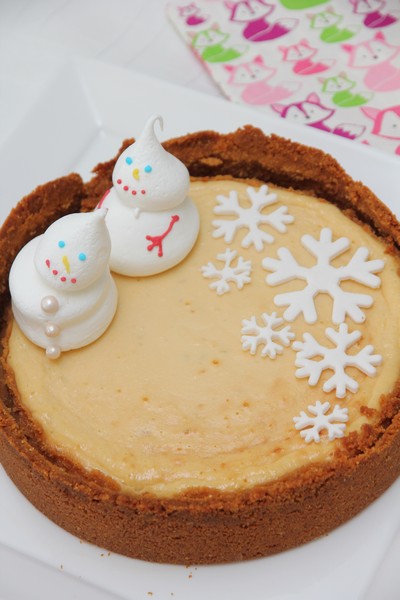
Some of the other things I made for the party included meringue snowmen and a lime pie (topped with snowflake icing decorations). These snowflake decorations were just made using some flower paste and using cutters that are available on ebay.

Elsa Cake Lime Pie

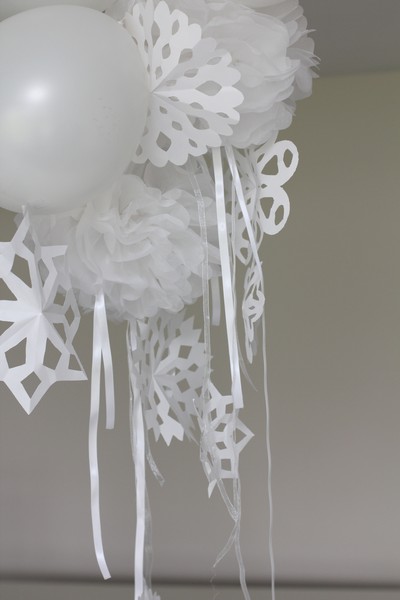
The decorations in the centre of the room were a combination of balloons, tissue paper pom poms and hand made snowflakes – always a fun craft to do!

Decorations

Elsa Cake

Cinnamon Rolls – Daring Bakers Challenge June 2014

Friday, June 27th, 2014

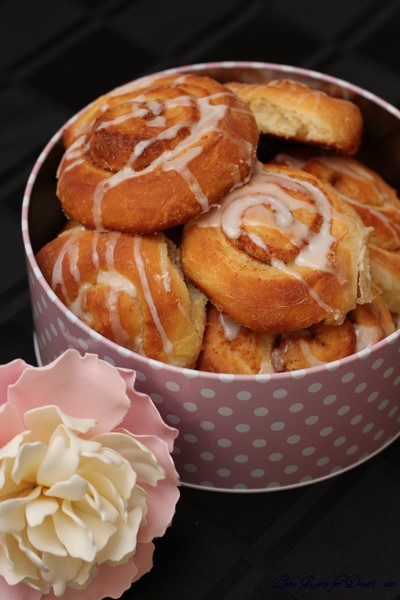
This month the Daring Bakers kept our creativity rolling with cinnamon bun inspired treats. Shelley from C Mom Cook dared us to create our own dough and fill it with any filling we wanted to craft tasty rolled treats, cinnamon not required!

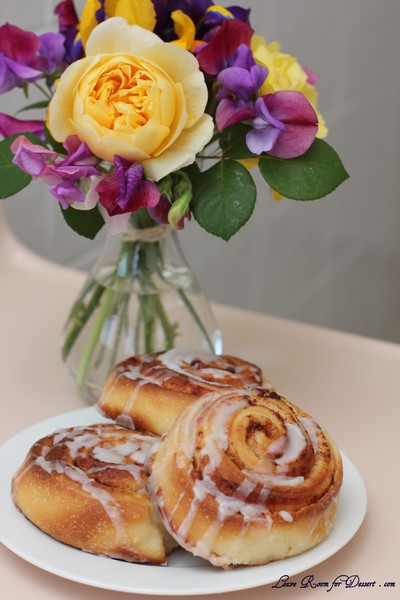
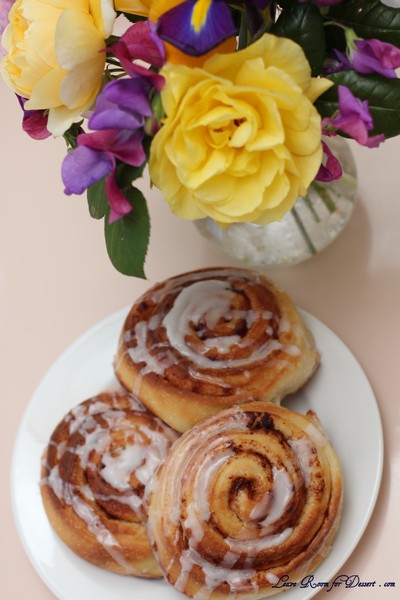
Cinnamon rolls (or scrolls) have been a favourite treat for my family since I tried it a year or two ago. They come out at special holidays, or family breakfasts.

I’m very happy with my current recipe, although as past experiences would confirm, sometimes it does pay to try another recipe. I once tried a new banana bread recipe, only to be asked – Why would you try another one? Your one is great, we don’t need to try another recipe. Only to hear exclamations of happiness for the new recipe.

This recipe for cinnamon rolls differs slightly to my usual one, the dough is slightly more cake like, likely due to the addition of egg. There is also no butter in the middle of the scroll, although this doesn’t seem to make a huge difference to the overall flavour or consistency.

By the end of the day all the rolls were eaten, but I doubt they would have kept well, as some of the ones left to the afternoon had started losing their freshness. Overall the flavour and consistency were lovely. Although I am likely to stick to my original recipe for the future.

There were a few other recipes suggested for this months challenge, including a roasted banana cinnamon bun with maple glaze…. now that I have to try…

Cinnamon Buns

(from The Bread Baker’s Apprentice by Peter Reinhart)
Makes 8-12 large or 12-16 smaller buns

Ingredients
6½ tablespoons (100 ml) (3 oz) (90 gm) granulated sugar
1 teaspoon (5 ml) (6 gm) salt
5½ tablespoons (85 ml) (2¾ oz) (80 gm) shortening, unsalted butter or margarine, at room temperature
1 large egg, slightly beaten
1 teaspoon (5 ml) lemon extract OR 1 teaspoon (5 ml) grated lemon zest (I used vanilla essence)
3½ cups (840 ml) (16 oz) (450 gm) unbleached bread (or all-purpose/plain) flour
2 teaspoons (10 ml) (¼ oz) (6 gm) instant yeast (active dry worked as well)
1 1/8 – 1 ¼ cups (270-300 ml) whole milk or buttermilk, at room temperature
½ cup (120 ml) (3½ oz) (100 gm) cinnamon sugar (6½ tablespoons (100ml) (3 oz) (90 gm) granulated sugar plus 1½ tablespoons (20 ml) (1/3 oz) (10 gm) ground cinnamon)

Directions:

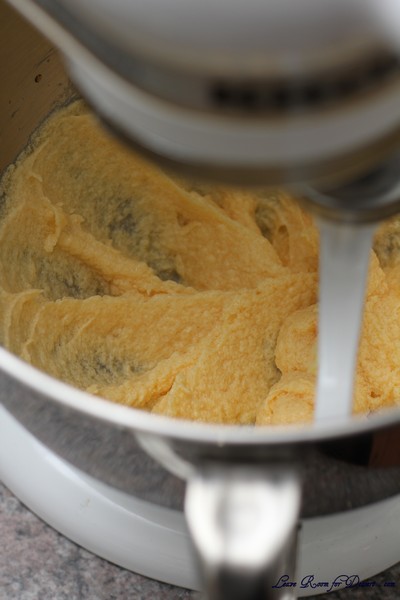
In a stand mixer fitted with the paddle attachment, cream together sugar, salt and shortening (though it is not difficult to do by hand, using a strong spoon).
Add the egg and lemon extract to the creamed sugar and shortening and mix together until smooth.

Add the flour, yeast and milk to the mixer and mix on low speed until the dough begins to form a ball.
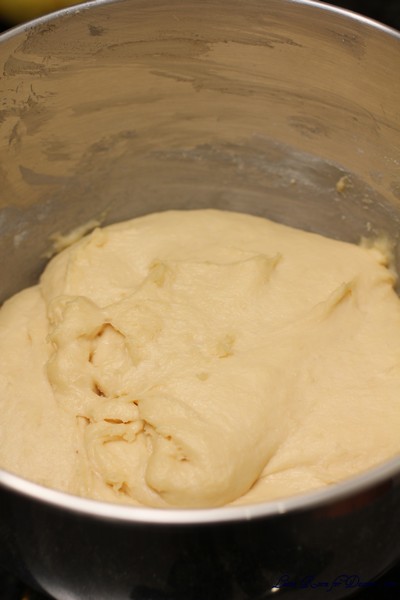
At this point, switch to the dough hook attachment and knead for 10 minutes (if kneading by hand, you will probably need to do so for closer to 12 – 15 minutes). The dough will be silky and supple, but not overly sticky. You may need to add a touch of flour if your dough is too sticky – that is okay.

Lightly oil a bowl, turn the kneaded dough out into it, turning to coat, then cover the bowl with plastic wrap.
Allow the dough to rest (ferment) until it has doubled in size, approximately 2 hours.

Once the dough has rested and risen, you are ready to shape the cinnamon buns. Prepare your a sheet pan by lining it with parchment paper.
Spray your work surface lightly with cooking spray and turn the dough out onto the work surface.
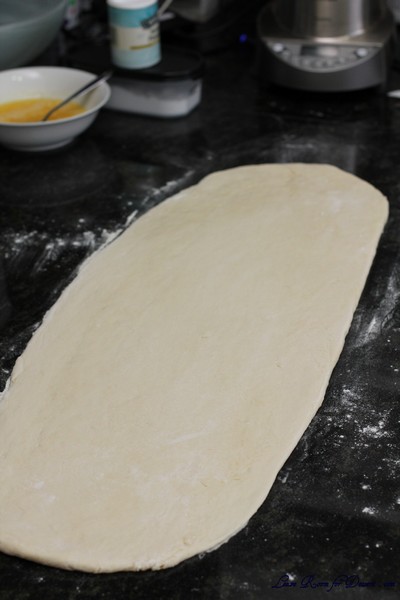
Using a rolling pin, roll the dough, into a rectangle about 2/3 an inch (15 mm) thick, 14 inches (350 mm)wide and 12 inches (300 mm) long (for large buns) (or 18 inches (450 mm) wide by 9 inches (230 mm) long for smaller ones). You may need to sprinkle the dough and/or work surface with a bit of flour to keep the dough from sticking. This is okay.
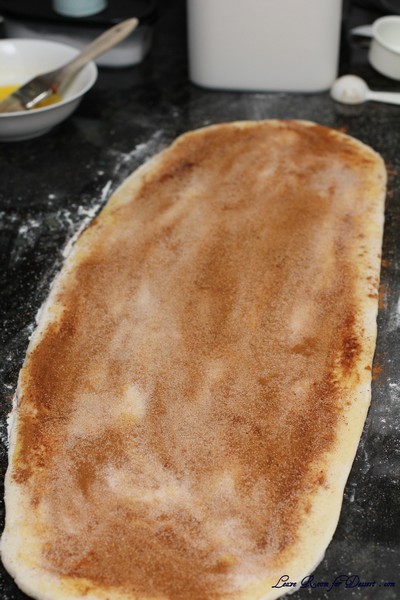
Sprinkle the cinnamon sugar filling over the surface of the dough.

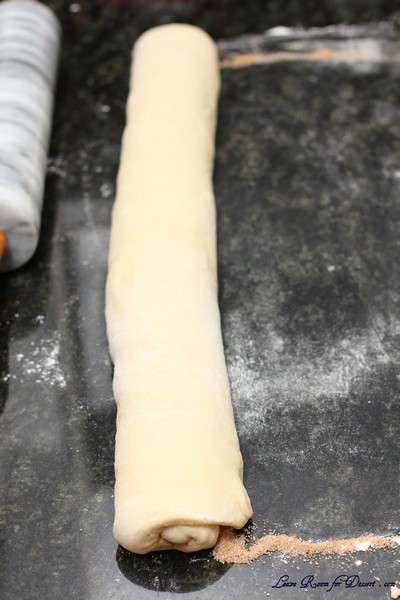
Starting with a long end, roll the dough, creating a spiral, into a log shape, making sure to end with the seam side down.

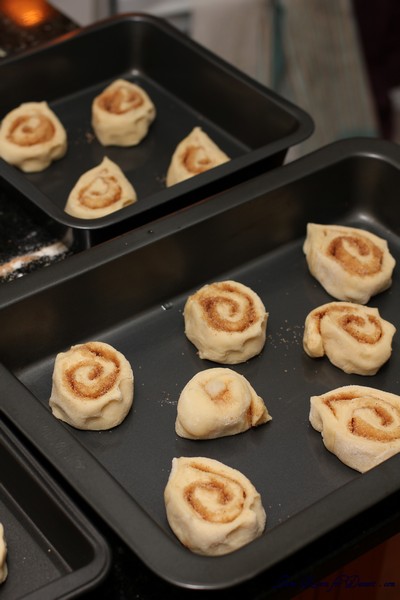
Cut the dough into pieces approximately 1¾ inches (45 mm) thick (for large buns) (1¼ inch (30 mm) for smaller buns).
Place buns approximately ½ inch (15 mm) apart on the prepared pan. They shouldn’t be touching at this time.

Allow the shaped buns to proof at room temperature for 75 – 90 minutes until they have nearly doubled in size. They will now be touching each other. If you are not planning on baking the buns the same day as you are preparing them, you can place them into the refrigerator after they are shaped (before this rise) for up to 2 days. If you do so, you will need to allow them to return to room temperature prior to baking, which means removing them from the refrigerator about 3 or 4 hours before baking.
Preheat the oven to moderate 350°F/180°C/gas mark 4 degrees at the end of this proofing time.
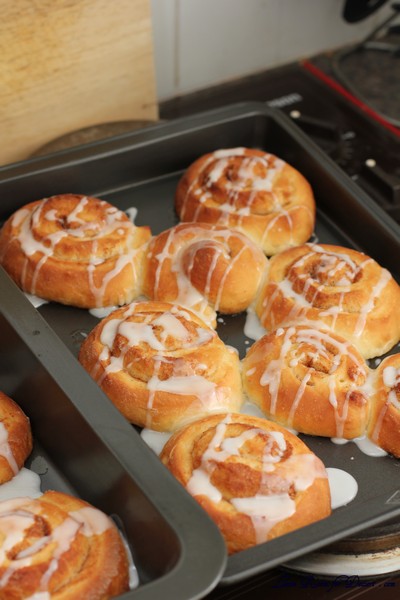
Bake the buns for 20 – 30 minutes, until golden brown
Allow the buns to cool for 10 minutes in the pan, then drizzle with glaze (recipe below). Remove the buns from the pan to a cooling rack and allow them to cool for at least 20 minutes before eating.

White fondant glaze for cinnamon buns:
(also from The Bread Bakers’ Apprentice)

Sift 4 cups (500 gm) (17½ oz) of confectioners’ (icing) sugar into a large bowl. Add 1 teaspoon (5 ml) of lemon or orange extract and between 6 tablespoons to ½ cup (90 to 120 ml) warm milk, whisking well until all of the sugar is dissolved. (Add the smaller amount of milk first, whisking briskly, then add slowly until you have the consistency you want for drizzling over the buns.)

Notes:
You can replace the lemon extract/zest with the extract/flavoring of your choice. I usually use vanilla extract.
This dough is silky, smooth and so lovely to work with, and the resulting buns are light and so incredibly easy to eat. I have made these several times, with traditional cinnamon-sugar filling and also with a fruit compote for a fresh, summery treat. Delicious!

Passion Fruit Caramel Chocolates – Daring Bakers Challenge July 2013

Sunday, July 28th, 2013

In a “celebration” of past Daring Baker and Daring Cook challenges, Lisa challenged all of us to search through the Daring Kitchen archives and pick any one we’d like! The REAL challenge was picking which delicious recipe(s) to try!

I remember before I started the Daring Bakers, each month on some of my favourite food blogs I couldn’t wait to see what everyone had made. Seeing their wonderful creations and wishing I had made them was the reason I joined up to the Daring Bakers.

So when this challenge came up, I thought it was a great opportunity for me to try some of those dishes I had missed making. Some of the dishes I considered making were eclairs, a French Yule Log or tuiles. Although after I attended a chocolate tempering class last year (and received some silicone chocolate moulds for Christmas), I decided to go back to a challenge I had already done, although hadn’t made one of components I would have liked to make.
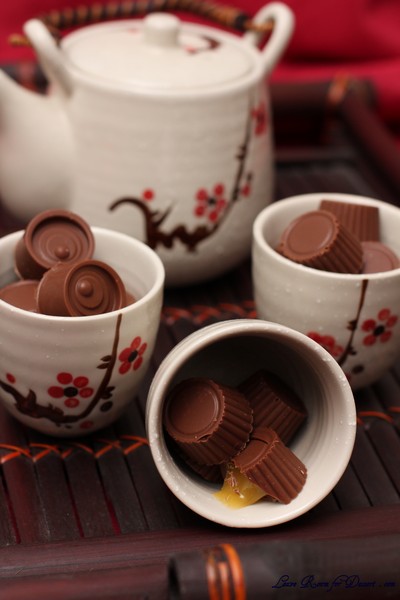
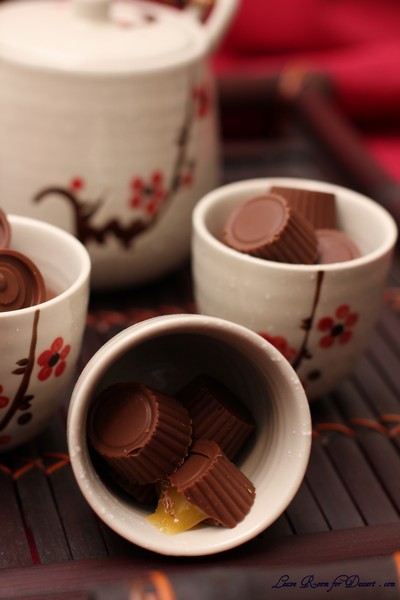
So, passion fruit caramel chocolates became my challenge for this month. The caramel just tasted divine, and some tips on chocolate tempering from the class came in handy too. When I handed out the chocolates I got a lot of great responses and comments that I could certainly make them again (which I will – because I loved them). They made quite a mess though, although to make yummy food, sometimes you need to spread chocolate over the counter and lots of utensils.

From Daring Bakers August 2011
Lisa’s Passion Fruit Caramel Bonbons was adapted from CandyBarLab.com

Passion Fruit Caramel Chocolates aka Bonbons

Servings: 16 large (1.5” – 2” molds) or 20 to 25 medium bonbons (would have made more than 30 small chocolates)

Painted passion fruit caramel filled bonbons
Ingredients, sans passion fruit, From CandyBarLab.com, with my revisions

Ingredients
Dark or milk chocolate melted, preferably tempered, about 1 lb / 450g
1 cup (225g / 8oz) Granulated White Sugar
1/2 cup (125ml / 4 fluid oz) Light Corn Syrup
1/2 cup (125ml / 4 fluid oz) Water
4 Tbsp (60g / 2 oz) Unsalted Butter
2 Tbsp (30ml / 1 fluid oz) Heavy Cream
1/4 cup (60ml / 2 fluid oz) Passion Fruit Puree (I purchased frozen passionfruit pulp, then thawed it and removed the seeds)
1/2 Tbsp salt

Equipment
2 or 3 quart, heavy-bottomed pot
Candy thermometer
Whisk

Directions:
1. Place the sugar, corn syrup and water in a medium saucepan.
2. Set over medium-high heat and stir to combine.
3. Bring the mixture to a boil and cook until dark amber in color 310°F-315°F / 155°C-158°C, about 5 minutes.
4. Use a pastry brush, dipped in water, to wash down sides of pan to prevent crystallization as the mixture boils.
5. Remove saucepan from the heat and gradually whisk in the passion fruit puree, heavy cream and butter.
6. Transfer to a medium bowl and let cool.
7. Transfer cooled caramel to a pastry bag fitted with a medium plain tip or a squeeze bottle.
8. Coat the molds with chocolate using the method mentioned above.
9. Fill chocolate coated molds with caramel. You can use a spoon too but it’s less messy and goes a lot quicker with either of the two aforementioned methods.
10. Finish off with a layer of chocolate as mentioned in the method above for making filled chocolates with molds
11. Once fully set, carefully knock the chocolates out of the mold

Tempering Methods

Method 1: On marble or granite

Marble slab, chocolate or bench scraper, dipping forks and chocolate thermometer

Tempering Ranges:

Celcius
Dark: 45°C-50°C > 27°C > 32°C
Milk: 45°C > 27°C > 30°C
White: 45°C > 27°C > 29°C

Fahrenheit
Dark: 113°F-122°F > 80.6°F > 89.6°F
Milk: 113°F > 80.6°F > 86°F
White: 113°F > 80.6°F > 84.2°F

Chocolate is melted and heated until it reaches 45°C / 113°F. It is then poured onto a marble surface and moved around the surface with a scraper until it has thickened and cools to 27°C / 80.6°F. Once cooled it is then put back into the bowl and over heat to bring it back up to 32°C/30°C/29°C /// 89.6°F/86°F/84.2°F depending on the chocolate you’re tempering. It is now ready for using in molds, dipping and coating.

Tempering using a marble surface

• Finely chop chocolate if in bar/slab form.
• Place chocolate in a heatproof bowl.
• Place bowl over a saucepan of simmering water (make sure the bowl does not touch the water).
Tip: Make sure that your bowl fits snuggly into the saucepan so that there’s no chance of steam forming droplets that
may fall into your chocolate. If water gets into your chocolate it will seize!
• Using a rubber spatula, gently stir the chocolate so that it melts evenly
• Once it’s melted, keep an eye on the thermometer, as soon as it reaches 45°C / 113°F remove from heat (between 45°C-50°C / 113°F-122°F for dark chocolate)
• Pour ¾ of the melted chocolate onto a marble or granite slab or worktop
• Using a scraper or large palette knife move the chocolate around the surface to help it cool
Tip: Keep the motions neat and tidy, if you’re not working with a lot of chocolate you don’t want to spread it too far otherwise you may end up with chocolate that begins to cool too quickly and start to set as well as drops below
• the necessary temperature. Use a motion that folds the chocolate on itself
• Check temperature regularly with a thermometer
• Once it reaches 27°C / 80°F put the chocolate back into the heatproof bowl with the remaining chocolate
• Gently stir together with a rubber spatula
• Check the temperature to see if it’s risen back up to the working temperature of the chocolate (milk, dark or white) as seen in the above chart
• If the temperature has not risen to its working temperature, put the bowl back over the simmering water, stirring gently
• IMPORTANT: You really need to keep an eye on the temperature as it can rise quicker than you think, so as soon as it’s up to its working temperature, remove from heat
• It’s now tempered and ready to use
Tip: If you’re using the chocolate to dip a lot of truffles etc. which means the chocolate will be sitting off heat for a while it will naturally start to thicken as it cools. To keep it at an ideal viscosity for even coating, put the bowl over steam for 30sec-1min every 5-10mins, just do not let the temperature go over the working temperature!
Tip: Having the chocolate in a warmed glass bowl and wrapped in hot kitchen towel can also help keep the chocolate at its working temperature for longer
Tip: It is also easier to keep the heat if you work with larger amounts of chocolate rather than small amounts. Any leftover chocolate can be kept to be used later and then re-tempered
Tip: Remember, don’t let any water get into your chocolate at any stage of the tempering process!
Method 2: With tempered chocolate pieces, also called “seeding”

Tempering Ranges:

Celsius
Dark: 45°C-50°C > 27°C > 32°C
Milk: 45°C > 27°C > 30°C
White: 45°C > 27°C > 29°C

Fahrenheit
Dark: 113°F-122°F > 80.6°F > 89.6°F
Milk: 113°F > 80.6°F > 86°F
White: 113°F > 80.6°F > 84.2°F

Chocolate is melted and heated until it reaches 45°C / 113°F. Tempered un-melted chocolate is then stirred and melted in until it brings the temperature down to 27°C/80.6°F. It is then put back over heat and brought up to its working temperature of 32°C/30°C/29°C /// 89.6°F/86°F/84.2°F depending on the chocolate you’re using. It is now ready for using in molds, dipping and coating.

Tempering using the seeding method with couverture callets

• Finely chop chocolate if in bar/slab form (about the size of almonds).
• Place about ⅔ of the chocolate in a heatproof bowl
• Set aside ⅓ of the chocolate pieces
• Place bowl over a saucepan of simmering water (make sure the bowl does not touch the water)
Tip: Make sure that your bowl fits snuggly into the saucepan so that there’s no chance of steam forming droplets that may fall into your chocolate. If water gets into your chocolate it will seize!
• Using a rubber spatula, gently stir the chocolate so that it melts evenly
• Once it’s melted, keep an eye on the thermometer, as soon as it reaches 45°C / 113°F remove from heat (between 45°C-50°C / 113°F-122°F for dark chocolate)
• Add small amounts of the remaining ⅓ un-melted chocolate (seeds) and stir in to melt
• Continue to add small additions of chocolate until you’ve brought the chocolate down to 27°C/80.6°F (You can bring the dark chocolate down to between 80°F and 82°F)
• Put it back on the double boiler and bring the temperature back up until it reaches its working temperature of the chocolate (milk, dark or white) as seen in the above chart. (32°C/89.6°F for dark, 30°C/86°F for milk and 29°C/84.2°F for white)
• If you still have a few un-melted bits of chocolate, put the bowl back over the simmering water, stirring gently and watching the thermometer constantly.
• IMPORTANT: You really need to keep an eye on the temperature so that it doesn’t go over its working temperature

It’s now tempered and ready to use

Tip: Another way of adding the “seed” is by dropping in one large chunk of tempered chocolate (the seed). That way you only need to fish out one piece of unmelted chocoalte and don’t need to fish out several small bits of unmelted chocolate once the chocolate has reached temper.
Other Tips

• If you’re using the chocolate to dip a lot of truffles etc. which means the chocolate will be sitting off heat for a while it will naturally start to thicken as it cools. To keep it at an ideal viscosity for even coating, put the bowl over steam for 30sec – 1min every 10 – 15mins, just do not let the temperature go over the working temperature!
• Having the chocolate in a warmed glass bowl and wrapped in hot kitchen towel can also help keep the chocolate at its working temperature for longer
• It is also easier to keep the heat if you work with larger amounts of chocolate rather than small amounts. Any leftover chocolate can be kept to be used later and then re-tempered
• Remember, don’t let any water get into your chocolate at any stage of the tempering process!
• Unless you’ve been working with chocolate for a while and have developed a feel for the tempering process and can tell the chocolate’s temperature by touching it to your lower lip like a pro, it’s imperative that you use a thermometer to determine the temperature, as going a few degrees either way can ruin the temper.
• If at any stage you do make a mistake with the tempering process you can simply start again from the beginning.
• While a marble or granite top is ideal for cooling the chocolate in the first method, you can also cool it on a countertop that’s laminated, glass or steel. It will take longer to cool, but it’s possible! (but I definitely wouldn’t recommend a wood or rough textured counter top Wink )
• Any chocolate left over after making your molded or dipped chocolate can be stored away in a cool place and then re-tempered before using again. There’s no need to ever waste good chocolate! Smile
• Wooden spoons can retain moisture so it’s best to use a rubber spatula while tempering

How to make filled chocolate with molds

Tempered Chocolate
Various Colored Cocoa Butters (optional)
OR Food Grade Cocoa Butter colored with powdered food coloring

Other Equipment:
A small brush
Chocolate molds
A Ladle
Bench or plastic scraper
OR
A small brush or spoon

Directions:

1. If using colored cocoa butter and plastic molds, paint designs at the bottom of the wells in each mold. Let dry. You can also use lustre dusts mixed with a bit of extract or vodka, instead of colored cocoa butters for a nice sheen. Let painted molds dry.

2. When coating the molds with the tempered chocolate, I like to do it how the chocolate pro’s do it (much faster and a lot less tedious). While holding mold over bowl of tempered chocolate, take a nice ladle of the chocolate and pour over the mold, making sure it cover and fills every well. Knock the mold a few times against a flat surface to get rid of air bubbles, then turn the mold upside down over the bowl of chocolate, and knock out the excess chocolate. Turn right side up and drag a bench or plastic scraper across so all the chocolate in between the wells is scraped off cleanly, leaving you with only chocolate filled wells. Put in the fridge to set, about 5 to 10 minutes. Alternatively, you could take a small brush and paint the tempered chocolate into each mold, or spoon it in if you’d like.

3. Remove from refrigerator and fill each well with the filling of your choice. Again take a ladle of chocolate and pour it on top of the filled chocolate wells, knocking against a flat surface to settle it in. Scrape excess chocolate off the mold with the bench scraper then refrigerate until set.

4. When set, pop your beautiful filled chocolates out of each well and enjoy!

Cinnamon Scrolls

Saturday, March 30th, 2013

I love fond memories of food from when you were younger or on holidays. I always remember the “love heart” candies and have looked all over the internet for these lollies. I have found many a love heart candy – none living up to the shape and size of the original ones, and none living up to the flavour.

I also have memories of a yummy and fantastic cinnamon scroll – the thing is, I have no idea where this originates from. I think it must have been bought somewhere – but I am still left wondering – where was this ideal scroll I ate…

I searched the internet for what I thought would make this magical scroll, and I kept finding recipes with an icing over the top – and this didn’t fit my memory, although almost all the recipes have icing, so I figured there must be a reason, it surely tastes great with the icing.

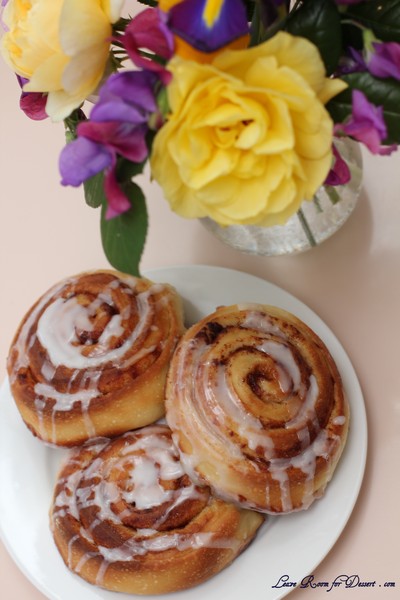
After trying this recipe, I have not looked elsewhere. This recipe is lovely and I have made it several times, and it has almost become a tradition for Easter or Christmas, holiday times, times with family or friends.

I have tried doing everything for this recipe all in one day, and also leaving to prove over night. Both work fine. Sometimes food has to fit around your schedule. I often make the full quantity – so double the recipe below, which makes about 60, as you can bake them at separate times.

Cinnamon Scrolls

ROLLS:
Recipe adapted from: Sugar and Spice (I changed a couple quantities in the frosting recipe and filling)

Makes about 30

DOUGH:
2 cups whole milk
1/2 cup vegetable oil
1/2 cup sugar
1 pkg active dry yeast (2 1/4 teaspoons or approx 1 tablespoon)
4 1/2 cups flour
1/2 teaspoon baking powder
1/2 teaspoon baking soda (bi-carb soda)
1/2 tablespoon salt

FILLING:
50-100g melted butter, plus more as needed
2 tablespoons ground cinnamon for sprinkling (or more or less to taste)
1/2 cup sugar, plus more as needed

Directions:
Mix milk, vegetable oil, and 1/2 cup of sugar in a pan. Scald the mixture (heat until just before the boiling point.) Remove from heat and let it cool 45 minutes to 1 hour.

When the mixture is lukewarm to warm, but NOT hot, sprinkle in package Active Dry Yeast. Let this sit for a minute and then add 4 cups of flour. Stir mixture together. Cover and let rise for at least an hour.

Next, add 1/2 cup flour, the baking powder, baking soda, and salt. Stir mixture together. From here, you could cover the dough and put it in the fridge until you need it—overnight or even a day or two, if necessary. Just keep your eye on it and if it starts to rise out of the pan, just punch it down. Or, of course, you can just go ahead and make the rolls.

Sprinkle surface generously with flour and roll the dough into a thin rectangular shape (approx 0.5cm x 28cm x 60cm). Brush melted butter on top, then sprinkle sugar over the butter, and finish with a generous sprinkling of cinnamon.

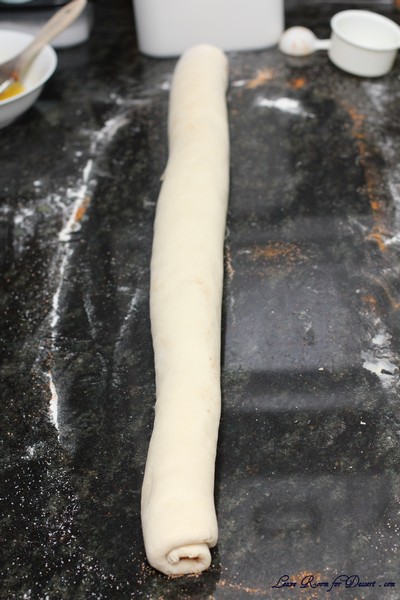
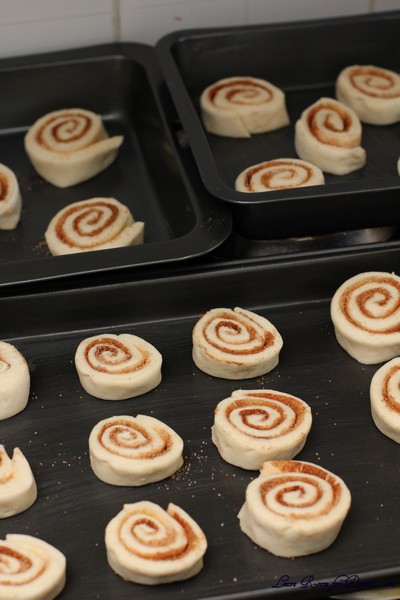
Starting with the wide end, roll the dough tightly towards you in a neat line. Next, pinch the seam to the roll to seal it. Spread 1 tbsp of melted butter in each pan/dish. With a sharp knife, begin cutting the dough into 1 inch slices, and laying them in the pans. Let rest for 20-30 minutes. Bake at 180C for 13 – 17 minutes, or until golden.

IF MAKING AHEAD FOR CHRISTMAS or EASTER MORNING: Instead of popping them into the oven, just put them straight into the fridge and let them rise for the 2nd time in the fridge overnight (they’ll rise VERY slowly in the fridge). Then, in the morning let them sit at room temperature for about 30 minutes, and then pop them in the oven as directed.

FROSTING: (you could multiply the frosting by 1.5 or 2x if you like loads of icing)
Ingredients:
100-200g icing sugar or icing mixture
1/2 tsp. maple flavoring (I left this out)
1/8 (30ml) cup milk
1-2 tablespoons (about 10g) melted butter
2 tablespoons brewed coffee (I didn’t use this, as I don’t like coffee – instead I added a dash of vanilla essence)
Pinch of salt

Directions:
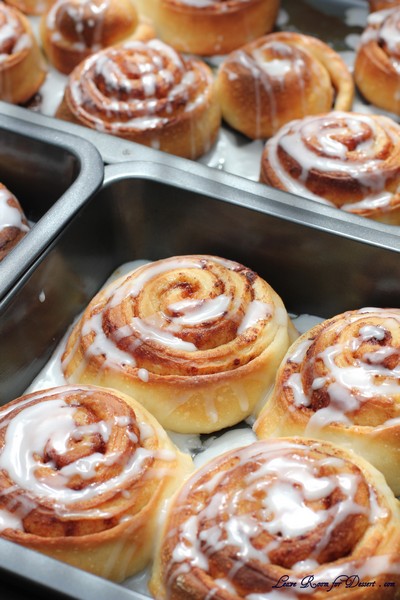
Mix together all ingredients, and stir well until smooth. It should be thick but pourable. Taste and adjust as needed. Generously drizzle over the warm rolls.

Raincoast Crisps – Daring Bakers Challenge February 2013

Wednesday, February 27th, 2013

Sarah from All Our Fingers in the Pie was our February 2013 Daring Bakers’ host and she challenges us to use our creativity in making our own Crisp Flatbreads and Crackers! 🙂

It wouldn’t be the end of the month without me rushing to finish and post my Daring Bakers Challenge. This month was focused around crackers, and after the last challenge made such wonderful ones, I was looking forward to it.

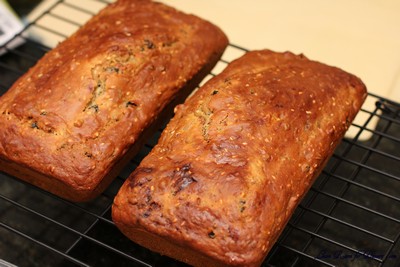
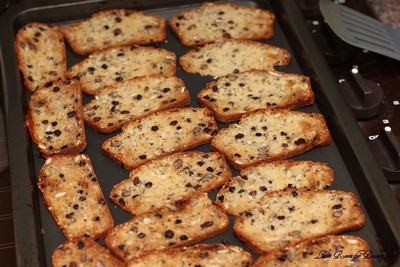
I think I may have chosen the easiest recipe given, as the dough came together very quickly. Although when it came to drying all the crackers, this looked like it would take a reasonable amount of time, as my oven only has two shelves (and the bottom shelf never cooks as fast or even). One loaf when sliced as thin as I could manage fit on two trays and after needing to put a pie in the oven, I decided on leaving the second loaf – as we had already eaten some of the thin slices that weren’t cut very well.

We ate the loaf for breakfast, sliced thickly, grilled and with a bit of butter, and it tasted very nice – with the currants (I used instead of raisins), adding a nice addition of sweetness and moisture. I think my parents in law would be quite surprised to see me eating dried fruit in bread or cake as I’ve always had an aversion to it.

I think the loaf was a little nicer than the crisps, as the flavour was more evident. I would definitely consider making the bread component of this challenge again.

Thanks to our host this month! It’s always a pleasure trying new recipes.

Raincoast Crisps

From Dinner with Julie blog with Julie van Rosendahl
Servings: About 8 dozen

Ingredients
2 cups (480 ml) (280 gm) (10 oz) all-purpose (plain) flour
2 teaspoons (10 ml) (10 gm) (1/3 oz) baking soda
1/2 teaspoon (2½ ml) (3 gm) salt
2 cups (480 ml) buttermilk
1/4 cup (60 ml) (50 gm) (1¾ oz) brown sugar, firmly packed
1/4 cup (60 ml) honey
1 cup (240 ml) (180 gm) (6½ oz) raisins (I used half a cup of currants)
1/2 cup (120 ml) (60 gm) (2 oz) chopped pecans
1/2 cup (120 ml) (125 gm) (4½ oz) roasted pumpkin seeds (optional)
1/4 cup (60 ml) (30 gm) (1 oz) sesame seeds
1/4 cup (60 ml) (30 gm) (1 oz) flax seed, ground
1 tablespoon (15 ml) (2 gm) finely chopped fresh rosemary

Directions
Preheat oven to moderate 350°F/180°C/gas mark 4.
In a large bowl, stir together the flour, baking soda and salt. Add the buttermilk, brown sugar and honey and stir a few strokes. Add the raisins, pecans, pumpkin seeds, sesame seeds, flax seed and rosemary and stir just until blended.
Pour the batter into two 8”x4” (20cmx10cm) loaf pans that have been sprayed with nonstick spray. Bake for about 45 minutes, until golden and springy to the touch. Remove from the pans and cool on a wire rack.

The cooler the bread, the easier it is to slice really thin. You can leave it until the next day or pop it in the freezer. Slice the loaves as thin as you can and place the slices in a single layer on an ungreased cookie sheet. Slice so thin that they are almost lacy. Reduce the oven heat to slow 300°F/150°C/gas mark 2 and bake them for about 15 minutes, then flip them over and bake for another 10 minutes, until crisp and deep golden. You can also cut in half before the second baking. This is the way I like them. The size works better. Be careful not to burn.

Storage and Freezing Instructions/Tips: Store in an airtight container at room temperature for up to 1 month. Prolong the freshness by freezing for up to 3 months.

Empanadas – Daring Bakers Challenge September 2012

Thursday, September 27th, 2012

Patri of the blog, Asi Son Los Cosas, was our September 2012 Daring Bakers’ hostess and she decided to tempt us with one of her family’s favorite recipes for Empanadas! We were given two dough recipes to choose from and encouraged to fill our Empanadas as creatively as we wished!

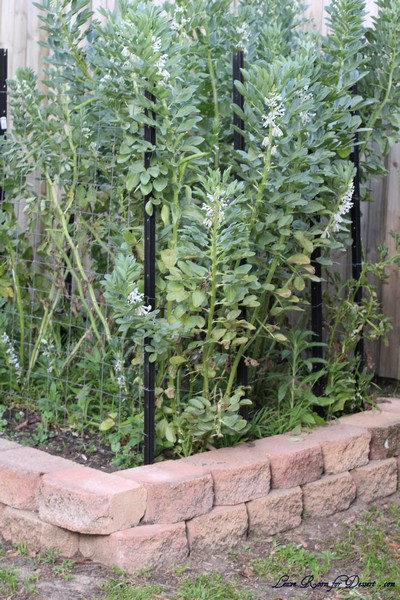
Nick’s veggie beds are all made 🙂 After the removal of some palm trees and their never ending root system, a partly new fence, a sturdy woodshed (made by my very talented Dad), there was finally room and time for Nick to make some raised garden beds. He used retaining wall blocks to build 5 veggie beds. On the weekend we were able to harvest our first broad beans from the bed, and we shared them with family – just as we shared this month’s Daring Bakers Challenge.


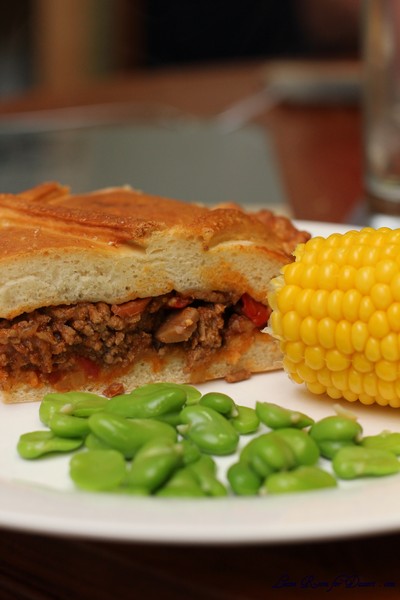
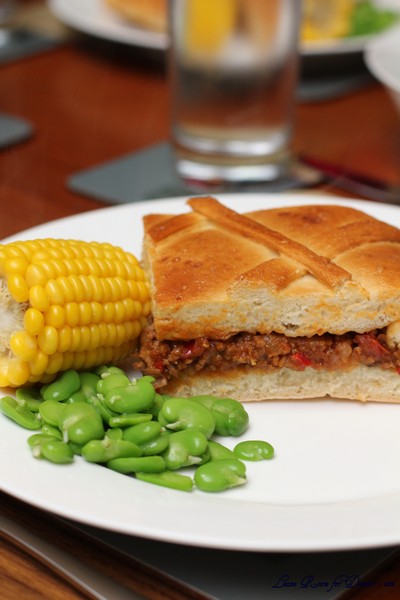
This recipe was quite easy to make and very tasty. I would love to make it again – maybe with a few changes on the ratio of bread to filling. (see my notes below). After seeing how easy it is, I’d love to try some more fillings.

My notes on the recipe:
I made double the meat mix and 1x the dough mix. Next time I will make about 4x the meat mix (~1kg), and 1x dough – and make it into 2x emapanadas (one on each tray).
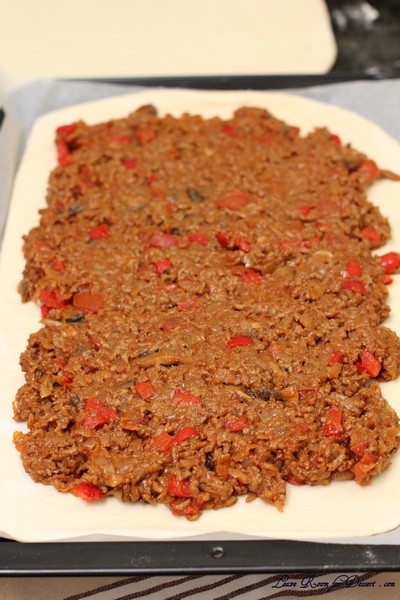
We added extra spices to the meat mix – try some salt, and cumin powder (and maybe some tomato paste). I also used mushrooms and red capsicum.

Empanadas

Serves about 8-10


Dough Ingredients:

5-1/3 cups (1280 ml) (750 gm) bread flour
2 cups (480 ml) of lukewarm water (about 85°F/30ºC), approximately
1 satchel (1 tablespoon) (15 gm) dry yeast or (1 oz) (30 gm) fresh yeast
2 teaspoons (10 ml) (11 gm) salt
4 tablespoons (60 ml) oil (you can use oil from the pan where you have cooked the filling)
1 large egg, for egg wash

Measure out all the ingredients.
Shift the flour into a big bowl and make a well in the middle. Rub the yeast in with your fingers.
In a small bowl, mix the water and the salt.
Now, using your fingers or a wooden spoon, start adding the water and mixing it with the flour-yeast mixture. Keep on working with your fingers or spoon until you have added enough water and all the flour has been incorporated and you have a messy ball of dough.
On a clean counter top, knead the dough for approximately 10 minutes
You could do all the above using a stand mixer, in that case mix the ingredients with the paddle attachment until mixed and then switch to a dough hook and knead on low for about 6 minutes.

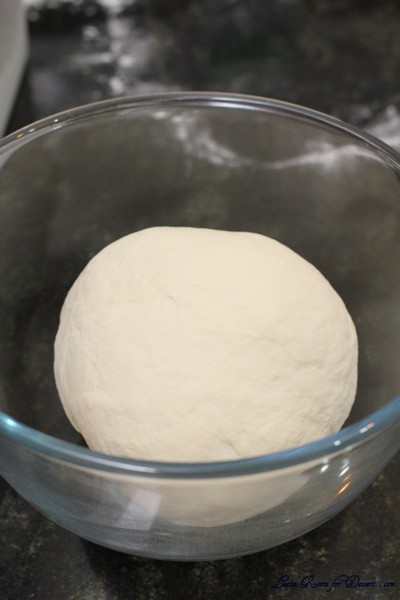
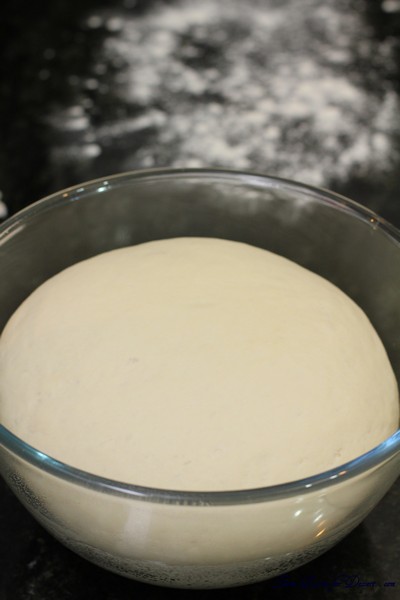
Clean and oil the big bowl you used for mixing and place the kneaded dough in it. Cover it with a napkin or piece of linen and keep it in a warm, draught-free place for approximately 40 to 50 minutes.

Once risen, turn the dough back into a floured counter and cut it in half. Cover one half with the napkin to prevent drying.
Spread the other half of the dough using a rolling pin. You can use a piece of wax paper over the counter, it will make it easier to move the dough around. Depending on the shape of your oven pan or cookie sheet, you will make a rectangle or a round.
Now, the thinness of the dough will depend on your choice of filling and how much bread you like in every bite. For your first time, make it about 3mm thin (about 1/10th of an inch) and then adjust from that in the next ones you make.

Ground meat filling:

400 gm (14 oz) chopped onion (approximately 1 big onion or 2 medium-sized ones)
200 gm (7 oz) tomatoes (peeled and seeded)
1 small green pepper
2 garlic cloves
¾ cup (180 ml) olive oil
300 grams (2/3 pound or 10.5 ounces) minced (ground) meat
1 teaspoon sweet paprika

Heat the oil in a skillet
Fry the finely chopped onions, pepper and garlic until the vegetables are soft. Add then the tomatoes, chopped small, and cook until done.
Add the meat and cook for about 5 minutes.
Add the paprika, and stir into the frittata.
Allow to cool for at least 30 minutes.
Fill the empanada en bake as indicated.

Assembling the empanada:

If you haven’t used wax paper, either lightly flour or line with wax paper your pan or tray.
Cover the base and sides with the dough. Using the rolling pin or a knife, cut the extra dough.
Place the filling, making sure it is cold and that all the base is covered. Using a hot filling will make the bottom layer of the empanada become soggy. Be careful to avoid adding too much oil from the filling, try to make it as “dry” as possible.
Start preheating your oven to moderate 350°F/180ºC/gas mark 4.
Take the other half of the dough and spread it out to the same or less thinness of the base. You can use a piece of wax paper for this too. Take into account that this “top” dough needs to be smaller around than the bottom, as it only needs to cover the filling.

If not using wax paper, move carefully the top to cover the filling. If using wax paper, transfer the dough, turn upside down, cover the filling and gently peel off the wax paper.
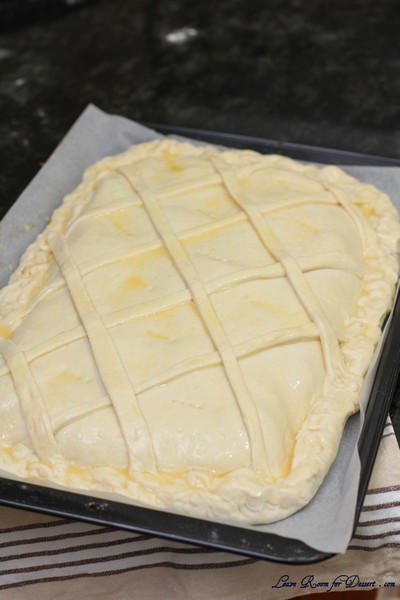
Using your fingers, join bottom and top dough, when you have gone all the way around, start pinching top and bottom together with your thumb and index finger and turning them half way in, that way you end up with a rope-like border. As a picture is worth a thousand words, please watch this video to see how it is done: http://youtu.be/CNpB7HkTdDk
When you are finished, make a 1 inch hole in the middle of the top layer. This will help hot air exit the empanada while it’s baking without breaking the cover.
You can use left-over dough to decorate the empanada, using rounds, bows, lines… let your imagination flow and make it pretty!
Using a fork, prick the top layer or, using scissors, make snips that go all the way through the top layer.
In a small bowl, beat an egg and add a tbsp of cold water. With the pastry brush, paint the top of the empanada with the egg wash.

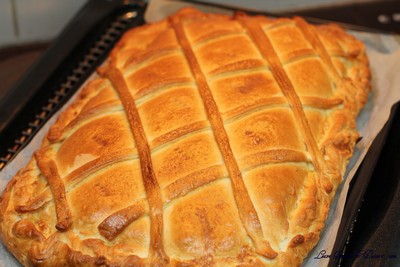
Place the empanada in the oven and bake for about 45 minutes. Check that the bottom part is done.