Budget Meals

Scones – Daring Bakers Challenge January 2012

Friday, January 27th, 2012

Audax Artifex was our January 2012 Daring Bakers’ host. Aud worked tirelessly to master light and fluffy scones (a/k/a biscuits) to help us create delicious and perfect batches in our own kitchens!

After News Years and Christmas, everyone wants a break from cooking don’t they? Well, not us, or at least that’s not what happened. We decided to have some friends over for a Garden Party so lots of cooking (and cleaning) happened in what was supposed to be a relaxing start to the New Year. Then some big birthdays came up, more desserts, Australia Day – I tried out a new lamington recipe, and of course the Daring Bakers Challenge.

Luckily for me, the challenge just happens to be easy, affordable, quick and extremely tasty. I love fresh scones, they are probably one of my favourite foods. They must have a large slathering of jam and cream on top too. Although I must admit, I could not resist the scones once they came out of the oven. I took a bite of the smallest scone and fell into buttery bliss.

Audax, did an amazing job with this recipe and had certainly done his research on the matter and how to make different textured and flavoured scones.

Thanks to Audax for a great (and thankfully quick) challenge this month. I always love seeing your creations from the challenges!

Basic Scones (a.k.a. Basic Biscuits)

Servings: about eight 2-inch (5 cm) scones or five 3-inch (7½ cm) scones
Recipe can be doubled – I doubled this recipe and would recommend doing so. I hope it can be tripled or quadrupled – as I loved the taste so much.

Ingredients:
1 cup (240 ml) (140 gm/5 oz) plain (all-purpose) flour
2 teaspoons (10 ml) (10 gm) (⅓ oz) fresh baking powder
¼ teaspoon (1¼ ml) (1½ gm) salt
2 tablespoons (30 gm/1 oz) frozen grated butter (or a combination of lard and butter)
approximately ½ cup (120 ml) cold milk
optional 1 tablespoon milk, for glazing the tops of the scones

Directions:
1. Preheat oven to very hot 475°F/240°C/gas mark 9.
2. Triple sift the dry ingredients into a large bowl. (If your room temperature is very hot refrigerate the sifted ingredients until cold.)
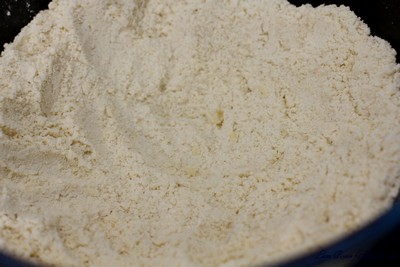
3. Rub the frozen grated butter (or combination of fats) into the dry ingredients until it resembles very coarse bread crumbs with some pea-sized pieces if you want flaky scones or until it resembles coarse beach sand if you want tender scones.

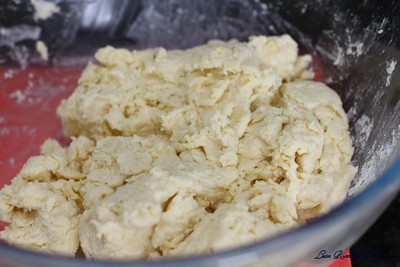
4. Add nearly all of the liquid at once into the rubbed-in flour/fat mixture and mix until it just forms a sticky dough (add the remaining liquid if needed). The wetter the dough the lighter the scones (biscuits) will be!


5. Turn the dough out onto a lightly floured board, lightly flour the top of the dough. To achieve an even homogeneous crumb to your scones knead very gently about 4 or 5 times (do not press too firmly) the dough until it is smooth. To achieve a layered effect in your scones knead very gently once (do not press too firmly) then fold and turn the kneaded dough about 3 or 4 times until the dough has formed a smooth texture. (Use a floured plastic scraper to help you knead and/or fold and turn the dough if you wish.)
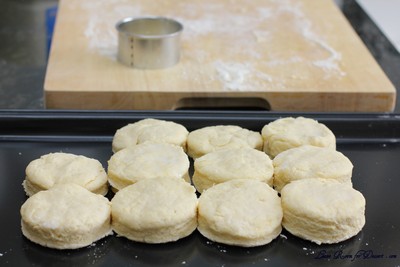
6. Pat or roll out the dough into a 6 inch by 4 inch rectangle by about ¾ inch thick (15¼ cm by 10 cm by 2 cm thick). Using a well-floured 2-inch (5 cm) scone cutter (biscuit cutter), stamp out without twisting six 2-inch (5 cm) rounds, gently reform the scraps into another ¾ inch (2 cm) layer and cut two more scones (these two scones will not raise as well as the others since the extra handling will slightly toughen the dough). Or use a well-floured sharp knife to form squares or wedges as you desire.

7. Place the rounds just touching on a baking dish if you wish to have soft-sided scones or place the rounds spaced widely apart on the baking dish if you wish to have crisp-sided scones. Glaze the tops with milk if you want a golden colour on your scones or lightly flour if you want a more traditional look to your scones.

8. Bake in the preheated very hot oven for about 10 minutes (check at 8 minutes since home ovens at these high temperatures are very unreliable) until the scones are well risen and are lightly coloured on the tops. The scones are ready when the sides are set.

9. Immediately place onto cooling rack to stop the cooking process, serve while still warm.

Variations on the Basic recipe
Buttermilk – follow the Basic recipe above but replace the milk with buttermilk, add ¼ teaspoon of baking soda, increase the fat to 4 tablespoons, in Step 3 aim of pea-sized pieces of fat coated in flour, in Step 5 fold and turn the dough, rounds are just touching in the baking dish, glaze with buttermilk.
Australian Scone Ring (Damper Ring) – follow the Basic recipe above but decrease the fat to 1 tablespoon, in Step 3 aim of fine beach sand sized pieces of fat coated in flour, in Step 5 knead the dough, in Step 7 form seven rounds into a ring shape with the eighth round as the centre, glaze with milk.
Cream – follow the Basic recipe above but replace the milk with cream, add ¼ teaspoon of baking soda, in Step 3 aim of beach sand sized pieces of fat coated in flour, in Step 5 knead the dough, rounds are just touching in the baking dish, glaze with cream.
Cheese and Chive – follow the Basic recipe above but add ¼ teaspoon of baking soda, after Step 2 add ½ teaspoon sifted mustard powder, ¼ teaspoon sifted cayenne pepper (optional), ½ cup (60 gm/2 oz) grated cheese and 2 tablespoons finely chopped chives into the sifted ingredients, in Step 3 aim of beach sand sized pieces of fat coated in flour, in Step 5 knead the dough, rounds are widely spaced in the baking dish, sprinkle the rounds with cracked pepper.
Fresh Herb – follow the Basic recipe above but after Step 3 add 3 tablespoons finely chopped herbs (such as parsley, dill, chives etc).
Sweet Fruit – follow the Basic recipe above but after Step 3 add ¼ cup (45 gm) dried fruit (e.g. sultanas, raisins, currents, cranberries, cherries etc) and 1 tablespoon (15 gm) sugar.
Wholemeal – follow the Basic recipe above but replace half of the plain flour with wholemeal flour.
Wholemeal and date – follow the Basic recipe above but replace half of the plain flour with wholemeal flour and after Step 3 add ¼ cup (45 gm) chopped dates and 1 tablespoon (15 gm) sugar.

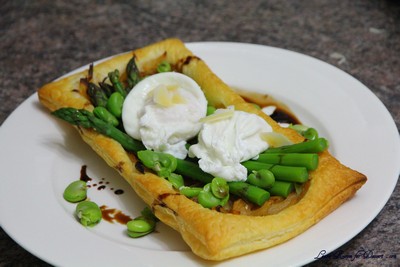
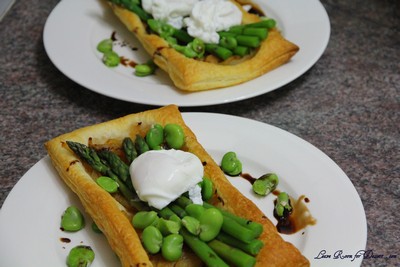
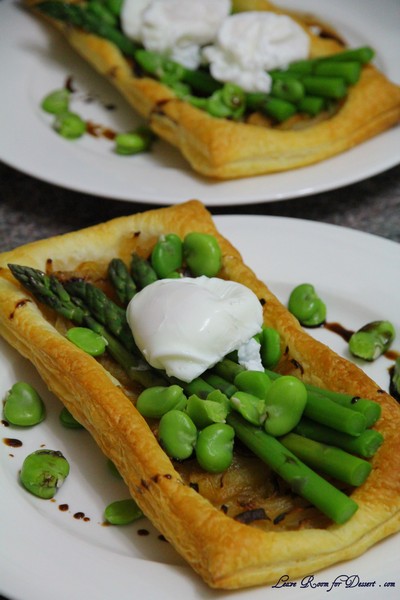
Asparagus, Broad Bean and Poached Egg Tart

Sunday, October 24th, 2010

Asparagus is on a great special at the moment in the shops and is tasting fantastic too. I always like using fresh, seasonal ingredients, because not only do they have an amazing taste, they are likely to have traveled less distance to reach the shops, and are also a good price – which is important to most people.

I have only just started getting into eating asparagus. This year in particular has been one where my whole family is eating asparagus – and broad beans too. I now have broad beans with a lot of meals, although we are lucky if they make it to the plate – as I tend to eat them whilst shelling them.

This is a quick and easy meal with fresh ingredients. I wish I was growing asparagus and broad beans as that would make it even more enjoyable and fresh. I haven’t left you with a recipe of how to poach eggs, as I haven’t come across a fool-proof way of making them yet so they look good. For my ones (which still tasted great), I boiled up water in a medium saucepan, added a splash of vinegar, stirred
the water, then added the egg. The eggs came apart a bit whilst cooking, although stayed together enough – they cooked for 2-4 minutes and were then drained.

Asparagus, Broad Bean and Poached Egg Tart

Recipe by Anita @ Leave Room for Dessert

Serves: 4

1 tablespoon olive oil
5 large onions, sliced
1/2 teaspoon salt
2 bunches of asparagus
2 cups broad beans
4-8 poached eggs
2 sheets puff pastry, thawed and halved
Caramelised balsamic vinegar to serve
Shaved Parmesan cheese, to serve

Preheat oven to 180C.

Heat oil in a medium saucepan on high. Add the onion and salt, stir and turn the heat down to medium/low (alternating if need be to make sure the onions don’t burn). Cook for 10-20 minutes until the onions are caramelised.

Place pastry halves on two lined baking trays. Divide the onion mix across the pastry halves, leaving a 2cm gap around the outside edges. Cook in the oven for 10-20 minutes until the pastry on the outside is puffed and golden brown.

Whilst the tarts are cooking, poach the eggs (with the method I used above, or according to your preferred method), and cook the asparagus and broad beans.

To cook the asparagus and broad beans, boil water in a medium saucepan. Place the broad beans in the water and cook for 2 minutes, or a little longer if they haven’t come to the surface of the water. Place in cold water straight away, to stop the cooking. Remove skins from the broad beans. Place the asparagus into the boiling water and cook for 2 minutes. Place in the cold water.

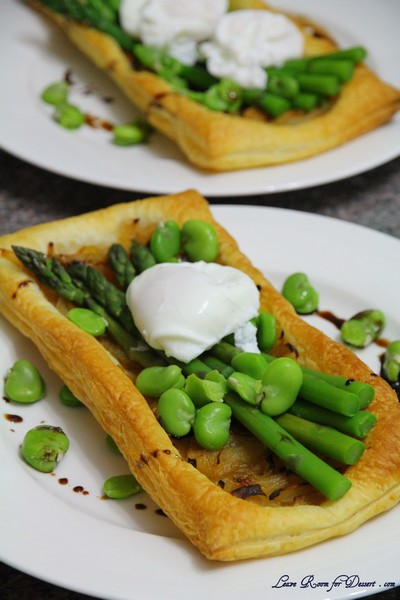
Rinse the broad beans and asparagus under a small amount of hot water, before draining and placing on top of the cooked onion tart. Top with 1-2 poached eggs per tart and drizzle caramelised balsamic vinegar around the edges.

Ciabatta Bread

Wednesday, October 6th, 2010

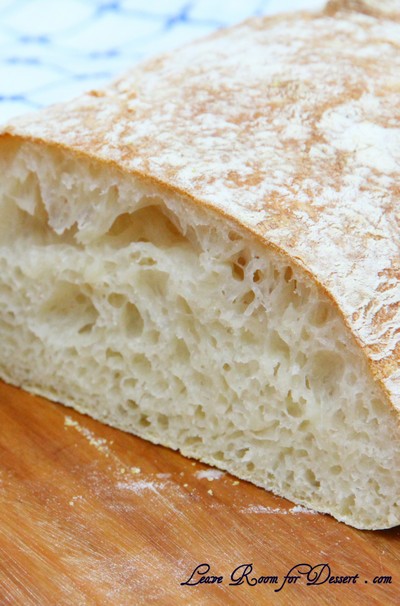
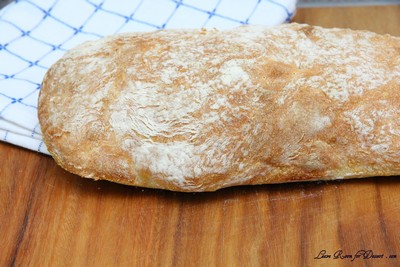
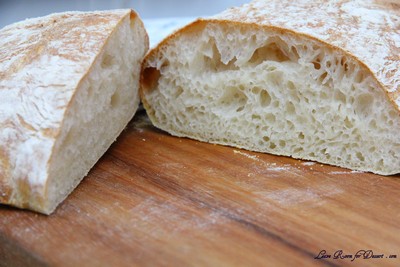
I’ve always had problems making bread at home. They nearly never end up with the same fluffy lovely texture the bought ones do. So I couldn’t be more excited to share with you all, the great ciabatta bread method Nick found. I know I have told so many people about it – and they have been very patient waiting for the recipe – so here it is (finally).

I had heard a while back about the no-knead bread. It sounds delicious and I still intend to make it one or two days when I have the time. This is a quick no-knead ciabatta bread and I don’t know why it’s called that, as there is quite a lot of kneading done by the KitchenAid. I wouldn’t want to do it by hand – as the mixture is just way too sticky.

Another plus it that you don’t need any special flour for it. Plain flour works beautifully.

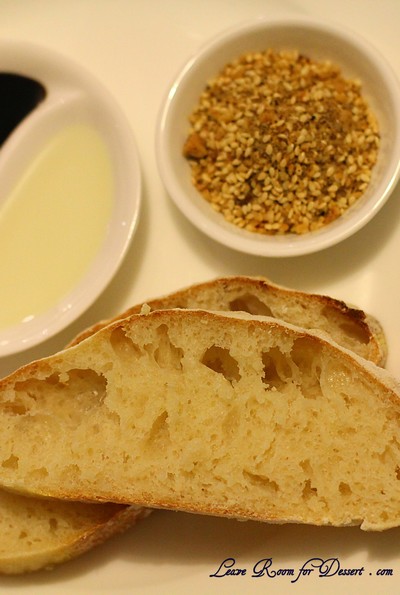
I hope more people try it – as there’s almost nothing better than dunking some fresh gorgeous ciabatta bread into olive oil, caramelised balsamic vinegar and dukkah.

Ciabatta Bread

Recipe by Nick based on Jason’s Quick Coccodrillo Ciabatta Bread and Food Wishes Video

**Note: Takes 3-8 hours or overnight with proving. (Nick has made it in 3 hours at the shortest time, although it works in 6 hours and even overnight!)

Makes: one loaf, and can easily be doubled to make two loaves

250g plain flour
1 teaspoon dry yeast
1 teaspoon salt
1 teaspoon sugar
250ml warm water

plain flour and polenta for dusting plastic wrap and baking paper lined tray

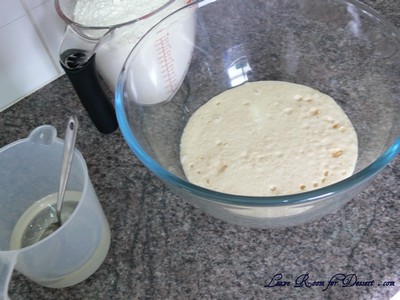
Place all dry ingredients into a bowl for a KitchenAid or mix master, with a dough hook attached. Whisk or mix the dry ingredients, then add the warm water and mix with the dough hook for 10 minutes. You may want to stop the mixer and scrape the bottom and sides of the bowl to ensure that all of the dry ingredients have come away from the sides. You should really notice the texture and consitency of the dough change after 10 minutes of mixing, going from gluggy to stretchy and bandy.

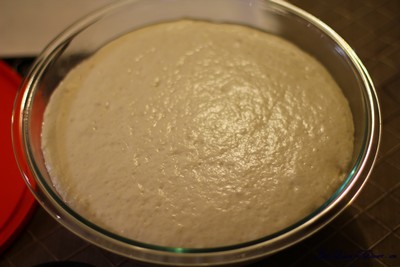
Pour the mixture into a large lightly oiled bowl. Cover with a lid, tea towel or plastic wrap and leave in a warm place for 3-6 hours or overnight.

Sprinkle some water onto a clean counter surface and lay out a piece of plastic wrap onto the wet surface. This stops the plastic wrap from moving around. Sift some plain flour onto the plastic wrap to give an even coating (slightly smaller than the size of a baking tray). Cover your baking tray with a piece of baking paper, then sift a similar sized patch of flour onto the baking paper. Then sprinkle some polenta onto the flour on top of the baking paper. The flour on the plastic wrap will stop the dough sticking to the plastic, and the flour and polenta on the baking paper will end up on the underside of the bread, giving it a good texture and flavour.

The mixture should have tripled in size after proving, and will be sticky and full of air bubbles. Pour the mixture onto the flour covered plastic wrap and shape the dough into a loaf roughly 30cm x 15cm. It’s best to pop any really large air-bubbles in the dough. Carefully lift the plastic wrap with the dough on top and flip the loaf on the flour and polenta covered baking paper, then remove the plastic wrap. Re-shape the dough into a loaf shape again on the tray if required.

Leave the dough to sit in a warm spot for 15 minutes to 1 hour.

Cook at 250C for approximately 20 minutes, until the outside has formed a nice crust and makes a hollow sound when tapped.

Allow to cool to a temperature you’re able to handle, then slice up and serve with a meal – or for a lovely starter serve with a good olive oil and caramelised balsamic vinegar, and perhaps dukkah too.

If you make two loaves, you can easily store one in a tea towel overnight. Place on a baking tray and reheat in the oven at 180C for 5-10 minutes, before serving. It’s almost as good as freshly baked.

Decorated Sugar Cookies – Daring Bakers Challenge September 2010

Monday, September 27th, 2010

The September 2010 Daring Bakers’ challenge was hosted by Mandy of “What the Fruitcake?!” Mandy challenged everyone to make Decorated Sugar Cookies based on recipes from Peggy Porschen and The Joy of Baking.

This challenge came at the perfect time, right before a High Tea that was being held at work. And just before my two week holiday – during which I would certainly not get these made. So I made these cookies right at the beginning of the month (and left it to the last minute to post it).

I tried to do a few different designs on my cookies, although not many turned out as pretty as I would have liked.

One of the mandatory elements for this month’s challenge was that it had to be the theme of September, whatever it means to each of us. For me, September is the start of Spring – my favourite season of the year. We have just had gorgeous flowers appearing in our garden. I recently bought three orchids, and after buying these, we found one in our garden which we had never noticed before. Then I was given oodles of them from both my Grandma and my Mum’s neighbour.

My sweet peas have flowered themselves silly. Last year I found my favourite one and once the seeds dried, I threw them around the garden, without Nick knowing and they have formed a jungle – and I love it.

I also discovered that previous owners have planted daffodils and although they didn’t flower last year, I’m so glad they did this year.

With such fantastic inspiration for this challenge, I tried to make flower inspired cookies. Most of which didn’t turn out as well as planned. Although the love heart ones will just have to symbolise my love of Spring.

The biscuits themselves were quite plain, as expected. For the time, effort and taste I probably won’t make these again, although I always enjoy trying something new.

Thanks again to our host for this month and the daring kitchen team!

Basic Sugar Cookies

Makes Approximately 36x 10cm / 4″ Cookies

200g / 7oz / ½ cup + 6 Tbsp Unsalted Butter, at room temperature
400g / 14oz / 3 cups + 3 Tbsp All Purpose / Plain Flour
200g / 7oz / 1 cup Caster Sugar / Superfine Sugar
1 Large Egg, lightly beaten
5ml / 1 tsp Vanilla Extract / Or seeds from 1 vanilla bean

Cream together the butter, sugar and any flavourings you’re using. Beat until just becoming creamy in texture.
• Tip: Don’t over mix otherwise you’ll incorporate too much air and the cookies will spread during baking, losing their shape.

Beat in the egg until well combined, make sure to scrape down the sides of the bowl. Add the sifted flour and mix on low until a non sticky dough forms.
• Tip: I don’t have a stand mixer so I find it easier to switch to dough hooks at this stage to avoid flour flying everywhere.

Knead into a ball and divide into 2 or 3 pieces.

Roll out each portion between parchment paper to a thickness of about 5mm/1/5 inch (0.2 inch)

Refrigerate for a minimum of 30mins.
• Tip: Recipes commonly just wrap the whole ball of dough in clingwrap and then refrigerate it for an hour or overnight, but by rolling the dough between parchment, this shortens the chilling time and then it’s also been rolled out while still soft making it easier and quicker.

Once chilled, peel off parchment and place dough on a lightly floured surface.

Cut out shapes with cookie cutters or a sharp knife.

Arrange shapes on parchment lined baking sheets and refrigerate for another 30mins to an hour.
• Tip: It’s very important you chill them again otherwise they’ll spread while baking.

Re-roll scraps and follow the above process until all scraps are used up.

Preheat oven to 180°C (160°C Fan Assisted) / 350°F / Gas Mark 4.

Bake until golden around the edges, about 8-15mins depending on the size of the cookies.
• Tip: Bake same sized cookies together otherwise mixing smaller with larger cookies could result in
some cookies being baked before others are done.
• Tip: Rotate baking sheets half way through baking if your oven bakes unevenly.

Leave to cool on cooling racks.

Once completely cooled, decorate as desired.
• Tip: If wrapped in tinfoil/cling wrap or kept in airtight containers in a cool place, un-decorated cookies can last up to a month.

Royal Icing

315g – 375g / 11oz – 13oz / 2½ – 3 cups Icing / Confectioner’s / Powdered Sugar, unsifted
2 Large Egg Whites
10ml / 2 tsp Lemon Juice
5ml / 1 tsp Almond Extract, optional

Beat egg whites with lemon juice until combined.
• Tip: It’s important that the bowls/spoons/spatulas and beaters you use are thoroughly cleaned and grease free.

Sift the icing sugar to remove lumps and add it to the egg whites.
• Tip: I’ve listed 2 amounts of icing sugar, the lesser amount is good for a flooding consistency, and the larger amount is for outlining, but you can add even more for a much thicker consistency good for writing. If you add too much icing sugar or would like to make a thinner consistency, add very small amounts of water, a few drops at a time, until you reach the consistency you need.

Beat on low until combined and smooth.

Use immediately or keep in an airtight container.
• Tip: Royal Icing starts to harden as soon as it’s in contact with air so make sure to cover containers with plastic wrap while not in use.

Decorating Your Cookies: Flooding
“Flooding” a cookie is a technique used when covering a cookie with Royal Icing.
1. You outline the area you want to flood which helps create a dam
2. Then fill or flood inside the area you’ve outlined

Decorating Your Cookies: Royal Icing
The most important thing when it comes to decorating with Royal Icing is the consistency.

There are two ways of flooding your cookies. Some like to do the outline with a thicker icing and then flood with a thinner icing. Some like to use the same icing to do both which saves time and you don’t have to have two different piping bags for each colour you’re using.

The Same Consistency Method
Consistency:

Mix your royal icing according to the recipe/instructions

Drag a knife through the surface of the Royal Icing and count to 10

If the surface becomes smooth between 5 & 10 seconds, the icing is at the correct consistency
• Tip: If your icing is too thick, thin it by adding a few drops of water. Mix, do the 10 second test, then if it’s still too thick, add a few more drops of water, repeat, etc.
• Tip: To thicken your icing, add small amounts of icing sugar until thick enough for the 10 second test


Two Different Consistencies Method

Consistency:

Mix your royal icing according to the recipe/instructions.

Separate into 2 different bowls, one lot of icing for outlining, the other for flooding.

For the outlining icing, drag a knife through the surface of the Royal Icing.

If the surface becomes smooth at around 10 seconds, the icing is at the correct consistency.
• Tip: If your icing is too thick, thin it by adding a few drops of water. Mix, count to 10 seconds, then if it’s still too thick, add a few more drops of water, repeat, etc.
• Tip: To thicken your icing, add small amounts of icing sugar until thick enough for the 10 second test.

For the flooding/filling icing, drag a knife through the surface of the Royal Icing.

If the surface becomes smooth at around 3-4 seconds, the icing is at the correct consistency.
• Tip: If your icing is too thick, thin it by adding a few drops of water. Mix, count to 3-4 seconds, then if it’s still too thick, add a few more drops of water, repeat, etc.
• Tip: To thicken your icing, add small amounts of icing sugar until thick enough for the 3-4 second test.

Colouring
Separate Royal Icing into separate bowls for each colour you plan on using.
• Tip: Make sure to cover the bowls with cling film or a damp cloth to prevent the top from setting and then making lumps

Using a toothpick, add gel or paste colouring to each bowl and mix thoroughly until desired colour is reached
• Tip: You can use liquid food colouring but you might not be able to get the desired strength of colour, liquid colouring will also thin out the icing so you’ll need to add more icing sugar to thicken it again.

Prepping and Filling Your Bag
Attach your icing tips to the piping bags using couplers
• Tip: You don’t need to use a coupler but it makes it easier if you want to change tip sizes
• Tip: A size 1 tip is best for doing intricate details. A size 2 tip is good for some details and outlining. Fill or flood with sizes 2 – 5.
• Tip: You don’t need a piping bag, you can use a parchment cone or ziplock bag with a tiny bit snipped off the corner. I would however recommend getting a piping set if you don’t have one as it will be much easier and more precise.

Stand the piping bags in glasses with the tops of the bags folded over the top of the glass.

Fill your icing bags with each coloured icing.

Tie the ends of the piping bags with elastic bands.

Decorating: Outlining

Fit the piping bag with a size 2 or 3 tip.
• Tip: Or snip a very small bit of the corner off of a parchment cone or Ziploc bag

Hold the piping bag at a 45 degree angle above the cookie where you want to start the outline.

Gently squeeze the piping bag and start moving in the direction you want to outline the cookie.

Start lifting the piping bag away from the cookie so that the flow of icing falls onto the cookie, making it an even and neater outline.

As you start to reach the beginning of the outline, bring the piping tip closer to the surface of the cookie to meet the start of the icing outline.
• Tip: If you’re doing an intricate cookie, like a snow flake, you won’t be able to lift the tip as far away from the cookie.

If you’re doing a different colour border, eg a black border, let the outline dry before flooding. If using the same colour for the outline as you’re flooding with, begin flooding after doing the outline.

Decorating: Flooding
Fit the piping bag with a size 2-5 tip, the bigger the area being filled, the bigger the tip.
• Tip: Or cut slightly more off the corner of a Ziploc bag to create a slightly larger opening.

Quickly zigzag back and forth over the area you want to fill.
• Tip: You need to be quick when flooding the cookie so don’t worry too much if it’s not filled in neatly.

Using a toothpick or clean paintbrush, push the icing around into the gaps that are still remaining.

Either pick up the cookie and tip it from side to side to even out the filling, or lightly bang the cookie down on your kitchen counter.

Decorating: Melding Colours

If you would like to add lines or dots to the base colour that you flooded the cookie with so that they meld and dry as a smooth surface, you need to add the lines/dots/patterns as quickly as possible after flooding and smoothing the surface of the cookie.
• Tip: Make sure to have all the colours you’re planning on using ready and close by so that you can switch between colours quickly

Simply pipe other colours onto the flooded surface in patterns or lines which you can either leave as that or then drag a toothpick through to make marbling patterns.

Decorating: On top of flooding

If you’d like to do other patterns/outlines or writing on top of the flooded surface so that they are raised above the flooded background, simply allow the icing to dry, preferably over night.

Fit the piping bag with tip sizes 1-3.

Pipe patterns or write on top of the dry icing
• Tip: For writing, the consistency of your icing should be thicker rather than thinner, drag a knife through your icing and when the surface smoothes around 12-15 seconds, the consistency is correct.

Packaging and Storing
Once fully decorated, allow cookies to dry for 24 hours in a cool and dry area.

Stack cookies in an airtight container, from largest cookies at the bottom, to smallest and more intricate at the top, with parchment or wax free paper in between the layers.

Store in a cool and dry area with the container’s lid firmly sealed.

Will last for about a month if stored this way.

General Baking Tips
When measuring by volume (cup) always shift/aerate your flour/icing sugar in the container/bag before measuring because it settles as it sits and so you end up with more flour/icing sugar in your cup. I do this by moving the ingredient around with a spoon, whisk or fork.

When measuring flour or icing sugar by volume (cup) never scoop the flour/icing sugar up with the cup otherwise you compress the contents and this can make a big difference in the amount you’re using. Rather, spoon the ingredient into the cup until level with the top.

When measuring baking powder or baking soda, always level off the top of the measuring spoon with something flat (like the back of a knife) as these ingredients need to be accurately measured.

When mixing your ingredients, always follow the recipe instructions, especially when it comes to beating in eggs and flour, so if it specifies to mix until just combined or to beat for 4 minutes, follow the instructions to get best results.

Unless otherwise specified, always have your ingredients at room temperature.

It’s always best to invest in an oven thermometer so that you know exactly the temperature you’re baking at then you can also find out if you have cold or hot spots in your oven.

If you need to rotate your trays midst baking, always allow at least half the baking time to lapse before opening your oven to move baking trays around, this allows time for your baked goods to form a good structure so that they won’t flop.

General Royal Icing Tips
Keep a damp cloth handy while decorating your cookies so that if you’re switching between different icing bags, you can keep the tips covered with the damp cloth so that the icing doesn’t dry and clog them.

If your icing tips do clog, use a toothpick or pin to unclog them.

Always pipe a little bit of royal icing onto a board/paper towel before you begin to make sure there are no air bubbles.

Remember to always cover bowls containing royal icing wither cling wrap, a damp cloth or sealable lid so that the surface doesn’t dry.

Don’t store anything decorated with royal icing in the fridge otherwise the royal icing will become tacky.

Pizza Wheels

Thursday, June 17th, 2010

These pizza wheels go so fast at any party we’ve had.

They can be made non-vegetarian by adding some chopped ham or salami.

I love them, and there’s not much more I really have to say about these – except how can you go wrong with a mini “pizza”?

Pizza Wheels

Recipe by Anita @ Leave Room for Dessert

Makes more than 40

4 puff pastry sheets
6 tablespoons tomato paste
1 red capsicum, diced
1 green capsicum, diced
grated cheese

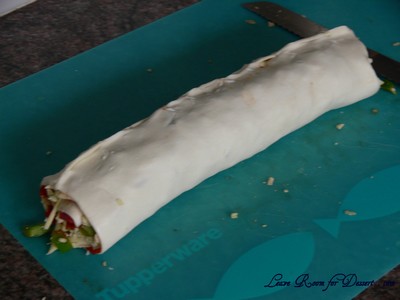
Spread the tomato paste over the puff pastry sheets, leaving a 1.5cm gap from one end. Sprinkle capsicums then cheese over the pastry leaving the gap. Roll the pastry toward the gap and then press the end onto the roll to join the pastry. This can be covered and placed in the refrigerator until needed.
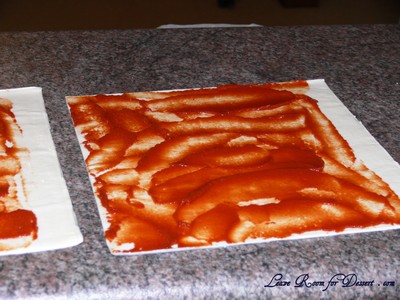
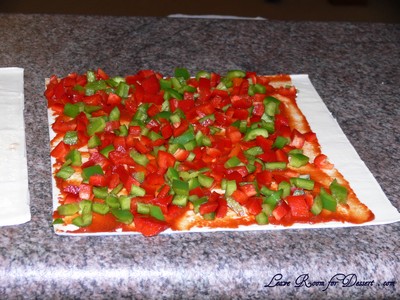
Cut 1cm slices of the roll and place on baking paper on a baking tray. Cook in a moderate oven (180C) for approx 10 minutes or until cheese has melted and pizza wheels have browned. Serve when hot.

Steamed Barbecued Pork Buns – Char Siu Bao

Sunday, February 14th, 2010

PorkBuns18

Happy Chinese New Year! The year of the Tiger has just begun and I decided to celebrate by making my first ever steamed barbeque pork buns.

PorkBuns20

The thing I love about barbecued pork buns is how sweet they are. I tend to add a tablespoon of sugar or more to most savoury dishes I make, although these go one step further – and I’m not complaining. 🙂

PorkBuns28

They do go well with other yum cha dishes as well, like some dumplings I recently made and I’ll have to post on them when I’ve perfected the recipes a bit more…

PorkBuns23

Enjoy! And Happy Chinese New Year! (I hope those who are celebrating Valentines Day also have a great day and weekend!)

PorkBuns25

Recipes altered by me from a number of websites.

Barbeque Pork

Makes enough for 48 buns, or Serves: 4

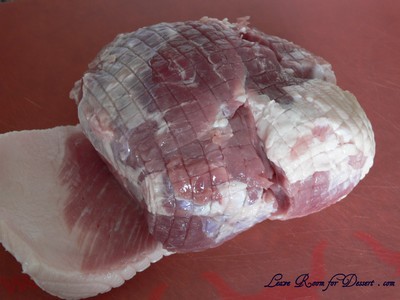
1 kg boned pork shoulder roast, large pieces of fat removed
½ cup hoisin sauce
½ cup soy sauce
1/ cup rice wine vinegar
1/3 cup honey
1 tablespoon sugar

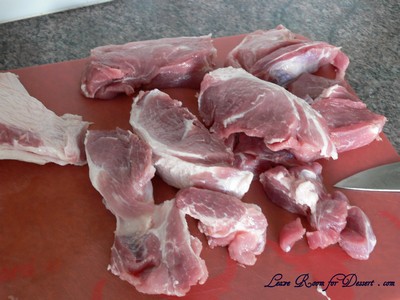
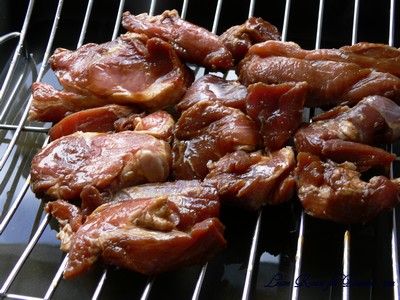
Slice the pork into 2-3 cm thick slices. Mix together all other ingredients and place in a bowl. Add the pork and marinate for a few hours, or preferably overnight.

PorkBuns30

PorkBuns32

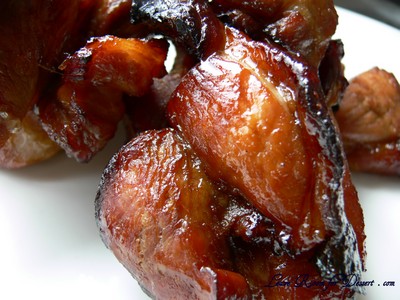
Preheat the oven to 200C and pour some water into a large roasting pan (not enough to reach the metal roasting rack). Place the pork on the roasting rack over the water. Cook for 10 minutes, then reduce the heat to 160C and cook for a further 30-40 minutes, turning and brushing on more marinade for a few times.

PorkBuns33

PorkBuns35

Once cooked, serve as is, or slice up. Alternatively, save it for pork buns, by allowing it to cool and using it once cooled or after storing in the fridge.

PorkBuns39

Barbeque Pork Filling

Makes enough for 24 buns

500g barbeque pork, (see recipe above) diced
1 spring onion/ shallot, finely sliced or chopped
1 garlic clove, crushed
1 tablespoon vegetable oil
1 tablespoon soy sauce
2 tablespoons hoisin sauce
2 tablespoons oyster sauce
2 tablespoons brown sugar
1 tablespoon honey
1½ tablespoons cornflour mixed with ¼ cup water

Mix together the soy sauce, hoisin sauce, oyster sauce, brown sugar and honey.

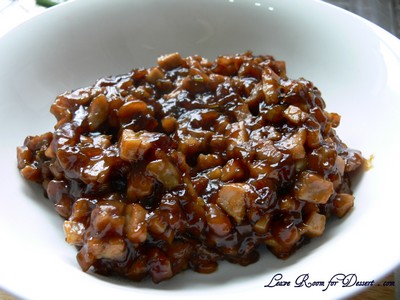
Heat a small saucepan or wok on medium/high heat. Add the oil, then the sliced spring onion. Cook for ½ minute, add the garlic and stir for 1 minute. Add the pork, stir for ½ minute, then add the sauce, mix, followed by the cornflour mixed with water.

Once the mixture comes together, about 1 minute. Remove from heat and allow to cool, for use in the pork buns later.

PorkBuns07

Bun Dough

Makes: 24

1 cup lukewarm water
1 teaspoon caster sugar
1 tablespoon yeast (~7g)
4 cups plain flour
1/3 cup white sugar
1½ teaspoons salt
2 tablespoons vegetable oil
½ cup boiling water

Mix together the lukewarm water, caster sugar and yeast in a large bowl. Leave for 10-20 minutes for the yeast to activate, while you get the rest of your ingredients ready.

PorkBuns05

Mix together the boiling water with the white sugar, salt and vegetable oil. Stir to dissolve the sugar and cool the water. Cool until lukewarm.

Add 3½ cups of the flour and the warm water to the yeast mixture. Mix to form a dough and then turn out onto a bench with the remaining ½ cup flour on it. Knead for a few minutes until the dough comes together nicely. Place in a large lightly oiled bowl and cover with plastic wrap or a tea towel. Leave for 1-2 hours in a warm place, until the dough has risen to double its size.

PorkBuns06

PorkBuns08

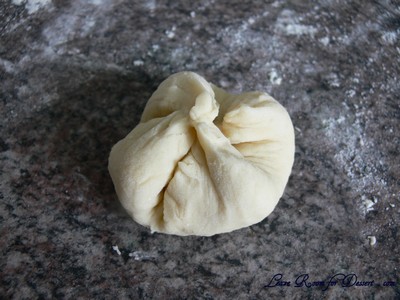
Tip the dough onto a lightly floured bench and lightly knead. Divide dough into 2 portions. Roll out one portion into a cylinder shape which is easy to divide. Divide into 12 portions. Roll out each portion into a small circle, large enough to fit a teaspoon of pork filling in the middle and to pull four sides of the circle, or pleat the edges to enclose the filling. Twist the top of the dough to seal the bun. Do the same with the remaining dough and mixture.

PorkBuns10

PorkBuns11

PorkBuns12

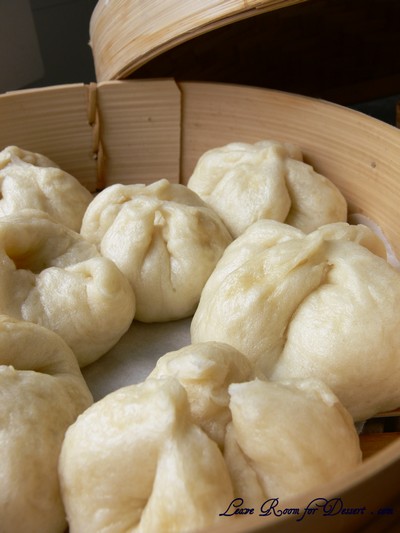
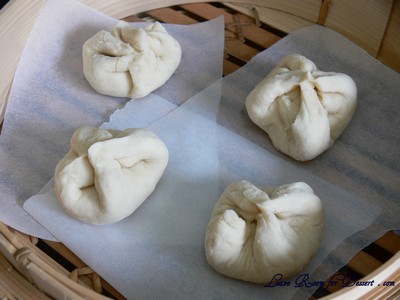
Place completed buns on pieces of baking paper in a bamboo steamer and cook straight away or leave for up to an hour before steaming over boiling water for 10 minutes. Serve.

PorkBuns09

PorkBuns15

PorkBuns29

Scones

Sunday, November 22nd, 2009

SconesMasterChef5

I love scones. Almost nothing is as good as jam and whipped cream on some fresh scones.

SconesMasterChef3

Even better is when they’re so quick and easy to make – and these ones surely are. They were seen on a masterclass show on MaterChef, although had dates and lemon. I’m sure this flavour combination would be great, but without them the recipe is lovely.

SconesMasterChef4

Scones

Recipe adapted from MasterChef’s Date and Lemon Scone recipe

150ml-175ml milk
150ml cream
1 egg
3 cups self-raising flour
2 tablespoons caster sugar
Cream & jam, to serve

Preheat oven 200°C fan forced. Line large flat oven tray with baking paper.

Whisk 150ml milk, cream and egg together until well combined. Combine flour and sugar in a large bowl. Add milk mixture and stir gently to a soft dough, adding remaining milk if necessary. Turn onto a lightly floured surface and knead gently until dough comes together.

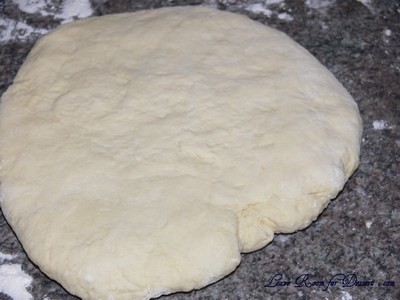
Press dough out to 2cm-thick.

SconesMasterChef03

Cut scones from dough and place onto tray flat-side up. Press dough together gently and repeat using the remaining dough.

SconesMasterChef2

Brush the tops with milk and sprinkle with a little sugar. Bake 12-15 minutes until golden and well risen. Serve hot with jam and cream.

SconesMasterChef05

SconesMasterChef1

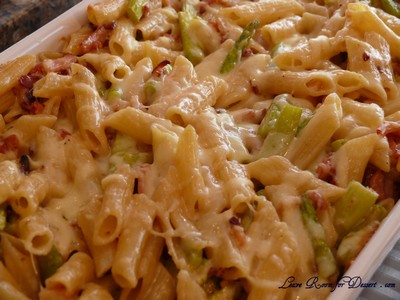
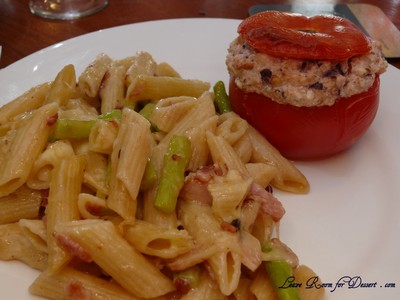
Feta and Ricotta Stuffed Tomatoes and Asparagus, Bacon and Parmesan Pasta – Cooking Class 11

Wednesday, November 18th, 2009

StuffedTomatoesAsparagusPasta11

Another cooking class, another new recipe (or two, possibly three – in this case).

Trying to fit quite a number of people in a small kitchen, all trying to find something to help with and space to actually do it, is quite a spectacle. Luckily the dessert for this cooking class was not too involved, as you will find out later…

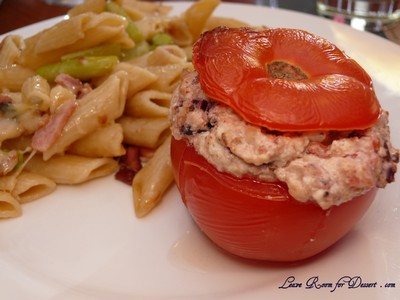
Not being a fan of asparagus or raw tomatoes, I was a bit concerned when I saw what we were making. Fortunately, both these dishes were great and most of us are looking forward to eating them again, either as separate dishes or together.

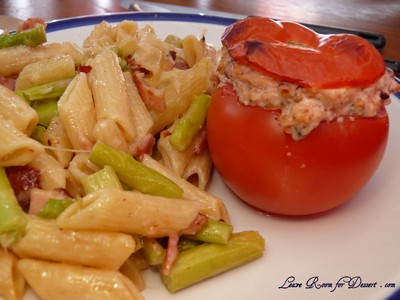
The pasta bake was lovely and flavoursome with the bacon, cheese and even the asparagus (I guess I do like asparagus). The stuffed tomatoes had a great combination of olives, pinenuts and herbs and of course the feta and ricotta.

StuffedTomatoesAsparagusPasta10

Dessert was described as a Jamie Oliver tried and tested, fantastic recipe. We were told it may take a while and could be quite involved… I was so intrigued as to what it could be and could not help but laugh when I saw the so-called “recipe”.

On the page was something I have made and eaten plenty of times before. At one stage I was eating it almost every night… it was…

Maltesers on Ice cream!

StuffedTomatoesAsparagusPasta01

I kid you not. It was in Jamie’s book, with an understandably short recipe. Something like:
Ingredients: Ice cream and a bag of maltesers
Method: Crush maltesers, place on ice cream and serve.

Feta and Ricotta Stuffed Tomatoes

Recipes from Party & Snack Perfection

Serves: 6

6 large firm tomatoes
105g feta cheese, crumbled
150g ricotta cheese
60g pine nuts, chopped
10 black olives, pitted and chopped
1 ½ tablespoons chopped fresh oregano
3 tablespoons wholemeal breadcrumbs
freshly ground black pepper
6 block olives to garnish
extra oregano leaves to garnish

Preheat oven to 180C.

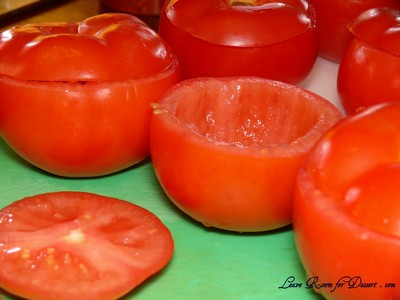
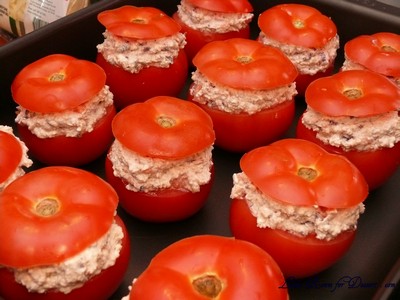
Cut a lid off the top of each tomatoes and set aside. Carefully scoop the centre of each tomatoes into and large bowl. Combine half the tomato mixture with the feta, ricotta, pine nuts, olives, oregano, breadcrumbs and pepper. Beat mixture together and spoon back into the cases (piling the tops high). Discard left over tomato flesh.

StuffedTomatoesAsparagusPasta02

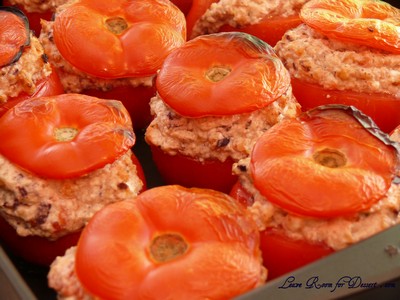
Place in a lightly greased shallow oven-proof dish and bake 20-25 minutes.

StuffedTomatoesAsparagusPasta05

Garnish with an olive and oregano (we left this bit out) and serve.

StuffedTomatoesAsparagusPasta07

Asparagus, Bacon and Parmesan Tortiglioni

Recipe from The Australian Women’s Weekly Eating in

Serves: 4

500g tortiglioni pasta (or another tube-pasta, if you can’t find this)
500g asparagus, chopped coarsely
2 teaspoons olive oil
5 bacon rashers, sliced thinly
1 clove garlic, crushed
100g butter, chopped
¼ cup coarsely chopped fresh flat-leaf parsley
½ cup (40g) grated parmesan cheese
½ cup (50g) grates mozzarella cheese

Cook pasta in a large saucepan of boiling water, uncovered, until just tender. Drain and return to pan.

Meanwhile, boil, steam or microwave asparagus until just tender, drain.

Heat oil in large frying pan, add bacon, cook, stirring, until crisp. Add garlic, cook until fragrant.

Add bacon mixture to drained pasta with butter, asparagus, parsley and a quarter of the combined cheeses, toss gently

Preheat grill to hot. Transfer pasta mixture to shallow 2.5 litre ovenproof dish. Sprinkle top of pasta with remaining cheese. Place under grill until cheese has browned. (Alternatively place the dish in a moderate oven [180C] for 10-20 minutes until the cheese has browned)

StuffedTomatoesAsparagusPasta08

StuffedTomatoesAsparagusPasta09

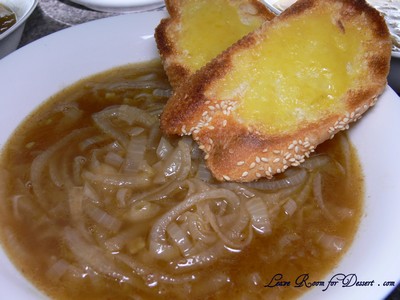
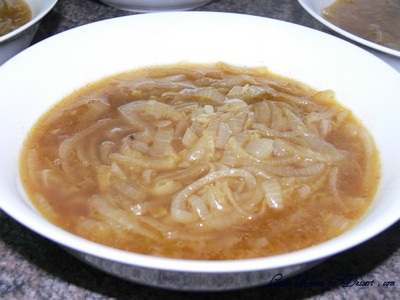
French Onion Soup

Monday, September 14th, 2009

frenchonionsoup03

I’ve been very busy in the last few weeks. I’ve been finishing off some photo albums (coffee table-style books) that I started almost a year ago. The deadline I had made for myself had been rapidly approaching and a sale prompted me to finish them off.

Finally it is completed, I’ve ordered the books and now I only have to worry about paying for them…

Sometimes in busy times and rough financial periods you need a quick, easy and cheap meal. What could be better than French Onion soup? (and yes, I finally got around to using up some more onions from that 10kg bag and I tried a new recipe)

frenchonionsoup07

I know spring is already quite warm at the moment and soup may not be on your list of meals to make on a warm night… but the option’s always there if you don’t have many ingredients at home and need a cheap eat.

(Hopefully I can get back to cooking, posting, replying and reading others blogs now) 🙂

French Onion Soup

Recipe from Taste.com.au, Originally Good Taste – June 2001, Page 74

Serves: 4

50g (2 1/2 tablespoons) butter
2 tablespoons olive oil
750g brown onions, thinly sliced
1 teaspoons caster sugar
500ml (2 cups) beef stock
500ml (2 cups) water
250ml (1 cup) dry white wine
60ml (1/4 cup) brandy (optional – I didn’t use this)
Salt & freshly ground black pepper
8 2cm-thick slices baguette (French bread stick)
90g (3/4 cup) coarsely grated gruyere cheese

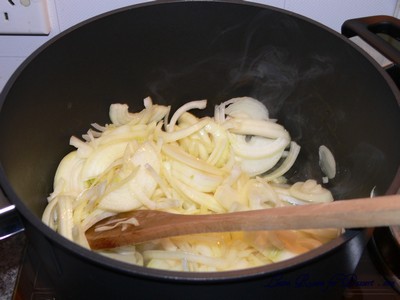
Heat the butter and oil in a large saucepan over medium-high heat until butter melts. Increase heat to high. Add onions and cook, uncovered, stirring constantly, for 5 minutes or until the onions begin to soften.

frenchonionsoup05

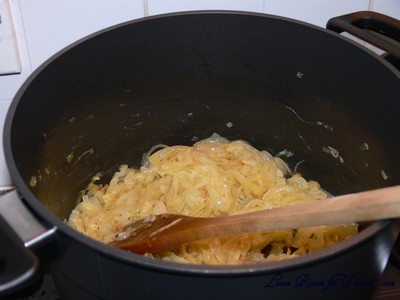
Reduce heat to medium. Add sugar and cook, uncovered, stirring occasionally, for 30 minutes or until onions are golden and caramelised.

(You could even cook it a bit longer than this if you want)

(You could even cook it a bit longer than this if you want)

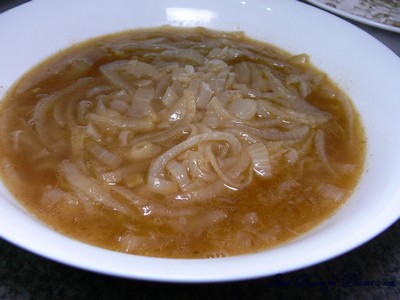
Add the stock, water, wine and brandy to the pan and season well with salt and pepper. Bring to the boil over medium-low heat. Reduce heat to low and simmer, uncovered, stirring occasionally, for 15 minutes.

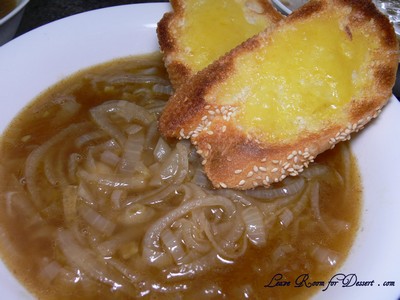
Meanwhile, preheat grill on medium. Place the baguette slices under preheated grill and toast for 1-2 minutes each side or until lightly toasted. Sprinkle one side of each slice with a little of the cheese. Grill for a further 1-2 minutes or until the cheese melts and is golden.

frenchonionsoup01

Ladle the hot soup into serving bowls. Top with the cheese toasts and sprinkle with pepper just before serving.

The soup will keep in an airtight container in the fridge for up to 3 days.

frenchonionsoup04

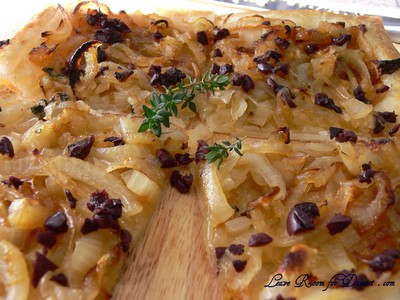
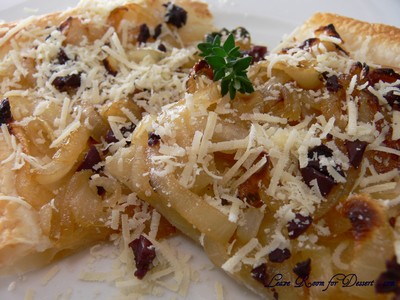
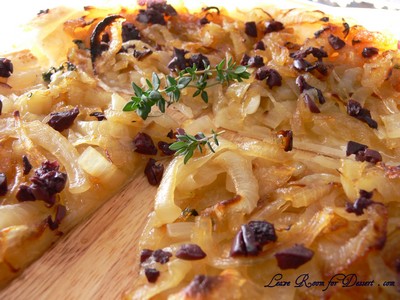
Caramelised Onion Tart

Sunday, September 6th, 2009

oniontart14

Now what am I supposed to do with 10kg of onions? Some may think it’s a little crazy to buy 10kg of onions – especially for me who really didn’t fancy them and used to pick them out of every meal (Sorry Mum).

Well, this is the second time we’ve bought a bag this big and we easily went through the last one. I wanted to make both a caramelised onion tart and French onion soup with the onions, but never got around to it. This time I made sure we made use of these onions and tried some new recipes.

oniontart01

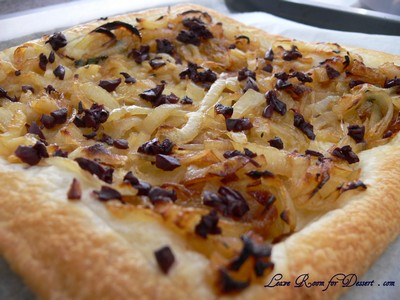
And we are so happy to have tried this recipe. I can’t wait to make it again. It was absolutely gorgeous, very easy and didn’t require many ingredients or steps. As long as you’ve got someone who doesn’t cry too much cutting onions, you’ll be fine and it’s easy. It even heated up quite well at work – an extra bonus!

oniontart12

Caramelised Onion Tart

Serves: 4 mains or 8 small entrees

2 tablespoons butter
2 tablespoons olive oil
4 brown onions, sliced
3 sprigs thyme
½ teaspoon salt
1 teaspoon sugar (optional)
1 tablespoon honey
14 Kalamata olives, chopped (pits removed)
2 sheets puff pastry

Preheat oven to 180ºC (160ºC fan forced).

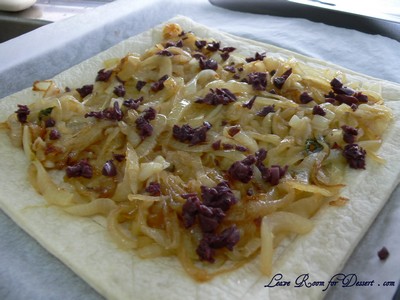
Heat a saucepan on medium heat. Add butter and oil, once bubbling add onions and thyme and continue to stir. After a few minutes add the salt, sugar and honey and continue to cook and stir until onions become translucent and eventually caramelise. This will take 10-20 minutes.

Place each sheet of puff pastry on a baking paper lined tray and cook in oven for 5-10minutes, until starting to brown very slightly. Remove from oven and place caramelised onions on top, leaving a 2cm border around the edges. Top with sliced olives and place back in the oven and cook for 10-20 minutes, until the pastry is nice a golden brown colour. (It may puff a little, but will deflate once taken out of the oven).

oniontart06

oniontart09