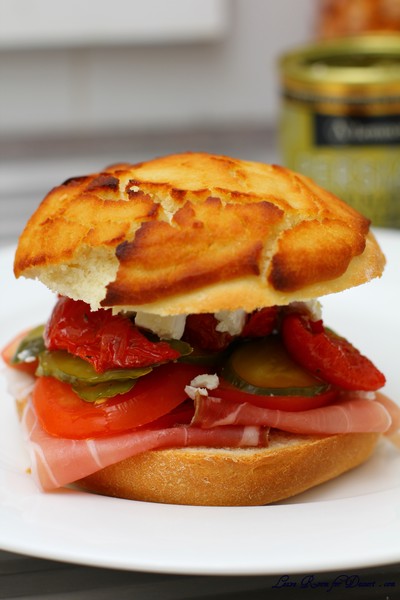
Sara and Erica of Baking JDs were our March 2012 Daring Baker hostesses! Sara & Erica challenged us to make Dutch Crunch bread, a delicious sandwich bread with a unique, crunchy topping. Sara and Erica also challenged us to create a one of a kind sandwich with our bread!
It has been a few months of bread challenges for the Daring Bakers. I must admit I have really enjoyed trying all these new recipes, I know I never would had gotten around to making most of them, or even finding the recipes on the internet. We still have our sourdough starter, and it is really working nicely now, hopefully Nick will do a guest post on it in the future.
This month we had a few challenges, to make a bread, to use the Dutch crunch topping (also called Tiger bread due to its appearance once cooked), and the make a sandwich. I tried one of the bread recipes that was given as a suggestion, and it is one of the best quick breads I have made, with a lovely soft inside, I will be making it again.
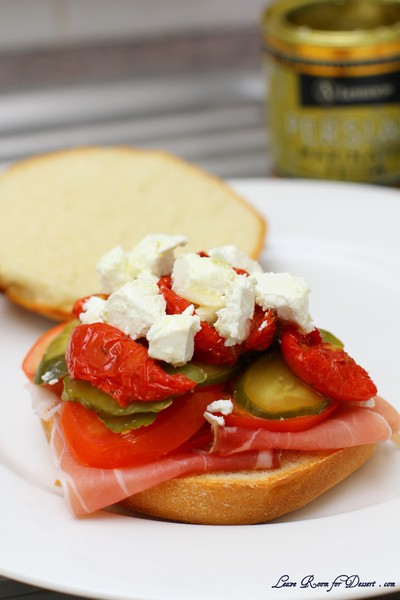
The Dutch crunch topping was very interesting to make, as it contains yeast and rice flour, and is like a bread dough in some ways. I used the suggested amount and had a nice thick layer on top of my bread. It came out lovely and crunchy. We used the rolls for sandwiches (I was going to use them as buns for veggie burgers, bit didn’t get around to making the veggie burger patties), and the loaf was warmed in the oven the next day and eaten with slow cooked beef in red wine with cous cous. I would also recommend eating it with olive oil, caramelised balsamic vinegar and dukkah.
The sandwiches we made had proscuitto, tomato, sliced polski-orgorki pickles and semi-dried tomatoes, topped with Persian Feta.
Recipe Source: The recipe for the Dutch Crunch topping came from Rose Levy Beranbaum’s The Bread Bible. The recipes for the breads we’ve suggested came from The Bread Bible and an adaptation of a recipe found on bakingbites.com (http://bakingbites.com/2006/09/cooking-school-dutch-crunch-bread/).
Dutch Crunch Topping
Servings: This recipe should make sufficient topping for two 9×5 loaves (23cmx13cm) or 12 rolls. If you make only 6 rolls in the first soft white roll recipe, you can cut the topping recipe in half.
We’ve provided this recipe first because it is the mandatory aspect of the challenge. Note, however, that you should not prepare the topping until the bread you’ve selected to bake is almost finished rising (~15 minutes from baking).
2 tablespoons (2 packets) (30 ml) (15 gm/½ oz) active dry yeast
1 cup (240 ml) warm water (105-115º F) (41-46°C)
2 tablespoons (30 ml) (30 gm/1 oz) sugar
2 tablespoons (30 ml) vegetable oil
½ teaspoon (2½ ml) (3 gm) salt
1½ cups (360 ml) (240 gm/8½ oz) rice flour (white or brown; NOT sweet or glutinous rice flour) (increase by 1 cup or more for home-made rice flour)
1. Combine all ingredients in a large bowl and beat with a whisk; beat hard to combine. The consistency should be like stiff royal icing – spreadable, but not too runny. If you pull some up with your whisk, as shown below, it should drip off slowly. Add more water or rice flour as necessary. Let stand 15 minutes.
2. Coat the top of each loaf or roll with a thick layer of topping. We tried coating it with a brush but it worked better just to use fingers or a spoon and kind of spread it around. You should err on the side of applying too much topping – a thin layer will not crack properly.
3. Let stand, uncovered, for any additional time your recipe recommends. With the Soft White Roll, you can place the rolls directly into the oven after applying the topping. With the Brown Rice Bread, the loaves should stand for 20 minutes with the topping before baking.
4. When baking, place pans on a rack in the center of the oven and bake your bread as you ordinarily would. The Dutch Cruch topping should crack and turn a nice golden-brown color.
Soft White Roll
Servings: Six sandwich rolls
This recipe approximates the quintessential white sandwich roll found throughout the Bay Area. The recipe is simple, quick, and addictive.
1 tablespoon (1 packet) (15 ml) (7 gm/ ¼ oz) active dry yeast
¼ cup (60 ml) warm water (105-110º F) (41-43°C) (No need to use a thermometer – it should feel between lukewarm and hot to the touch).
1 cup (240 ml) warm milk (105-110º F) (41-43°C) (We’ve tried both nonfat and 2%, with no noticeable difference)
1½ tablespoons (22½ ml) (20 gm/ ⅔ oz) sugar
2 tablespoons (30 ml) vegetable oil (plus additional olive or vegetable oil for greasing bowl during rising)
1½ teaspoons (7½ ml) (9 gm/⅓ oz) salt
Up to 4 cups (960 ml) (600 gm/21oz) all purpose flour
1. In the bowl of an electric mixer or large mixing bowl, combine yeast, water, milk and sugar. Stir to dissolve and let sit for about 5 minutes (The mixture should start to bubble or foam a bit and smell yeasty).
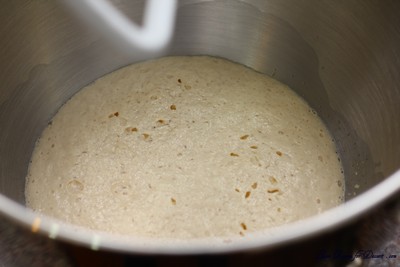
2. Add in vegetable oil, salt and 2 cups of flour. Using the dough hook attachment or a wooden spoon, mix at medium speed until the dough comes together. (The photo to below is with the first 2 cups of flour added).
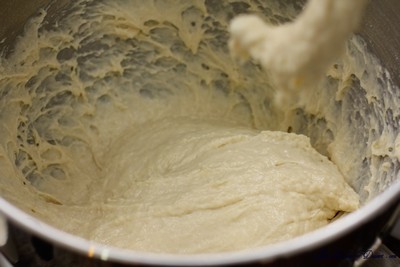
3. Add remaining flour a quarter cup at time until the dough pulls away from the sides of the bowl, as shown in the photo below (For us, this usually required an additional 1½ to 2 cups of flour).
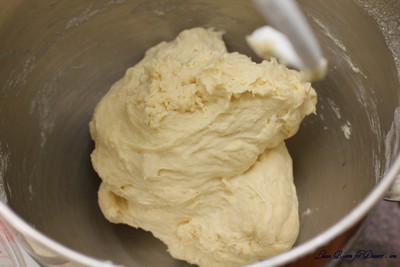
4. Turn out onto a lightly floured surface and knead for about 4 minutes, until smooth and elastic.
5. Place in a lightly greased bowl and cover with plastic wrap. Let rise for 1 hour, or until doubled (or more) in size (see photo comparison).
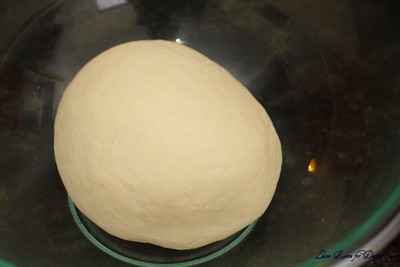
6. Once the dough has risen, turn it out onto a lightly floured surface and divide it into 6 equal portions (if you’d like to make rolls) or 2 equal portions (if you’d like to make a loaf) (using a sharp knife or a dough scraper works well). Shape each into a ball or loaf and place on a parchment-lined baking sheet (try not to handle the dough too much at this point).
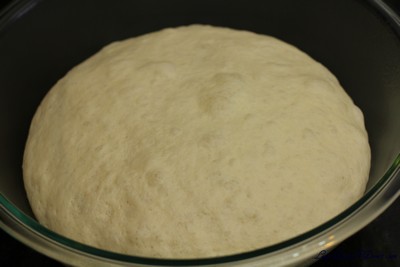
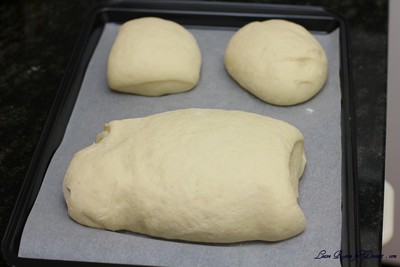
7. Cover with plastic wrap and let rise for 15 minutes while you prepare the topping.
8. Coat the top of each roll or loaf with the topping as described above. While the original recipe recommends letting them stand for 20 minutes after applying the topping, I got better results by putting them directly into the oven.

9. Once you’ve applied the topping, bake in a preheated moderately hot 380ºF/190°C/gas mark 5 for 25-30 minutes, until well browned. Let cool completely on a wire rack before eating.
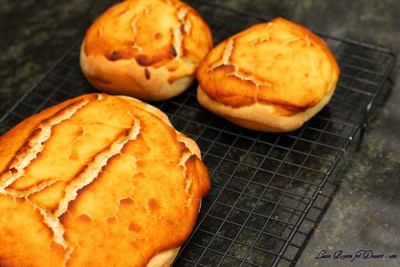
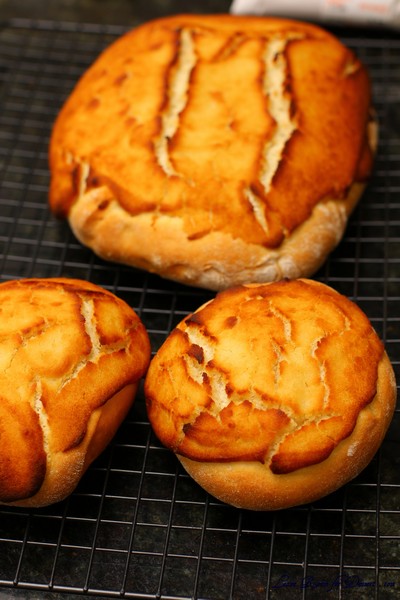
Our finished products: Note the roll in the foreground on the left. This is what happens if you don’t put enough topping on the bread – no cracking! So be sure to load on the topping.
