Your Chance to Win a Ferrero Easter Gift Box

April 20th, 2011


The post was sponsored by Ferrero.

The ANZAC Day and Easter long weekend are just around the corner. For me, this weekend will involve spending time with friends and family, working in the garden and picking which roses I’d like to plant, cooking of course (choc chip hot cross buns are on the list), and lastly, eating chocolate Easter eggs!!! Oh and might I add, I hope to relax a little too 🙂 Hopefully I will get a chance to read everyone’s blogs which I have been unfortunately missing out on recently.

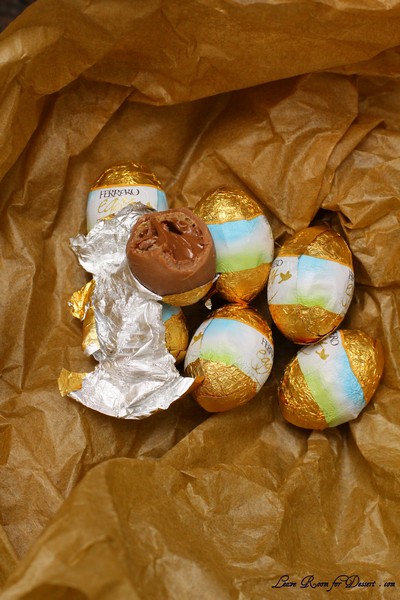
Being so close to Easter, I was sent some of Ferrero’s new Ferrero Eggs to try, and even better, the chance for one of my readers to win a Ferrero Easter Gift Box. I was happy to see my favourite feature of the Ferrero Rocher chocolates were included in the Ferrero Eggs – the creamy hazelnut filling, which was surrounded by wafer and milk chocolate.

The Ferrero Easter Gift Box and many other Gift boxes can be purchased on the Ferrero Boutique website.

There are three prizes to be won – the Ferrero Easter Gift Box featuring a packet of 10 Ferrero Eggs together with the Ferrero Collection Bunny, Rocher Egg Gift Box and a box of Ferrero Rocher and Ferrero Rondnoir, all wrapped in a beautiful brown gift box, and two packs of Ferrero Eggs for the second and third prize.

For your chance to win one of these prizes, please answer the following question as a comment below:

What is your favourite treat to make or buy over the Easter break?

The competition will end at 5pm Tuesday 26th April 2011. The winners will be chosen by myself and Ferrero and notified by email for their address. The prize will only be sent within Australia.


French Food Safari

April 10th, 2011

I was grateful to receive a Gourmet Safaris voucher from some lovely friends recently. You can choose either a bus tour or a walking tour, and I decided a bus tour would be nice (even though a bit of walking whilst eating is a good idea). I love French food, and seeing as the earliest one I could make was on a Wednesday, I decided a break in the middle of the work week would be nice.

We had one of the smallest groups our host Marie had taken, and at 18 people it was a nice number being not too big.

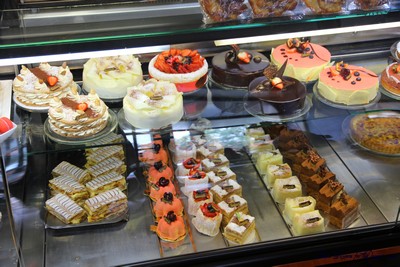
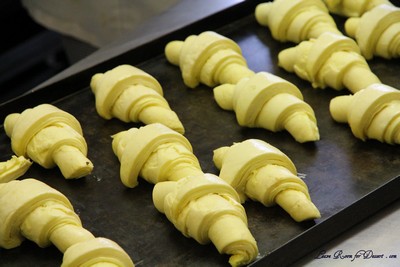
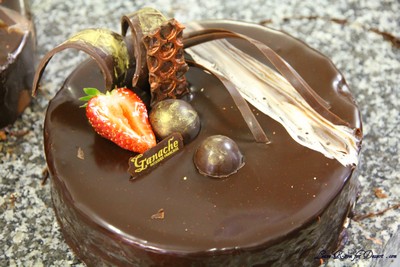
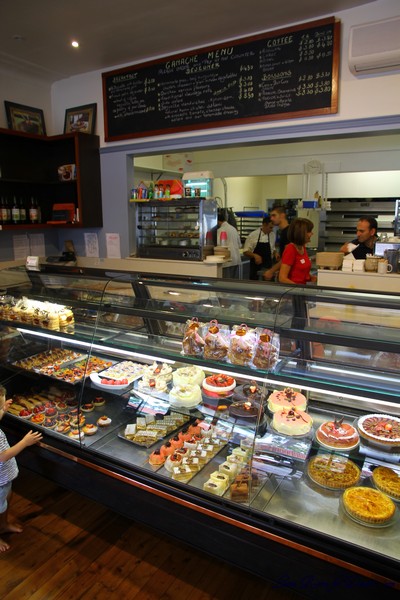
We started our day with a visit to Ganache Patisserie in Castlecrag, where the owner and chefs showed us how they make croissants and other pastries and the techniques they use to decorate their cakes. It was a very interesting process where you watch as the cake is transformed. Each addition makes it looks more complete, until the finishing touches are added and the cake is complete.

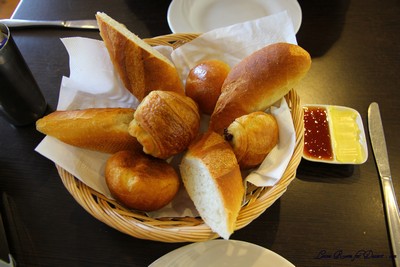
After the demonstration, Garanche Patisserie served us a French breakfast, or by this time for me, it was morning tea. We were given a large bowl of hot chocolate or coffee (or whatever you wanted to order), with a basket of cut baguettes, chocolate croissant and another croissant type pastry served with butter and apricot jam. I never buy or eat apricot jam as I can’t stand any that I have tried – until now, this was amazing jam – so amazing I had to buy some and take it home. The baguettes were the best I have tried. Crispy on the outside and soft in the middle, and they worked perfectly with the butter and jam. We were unfortunately too late (at 10.30am) for me to try an almond croissant (a favourite of mine), as they had sold out. I would have loved to have tried it. Perhaps I will have to go back on my own sometime.

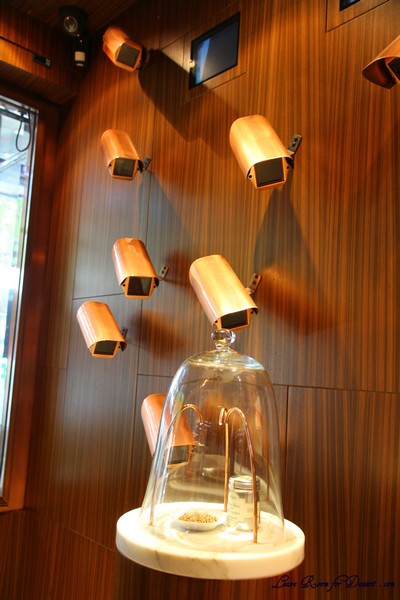
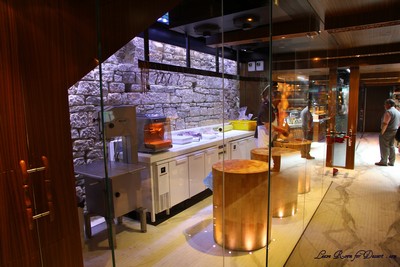
Next we went to a butcher that was nothing like anything I had ever seen – Victor Churchill in Woollahra. The display in the front window looked like it was from a jewellery store. With a Valentines theme, different types of meat were placed on ingredients they were “made for”. Beautiful meats were visible in the cold-rooms behind glass, while the experienced butchers prepared meat in front of the customers behind the glassed preparation areas. They had their own drying and salting room, which had glass walls, except for the one at the back which was made of salt “bricks” which help remove the moisture for the meat as they hang and age for 28 days. We were able to try some of their prosciutto and pork rigullettes, which were both gorgeous.


The Essential ingredient in Rozelle was next, and for most of us foodies was somewhere we had been before. To begin with there was a demonstration of some of their French items, which would be good for someone who is in need of some new items, although many of the brands were just too expensive for me. I was lucky to get a Le Creuset pot for Christmas which I am very grateful for, so I didn’t really need to buy any more cookware. I did stock up on a few other items for my pantry though and a few nice serving-ware pieces.

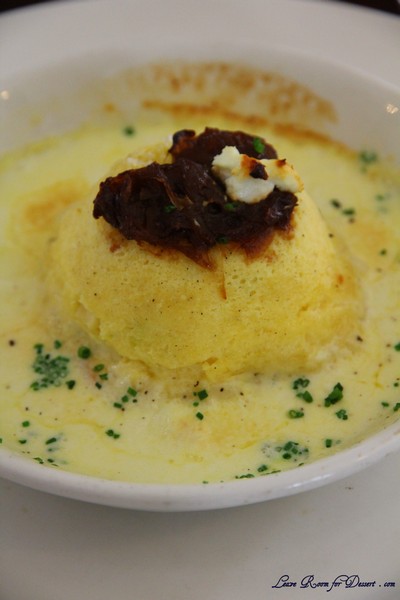
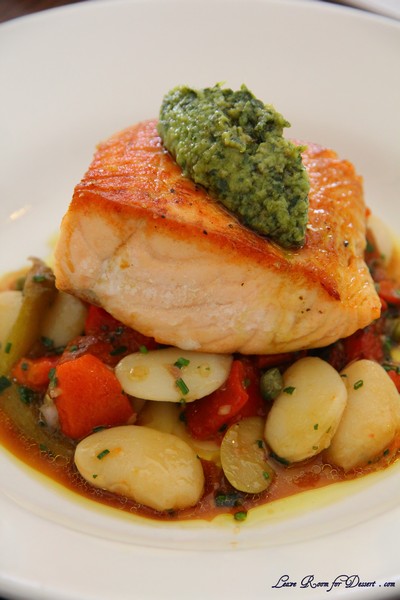
For lunch we went to La Grande Bouffe, just down the road from the Essential Ingredient. The staff and chef were friendly and very attentive. We were greeted with a glass of champagne and baguette. The Chef came and described what we were having for lunch and was happy to answer any questions. We were served a Gruyere cheese soufflé to start with, which had a beautiful in texture and taste. Next came the main with white or red wine. The main was salmon with pesto, caper, olive, capsicum salad. Everything was cooked beautifully and the wine kept coming.

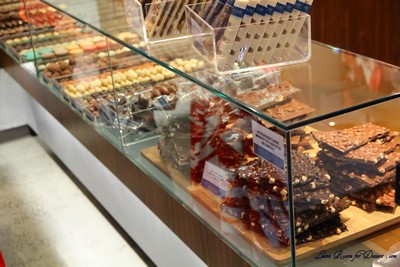
After lunch came chocolate (the chocolate only came before cheese due to the locations of the places we were visiting). We visited Belle Fleur Chocolates in Petersham and met Jan Ter Heerdt who is a very experienced chocolatier and owner of Belle Fleur Fine Chocolates.

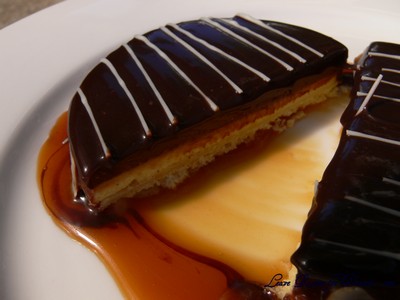
Jan went through how chocolate is made, with samples of the cocoa bean, 99% cocoa chocolate, single origin chocolate, 66% cocoa chocolate and an amazing 4 or so flavoured and hand made chocolates from their range. One of these was my absolute favourite, which is what Jan called a traditional Belgium chocolate. It was dark chocolate encasing caramel, cream and a milk chocolate cream topping. It was lovely.

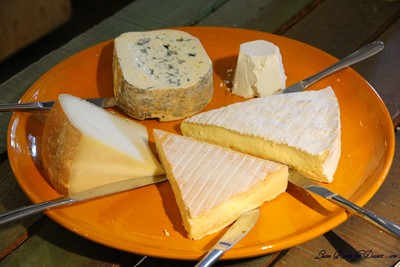
Last but not least we visited Simon Johnson in Alexandria for our cheese fill for the day. We arrived to be greeted by a very large amount of cheese to sample. I was more than happy to have a past bad experience with goats cheese now corrected. My two favourites (and the most mildest) were the goat’s milk cheese: Caridoux and the cow’s milk Fromage de Meaux.

The day complete, we left with cheese, jam, chocolate and some serving-ware. I just wish I had bought a baguette earlier in the day – like most of the other people on the tour did…

I really enjoyed the tour, and have seen quite a few others on the Gourmet Safaris website that I would love to go on.


Yeasted Meringue Coffee Cake – Daring Bakers Challenge March 2011

March 27th, 2011

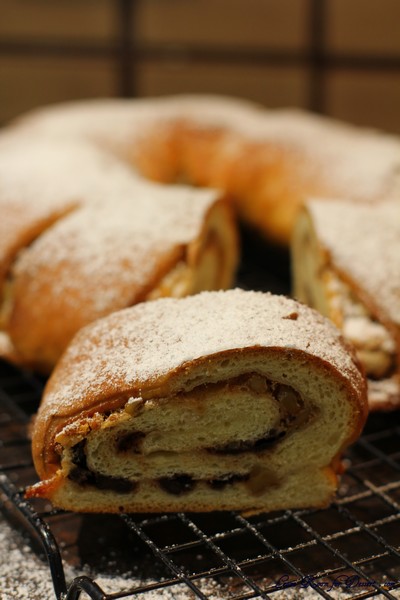
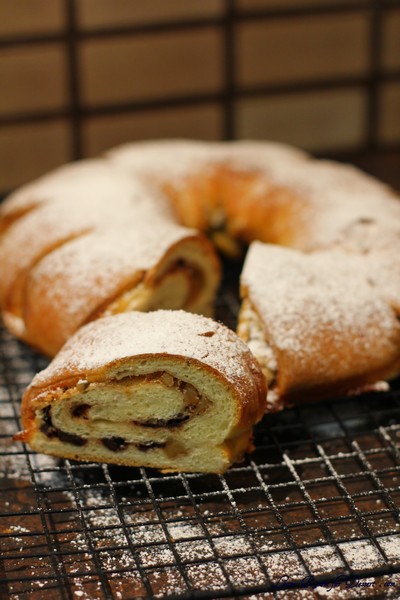
The March 2011 Daring Baker’s Challenge was hosted by Ria of Ria’s Collection and Jamie of Life’s a Feast. Ria and Jamie challenged The Daring Bakers to bake a yeasted Meringue Coffee Cake.

Another month, another Daring Bakers Challenge. I remember reading the title of this month’s challenge and thinking – well it must have coffee in it, I’m sure I’ll find a way of substituting something else (like chocolate) for the coffee. Lucky for me, it was actually perfect without alterations, as there was no coffee in the cake, rather it is meant to be eaten whilst drinking coffee – or hot chocolate (in my case).

When I told others what this month’s challenge was, I got a two responses – delight (if they were coffee drinkers) and upset (if they hated coffee) in both cases I had to clarify that there was no coffee in the coffee cake. In the end I ended up calling it a yeasted cake with chocolate and walnuts – as to not cause any more confusion.

Call it by any name you like, it doesn’t matter. What does matter is the taste, and I had no complaints, with many people saying how lovely it was. I must agree, it was very delicious and fresh, even the day after, or toasted under the grill.

I unfortunately ran out of time whilst making it and decided to place it in the fridge overnight , once fully assembled (at the point where you need to let it rise for the last time then bake). My only thoughts were on the yeasted cake, that it should be fine in the fridge and that it would slowly rise and then I could cook it fresh in the morning. I forgot about the meringue mix inside, and it dissolved in the fridge, leaving a sticky sugary liquid coming out by the morning (the cake itself didn’t rise much either). I cooked it up and no one could not tell anything might have been wrong with it. I would love to try the original method, without putting it in the fridge, and see the effect of the meringue.

Thanks again to our hosts this month, and the team at the Daring Kitchen.

Filled Meringue Coffee Cake

Makes 2 round coffee cakes, each approximately 10 inches in diameter
The recipe can easily be halved to make one round coffee cake

Ingredients
For the yeast coffee cake dough:

4 cups (600 g / 1.5 lbs.) flour
ÂĽ cup (55 g / 2 oz.) sugar
Âľ teaspoon (5 g / ÂĽ oz.) salt
1 package (2 ÂĽ teaspoons / 7 g / less than an ounce) active dried yeast
Âľ cup (180 ml / 6 fl. oz.) whole milk
¼ cup (60 ml / 2 fl. oz. water (doesn’t matter what temperature)
½ cup (135 g / 4.75 oz.) unsalted butter at room temperature
2 large eggs at room temperature

10 strands saffron for Ria’s version (Saffron might be hard to find and it’s expensive, so you can substitute with ½ – 1 teaspoon of ground cardamom or ground nutmeg. Or simply leave it plain like Jamie’s version)

For the meringue:

3 large egg whites at room temperature
ÂĽ teaspoon salt
½ teaspoon vanilla
½ cup (110 g / 4 oz.) sugar

For the filling:

Jamie’s version: (I did this one)
1 cup (110 g / 4 oz.) chopped pecans or walnuts
2 Tablespoons (30 g / 1 oz.) granulated sugar
ÂĽ teaspoon ground cinnamon
1 cup (170 g / 6 oz.) semisweet chocolate chips or coarsely chopped chocolate

Ria’s version:
1 cup (130 g / 5 oz.) chopped cashew nuts
2 Tablespoons (30 g / 1 oz.) granulated sugar
½ teaspoon garam masala (You can make it at home – recipe below – or buy from any Asian/Indian grocery store)
1 cup (170g / 6 oz.) semisweet chocolate chips ( I used Ghirardelli)

Egg wash: 1 beaten egg
Cocoa powder (optional) and confectioner’s sugar (powdered/icing sugar) for dusting cakes

**Garam (means “hot”) masala (means “mixture”) is a blend of ground spices and is used in most Indian savory dishes. It is used in limited quantities while cooking vegetables, meats & eggs. There is no “one” recipe for it as every household has a recipe of their own. Below, I am going to share the recipe which I follow.

4 or 5 sticks (25 g) Cinnamon Sticks (break a stick and open the scroll)
3 ½ tablespoons (25 g / less than an ounce) Cloves, whole
100 g. (3.5 oz.) Fennel seeds
4 tablespoons (25 g / less than an ounce) Cumin seeds
1 ½ tablespoons (10 g / less than half an ounce) Peppercorns
25 g (less than half an ounce) Green Cardamom pods

In a small pan on medium heat, roast each spice individually (it hardly takes a minute) until you get a nice aroma. Make sure you stir it throughout so that it doesn’t burn. As soon as each spice is roasted, transfer it to a bowl to cool slightly. Once they are all roasted, grind into a fine powder by using a coffee grinder, or pestle & mortar. Store in an airtight container and use as needed.

Directions:

Prepare the dough:

In a large mixing bowl, combine 1 ½ cups (230 g) of the flour, the sugar, salt and yeast.

In a saucepan, combine the milk, water and butter and heat over medium heat until warm and the butter is just melted. Ria’s version: add the 10 saffron threads to the warmed liquid and allow to steep off of the heat for 10 minutes. This will give the mixture a distinct aroma and flavor and a yellowish-orange hue.

With an electric mixer on low speed, gradually add the warm liquid to the flour/yeast mixture, beating until well blended. Increase mixer speed to medium and beat 2 minutes. Add the eggs and 1 cup (150 g) flour and beat for 2 more minutes.

Using a wooden spoon, stir in enough of the remaining flour to make a dough that holds together. Turn out onto a floured surface (use any of the 1 ½ cups of flour remaining) and knead the dough for 8 to 10 minutes until the dough is soft, smooth, sexy and elastic, keeping the work surface floured and adding extra flour as needed.

Place the dough in a lightly greased (I use vegetable oil) bowl, turning to coat all sides. Cover the bowl with plastic wrap and a kitchen towel and let rise until double in bulk, 45 – 60 minutes. The rising time will depend on the type of yeast you use.

Prepare your filling:In a small bowl, combine the cinnamon and sugar for the filling if using. You can add the chopped nuts to this if you like, but I find it easier to sprinkle on both the nuts and the chocolate separately.

Once the dough has doubled, make the meringue:
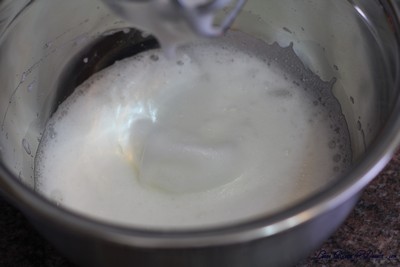
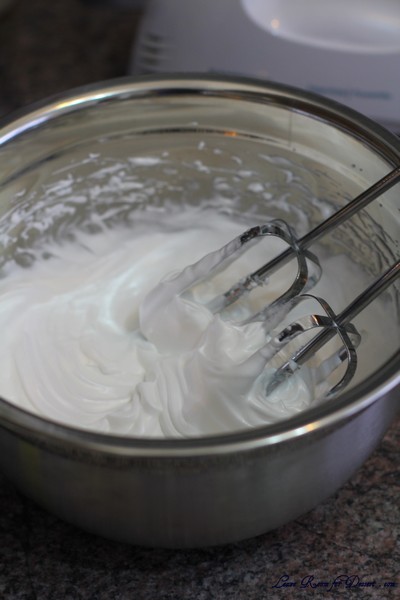
In a clean mixing bowl – ideally a plastic or metal bowl so the egg whites adhere to the side (they slip on glass) and you don’t end up with liquid remaining in the bottom – beat the egg whites with the salt, first on low speed for 30 seconds, then increase to high and continue beating until foamy and opaque. Add the vanilla then start adding the ½ cup sugar, a tablespoon at a time as you beat, until very stiff, glossy peaks form.

Assemble the Coffee Cakes:

Line 2 baking/cookie sheets with parchment paper.

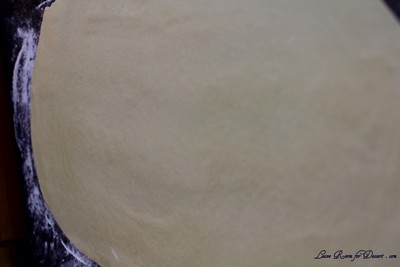
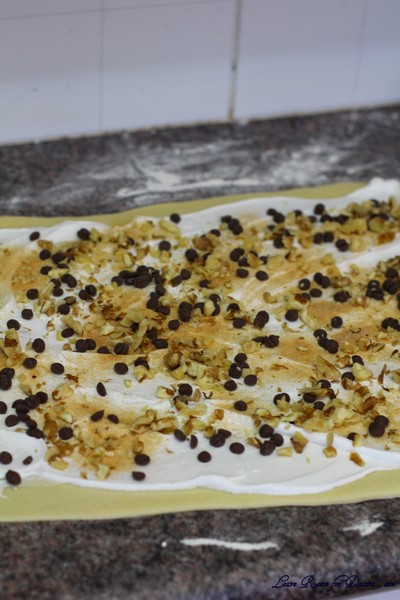
Punch down the dough and divide in half. On a lightly floured surface, working one piece of the dough at a time (keep the other half of the dough wrapped in plastic), roll out the dough into a 20 x 10-inch (about 51 x 25 ½ cm) rectangle. Spread half of the meringue evenly over the rectangle up to about 1/2-inch (3/4 cm) from the edges. Sprinkle half of your filling of choice evenly over the meringue (ex: half of the cinnamon-sugar followed by half the chopped nuts and half of the chocolate chips/chopped chocolate).

Now, roll up the dough jellyroll style, from the long side. Pinch the seam closed to seal. Very carefully transfer the filled log to one of the lined cookie sheets, seam side down. Bring the ends of the log around and seal the ends together, forming a ring, tucking one end into the other and pinching to seal.

Using kitchen scissors or a sharp knife (although scissors are easier), make cuts along the outside edge at 1-inch (2 ½ cm) intervals. Make them as shallow or as deep as desired but don’t be afraid to cut deep into the ring.

Repeat with the remaining dough, meringue and fillings.

Cover the 2 coffee cakes with plastic wrap and allow them to rise again for 45 to 60 minutes.

Preheat the oven to 350°F (180°C).

Brush the tops of the coffee cakes with the egg wash. Bake in the preheated oven for 25 to 30 minutes until risen and golden brown. The dough should sound hollow when tapped.

Remove from the oven and slide the parchment paper off the cookie sheets onto the table. Very gently loosen the coffee cakes from the paper with a large spatula and carefully slide the cakes off onto cooling racks. Allow to cool.

Just before serving, dust the tops of the coffee cakes with confectioner’s sugar as well as cocoa powder if using chocolate in the filling. These are best eaten fresh, the same day or the next day.


Chocolate Delice – Update

March 24th, 2011

You might remember quite a while back, in late 2009, I attempted the chocolate Delice made by Eamon Sullivan, as seen on Australian Celebrity Masterchef. Unfortunately the recipe on the MasterChef website was not correct, and I had to try and fix quite a few parts of this recipe – which I went through in the hope of helping anyone else who decided to make it.

I have good news though. The developer of this recipe, Eamon Sullivan, has set up his own food blog “Eamon eats” quite recently – and has posted the actual, true, tried and tested recipe + some great photos and videos. So check it out if you were interested in making the chocolate delice – I enjoyed it so much, I think I might have to make it again at some point – I’ll add it to my long long list of desserts to make 🙂


Chocolate Panna cotta with Florentine Cookies – Daring Bakers Challenge February 2011

February 27th, 2011

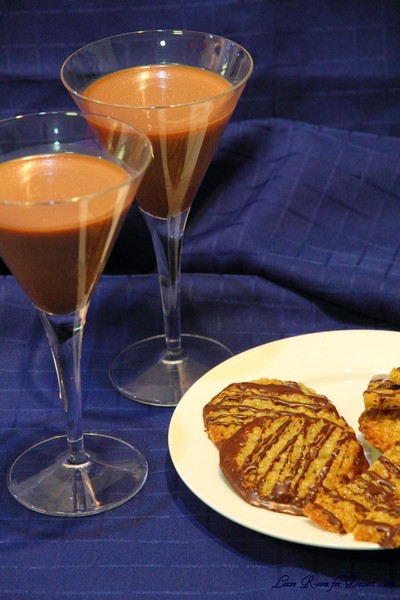
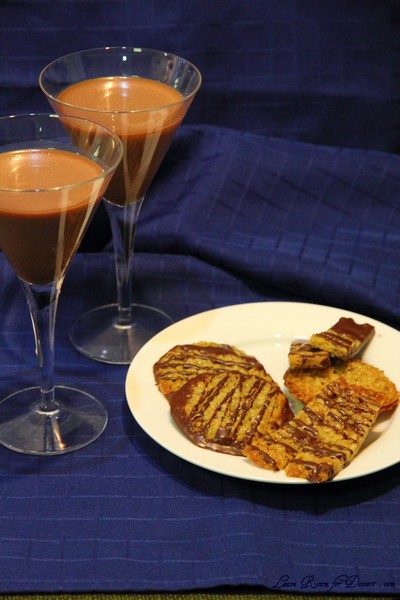
The February 2011 Daring Bakers’ challenge was hosted by Mallory from A Sofa in the Kitchen. She chose to challenge everyone to make Panna Cotta from a Giada De Laurentiis recipe and Nestle Florentine Cookies.

Both the chocolate panna cotta and florentine cookies were a bit hit this month. I was grateful that both were very quick recipes, as I’ve said in previous posts – our garden has gone crazy this spring and summer and we have been spending much of our time trying to sort it out, and the rest of our time has been spent with family. The panna cotta has already been requested again, with some people saying it tasted like a chocolate mousse.

I tried to out-turn the panna cottas – like I have before, although they didn’t have enough gelatine for the tall ones to stand, and the ones from the glasses ended up looking a little naughty (some dark chocolate chocolate fell to the base of the glass – I’ll leave the imagery to your imagination).

Thanks again to the Daring Bakers and our hosts every month!

My notes: I found the panna cotta served 8-10 people. I accidentally made my florentine cookies a little big, so they look a little longer to cook and made a few less than expected. I also made some large rectangles of florentines, so they could be cut into clean rectangles after cooking.

Chocolate Panna Cotta

Recipe adapted from Bon Appetit

1 cup (240 ml) whole milk
1 tablespoon (15 ml) (7 gm) (ÂĽ oz) unflavored powdered gelatin
2 cups (480 ml) whipping cream (30+% butterfat)
½ cup (115 gm) (4 oz) sugar
Âľ cup (145 gm)(5 oz) bittersweet or semisweet chocolate
½ teaspoon (2½ ml) vanilla extract

Pour milk into a small bowl, sprinkle gelatin over the top, set aside for 2-5 minutes.

Place a medium saucepan over medium heat, stir in cream, sugar and vanilla. Bring to a low boil.

Add chocolate and whisk until melted. Whisk the milk/gelatin mixture into chocolate cream mixture. Whisk until gelatin has dissolved.

Transfer to ramekins, or nice glasses for serving.

Cover and chill at least 8 hours, or overnight

Nestle Florentine Cookies

Recipe from the cookbook “Nestle Classic Recipes”, and their website.

2/3 cup (160 ml) (150 gm) (5.3 oz) unsalted butter
2 cups (480 ml) (160 gm) (5 2/3 oz) quick oats
1 cup (240 ml) (230 gm) (8 oz) granulated sugar
2/3 cup (160 ml) (95 gm) (3â…“ oz) plain (all purpose) flour
1/4 cup (60 ml) dark corn syrup
1/4 cup (60 ml) whole milk
1 tsp (5 ml) vanilla extract
pinch of salt
1½ cups (360 ml) (250 gm) (9 oz) dark or milk chocolate

Preheat oven to moderately hot 375°F (190°C) (gas mark 5). Prepare your baking sheet with silpat or parchment paper.

Melt butter in a medium saucepan, then remove from the heat.

To the melted butter add oats, sugar, flour, corn syrup, milk, vanilla, and salt. Mix well. Drop a tablespoon full, three inches (75 mm) apart, onto your prepared baking sheet. Flatten slightly with the back of your tablespoon, or use a spatula.

Bake in preheated oven for 6-8 minutes, until cookies are golden brown. Cool completely on the baking sheets.

While the cookies are cooling melt your chocolate until smooth either in the microwave (1 1/2 minutes), or stovetop (in a double boiler, or a bowl that fits atop a saucepan filled with a bit of water, being sure the water doesn’t touch the bottom of the bowl).

Peel the cookies from the silpat or parchment and place face down on a wire rack set over a sheet of wax/parchment paper (to keep counters clean).

Spread a tablespoon of chocolate on the bottom/flat side of your cookie, sandwiching another (flat end) cookie atop the chocolate.

This recipe will make about 2 1/2 – 3 dozen sandwiched Florentine cookies. You can also choose not to sandwich yours, in which case, drizzle the tops with chocolate (over your wax paper).


Joconde Imprime + Mousse Entrement – Daring Bakers Challenge January 2011

January 27th, 2011

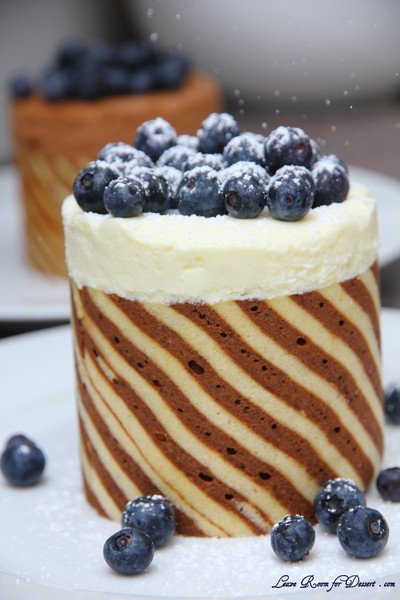
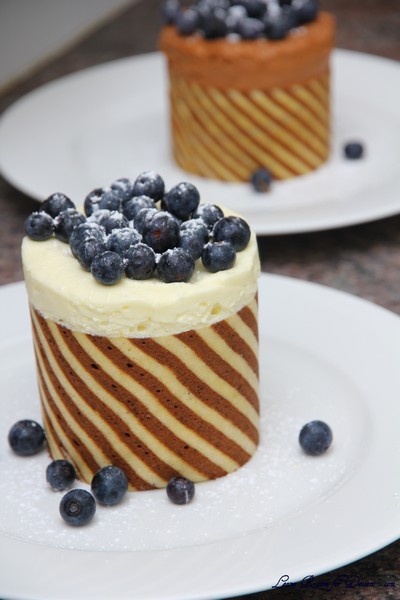
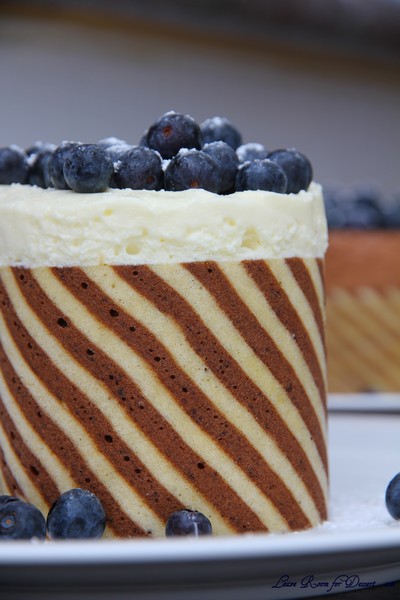
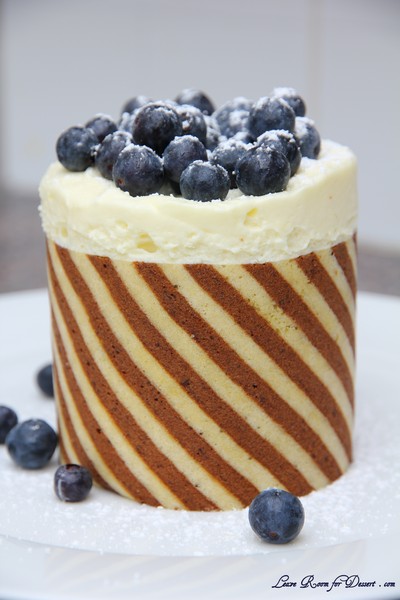
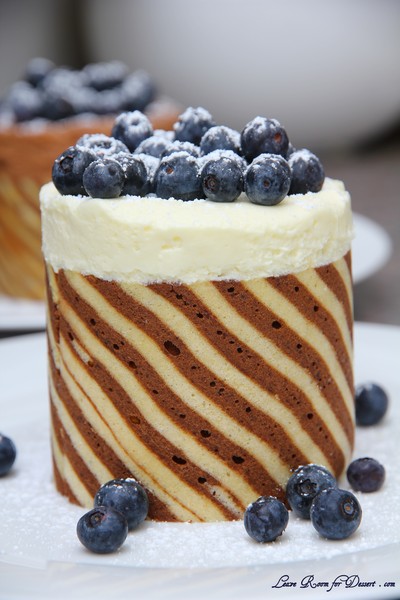
The January 2011 Daring Bakers’ challenge was hosted by Astheroshe of the blog accro. She chose to challenge everyone to make a Biscuit Joconde Imprime to wrap around an Entremets dessert.

What a way to start the new year – with an amazing challenge.

I have seen joconde imprimes, the decorated sponge around beautiful cakes – or entrements and always thought they looked wonderful. I always love that being a part of the Daring Bakers help to motivate me to make some of the sweets I’ve wanted to make for some time.

As our host for this month said, this was actually quite an easy recipe. For me, the challenge was figuring out what to fill my entrement with.

I chose to make 4 smaller sized entrements, and decided to try a vanilla marshmallow mousse and chocolate marshmallow mousse filling. Both mousses set quite well.

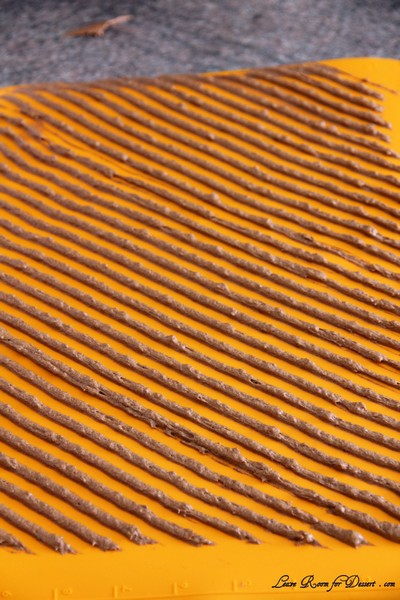
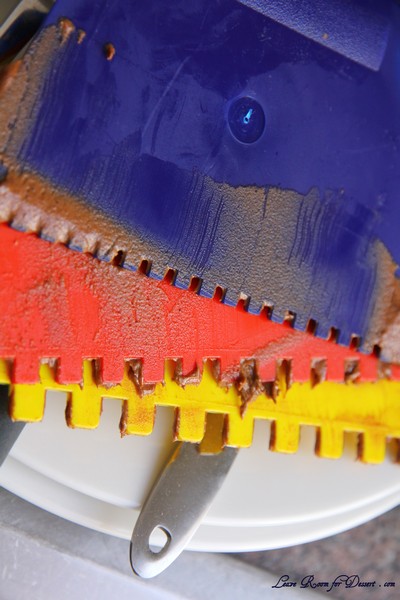
To make my pattern I used some plastic notch trowels (normally used for tiling) from the local hardware store. They are quite cheap compared to the combs you can find in specialty stores.

Thanks to our host this month – I’m glad I made it just in time 🙂

My notes: I found the joconde paste made more than required for the sponge, so cooked it in a square tin and used it for the base of some of my entrements. I ended up with more sponge than needed for the mousse I made, although it got eaten quite quickly – and was good to have more to choose from.

We shared two of these entrements between 8 people and it was enough for a dessert. It is very sweet and should be enjoyed with some fruit.

Joconde Sponge

Recipe Source: I (Astheroshe) received this recipe from Chef John O. while attending The International Culinary School in Atlanta, Georgia USA.

YIELD: Two ½ size sheet pans or a 13” x 18” (33 x 46 cm) jelly roll pan

Âľ cup/ 180 ml/ 3oz/ 85g almond flour/meal – *You can also use hazelnut flour, just omit the butter
½ cup plus 2 tablespoons/ 150 ml/ 2â…” oz/ 75g confectioners’ (icing) sugar
ÂĽ cup/ 60 ml/ 1 oz/ 25g cake flour *See note below
3 large eggs – about 5â…“ oz/ 150g
3 large egg whites – about 3 oz/ 90g
2½ teaspoons/ 12½ ml/ ⅓ oz/ 10g white granulated sugar or superfine (caster) sugar
2 tablespoons/ 30 ml/ 1oz / 30g unsalted butter, melted

*Note: How to make cake flour: http://www.joythebaker.com/blog/2009/09/how-to-make-cake-flour/

1. In a clean mixing bowl whip the egg whites and white granulated sugar to firm, glossy peeks. Reserve in a separate clean bowl to use later.

2. Sift almond flour, confectioner’s sugar, cake flour. (This can be done into your dirty egg white bowl)
3. On medium speed, add the eggs a little at a time. Mix well after each addition. Mix until smooth and light. (If using a stand mixer use blade attachment. If hand held a whisk attachment is fine, or by hand. )

4. Fold in one third reserved whipped egg whites to almond mixture to lighten the batter. Fold in remaining whipped egg whites. Do not over mix.
5. Fold in melted butter.
6. Reserve batter to be used later.

Patterned Joconde-Décor Paste

YIELD: Two ½ size sheet pans or a 13” x 18” (33 x 46 cm) jelly roll pan

14 tablespoons/ 210ml/ 7oz/ 200g unsalted butter, softened
1½ cups plus1½ tablespoons/ 385ml/ 7oz/ 200g Confectioners’ (icing) sugar
7 large egg whites – about 7 oz / 200g
1Âľ cup/ 420ml/ 7Âľ oz/ 220g cake flour
Food coloring gel, paste or liquid

COCOA Décor Paste Variation: Reduce cake flour to 6 oz / 170g. Add 2 oz/ 60 g cocoa powder. Sift the flour and cocoa powder together before adding to creamed mixture.

1. Cream butter and sugar until light and fluffy (use stand mixer with blade, hand held mixer, or by hand)

2. Gradually add egg whites. Beat continuously.
3. Fold in sifted flour.

4. Tint batter with coloring to desired color, if not making cocoa variation.

Preparing the Joconde- How to make the pattern:

1. Spread a thin even layer of décor paste approximately 1/4 inch (5 millimeter) thick onto silicone baking mat with a spatula, or flat knife. Place mat on an upside down baking sheet. The upside down sheet makes spreading easier with no lip from the pan.
2. Pattern the décor paste – Here is where you can be creative. Make horizontal /vertical lines (you can use a knife, spatula, cake/pastry comb). Squiggles with your fingers, zig zags, wood grains. Be creative whatever you have at home to make a design can be used. OR use a piping bag. Pipe letters, or polka dots, or a piped design. If you do not have a piping bag. Fill a ziplock bag and snip off corner for a homemade version of one.

3. Slide the baking sheet with paste into the freezer. Freeze hard. Approx 15 minutes.
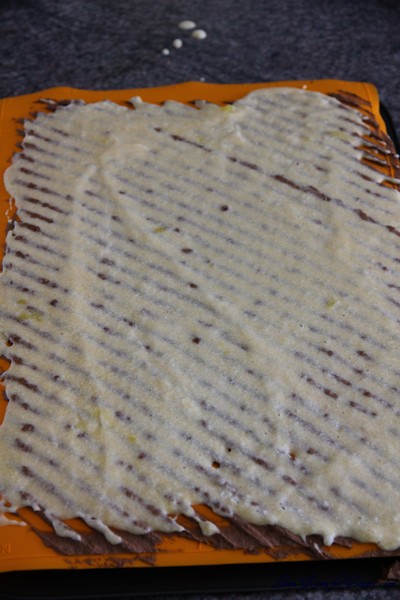
4. Remove from freezer. Quickly pour the Joconde batter over the design. Spread evenly to completely cover the pattern of the Décor paste.

5. Bake at 475ÂşF /250ÂşC until the joconde bounces back when slightly pressed, approx. 15 minutes. You can bake it as is on the upside down pan. Yes, it is a very quick bake, so watch carefully. (I cooked mine at 220ÂşC and it took 5-10 minutes).
6. Cool. Do not leave too long, or you will have difficulty removing it from mat.
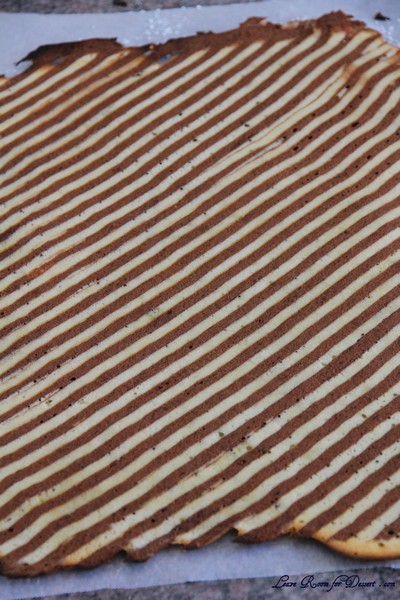
7. Flip cooled cake on to a powdered sugared parchment paper. Remove silpat. Cake should be right side up, and pattern showing! (The powdered sugar helps the cake from sticking when cutting.)

Preparing the MOLD for entremets:

You can use any type of mold. I would suggest:

1. Start with a large piece of parchment paper laid on a very flat baking sheet. Then a large piece of cling wrap over the parchment paper. Place a spring form pan ring, with the base removed, over the cling wrap and pull the cling wrap tightly up on the outside of the mold. Line the inside of the ring with a curled piece of parchment paper overlapping top edge by ½ inch. CUT the parchment paper to the TOP OF THE MOLD. It will be easier to smooth the top of the cake.
2. A biscuit cutter/ cookie cutter- using cling wrap pulled tightly as the base and the cling covering the outside of the mold, placed on a parchment lined very flat baking sheet. Line the inside with a curled piece of parchment paper overlapping.
3. Cut PVC pipe from your local hardware store. Very cheap! These can be cut into any height you wish to make a mold. 2 to 3 inches is good. My store will cut them for me, ask an employee at your store. You can get several for matching individual desserts. Cling wrap and parchment line, as outlined above.
4. Glass Trifle bowl. You will not have a free standing dessert, but you will have a nice pattern to see your joconde for this layered dessert.

My Mould: Cut an A4 piece of projector plastic/acetate in half lengthways. Curve it into a 9cm diameter circle cutter and sticky tape the sides shut.

Preparing the Jaconde for Molding:
Video: MUST WATCH THIS. This is a very good demo of the joconde and filling the entremets:

1. Trim the cake of any dark crispy edges. You should have a nice rectangle shape.
2. Decide how thick you want your “Joconde wrapper”. Traditionally, it is ½ the height of your mold. This is done so more layers of the plated dessert can be shown. However, you can make it the full height.
3. Once your height is measured, then you can cut the cake into equal strips, of height and length. (Use a very sharp paring knife and ruler.)
4. Make sure your strips are cut cleanly and ends are cut perfectly straight. Press the cake strips inside of the mold, decorative side facing out. Once wrapped inside the mold, overlap your ends slightly. You want your Joconde to fit very tightly pressed up to the sides of the mold. Then gently push and press the ends to meet together to make a seamless cake. The cake is very flexible so you can push it into place. You can use more than one piece to “wrap “your mold, if one cut piece is not long enough.
5. The mold is done, and ready to fill.

*Note: If not ready to use. Lay cake kept whole or already cut into strips, on a flat surface, wrap in parchment and several layers of cling wrap and freeze.

Vanilla Marshmallow Mousse

Recipe by Anita @ Leave Room for Dessert

100g white chocolate
150g vanilla marshmallows
300ml thickened cream

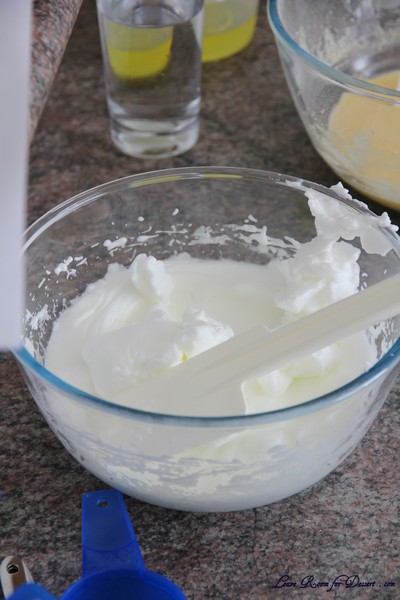
Melt the chocolate and marshmallows in a small saucepan over medium/low heat, stirring regularly. Once melted, remove from heat and allow to cool. Whip the cream until thickened and peaks are formed. Fold through the cooled chocolate marshmallow mix. Pour into lined moulds and place in the freezer for a few hours to set around the edges. It can then be stored in the fridge. If desired, the dessert can be eaten frozen.

For Chocolate Mousse – use 200g dark chocolate instead of the 100g white chocolate.


Cute Owl Cake

January 18th, 2011

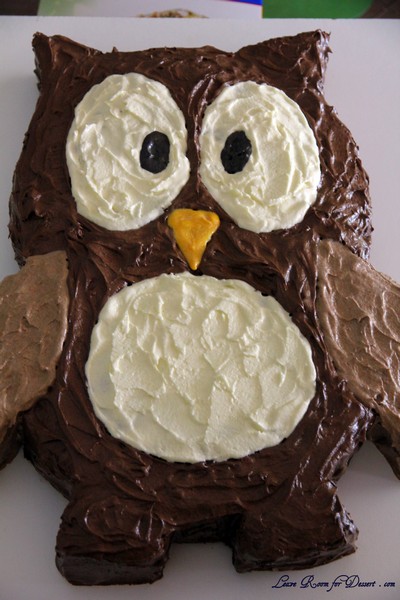
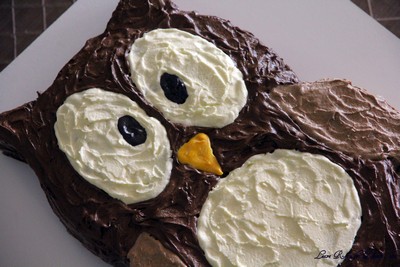
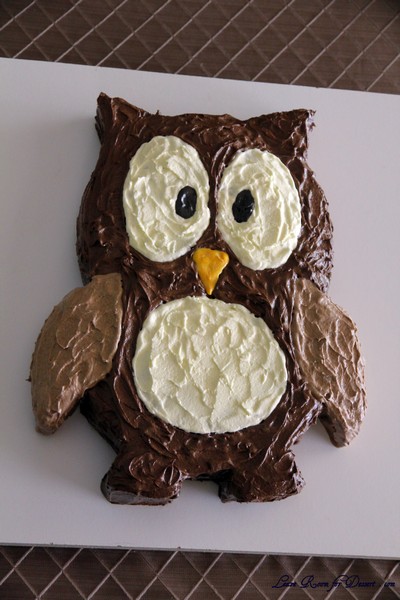
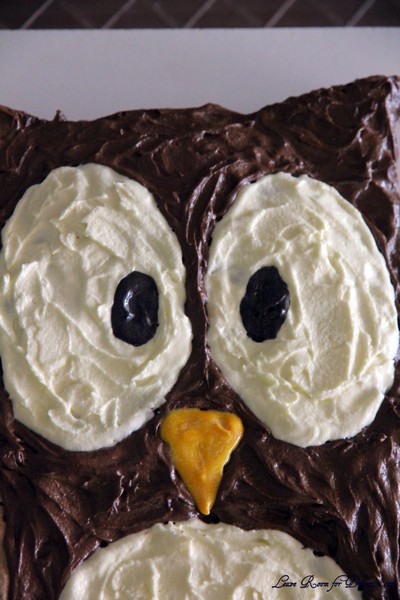
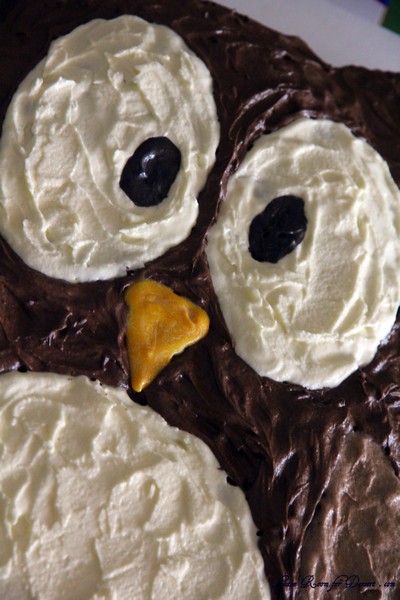
I just had to share pics of this cute owl cake we made this weekend. It was for my sister’s birthday, although is probably more suitable for a child’s cake.

Mum was making two round cakes, so I designed the cake to suit what was being made.

I had so much fun – and I think it’s so cute, I just want to design more cute cakes 🙂

How to make the Owl Cake

You will need:
2 x 22cm round cakes, cooled – these can be vanilla or chocolate or any cake that would work well with chocolate and vanilla icing – you can use 20cm or 24cm cakes if that is all you have
chocolate and vanilla icing
black and orange food colouring
a sharp knife
a large board for the cake
a chopping board
bowls for the icing
greaseproof paper for the design

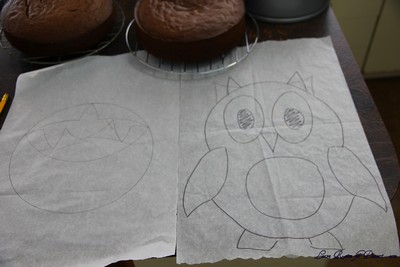
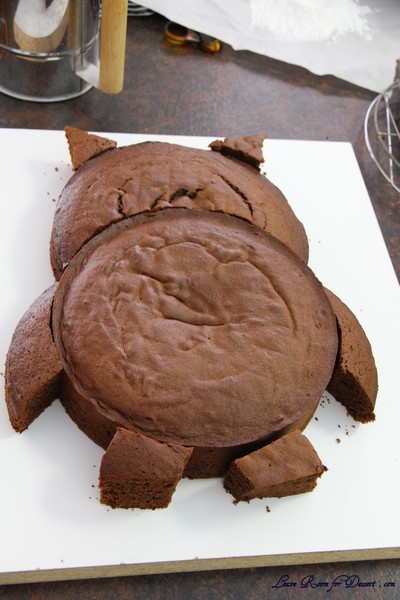
Firstly I designed the owl cake on greaseproof paper. Draw two 22cm circles (drawing around your cake tin) intersecting half way. Draw on the ears, eyes, beak, wings, belly and feet. Once you’re happy, go over the outline (plus eyes, beak and belly).

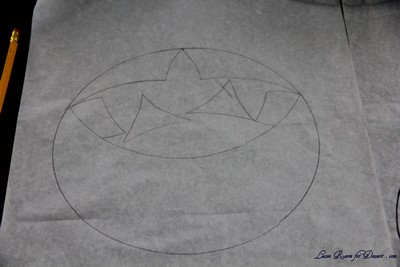
Next, you’ll need to draw one 22cm circle on a separate piece of grease proof paper. Draw out everything that does not fit in the circle which will be used for the belly (the head, ears, feet, and half wings). Make sure this all fits in the circle, as this will be used to cut out pieces of cake. Cut out the shapes. Make sure that both wings are the same size, as well as the ears and feet. If not, just use one template and reverse it for the other side when cutting out the cake.

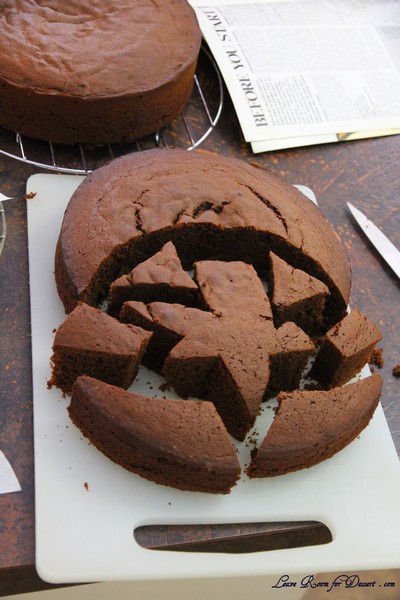
Place cut out templates on one cake and cut carefully with a sharp knife around the shapes.

Place the cut of pieces of cake around the full cake to make the owl. Make sure this is on a nice serving board.

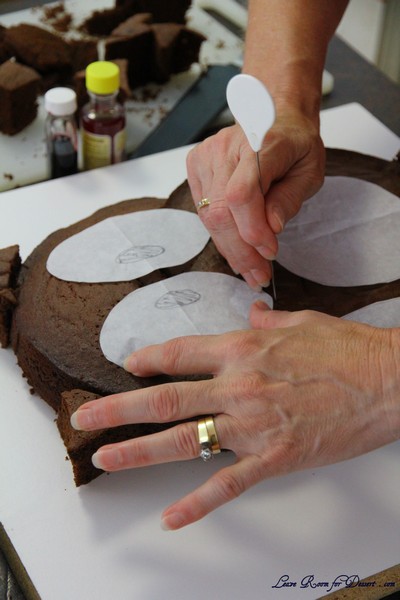
Draw the eyes, pupils, full wings, beak and belly onto greaseproof paper. (Only one eye and wing is required, as these can be reversed for the other side). Make sure your belly is round by drawing a rough circle, then folding it in half, in half again and again, until you get you get a wedge. Cut a curve in the paper to make the circle.

Place templates on cake and using a toothpick or cake tester go around each template so you can see where you need to apply the icing.

Attach the extra pieces of cake to the round cake with some icing. Cover most of the owl in chocolate icing. Mix some chocolate and some vanilla icing together for the wings. Use vanilla icing for the belly and eyes, and colour some chocolate icing black for the pupils of the eyes and the vanilla icing orange for the beak. Enjoy!


2010 Roundup + Have a Happy New Year

January 1st, 2011

Like everyone says at the end of every year – where did the year go?

It always feels as though it’s just zoomed on past, especially the last few months.

I look back through 2010 where some exciting things have happened to my life and those around me.

On the cooking, baking and eating front – life has been full of sweet treats. I look forward to exploring and designing some of the desserts I have been thinking about. Although, as I’m sure everyone knows, time just flies – whether it be with work, family, friends or a high-maintenance garden. I still have my fingers crossed that I can accomplish or further some of the goals (cooking and personal) I have set for myself this year.

Best wishes to everyone. I hope you all have a fantastic New Year!!

V8 Cake

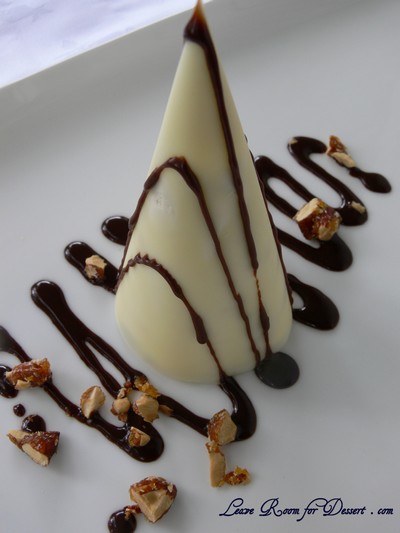
White Chocolate Cones with Nougat and Vienna Almond Semifreddo

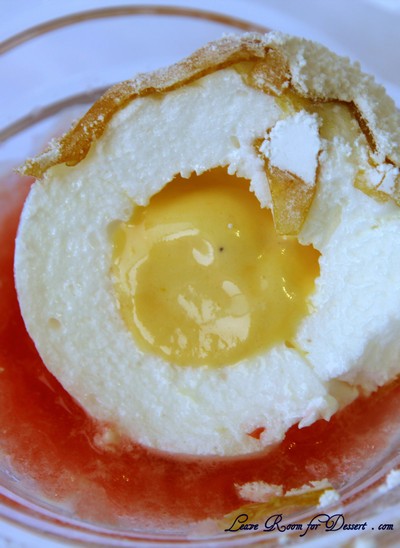
Tropical Snow Egg

Chocolate Hazelnut Tart

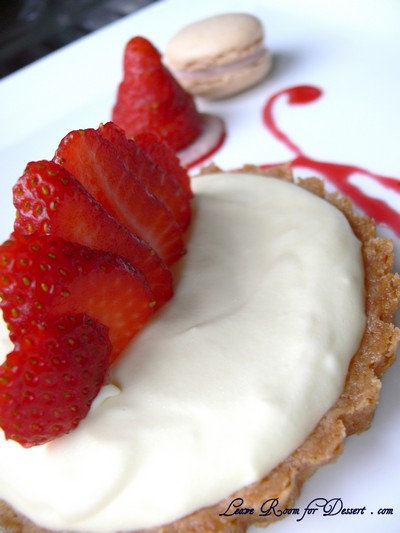
Vanilla Mousse Tart with Strawberries and Macaron

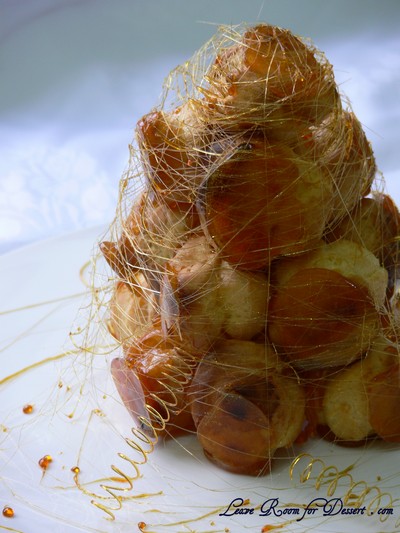
Croquembouche (Piece Montée)

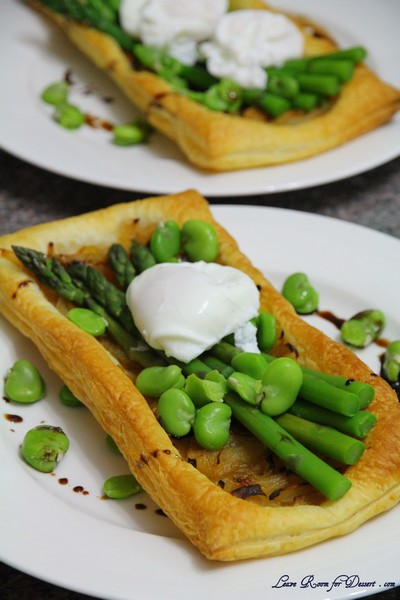
Asparagus, Broad Bean and Poached Egg Tart

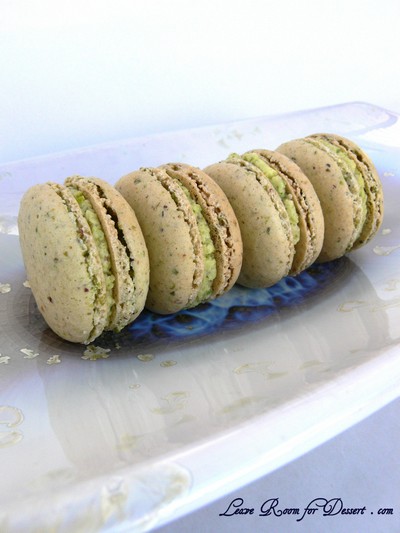
Pistachio Macarons

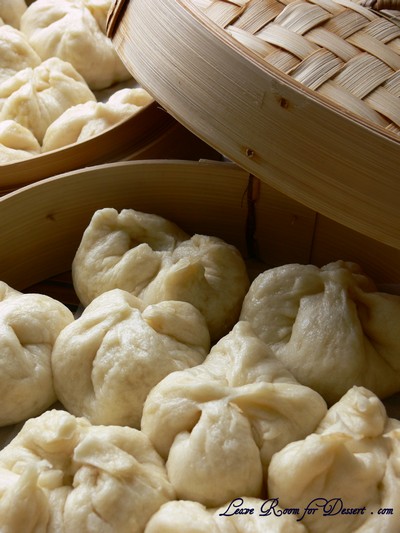
Steamed Barbecued Pork Buns – Char Siu Bao

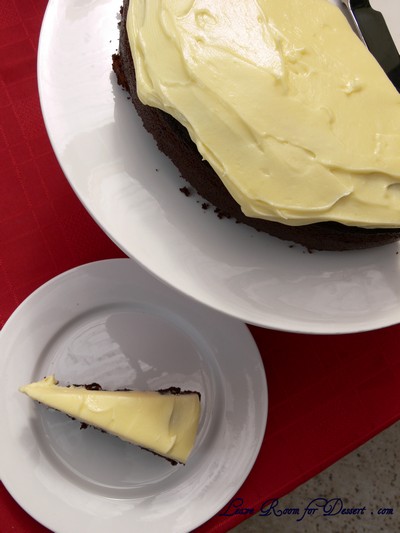
Chocolate Guinness Cake

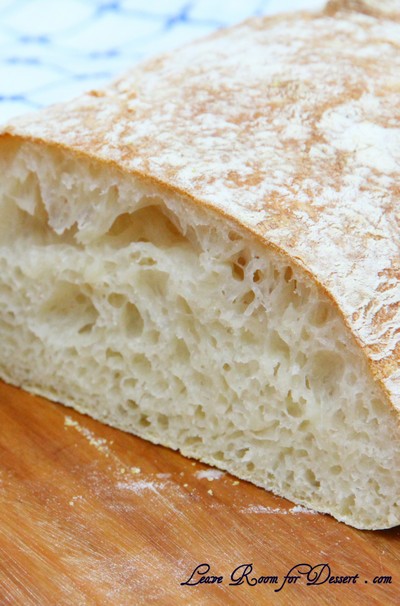
Ciabatta Bread

Raspberry Sorbet

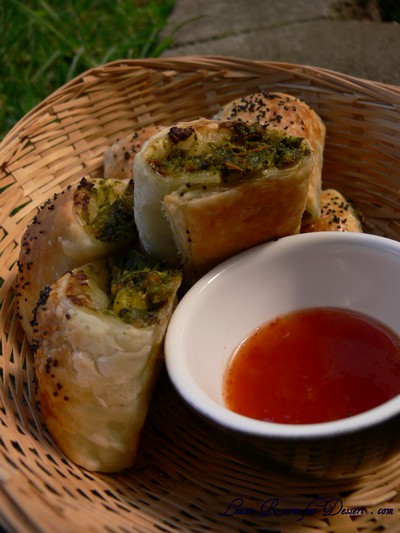
Vegetable Rolls

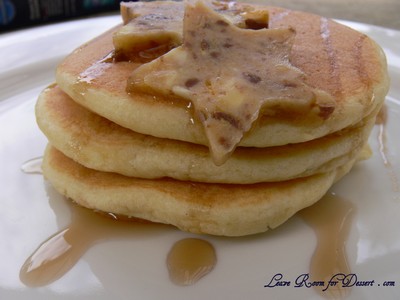
Ricotta Hotcakes with Honeycomb Butter by Bill Granger

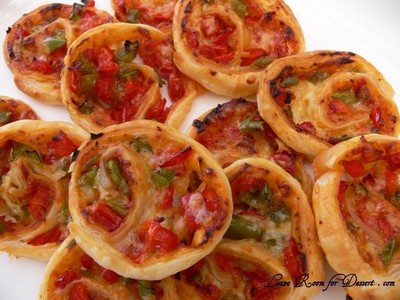
Pizza Wheels

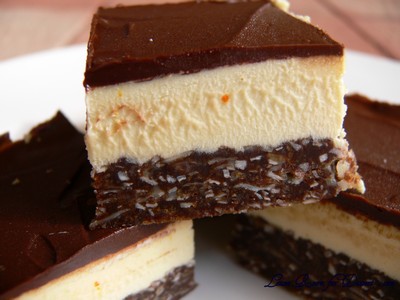
Gluten-Free Graham Wafers and Nanaimo Bars


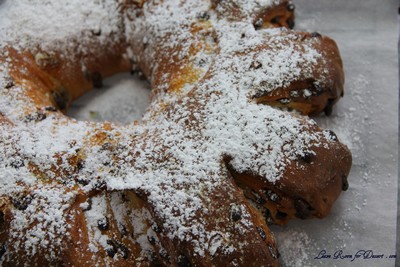
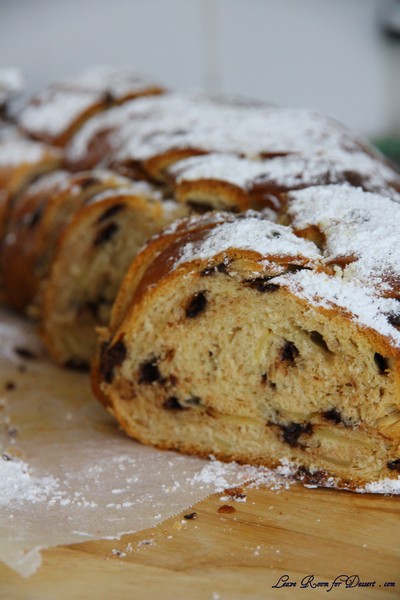
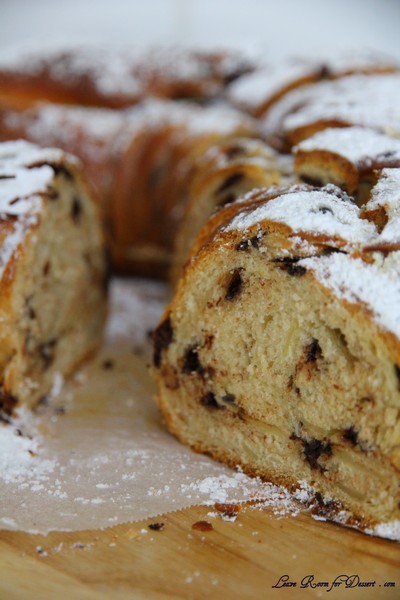
Chocolate Chip Stollen – Daring Bakers Challenge December 2010

December 27th, 2010

The 2010 December Daring Bakers’ challenge was hosted by Penny of Sweet Sadie’s Baking. She chose to challenge Daring Bakers’ to make Stollen. She adapted a friend’s family recipe and combined it with information from friends, techniques from Peter Reinhart’s book………and Martha Stewart’s demonstration.

We hosted a lovely lunch on Boxing Day this year. The day started off with rain, then went a little cold, got quite hot and then rained at night. I’m glad for the few hours of cool weather (we are currently experiencing a strange Summer here in Sydney), as we had the oven and BBQ on for the meals. We started with beautiful cheeses from Formaggi Ocello. For lunch we had gammon, lamb and roast chicken, with a garden salad, bok choy salad, pumpkin, beetroot and walnut salad.

And for dessert…

We had profiteroles, a triple chocolate cheese cake, a pavlova, fruit and berries, an almond slice and a chocolate chip stollen.

This was the only opportunity for me to make this month’s Daring Bakers Challenge. The month has been full of Christmas and end of year parties and get-togethers, along with all the shopping for presents. I got some lovely cookbooks, clothes and a gorgeous Le Creseut pot.

I considered making the stollen to the original recipe – as there are a couple people in my family who really enjoy fruit breads, although after taking a vote on whether to make the original version or a choc chip version – there was a resounding vote for the choc chip version.

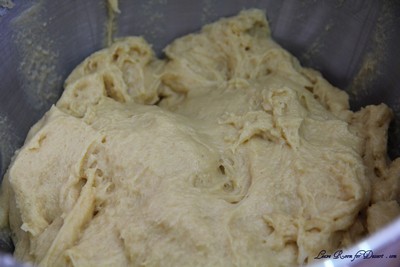
I thought it may turn out like choc chip hot cross buns – and it was quite similar. It was great an hour out of the oven and great toasted with a bit of butter a day or two after.

Everyone was quite impressed with this as part of our dessert menu. I hope everyone had a great Christmas and have a fantastic New Years.

Chocolate Chip Stollen Wreath

my changes in italics

Makes one large wreath or two traditional shaped Stollen loaves. Serves 10-12 people

ÂĽ cup (60ml) lukewarm water (110Âş F / 43Âş C)
2 packages (4 1/2 teaspoons) (22 ml) (14 grams) (1/2 oz) active dry yeast
1 cup (240 ml) milk
10 tablespoons (150 ml) (140 grams) unsalted butter (can use salted butter)
5½ cups (1320 ml) (27 ozs) (770 grams) all-purpose (plain) flour (Measure flour first – then sift- plus extra for dusting)
½ cup (120 ml) (115 gms) sugar
¾ teaspoon (3 ¾ ml) (4 ½ grams) salt (if using salted butter there is no need to alter this salt measurement)
1 teaspoon (5 ml) (6 grams) cinnamon
3 large eggs, lightly beaten
Grated zest of 1 lemon and 1 orange (I left this out)
2 teaspoons (10 ml) (very good) vanilla extract
1 teaspoon (5 ml) lemon extract or orange extract (I left this out)
Âľ cup (180 ml) (4 Âľ ozs) (135 grams) mixed peel (link below to make your own) (I left this out)
1 cup (240 ml) (6 ozs) (170 gms) firmly packed raisins (I used approx 1 1/2 cups choc chips – 250g)
3 tablespoons (45ml) rum (I left this out)
12 red glacé cherries (roughly chopped) for the color and the taste. (optional) (I left this out)
1 cup (240 ml) (3 ½ ozs) (100 grams) flaked almonds
Melted unsalted butter for coating the wreath
Confectioners’ (icing) (powdered) sugar for dusting wreath

Note: If you don’t want to use alcohol, double the lemon or orange extract or you could use the juice from the zested orange.

Soak the raisins (I left this out)
In a small bowl, soak the raisins in the rum (or in the orange juice from the zested orange) and set aside. See Note under raisins.

To make the dough:

Pour ÂĽ cup (60 ml) warm water into a small bowl, sprinkle with yeast and let stand 5 minutes. Stir to dissolve yeast completely.

In a small saucepan, combine 1 cup (240 ml) milk and 10 tablespoons (150 ml) butter over medium – low heat until butter is melted. Let stand until lukewarm, about 5 minutes.

Lightly beat eggs in a small bowl and add lemon and vanilla extracts.

In a large mixing bowl (4 qt) (4 liters) (or in the bowl of an electric mixer with paddle attachment), stir together the flour, sugar, salt, cinnamon, orange and lemon zests.

Then stir in (or mix on low speed with the paddle attachment) the yeast/water mixture, eggs and the lukewarm milk/butter mixture. This should take about 2 minutes. It should be a soft, but not sticky ball. When the dough comes together, cover the bowl with either plastic or a tea cloth and let rest for 10 minutes.

Add in the mixed peel, soaked fruit and almonds and mix with your hands or on low speed to incorporate. Here is where you can add the cherries if you would like. Be delicate with the cherries or all your dough will turn red!

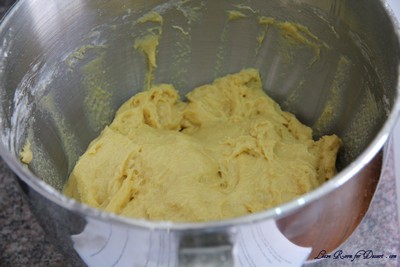
Sprinkle flour on the counter, transfer the dough to the counter, and begin kneading (or mixing with the dough hook) to distribute the fruit evenly, adding additional flour if needed. The dough should be soft and satiny, tacky but not sticky. Knead for approximately 8 minutes (6 minutes by machine). The full six minutes of kneading is needed to distribute the dried fruit and other ingredients and to make the dough have a reasonable bread-dough consistency. You can tell when the dough is kneaded enough – a few raisins will start to fall off the dough onto the counter because at the beginning of the kneading process the dough is very sticky and the raisins will be held into the dough but when the dough is done it is tacky which isn’t enough to bind the outside raisins onto the dough ball.

My KitchenAid couldn’t fit this in it, so I kneaded it by hand

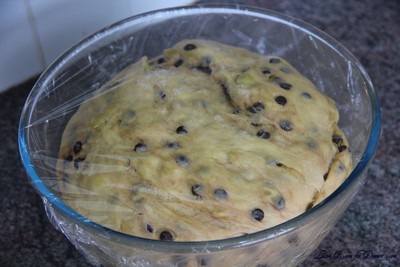
Lightly oil a large bowl and transfer the dough to the bowl, rolling around to coat it with the oil. Cover the bowl with plastic wrap.
Put it in the fridge overnight. The dough becomes very firm in the fridge (since the butter goes firm) but it does rise slowly… the raw dough can be kept in the refrigerator up to a week and then baked on the day you want.

Shaping the Dough and Baking the Wreath

Let the dough rest for 2 hours after taking out of the fridge in order to warm slightly.

Line a sheet pan with parchment paper.

Preheat oven to moderate 350°F/180°C/gas mark 4 with the oven rack on the middle shelf.

Punch dough down, roll into a rectangle about 16 x 24 inches (40 x 61 cms) and ÂĽ inch (6 mm) thick.

Starting with a long side, roll up tightly, forming a long, thin cylinder.

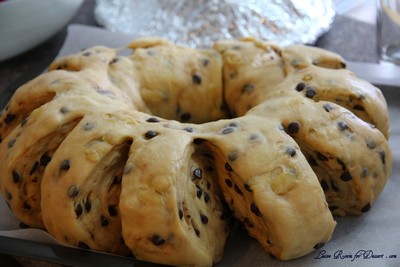
Transfer the cylinder roll to the sheet pan. Join the ends together, trying to overlap the layers to make the seam stronger and pinch with your fingers to make it stick, forming a large circle. You can form it around a bowl to keep the shape.

Using kitchen scissors, make cuts along outside of circle, in 2-inch (5 cm) intervals, cutting 2/3 of the way through the dough.

Twist each segment outward, forming a wreath shape. Mist the dough with spray oil and cover loosely with plastic wrap.

Proof for approximately 2 hours at room temperature, or until about 1½ times its original size.

Bake the stollen for 20 minutes, then rotate the pan 180 degrees for even baking and continue to bake for 20 to 30 minutes (Mine took approx 40min in total). The bread will bake to a dark mahogany color, should register 190°F/88°C in the center of the loaf, and should sound hollow when thumped on the bottom.

Transfer to a cooling rack and brush the top with melted butter while still hot.

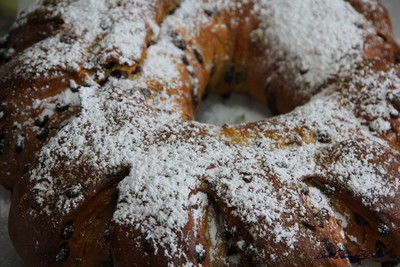
Immediately tap a layer of powdered sugar over the top through a sieve or sifter.

Wait for 1 minute, then tap another layer over the first.

The bread should be coated generously with the powdered sugar.

Let cool at least an hour before serving. Coat the stollen in butter and icing sugar three times, since this many coatings helps keeps the stollen fresh – especially if you intend on sending it in the mail as Christmas presents!

When completely cool, store in a plastic bag. Or leave it out uncovered overnight to dry out slightly, German style.

The stollen tastes even better in a couple of days and it toasts superbly…. so delicious with butter and a cup of tea….mmmmm

Storage
The more rum and the more coatings of butter and sugar you use the longer it will store.
The following is for the recipe as written and uses the 45 mls of rum and two coatings of butter and icing sugar
1. Stollen freezes beautifully about 4 months
2. The baked stollen stores well for 2 weeks covered in foil and plastic wrap on the counter at room temperature and
3. One month in the refrigerator well covered with foil and plastic wrap.


Crostata con la Crema – Daring Bakers Challenge November 2010

November 27th, 2010

The 2010 November Daring Bakers’ challenge was hosted by Simona of briciole. She chose to challenge Daring Bakers’ to make pasta frolla for a crostata. She used her own experience as a source, as well as information from Pellegrino Artusi’s Science in the Kitchen and the Art of Eating Well.

Spring is almost over, before it even really begun. This year we had two lovely days of Spring weather at the beginning of September, followed by many days of rain, cold days and lots of windy days.
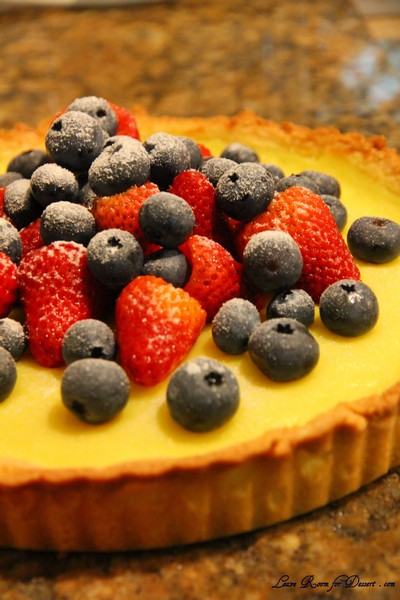
This last week has been beautiful. Quite warm, but not too hot (I say this, even though I work in an air-conditioned building). Our garden is going crazy – plants and weeds alike. Three plants in particular are quite exciting at the moment: our fig, blueberry and raspberry. All three plants are in their second Spring season and are very happy, we have a number of figs forming, quite a few blueberries and many raspberries.

One thing I didn’t understand when I bought the raspberry is the shop assistance’s advice: Watch out, the raspberry can take over… What? Isn’t that a good thing? Surely people aren’t unhappy about loads of raspberries.

What he should have said was: Watch out, the raspberry sends suckers through the lawn and new plants shoot up more than one metre away from the original plant meaning you have no control of where are how far it will travel… Whoops!! Luckily running the mower over them have stopped new plants forming in the middle of our yard – I hope!
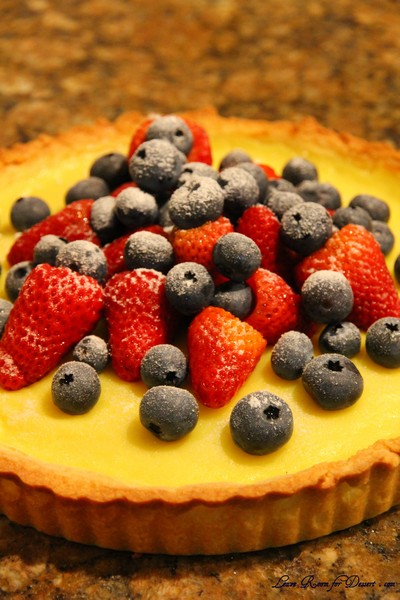
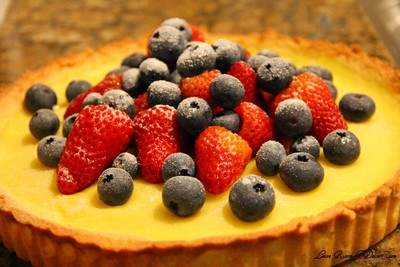
Although my baking (and blogging) has been hindered by the lovely weather and constant maintenance of our yard, this recipe chosen for the daring bakers this month was great, as many components can be made the day or night before, and cooked while everyone is eating dinner.

My family are huge fans of Portuguese custard tarts, so I had no trouble picking pastry cream to fill my tart shell.

I must admit I used the food processor for the dough to make the tart shell. It seemed a bit dry and wasn’t coming together, so I added a touch more egg white (ok, accidentally – a bit more than a touch – making it a little too soft).

I didn’t blind bake my tart, I just added the pastry cream and cooked it for 40 minutes or more, until the pastry cream was set and the pastry golden. The pastry was lovely in texture and taste – very lovely. I thought I needed more pastry cream for the tart, although perhaps because the pastry was a little soft, it shrunk or fell a little at the sides, making it more level with the pastry cream when cooked.
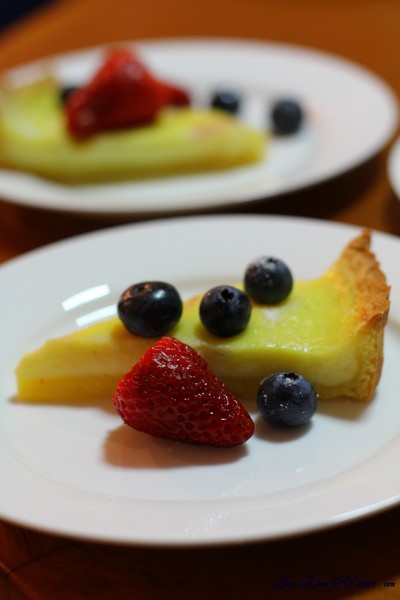
I was very happy with the length of time required for this challenge and was more than happy to try out another pastry and pastry cream recipe – and my family was more than happy to have it for dessert 🙂

Thanks to our host for this month, for trialling so many recipes for people to choose from and be inspired from.
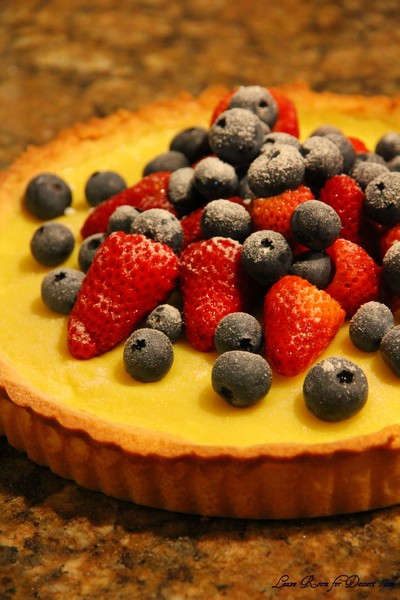
Crostata con la Crema (crostata with pastry cream filling)

Recipe Source: There are many recipes for pasta frolla and different ideas about how to make it. I will give you two versions that I have been using for some time. They have been inspired by those in the book La scienza in cucina e l’arte di mangiare bene by Pellegrino Artusi (1820-1911). The book was first published in 1891, and is available in English translation as Science in the Kitchen and the Art of Eating Well (further details are given in the Additional Information section).

Pasta frolla

1/2 c. minus 1 tablespoon [105 ml, 100 g, 3 ½ oz] superfine sugar (see Note 1) or a scant 3/4 cup [180ml, 90g, 3 oz] of powdered sugar
1 and 3/4 cup [420 ml, 235 g, 8 1/4 oz.] unbleached all-purpose flour
a pinch of salt
1 stick [8 tablespoons / 4 oz. / 115 g] cold unsalted butter, cut into small pieces
grated zest of half a lemon (you could also use vanilla sugar as an option, see Note 2) (I didn’t use this)
1 large egg and 1 large egg yolk, lightly beaten in a small bowl

Note 1: Superfine sugar is often also referred to as ultrafine, baker’s sugar or caster sugar. It’s available in most supermarkets. If you cannot find “superfine” sugar, you can make your own by putting some regular granulated sugar in a food processor or blender and letting it run until the sugar is finely ground.

Note 2: There are different ways of making vanilla sugar. I keep vanilla beans in a jar half-filled with sugar until I need to use them, for example, to make vanilla ice cream. After I remove the split bean from the custard that will go into the ice cream maker, I rinse it, dry it and put it back in the jar with sugar.

Making pasta frolla by hand:

Whisk together sugar, flour and salt in a bowl.

Rub or cut the butter into the flour until the mixture has the consistency of coarse crumbs. You can do this in the bowl or on your work surface, using your fingertips or an implement of choice.

Make a well in the center of the mounded flour and butter mixture and pour the beaten eggs into it (reserve about a teaspoon of the egg mixture for glazing purposes later on – place in the refrigerator, covered, until ready to use).

Add the lemon zest to your flour/butter/egg mixture.

Use a fork to incorporate the liquid into the solid ingredients, and then use your fingertips.

Knead lightly just until the dough comes together into a ball.

Shape the dough into a flat disk and wrap in plastic wrap. Place the dough in the refrigerator and chill for at least two hours. You can refrigerate the dough overnight.

Making pasta frolla with a food processor:

Put sugar, flour, salt, and lemon zest in the food processor and pulse a few times to mix.

Add butter and pulse a few times, until the mixture has the consistency of coarse meal.

Empty food processor’s bowl onto your work surface

See step 3 above and continue as explained in the following steps (minus the lemon zest, which you have already added).

Pastry Cream

2 eggs
1/2 cup caster sugar
500ml milk
1 teaspoon vanilla essence
3 tablespoons plain flour

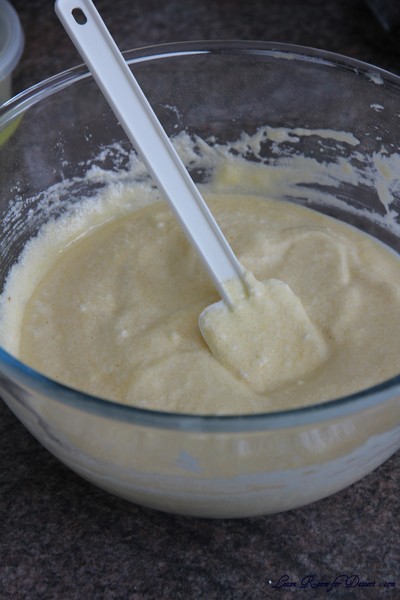
Heat milk in a saucepan until almost bubbling. Whisk eggs with caster sugar, then whisk in plain flour. Slowly pour half the warm milk over the egg sugar mixture, mixing well to stop the eggs cooking. Pass the egg mixture through a sieve back into the saucepan. Place the saucepan back over medium heat and continue stirring the mixture until it bubbles. Pour the pastry cream into a bowl and place the bowl in a sink or bowl with cold or icy water, add the vanilla essence and stir the pastry cream until cooled. Refrigerate until cool.

Assembling and baking the crostata con la crema:

Heat the oven to 350ÂşF [180ÂşC/gas mark 4].

Take the pasta frolla out of the fridge, unwrap it and cut away ÂĽ of the dough. Reserve this dough to make the lattice top of the crostata. Refrigerate this dough while you work on the tart base.

To help roll the crostata dough, keep the dough on top of the plastic wrap that you had it wrapped in. This can help rolling the dough and can also help when transferring the dough to your pan. You can also use parchment paper for this. However, you can also roll the dough directly on a work surface if you prefer.

Lightly dust the top of the dough and your work surface (if you’re rolling directly on a work surface) with flour. Keep some flour handy to dust the dough as you go along.

If the dough is very firm, start by pressing the dough with the rolling pin from the middle to each end, moving the rolling pin by a pin’s width each time; turn the dough 180 degrees and repeat; when it softens, start rolling.

Roll the dough into a circle about 1/8th inch (3 mm) thick.

If you used the plastic wrap or parchment paper as rolling surface, flip dough over the pan, centering it, and delicately press it all around so the corners are well covered. Peel away the plastic wrap.

Trim the excess dough hanging over the edges of the pan. Press the remaining dough around the border into the sides of the pan making sure the border is an even thickness all the way around.

Prick the bottom of the dough with a fork in several places.

Take out of the fridge the reserved pasta frolla you had cut away earlier. Roll it with your pin and cut into strips or use cookie cutters to make small shapes (this is not traditional, but it looks cute); or roll with your hands into ropes.

Instead of jam or fruit preserves, cover the bottom of the crostata crust evenly with the pastry cream.

Use the prepared strips or rolls of dough to make a lattice over the surface, or decorate with the cut shapes. (Note: You can use dough scraps to make cookies: see the Additional Information section for some pointers)

Brush the border and strips of dough with the reserved beaten eggs. You can add a drop or two of water to the beaten eggs if you don’t have enough liquid.

Put the tart in the oven and bake for 30 minutes.

After 35 minutes, check the tart, and continue baking until the tart is of a nice golden hue. (Note: Every oven is different. In my oven it took 45 minutes to bake the tart until golden.)

When done, remove the tart from the oven and let cool. If you have used a tart pan with a removable bottom, then release the tart base from the fluted tart ring. Make sure the tart is completely cool before slicing and serving.