Swiss Swirl Ice Cream Cake – Daring Bakers Challenge July 2010

July 27th, 2010

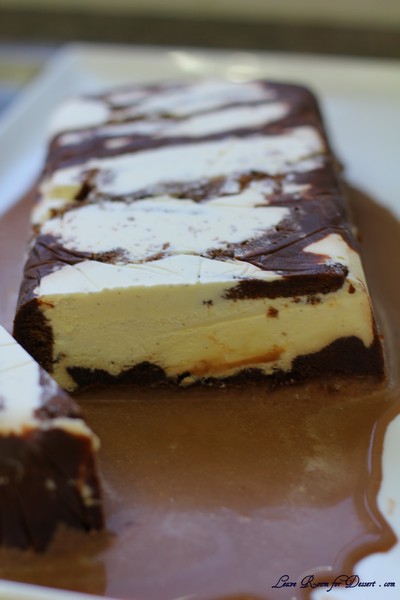
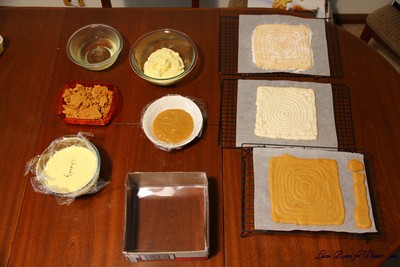
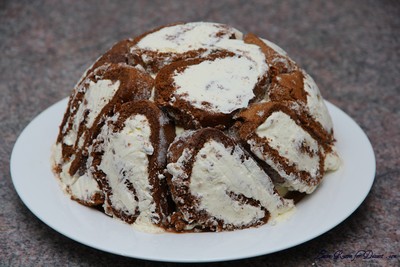
The July 2010 Daring Bakers’ challenge was hosted by Sunita of Sunita’s world – life and food. Sunita challenged everyone to make an ice-cream filled Swiss roll that’s then used to make a bombe with hot fudge. Her recipe is based on an ice cream cake recipe from Taste of Home.

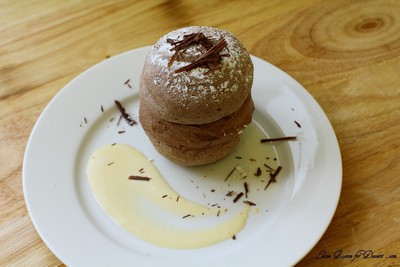
A crowd pleaser – on all accounts. Everyone loved this dessert – probably because it was composed of chocolate and vanilla components. Chocolate cake and a whole lot of cream sums up this dessert – as do the words ‘yum’ ‘that was great’ and ‘can I have some more’. And yes, people did go back for seconds.

I was a little concerned at the beginning as the ice cream recipes had no egg yolks, and the chocolate ice cream only had cocoa for flavouring, which I thought would impact greatly on flavour and texture – but I think it all worked wonderfully together and would happily make this again.

I had a little trouble with the chocolate swiss roll breaking a touch when I rolled the cream up in it, so I would probably use a different recipe if I were to serve the swiss roll by itself. My food processor couldn’t grind up the vanilla bean fine enough for my likings, so I used the seeds only. And I have learnt my lesson (for the final time). Don’t try and freeze two things in the ice cream machine on the same day! I left my chocolate ice cream too late and it didn’t freeze in the ice cream machine, so we had an ice cream cake with chocolate cream sauce for dessert and it was all too good.

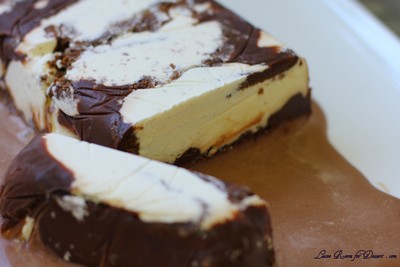
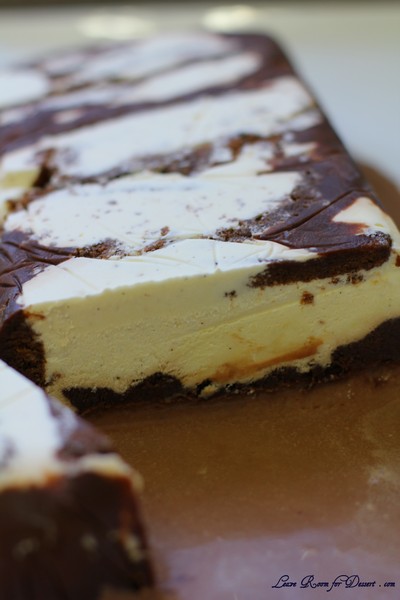
I had leftovers from my 2.4L bowl, so I also made a loaf tin of the swiss roll ice cream cake – and eyes lit up when I said a week after the first one – “would anyone like ice cream cake for dessert?”

Thanks to our Daring Baker host this month, Sunita. I never would have thought or got around to making this if it weren’t on the Daring Bakers – and a big Thank you to all those who maintain and manage the website.

Swiss Swirl Ice Cream Cake

Recipe source- Inspired by the Swiss swirl ice cream cake from the Taste of Home website. The recipes for the cake, filling, eggless ice creams and the fudge topping have been developed by Sunita.

The Swiss rolls

6 medium sized eggs
1 C / 225 gms caster sugar /8 oz+ extra for rolling
6 tblsp / 45gms/ a pinch over 1.5 oz of all purpose (plain) flour + 5 tblsp/40gm /a pinch under 1.5 oz of natural unsweetened cocoa powder, sifted together
2 tblsp /30ml / 1 fl oz of boiling water
a little oil for brushing the pans

For the filling

2C / 500 mls/ 16 fl oz of whipping cream
1 vanilla pod, cut into small pieces of about ½ cm (or 1 tsp vanilla extract)
5 tblsp / 70gms/2.5oz of caster sugar

Pre heat the oven at 200 deg C /400 deg F approximately. Brush the baking pans ( 11 inches by 9 inches ) with a little oil and line with greaseproof baking paper. If you have just one pan, bake one cake and then let the pan cool completely before using it for the next cake.

In a large mixing bowl, add the eggs and sugar and beat till very thick; when the beaters are lifted, it should leave a trail on the surface for at least 10 seconds.

Add the flour mixture, in three batches and fold in gently with a spatula. Fold in the water.

Divide the mixture among the two baking pans and spread it out evenly, into the corners of the pans.
Place a pan in the centre of the pre heated oven and bake for about 10-12 minutes or till the centre is springy to the touch.

Spread a kitchen towel on the counter and sprinkle a little caster sugar over it.
Turn the cake on to the towel and peel away the baking paper. Trim any crisp edges.

Starting from one of the shorter sides, start to make a roll with the towel going inside. Cool the wrapped roll on a rack, seam side down.

Repeat the same for the next cake as well.
Grind together the vanilla pieces and sugar in a food processer till nicely mixed together. If you are using vanilla extract, just grind the sugar on its own and then add the sugar and extract to the cream.

In a large bowl, add the cream and vanilla-sugar mixture and beat till very thick.
Divide the cream mixture between the completely cooled cakes.
Open the rolls and spread the cream mixture, making sure it does not go right to the edges (a border of ½ an inch should be fine).

Roll the cakes up again, this time without the towel. Wrap in plastic wrap and chill in the fridge till needed, seam side down.

The vanilla ice cream

2 and ½ C / 625 ml / 20 fl oz of whipping cream
1 vanilla bean, minced or 1 tsp/ 5 ml/ .15 fl oz vanilla extract
½ C / 115gms/ 4 oz of granulated sugar

Grind together the sugar and vanilla in a food processor. In a mixing bowl, add the cream and vanilla –sugar mixture and whisk lightly till everything is mixed together. If you are using the vanilla extract, grind the sugar on its own and then and the sugar along with the vanilla extract to the cream.

Pour into a freezer friendly container and freeze till firm around the edges. Remove from the freezer, beat till smooth and return to the freezer. Do this 3-4 times and then set completely.

The Hot fudge sauce– I made this just after adding the layer of vanilla ice cream to the cake.

1 C / 230gms/ 8 oz of caster sugar
3 tblsp / 24gms/1.5 oz of natural unsweetened cocoa powder
2 tblsp /15gms/ 1 oz of cornflour/cornstarch
1 and ½ C /355ml /12 fl oz of water
1 tblsp /14gms/ 1 oz butter
1 tsp/5 ml / .15 fl oz vanilla extract

In a small saucepan, whisk together the sugar, cocoa powder, cornflour and water.

Place the pan over heat, and stir constantly, till it begins to thicken and is smooth (for about 2 minutes).
Remove from heat and mix in the butter and vanilla. Keep aside to cool .

The chocolate ice cream

2C/ 500 ml whipping cream
1 C/230gms/8 oz caster sugar
3 tblsp/ 24 gms/1.5 oz of natural unsweetened cocoa powder

Grind together the sugar and the cocoa powder in a food processor .
In a saucepan, add all the ingredients and whisk lightly.
Place the pan over heat and keep stirring till it begins to bubble around the edges.

Remove from heat and cool completely before transferring to a freezer friendly container till firm around the edges. If you are using an ice cream maker, churn the ice cream according to the manufacturer’s instruction, after the mixture has cooled completely.
Remove from the freezer, beat till smooth and return to the freezer. Do this 3-4 times and then set completely.

Assembly-

Cut the Swiss rolls into 20 equal slices ( approximately 2 cms each ).

Cover the bottom and sides of the bowl in which you are going to set the dessert with cling film/plastic wrap.

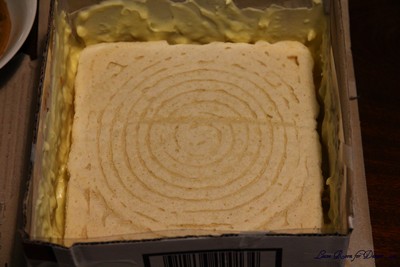
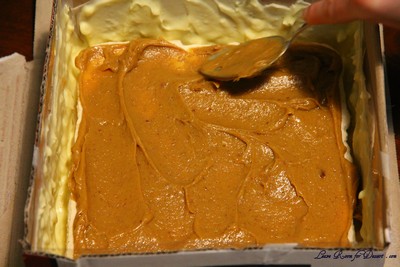
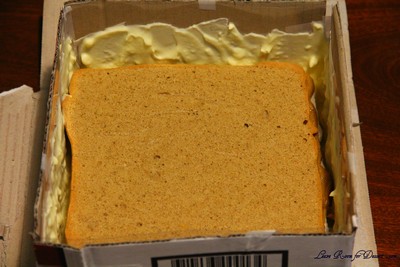
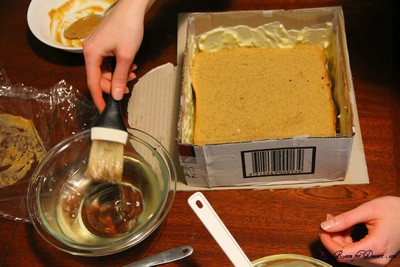
Arrange two slices at the bottom of the pan, with their seam sides facing each other. Arrange the Swiss roll slices up the bowl, with the seam sides facing away from the bottom, to cover the sides of the bowl. Cover the bowl with plastic wrap and freeze till the slices are firm (at least 30 minutes).

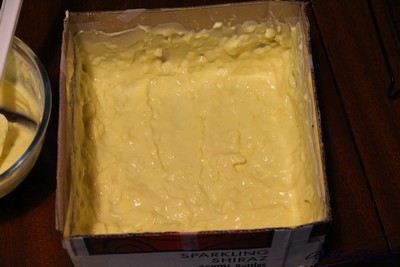
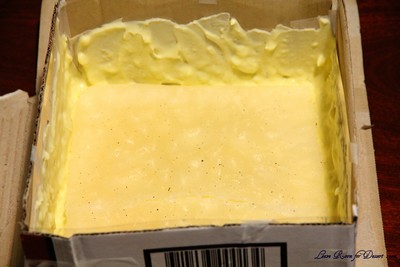
Soften the vanilla ice cream. Take the bowl out of the freezer, remove the cling film cover and add the ice cream on top of the cake slices. Spread it out to cover the bottom and sides of the bowl. Cover the bowl with plastic wrap and freeze till firm ( at least 1 hour)

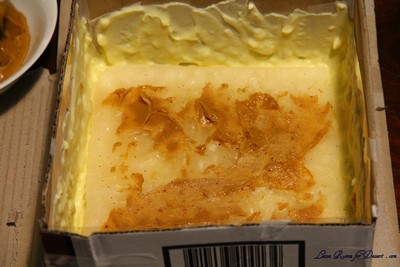
Add the fudge sauce over the vanilla ice cream, cover and freeze till firm . ( at least an hour)

Soften the chocolate ice cream and spread it over the fudge sauce. Cover with plastic wrap and freeze for at least 4-5 hours till completely set .

Remove the plastic cover, and place the serving plate on top of the bowl. Turn it upside down and remove the bowl and the plastic lining. If the bowl does not come away easily, wipe the outsides of the bowl with a kitchen towel dampened with hot water. The bowl will come away easily.

Keep the cake out of the freezer for at least 10 minutes before slicing, depending on how hot your region is. Slice with a sharp knife, dipped in hot water.
V8 Cake

July 25th, 2010

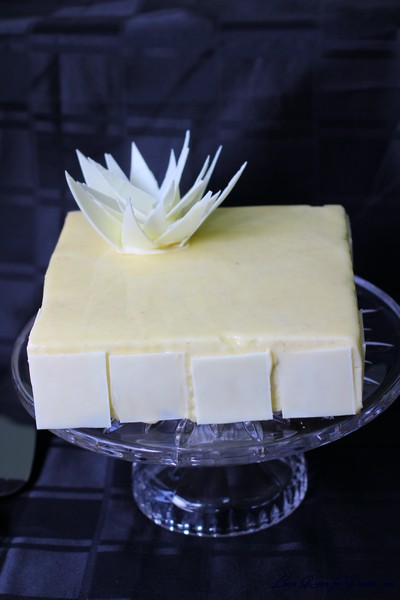
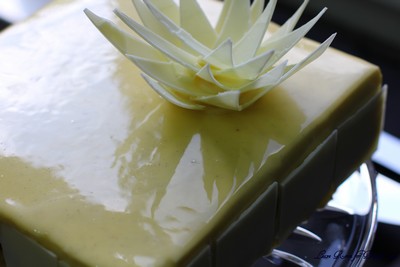
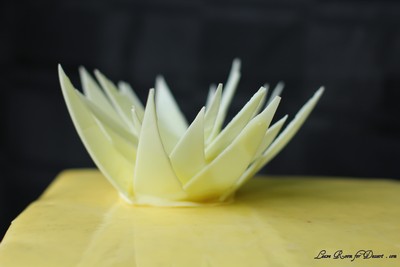
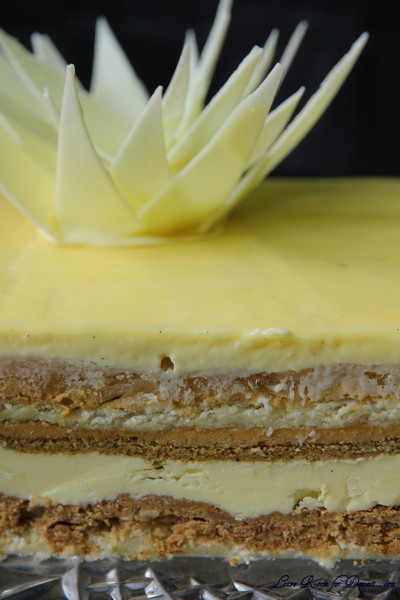
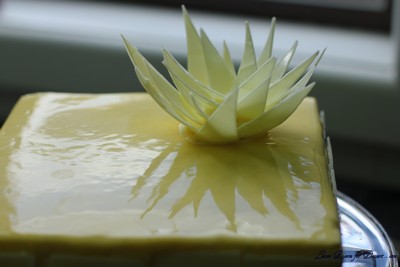
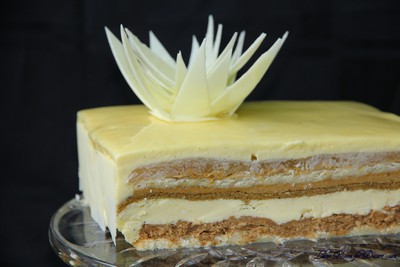
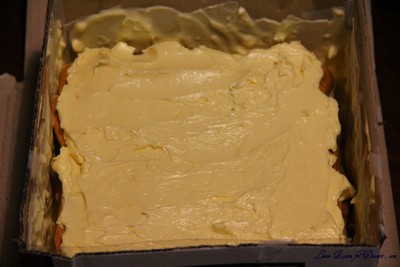
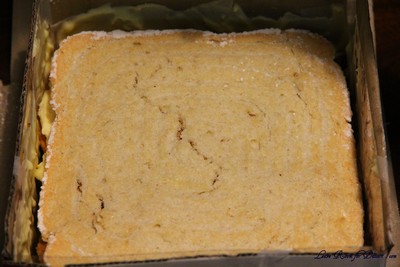
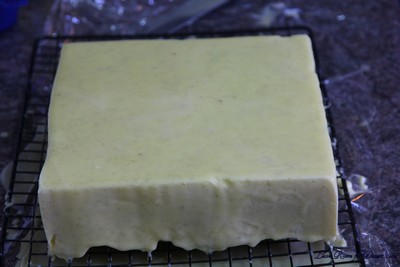
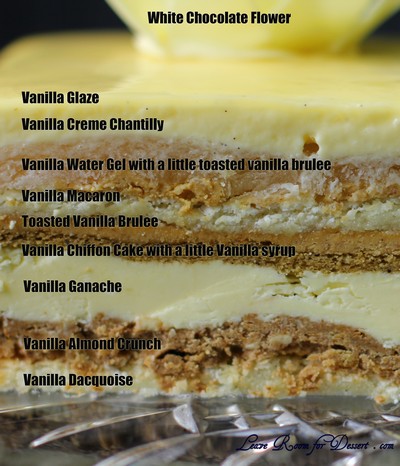
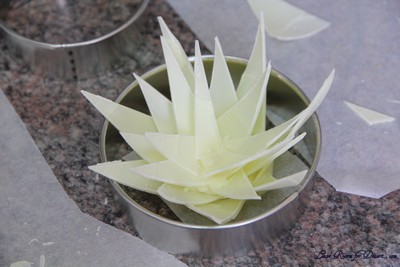
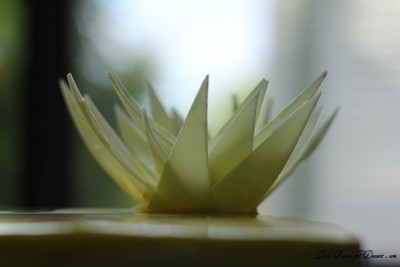
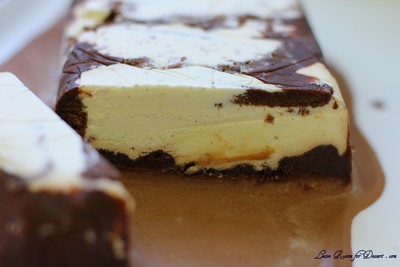
Yes, that’s right. I decided to make Adriano Zumbo’s V8 cake. Not a car cake as might be thought by the name, but a gorgeous cake composed of eight different layers of vanilla. Vanilla crème chantilly, toasted vanilla brulee, vanilla water gel, vanilla glaze, vanilla ganache, vanilla macaron, vanilla dacquoise, vanilla chiffon cake, vanilla almond crunch… hmmm.. that’s 9 layers… oh well.

After the pressure test episode on MasterChef, I had loads of people coming up and asking whether I would be making the cake – with all of them hoping to get a chance to try it.

I haven’t made anything from this series of MasterChef, even though there was one other dish that looked very gorgeous and tasty. So, I decided to make this cake (unfortunately not using all the beans used here, and substituting vanilla essence for some – as they are quite expensive). I also didn’t use any of the titanium dioxide in the glaze or chocolate. I know this would have made a gorgeous colour, but it would have been difficult to get a hold of, and I thought that 12.5g was a little large for the cake. The cake still looked gorgeous, without the brilliant white look.

I am glad tonight’s episode is the last MasterChef, as hopefully I can get a bit of my time back – I haven’t been visiting people blogs, getting enough sleep, blogging as much as I’d like and experimenting with some of my own creations.

My notes on making this cake:
I didn’t use all the vanilla beans, due to expense. I used half the number here + vanilla essence.
I made my own almond praline paste – not sure if it’s what it’s supposed to be like, the recipe is at the bottom of this page.
I made my own miroir glaze – this recipe is also at the end – it makes more than required (about 1/3 extra).
I didn’t use Titanium dioxide – the cake still looked gorgeous.
I made my own 20cm acetate box – cutting out a 20cm x 20cm square + 4 20cm x 9cm recatangles (although these were too large and could have been 20cm x 7cm). Sticky tape the rectangles to each side of the square, then sticky tape together. Use cardboard for supports on the bottom and each end.)
You can use projector sheets or sheets that cover the front of a book for acetate in this recipe.
I thought the ganache was a bit more difficult to get smooth than more traditional ganaches (pouring hot cream over the chocolate). Although with lots of pressure from the food processor – it came together in the end. I would suggest cutting it up finely to begin with, otherwise cream goes everywhere. This also made around 1/3 too much I think.
In place of the 1.5g gellanin the vanilla water gel, I used 2 sheets gold gelatine (4-5g) to get a jelly layer.
I used All Bran wheat flakes instead of the pailette feuillitine, but only 20g of it.
There was way too much vanilla syrup. I would suggest doing 1/4 of the recipe or less.
There was too much brown sugar crumble – this could have been cut by half.
There could have been a bit more vanilla creme chantilly made, as this was a little short for me… Make 1/4-1/2 more.

Enjoy!! If you decide to make it 🙂

V8 Cake

Recipe by Adriano Zumbo on MasterChef Australia 2010 (series 2)
see my notes above

2 vanilla beans
100g blanched almonds
Sugar spheres, to serve

Vanilla crème chantilly
4g gold strength gelatine leaves
590g thickened cream
1 vanilla bean, seeds scraped
175g caster sugar
24g cold water

Toasted vanilla brulee

3 egg yolks
50g dark brown sugar
250g thickened cream
1 vanilla bean
1 tsp vanilla extract

Vanilla water gel
250g water
38g caster sugar
1.5g gellan
1 vanilla bean, split, seeds scraped

Vanilla glaze
9.5g gelatine leaves
60g cold water
40g glucose liquid
35g water
250g caster sugar
400g thickened cream
1 vanilla bean, split, seeds scraped
150g miroir glaze (specialty cold-application patisserie glaze)
7.5g titanium dioxide (white colourant, powdered)

Vanilla ganache
300g white couverture chocolate
185g thickened cream
2 tsp vanilla extract
1/2 vanilla bean, split, seeds scraped
95g unsalted butter, softened

Brown sugar crumble
50g unsalted butter
50g plain flour
50g dark brown sugar
50g almond meal
¼ scraped vanilla bean

Vanilla macaron
53g egg whites
50g pure icing sugar
150g TPT (equal parts sifted almond meal and sifted pure icing sugar)
½ scraped vanilla bean

Vanilla dacquoise
60g egg whites
43g caster sugar
65g almond meal
40g pure icing sugar, sifted
1 vanilla bean, split, seeds scraped
½ tsp vanilla extract

Vanilla chiffon cake

17.5g plain flour
1 roasted and finely ground vanilla bean
1.25 (21g) egg yolks
5g dark brown sugar
17.5g water
15g canola oil
45g egg whites
22.5g caster sugar
2.5g rice flour

Vanilla almond crunch

45g milk couverture chocolate
90g almond praline paste
90g pure almond paste
18g unsalted butter
45g brown sugar crumble
45g pailette feuillitine (crunchy wheat flakes)
18g toasted diced almonds
1 roasted and finely ground vanilla bean
2g sea salt
¼ scraped vanilla bean

Vanilla syrup
125g caster sugar
250g water
½ vanilla bean, split
1 tsp vanilla extract

White chocolate flower and tiles
500g white couverture chocolate, grated or finely chopped
5g titanium dioxide

Please note – you will need precision scales. The vanilla crème chantilly, vanilla glaze, brown sugar crumble, and vanilla syrup can all be made ahead of time.

1. Preheat oven to 160°C.

2. To make the roasted vanilla beans, place 2 vanilla beans in oven until burnt and charcoal in texture. Grind to a fine powder in a mortar and pestle or spice grinder. Cover and set aside.

3. To make the pure almond paste, place 100g blanched almonds on a baking tray and bake for 10 minutes or until deep golden. Grind to a coarse paste. Cover and set aside.

4. To make the vanilla crème chantilly, cut gelatine into small squares, soak in the cold water. Place cream, vanilla and sugar in a saucepan and bring to the boil. Remove from the heat and allow to cool to 70-80°C, and then stir through the gelatine and water mixture until dissolved. Place in a container, cover the surface with cling wrap and place in the fridge.
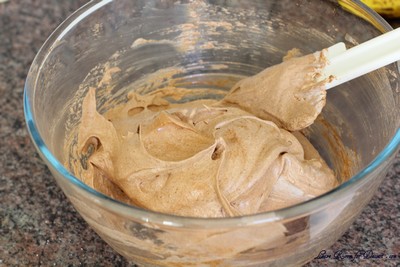
5. For the toasted vanilla brulee, mix yolks and sugar in a bowl by hand with a whisk until just combined. Add cream and vanilla bean to a small saucepan and bring to the boil, pour a little over the eggs while stirring, then add the remaining liquid including vanilla bean. Puree with a hand blender until smooth and pour into a shallow baking tray about 25 x 38cm. Place into the oven and cook until just set, about 10 minutes, then increase oven to 200°C and bake until it forms a golden brown crust, about 5 minutes. It should look slightly split when removed from the oven. Scrape mixture into a thermomix, blender, or small food processor and blend to a smooth paste. Set aside in a small bowl, covering the surface of the brulee with cling wrap so it doesn’t form a skin. Reduce oven temperature to 160°C.

6. To make the vanilla water gel, place a lined 18cm square cake tin in the fridge to chill. Boil all ingredients in saucepan whilst whisking until dissolved and mixture starts to thicken. To test if set, drop about a teaspoon of liquid into a metal bowl, it should thicken slightly. It will thicken on cooling. To speed up cooling, pour into a metal bowl and set aside for 5 minutes. Pour into chilled cake tin and place in the freezer until solid, about 30 minutes. Remove from mould and keep gel in freezer.

7. For the vanilla glaze, soak the gelatine leaves in cold water until softened. Drain, squeezing out any excess water. Boil glucose, water and sugar until 165°C, brushing around the sides of the saucepan with a pastry brush dipped in cold water as you go. Do not allow caramel to take on any colour. In another saucepan, bring cream and vanilla seeds to boil and then add to the sugar syrup. Mix through, then allow to cool to 70°C and add softened gelatine, stirring well. Add miroir glaze and titanium dioxide and blend well. Strain, then freeze until set. Reheat to 35°C when glazing the cake.
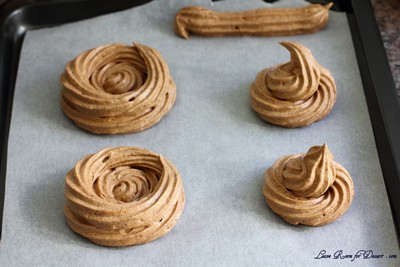
8. For the vanilla ganache, place all ingredients in a blender and mix until smooth and creamy. Cover closely with cling wrap and set aside until needed.

9. To make the brown sugar crumble, place all ingredients in an electric mixer and beat mix until dough forms. ‘Grate’ through a cooling rack with a lined baking tray sitting underneath to catch the crumble then bake in the oven for about 10 minutes until golden.

10. To make the vanilla macaron, draw an 18cm square on a piece of baking paper placed on a baking tray. Using an electric mixer or hand beaters, whisk egg whites on high speed until soft peaks form then slowly add pure icing sugar, checking it has dissolved in between additions until you have stiff glossy peaks. Stir through TPT with vanilla seeds. Spoon mixture into a piping bag fitted with a 5mm nozzle. Pipe into the pencilled frame using a continuous snaking motion to fill the entire square. Let a skin form and then bake for 10 minutes at 160°C until golden. Remove from oven, slide baking paper off tray and place on kitchen bench. Increase oven temperature to 180°C.

11. To make the vanilla dacquoise, draw an 18cm square on a piece of baking paper placed on a baking tray. In an electric mixer fitted with whisk attachment, whisk egg whites on high speed until soft peaks form then slowly add caster sugar, beating until you have stiff glossy peaks. Mix almond meal with icing sugar, vanilla seeds and extract, gently fold through egg whites. Spoon into a piping bag fitted with a 5mm nozzle. Pipe into the pencilled frame using a continuous snaking motion to fill the entire square. Dust with icing sugar, let sit 2 minutes then dust again. Bake at 180°C 10-12 minutes or until golden. Remove from oven, slide baking paper off tray and place on kitchen bench. Reduce oven temperature to 160°C.

12. To make the vanilla chiffon cake, draw an 18cm square on a piece of baking paper placed on a baking tray. Mix flour, roasted vanilla bean powder, egg yolks, brown sugar, water and oil in a bowl until combined. Whisk egg whites in an electric mixer on high speed until soft peaks form then slowly add the sugar and rice flour, beating until you have stiff, glossy peaks. Fold the meringue through the batter gently. Spoon into a piping bag fitted with a 5mm nozzle. Pipe into the pencilled frame using a continuous snaking motion to fill the entire square. Bake in the oven set at 160°C until golden, about 15 minutes.

13. To make the vanilla almond crunch, melt milk chocolate, add almond praline and the pure almond paste and mix well. Melt butter and take to nut brown (noissette) stage. Add crumble and fueilletine flakes and mix through praline mixture, then fold through burnt butter, followed by toasted almonds, crushed vanilla beans, sea salt and scraped vanilla seeds. Smooth a 5mm layer over vanilla dacquoise and set aside.

14. To make the vanilla syrup, bring all ingredients to the boil, then allow to cool.

15. To make the white chocolate tiles and flower, bring 5cm of water in a medium saucepan to the boil, turn off the heat and sit a metal bowl with 300g of the chocolate over the water. Stir until just melted then remove bowl to the bench and add about 100g more chocolate to bring the temperature down. Stir vigorously until the chocolate has melted, if the chocolate does not feel cold to the touch, add the remaining 100g chocolate to bring down the temperature. Add titanium dioxide and mix well. Keep stirring well to remove all lumps. If the chocolate mixture feels cold to the touch, spread a small, thin layer onto a small piece of baking paper. Set aside for about 3-4 minutes, it will start to harden if it is tempered correctly. If the chocolate becomes too thick and the temperature is too low, gently reheat the mixture in the bowl set over the saucepan of steaming water, but it still needs to be cold.
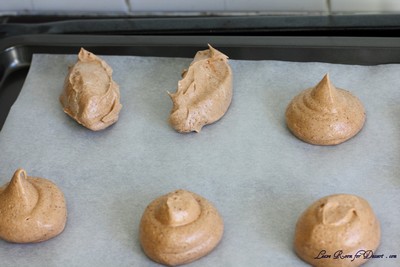
16. When the chocolate is tempered, to make the flower, spread a thin layer, about 2-3mm thick on 2 pieces of acetate (30 x 40cm) using a large palette knife. Once the chocolate has almost set, on one sheet of acetate carefully mark 3 strips lengthways on the strips, about 7-9cm-wide. Mark thin triangles in each strip. These form the flower petals. Place a piece of baking paper over the top, and wrap around a rolling pin or similar cylinder and allow to completely harden.

17. On the other sheet use a ruler to mark out 4 ½ cm squares. Place a piece of baking paper over the top and invert onto a board or clean work surface to completely harden.

18. To assemble the cake, in a 20cm acetate-lined straight-sided cake tin spread a 5-10mm layer of Chantilly crème around base and sides of tin. Chill in freezer until firm. Lay vanilla gel at the base of the tin and smear with a tiny amount of brulee so that macaron layer will stick to the gel. Lay macaron layer over brulee smear. Cover macaron layer with an even 5mm of brulee. Place chiffon cake over brulee layer. Brush chiffon cake with a little vanilla syrup. Spread a 5mm layer of ganache over chiffon cake. Invert the dacquoise/crunch layers so the vanilla almond crunch layer is sandwiched next to the ganache and the dacquoise is facing up. The dacquoise will become the base of the cake.

19. Fill in any gaps with Chantilly cream, then place in the freezer for 30-60 minutes until firm. Place a large piece of cling wrap on the bench and place a cooling rack on top. Remove the cake from the chiller and invert onto the cooling rack. Heat sides of cake tin gently with a blow torch to help release the mould from the cake. Remove any acetate. Smooth top and sides if necessary with a palette knife. Pouring generously and using a palette knife, spread the vanilla glaze evenly over the top and sides, completely covering the surface. Using a large palette knife transfer the cake to a cake stand and place the chocolate tiles around the cake.

20. To assemble the flower spread a small amount of melted tempered chocolate onto a small piece of baking paper and use this as a base to stick the petals, starting in the centre, working outwards to create a flower. Using choco-cool will help ‘fix’ the petals in place and firm up the chocolate base. Place chocolate flower on top of the cake and decorate the top of the cake with a few sugar spheres.

Almond Praline
Recipe by Anita @ Leave Room for Dessert

50g caster sugar
60g blanched slivered almonds

Roast the almonds for 5-10mins at 160°C. Heat the sugar on high, until the sugar starts browning around the outside. Gently stir in the un-melted sugar, until it is all caramelised in colour. Pour over the roasted almonds. Allow to cool, then blend in a food processor. (It won’t go into the same paste texture as the almond paste above).

Miroir Glaze
Recipe by Anita @ Leave Room for Dessert

2 gold gelatine leaves (4g)
220g water
60g caster sugar
30g glucose

Place the gelatine leaves into cold water to soak for 5 minutes. Heat the water, caster sugar and glucose in a small saucepan until it starts to boil. Remove from heat and let it cool to 70°C. Squeeze excess water from gelatine leaves, place in saucepan and stir until dissolved. Transfer to a bowl and allow to cool slightly before storing in the fridge.


Chocolate Pavlova with Chocolate Mascarpone Mousse – Daring Bakers Challenge June 2010

June 27th, 2010

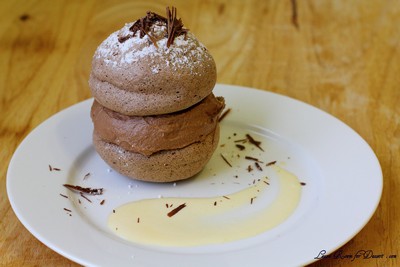
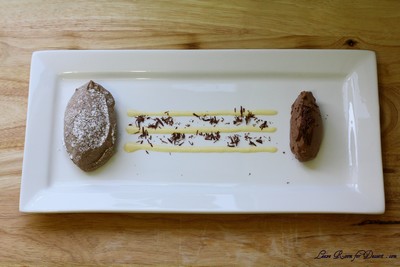
The June 2010 Daring Bakers’ challenge was hosted by Dawn of Doable and Delicious. Dawn challenged the Daring Bakers’ to make Chocolate Pavlovas and Chocolate Mascarpone Mousse. The challenge recipe is based on a recipe from the book Chocolate Epiphany by Francois Payard.

Even though I end up with loads of egg whites after my cooking escapades, I never tend to make meringues out of them. I end up trialling out some macarons and other egg white based goodies like souffles.

I was really excited to try chocolate meringues though and these were a big winner with everyone, especially Nick – who just loved them and wants more (I guess I know what I may be making with any more egg whites).

The mousse was quite nice and a bit rich – I think it would be a great recipe for those who want an eggless mousse.

I decided to make half the mascarpone cream and crème anglaise, as I didn’t think I would need such a large volume, especially considering I had seen most people only do a light drizzle over there meringue and mousse. After plating and taking photos I poured a whole lot over the meringue and mousse as an ice cream substitute with its lovely vanilla flavour (even if I did over cook the crème anglaise – whoops).

What a great challenge (Thanks Dawn!) Even though I had a bit of trouble finding the time, I had no trouble finding people to help eat the dessert.

Chocolate Pavlova with Chocolate Mascarpone Mousse

Recipe Source: Chocolate Epiphany by Francois Payard

Chocolate Meringue (for the chocolate Pavlova):

3 large egg whites
½ cup plus 1 tbsp (110 grams) white granulated sugar
¼ cup (30 grams) confectioner’s (icing) sugar
1/3 cup (30 grams) cocoa powder

Place a rack in the center of the oven and preheat to 200º F (95º C) degrees. Line two baking sheets with silpat or parchment and set aside.

Put the egg whites in a bowl and whip until soft peaks form. Increase speed to high and gradually add granulated sugar about 1 tbsp at a time until stiff peaks form. (The whites should be firm but moist.)

Sift the confectioner’s sugar and cocoa powder over the egg whites and fold the dry ingredients into the white. (This looks like it will not happen. Fold gently and it will eventually come together.)

Fill a pastry bag with the meringue. Pipe the meringue into whatever shapes you desire. Alternatively, you could just free form your shapes and level them a bit with the back of a spoon. (Class made rounds, hearts, diamonds and an attempt at a clover was made!)

Bake for 2-3 hours until the meringues become dry and crisp. Cool and store in an airtight container for up to 3 days.

Chocolate Mascarpone Mousse (for the top of the Pavlova base): (I left out the lemon and orange juice/ Grand Marnier)

1 ½ cups (355 mls) heavy cream (cream with a milk fat content of between 36 and 40 percent)
grated zest of 1 average sized lemon
9 ounces (255 grams) 72% chocolate, chopped
1 2/3 cups (390 mls) mascarpone (we made this for the Tiramisu Daring bakers challenge – see the recipe here)
pinch of nutmeg
2 tbsp (30 mls) Grand Marnier (or orange juice)

Put ½ cup (120 mls) of the heavy cream and the lemon zest in a saucepan over medium high heat. Once warm, add the chocolate and whisk until melted and smooth. Transfer the mixture to a bowl and let sit at room temperature until cool.

Place the mascarpone, the remaining cup of cream and nutmeg in a bowl. Whip on low for a minute until the mascarpone is loose. Add the Grand Marnier and whip on medium speed until it holds soft peaks. (DO NOT OVERBEAT AS THE MASCARPONE WILL BREAK.)

Mix about ¼ of the mascarpone mixture into the chocolate to lighten. Fold in the remaining mascarpone until well incorporated. Fill a pastry bag with the mousse. Again, you could just free form mousse on top of the pavlova.

Mascarpone Cream (for drizzling): ( I made half this quantity)

1 recipe crème anglaise
½ cup (120 mls) mascarpone
2 tbsp (30 mls) Sambucca (optional)
½ cup (120 mls) heavy cream

Prepare the crème anglaise. Slowly whisk in the mascarpone and the Sambucca and let the mixture cool. Put the cream in a bowl and beat with electric mixer until very soft peaks are formed. Fold the cream into the mascarpone mixture.

Crème Anglaise (a component of the Mascarpone Cream above): (I made half this quantity)

1 cup (235 mls) whole milk
1 cup (235 mls) heavy cream
1 vanilla bean, split or 1 tsp pure vanilla extract
6 large egg yolks
6 tbsp (75 grams) sugar

In a bowl, whisk together the egg yolks and sugar until the mixture turns pale yellow.
Combine the milk, cream and vanilla in a saucepan over medium high heat, bringing the mixture to a boil. Take off the heat.

Pour about ½ cup of the hot liquid into the yolk mixture, whisking constantly to keep from making scrambled eggs. Pour the yolk mixture into the pan with the remaining cream mixture and put the heat back on medium. Stir constantly with a wooden spoon until the mixture thickens enough to lightly coat the back of a wooden spoon. DO NOT OVERCOOK.

Remove the mixture from the heat and strain it through a fine mesh sieve into a bowl. Cover and refrigerate until the mixture is thoroughly chilled, about 2 hours or overnight.

Assembly:
Pipe the mousse onto the pavlovas and drizzle with the mascarpone cream over the top. Dust with confectioner’s sugar and fresh fruit if desired.


Gluten Free Carrot, Zucchini and Apple Cake

June 23rd, 2010

When I was asked by Haystac whether I wanted to try out some of the gluten free products by Vitarium, I was excited to work with gluten free flour.

The texture was a lot finer, and to me resembled a something similar to the texture of cornflour. I was given both self raising flour and a packet mix of Chocolate Ripple biscuits to try. I’d like to pass on the Chocolate Ripple biscuit packet mix to someone who would like it (and live in Australia) – so please leave a comment and let me know if you’d like it and why.

Photo from Vitarium website

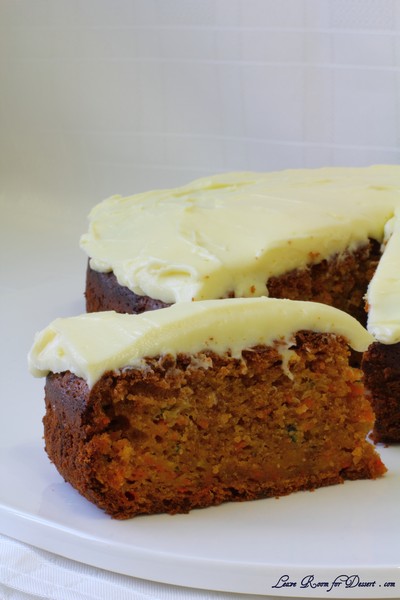
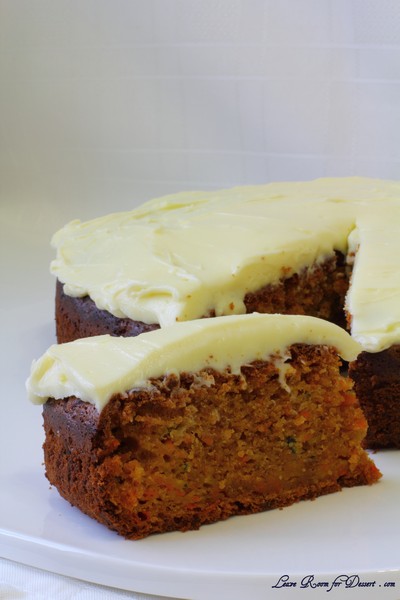
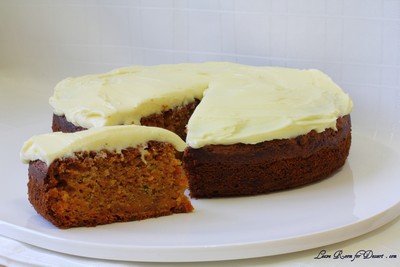
I decided to make something in-between a carrot cake and zucchini cake, even though I’ve never tried a zucchini cake, plus I wanted to add some grated apple too. And what is a carrot cake without the gorgeous icing? (Still a lovely carrot cake 🙂 ) But I decided to add the icing – just because it works so well and everyone loves it 😛

I have just submitted this recipe to the The Great Vitarium Gluten Free Bake Off which has just started and has some amazing prizes – check it out and wish me luck 🙂 I also want to wish all the other contestants luck for this competition, and think it is fantastic there will be such a great new range of recipes for those requiring gluten free diets.

Now, I’d love to have a try with the plain flour…

Gluten Free Carrot, Zucchini and Apple Cake

Recipe by Anita @ Leave Room for Dessert

1 1/2 cups brown sugar
1 cup vegetable oil
4 eggs
2 cups Vitarium gluten free self-raising flour
1 1/2 teaspoons ground cinnamon
1/2 teaspoon ground ginger
230g grated carrot
100g grated zucchini, excess liquid removed
50g grated apple, after excess liquid is removed
2/3 cup walnuts (optional, I didn’t use these)

250g cream cheese, at room temperature
1 cup pure icing sugar, sifted
1 teaspoon vanilla essence

Preheat oven to 160C.

In a large mixer, beat together the oil and brown sugar for 2-3 minutes. Add the eggs one at a time, beating well in between additions. Sift in the flour, cinnamon and ginger and mix for one minute. Mix in the grated carrot, zucchini, apple and walnuts (if using). Pour into a greased and lined 22cm round tin. Cook in preheated oven for 1 hour 20 minutes or until a skewer inserted in the centre comes out clean.

Allow to cool for 10 minutes in the tin, then transfer to a wire rack and allow to cool completely before icing.

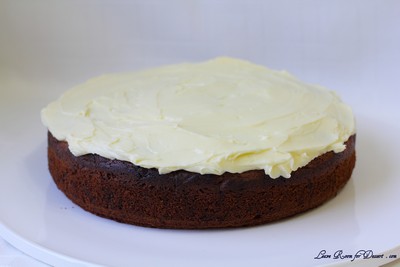
For the icing, beat the cream cheese until light and fluffy. Add the icing sugar in two lots, beating well between additions. Add the vanilla essence and mix to combine. Spread over cooled cake and serve.


Pizza Wheels

June 17th, 2010

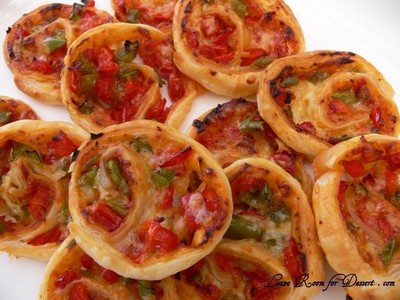
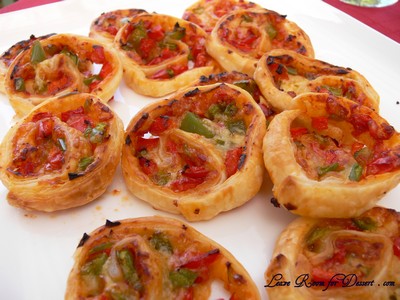
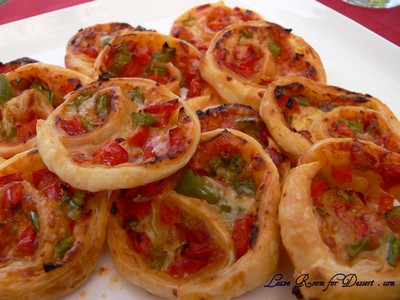
These pizza wheels go so fast at any party we’ve had.

They can be made non-vegetarian by adding some chopped ham or salami.

I love them, and there’s not much more I really have to say about these – except how can you go wrong with a mini “pizza”?

Pizza Wheels

Recipe by Anita @ Leave Room for Dessert

Makes more than 40

4 puff pastry sheets
6 tablespoons tomato paste
1 red capsicum, diced
1 green capsicum, diced
grated cheese

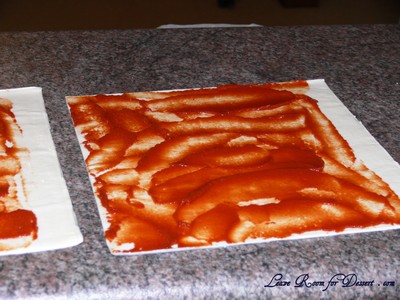
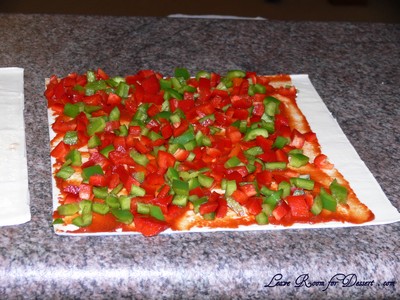
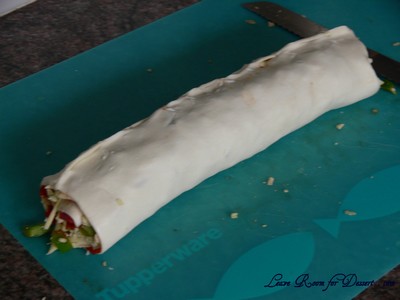
Spread the tomato paste over the puff pastry sheets, leaving a 1.5cm gap from one end. Sprinkle capsicums then cheese over the pastry leaving the gap. Roll the pastry toward the gap and then press the end onto the roll to join the pastry. This can be covered and placed in the refrigerator until needed.

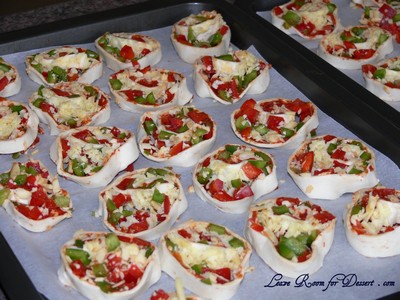
Cut 1cm slices of the roll and place on baking paper on a baking tray. Cook in a moderate oven (180C) for approx 10 minutes or until cheese has melted and pizza wheels have browned. Serve when hot.


Mum’s Trifle

June 5th, 2010

MumsTrifle4

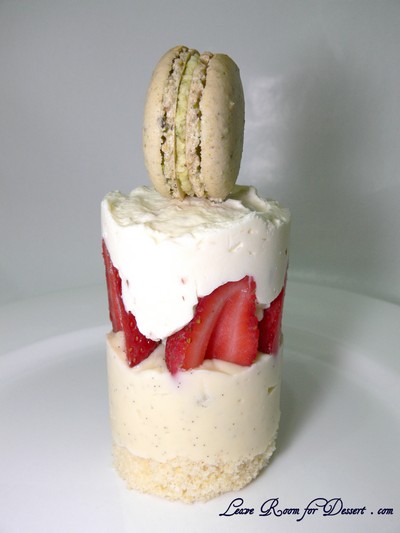
For my Mum’s birthday a couple of months ago, I designed a trifle just for her.

MumsTrifle7

Although I don’t normally make trifles, I’ll make anything that my Mum wants for her birthday. So a trifle once or twice a year is not much to ask or give.

MumsTrifle8

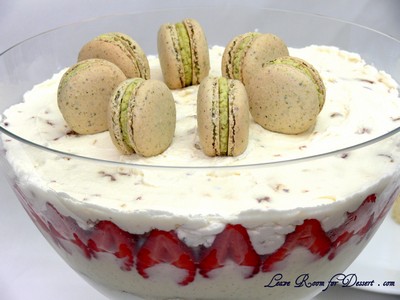
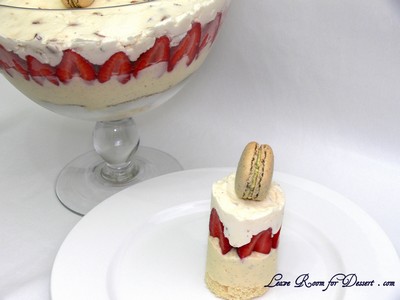
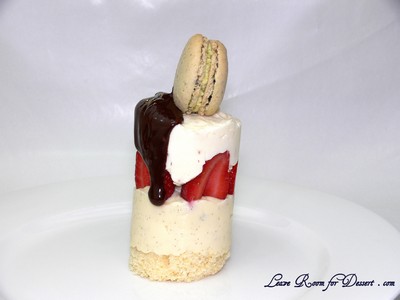
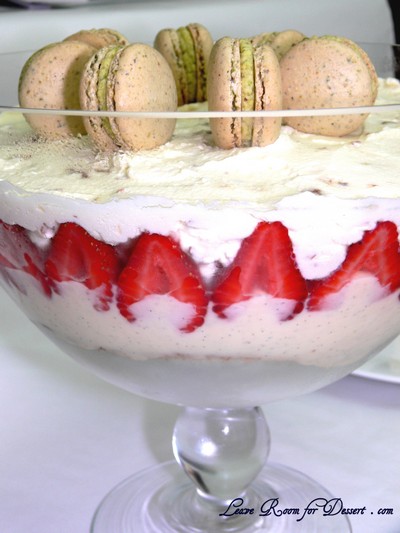
I decided to make the trifle layered and served in a cylindrical shape – making an individual portion and a cuter chic-styled trifle. And what would make a trifle more modern than pretty pistachio macarons!

MumsTrifle1

The individual portion was frozen, and without enough time to allow it to thaw after removal of the acetate, it was eaten frozen – I hear it was lovely frozen. I ate a scoop from the bowl and thought all the flavours worked extremely well together.

Mum’s Trifle

Recipe by Anita @ Leave Room for Dessert

Serves: 10

Vanilla Sponge
4 eggs
150g (1 cup) self raising flour
150g (3/4 cup) caster sugar
40g (1/4 cup) cornflour
1 teaspoon vanilla essence

Custard
4 egg yolks
125g caster sugar
20g cornflour
250ml cream
350ml milk
1 vanilla bean, scraped

2 punnets strawberries, cored and sliced in half

Vienna almond and nougat cream
100g nougat, chopped
150g Vienna almonds, chopped
1 teaspoon vanilla essence
600ml thickened cream
1/4 cup icing sugar mixture

Pistachio macarons, for serving – see my recipe here

Chocolate Sauce
100g dark chocolate
80ml cream
1 tablespoon Kahlua, optional

For the sponge, preheat oven to 180°C. Beat together the eggs and caster sugar for 4 minutes or until light, fluffy and increased in size. Beat in the vanilla essence. Fold in the sifted flour and cornflour. Pour into a baking paper lined tray. Cook for 20-25 minutes or until cooked through. Allow to cool for 10 minutes in the tin and then remove and allow to cool fully on a cooling rack.

For the custard, whisk the yolks, cornflour and caster sugar in a saucepan. Once smooth, whisk in the cream slowly, then the milk. Place mixture on medium heat and cook until the mixture has thickened or starts to boil. Remove from heat and pour into a bowl and let cool slightly. Place cling film over the custard – touching the custard so it prevents a skin forming.

For the Vienna almond and nougat cream, whip the cream with the vanilla and icing sugar mixture until thick peaks are formed. Fold through the chopped Vienna almond and nougat.

For the Chocolate Sauce, heat the cream in saucepan, until it just starts to bubble. Pour the cream over the chopped chocolate. Add the Kahlua or other alcohol at this point, if using. Whisk or stir until smooth. This is best made just before serving.

To assemble:
Cut the sponge base to fit the serving bowl. Alternatively, cut 5cm diameter rounds from the cake (it may need to be cut in half depending on how tall the sponge is). Cut some acetate or projector film into 8-10cm high and approx 17cm wide (or enough to fit around the sponge/5cm cutting circles). Make the acetate into cylinders around the sponge or 5cm rounds and hold in place with sticky tape, with the sponge at the bottom of the cylinder.

If desired, you can brush the sponge with any liqueur you like.

Next, pour the custard on top of the sponge, smooth the top and place in the fridge for 30 minutes. Place any individual portions in the freezer and set until the top of the custard is firm.

Place the cut strawberries around the edge of the glass dish or acetate strips and the remaining ones in the middle.

Cover with Vienna almond, nougat cream. Smooth the top and place in the fridge to set for a few hours before serving. For individual portions, place back in the freezer (otherwise the acetate won’t come off easily).

To serve: Remove acetate from any individual trifles. Place pistachio macarons on top of the trifle and serve with the chocolate sauce in a pourer.

MumsTrifle6


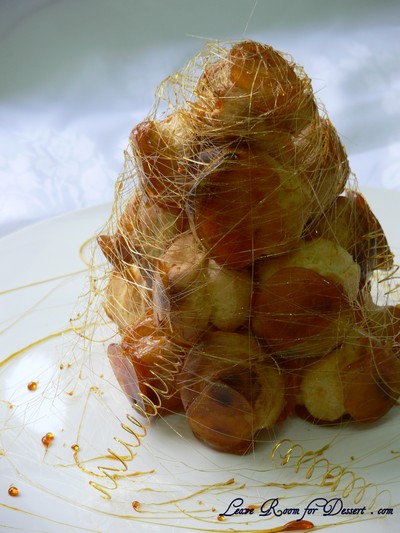
Croquembouche (Piece Montée) – Daring Bakers Challenge May 2010

May 27th, 2010

The May 2010 Daring Bakers’ challenge was hosted by Cat of Little Miss Cupcake. Cat challenged everyone to make a piece montée, or croquembouche, based on recipes from Peter Kump’s Baking School in Manhattan and Nick Malgieri.

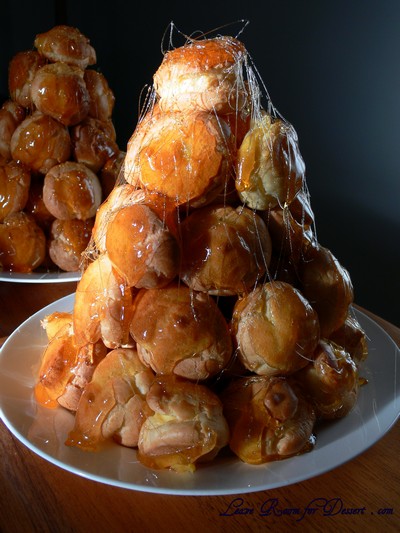
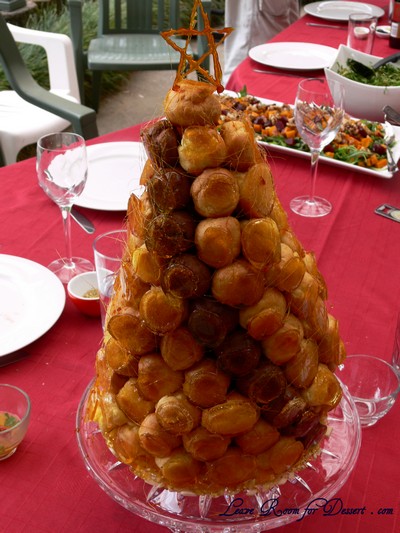
I’ve made two croquembouches’ so far, the original one from Masterchef and the chocolate swirl one, also from MasterChef. So, when I found out this month’s challenge was also a croquembouche I was both a bit indifferent, and also excited.

First of all, the slight disappointment was due to it not being something new. Although the excitement came from knowing how gorgeous the custard filled profiteroles with lovely crunchy toffee are. My family and I cannot resist croquembouche, although the next Christmas or event I make it for, I’ll just be pouring the caramel over the top and not building a cone shaped tower.

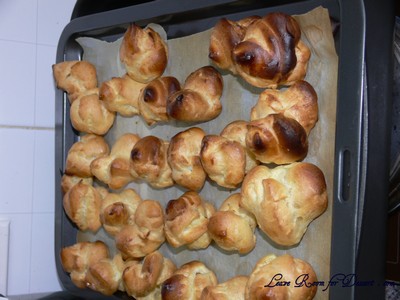
The other excitement came from trying the different recipes, I was hoping for a harder choux pastry, one which was a bit crunchy and kept its shape quite well. I think this choux pastry recipe may have succeeded in this, although I still need to learn my oven better, as they were cooked in 10-15 minutes, almost burning, so I couldn’t leave them in the oven to dry out longer, for fear of losing them.

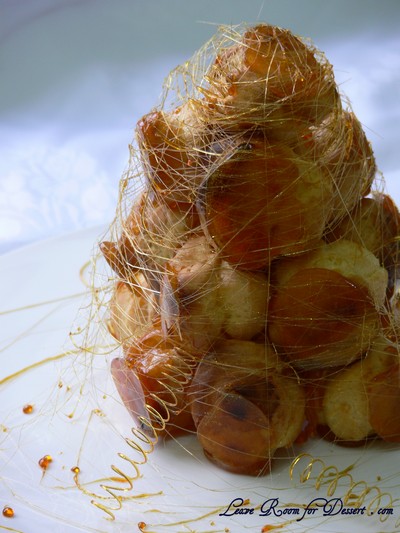
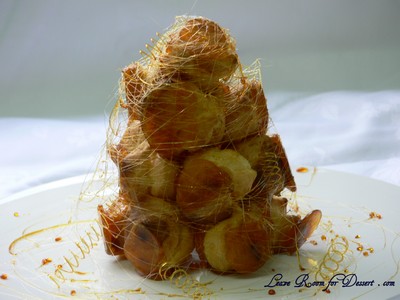
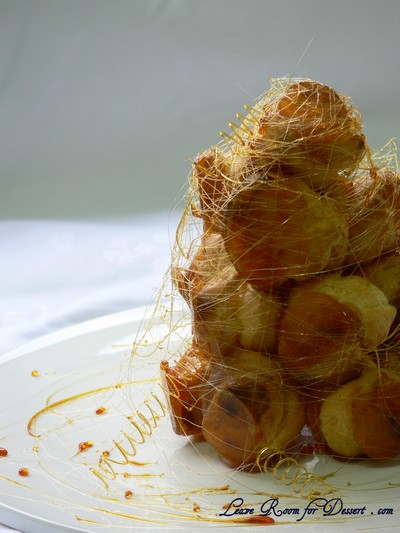
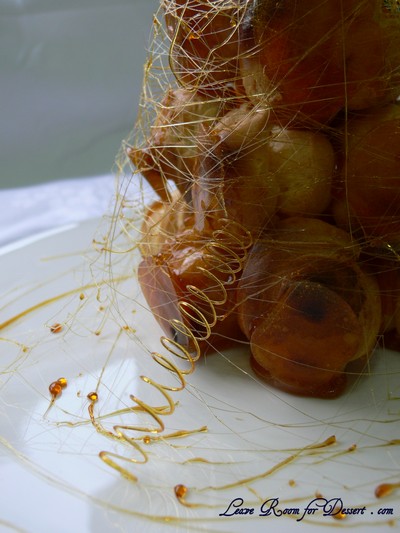
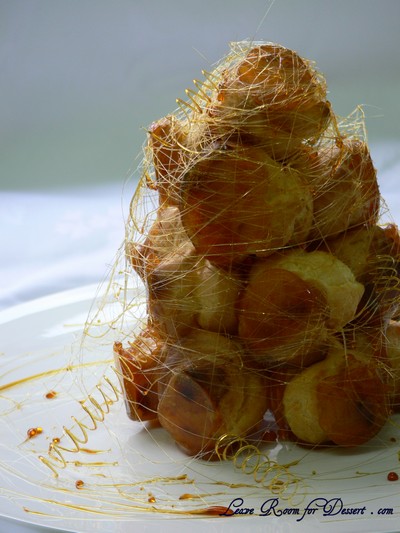
For my own challenge, I decided to try making cute little caramel corkscrews. Using a spoon, I spun the caramel around a clean knife (sharpening) steel. And they worked! I had to keep heating and cooling the caramel though to make it the right consistency – which was quite difficult to figure out.

Unfortunately for the presentation, the lovely caramel strands around the outside started beading within 20 minutes and by the time we ate the croquembouche, a few hours afterwards, there were no strands to be seen. I’m not sure whether this was due to the humidity we had here, or whether the glucose added to caramel contributes to the stability of the caramel.

Overall, I was very excited making this again, and I think it made the perfect quantity (even though people asked – where’s the rest of it?). The different components themselves are relatively easy, and I will consider making it more often, now that I won’t be making trays and trays worth of profiteroles, and a large lasagna dish filled with custard.

Croquembouche (Piece Montée)

Recipe Source: Peter Kump’s Baking School in Manhattan and were originally created by famed pastry chef, Nick Malgieri.

Vanilla Crème Patissiere (Half Batch) [I made a full batch – double this – although I think I could have made 1.5 batches – three times this]
1 cup (225 ml.) whole milk
2 Tbsp. cornstarch / cornflour
6 Tbsp. (100 g.) sugar – I used caster sugar
1 large egg
2 large egg yolks
2 Tbsp. (30 g.) unsalted butter
1 Tsp. Vanilla

Dissolve cornstarch in ¼ cup of milk. Combine the remaining milk with the sugar in a saucepan; bring to boil; remove from heat.

Beat the whole egg, then the yolks into the cornstarch mixture. Pour 1/3 of boiling milk into the egg mixture, whisking constantly so that the eggs do not begin to cook.

Return the remaining milk to boil. Pour in the hot egg mixture in a stream, continuing whisking.

Continue whisking (this is important – you do not want the eggs to solidify/cook) until the cream thickens and comes to a boil. Remove from heat and beat in the butter and vanilla.

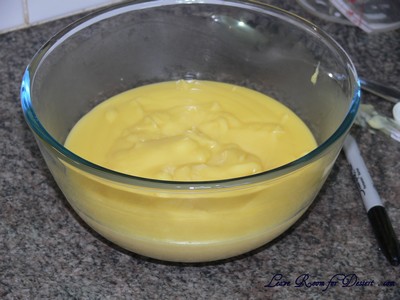
Pour cream [Crème Patissiere] into a stainless steel/ceramic bowl. Press plastic wrap firmly against the surface. Chill immediately and until ready to use.

Pate a Choux (Yield: About 28) [Mine made more than 50]
¾ cup (175 ml.) water
6 Tbsp. (85 g.) unsalted butter
¼ Tsp. salt
1 Tbsp. sugar
1 cup (125 g.) all-purpose flour
4 large eggs

For Egg Wash: 1 egg and pinch of salt

Pre-heat oven to 425◦F/220◦C degrees. Line two baking sheets with parchment paper.

Preparing batter:
Combine water, butter, salt and sugar in a saucepan over medium heat. Bring to a boil and stir occasionally. At boil, remove from heat and sift in the flour, stirring to combine completely.

Return to heat and cook, stirring constantly until the batter dries slightly and begins to pull away from the sides of the pan.

Transfer to a bowl and stir with a wooden spoon 1 minute to cool slightly. [A KitchenAid works so well for this]

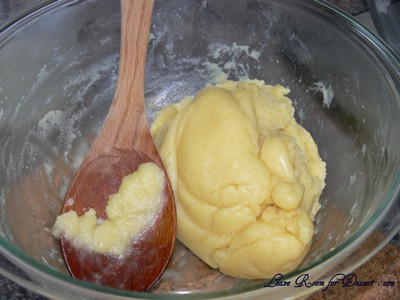
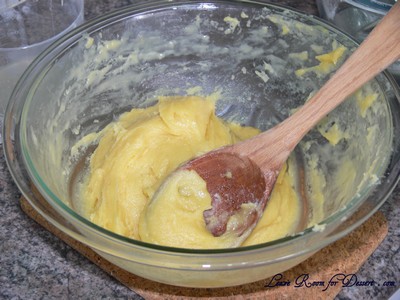
Add 1 egg. The batter will appear loose and shiny.

After mixing in the first egg

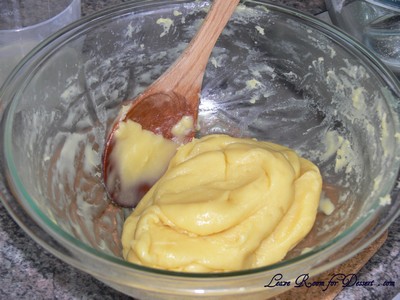
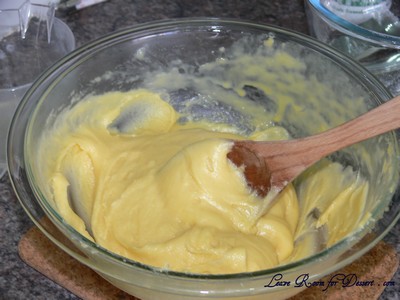
As you stir, the batter will become dry-looking like lightly buttered mashed potatoes.

It is at this point that you will add in the next egg. Repeat until you have incorporated all the eggs.

After mixing in the second egg

After mixing in the third egg

After the fourth and final egg

Piping:
Transfer batter to a pastry bag fitted with a large open tip (I piped directly from the bag opening without a tip). Pipe choux about 1 inch-part in the baking sheets. Choux should be about 1 inch high about 1 inch wide.

Using a clean finger dipped in hot water, gently press down on any tips that have formed on the top of choux when piping. You want them to retain their ball shape, but be smoothly curved on top.

Brush tops with egg wash (1 egg lightly beaten with pinch of salt).

Baking:
Bake the choux at 425◦F/220◦C degrees until well-puffed and turning lightly golden in color, about 10 minutes. [mine cooked in 15 minutes total]

Lower the temperature to 350◦F/180◦C degrees and continue baking until well-colored and dry, about 20 minutes more. Remove to a rack and cool.

Can be stored in a airtight box overnight.

Filling:
When you are ready to assemble your piece montée, using a plain pastry tip, pierce the bottom of each choux. Fill the choux with pastry cream using either the same tip or a star tip, and place on a paper-lined sheet. Choux can be refrigerated briefly at this point while you make your glaze.

Use one of these to top your choux and assemble your piece montée.

Hard Caramel Glaze: [I needed 1.5 – 2 times this recipe, as I stirred it too early]
1 cup (225 g.) sugar
½ teaspoon lemon juice

Combine sugar and lemon juice in a saucepan with a metal kitchen spoon stirring until the sugar resembles wet sand. Place on medium heat; heat without stirring until sugar starts to melt around the sides of the pan and the center begins to smoke. Begin to stir sugar. Continue heating, stirring occasionally until the sugar is a clear, amber color. Remove from heat immediately; place bottom of pan in ice water to stop the cooking. Use immediately.

Assembly of your Piece Montée:
You may want to lay out your unfilled, unglazed choux in a practice design to get a feel for how to assemble the final dessert. For example, if making a conical shape, trace a circle (no bigger than 8 inches) on a piece of parchment to use as a pattern. Then take some of the larger choux and assemble them in the circle for the bottom layer. Practice seeing which pieces fit together best.

Once you are ready to assemble your piece montée, dip the top of each choux in your glaze (careful it may be still hot!), and start assembling on your cake board/plate/sheet. Continue dipping and adding choux in levels using the glaze to hold them together as you build up.

When you have finished the design of your piece montée, you may drizzle with remaining glaze or use ribbons, sugar cookie cut-outs, almonds, flowers, etc. to decorate. Have fun and enjoy! Bon appétit!


Vegetable Rolls

May 20th, 2010

VegetableRolls1

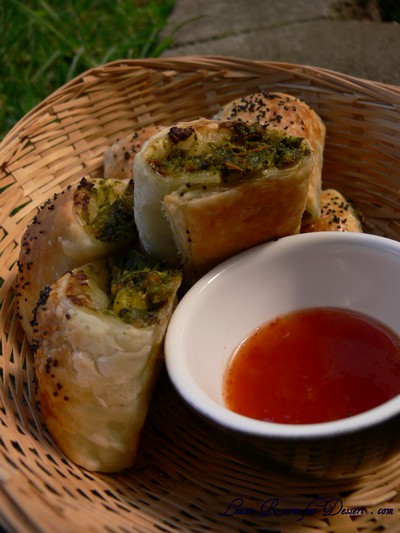
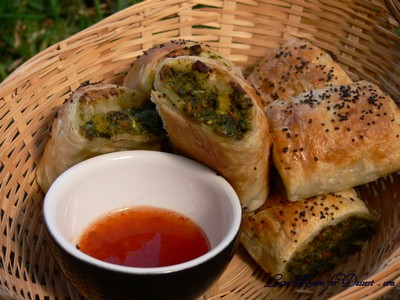
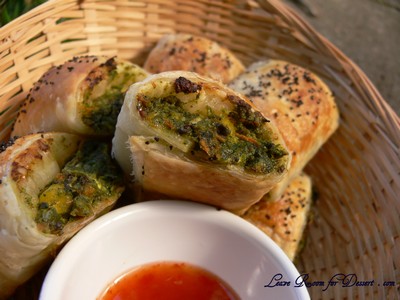
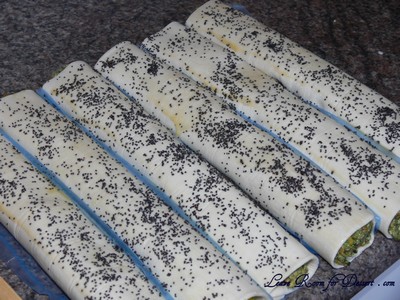
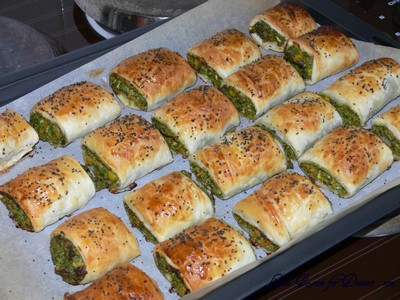
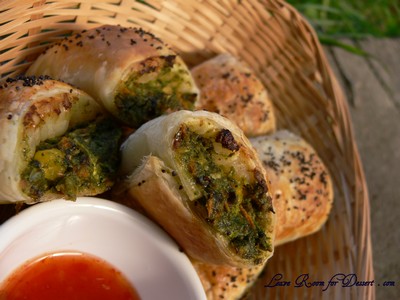
Now, I don’t suppose you could call anything with puff pastry healthy. Although, you could say this is healthier than the normal sausage roll. These vegie rolls are packed full of vegetables, most of which you might not be able to guess while eating them. So, unsuspecting kids (and adults) will get a vegie fill when they go for these rolls at a party.

VegetableRolls04

I decided to make this recipe combining many vegetables I had on hand, so I’m sure it can be altered to what you have lying around.

VegetableRolls07

Vegetables Rolls

Recipe by Anita @ Leave Room for Dessert

Makes: 50

250g spinach, fresh or frozen (thawed and water pressed out)
2 large carrots (300g), grated
1 zucchini (200g), grated
12 mushrooms (200g), grated
4 cloves garlic, crushed
200g corn kernels, drained
1 egg, lightly beaten
250g ricotta
1/4 cup sweet chili sauce
1/2 cup bread crumbs
5 sheets puff pastry

1 egg beaten for glazing (or milk)
poppy seeds for sprinkling on top

Mix all the vegetables in a large bowl. Add the ricotta, egg and sweet chili sauce, mix to combine. Add the breadcrumbs and mix until fully combined.

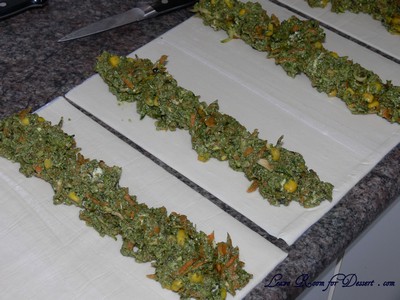
Cut the pastry sheets in half. Spoon equal amounts of the vegetable filling down the middle or side of the pastry sheet – to form an even roll. Place a small amount of egg wash down the length of the puff pastry. Roll the pastry up firmly and sealing with a little pinch on the edge. Brush some egg wash over the top and sprinkle with poppy seeds.

VegetableRolls01

VegetableRolls02

At this stage, either freeze as they are (with some baking paper or puff pastry plastic between the rolls) or, to eat straight away – preheat oven to 180°C. Cut each roll into 5 equal portions. Place on a baking paper lined tray and place in the preheated oven for 15 minutes or until they are browned and cooked through. Serve with sweet chili sauce.

For Frozen rolls, allow to thaw enough to cut through with a knife. Cook in a preheated oven (180°C) for 20 minutes or longer, depending on how much they have thawed.

VegetableRolls03

VegetableRolls06


Pistachio Macarons

May 9th, 2010

PistachioMacaron03

Happy Mother’s Day!

PistachioMacaron07

Even though these lovely pistachio macarons weren’t made for Mother’s Day – they were made for my Mum – on her birthday. They were the decorations for the dessert I made for her (a while ago now), I hope to post it soon. For the main meal on her birthday, we made the most awesome beef bourguignon pie – using Julia Child’s recipe (here is the recipe, if you don’t have the book). It was AMAZING! It took a while to prepare, but was worth it – it doesn’t get any better.
PistachioMacaron01

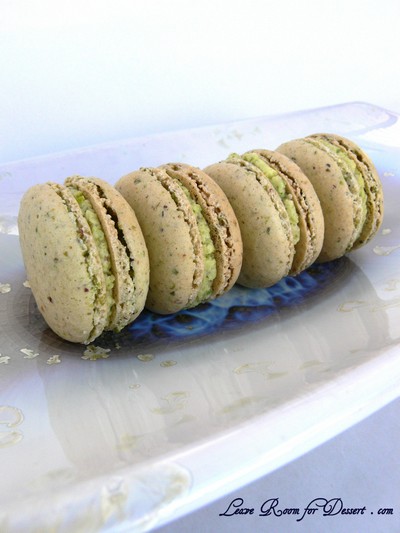
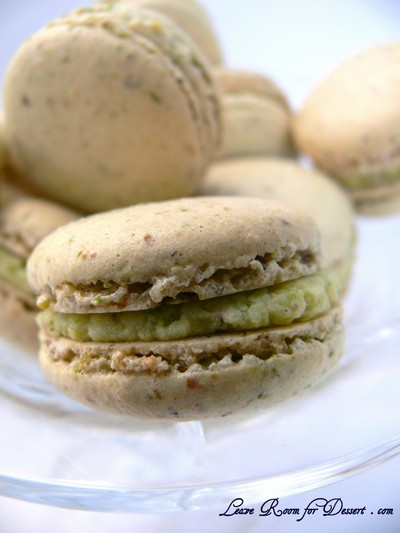
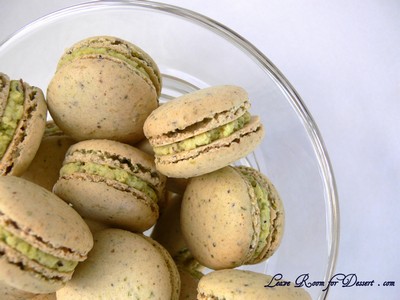
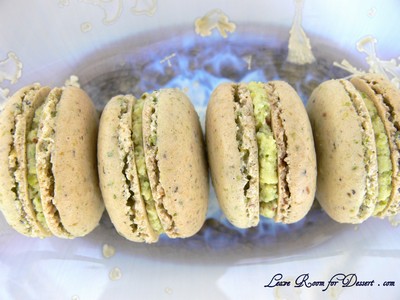
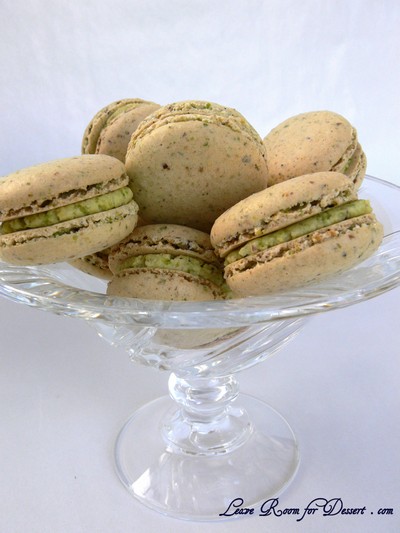
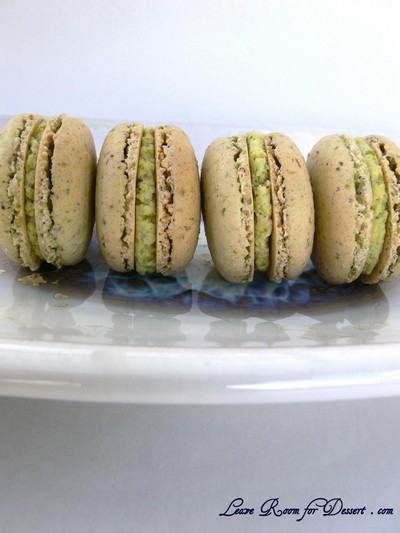
These home made pistachio macarons turned out just how I wanted. Cute little feet (the frill at the base of the macaron), slightly crisp on the outside, a lovely chewy centre and a wonderfully tasty pistachio flavour.

PistachioMacaron05

These would be perfect for a kitchen tea, high tea, baby shower or petit fours after a meal.

PistachioMacaron06

Pistachio Macarons

Recipe by Anita @ Leave Room for Dessert

Makes 46 sandwiched macarons

120g egg whites (aged for a day or two – covered in the fridge then brought to room temperature, or left at room temperature if the weather’s cool)
90g caster sugar
220g pure icing sugar
80g almond meal
80g pistachios

Pistachio butter cream
80g butter, at room temperature
160g icing sugar
50g pistachio

Process the icing sugar, pistachios and almond meal in a food processor until very finely ground, like dust. Sift and set aside.

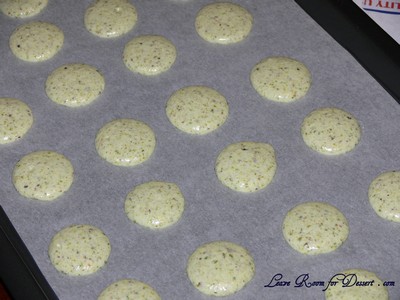
Beat egg whites until frothy, add the caster sugar whilst continuing to beat the egg whites on high until it forms a glossy thick meringue. Beat and fold the icing sugar and nut mixture into the meringue until the mixture flows and when the mixture is piped, any peaks sink back after a few minutes. Pipe 3-4cm circles on lined baking trays. Leave at room temperature for 30 minutes or more to form a skin.

PistachioMacaron02

Preheat oven to 150°C and cook macarons for 10 minutes or until slightly coloured, crisp on the outside and chewy on the inside. Allow to cool and then fill with the pistachio butter cream or another filling.

For the pistachio butter cream, cream the butter until light and fluffy. Process the pistachios with the icing sugar until finely ground. Beat the pistachio sugar into the butter in batches. When all the pistachio sugar is incorporated it is ready to fill the macarons. If it isn’t spreadable, add a touch of milk and mix until smooth.

PistachioMacaron04


Vanilla Panna Cotta with Pomegranate and Pomegranate Syrup

May 1st, 2010

PannacottaPomegranate09

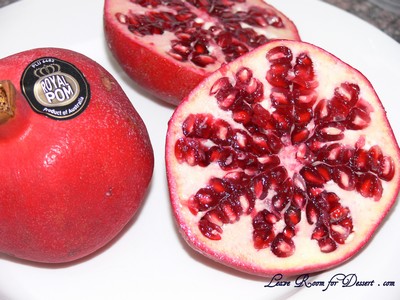
After being sent two lovely Royal Pom pomegranates from Catherine at Wordstom, I decided to try my hand (for a third time) at making a vanilla panna cotta with pomegranate, pomegranate syrup and lavender honey similar to the one served at Jonah’s at Whale Beach (I tried it at Taste of Sydney earlier this year – lovely!).

PannacottaPomegranate10

The Royal Pom pomegranates I was sent are grown in Australia, and the distributor Perfection Fresh, is Australian owned. Supporting Australian grown and owned produce and businesses is always a high priority. I also found out from the info I was sent that you can freeze the pomegranate arils for a year – so I’ve got some in the freezer, so we’ll see how they go.

With their lovely burst of flavour, you can see why I’ve already used pomegranates in this herb and fruit chicken dish.

PannacottaPomegranate04

Now, I mentioned this was my third time at trying to make this dessert – well, that’s because I thought I could make my own moulds for the panna cotta. And I couldn’t.

I have previously, successfully made moulds from baking paper, which support chocolate, and using acetate – which supports mousse. Although the panna cotta mix is too liquid – if there is a hole at the bottom of the mould, it leaks out. If you manage to twist the acetate in a way that there is no hole, it will leak into every spot possible and won’t come off easily either…

PannacottaPomegranate12

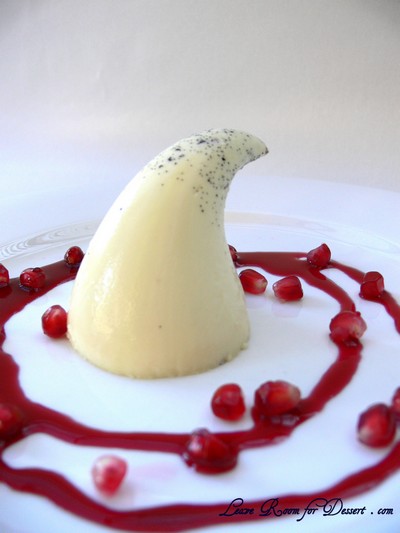
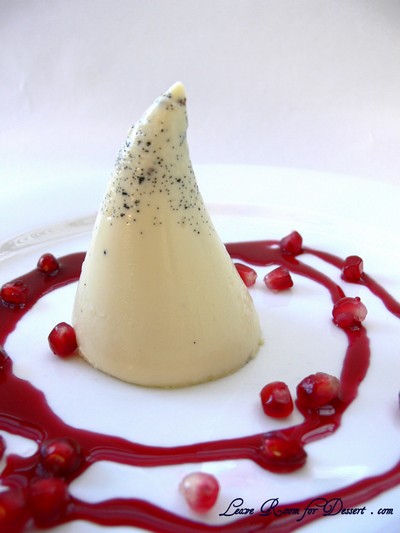
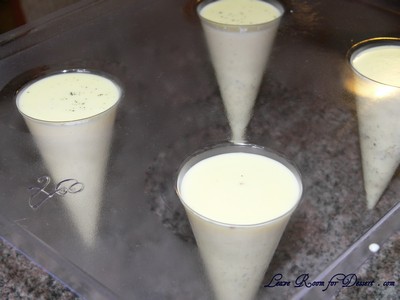
So I went and bought some cone moulds and although they certainly held the liquid, the panna cotta still stuck to the mould and needed a knife and a bit of patience for it to finally come out.

PannacottaPomegranate11

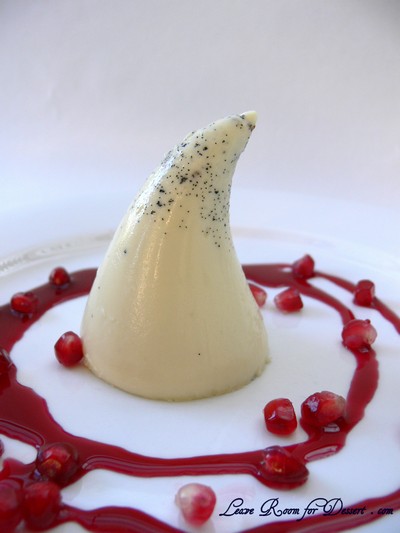
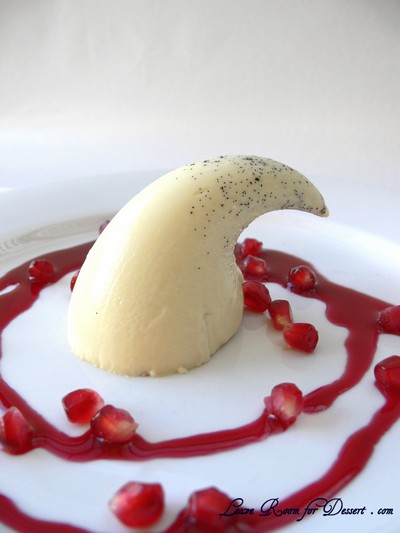
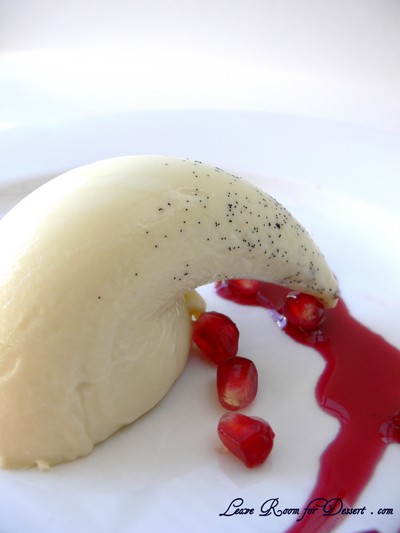
I also needed Nick’s help in holding the panna cotta upwards, as the cone was either the wrong shape (too high), or I needed a touch more gelatine for the liquid I had used (or I should have left it longer – as ones that were taken out the next day stood up a lot better). Either way – the vanilla panna cotta tasted lovely and went very well with the burst of flavour from the pomegranate arils, and the pomegranate syrup. (Can you believe I had no honey in the house! – this would have worked very nicely with the rest of the dessert).

PannacottaPomegranate01

Vanilla Panna Cotta with Pomegranate and Pomegranate Syrup

Recipe by Anita @ Leave Room for Dessert
Inspiration: the dessert from Jonah’s at Whale Beach

Serves: 6-8

600ml cream
200ml milk
1 vanilla bean, scraped
3 titanium strength gelatine leaves*
Oil for greasing

½ pomegranate, juiced [approx 75ml] (with a normal citrus juicer – wear an apron)
25g caster sugar

½ pomegranate, seeds/arils to serve
Honey or lavender infused honey, to serve

* the gelatine leaves I was using were titanium strength (5g each) – the packet said 1 sheet will set 250ml liquid (the same as 1 teaspoon of gelatine). As far as I know, 4 gold strength gelatine leaves set 250ml – you may need 12 gold strength gelatine leaves for this recipe. If you aren’t using a difficult mould like I did – less gelatine can be used (maybe 2 sheets) as this will produce a softer panna cotta.

Soak the gelatine leaves in water for 5 minutes, or until soft.

Place the cream, milk, vanilla bean seeds and vanilla bean in a saucepan and bring almost to the boil. Remove from heat. Whisk in the gelatine leaves until dissolved, then pour into a large bowl and stir to remove heat. Spray any moulds, that you want the panna cotta to come out of, with a bit of oil (if you are pouring into a glass, no oil is needed). Allow mixture to sit at room temperature for 30 minutes, stirring occasionally, to reduce the heat before pouring into moulds. Allow to set for a few hours or overnight in the fridge.

PannacottaPomegranate07

For the pomegranate syrup, mix pomegranate juice and sugar in a saucepan over medium/high heat. Reduce to half the volume or until at a flavour you are happy with (if left too long it will start to caramelise).

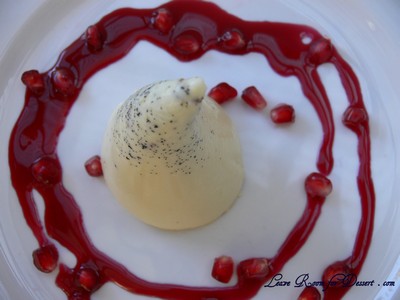
To serve, remove panna cotta from mould in the middle of a plate. Drizzle the pomegranate syrup around the panna cotta and scatter pomegranate arils. (Honey or lavendar infused honey can also be drizzled around the panna cotta).

PannacottaPomegranate02