Sandie of the lovely blog, Crumbs of Love, was our November hostess. Sandie challenged us to make a traditional Italian dessert, along with its American version – Sfogliatelle (or better known in the US – lobster tails!) The flakey, 1000 layers of super thin dough, shaped into a horn and filled with a scrumptious filling. Così buono!
We were given a couple of choices this month for our challenge, and I chose the first one mentioned, Sfogliatelle Ricci (although after trouble with the pastry, I wish I had gone with the Sfogliatelle Frolle. Sandie mentions this recipe is a tender pastry, made with dough similar to pie crust (and much easier to make). Whereas the one I made was quite crispy indeed.
I enjoyed getting in and making some fresh ricotta, even though I found the lemon juice was not enough to make it curdle. Perhaps my lemon was not acidic enough? I recall once before I had tried making ricotta after being told how easy it was. I added the lemon juice, and very fine curds appeared. The website I had used said fine curds would make a lighter ricotta, although I tried to put it through my cheesecloth and there really wasn’t anything left. I searched troubleshooting for ricotta making, as some websites didn’t say to boil it, they said just to 94C, and others said to whisk, whereas some said to just let it sit. Well, it turns out that after boiling and whisking madly for this challenge, I looked up a youtube video and figured the only way I could save all this milk and cream was to start adding more acid. Two extra tablespoons of lemon juice and still nothing was happening. About 3 or 4 tablespoons of white vinegar, and I had curds! Very happy and now I know I can make ricotta without any hassle.
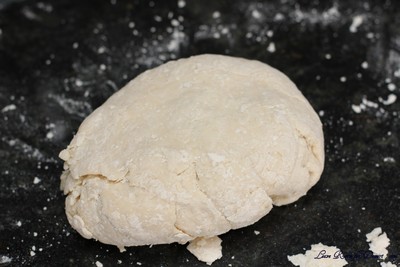
Then came the dough for this recipe. I tried hard not to add much more water than the recipe said, and ended up with a very solid dough. It was super hard for me to roll thin enough to fit into my pasta maker… When it came to the second round of rolling, I waited for Nick to return home, so I didn’t have to roll it.
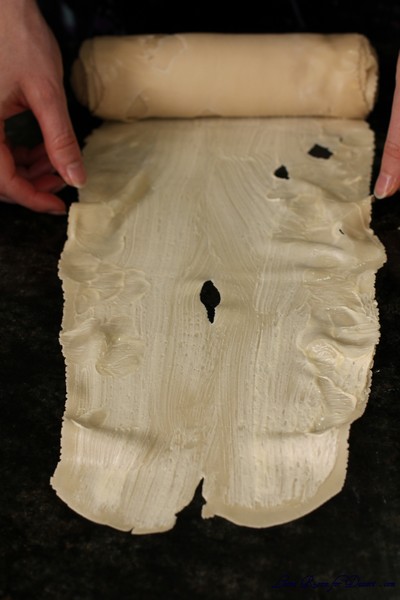
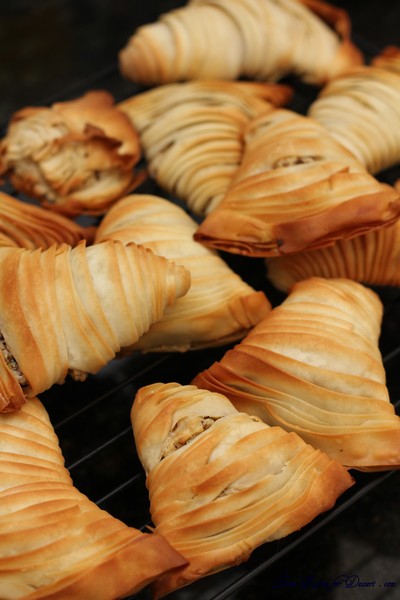
When adding the lard/butter mix onto the pastry, I couldn’t add more than a smear, and ended up with a lot left over. My pastry tore very easily when I tried to stretch it, but I continued on. To fill the pastries, I enlisted Nick’s help again to do the piping whilst I held the pastries. Once out of the oven they were lovely – very crispy (some said a little too crispy).
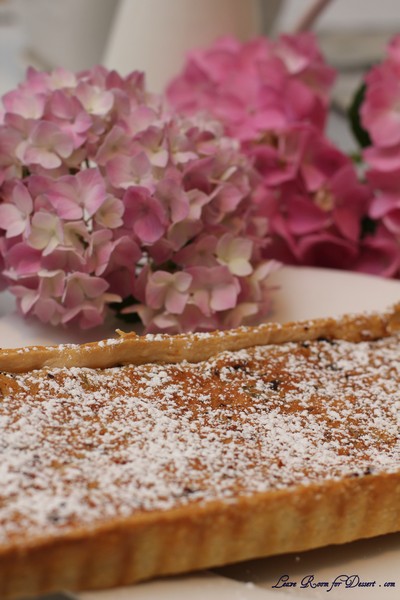
I had left over filling, which I put into a pie dish lined with shortcrust pastry, it was lovely and made the filling stand out a little more.
What a challenge! I’m very happy to have completed it in time before my bub arrives.
Best wishes
Anita
Recipe sources:
The pastry dough recipe is from Great Italian Desserts by Nick Malgieri. Unfortunately this book is out of print but you can still find used copies online or if your lucky, your local library. The Ricotta Cheese recipe is from Luscious Creamy Desserts by Lori Longbotham.
Fresh Ricotta Cheese
(makes 2 cups)
[Anita’s notes: I found once I had added the lemon juice, the curds were extremely small. I added about 2 more tablespoons of lemon juice and then about 3 tablespoons or more of white vinegar to make the curds really appear]
Servings: Makes 2 cups
8 cups (2 litres) whole milk (or goats milk)
1 cup (250 ml) heavy whipping cream (about 35%)
1/2 teaspoon (3 gm) salt
3 tablespoons (45 ml) fresh lemon juice – see my note above…
1. Line a large colander or strainer with 2 layers of lightly dampened cheesecloth over a large glass; set aside.
2. Pour the whole milk, heavy cream and salt into a large pot and bring to a boil over medium heat, whisking occasionally. Reduce the heat, add the fresh lemon juice and stir/whisk continuously for 2-3 minutes. The mixture will curdle, which is exactly what you want it to do. Pour this into the cheesecloth lined strainer and let it drain for about 1 hour or until it comes to room temperature. At this point you can scrape the ricotta from the cheesecloth into a container and refrigerate for up to 2 days.
3. The liquid in the bowl is the whey, a very nutritious and tasty leftover byproduct from making cheese. It is excellent to use instead of water when baking bread, or added to soup stock. I love the stuff and never discard it. Here is an excellent article on the wonders of whey!
Semolina-Ricotta Filling
This recipe is used for both the Ricci and the Frolle versions
[Anita’s notes: This filling was more than enough for the pastry, maybe only half was needed? I used the remainder for a tart lined with bought shortcurst pastry. I didn’t use the lemon flavours, and instead used 50g chopped dark chocolate, and 30g pistachios]
1 cup (250 ml) milk
1/2 cup (120 ml) (4 oz) (115 gm) granulated sugar
2/3 cup (160 ml) (4 oz) (115 gm) fine semolina or cream of wheat (I have tried both and personally like the semolina version)
1 1/2 cups (360 ml) (13-1/4 oz) (375 gm) whole milk ricotta, preferably fresh (see above)
2 large egg yolks
2 teaspoons (10 ml) pure vanilla extract (or the seeds of one pod and 1 teaspoon of extract)
1/4 teaspoon (1 gm) ground cinnamon
1/3 cup (80 ml) (2 oz) (60 gm) candied orange peel (commercial or home-made)
zest of 1 lemon
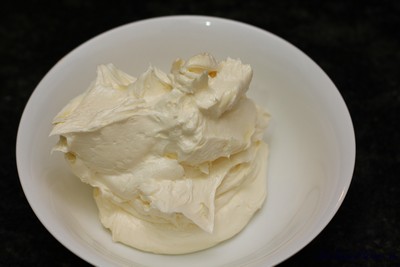
Combine the milk and the sugar in a medium saucepan. Bring to a boil, then lower the heat and slowly add the semolina (or cream of wheat), whisking quickly as to avoid any lumps. Cook, stirring often, until the mixture is smooth and thick, about 2 minutes. Spread the mixture onto a lined baking sheet, about 1/2 inch (15 mm), to cool. When cool, break into pieces and place into the bowl of your stand mixer, fitted with the paddle attachment (or a food processor), and add the ricotta cheese, egg yolks, vanilla and cinnamon. Beat until very smooth and creamy. Stir in the candied orange peel and lemon zest. (Maybe even some mini chocolate chips? Or pistachios?? mmmm…I can’t wait to see what you come up with)
Scrape into a container, place plastic wrap directly onto the surface and refrigerate until needed (up to 3 days).
Sfogliatelle Ricci
Servings: 14-18 pastries
[Anita’s notes: I used only half the lard/butter mix and thought this was more than enough.]
You will need a large/long workspace for this. I used my dining room table for this though I am sure someone will be more creative with limited space!
Dough
3 cups (750 ml) (15 oz) (420 gm) all-purpose (plain) flour
teaspoon (6 gm) salt
3/4 cup (180 ml) warm water (about 100°F/38°C)
4 oz (115 gm) lard (I used Crisco butter flavored shortening)
1/2 cup (1 stick/4 oz) (115 gm) unsalted butter, softened
Semolina-ricotta filling (see above)
1. Combine the flour and salt in a large mixing bowl and stir in the water, or use your standing mixer with the paddle attachment. The dough will be very dry. If you feel absolutely compelled, add an extra teaspoon of water but it is supposed to be very dry. Turn this out onto a clean work surface and knead the dough together, bringing in all the dry bits. At this point get your pasta roller out and ready. Roll out the dough to about 1/3 inch (10 mm) and pass through your pasta machine at the widest setting. I find it much easier to cut my dough in half and work 1/2 at a time for this step. Fold the dough in half after each pass also change the direction of the dough occasionally. After about 15 passes the dough should be very smooth. Knead the dough back into a ball and wrap in plastic wrap. Refrigerate and rest the dough for at 2 hours, or overnight.
2. Beat the lard/shortening and butter together in your mixing bowl until very fluffy. Make sure it is thoroughly combined. Place into a bowl and set on the workspace in easy reaching distance.
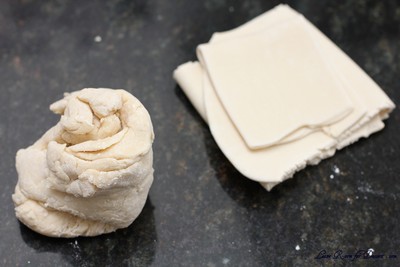
3. Remove the dough from the refrigerator and divide it into 4 equal pieces. Working with one piece of dough at a time (cover the other pieces with a towel or plastic wrap), lightly flour a piece pass it through the pasta roller set at the widest setting. Try to get the dough as even as possible, your goal is an even rectangle strip, about 4 inches (10 cm) in width. If needed, fold it over on itself a few times until you get an even strip. Once even, pass the dough through every setting, ending with the highest (mine is 7)
4. You should end up with a long 4 inch (10 cm) wide strip. Repeat with the other three remaining pieces of dough.
5. *For my own ease of use I made my own rolling pin contraption like you can see on many instructional videos. I turned 2 bowls upside down and placed them on my table where I was planning to work. I then took a rolling pin (with handles, not French) and taped the handles to the bowls. Every time that a piece of dough is finished and ready I lightly floured the dough and rolled it up onto the rolling pin. When all 4 pieces of dough were finished it made it much easier to pull out a section at a time to stretch the dough. If you are clumsy like me you might like to try this too!
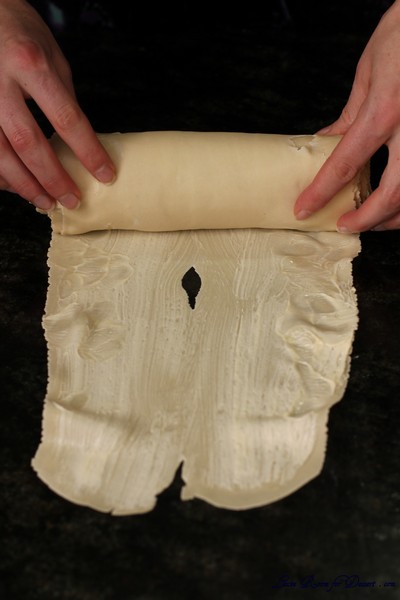
6. Place one piece of a strip on you clean work surface and paint (or smear) it liberally with the lard/butter mixture. I do about a 8 inch (20 cm) section at a time. Gently pull the sides of the dough and stretch it, starting from the middle and going out, until it is about 8 or 9 inches (20 or 23 cm) in width. Begin from the short end and start rolling the dough into a very tight roll. When you start to reach the end of your stretched section, stop and liberally grease up another section, stretching and rolling until all the dough is finished. When one strip of dough is finished, overlap the end of one to the beginning of the other; continue to pull, stretch and roll up.
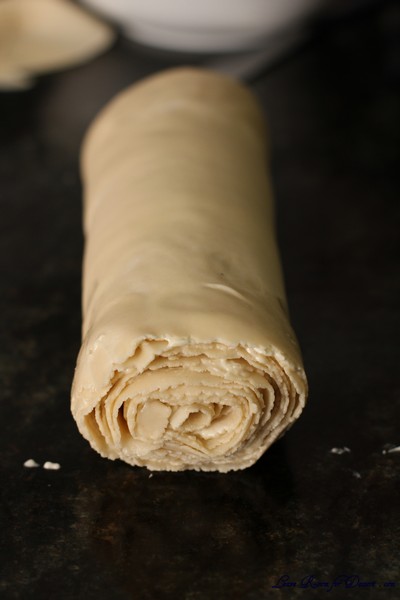
7. Spread the lard/butter mixture over the entire finished log and starting in the middle gently run the hands down the length to extend the length another inch (30 mm) or so. This will release any air pockets and tighten the roll. Your finished roll should be approximately 10 or 11 inches (25 or 28 cm).
8. Wrap in plastic wrap and chill for at least 2 hours or overnight. The dough may be frozen for up to 3 months, at this time. Defrost it in the refrigerator overnight before using.
9. Preheat your oven to moderately hot 400°F/200°C/gas mark 6
10. Line 2 baking sheets with parchment.
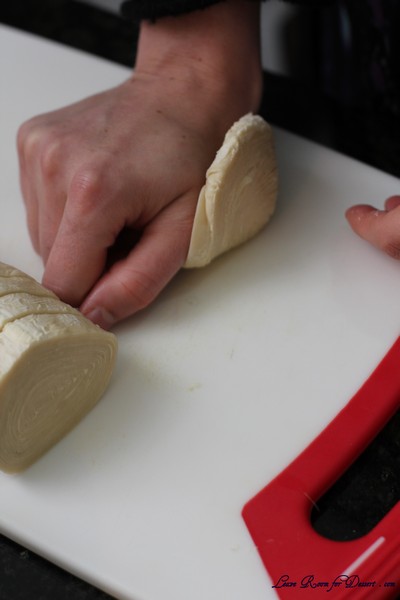
11. Remove the dough from the refrigerator, unwrap, and place on a cutting board. Slice off about an inch (30 mm) from each end so that they are straight and even. Cut the roll into 1/2 inch (15 mm) slices. Put the semolina-ricotta mixture into a pastry bag with a 3/4 inch (20 mm) opening (A disposable pastry bag or even a ziploc bag with the corner cut off is fine).
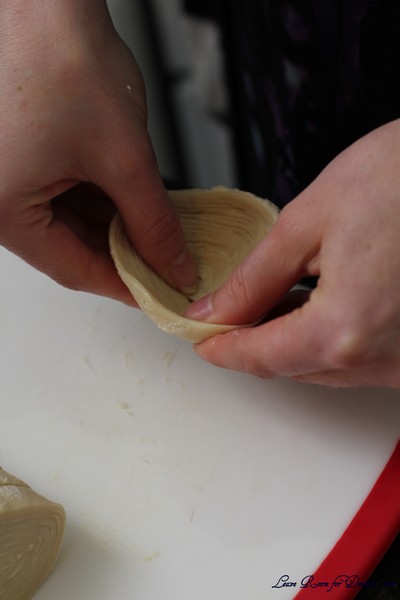
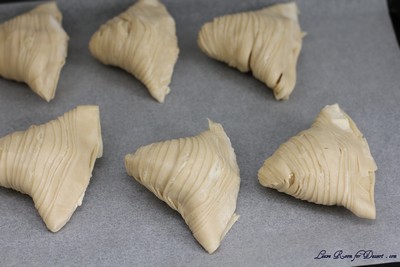
12. Take one slice of dough and place it on your workplace. With the heel of your hand, push out from the center in one direction. Rotate the dough and do this in all four directions. This forms the dough and opens up the layers. Pick up the piece and insert your thumbs on the inside with your forefingers on the outside meanwhile gently stretch the center to make it more into the shape of a cone. You don’t want the layers to actually separate. Holding the cone in one hand, squeeze some of the filling into the cavity so it is full. Lightly push the opening closed. You do not have to seal the opening as the filling is too thick to ooze out during baking.
13. Place onto the prepared baking sheet and very lightly brush the outside of each completed pastry with the lard/butter mixture. Bake them in a preheated moderately hot 400°F/200°C/gas mark 6 oven for about 20 to 25 minutes or until they are a deep golden brown.
14. Remove from the oven and cool on a rack. These are best served warm with a sprinkling of confectioners’ sugar on the day they are made. To reheat them, just place them in a moderate 350°F/180°C/gas mark 4 oven for about 5 minutes.




Wow what a professional and delicious looking dessert. Very impressive with all those flaky layers
Wow! That looks so good.
That looks amazing!
Lovely hydrangeas! This does sound like a challenging recipe. It’s interesting to hear how to troubleshoot ricotta.