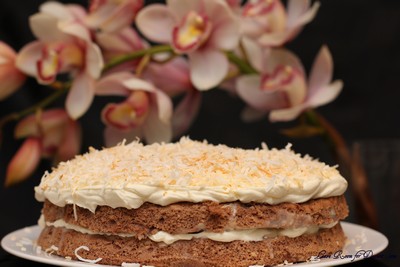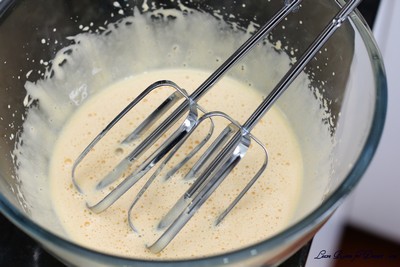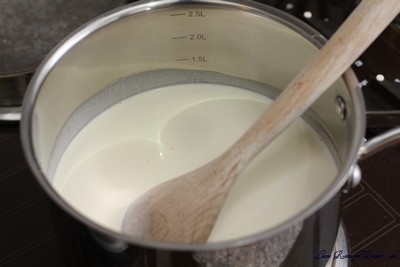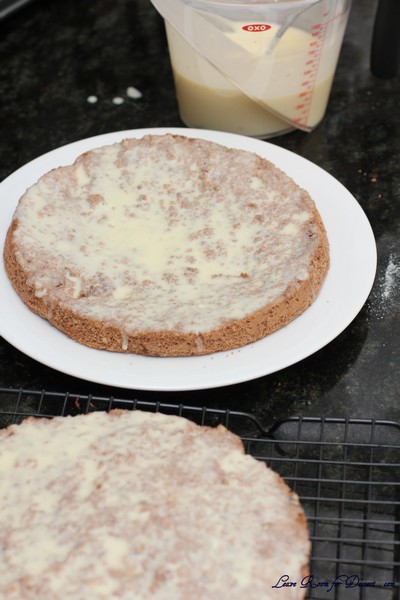
Recipes

Pražský koláč (Prague Kolache) – Daring Bakers Challenge September 2014

Saturday, September 27th, 2014

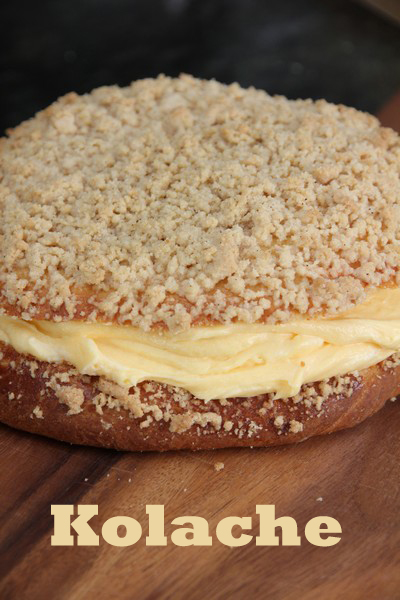
Kolache

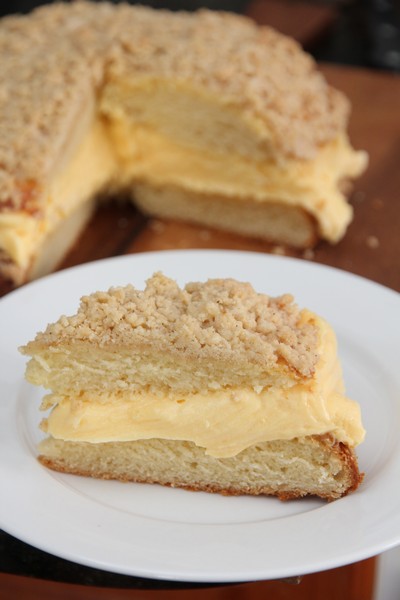
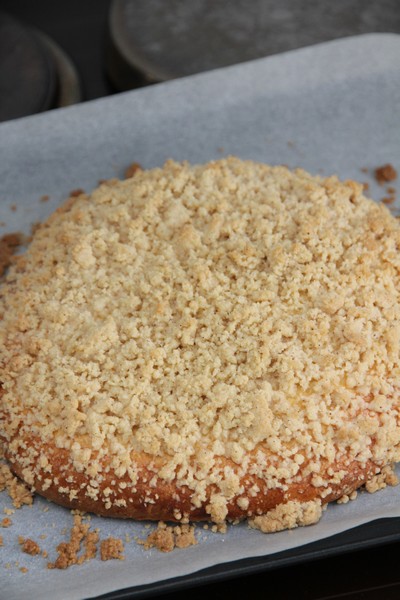
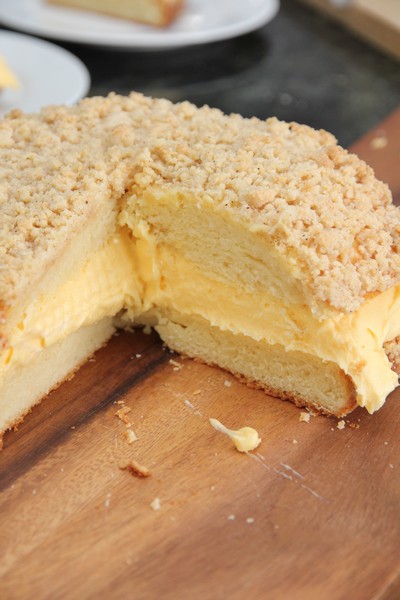
The September Daring Bakers’ challenge was brought to us by Lucie from ChezLucie. She challenged us to make a true Czech treat –Kolaches!

The challenge this month looked like lots of fun. (I missed out on last months challenge, but hope to make it up soon). A bready-cake topped with a crunchy cinnamon topping and filled with custard was highly likely to taste great.

Kolache07

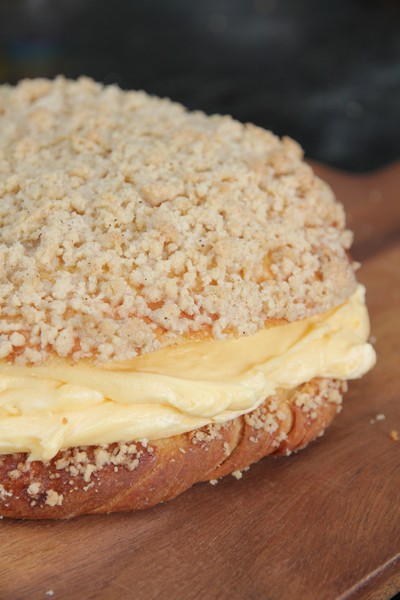
All components were quite easy, although I was a little concerned when my cake didn’t rise much in either of the resting periods. It all turned out in the end and was so lovely, after eating our first slice, Nick and I went back for a second slice. This probably wasn’t the best idea, as it was a little rich as the custard wasn’t very cold.

There was a little bit of cake left over the next day, and it was devoured very quickly. The topping stayed surprisingly crunchy and everything was still lovely. I do enjoy trying new dishes, it’s so much fun!

Kolache09

Pražský koláč (Prague Kolache)

Servings: 8 – 10 (original recipe in metric)

for cake:
1¾ cups (420 ml) (9 oz) (250 gm) all-purpose (plain) flour
½ cup (120 ml) (125 gm) mayonnaise (store-bought or home-made), room temperature
2 tablespoons (30 ml) (1 oz) (30 gm) granulated sugar
1 small egg, room temperature
15 gm (½ oz) fresh yeast or 1 packet (2 teaspoons) (7gm) dry active yeast
5 tablespoons (75 ml) milk, warm
½ teaspoon (3 gm) salt
for cream:
2 cups (500 ml) milk, divided
½ cup (120 ml) (3½ oz) (100 gm) granulated sugar plus 1 tablespoon (½ oz) (15 gm)vanilla sugar
½ cup (120 ml) (2-2/3 oz) (75 gm) vanilla pastry cream powder
1 stick (½ cup) (4 oz) (125 gm) butter, room temperature
5 tablespoons (75 ml) double cream, chilled
for streusel topping:
1/3 cup (1¾ oz) (50 gm) plain flour
¼ cup (60 ml) (1¾ oz) (50 gm) butter, chilled and diced
¼ cup (60 ml) (1¾ oz) (50 gm) caster (or granulated) sugar
½ teaspoon (2 gm) ground cinnamon
for finishing:
1 small egg, lightly beaten

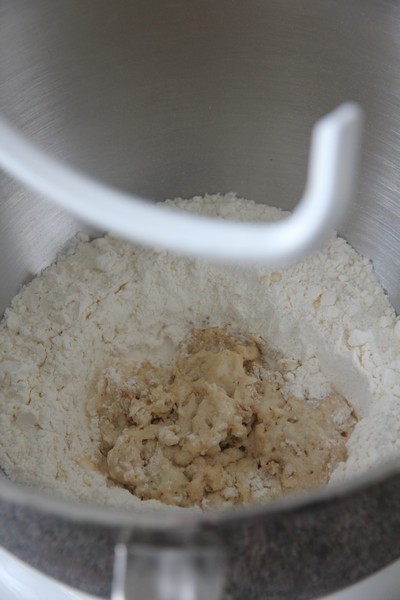
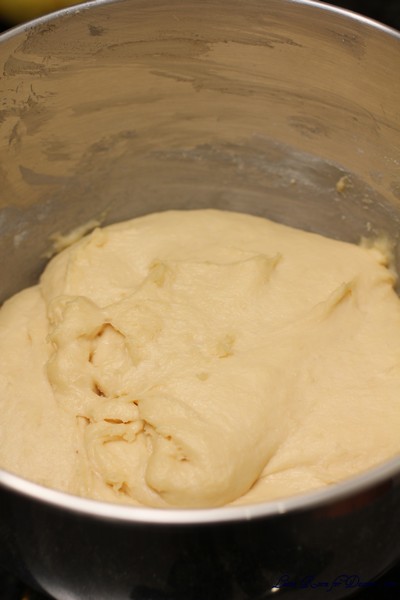
In a bowl of your stand mixer, sift flour and make a hole in the middle. Crumb the yeast into the hole, add 1 teaspoon sugar and about 3 teaspoons warm milk. Mix yeast, sugar and milk with fork and lightly sprinkle the surface with flour. Cover the bowl with towel and let rise for 10-15 minutes.

Kolache01

Add rest ingredients (mayonnaise, sugar, milk, egg and salt) and knead with dough hook on low speed for 10 minutes, until you have smooth dough.

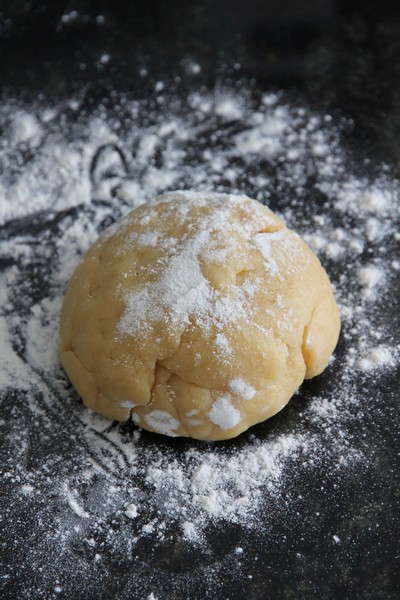
Turn the dough onto a lightly floured surface. Cover with towel or clingfilm and let rise for about an hour to double its volume.

Kolache02

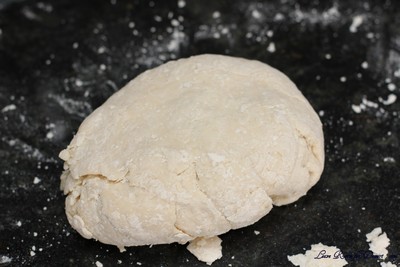
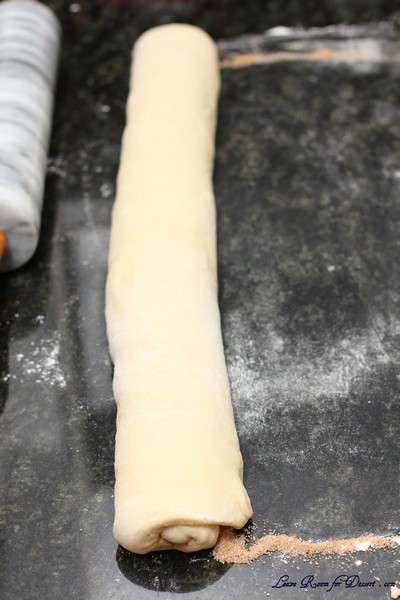
Form the dough into a ball and place it onto the baking sheet lined with parchment paper. With your palms and fingers press the dough and shape it to disc about 20–25 cm (8-10 inch) in diameter and 2–3 cm (¾-1 inch)thick. Let rise for 30 minutes.

Meanwhile preheat your oven to moderate 320°F/160°C/gas mark 3 and make streusel topping. In a medium bowl, mix together sugar, flour and cinnamon. Add cold butter and with your fingers, mix all ingredients until crumbly.

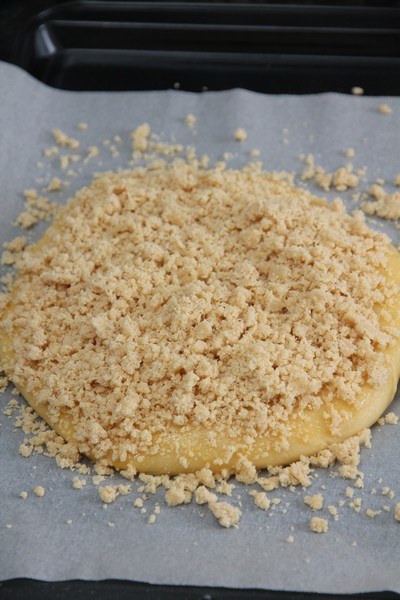
Brush the cake with eggwash and sprinkle with generous amount of streusel topping.

Kolache04

Bake for 20 minutes until golden brown. Let cool on a wire rack.

Kolache05

Prepare the cream.
In a small bowl, mix well ½ cup (125ml) milk with the vanilla pastry cream powder. Set aside. In a saucepan, mix the rest of the milk 1½ cup (375ml) with the sugar and vanilla sugar and bring it to boil, stir occasionally. Add the milk-pasty cream powder mixture and boil for 3 – 5 minutes, stirring constantly.
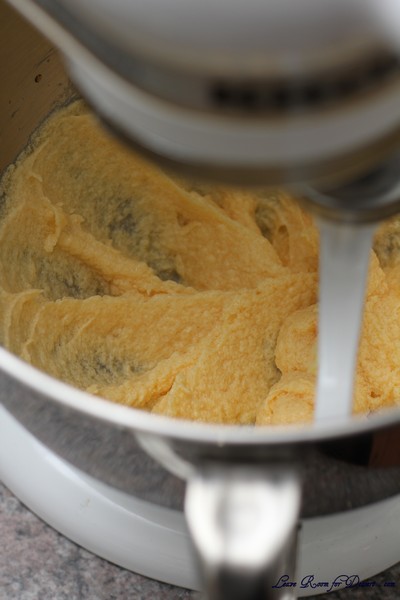
Transfer the mixture into a bowl of your standing mixer fitted with paddle attachment and let cool completely, while stirring constantly on a low speed. Add diced butter and mix together.
Separately whip the double cream until stiff. Mix with vanilla cream.

Kolache03

Cut cooled cake lengthwise and spread the cream onto the bottom part. Cover with upper part. Cut into 8 to 10 pieces.

Kolache08

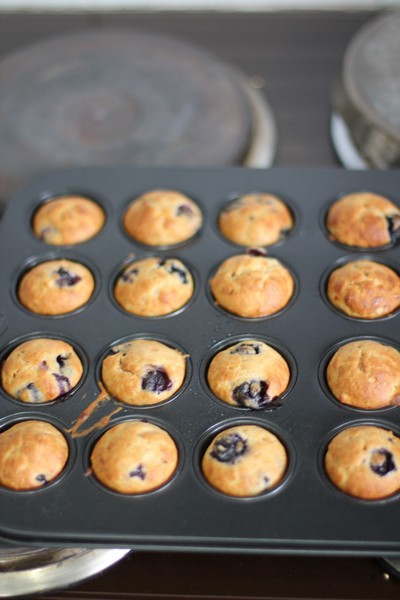
Banana and Blueberry Mini Muffins

Thursday, August 28th, 2014

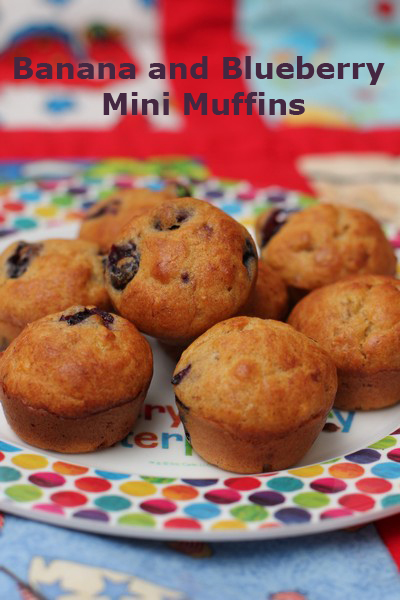
Banana and Blueberry Mini Muffins

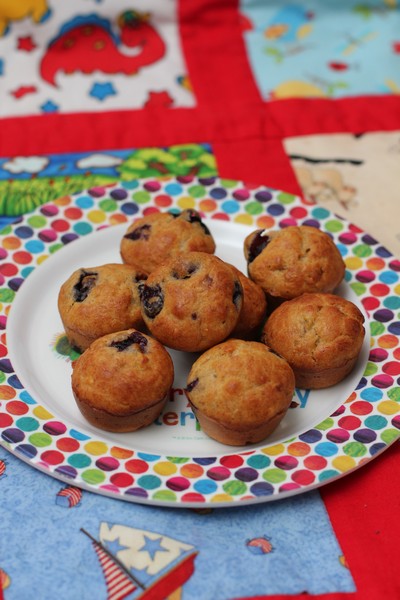
When I first decided to make some mini muffins for my bub, I didn’t want to add extra sugar (whatever was already present in fruit would be sweet enough), so I came up with an easy recipe that I am super happy with (as are the bubs and adults who have tried it).

I doubt this recipe would make fantastic normal sized muffins (as I do have a sweet tooth, and find them a little on the low-sweet side), but they are perfect mini muffins.

Banana and Blueberry Mini Muffins

I hope you and your kids or bubs enjoy this recipe.

Banana and Blueberry Mini Muffins

Recipe from Anita @ Leave Room for Dessert
Makes 16 mini muffins

1 banana, mashed
3 Tablespoons vegetable oil (plus a touch extra for the mini muffin pan)
1 egg
1/2 teaspoon vanilla extract (or seeds from half a vanilla pod)
1/2 teaspoon cinnamon powder
1/2 cup (70g) self-raising flour, sifted (you could probably use self raising wholemeal flour)
1/2 cup (70g) blueberries, fresh or frozen, washed

Preheat oven to 170C. Lightly grease 16 holes of a mini muffin tin with a little oil (using a pastry brush).

In a medium bowl, whisk together the egg and oil. Once well mixed, add banana, vanilla and cinnamon and whisk well.
Add self-raising flour and fold through with a spatula, followed by the blueberries. Mix until just incorporated, try not to over-mix.

Spoon the mixture into 16 mini muffin holes and bake for approximately 15 minutes. (check at 5 and 10 minutes to gauge how long they will take). Allow to cool slightly in the tin for a few minutes, then remove and cool on a cooling rack.

Mini muffins are best eaten on the day of making, but can be kept in an airtight container for 2 days, or frozen and allowed to thaw on the day of eating.

Banana and Blueberry Mini Muffins

Choc Top Extraordinaire

Monday, August 11th, 2014

Choc Top Extraordinaire
There have been many lovely dessert recipes on MasterChef this year (like most years). Some of the top chefs in Australia share some of their beautiful recipes, some which can be mastered at home, and others which are a bit more difficult to achieve at home (either due to equipment or accessibility to ingredients).

One of the recent recipes was by Nick Palumbo from Messina (an amazing gelato store and one of the best in Sydney), and it was a decadent looking choc-top. Having visited Messina many times to try both their gelato and magnificent desserts from their Creative Department, I knew this dessert was one I wanted to try.

I took two days to make the components (as I needed to organise my time around my bubs naps). The first day I made the almond meal, hazelnut paste, amaretti and gelato base (and left it in the fridge over night before churning), the second day I made the ice cream cones, Italian meringue, ganache and chocolate dip and assembled it.

Choc Top

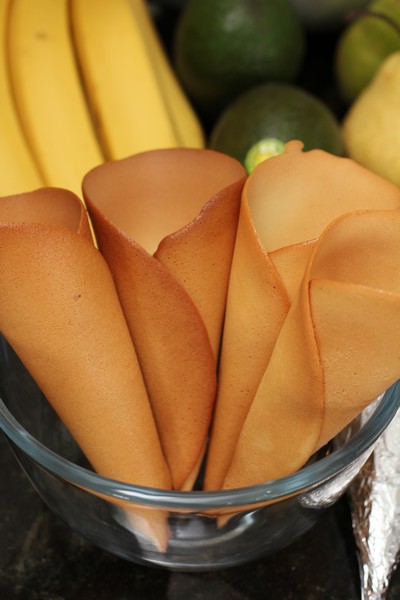
My first cone didn’t turn out very well (shape-wise), which meant we got to try it! It was lovely and crunchy and a had wonderful flavour. I would love to make them again (even if they were time consuming). I think I may have also taken the caramel a little too far, as I ended up with a slight bitter taste in the gelato (although it still went well with all the other flavours.

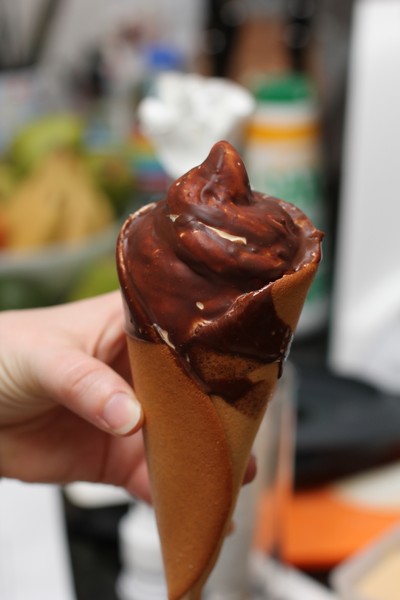
The cone that made it into the pictures, was piped (using a piping bag) and placed in the freezer for a while (maybe 20 mins?) and then dipped into the chocolate, which had cooled a little, but was still warm. The choc-tops were very lovely, quite sweet (probably not helped by the melting gelato). I would love to make the cone mixture again, even if just in rounds to have with ice cream.

Choc Top

My notes to help the home cook:

    • I made 1/3 of the almond meal, hazelnut paste and gelato (this base was placed in my two ice cream makers). I made half the quantity of the amaretti, ganache, chocolate dip and cones (it made 7 cones – which only used about half the gelato and even less of the biscuits).
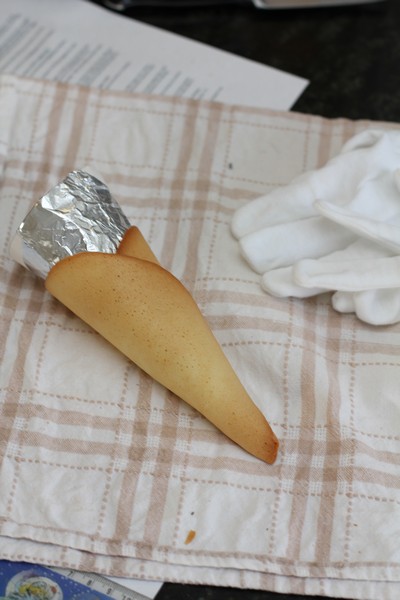
    • I used some cotton gloves handle the cones before setting.
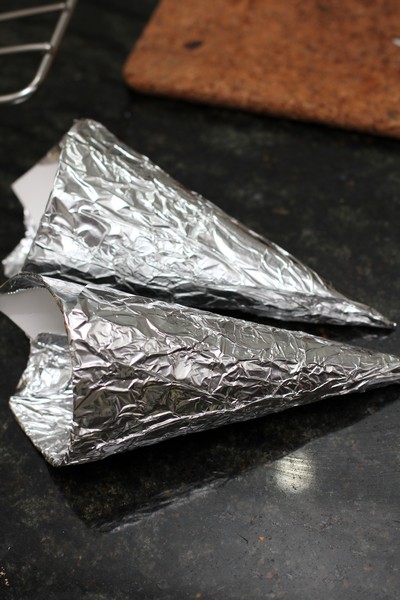
    • I made my own templates for moulding the cones. Cut an A4 piece of cardboard in half. Twist the cardboard, making the middle of one of the long edges the point of the cone. When satisfied with the shape, staple in place and then cover in foil.

Homemade cone rollers

  • I found a skin formed on the top of my gelato base, as it was left in the fridge overnight (I just whisked it back in).
  • I made the ganache and Italian meringue 3 hours before serving, and this was fine (could have even gone longer).
  • I churned the gelato and placed it in the freezer 2 hours before serving, and it should have been in longer. Once I piped it into the cones it was already melting, although we didn’t have time or space to leave them to set in the freezer for longer – this made dipping them in the chocolate very hard.

Choc Top Extraordnaire

Recipe by Nick Palumbo (recipe seen on MasterChef season 6)

Ingredients
Almond Meal:
100 g almonds, skin on

Hazelnut Paste:
200 g hazelnuts
20 g vegetable oil (I needed a little more oil than this)

Gelato:
3000 g milk
200 g egg yolks
70 g maltodextrine (I used dextrose, as I didn’t find this in time)
300 g skim milk powder (I used normal milk powder, as that’s what I had available)
20 g Murray River salt
800 g caster sugar
1000 g cream

Amaretti Biscuit:
100 g egg white
100 g icing sugar
100 g sugar
5 grams bi-carb soda
pinch cream of tartar
5 g bitter almond extract (I used vanilla essence, as I don’t like almond essence)
30 g almond meal

Ganache:
50 g hazelnut paste
160 g cream
20 g dextrose (glucose powder)
40 g liquid glucose
160 g milk chocolate

Italian Meringue:
125 g egg whites, room temperature
200 g sugar
50 g liquid glucose

Sugar Cone:
4 egg whites
230 g caster sugar
80 g milk
2 g vanilla extract
pinch salt
170 g plain flour plus more for dusting
40 g unsalted butter, melted
cooking spray

Chocolate Dip:
320 g dark chocolate
40 g hazelnut paste
120 g cocoa butter

Method

Preheat one oven to 150C and a second oven to 195C.
To make the almond meal, place almonds on a baking tray and place in the 195C oven for 8 minutes. Remove from oven and place in blast chiller to cool down. Transfer almonds to the thermomix and blend to make almond meal, being careful not to blend too much. Set aside to use in the amaretii biscuit.

To make the hazelnut paste, place hazelnuts and vegetable oil in a thermomix and blend until smooth. Pass through a drum sieve into a bowl and set aside to use in the ganache and chocolate dip.

To make the gelato, place milk in a 7 L saucepan, set over medium heat and heat to 40C.
Place egg yolks in a bowl and whisk till pale.
Place malodextrine, skim milk powders and salt in a bowl and mix until combined.
Once the milk hits 40 C, add the powders and blend. Pour about ¼ of the mix slowly into the egg yolks and keep whisking. Then, pour the yolks with a ¼ mix, back into the saucepan with the rest of the mixture and bring up to 75 C. Take off the heat and let stand.
In a large saucepan, place the sugar with a little water and make a slurry and put on a stove on highest heat and let sugar caramelize till you get a dark amber colour.
At the same time, place the cream in a saucepan and heat to just before boiling, careful not to burn the cream.
Once sugar is dark amber colour, take off heat and very slowly pour the hot cream in, being careful that it doesn’t bubble over.
Once sugar and cream are combined, add to the reserved mixture. Blend with a stick blender and strain into shallow pans. Transfer to the blast chiller and cool until the mix gets to around 5 degrees.
Transfer mix to the soft serve machine and set to production mode.

To make the ganache, place hazelnut paste, cream, dextrose and glucose in a thermomix and heat to 80C, speed 3. Turn off thermomix and reset to 37C, speed 3. Slowly add chocolate until combined. Transfer to a shallow container and place in the fridge to cool.

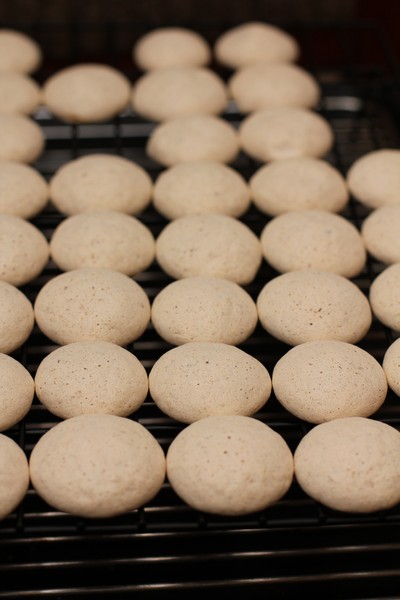
To make the amaretti biscuits, place egg whites, icing sugar and sugar in mixer with whisk attachment and mix until meringue forms and sugar is dissolved. Add bi carb and cream of tartar while still whisking and then add the bitter almond extract. Fold in reserved 30 grams almond meal. Transfer mixture to a piping bag and pipe small droplets the size of a 20 cent coin onto a paper lined tray.
Place in the 150C oven and bake for 10 minutes, reduce oven to 110 C and continue to bake until dry and crunchy, about 40 minutes. Remove from oven and set aside.

Amaretti

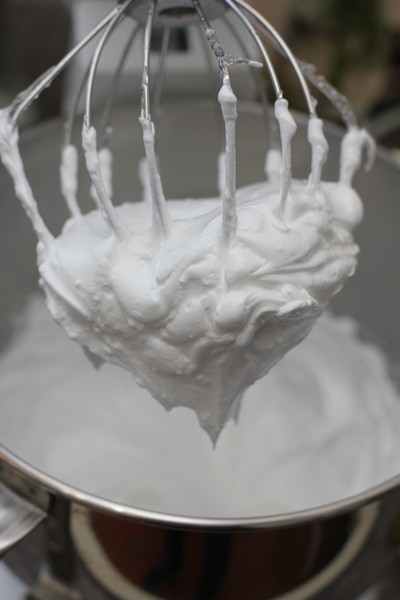
To make the Italian meringue, place sugar, glucose and enough water to make a slurry in a saucepan and set over medium heat. Heat to 121C.
While the sugar is heating, place egg whites in the bowl of an electric mixer and whisk until firm peaks form.
While the mixer is running, slowly pour in hot sugar syrup. Whisk until mixture is room temperature and thick and glossy. Transfer mixture to a piping bag and set aside in the freezer.

Italian Meringue

To make the sugar cone, place egg white, sugar, milk, vanilla and salt into a food processor and blend together for a few minutes. Add flour and butter and beat until fully incorporated and batter is smooth.
Lightly spray a 25cm crepe pan with a small amount of cooking spray. Pour 45gr of batter on to the cold pan and roll the pan around and tap it a little so you form what looks like a pancake about 18cm round, making sure it is even thickness all over.
Place pan in a preheated oven at 195 C until a nice tan colour around edges, about 9 minutes. Take out and flip and place back in oven for another 1-2 minutes.
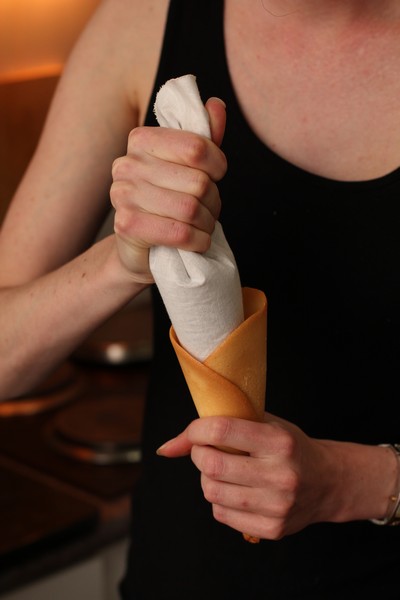
Take pan out of oven and quickly lay sugar disc onto a clean towel and top with cone roller, leaving enough of the disc sitting off the edge of the roller to allow for a pointed cone base to form. Using towel and cone roller as a guide, roll sugar disc into a cone shape with a 6cm opening. Hold seam side down for 1 to 2 minutes or until cone cools, making sure to also pinch the bottom of the cone so there is no hole at the bottom.
Cool pan completely in an ice bath, wipe dry and repeat until all batter has been used. Set cones aside.

Rolling the cone

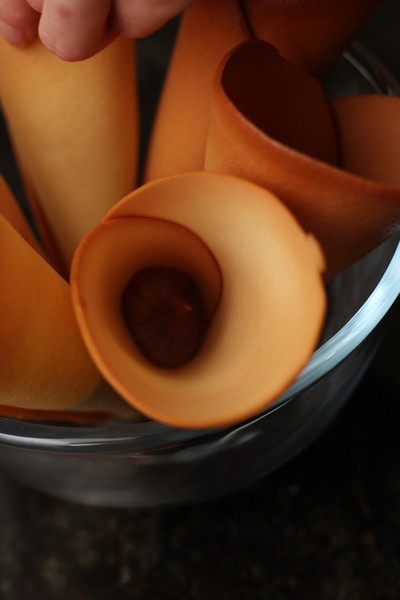
Cones

To make the chocolate dip, place chocolate, hazelnut paste and cocoa butter in a thermomix and set on time 10 minutes, temperature 50, speed 4. Set aside, keeping at 50C.

Transfer the ganache to a piping bag and return to the fridge.

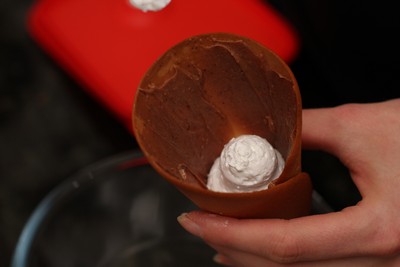
To assemble the cone, take the ganache piping bag from the fridge and pipe a little into the base of the sugar cone. Using a small palette knife, work the ganache up the inside wall of the cone all the way up to the opening, making sure to have the same thickness lining the inside of the cone.
Piping
Ganache
Take the Italian meringue piping bag from the freezer, cut the tip and pipe a little into the cone. Using a small palette knife, work the meringue up the inside wall of the cone all the way up to the opening, making sure to have the same thickness of meringue lining the inside of the cone.
Meringue and Ganache

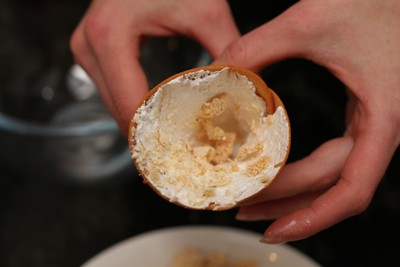
Crush amaretti biscuits finely and sprinkle inside the cone covering the meringue. Tip cone upside down to remove any excess crushed amaretti that didn’t stick to the meringue.
Meringue and Amaretti
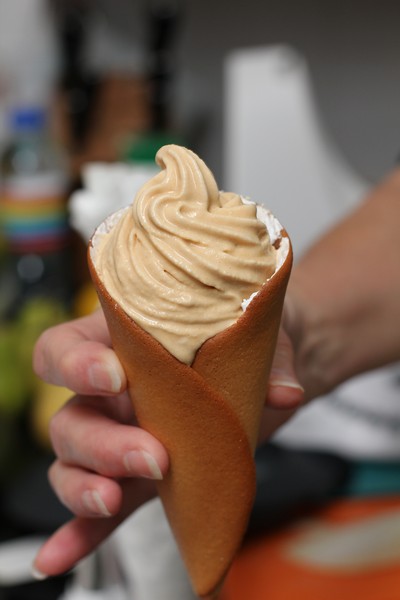
Place the cone hard up to the gelato machine and ensure that the gelato packs firmly inside the cone. Once you have packed the cone level, slowly turn the cone around in a circular motion to achieve the classic soft serve cone. Place in the blast chiller to firm up for 1 minute.
Piped caramel gelato
Remove gelato from blast chiller and stab the gelato with the Italian meringue piping bag and pipe in 3 lots of meringue.
Stab the gelato with the ganache piping bag and pipe in 3 lots of ganache. Return the gelato to the blast chiller to firm 1-2 minutes.
Dip the cone in the chocolate topping ensuring that you cover the gelato and at least 2 cm of cone as well, ensure it doesn’t run down the cone by keeping it on an angle.
ChocTop
Sieve crushed amaretti biscuit and sprinkle the gelato with larger pieces of crushed amaretti biscuit.
Serve

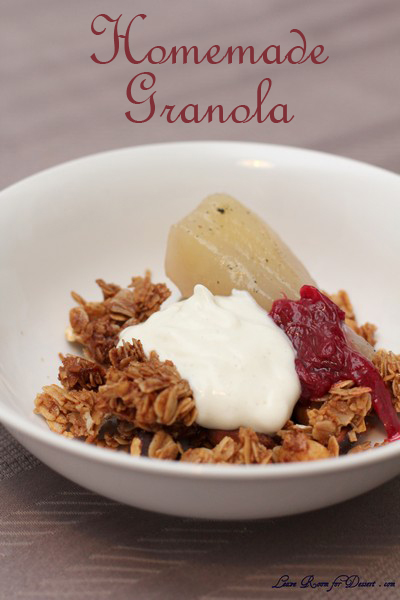
Anita’s Homemade Granola

Tuesday, July 15th, 2014

I’ve never been much of a fan of most breakfast type cereals, including muesli and porridge, but one day Thomas Dux was handing out little trials of granola and yoghurt. Both tasted amazing, and their marketing had worked brilliantly – I was in the door buying granola and yoghurt (the yoghurt I had liked is no longer being stocked, but I have now come across the FiveAM yoghurt which I love, and I am trying to make my own yoghurt as well).

The granola was Irrewarra Sourdough’s granola, and it is strangely addictive. So addictive that I was sad each time I finished a pack. So I decided it was time to make my own and I tried many different recipes on the internet. Many were not sweet enough, others fell apart easily, and some just lacked a bit of flavour.

I ended up coming up with my own version, which is now loved by my family, so much, that when a batch is finished everyone gets sad…

Anita’s Homemade Granola

Recipe by Anita @ Leave Room for Dessert

150g honey
1 tablespoon ground cinnamon
1 tablespoon vanilla essence
1 vanilla bean, seeds scraped (optional)
1/4 teaspoon salt
140g (3/4 cup) vegetable oil

500g (5 cups) rolled oats
400g (3 cups) mixed nuts (I use what I have in the cupboard, almond, hazelnuts, macadamias, pecan, walnuts etc), chopped
40g (1/4 cup) sunflower seeds
40g (1/4 cup) pepitas (pumpkin seeds)
65g (1 cup) shredded coconut
40g (1/4 cup) hemp seeds

Preheat oven to 150C (fan forced). Line two baking trays with baking paper.

Mix together the oats, nuts, seeds and coconut in very large bowl.

Whisk together the honey, cinnamon, vanilla essence and vanilla bean seeds (if using) and salt in a bowl until well combined. Add the oil and whisk again until well combined.

Pour the honey mixture into the oat mixture and stir with a spoon or spatula until well combined.

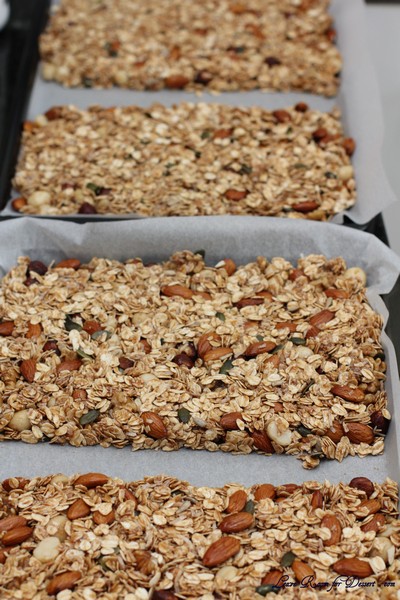
Divide the mixture onto the two trays and push to fill the tray. Once the mixture has filled the tray, make a line in the centre of each (this helps make the cooking more even). Make sure to press the mixture down firmly.

If you want smaller pieces more like a muesli,

Bake for 15- 20 minutes, stirring the granola occasionally (every 5-10 minutes) to ensure even cooking. Once cooked to your liking, turn the temperature down to very low and allow the granola to dry in the oven 10min at 100C – this will make it store longer.

If you want large chunks:

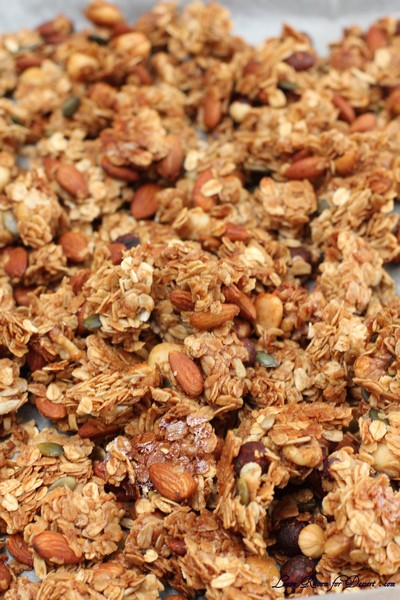
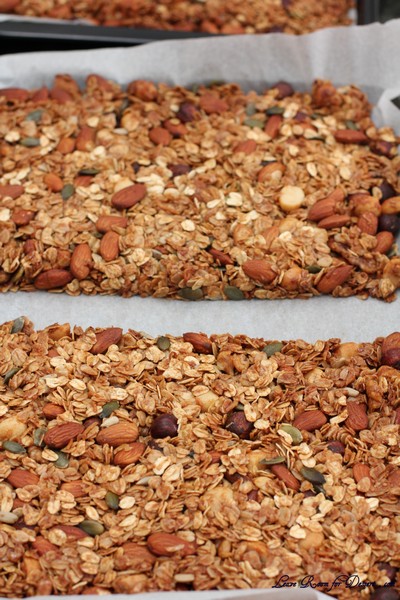
Bake for 20-30 minutes or until the granola is nice and golden (checking and rotating trays after 10 minutes). Wait until the granola has cooled completely before breaking into edible sized pieces.

When breaking the pieces apart, you may find the edges break easily, but the centre portion may have some give or stickiness. If this is the case, put the broken pieces back in the oven for 5-10 minutes. Again, wait until completely cooled before transferring to a container for storage.

Poached Pears

Recipe adapted from Taste

4 brown pears, free from blemishes and bruises, peeled, cored and cut into quarters
lemon juice (optional)
1 cup sugar
3 cups water
1 vanilla bean, split, seeded

Place sugar and water in a saucepan over medium heat and stir until sugar has dissolved. Increase heat and simmer for 5 minutes.

Add pears and a split, seeded vanilla bean. Allow the pears to simmer, covered with a square of baking paper, in the liquid for 10-15 minutes or until tender. Turn occasionally to ensure even cooking. Serve pear warm or cooled with a little poaching liquid.

Stewed Rhubarb

This made quite a tart rhubarb, although when served with sweet granola and poached pears it was nice. It you are not serving with other sweet ingredients, more sugar will be required.

100g rhubarb
50g sugar (more may be required, it depends on the tartness of your rhubarb)

Cut rhubarb into 5cm lengths (approx), and place in a saucepan with sugar. Cook 5-10 minutes or medium heat until sugar is dissolved and rhubarb is tender.

Cinnamon Rolls – Daring Bakers Challenge June 2014

Friday, June 27th, 2014

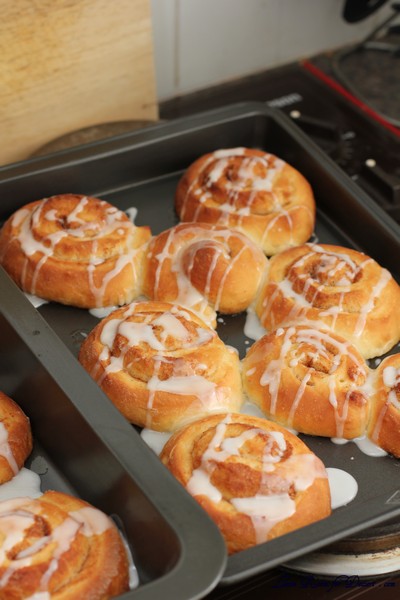
This month the Daring Bakers kept our creativity rolling with cinnamon bun inspired treats. Shelley from C Mom Cook dared us to create our own dough and fill it with any filling we wanted to craft tasty rolled treats, cinnamon not required!

Cinnamon rolls (or scrolls) have been a favourite treat for my family since I tried it a year or two ago. They come out at special holidays, or family breakfasts.

I’m very happy with my current recipe, although as past experiences would confirm, sometimes it does pay to try another recipe. I once tried a new banana bread recipe, only to be asked – Why would you try another one? Your one is great, we don’t need to try another recipe. Only to hear exclamations of happiness for the new recipe.

This recipe for cinnamon rolls differs slightly to my usual one, the dough is slightly more cake like, likely due to the addition of egg. There is also no butter in the middle of the scroll, although this doesn’t seem to make a huge difference to the overall flavour or consistency.

By the end of the day all the rolls were eaten, but I doubt they would have kept well, as some of the ones left to the afternoon had started losing their freshness. Overall the flavour and consistency were lovely. Although I am likely to stick to my original recipe for the future.

There were a few other recipes suggested for this months challenge, including a roasted banana cinnamon bun with maple glaze…. now that I have to try…

Cinnamon Buns

(from The Bread Baker’s Apprentice by Peter Reinhart)
Makes 8-12 large or 12-16 smaller buns

Ingredients
6½ tablespoons (100 ml) (3 oz) (90 gm) granulated sugar
1 teaspoon (5 ml) (6 gm) salt
5½ tablespoons (85 ml) (2¾ oz) (80 gm) shortening, unsalted butter or margarine, at room temperature
1 large egg, slightly beaten
1 teaspoon (5 ml) lemon extract OR 1 teaspoon (5 ml) grated lemon zest (I used vanilla essence)
3½ cups (840 ml) (16 oz) (450 gm) unbleached bread (or all-purpose/plain) flour
2 teaspoons (10 ml) (¼ oz) (6 gm) instant yeast (active dry worked as well)
1 1/8 – 1 ¼ cups (270-300 ml) whole milk or buttermilk, at room temperature
½ cup (120 ml) (3½ oz) (100 gm) cinnamon sugar (6½ tablespoons (100ml) (3 oz) (90 gm) granulated sugar plus 1½ tablespoons (20 ml) (1/3 oz) (10 gm) ground cinnamon)

Directions:

In a stand mixer fitted with the paddle attachment, cream together sugar, salt and shortening (though it is not difficult to do by hand, using a strong spoon).
Add the egg and lemon extract to the creamed sugar and shortening and mix together until smooth.

Add the flour, yeast and milk to the mixer and mix on low speed until the dough begins to form a ball.
At this point, switch to the dough hook attachment and knead for 10 minutes (if kneading by hand, you will probably need to do so for closer to 12 – 15 minutes). The dough will be silky and supple, but not overly sticky. You may need to add a touch of flour if your dough is too sticky – that is okay.

Lightly oil a bowl, turn the kneaded dough out into it, turning to coat, then cover the bowl with plastic wrap.
Allow the dough to rest (ferment) until it has doubled in size, approximately 2 hours.

Once the dough has rested and risen, you are ready to shape the cinnamon buns. Prepare your a sheet pan by lining it with parchment paper.
Spray your work surface lightly with cooking spray and turn the dough out onto the work surface.
Using a rolling pin, roll the dough, into a rectangle about 2/3 an inch (15 mm) thick, 14 inches (350 mm)wide and 12 inches (300 mm) long (for large buns) (or 18 inches (450 mm) wide by 9 inches (230 mm) long for smaller ones). You may need to sprinkle the dough and/or work surface with a bit of flour to keep the dough from sticking. This is okay.
Sprinkle the cinnamon sugar filling over the surface of the dough.

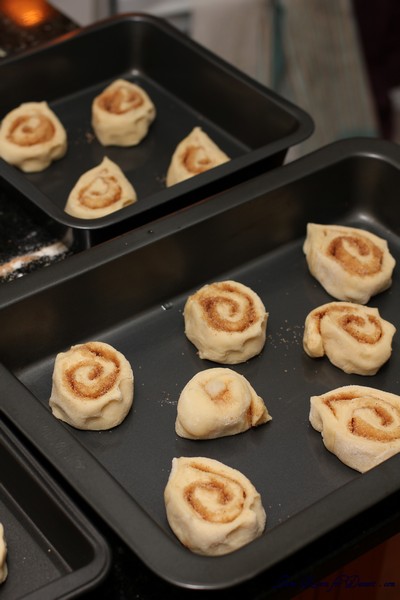
Starting with a long end, roll the dough, creating a spiral, into a log shape, making sure to end with the seam side down.

Cut the dough into pieces approximately 1¾ inches (45 mm) thick (for large buns) (1¼ inch (30 mm) for smaller buns).
Place buns approximately ½ inch (15 mm) apart on the prepared pan. They shouldn’t be touching at this time.

Allow the shaped buns to proof at room temperature for 75 – 90 minutes until they have nearly doubled in size. They will now be touching each other. If you are not planning on baking the buns the same day as you are preparing them, you can place them into the refrigerator after they are shaped (before this rise) for up to 2 days. If you do so, you will need to allow them to return to room temperature prior to baking, which means removing them from the refrigerator about 3 or 4 hours before baking.
Preheat the oven to moderate 350°F/180°C/gas mark 4 degrees at the end of this proofing time.
Bake the buns for 20 – 30 minutes, until golden brown
Allow the buns to cool for 10 minutes in the pan, then drizzle with glaze (recipe below). Remove the buns from the pan to a cooling rack and allow them to cool for at least 20 minutes before eating.

White fondant glaze for cinnamon buns:
(also from The Bread Bakers’ Apprentice)

Sift 4 cups (500 gm) (17½ oz) of confectioners’ (icing) sugar into a large bowl. Add 1 teaspoon (5 ml) of lemon or orange extract and between 6 tablespoons to ½ cup (90 to 120 ml) warm milk, whisking well until all of the sugar is dissolved. (Add the smaller amount of milk first, whisking briskly, then add slowly until you have the consistency you want for drizzling over the buns.)

Notes:
You can replace the lemon extract/zest with the extract/flavoring of your choice. I usually use vanilla extract.
This dough is silky, smooth and so lovely to work with, and the resulting buns are light and so incredibly easy to eat. I have made these several times, with traditional cinnamon-sugar filling and also with a fruit compote for a fresh, summery treat. Delicious!

Eve

Friday, February 14th, 2014

One of my biggest cooking challenges since giving birth, was this cake, but I had desperately wanted to make it for Valentines day (as I knew Nick would probably prefer a different cake for his birthday), so the next best excuse was today (even though we don’t normally celebrate the day).
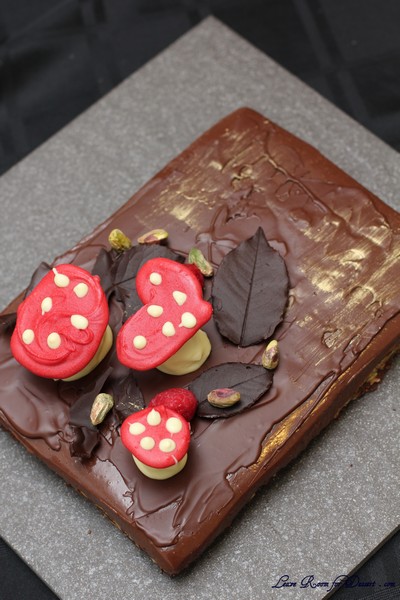
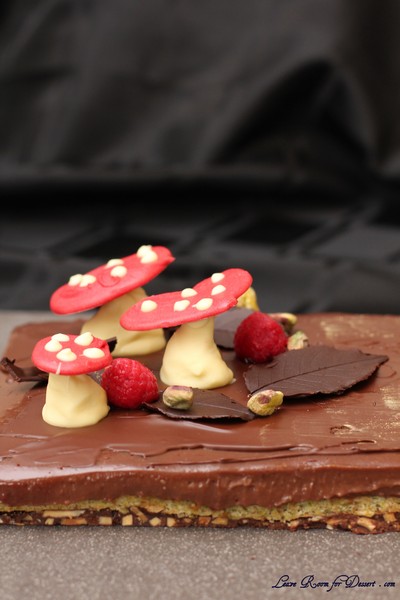
Eve was made by Kirsten Tibballs from Savour Chocolate and Patessiere School on one of the MasterChef episodes in their “Love” week last year. Having been lucky enough to do a short course at Savour a while ago, and tasting their wonderful creations, I was looking forward to making this cake. I have also noticed Kirsten has a cookbook released recently which looks lovely and one day I would like to get my hands on it.

The cake turned out extremely well, and it was extremely rich (you only need a small slice). I was happy with all three components, although a number of people thought a little less cremeux would be good. It looked quite impressive once put together and I was super happy with the result.
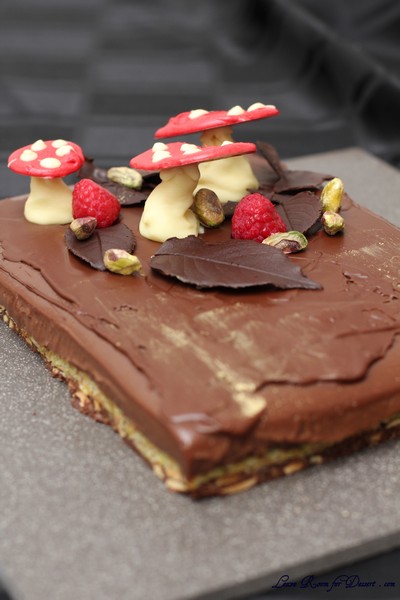
My notes and troubleshooting:

I had trouble with the red colouring for the mushrooms. The powder I used wasn’t turning the chocolate red, more of a brown colour, so then I added some of my Wilton colouring gel, and although it turned it a maroon colour (and not vibrant red initially), it also seized the chocolate, meaning it was hard to pipe – I had to pipe it best I could and then use a spoon or knife to spread it into a shape.

For the stems of the mushrooms, I ended up seizing the chocolate too much, so couldn’t pipe it – it was so solid I ended up just moulding it with my hands (like fondant).

I cut the cake into two, as it was quite large and I thought the decorations wouldn’t look in proportion if the cake was left its original size.

I used less chocolate for many aspects (mushrooms and toppings), as I didn’t want much left over. I also just used what chocolate I had available, e.g. cooking chocolate that didn’t require tempering

For the hazelnut praline paste I halved this recipe from Sweet as Honey. I added a bit of water, but it didn’t really get as liquidy as the photos on that website. Therefore for the crispy almond layer I needed to add more melted chocolate and some hazelnut spread.
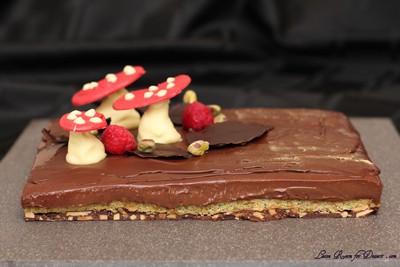
Eve Cake

Recipe by Kirsten Tibballs
*You will need a 33cm x 23cm cake pan for this recipe

Pistachio dacquoise
145g egg whites, at room temperature
2g cream of tartar
64g caster sugar
2 drops green food colouring
128g ground pistachios, sifted
100g icing sugar, sifted
24g plain flour, sifted
Good quality raspberry jam, for brushing

Crispy almond layer
70g Callebaut dark chocolate, broken into pieces
180g Hazelnut praline paste, or increase chocolate by 40g and add 1 tablespoon almond oil (I made my own hazelnut praline, but also added 50g more chocolate and 1 tablespoon Nutella)
172g slivered almonds, roasted
30g Callebaut cocoa nibs or almonds (I used the almonds)

Chocolate cremeux
690g thickened cream
156g egg yolks
76g caster sugar
265g Callebaut milk chocolate (33.6% cocoa), broken into pieces
265g Callebaut dark chocolate (60% cocoa), broken into pieces

Chocolate leaves and bark
100g good quality dark chocolate (57.8% cocoa) (I used only about 30-50g)
Assorted fresh leaves, washed and dried with paper towel

Chocolate mushrooms
150g Callebaut W2 white chocolate (28% cocoa) (I used only 50-100g)

Red chocolate heart tops
200g Callebaut velvet white chocolate (I used only 50-100g)
20g red soluble oil based powder

Edible pebbles
30g pistachios, roughly chopped
Edible green metallic (I used gold)

Pistachio dacquoise
1. For the pistachio dacquoise, preheat oven to 170C.
2. Whisk egg whites and cream of tartar in the bowl of an electric mixer to soft peaks, on medium speed.
3. Increase speed to high, then gradually add caster sugar while mixing continuously to allow sugar to dissolve. Add food colouring, whisking to combine.

4. Meanwhile, combine pistachios, icing sugar and flour in a bowl.

5. Gently fold meringue into bowl with pistachio mixture until just combined.

6. Using a palette knife, evenly spread mixture into a 35 x 25cm Flexipat or same-size tray lined with baking paper. Bake in oven for 15-18 minutes, then remove, and set aside to cool completely.
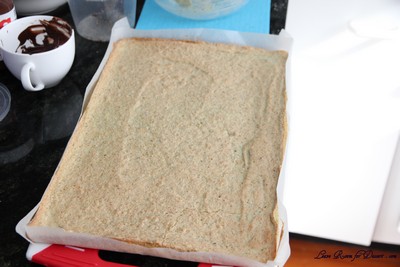
7. Trim dacquoise to 33cm x 23cm rectangle.

Crispy almond layer
1. For the crispy almond layer, grease and line the cake pan with baking paper.

2. Melt chocolate to 36°C in a microwave in 30 second increments. Add remaining ingredients and stir to combine.

3. Evenly press mixture into cake pan. Set aside until just before the almond layer sets, then place dacquoise layer on top.

4. Brush a thin layer of jam over the top of the pistachio dacquoise.

Chocolate cremeux
1. For the chocolate cremeux, bring cream to the boil in a saucepan over medium heat.

2. Meanwhile, whisk egg yolks and sugar in a bowl until well combined. Whisking constantly, slowly add half of the warm cream to bowl with egg yolk mixture until combined.

3. Pour egg yolk mixture into pan with remaining cream, and place over low heat. Using a wooden spoon, stir constantly until mixture reaches 80°C, and coats the back of the wooden spoon.

4. Meanwhile, place chocolate in a medium bowl. Strain cream mixture through a fine sieve over the chocolate, and stir until melted and combined.

5. Pour crémeux over the raspberry jam layer.

6. Refrigerate for 4 hours or until set. You can freeze for up to 1 month in the freezer.

Chocolate leaves and bark
1. For the chocolate leaves and bark, temper dark chocolate as per instructions below.

2. For the bark, brush a thin layer of chocolate onto a piece of baking paper and roll up and set aside.

3. For the leaves, brush a thin layer on each leaf, until you can’t see the leaf. Once the chocolate has set, carefully remove the leaf.

Chocolate mushrooms
1. For the chocolate mushrooms, temper chocolate as per instructions below. Add a few drops of water at a time, stirring until the chocolate thickens to a piping consistency. With a disposable piping bag fitted with a 1cm nozzle, pipe 3 mushroom bases onto a tray lined with baking paper. Set aside until firm.

Red chocolate heart tops
1. For the heart tops, temper chocolate as per instructions below. Sift the red powder into ¾ of the white chocolate and mix until combined. Transfer red chocolate to a piping bag made of baking paper. Pipe red chocolate into heart shapes, using a template as a guide underneath a sheet of baking paper. (see last page) Set the chocolate for 20-30 minutes before removing from the paper.

2. Use the remaining white chocolate to pipe white dots onto the mushroom tops, and to stick the tops and stems together.

Edible pebbles
1. Place pistachios in a bowl and add green metallic, tossing to coat.

To Assemble
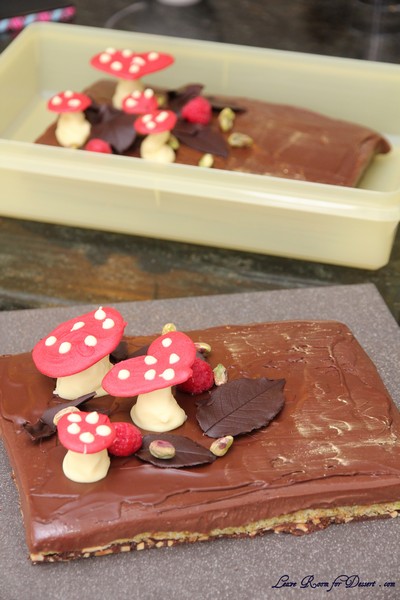
1. To assemble, temper the dark chocolate as per instructions below. Brush a thin layer of chocolate onto the surface of the cake to create a rough texture. Brush with gold metallic once set.

2. Garnish with chocolate leaves, bark, chocolate mushrooms, pebbles, raspberries and hazelnuts.
Tempering chocolate
1. Place required chocolate in a plastic bowl (glass retains too much heat).

2. Melt chocolate in a microwave for no more than 30-second increments, stirring in between.

3. Melt chocolate until you have 50% solid chocolate and 50% melted chocolate. Continue stirring without applying any additional heat. It may take a few minutes for all of the solid chocolate to melt. Stir continuously during this time.

4. If the chocolate does not melt completely, apply gentle heat with a hair drier. Do a test by spreading a small amount of chocolate onto a piece of baking paper, in a room at a temperature no higher than 22C. The chocolate should set at room temperature in 5-10 minutes.

a. Dark couverture should set in approximately 5 minutes.

b. Milk couverture should set in approximately 7 minutes.

c. White chocolate should set in approximately 10 minutes.

5. It is necessary to maintain the chocolate in a liquid state by reheating if necessary. Be sure to take a new test every time you reheat.

6. To test if your chocolate is tempered correctly, dip a teaspoon or a square of acetate in the couverture and leave it to set. This should take around 5-10 minutes at room temperature. If the couverture does not set after 10 minutes, it is not tempered correctly. If it sets but there are streaks on the surface, you will need to continue stirring the couverture, then take another test.
Sfogliatelle Ricci – Daring Bakers Challenge November 2013

Wednesday, November 27th, 2013

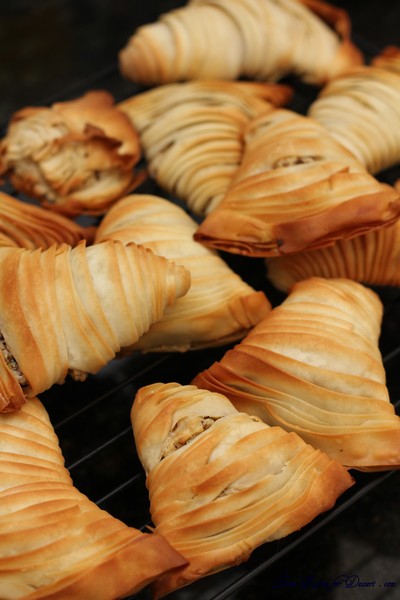
Sandie of the lovely blog, Crumbs of Love, was our November hostess. Sandie challenged us to make a traditional Italian dessert, along with its American version – Sfogliatelle (or better known in the US – lobster tails!) The flakey, 1000 layers of super thin dough, shaped into a horn and filled with a scrumptious filling. Così buono!

We were given a couple of choices this month for our challenge, and I chose the first one mentioned, Sfogliatelle Ricci (although after trouble with the pastry, I wish I had gone with the Sfogliatelle Frolle. Sandie mentions this recipe is a tender pastry, made with dough similar to pie crust (and much easier to make). Whereas the one I made was quite crispy indeed.

I enjoyed getting in and making some fresh ricotta, even though I found the lemon juice was not enough to make it curdle. Perhaps my lemon was not acidic enough? I recall once before I had tried making ricotta after being told how easy it was. I added the lemon juice, and very fine curds appeared. The website I had used said fine curds would make a lighter ricotta, although I tried to put it through my cheesecloth and there really wasn’t anything left. I searched troubleshooting for ricotta making, as some websites didn’t say to boil it, they said just to 94C, and others said to whisk, whereas some said to just let it sit. Well, it turns out that after boiling and whisking madly for this challenge, I looked up a youtube video and figured the only way I could save all this milk and cream was to start adding more acid. Two extra tablespoons of lemon juice and still nothing was happening. About 3 or 4 tablespoons of white vinegar, and I had curds! Very happy and now I know I can make ricotta without any hassle.

Then came the dough for this recipe. I tried hard not to add much more water than the recipe said, and ended up with a very solid dough. It was super hard for me to roll thin enough to fit into my pasta maker… When it came to the second round of rolling, I waited for Nick to return home, so I didn’t have to roll it.

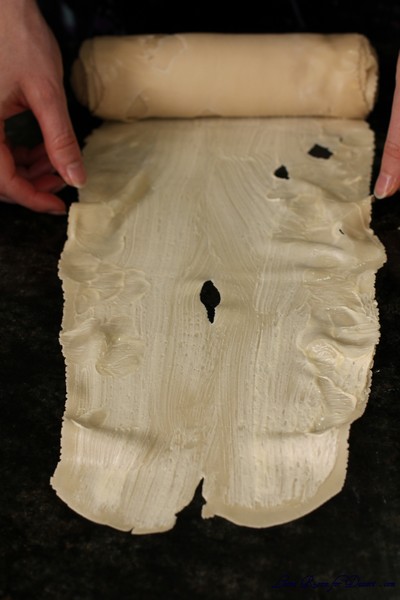
When adding the lard/butter mix onto the pastry, I couldn’t add more than a smear, and ended up with a lot left over. My pastry tore very easily when I tried to stretch it, but I continued on. To fill the pastries, I enlisted Nick’s help again to do the piping whilst I held the pastries. Once out of the oven they were lovely – very crispy (some said a little too crispy).

I had left over filling, which I put into a pie dish lined with shortcrust pastry, it was lovely and made the filling stand out a little more.

What a challenge! I’m very happy to have completed it in time before my bub arrives.

Best wishes
Anita

Recipe sources:
The pastry dough recipe is from Great Italian Desserts by Nick Malgieri. Unfortunately this book is out of print but you can still find used copies online or if your lucky, your local library. The Ricotta Cheese recipe is from Luscious Creamy Desserts by Lori Longbotham.

Fresh Ricotta Cheese

(makes 2 cups)

[Anita’s notes: I found once I had added the lemon juice, the curds were extremely small. I added about 2 more tablespoons of lemon juice and then about 3 tablespoons or more of white vinegar to make the curds really appear]

Servings: Makes 2 cups

8 cups (2 litres) whole milk (or goats milk)
1 cup (250 ml) heavy whipping cream (about 35%)
1/2 teaspoon (3 gm) salt
3 tablespoons (45 ml) fresh lemon juice – see my note above…

1. Line a large colander or strainer with 2 layers of lightly dampened cheesecloth over a large glass; set aside.

2. Pour the whole milk, heavy cream and salt into a large pot and bring to a boil over medium heat, whisking occasionally. Reduce the heat, add the fresh lemon juice and stir/whisk continuously for 2-3 minutes. The mixture will curdle, which is exactly what you want it to do. Pour this into the cheesecloth lined strainer and let it drain for about 1 hour or until it comes to room temperature. At this point you can scrape the ricotta from the cheesecloth into a container and refrigerate for up to 2 days.

3. The liquid in the bowl is the whey, a very nutritious and tasty leftover byproduct from making cheese. It is excellent to use instead of water when baking bread, or added to soup stock. I love the stuff and never discard it. Here is an excellent article on the wonders of whey!

Semolina-Ricotta Filling

This recipe is used for both the Ricci and the Frolle versions

[Anita’s notes: This filling was more than enough for the pastry, maybe only half was needed? I used the remainder for a tart lined with bought shortcurst pastry. I didn’t use the lemon flavours, and instead used 50g chopped dark chocolate, and 30g pistachios]

1 cup (250 ml) milk
1/2 cup (120 ml) (4 oz) (115 gm) granulated sugar
2/3 cup (160 ml) (4 oz) (115 gm) fine semolina or cream of wheat (I have tried both and personally like the semolina version)
1 1/2 cups (360 ml) (13-1/4 oz) (375 gm) whole milk ricotta, preferably fresh (see above)
2 large egg yolks
2 teaspoons (10 ml) pure vanilla extract (or the seeds of one pod and 1 teaspoon of extract)
1/4 teaspoon (1 gm) ground cinnamon
1/3 cup (80 ml) (2 oz) (60 gm) candied orange peel (commercial or home-made)
zest of 1 lemon

Combine the milk and the sugar in a medium saucepan. Bring to a boil, then lower the heat and slowly add the semolina (or cream of wheat), whisking quickly as to avoid any lumps. Cook, stirring often, until the mixture is smooth and thick, about 2 minutes. Spread the mixture onto a lined baking sheet, about 1/2 inch (15 mm), to cool. When cool, break into pieces and place into the bowl of your stand mixer, fitted with the paddle attachment (or a food processor), and add the ricotta cheese, egg yolks, vanilla and cinnamon. Beat until very smooth and creamy. Stir in the candied orange peel and lemon zest. (Maybe even some mini chocolate chips? Or pistachios?? mmmm…I can’t wait to see what you come up with)
Scrape into a container, place plastic wrap directly onto the surface and refrigerate until needed (up to 3 days).

Sfogliatelle Ricci

Servings: 14-18 pastries

[Anita’s notes: I used only half the lard/butter mix and thought this was more than enough.]

You will need a large/long workspace for this. I used my dining room table for this though I am sure someone will be more creative with limited space!

Dough

3 cups (750 ml) (15 oz) (420 gm) all-purpose (plain) flour
teaspoon (6 gm) salt
3/4 cup (180 ml) warm water (about 100°F/38°C)
4 oz (115 gm) lard (I used Crisco butter flavored shortening)
1/2 cup (1 stick/4 oz) (115 gm) unsalted butter, softened

Semolina-ricotta filling (see above)

1. Combine the flour and salt in a large mixing bowl and stir in the water, or use your standing mixer with the paddle attachment. The dough will be very dry. If you feel absolutely compelled, add an extra teaspoon of water but it is supposed to be very dry. Turn this out onto a clean work surface and knead the dough together, bringing in all the dry bits. At this point get your pasta roller out and ready. Roll out the dough to about 1/3 inch (10 mm) and pass through your pasta machine at the widest setting. I find it much easier to cut my dough in half and work 1/2 at a time for this step. Fold the dough in half after each pass also change the direction of the dough occasionally. After about 15 passes the dough should be very smooth. Knead the dough back into a ball and wrap in plastic wrap. Refrigerate and rest the dough for at 2 hours, or overnight.
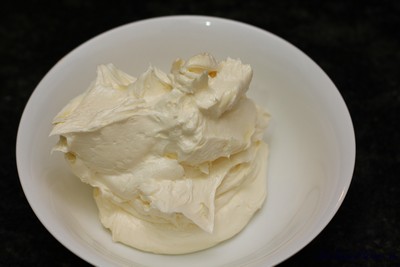
2. Beat the lard/shortening and butter together in your mixing bowl until very fluffy. Make sure it is thoroughly combined. Place into a bowl and set on the workspace in easy reaching distance.

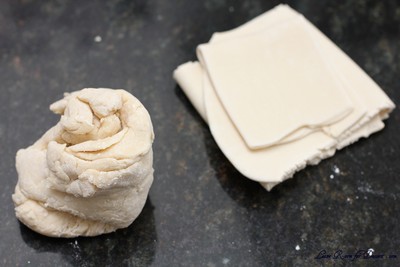
3. Remove the dough from the refrigerator and divide it into 4 equal pieces. Working with one piece of dough at a time (cover the other pieces with a towel or plastic wrap), lightly flour a piece pass it through the pasta roller set at the widest setting. Try to get the dough as even as possible, your goal is an even rectangle strip, about 4 inches (10 cm) in width. If needed, fold it over on itself a few times until you get an even strip. Once even, pass the dough through every setting, ending with the highest (mine is 7)

4. You should end up with a long 4 inch (10 cm) wide strip. Repeat with the other three remaining pieces of dough.

5. *For my own ease of use I made my own rolling pin contraption like you can see on many instructional videos. I turned 2 bowls upside down and placed them on my table where I was planning to work. I then took a rolling pin (with handles, not French) and taped the handles to the bowls. Every time that a piece of dough is finished and ready I lightly floured the dough and rolled it up onto the rolling pin. When all 4 pieces of dough were finished it made it much easier to pull out a section at a time to stretch the dough. If you are clumsy like me you might like to try this too!

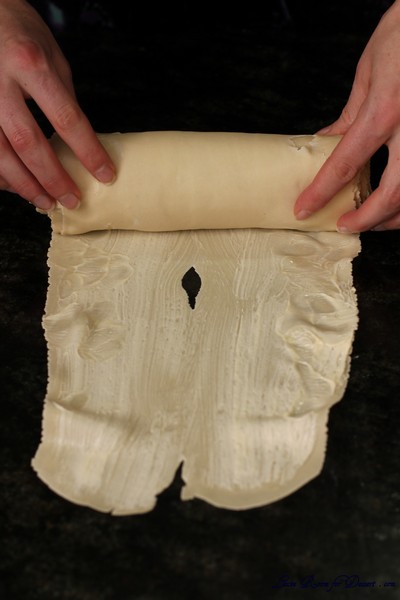
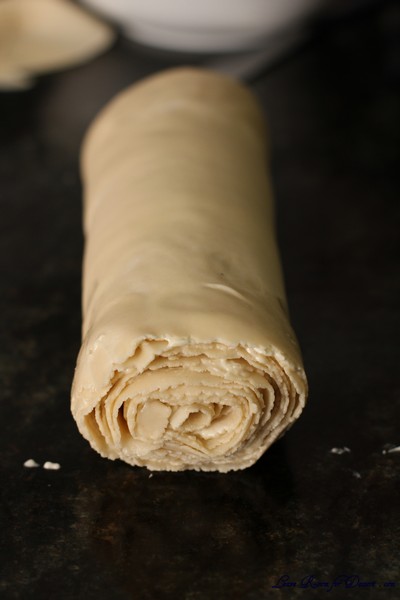
6. Place one piece of a strip on you clean work surface and paint (or smear) it liberally with the lard/butter mixture. I do about a 8 inch (20 cm) section at a time. Gently pull the sides of the dough and stretch it, starting from the middle and going out, until it is about 8 or 9 inches (20 or 23 cm) in width. Begin from the short end and start rolling the dough into a very tight roll. When you start to reach the end of your stretched section, stop and liberally grease up another section, stretching and rolling until all the dough is finished. When one strip of dough is finished, overlap the end of one to the beginning of the other; continue to pull, stretch and roll up.

7. Spread the lard/butter mixture over the entire finished log and starting in the middle gently run the hands down the length to extend the length another inch (30 mm) or so. This will release any air pockets and tighten the roll. Your finished roll should be approximately 10 or 11 inches (25 or 28 cm).

8. Wrap in plastic wrap and chill for at least 2 hours or overnight. The dough may be frozen for up to 3 months, at this time. Defrost it in the refrigerator overnight before using.

9. Preheat your oven to moderately hot 400°F/200°C/gas mark 6

10. Line 2 baking sheets with parchment.

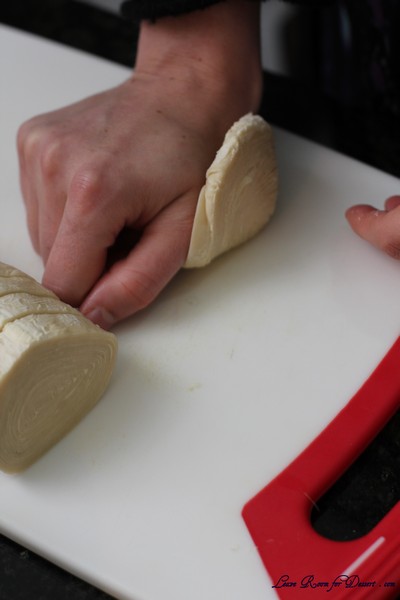
11. Remove the dough from the refrigerator, unwrap, and place on a cutting board. Slice off about an inch (30 mm) from each end so that they are straight and even. Cut the roll into 1/2 inch (15 mm) slices. Put the semolina-ricotta mixture into a pastry bag with a 3/4 inch (20 mm) opening (A disposable pastry bag or even a ziploc bag with the corner cut off is fine).

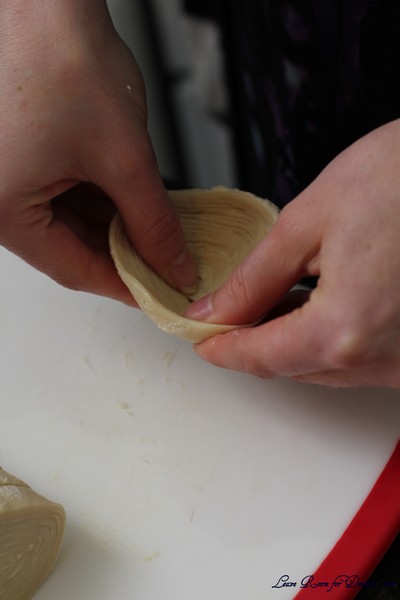
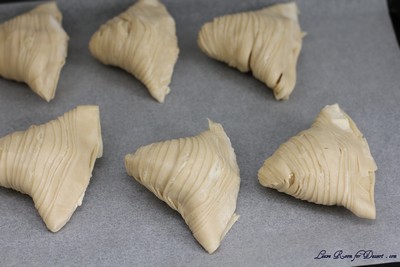
12. Take one slice of dough and place it on your workplace. With the heel of your hand, push out from the center in one direction. Rotate the dough and do this in all four directions. This forms the dough and opens up the layers. Pick up the piece and insert your thumbs on the inside with your forefingers on the outside meanwhile gently stretch the center to make it more into the shape of a cone. You don’t want the layers to actually separate. Holding the cone in one hand, squeeze some of the filling into the cavity so it is full. Lightly push the opening closed. You do not have to seal the opening as the filling is too thick to ooze out during baking.

13. Place onto the prepared baking sheet and very lightly brush the outside of each completed pastry with the lard/butter mixture. Bake them in a preheated moderately hot 400°F/200°C/gas mark 6 oven for about 20 to 25 minutes or until they are a deep golden brown.

14. Remove from the oven and cool on a rack. These are best served warm with a sprinkling of confectioners’ sugar on the day they are made. To reheat them, just place them in a moderate 350°F/180°C/gas mark 4 oven for about 5 minutes.

Slow-Cooked Beef and Mushroom Pie – Daring Bakers Challenge October 2013

Sunday, October 27th, 2013

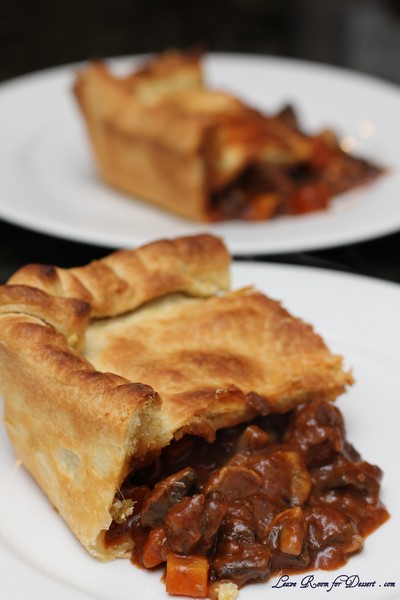
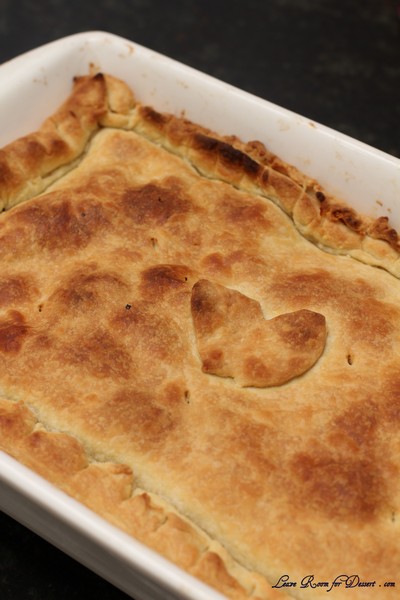
Hannah of Rise and Shine was our October 2013 Daring Bakers’ hostess and she challenged us to bake our own double crusted savory pot pies. Using any from-scratch crust and filling we choose, we were allowed to get completely creative with our recipe, showing off the savory flavors and fillings from our own home or region.

Pie, Pie, Me oh My, I love Pie!

Pie is definitely one of my favourite comfort foods. Pastry just works with anything and everything! It makes a casserole better, a curry better, not to mention custard or lemon curd! But sweet foods were off our list! Never mind, it doesn’t take much convincing for me to make a pie. My only issue was how long it takes to get a truly lovely beef pie.

Many times in the past, I have made recipes using beef that was easy to prepare – not much fat, because I tend to be a little too pedantic when it comes to removing the fat from my meat. Gravy beef often just looks like took much effort, and I go for something like rump. Although it is easier to prepare, it doesn’t have the same flavour, and doesn’t fall apart and stay moist like this gravy beef did.

I had to be disciplined and only remove the major pieces of fat, leaving behind the fat running through the meat, and we were rewarded in the end. The rich gravy with wonderful flavours paired just beautifully with the buttery flaky pastry that was our challenge for this month. The pastry was super easy to make (I used a food processor, not sure if I was supposed to – but it made it that much more easy, and I needed to put my feet up and rest my back after the prep work for the casserole filling).

Thanks to our host, we sure were in the mood for comfort food last night. I had everyone commenting on how lovely the pie was.

Slow-Cooked Beef and Mushroom Casserole

Recipe by Anita @ Leave Room for Dessert

This mix can either be cooked and served with rice, veggie mash or in a pie casing (as is done here).

Serves 8 (fits into one lasagna dish)

Time: 2 hours of cooking, plus ~30min prep (+ 30 minutes, if making into a pie)

1 kg gravy beef, large pieces of sinew discarded, remaining meat cut into chunks 2-3cm diameter)
1/4 cup plain flour
1/2 teaspoon salt
1/4 teaspoon oregano
4 tablespoons olive oil (more or less, depending on your pan)
2 onions, chopped
1 celery stalk, chopped
1/2 teaspoon salt
4 cloves garlic, crushed, chopped or sliced
1 cup red wine
1 cup beef stock
4 tablespoons tomato paste
1 teaspoon mixed herbs
salt and pepper to taste
2 carrots, chopped
400g mushrooms, quartered (or cut into sixths or eighths if mushrooms are large)
1 tablespoon cornflour + 1 tablespoon water – optional, for thickening at the end if required

1 quantity of flaky pastry below – or 2 sheets shortcrust pastry + 2 sheets puff pasty

Combine the plain flour, 1/2 teaspoon salt and oregano. Lightly coat the beef pieces, removing excess flour. Discard remaining flour mix.

Heat a large saucepan over medium/ medium-high heat. Add a tablespoon of oil and fry about one third of the beef for a few minutes on each side. Remove, and repeat with remaining batches or meat. (depending on how much the meat sticks, may determine how much oil to add).

Once all the beef is seared and removed from the pan, add a tablespoon of oil and cook the onion, celery and 1/2 teaspoon salt together for a few minutes on medium until slightly translucent (it will cook for a long time, so don’t worry too much). Add the garlic and stir for a minute. Add the wine and allow it to come to the boil. Cook to remove anything stuck to the bottom of the pan, and reduce until there isn’t much liquid left in the saucepan.

Add the beef back into the saucepan along with the beef stock, tomato paste and mixed herbs. Cook on low, with the lid on for 1 1/2 hours (now is the stage to make the pastry if you haven’t already done so, and aren’t using pre-made shortcrust and/or puff pastry). Then add the carrots and mushrooms and cook, without the lid, for a further 30 minutes. (If you plan on serving without cooking in a pie, you may want to add the carrots earlier – maybe 45-60mins before cooking). While this is cooking, you can preheat the oven to 180C, and start to prepare for the pie (if making).

The beef should be falling apart by this stage. This is now ready to serve, or you can thicken the juices if it requires thickening. I removed all my mix, and left only the extra sauce in the saucepan. Combine the cornflour and water and whisk it into the juices, cooking it on medium heat. You may decide to cook for longer or add more cornflour if you like.

Flaky Pie Crust

This recipe was by our host this month, Hannah of Rise and Shine

(These instructions are for a round pie dish, if making a lasagna dish, roll out pastry into rectangles, both before chilling and after) I used a food processor for the whole process

Servings: about 8 (one 9 1/2 inch (24 cm) pie), or one lasagna dish

3 1/2 cups ( 840 ml)(17 ¼ oz)(490 gm) all-purpose (plain) flour
1 tablespoon (15 ml) (½ oz) (13 gm) brown sugar, firmly packed
1 1/2 teaspoons (9 gm) salt
1/2 cup (120 ml) (4 oz) (115 gm) cold shortening (I always use butter flavored), cut into pieces
3/4 cup (180 ml) (6 oz) (170 gm) cold unsalted butter (I didn’t use shortening, and used a total or 280 g butter)
1 cup (240 ml) ice water

1. Mix flour, sugar and salt in a large bowl. Drop in shortening and quickly grate butter directly into the bowl using a cheese grater.

2. Using your fingers, a fork or a pastry cutter, work butter and shortening into the flour mixture until it’s broken down into course, chunky crumbs. Stop mixing when the largest crumb is about the size of a pea.

3. Using a fork, quickly stir in very cold ice water. Turn the rough dough and crumbs onto a floured surface.

4. Knead just until dough starts to hold together in a rough mass, up to 10 times. Do not over mix! You will be able to see chunks of butter in the dough and this is a good thing.

5. Divide the dough in half and pat each half into a disk. Wrap each disk in plastic wrap and refrigerate for at least an hour before use. The dough will keep in the fridge for a full day, or you may freeze the dough for up to 3 months (and bring back to a thawed chill before rolling).

11. Roll out one half of the chilled dough about 1/4 inch (5 mm) thick using a floured rolling pin on a well-floured surface. Once your round of dough is about ten inches (25 cm) across, dust the top with flour, pick the round up from the counter and dust under the dough again before rolling out completely to about 15 inches (38 cm) across. Hold your pie plate up to the round of dough to ensure it is large enough to fit your pie plate.

12. To set the dough into your pie plate, fold the round of dough in half, then in half again to create a large triangle of dough. Point the tip of triangle of dough into the center of the pie plate and unfold. Be careful not to stretch the dough while you ensure that you have the dough tucked into all corners.

13. Pour the filling into the unbaked pie shell.

14. Roll out the top crust and cover the filling. Trim excess dough and seal the edge crust by folding the top dough layer under the bottom and pinching the dough together with your fingers or pressing with the tines of a fork.

15. Bake in the lower third of your oven until the pastry is golden brown, 45 to 50 minutes (Mine only took 30 minutes, so check after 15 minutes to get an idea). To ensure the bottom is browned, you may choose to prop an electric oven open using the handle of a wooden spoon for the last ten minutes of the baking time. If at any point you fear the top crust is over-browning, cover with foil for the remainder of the baking time. Serve immediately while warm.

Coconut Three Milks Cake – Daring Bakers Challenge September 2013

Friday, September 27th, 2013

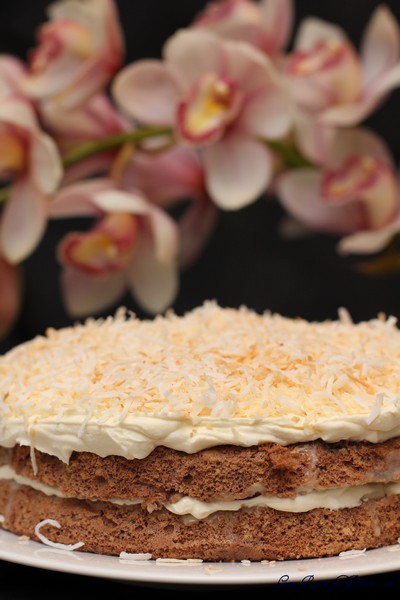
Inma of la Galletika was our Sept. 2013 Daring Bakers’ hostess and WOW did she bring us something decadent and delicious! Pastel de Tres Leches or Three Milk Cake, creamy yet airy, super moist but not soggy.. just plain delish!

Coconut is one of the things I have been craving recently, so when given the choice between a classic vanilla and fruit three milks cake and a coconut three milks cake, I chose the latter. All the components were easy to make and worked very well together making a very lovely cream filled cake.

When the cake came out of the oven and I had a look at the size of the cake compared to the amount of liquid, I was a little apprehensive (due to a recent past experience in which the cake was just too soggy – something I really dislike in cake). I made myself put about half the soaking liquid onto the cake, but some of it just sat on top and didn’t soak in. I decided at that point I would err on the side of caution and not add any more. Everyone who tried it agreed that no more liquid should have been added, as it would have been far too soggy. I think even a quarter of the soaking mix would have been sufficient.

The cake was a little rich for Nick, as he is not mad about lots of whipped cream, but my friends at work managed to eat it all up the next day 🙂

Coconut Three Milks Cake

Recipe Source: This recipe slightly adapted from an interview given by one of Mexico’s best Pastry Chefs; Paulina Abascal to the magazine Revista Secretos de la Pastelería Caserais it produces a super moist yet light Tres Leches.

Servings: 12
A variation – Three milk chocolate roll with toasted coconut.

Ingredients for sponge cake
5 large eggs (separated)
½ cup (120 ml) (4 oz) (125 gm) sugar
2 teaspoons (10 ml) vanilla extract
1 cup (240 ml) (5 oz) (140gm) all-purpose (plain) flour (sifted)
¼ cup (60 ml) water
3 tablespoons (45 ml) (¾ oz) (25 gm) unsweetened cocoa powder

For the coconut syrup (I ended up using only half this amount, so you could halve this before cooking if you wanted)
1 can (14 oz) (400 gm) sweetened condensed milk
1 can (12 oz) (340 gm) coconut milk
1 cup (240 ml) heavy cream (about 35% fat)

Topping and filling
2 cups (500 ml) of whipping cream (about 30% fat)
½ cup (120 ml) (4 oz) (125 gm) sugar (I used half this amount and it was sweet enough)
1 cup (240 ml) (3½ oz) (100 gm) shredded coconut

Directions For the Sponge Cake:

Preheat oven to moderate 180°C/350°F/gas mark 4. Prepare a square 9”x9” (23cmx23 cm) pan or 9” (23 cm) round cake pan
Separate the egg whites from the yolks.
Beat the egg whites on medium speed, 3 – 5 minutes.
When soft peaks form slowly add the sugar in small batches.
Whip until stiff peaks form about 5 minutes. Set aside.

In a medium bowl beat egg yolks at medium-high speed for about 5 to 6 minutes, or until the egg yolks become pale colored, creamy and puffy. Stir in vanilla.

Pour the egg yolks over the egg whites, gently fold until just combined trying not to lose any volume from the mixture.
Fold in the flour little by little in the form of rain. Mix until just combined (over-beating will result in a denser, flatter cake).
After folding in the flour you have to fold in the cocoa powder dissolved in the ¼ cup of water (it should be a thick paste)
Pour the batter into the prepared 9”x9” (23cmx23 cm) square cake pan or 9” (23 cm) round cake pan.

Bake in the preheated moderate oven for 25 minutes or until the toothpick comes out clean


Let it cool
Once cool, split the cake in half, flip the top of the cake and place it on a base. Poke using a fork holes all over the cake to better absorb the three milk soaking liquid.

Directions for the coconut syrup

In a saucepan add the sweetened condensed milk, coconut milk and heavy cream, bring to a boil, reduce the heat and continue boiling for 5 minutes. Remove it and let it cool.

Cut the cake in half and brush the syrup on both sides until totally absorbed.

Directions for the decoration
1. In a skillet, over medium heat, toast the coconut
2. Cover the cake with whipping cream and spread the coconut on the top. Enjoy.

Storage & Freezing Instructions/Tips:
It is better when the cake has had time to mellow in the refrigerator at least one hour but best if refrigerated overnight. Storage will keep in the refrigerator for 2-3 days if well-covered.

Mawa Cake and Bolinhas De Coco – Daring Bakers Challenge August 2013

Tuesday, August 27th, 2013

Aparna of My Diverse Kitchen was our August 2013 Daring Bakers’ hostess and she challenged us to make some amazing regional Indian desserts. The Mawa Cake, the Bolinhas de Coco cookies and the Masala cookies – beautifully spiced and delicious!

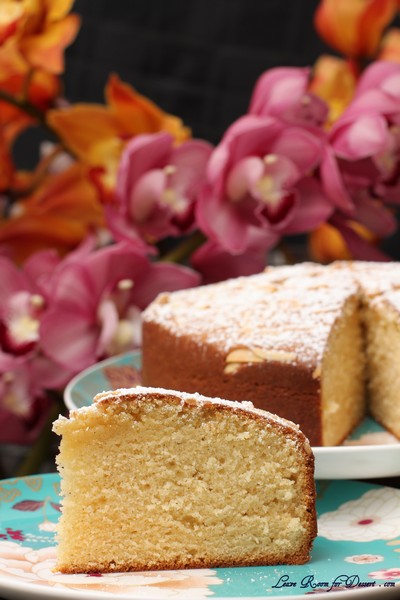
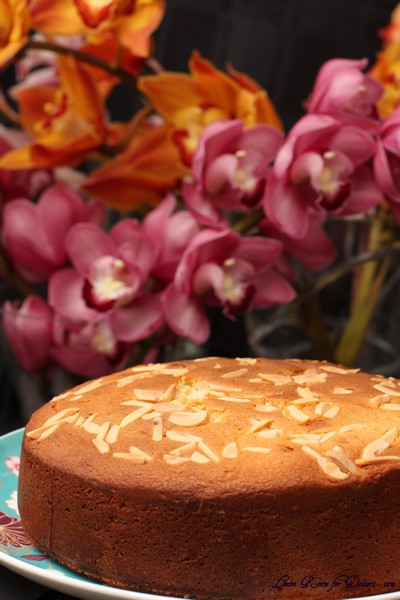
A light cardamon and vanilla scent spread through the house when I cooked the Mawa cake. We were lucky enough to be able to try this cake while it was still slightly warm, which I think made it ever so more tantalising. A beautifully textured cake, it was lovely and moist with a beautiful flavour.

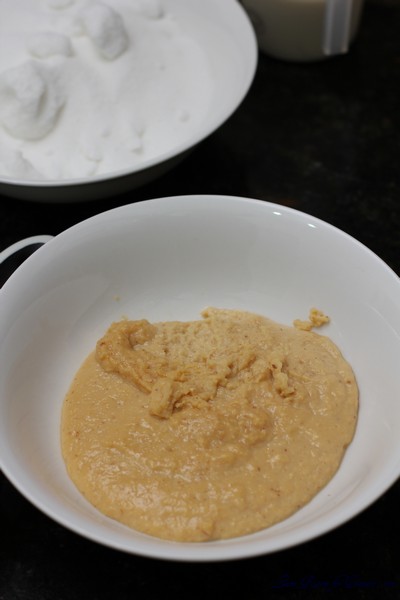
Although the cake itself was as easy to make as any butter cake, the mawa was a bit time consuming. I didn’t think this would be an issue as I was making the base for the bolinhas de coco at the same time, so I was able to keep an eye on the milk and stir it often. Even with my non-stick saucepan the bottom seemed to stick and burn a little, so when it really started to reduce I transferred it to another saucepan. It did reduce down to a very interesting paste, despite my concerns about it burning. I would never have thought to cook milk for 2 hours and reduce it like this recipe states.

Would I like to eat this cake again – of course, although maybe if there was an easier way to make the mawa 🙂

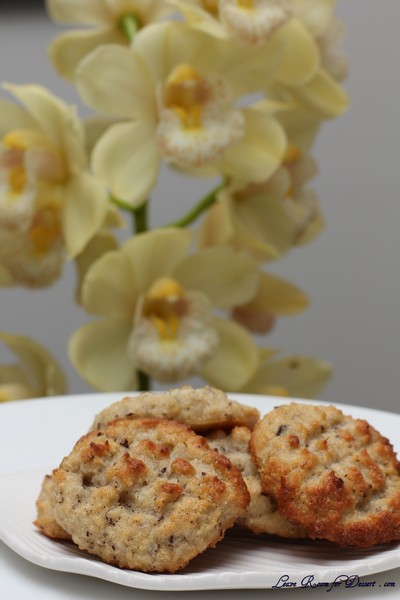
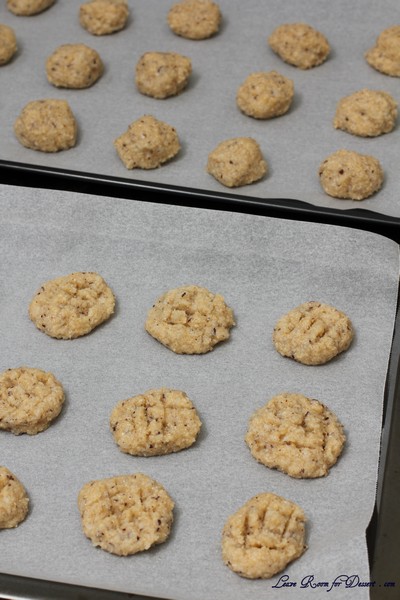
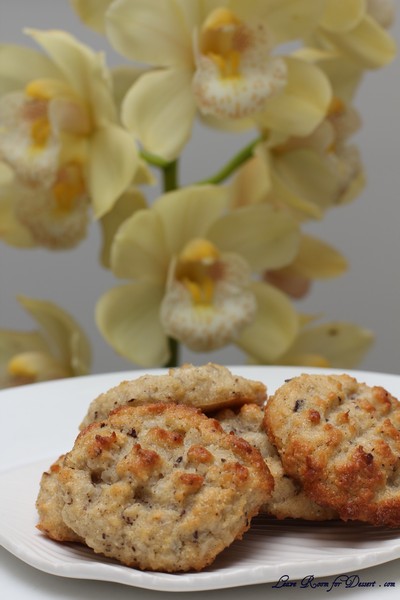
The next recipe I tried was the bolinhas de coco, a biscuit made with coconut, semolina and cardamon flavour. I used up one coconut (which made about 2 1/2 -3 cups coconut flesh), and got Nick to remove all the flesh from the shell, then put it straight into the food processor. I then made the base for the biscuits, which was the semolina, coconut and sugar syrup. This mix tasted lovely by itself, so I was excited to cook the biscuits the next night. I found it difficult to break up this base the next night, and mix the base with the eggs and cardamon.

I found the biscuits a bit hard to roll up, the mix was quite sticky, and in hindsight I should have used flour (as suggested) to help with the rolling. This also made my biscuits not as beautiful as Aparna’s ones. The biscuits had a lovely crunchy outside and soft chewy inside, with a light cardamon flavour. (although the next day they had lost this lovely crunch).

I wish I had the chance to make the Masala biscuits, they sounded lovely with different spices. Sunday was just too lovely to spend all day inside, as we are having beautiful Spring days even before Winter finishes – time to make the most of these days.

MAWA CAKE (Cardamom Flavoured Milk Cake)

Servings: Serves 8 to 10

Mawa Cakes are a specialty cake that is the hallmark of Irani cafés in India. The Iranis are Zoroastrians who left Persia/ Iran in the 19th and early 20th centuries to escape persecution of non-Muslims, and settled down and thrived here mostly in the cities of Mumbai, Hyderabad and Pune. They’re most famous in India for their friendly informal cafés/ restaurants that serve the most awesome food. The brun pav or maska pav(kinds of bread) with Irani chai (thick, strong, sweet and milky cardamom flavoured tea), their Shrewsbury biscuits and Mawa cakes are just a few of them.

Mawa (also known as Khoya/ Khoa) is made by slowly reducing milk (usually full-fat) until all that remain is a mass of slightly caramelized granular dough-like milk solids. Mawa is used in a wide variety of Indian sweets like Gulab Jamun and Peda, to mention just two. Mawa is pronounced as Maa-vaa; Khoya is pronounced as KhOh-yaa.

In this cake, Mawa lends a rich and a caramelized milky taste to this cake which is slightly dense and reminiscent of a pound cake. Cardamom and cashewnuts are typical of a Mawa Cake, though blanched almonds are also used. Mawa Cakes are also bakes as cupcakes.

The cake is very easy to make and the Mawa is not too difficult. It just requires some time, patience and a lot of stirring!

Ingredients

For the Mawa:
1 litre (4 cups) full fat milk

For the cake:
1/2 cup (1 stick) (120 ml) (4 oz) (115 gm) unsalted Butter (soft at room temperature)
3/4 cup (180 ml) packed crumbled mawa
1-1/4 cups (300 ml) (10 oz) (280 gm) castor sugar
3 large eggs
5 to 6 cardamom pods, powdered, (about 1-1/2 tsp powdered cardamom)
2 cups (500ml) (9 oz) (260 gm) cake flour
1 teaspoon (5 ml) (5 gm) baking powder
1/4 teaspoon salt
1/2 cup (120 ml) milk
1 teaspoon (5ml) vanilla extract (optional)
Cashewnuts (or blanched almonds) to decorate (about 18 to 20)

Directions:

1. First make the “Mawa”. Pour the milk into a heavy bottomed saucepan, preferably a non-stick one. Bring the milk to a boil, stirring it on and off, making sure it doesn’t stick to the bottom.
Turn down the heat to medium and keep cooking the milk until reduces to about a quarter of its original volume. This should take about an hour to an hour and a half.

2. The important thing during this process is to watch the milk and stir it frequently to make sure it doesn’t stick to the sides or bottom of the pan and get burnt. The danger of this happening increases as the milk reduces and gets thicker.

3. Once the milk it has reduced to about one fourth, 1/4 quantity, lower the heat to low and let cook for a little while longer. Keep stirring regularly, until the milk solids (mawa) take on a lumpy appearance. There should be no visible liquid left in the pan, but the mawa should be moist and not stick to the sides of the pan.

4. Remove the pan from heat and transfer the mawa to a bowl and let it cool completely. Then cover and refrigerate it for a day or two (not more) till you’re ready to make the cake. It will harden in the fridge so let it come to room temperature before using it.

You should get about 3/4 to 1 cup of mawa from 1 litre (4 cups) of full-fat milk.

5. Now start preparations for the cake by pre-heating your oven to moderate 180°C/350°F/gas mark 4. Beat the butter, the crumbled mawa and the sugar in a largish bowl, using a hand held electric beater, on high speed until soft and fluffy.

6. Add the eggs, one at a time, and beat on medium speed till well incorporated. Add the vanilla and milk and beat till mixed well.

7. Sift the cake flour, baking powder, cardamom, and salt onto the batter and beat at medium speed and well blended. If you cannot find cake flour, place 2 tablespoon of cornstarch in the bottom of your 1-cup measure and then fill it with all-purpose (plain) flour to make up to 1 cup.

8. Grease and line only the bottom of an 8 inch (20 cm) spring form pan. Pour the batter into this and lightly smooth the top. Place the cashew nuts (or blanched almonds) on top of the batter randomly. Do not press the nuts down into the batter. A Mawa Cake always has a rustic finished look rather than a decorated look.

9. Bake in a preheated moderate oven for about 1 hour until the cake is a golden brown and a skewer pushed into the centre comes out clean. Do not over bake the cake or it will dry out. If the cake seems to be browning too quickly, cover it will aluminium foil hallway through the baking time.

10. Remove from oven and allow it to cool for 10 min in the tin. Release the cake, peel off the parchment from the base and let it cool completely.

BOLINHAS DE COCO (Cardamom Flavored Coconut Biscuits/ Cookies)

Servings: Makes about 4 dozen cookies

Bolinhas are cardamom flavoured coconut and semolina cakelets or biscuits (In India we call them biscuits and not cookies) from the Indian state of Goa. They are a little crisp/ crunchy on the outside and soft and have a melt-in-the-mouth texture on the inside.
As the name suggests this recipe, like a lot of Goan Catholic cooking, is very much influenced by the Portuguese occupation of Goa.

Bolinhas de Coco are a Christmas-time treat and a Goan Christmas sweet platter would be incomplete without them, though they’re eaten throughout the year.
What is unusual about these biscuits/ cookies is they are made entirely with semolina and fresh grated coconut (no flour), and making the batter involves an overnight rest of at least 8 hours so that the semolina can soak up liquids and become really soft.

Ingredients:

2 cups (500 ml) (5-1/3 oz) (150 gm) fresh grated coconut, packed
1-1/2 cups (360 ml) (9 oz) (250 gm) semolina
1-1/4 cups (300 ml) (8-3/4 oz) (250 gm) granulated sugar
3/4 cup water (180ml) (6 oz) (175 gm) water
A pinch of salt
2 tablespoons (30 ml) (1 oz) (30 gm) ghee (clarified butter) or melted unsalted butter
2 large eggs
8 to 10 pods cardamom, powdered (about 1-1/2 teaspoon)

Directions:

1. Run the grated coconut in your processor or the small jar of your blender a couple of times so that the flakes are smaller and uniform in texture. Do not grind into a paste. Keep aside.

2. Put the semolina in a pan and toast/ roast it, over low to medium heat, until it starts giving off an aroma, and looks like it’s about to start changing colour. This should take a couple of minutes. Do not brown. Transfer the semolina into a bowl and keep aside.

3. In the same pan, pour the water and add the sugar to it. Place it on medium heat and keep stirring until the sugar dissolves completely. Once the sugar has dissolved, keep stirring the solution and let it cook for about 2 minutes. Turn off the heat. The sugar solution should just begin to start forming a syrup but is still watery. Do not cook until it forms a thick syrup.

4. Add the toasted/ roasted semolina and mix well. Then add the coconut, salt and ghee (or melted butter) and mix well. Put the pan back on the stove, and over medium heat stir the coconut mixture until it is really hot and easily forms a thick clump. This should take about 2 to 3 minutes.

5. Take the pan off the heat and let the semolina coconut mixture cool to room temperature. Transfer this into a bowl or container, cover and refrigerate for at least 8 hours, ideally overnight. For really fluffy biscuits/ cookies, the overnight rest is recommended.

6. The next day, take the dough out of the fridge and let it come to room temperature. Separate the yolks from the egg whites. Lightly beat the yolks with a fork to break them and add to the dough. Also add the powdered cardamom and mix well with a wooden spoon or fork.

7. Whisk the egg whites by hand until frothy and add to the dough. Mix well till incorporated.

8. You will now have a slightly moist and sticky dough. Refrigerate this dough for about half an hour so it firms up a bit.

9. Pre-heat your oven to moderate 180°C/350°F/gas mark 4. Line your baking trays with parchment or grease them well with some ghee or melted butter.

10. Take the dough out and pinch off walnut sized bits of dough. The dough should be firm enough to handle without difficulty. If the dough is sticking to your palms, lightly dust your palms with flour before shaping the dough. Roll the bits of dough into balls and then flatten them very slightly.

11. Decorate the top by marking criss-crosses (3 equidistant lines one way and another 3 crossing them at right angles), with a table knife. Press down a bit but not too deep or right through the biscuit/ cookie. Use up all the dough this way.

12. Place the shaped dough on the baking trays leaving a little space between them. Bake in a preheated moderate oven for about 20 to 25 minutes until they’re a golden brown and done. Let them cool on the sheets for about 5 minutes and then transfer to racks to cool completely.

13. Store the biscuits/ cookies in airtight containers. This recipe makes about 4 dozen Bolinhas de Coco.