Egg Yolks

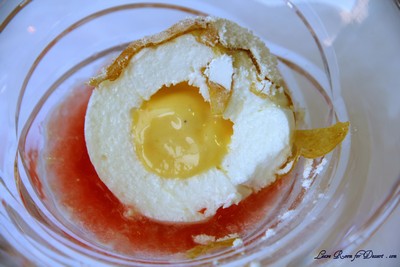
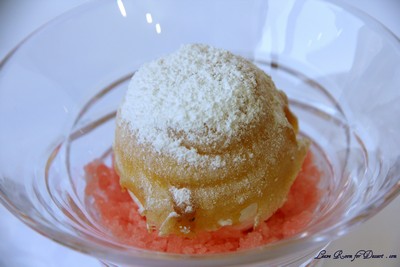
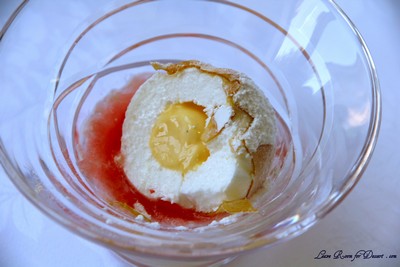
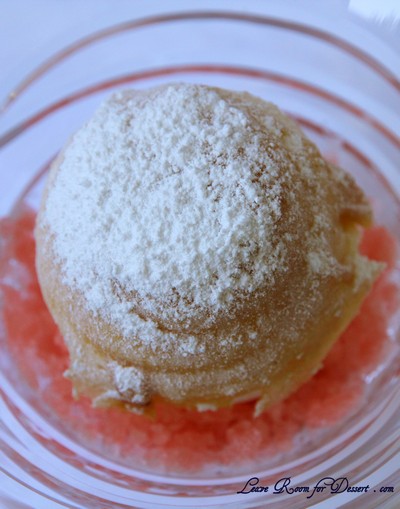
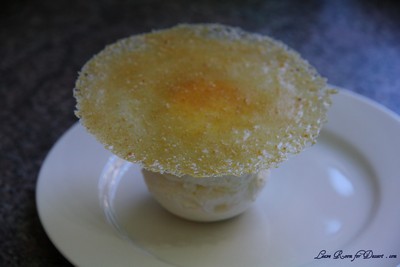
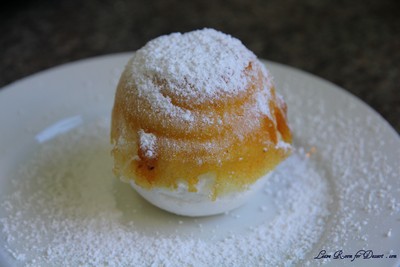
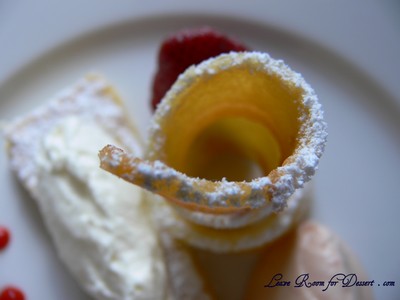
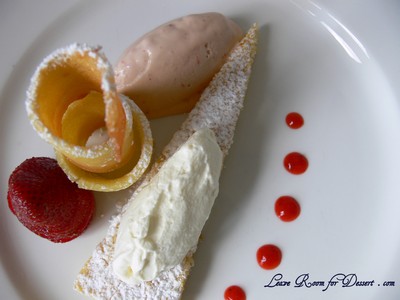
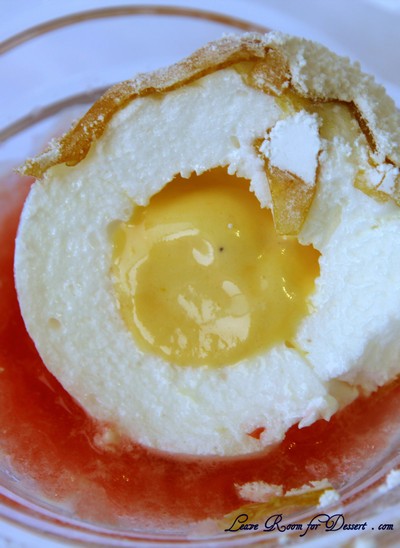
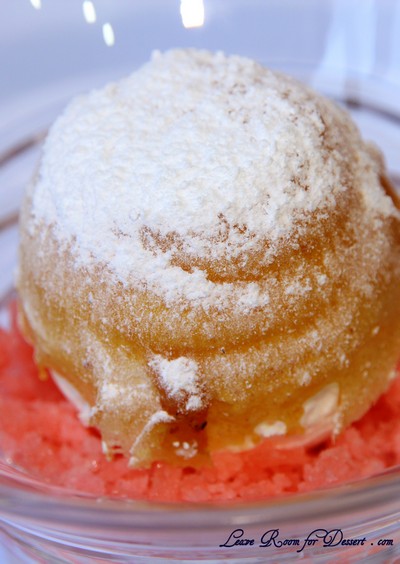
Tropical Snow Egg

Tuesday, August 3rd, 2010

After our trip to Quay last year, I have wanted to replicate Peter Gilmore’s Snow egg. It never occurred to me again, until I saw Peter Gilmore in a Gourmet Traveller video, where he showed roughly how his two signature desserts (the eight-textured chocolate cake and the snow egg) were made, along with his inspiration behind them. I went searching for recipes for poached meringues, crispy tuilles and with terrible luck (and terrible search terms) it took me quite a few hours before I had found the actual recipe on the internet…

And then I saw it everywhere, even little searches brought me to his recipe, either posted by someone who went to Peter’s cooking class or even on a lifestyle website. Then it was the final dish to be prepared by MasterChef contestants in series 2.

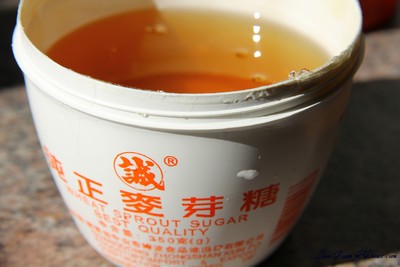
The best part of this dessert being on MasterChef were the comments by people below the recipe, as everyone was discussing where to buy maltose. Beforehand I tried looking in the shops and found rice malt – a brownish liquid maltose (+ carbohydrates and a little glucose). I decided to try it out, without trying any other parts of the recipe, to see if this would work. It didn’t. The tuilles melted into a terrible mess. After checking out the MasterChef website I found people suggesting going to Asian grocery stores. And with much luck, my local Asian grocery store had it. I had to ask for it though as it was too difficult to find, although the lovely staff member there found me some – it was labelled: Wheat Sprout Sugar, Ingredients: Rice, malt…

These tuilles were perfect! They worked very well on baking paper and hardly any broke. It also didn’t matter if they stayed on the paper a while.

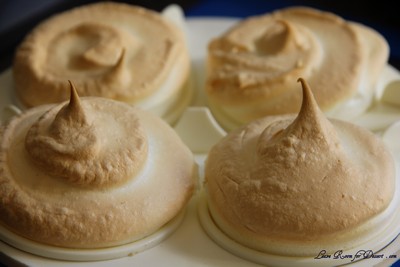
The other piece of equipment I was missing were the hemisphere moulds. Although my Mum came up with the brillant idea of using an egg poacher for the meringue moulds. Lucky my mum’s one had smooth hemispheres compared to mine with a flat base. These worked perfectly, with the only problem being that there were only 4 moulds, so I had to clean them between cooking each batch of 4 halves. I made a total of 8 snow eggs, so this part got tedious after the 2nd batch.

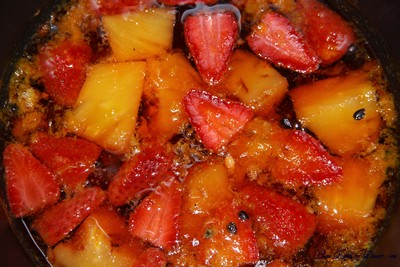
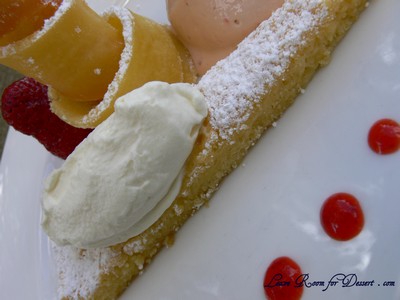
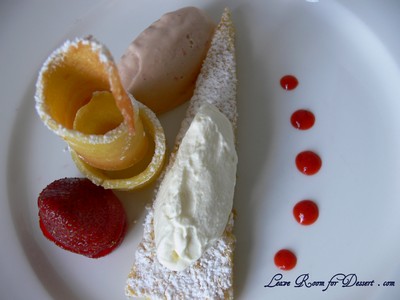
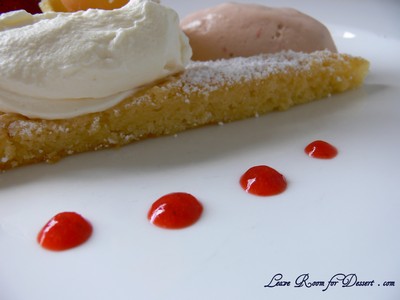
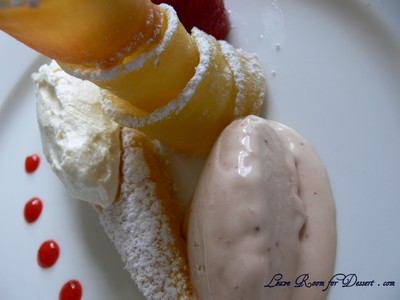
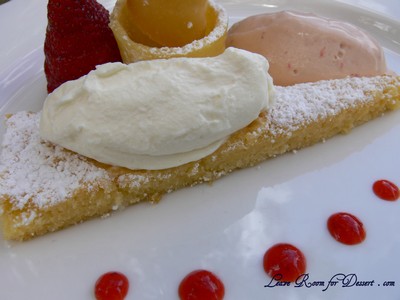
The flavours Peter uses are gorgeous, although trying to make this using seasonal fruits or frozen fruits I had on hand, made me change the recipe to suit the timing of the year. I decided on a passionfruit ice cream for the “yolk” of the egg, with a tropical, strawberry, pineapple and passion fruit granita along with a strawberry cream. I think most flavours worked wonderfully – although the strawberry cream was maybe a little overpowering in flavour.

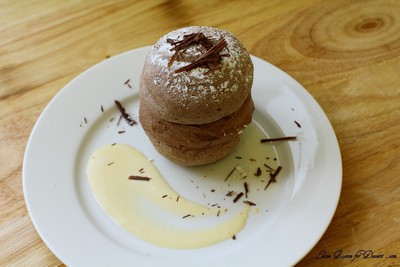
I have learnt so much from this challenge – the maltose experience was extremely interesting, as were making the poached meringue and granita. I am so glad I have made this, and even more glad the extremely talented and incredibly gifted Peter Gilmore shared such a beautiful recipe of his. I would much like to go back to Quay at some point as the experience was just amazing. I am also greatly anticipating the launch of his book on 1st November this year!!! I tried to make my own version of Peter Gilmore’s eight textured chocolate cake as I could not find his recipe anywhere – although it didn’t turn out particularly well in the presentation department (and obviously didn’t compare to the flavours of Peter’s, but was still delicious). I’m not sure whether I should post it due to the bad photos… – although I have heard his actual recipe may be in his book – making me super excited!!

And to answer your questions, I think this dessert is worth making. Many components can be made the night or a few nights beforehand, the presentation is lovely, the flavours are beautiful, the concept is amazing. (Although, this is on the condition of getting some hemisphere moulds – as cleaning the egg poachers was too tedious. Please let me know if you find any in Sydney or on the internet?) {now that’s not a hint for a birthday present, if I ever did give one 🙂 }

Tropical Snow Egg

Recipe adapted from Peter Gilmore from Quay‘s Guava and Custard Apple Snow Egg

Passion fruit ice cream
100ml milk
3 egg yolks
100g caster sugar
100g passion fruit pulp
50ml pouring cream

Vanilla custard base
400ml pouring cream
2 vanilla beans, split and seeds scraped
1 whole egg
3 egg yolks
80g caster sugar

Tropical granita
100g caster sugar
500ml water
150g pineapple, diced
100g passion fruit pulp
100g fresh strawberries, hulled and halved

Poached meringue (I used all the left over egg whites from the ice cream and custard – making a meringue of ~200g egg whites and ~200g caster sugar)
Canola oil spray or vegetable oil
150g egg white
150g caster sugar

Maltose tuiles
200g liquid maltose
100g caster sugar
20g flaked almonds

Vanilla cream

100g vanilla custard base
100g double cream

Strawberry Cream
100g of strawberries, pureed and sieved
200g vanilla cream

1 cup icing sugar, to serve

Preheat oven to 150ºC and turn on ice cream machine to chill.

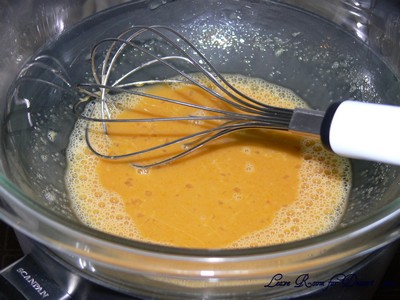
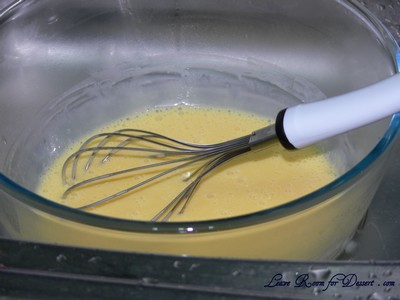
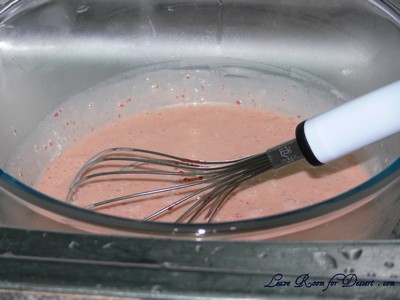
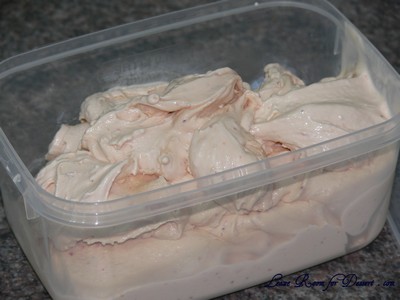
For the passion fruit ice cream, bring milk to the boil in a small saucepan. Whisk egg yolks and sugar together by hand, then pour boiling milk onto the egg yolk mixture while whisking. Pour into a stainless steel bowl and cook while whisking over a pot of simmering water for about 10 minutes or until it is thickened. Whisk sabayon until cool over ice, then whisk in the passion fruit pulp and the cream. Strain and then place the mixture into an ice cream machine and churn for about 40 minutes. Place in the freezer until set.

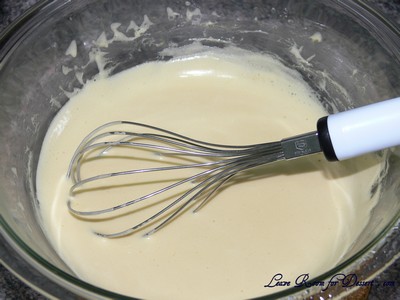
For the vanilla custard base, heat cream and vanilla seeds together in a small saucepan until it just begins to boil, and then remove from the heat. Whisk by hand the eggs, egg yolks and sugar together in a stainless steel bowl until combined. While whisking the eggs, slowly pour on the hot vanilla cream. Mix well and remove the vanilla pods. Pour this mixture into 4 dariole moulds to a depth of 5 cm, place the dariole moulds into a small baking dish with boiling water around the dariole moulds up to halfway to form a water bath. Place the water bath into a 150ºC oven and cook the custard 25 minutes or until the custard is just set. If the centre is still runny place in the freezer until set then place in refrigerator until needed.

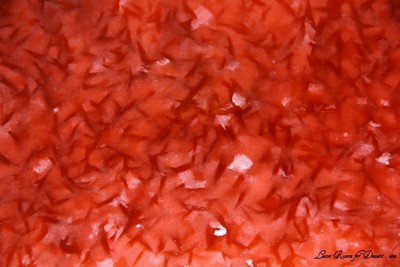
For the granita, combine sugar and water in a large saucepan; bring to the boil then lower heat. Add diced fruit and gently simmer for 10 minutes. Take off the heat and allow to infuse at room temperature for 30 minutes. Pass the liquid through a muslin cloth and discard the solids. Pour the syrup into a lamington or slice tin to a depth of 5cm. Place in the freezer until solid. Scrape with a fork into crystals and then transfer to the freezer until required.

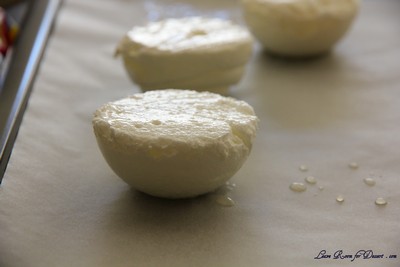
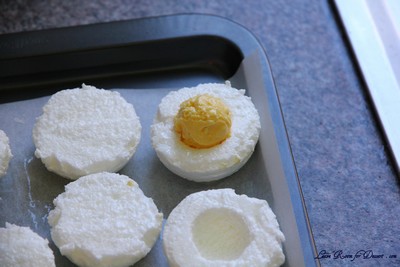
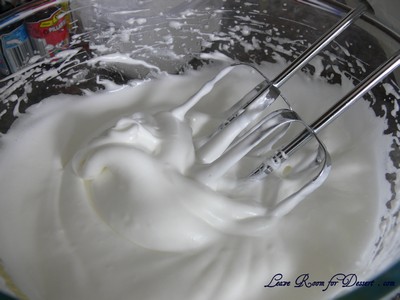
For the poached meringue, whisk the egg whites in an electric mixer until they form soft peaks and then slowly add the sugar bit by bit. Keep whisking until the meringue forms firm peaks and the sugar has dissolved. Spray hemisphere moulds lightly with canola oil spray. Spoon mixture into a piping bag fitted with a 1cm nozzle. Pipe mixture into moulds so it sits above the surface. Place the filled moulds into a large baking dish and pour boiling water into the baking dish to a depth of about 3cm. Bake at 150ºC for 15 minutes until just. Allow to cool for 2 minutes, then trim off tops so they are perfect hemispheres. Gently un-mould and place cut side up on a baking paper lined tray in the fridge until needed. Increase oven temperature to 180ºC.

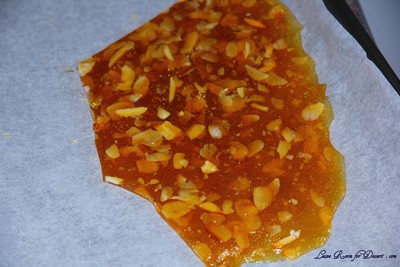
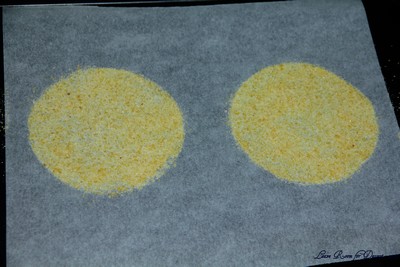
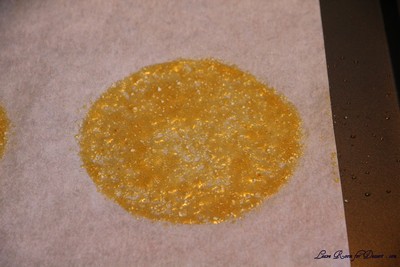
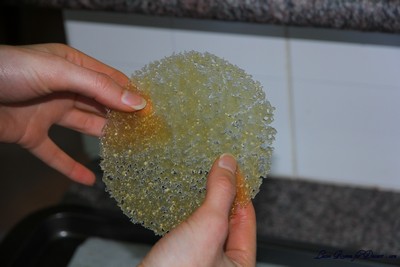
To make the maltose tuiles, stir maltose and sugar together in a small saucepan then bring to the boil until it reaches hard crack stage (until it caramelises) (this will occur at 160ºC or a little higher). Take care to brush down the sides with a pastry brush dipped in water so it doesn’t crystallise. Once golden add the flaked almonds and immediately pour the mixture onto a silicon mat, allow to cool completely. Process the cooled praline in the bowl of a hand blender to form a fine powder. Next sift a fine layer of the praline mixture through a drum sieve, over an acetate stencil with 11cm circles cut out of it onto a silicon mat on a baking sheet. Melt this mixture in a 180ºC oven for a few minutes until it forms a clear liquid paste. Cool tuiles slightly and peel off silicon sheet while still flexible. Store flat between sheets of baking paper until ready to use.

For the vanilla cream, whisk the cream and custard together to form soft peaks. Store in the fridge until ready to use.

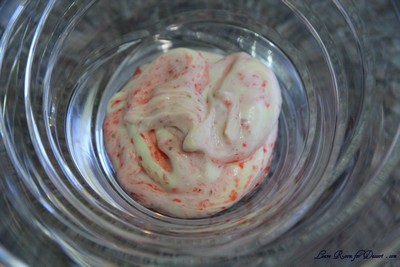
For the strawberry cream, place the strawberry puree in a small bowl and fold through the vanilla cream gently to form a rippled effect. Do this just before you are ready to assemble the dessert.

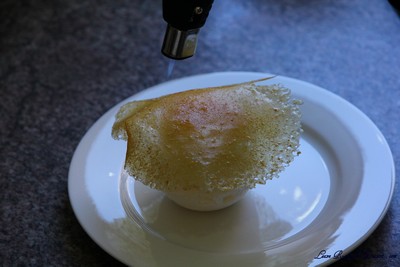
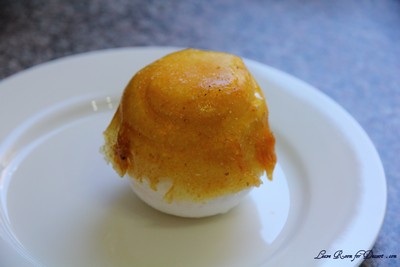
To assemble, take 8 of the half hemisphere poached meringues. Using a teaspoon or half teaspoon measure remove a small scoop from the centre of each half hemisphere being careful not to break through the outer edge. Then place a teaspoon or half teaspoon measure scoop of passion fruit ice cream in four of the hemispheres. Invert the other four hemispheres over the ice cream filled meringues to form a complete sphere. Use wet fingers to stick the two halves together. Place a tuile on top of each sphere and using a blow torch and an even motion, melt it over the sphere, patting it down if necessary. Dust spheres liberally with icing sugar. Next add a generous spoonful of the strawberry cream in the bottom of each serving glass. Top the cream with the tropical granita. Use two teaspoons to place the snow egg on top of the granita and serve.
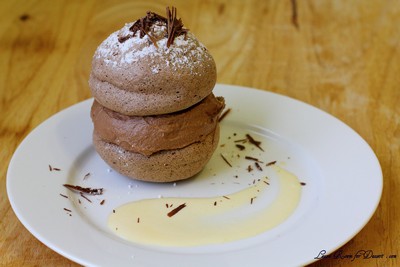
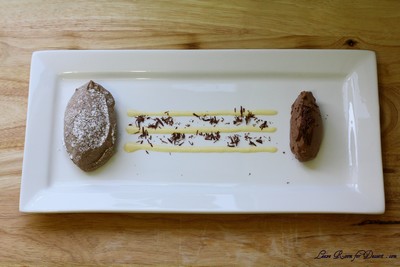
Chocolate Pavlova with Chocolate Mascarpone Mousse – Daring Bakers Challenge June 2010

Sunday, June 27th, 2010

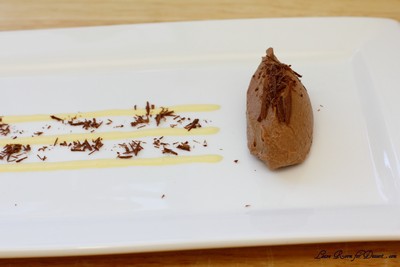
The June 2010 Daring Bakers’ challenge was hosted by Dawn of Doable and Delicious. Dawn challenged the Daring Bakers’ to make Chocolate Pavlovas and Chocolate Mascarpone Mousse. The challenge recipe is based on a recipe from the book Chocolate Epiphany by Francois Payard.

Even though I end up with loads of egg whites after my cooking escapades, I never tend to make meringues out of them. I end up trialling out some macarons and other egg white based goodies like souffles.

I was really excited to try chocolate meringues though and these were a big winner with everyone, especially Nick – who just loved them and wants more (I guess I know what I may be making with any more egg whites).

The mousse was quite nice and a bit rich – I think it would be a great recipe for those who want an eggless mousse.

I decided to make half the mascarpone cream and crème anglaise, as I didn’t think I would need such a large volume, especially considering I had seen most people only do a light drizzle over there meringue and mousse. After plating and taking photos I poured a whole lot over the meringue and mousse as an ice cream substitute with its lovely vanilla flavour (even if I did over cook the crème anglaise – whoops).

What a great challenge (Thanks Dawn!) Even though I had a bit of trouble finding the time, I had no trouble finding people to help eat the dessert.

Chocolate Pavlova with Chocolate Mascarpone Mousse

Recipe Source: Chocolate Epiphany by Francois Payard

Chocolate Meringue (for the chocolate Pavlova):

3 large egg whites
½ cup plus 1 tbsp (110 grams) white granulated sugar
¼ cup (30 grams) confectioner’s (icing) sugar
1/3 cup (30 grams) cocoa powder

Place a rack in the center of the oven and preheat to 200º F (95º C) degrees. Line two baking sheets with silpat or parchment and set aside.

Put the egg whites in a bowl and whip until soft peaks form. Increase speed to high and gradually add granulated sugar about 1 tbsp at a time until stiff peaks form. (The whites should be firm but moist.)

Sift the confectioner’s sugar and cocoa powder over the egg whites and fold the dry ingredients into the white. (This looks like it will not happen. Fold gently and it will eventually come together.)

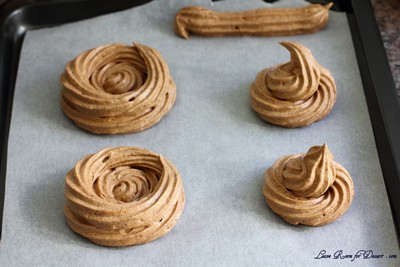
Fill a pastry bag with the meringue. Pipe the meringue into whatever shapes you desire. Alternatively, you could just free form your shapes and level them a bit with the back of a spoon. (Class made rounds, hearts, diamonds and an attempt at a clover was made!)

Bake for 2-3 hours until the meringues become dry and crisp. Cool and store in an airtight container for up to 3 days.

Chocolate Mascarpone Mousse (for the top of the Pavlova base): (I left out the lemon and orange juice/ Grand Marnier)

1 ½ cups (355 mls) heavy cream (cream with a milk fat content of between 36 and 40 percent)
grated zest of 1 average sized lemon
9 ounces (255 grams) 72% chocolate, chopped
1 2/3 cups (390 mls) mascarpone (we made this for the Tiramisu Daring bakers challenge – see the recipe here)
pinch of nutmeg
2 tbsp (30 mls) Grand Marnier (or orange juice)

Put ½ cup (120 mls) of the heavy cream and the lemon zest in a saucepan over medium high heat. Once warm, add the chocolate and whisk until melted and smooth. Transfer the mixture to a bowl and let sit at room temperature until cool.

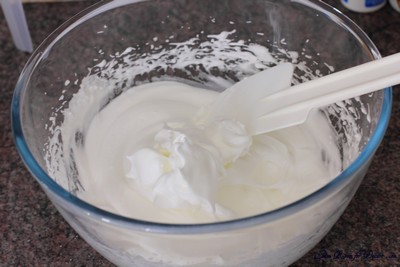
Place the mascarpone, the remaining cup of cream and nutmeg in a bowl. Whip on low for a minute until the mascarpone is loose. Add the Grand Marnier and whip on medium speed until it holds soft peaks. (DO NOT OVERBEAT AS THE MASCARPONE WILL BREAK.)

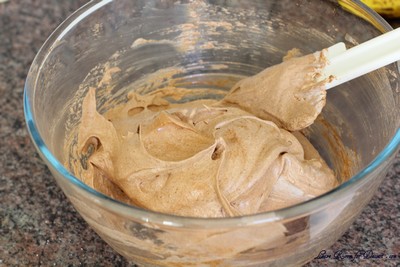
Mix about ¼ of the mascarpone mixture into the chocolate to lighten. Fold in the remaining mascarpone until well incorporated. Fill a pastry bag with the mousse. Again, you could just free form mousse on top of the pavlova.

Mascarpone Cream (for drizzling): ( I made half this quantity)

1 recipe crème anglaise
½ cup (120 mls) mascarpone
2 tbsp (30 mls) Sambucca (optional)
½ cup (120 mls) heavy cream

Prepare the crème anglaise. Slowly whisk in the mascarpone and the Sambucca and let the mixture cool. Put the cream in a bowl and beat with electric mixer until very soft peaks are formed. Fold the cream into the mascarpone mixture.

Crème Anglaise (a component of the Mascarpone Cream above): (I made half this quantity)

1 cup (235 mls) whole milk
1 cup (235 mls) heavy cream
1 vanilla bean, split or 1 tsp pure vanilla extract
6 large egg yolks
6 tbsp (75 grams) sugar

In a bowl, whisk together the egg yolks and sugar until the mixture turns pale yellow.
Combine the milk, cream and vanilla in a saucepan over medium high heat, bringing the mixture to a boil. Take off the heat.

Pour about ½ cup of the hot liquid into the yolk mixture, whisking constantly to keep from making scrambled eggs. Pour the yolk mixture into the pan with the remaining cream mixture and put the heat back on medium. Stir constantly with a wooden spoon until the mixture thickens enough to lightly coat the back of a wooden spoon. DO NOT OVERCOOK.

Remove the mixture from the heat and strain it through a fine mesh sieve into a bowl. Cover and refrigerate until the mixture is thoroughly chilled, about 2 hours or overnight.

Assembly:
Pipe the mousse onto the pavlovas and drizzle with the mascarpone cream over the top. Dust with confectioner’s sugar and fresh fruit if desired.

Croquembouche (Piece Montée) – Daring Bakers Challenge May 2010

Thursday, May 27th, 2010

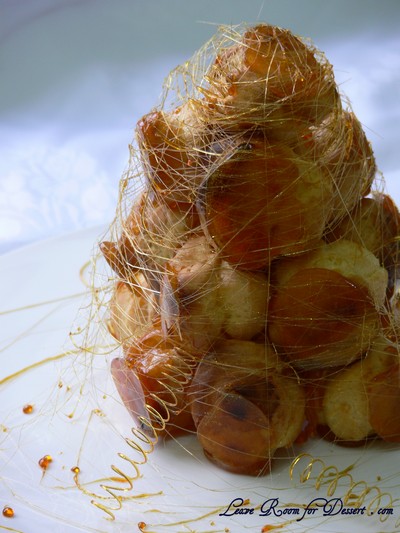
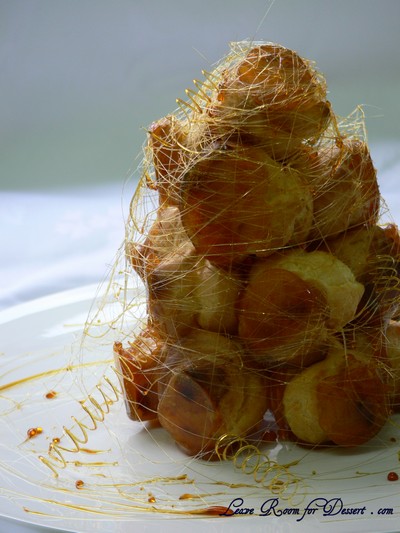
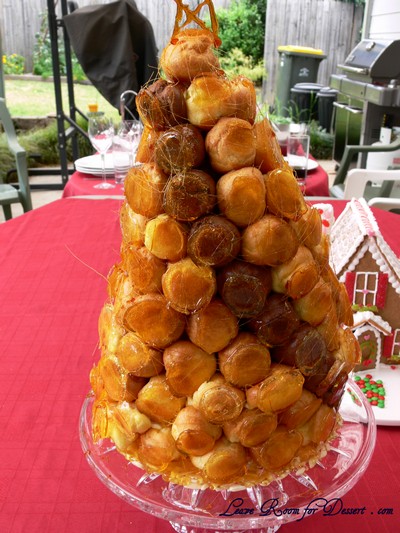
The May 2010 Daring Bakers’ challenge was hosted by Cat of Little Miss Cupcake. Cat challenged everyone to make a piece montée, or croquembouche, based on recipes from Peter Kump’s Baking School in Manhattan and Nick Malgieri.

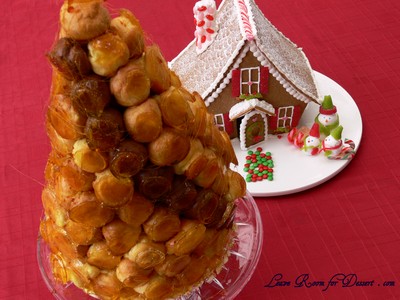
I’ve made two croquembouches’ so far, the original one from Masterchef and the chocolate swirl one, also from MasterChef. So, when I found out this month’s challenge was also a croquembouche I was both a bit indifferent, and also excited.

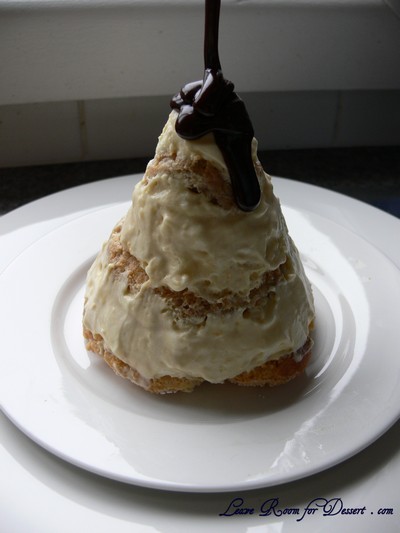
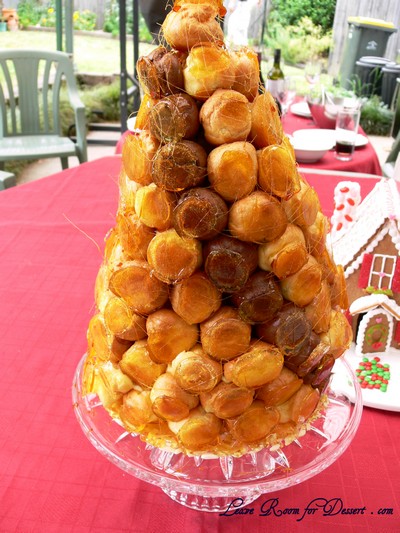
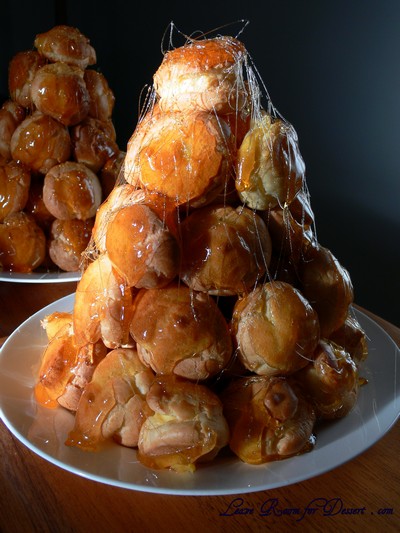
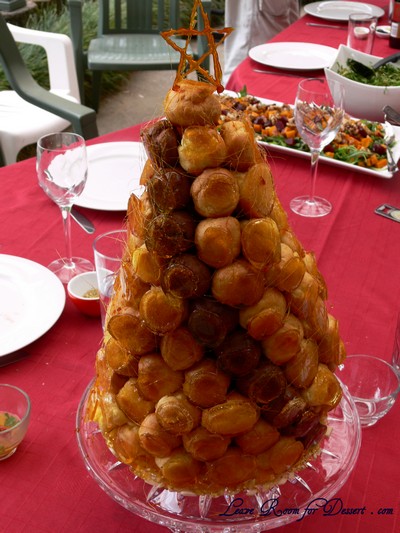
First of all, the slight disappointment was due to it not being something new. Although the excitement came from knowing how gorgeous the custard filled profiteroles with lovely crunchy toffee are. My family and I cannot resist croquembouche, although the next Christmas or event I make it for, I’ll just be pouring the caramel over the top and not building a cone shaped tower.

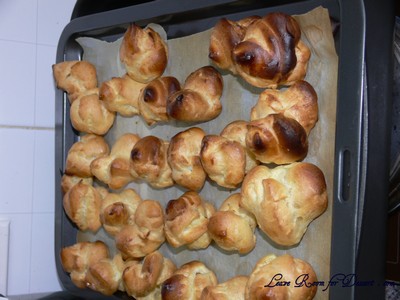
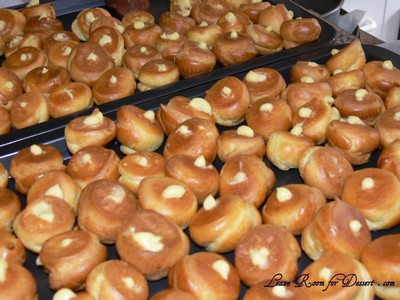
The other excitement came from trying the different recipes, I was hoping for a harder choux pastry, one which was a bit crunchy and kept its shape quite well. I think this choux pastry recipe may have succeeded in this, although I still need to learn my oven better, as they were cooked in 10-15 minutes, almost burning, so I couldn’t leave them in the oven to dry out longer, for fear of losing them.

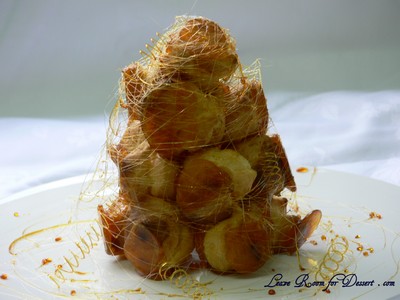
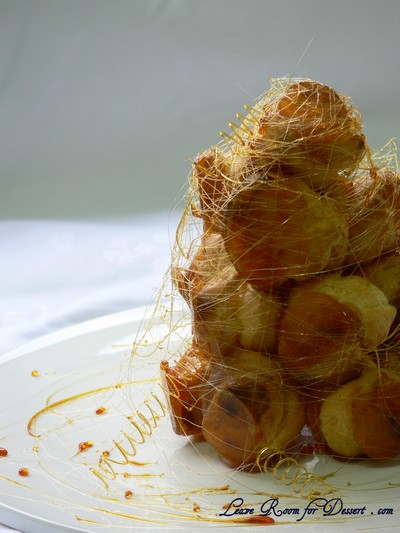
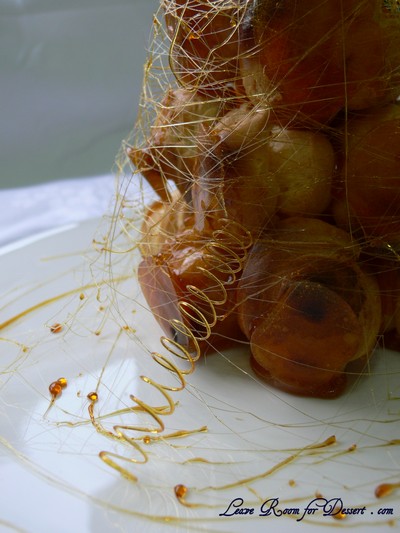
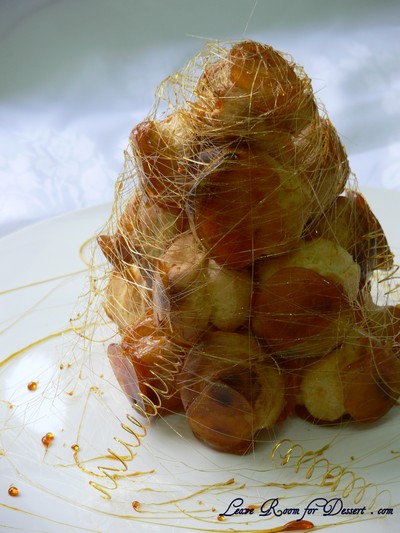
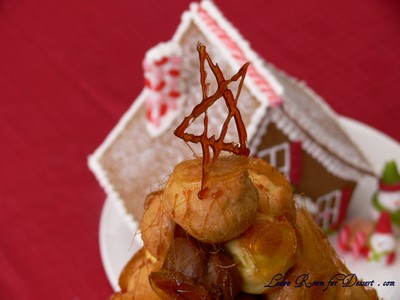
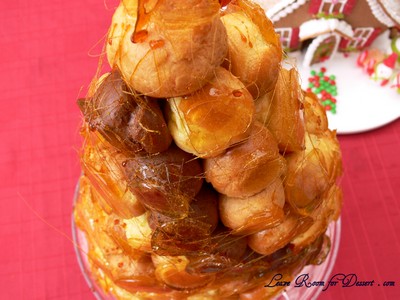
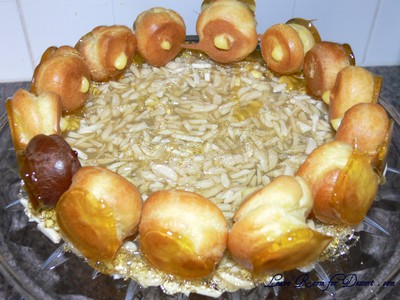
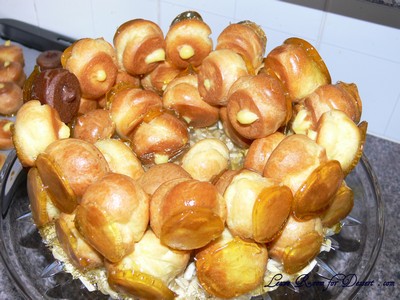
For my own challenge, I decided to try making cute little caramel corkscrews. Using a spoon, I spun the caramel around a clean knife (sharpening) steel. And they worked! I had to keep heating and cooling the caramel though to make it the right consistency – which was quite difficult to figure out.

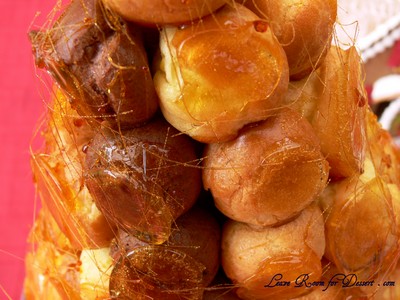
Unfortunately for the presentation, the lovely caramel strands around the outside started beading within 20 minutes and by the time we ate the croquembouche, a few hours afterwards, there were no strands to be seen. I’m not sure whether this was due to the humidity we had here, or whether the glucose added to caramel contributes to the stability of the caramel.

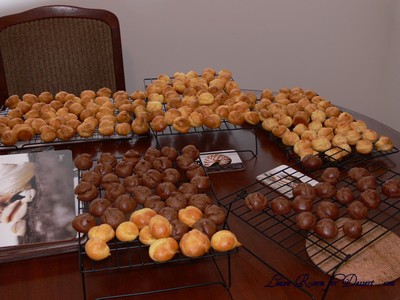
Overall, I was very excited making this again, and I think it made the perfect quantity (even though people asked – where’s the rest of it?). The different components themselves are relatively easy, and I will consider making it more often, now that I won’t be making trays and trays worth of profiteroles, and a large lasagna dish filled with custard.

Croquembouche (Piece Montée)

Recipe Source: Peter Kump’s Baking School in Manhattan and were originally created by famed pastry chef, Nick Malgieri.

Vanilla Crème Patissiere (Half Batch) [I made a full batch – double this – although I think I could have made 1.5 batches – three times this]
1 cup (225 ml.) whole milk
2 Tbsp. cornstarch / cornflour
6 Tbsp. (100 g.) sugar – I used caster sugar
1 large egg
2 large egg yolks
2 Tbsp. (30 g.) unsalted butter
1 Tsp. Vanilla

Dissolve cornstarch in ¼ cup of milk. Combine the remaining milk with the sugar in a saucepan; bring to boil; remove from heat.

Beat the whole egg, then the yolks into the cornstarch mixture. Pour 1/3 of boiling milk into the egg mixture, whisking constantly so that the eggs do not begin to cook.

Return the remaining milk to boil. Pour in the hot egg mixture in a stream, continuing whisking.

Continue whisking (this is important – you do not want the eggs to solidify/cook) until the cream thickens and comes to a boil. Remove from heat and beat in the butter and vanilla.

Pour cream [Crème Patissiere] into a stainless steel/ceramic bowl. Press plastic wrap firmly against the surface. Chill immediately and until ready to use.

Pate a Choux (Yield: About 28) [Mine made more than 50]
¾ cup (175 ml.) water
6 Tbsp. (85 g.) unsalted butter
¼ Tsp. salt
1 Tbsp. sugar
1 cup (125 g.) all-purpose flour
4 large eggs

For Egg Wash: 1 egg and pinch of salt

Pre-heat oven to 425◦F/220◦C degrees. Line two baking sheets with parchment paper.

Preparing batter:
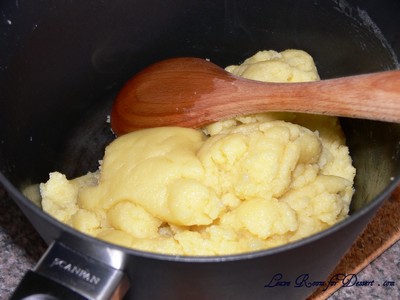
Combine water, butter, salt and sugar in a saucepan over medium heat. Bring to a boil and stir occasionally. At boil, remove from heat and sift in the flour, stirring to combine completely.

Return to heat and cook, stirring constantly until the batter dries slightly and begins to pull away from the sides of the pan.

Transfer to a bowl and stir with a wooden spoon 1 minute to cool slightly. [A KitchenAid works so well for this]

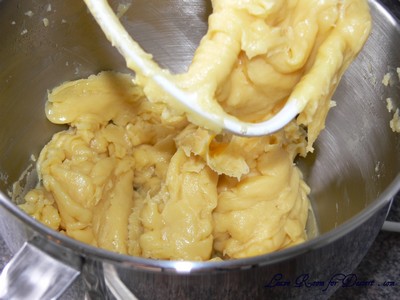
Add 1 egg. The batter will appear loose and shiny.

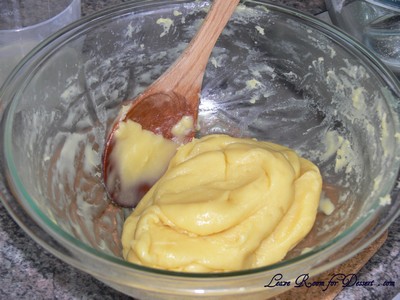
After mixing in the first egg

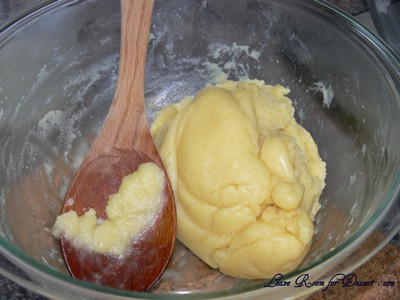
As you stir, the batter will become dry-looking like lightly buttered mashed potatoes.

It is at this point that you will add in the next egg. Repeat until you have incorporated all the eggs.

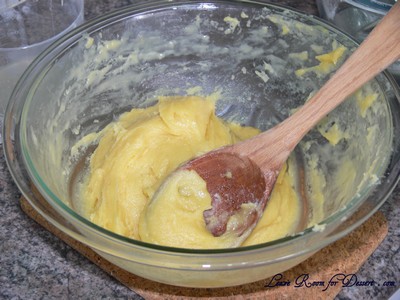
After mixing in the second egg

After mixing in the third egg

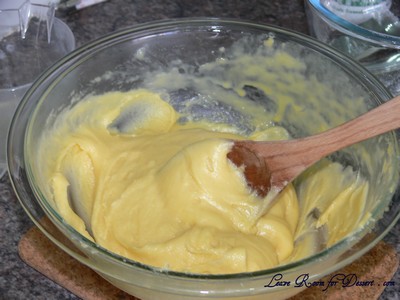
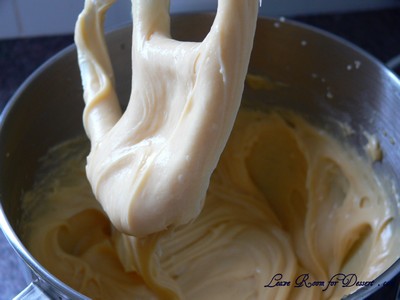
After the fourth and final egg

Piping:
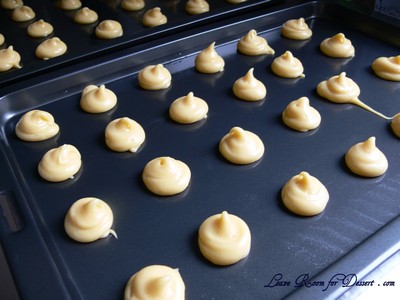
Transfer batter to a pastry bag fitted with a large open tip (I piped directly from the bag opening without a tip). Pipe choux about 1 inch-part in the baking sheets. Choux should be about 1 inch high about 1 inch wide.

Using a clean finger dipped in hot water, gently press down on any tips that have formed on the top of choux when piping. You want them to retain their ball shape, but be smoothly curved on top.

Brush tops with egg wash (1 egg lightly beaten with pinch of salt).

Baking:
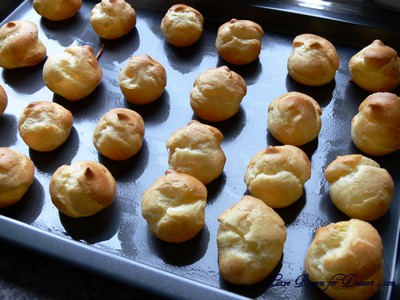
Bake the choux at 425◦F/220◦C degrees until well-puffed and turning lightly golden in color, about 10 minutes. [mine cooked in 15 minutes total]

Lower the temperature to 350◦F/180◦C degrees and continue baking until well-colored and dry, about 20 minutes more. Remove to a rack and cool.

Can be stored in a airtight box overnight.

Filling:
When you are ready to assemble your piece montée, using a plain pastry tip, pierce the bottom of each choux. Fill the choux with pastry cream using either the same tip or a star tip, and place on a paper-lined sheet. Choux can be refrigerated briefly at this point while you make your glaze.

Use one of these to top your choux and assemble your piece montée.

Hard Caramel Glaze: [I needed 1.5 – 2 times this recipe, as I stirred it too early]
1 cup (225 g.) sugar
½ teaspoon lemon juice

Combine sugar and lemon juice in a saucepan with a metal kitchen spoon stirring until the sugar resembles wet sand. Place on medium heat; heat without stirring until sugar starts to melt around the sides of the pan and the center begins to smoke. Begin to stir sugar. Continue heating, stirring occasionally until the sugar is a clear, amber color. Remove from heat immediately; place bottom of pan in ice water to stop the cooking. Use immediately.

Assembly of your Piece Montée:
You may want to lay out your unfilled, unglazed choux in a practice design to get a feel for how to assemble the final dessert. For example, if making a conical shape, trace a circle (no bigger than 8 inches) on a piece of parchment to use as a pattern. Then take some of the larger choux and assemble them in the circle for the bottom layer. Practice seeing which pieces fit together best.

Once you are ready to assemble your piece montée, dip the top of each choux in your glaze (careful it may be still hot!), and start assembling on your cake board/plate/sheet. Continue dipping and adding choux in levels using the glaze to hold them together as you build up.

When you have finished the design of your piece montée, you may drizzle with remaining glaze or use ribbons, sugar cookie cut-outs, almonds, flowers, etc. to decorate. Have fun and enjoy! Bon appétit!

Orange Tian – Daring Bakers Challenge March 2010

Saturday, March 27th, 2010

OrangeTian11

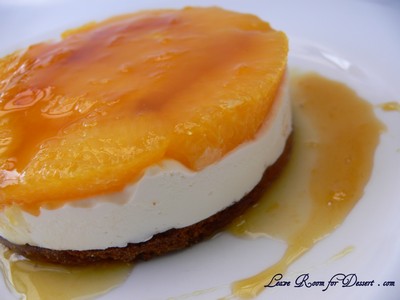
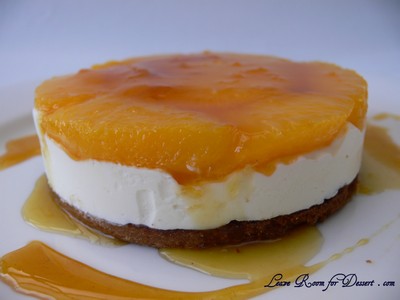
The 2010 March Daring Baker’s challenge was hosted by Jennifer of Chocolate Shavings. She chose Orange Tian as the challenge for this month, a dessert based on a recipe from Alain Ducasse’s Cooking School in Paris.

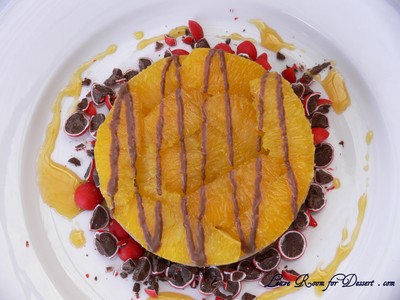
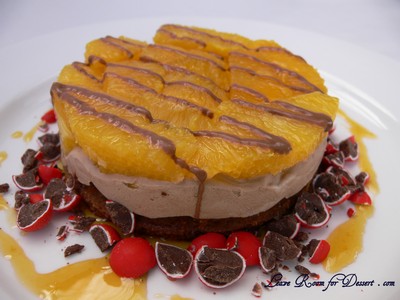
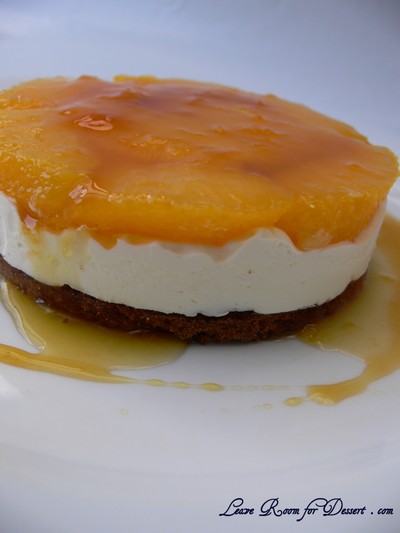
I don’t use oranges much in my desserts, except for fruit salads, so the concept of this dessert was difficult to grasp. I decided to make the dessert as written, along with adding chocolate to half the mix and serving with Jaffas to make choc orange dessert.

OrangeTian31

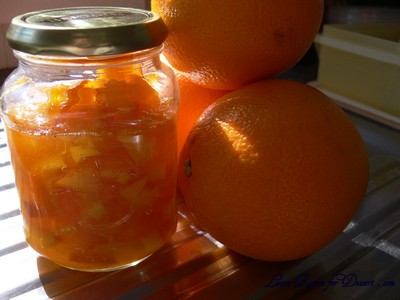
There were many components to this challenge, including the marmalade – which Nick was very excited that I would be making. He loves marmalade, especially chunky marmalade, so I decided to make it chunky – a little too chunky for me. The pate sable was lovely and easy to make, although I needed to cut the pieces again after cooking to ensure they fit in moulds.

I had a touch of trouble with the caramel, as it melted and caramelised at the same time, so when I added the orange juice it clumped a heap and I had to cook it until the clumps of sugar dissolved again.

OrangeTian24

I tried both the normal and chocolate version, although think I prefer other desserts and flavour combinations. The others who tried it thought it was quite nice – even prefering the original flavour over the chocolate version.

Thanks again to our host Jennifer for this challenge. I found the flavour combinations very interesting, and have learnt quite a bit from the experience.

OrangeTian17

Orange Tian

Dessert based on a recipe from Alain Ducasse’s Cooking School in Paris

For the Pate Sablee:

2 medium-sized egg yolks at room temperature
granulated sugar 6 tablespoons + 1 teaspoon; 2.8 oz; 80 grams
vanilla extract ½ teaspoon
Unsalted butter ¼ cup + 3 tablespoons; 3.5 oz; 100 grams ice cold, cubed
Salt 1/3 teaspoon; 2 grams
All-purpose flour 1.5 cup + 2 tablespoons; 7 oz; 200 grams
baking powder 1 teaspoon ; 4 grams

Put the flour, baking powder, ice cold cubed butter and salt in a food processor fitted with a steel blade.

In a separate bowl, add the eggs yolks, vanilla extract and sugar and beat with a whisk until the mixture is pale. Pour the egg mixture in the food processor.

Process until the dough just comes together. If you find that the dough is still a little too crumbly to come together, add a couple drops of water and process again to form a homogenous ball of dough. Form into a disc, cover with plastic wrap and leave to rest in the fridge for 30 minutes.
Preheat your oven to 350 degree Fahrenheit.

Roll out the dough onto a lightly floured surface until you obtain a ¼ inch thick circle.

Using your cookie cutter, cut out circles of dough and place on a parchment (or silicone) lined baking sheet. Bake for 20 minutes or until the circles of dough are just golden.

For the Marmalade:

Freshly pressed orange juice ¼ cup + 3 tablespoons; 3.5 oz; 100 grams
1 large orange used to make orange slices
cold water to cook the orange slices
pectin 5 grams
granulated sugar: use the same weight as the weight of orange slices once they are cooked

Finely slice the orange. Place the orange slices in a medium-sized pot filled with cold water. Simmer for about 10 minutes, discard the water, re-fill with cold water and blanch the oranges for another 10 minutes.

Blanch the orange slices 3 times. This process removes the bitterness from the orange peel, so it is essential to use a new batch of cold water every time when you blanch the slices.

Once blanched 3 times, drain the slices and let them cool.

Once they are cool enough to handle, finely mince them (using a knife or a food processor).

Weigh the slices and use the same amount of granulated sugar . If you don’t have a scale, you can place the slices in a cup measurer and use the same amount of sugar.

In a pot over medium heat, add the minced orange slices, the sugar you just weighed, the orange juice and the pectin. Cook until the mixture reaches a jam consistency (10-15 minutes).

Transfer to a bowl, cover with plastic wrap and put in the fridge.

OrangeTian03

For the Orange Segments:

For this step you will need 8 oranges.

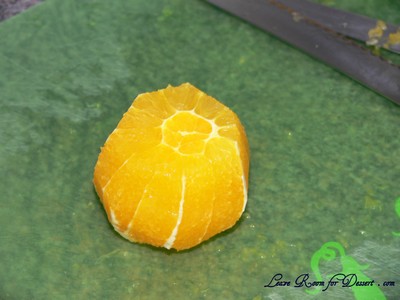
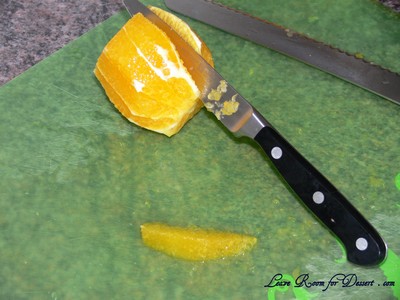
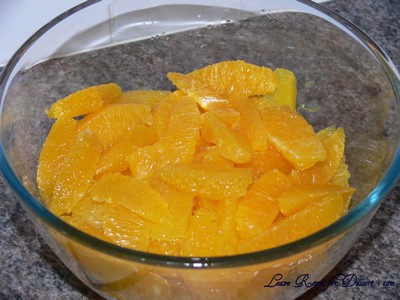
Cut the oranges into segments over a shallow bowl and make sure to keep the juice. Add the segments to the bowl with the juice.

OrangeTian07

OrangeTian08

OrangeTian09

For the Caramel:

granulated sugar 1 cup; 7 oz; 200 grams
orange juice 1.5 cups + 2 tablespoons; 14 oz; 400 grams

Place the sugar in a pan on medium heat and begin heating it.

Once the sugar starts to bubble and foam, slowly add the orange juice. As soon as the mixture starts boiling, remove from the heat and pour half of the mixture over the orange segments.

Reserve the other half of the caramel mixture in a small bowl — you will use this later to spoon over the finished dessert. When the dessert is assembled and setting in the freezer, heat the kept caramel sauce in a small saucepan over low heat until it thickens and just coats the back of a spoon (about 10 minutes). You can then spoon it over the orange tians.

[Tip: Be very careful when making the caramel — if you have never made caramel before, I would suggest making this step while you don’t have to worry about anything else. Bubbling sugar is extremely, extremely hot, so make sure you have a bowl of ice cold water in the kitchen in case anyone gets burnt!]

For the Whipped Cream:

heavy whipping cream 1 cup; 7 oz; 200 grams
3 tablespoons of hot water
1 teaspoon Gelatine
1 tablespoon of confectioner’s sugar
orange marmalade (see recipe above) 1 tablespoon
I folded 50g melted and cooled dark chocolate to this whipped cream for my choc orange version

In a small bowl, add the gelatine and hot water, stirring well until the gelatine dissolves. Let the gelatine cool to room temperature while you make the whipped cream. Combine the cream in a chilled mixing bowl. Whip the cream using a hand mixer on low speed until the cream starts to thicken for about one minute. Add the confectioner sugar. Increase the speed to medium-high. Whip the cream until the beaters leave visible (but not lasting) trails in the cream, then add the cooled gelatine slowly while beating continuously. Continue whipping until the cream is light and fluffy and forms soft peaks. Transfer the whipped cream to a bowl and fold in the orange marmalade.
[Tip: Use an ice cold bowl to make the whipped cream in. You can do this by putting your mixing bowl, cream and beater in the fridge for 20 minutes prior to whipping the cream.]

Assembling the Dessert:

Make sure you have some room in your freezer. Ideally, you should be able to fit a small baking sheet or tray of desserts to set in the freezer.

Line a small tray or baking sheet with parchment paper or a silicone sheet. Lay out 6 cookie cutters onto the parchment paper/silicone.

Drain the orange segments on a kitchen towel.

Have the marmalade, whipped cream and baked circles of dough ready to use.

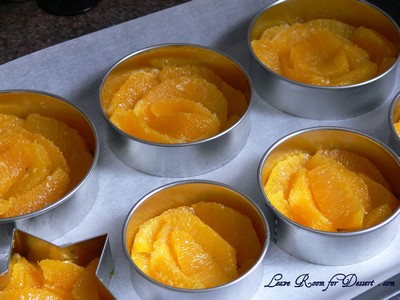
Arrange the orange segments at the bottom of each cookie cutter. Make sure the segments all touch either and that there are no gaps. Make sure they fit snuggly and look pretty as they will end up being the top of the dessert. Arrange them as you would sliced apples when making an apple tart.

OrangeTian18

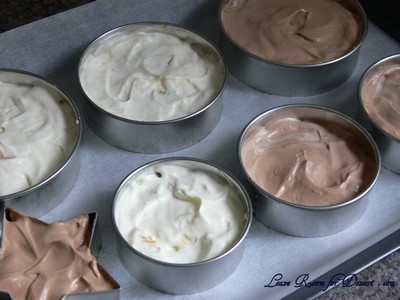
Once you have neatly arranged one layer of orange segments at the bottom of each cookie cutter, add a couple spoonfuls of whipped cream and gently spread it so that it fills the cookie cutter in an even layer. Leave about 1/4 inch at the top so there is room for dough circle.

OrangeTian19

Using a butter knife or small spoon, spread a small even layer of orange marmalade on each circle of dough.

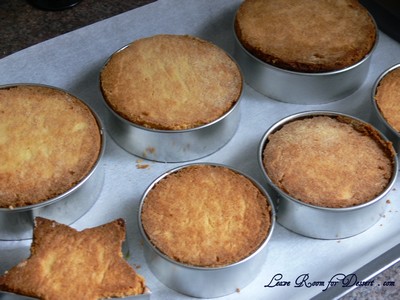
Carefully place a circle of dough over each ring (the side of dough covered in marmalade should be the side touching the whipping cream). Gently press on the circle of dough to make sure the dessert is compact.

OrangeTian10

Place the desserts to set in the freezer to set for 10 minutes. (I left mine in the freezer for a few hours, and stored leftover ones in there too)

Using a small knife, gently go around the edges of the cookie cutter to make sure the dessert will be easy to unmold. Gently place your serving plate on top of a dessert (on top of the circle of dough) and turn the plate over. Gently remove the cookie cutter, add a spoonful of caramel sauce and serve immediately.

OrangeTian29

Tiramisu – Daring Bakers Challenge February 2010

Saturday, February 27th, 2010

Tiramisu37

The February 2010 Daring Bakers’ challenge was hosted by Aparna of My Diverse Kitchen and Deeba of Passionate About Baking. They chose Tiramisu as the challenge for the month. Their challenge recipe is based on recipes from The Washington Post, Cordon Bleu at Home and Baking Obsession.

Tiramisu30

We were not given one challenge this month – but three! We were to make our own mascarpone, ladyfinger / savoiardi biscuits and finally construct a tiramisu (which in itself had pastry cream and zabaglione components).

Tiramisu20

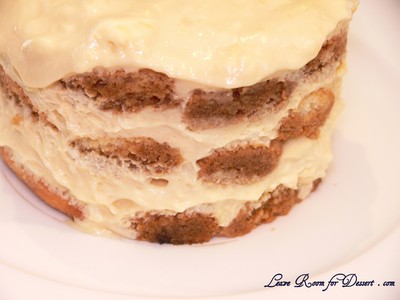
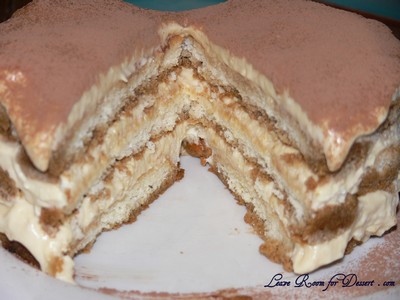
Not being a huge coffee lover, I thought this would be a good opportunity to try a chocolate only tiramisu, and noticed there weren’t many recipes that catered for only chocolate tiramisu without any coffee flavouring. I decided to make up my own dipping sauce for the biscuits – which is the only portion which contains coffee. I just substituted some cocoa, sugar and baileys for the coffee.

Tiramisu63

As for the mascarpone, it was great to finally make it. It was so easy to make and tasted lovely. And what did I do with the leftovers? Well, a dollop on some pasta or pumpkin soup, made it much tastier (although not healthier…)

Tiramisu31

I enjoyed the chocolate tiramisu, with the coffee drinkers preferring the coffee tiramisu that I made. Although, I probably wouldn’t make the tiramisu again, as I love other desserts more – and have a long long list of desserts I’d still love to make.

Tiramisu39

I’d like to thank Aparna and Deeba for a great challenge (or number of challenges) this month! I managed to make quite a number of things I have wanted to make and never found the time. 🙂

Tiramisu70

P.S. I realised after reading others’ results, that many froze their tiramisu’s before removing any moulds. I didn’t with mine and therefore the tiramisu started melting quite fast and didn’t stay well in their moulds.

Tiramisu

(Recipe source: Carminantonio’s Tiramisu from The Washington Post, July 11 2007 )
This recipe makes 6 servings

For the zabaglione:
2 large egg yolks
3 tablespoons sugar/50gms
1/4 cup/60ml Marsala wine (or port or coffee)
1/4 teaspoon/ 1.25ml vanilla extract
1/2 teaspoon finely grated lemon zest

For the vanilla pastry cream:
1/4 cup/55gms sugar
1 tablespoon/8gms all purpose flour
1/2 teaspoon finely grated lemon zest
1/2 teaspoon/ 2.5ml vanilla extract
1 large egg yolk
3/4 cup/175ml whole milk

For the whipped cream:
1 cup/235ml chilled heavy cream (we used 25%)
1/4 cup/55gms sugar
1/2 teaspoon/ 2.5ml vanilla extract

To assemble the tiramisu:
2 cups/470ml brewed espresso, warmed
1 teaspoon/5ml rum extract (optional)
1/2 cup/110gms sugar
1/3 cup/75gms mascarpone cheese
36 savoiardi/ ladyfinger biscuits (you may use less)
2 tablespoons/30gms unsweetened cocoa powder
My note: To make this with no coffee flavour, replace the espresso and rum with 2 teaspoons cocoa powder, 2 teaspoons of baileys and 2 cups warm water – add together with the sugar for a chocolate alternative for dipping the biscuits.

For the zabaglione:
Heat water in a double boiler. If you don’t have a double boiler, place a pot with about an inch of water in it on the stove. Place a heat-proof bowl in the pot making sure the bottom does not touch the water.

In a large mixing bowl (or stainless steel mixing bowl), mix together the egg yolks, sugar, the Marsala (or espresso/ coffee), vanilla extract and lemon zest. Whisk together until the yolks are fully blended and the mixture looks smooth.

Tiramisu08

Transfer the mixture to the top of a double boiler or place your bowl over the pan/ pot with simmering water. Cook the egg mixture over low heat, stirring constantly, for about 8 minutes or until it resembles thick custard. It may bubble a bit as it reaches that consistency.

Tiramisu11

Let cool to room temperature and transfer the zabaglione to a bowl. Cover and refrigerate at least 4 hours or overnight, until thoroughly chilled.

For the pastry cream:
Mix together the sugar, flour, lemon zest and vanilla extract in a medium heavy-bottomed saucepan. To this add the egg yolk and half the milk. Whisk until smooth.
Now place the saucepan over low heat and cook, stirring constantly to prevent the mixture from curdling.

Tiramisu09

Add the remaining milk a little at a time, still stirring constantly. After about 12 minutes the mixture will be thick, free of lumps and beginning to bubble. (If you have a few lumps, don’t worry. You can push the cream through a fine-mesh strainer.)

Tiramisu10
Transfer the pastry cream to a bowl and cool to room temperature. Cover with plastic film and refrigerate at least 4 hours or overnight, until thoroughly chilled.

For the whipped cream:
Combine the cream, sugar and vanilla extract in a mixing bowl. Beat with an electric hand mixer or immersion blender until the mixture holds stiff peaks. Set aside.

To assemble the tiramisu:
Have ready a rectangular serving dish (about 8″ by 8″ should do) or one of your choice.

Mix together the warm espresso, rum extract and sugar in a shallow dish, whisking to mix well. Set aside to cool.

In a large bowl, beat the mascarpone cheese with a spoon to break down the lumps and make it smooth. This will make it easier to fold. Add the prepared and chilled zabaglione and pastry cream, blending until just combined. Gently fold in the whipped cream. Set this cream mixture aside.

Tiramisu14

Now to start assembling the tiramisu.
Workings quickly, dip 12 of the ladyfingers in the sweetened espresso, about 1 second per side. They should be moist but not soggy. Immediately transfer each ladyfinger to the platter, placing them side by side in a single row. You may break a lady finger into two, if necessary, to ensure the base of your dish is completely covered.

Spoon one-third of the cream mixture on top of the ladyfingers, then use a rubber spatula or spreading knife to cover the top evenly, all the way to the edges.

Repeat to create 2 more layers, using 12 ladyfingers and the cream mixture for each layer. Clean any spilled cream mixture; cover carefully with plastic wrap and refrigerate the tiramisu overnight.
To serve, carefully remove the plastic wrap and sprinkle the tiramisu with cocoa powder using a fine-mesh strainer or decorate as you please. Cut into individual portions and serve.
Mascarpone Cheese

(Source: Vera’s Recipe for Homemade Mascarpone Cheese)
This recipe makes 12oz/ 340gm of mascarpone cheese

474ml (approx. 500ml)/ 2 cups whipping (36 %) pasteurized (not ultra-pasteurized), preferably organic cream (between 25% to 36% cream will do)
1 tablespoon fresh lemon juice

Bring 1 inch of water to a boil in a wide skillet. Reduce the heat to medium-low so the water is barely simmering. Pour the cream into a medium heat-resistant bowl, then place the bowl into the skillet. Heat the cream, stirring often, to 190 F. If you do not have a thermometer, wait until small bubbles keep trying to push up to the surface.

It will take about 15 minutes of delicate heating. Add the lemon juice and continue heating the mixture, stirring gently, until the cream curdles. Do not expect the same action as you see during ricotta cheese making. All that the whipping cream will do is become thicker, like a well-done crème anglaise. It will cover a back of your wooden spoon thickly.

Tiramisu76

You will see just a few clear whey streaks when you stir. Remove the bowl from the water and let cool for about 20 minutes. Meanwhile, line a sieve with four layers of dampened cheesecloth and set it over a bowl. Transfer the mixture into the lined sieve. Do not squeeze the cheese in the cheesecloth or press on its surface (be patient, it will firm up after refrigeration time). Once cooled completely, cover with plastic wrap and refrigerate (in the sieve) overnight or up to 24 hours.

Tiramisu77

Tiramisu80

Vera’s notes: The first time I made mascarpone I had all doubts if it’d been cooked enough, because of its custard-like texture. Have no fear, it will firm up beautifully in the fridge, and will yet remain lusciously creamy.

Keep refrigerated and use within 3 to 4 days.

Ladyfingers / Savoiardi Biscuits

(Source: Recipe from Cordon Bleu At Home)
This recipe makes approximately 24 big ladyfingers or 45 small (2 1/2″ to 3″ long) ladyfingers.

3 eggs, separated
6 tablespoons /75gms granulated sugar
3/4 cup/95gms cake flour, sifted (or 3/4 cup all purpose flour + 2 tbsp corn starch)
6 tablespoons /50gms confectioner’s sugar,

Preheat your oven to 350 F (175 C) degrees, then lightly brush 2 baking sheets with oil or softened butter and line with parchment paper.

Beat the egg whites using a hand held electric mixer until stiff peaks form. Gradually add granulate sugar and continue beating until the egg whites become stiff again, glossy and smooth.
In a small bowl, beat the egg yolks lightly with a fork and fold them into the meringue, using a wooden spoon. Sift the flour over this mixture and fold gently until just mixed. It is important to fold very gently and not overdo the folding. Otherwise the batter would deflate and lose volume resulting in ladyfingers which are flat and not spongy.

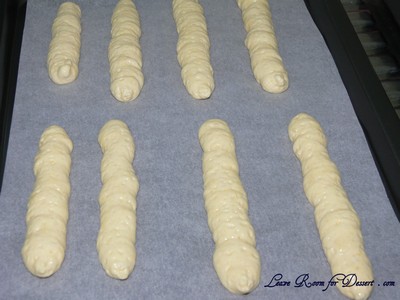
Fit a pastry bag with a plain tip (or just snip the end off; you could also use a Ziploc bag) and fill with the batter. Pipe the batter into 5″ long and 3/4″ wide strips leaving about 1″ space in between the strips.

Sprinkle half the confectioner’s sugar over the ladyfingers and wait for 5 minutes. The sugar will pearl or look wet and glisten. Now sprinkle the remaining sugar. This helps to give the ladyfingers their characteristic crispness.

Tiramisu04

Hold the parchment paper in place with your thumb and lift one side of the baking sheet and gently tap it on the work surface to remove excess sprinkled sugar.
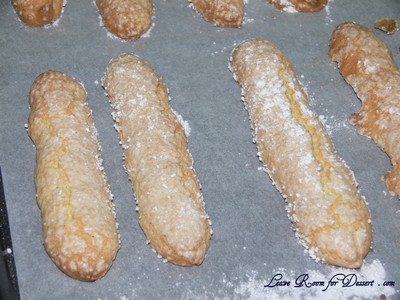
Bake the ladyfingers for 10 minutes, then rotate the sheets and bake for another 5 minutes or so until the puff up, turn lightly golden brown and are still soft.

Tiramisu06

Allow them to cool slightly on the sheets for about 5 minutes and then remove the ladyfingers from the baking sheet with a metal spatula while still hot, and cool on a rack.
Store them in an airtight container till required. They should keep for 2 to 3 weeks.

Chocolate Swirl Croquembouche

Tuesday, December 29th, 2009

ChocSwirlCroquembouche13

I started craving croquembouche again after the second last celebrity MasterChef. I was craving it so bad, that I didn’t think I could wait until Christmas (which is when I had planned to make my next croquembouche) to eat a custard or pastry cream filled profiterole with the lovely caramel or toffee crunch.

ChocSwirlCroquembouche15

The chocolate delice challenge was taking up my time and weekends were being filled so fast with dinners, outings and a gingerbread house, I didn’t know if I would get any Christmas shopping done (I didn’t get much done, lucky I have a wonderful mum and sisters who did most of it, and whom I thanked with this lovely croquembouche along with the rest of Christmas lunch).

ChocSwirlCroquembouche20

For Christmas I decided to make Adriano Zumbo’s chocolate swirl croquembouche, as I was intrigued by the chocolate profiteroles, but I still wanted the original gorgeous profiteroles too.

ChocSwirlCroquembouche17

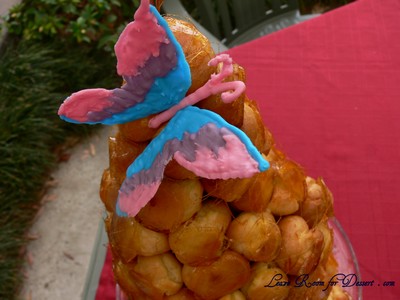
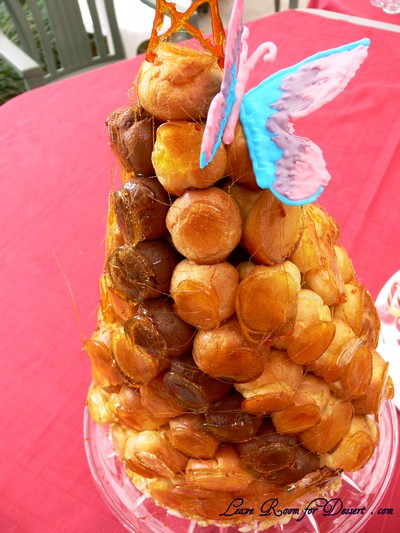
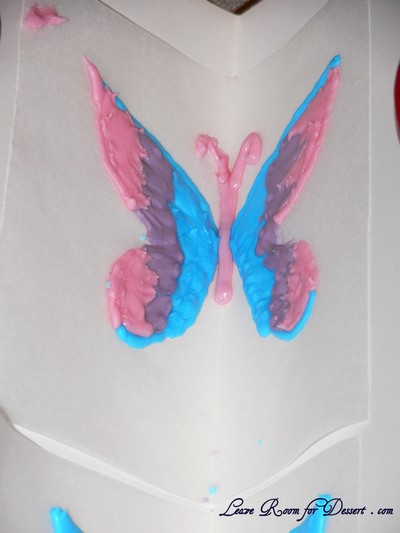
Others and myself looked around quite a bit to find isomalt and the white food white colouring, but were unable to find any in shops – a few places online look as though they sell it. So, instead I decided to make some royal icing butterflies to go on top (using the leftovers from my gingerbread house).

ChocSwirlCroquembouche22

After comparing these quantities to those from the first croquembouche, I decided to cook half the quantity of choux pastry (for the normal and chocolate ones) and a bit more than half the caramel (although I should have made the full quantity of caramel/toffee, as I was making the base and the extra was required for this). I think it’s better to have left over custard than profiterole cases and toffee.

ChocSwirlCroquembouche14

The half amount of choux pastry made almost the perfect number of profiteroles for the vanilla pastry cream. I ended up with a decent amount of chocolate pastry cream left over, but I’m not complaining – as both pastry creams are delicious.

ChocSwirlCroquembouche18

I ended up making quite a large filled croquembouche this time around, although probably wouldn’t recommend one quite as large, as mine only lasted long enough for the photos before crashing down. The next day all the caramel/toffee had dissolved into a large sticky puddle, even though the profiteroles were in an air tight container. We had a large amount of humidity on Christmas day.

ChocSwirlCroquembouche16

I’m really happy I tried the chocolate swirl croquembouche, although think I would stick to the normal one in future, and make the tower a bit smaller.

ChocSwirlCroquembouche21

Chocolate Swirl Croquembouche

Recipe slightly adapted from Adriano Zumbo’s recipe on Celebrity MasterChef 2009

Serves: 12 (I think it serves 20 or more)

Vanilla pastry cream
2 litres milk
500g egg yolks (from around 30 large or extra large eggs)
500g sugar
200g cornflour
200g butter
2 vanilla beans, split, seed scraped out

Chocolate pastry cream
750g of the vanilla pastry cream
375g cream
190g Cocoa Barry 72% Venezuela Chocolate (I used 100g 70% Lindt Chocolate + 90g dark cooking chocolate)

Choux pastry (this is half the quantity from the original recipe and made around 130 profiteroles)
212 ml water
265 ml milk
10g sugar
10g salt
200g butter
265 g plain flour
8 eggs

Chocolate choux pastry (this is half the quantity from the original recipe and made around 40 chocolate profiteroles)
80ml water
100ml milk
4g sugar
4g salt
75g butter
75g flour
25g Barry cocoa powder
3 eggs

Caramel
1kg sugar
300ml water
400g glucose
250g chopped almonds

Decorations (optional)
200g isomalt
20ml water
A few drops of food colouring
Selection of food colouring

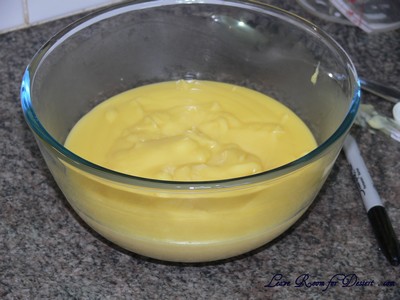
1. To make the pastry cream: place milk and vanilla beans into a large saucepan. Heat gently over medium heat until milk almost boils. Remove from heat, discard vanilla beans and set aside. Beat egg yolks, sugar and cornflour with electric beaters until thick and pale. Gradually whisk in the warm milk and return mixture to the same pan. Stir over medium heat until the custard boils. Remove from heat and pour onto flat tray, spread out to cool rapidly. Cover the surface of the custard closely with cling film, to prevent a skin from forming. Use a candy thermometer to check temperature of custard. When mixture has reached 55ºC, stir through butter and refrigerate, still covered, until completely cooled.

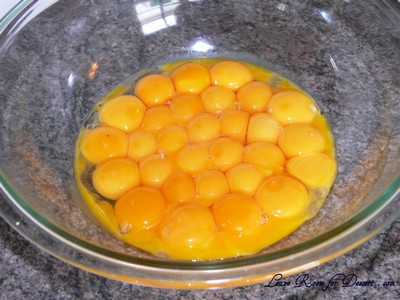
30 egg yolks - the most I've ever used

30 egg yolks - the most I've ever used

ChocSwirlCroquembouche26

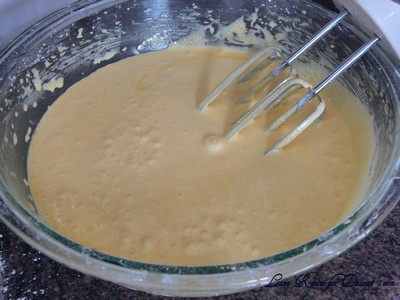
The custard mixture was too much for the bowl I had. So I whisked in 1 litre of the milk mixture into the bowl with the egg yolks and sugar, before straining it all back into the remaining 1 litre of milk in the saucepan.

ChocSwirlCroquembouche27

2. To make the chocolate pastry cream: place 750g of cooled vanilla pastry cream, chocolate and cream in a saucepan and reboil. Pour onto a tray, cover with cling film and refrigerate until completely cooled.

3. To make the choux pastry: preheat the oven to 210ºC convection. Lightly grease 2-3 large oven trays and set aside. Combine the water, milk, sugar, salt and butter in a large heavy-based saucepan and bring to the boil. Remove from the heat and using a wooden spoon quickly beat in the flour. Return saucepan to the heat and continue beating until the mixture comes together and pulls away from the sides of the pan. Cook stirring over low heat for a further 1-2 minutes to cook out the flour. Remove from heat and allow to cool slightly.

ChocSwirlCroquembouche28

4. Using hand beaters, beat the mixture to release any more heat. (I used my KitchenAid to get rid of a lot of the heat before adding the eggs). Gradually add the eggs, one at a time. Beat well between each addition until all the eggs have been added and the mixture is thick and glossy (a spoon should be able to stand upright in it). Beat for several more minutes, or until thickened.

Half way through the eggs

Half way through the eggs

ChocSwirlCroquembouche32

5. To make the chocolate choux pastry: repeat step 3 & 4 to make chocolate choux pastry adding the cocoa powder with the flour.

6. Spoon the mixtures, in batches, into piping bags fitted with a 1.25-1.5cm nozzle. Cover remaining pastry with cling film. Pipe mixture onto trays about 2.5cm x 2cm high leaving room for spreading. Bake for 25-30 minutes, in batches, or until firm and hollow when tapped. Transfer puffs to wire racks.

ChocSwirlCroquembouche34

ChocSwirlCroquembouche01

ChocSwirlCroquembouche07

7. Spoon custards into separate piping bags with a nozzle less than 1cm. Poke a small hole in the base of each puff and fill choux pastry with vanilla pastry cream and chocolate choux with chocolate pastry cream. Set aside.

ChocSwirlCroquembouche08

ChocSwirlCroquembouche10

8. For the caramel: grease a cake ring with cooking spray. Combine water and sugar in a saucepan until it boils. Add glucose, and cook until syrup turns a caramel colour. Remove from the heat and dip the base of the pan in a bowl of cold water to cool slightly. Pour just enough caramel to cover almonds and mix well; pour almond caramel into ring to form a 5mm base. This is the base for the croquembouche.

9. Dip the puff bases (I dipped the tops of the profiteroles) in enough toffee to coat and place upside down on a tray lined with silicon paper or silpat mat. (I used baking paper, which worked reasonable well).

10. Combine isomalt and water in a medium saucepan and bring to the boil over high heat. Using a candy thermometer, bring mixture to 160ºC. Remove from heat and add white food colouring. Mix well; mixture will turn completely white. Slowly add drop by drop of colours and swirl pan to mix slightly. Pour into silpat moulds, reserving 1-2 tablespoons of mixture. Stand butterflies for 5 minutes or until hardened.

ChocSwirlCroquembouche05

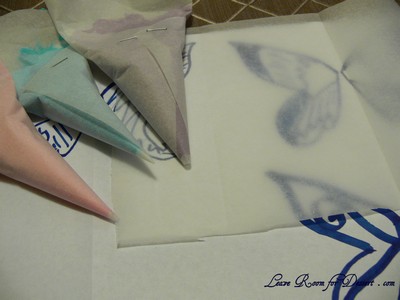
I improvised and made royal icing butterflies, by piping different coloured royal icing onto baking paper – be careful – they are fragile (two of my three fell apart.

ChocSwirlCroquembouche06

11. To assemble: oil the inside of the croquembouche cone. Dip the sides of the puff balls in the toffee one at a time and place around the inside of the cone in a single row. Place one chocolate ball in each row, to the bottom right of previous chocolate ball. Continue adding rows of vanilla balls and single chocolate balls until the cone is filled and the chocolate balls forms 2 spirals pattern. Place a small amount of caramel on the last balls inside the cone. Place base inside the cone, gently invert cone and slide off the metal cone. Using reserved isomalt mixture, dip butterflies into mixture and fix to top of croquembouche.

Note: I built my croquembouche from scratch, although it was too tall to stand by itself. I may have needed to use more toffee to hold it together. I would make a smaller one in the future.

ChocSwirlCroquembouche11

ChocSwirlCroquembouche12

ChocSwirlCroquembouche14

Chocolate Delice

Wednesday, December 9th, 2009

ChocolateDelice45

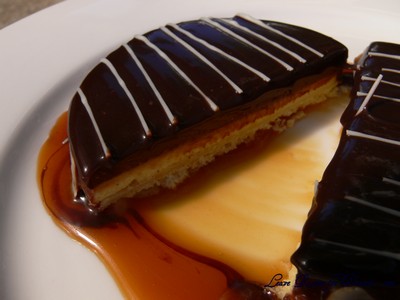
I was contemplating making the chocolate swirl croquembouche on the second last episode of Celebrity MasterChef, although that will have to wait until the Christmas holiday. I instead decided to make Eamon Sullivan’s Chocolate Delice, which scored the highest, 30/30 from the judges.

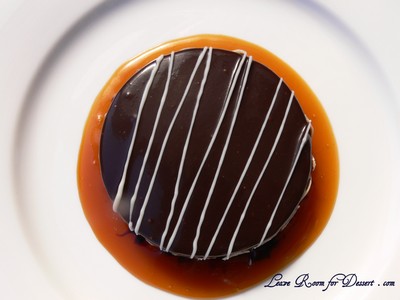
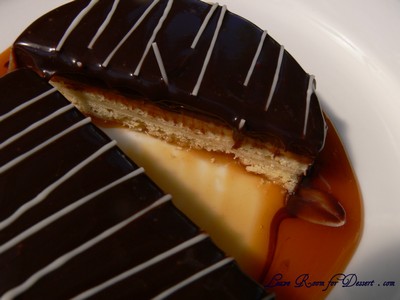
It sounded fantastic, like an upmarket Mars bar. Biscuit, crème brulee, chocolate cream, chocolate ganache and salted caramel sauce – it does sound good, doesn’t it?

ChocolateDelice31

I also thought I could make it over two days and this would make it a lot easier. I decided to follow the recipe exactly (even though it doesn’t state the strength of the gelatine leaf – I’ve been wrong before just assuming Chef’s mean gold strength).

The biscuit came first and was a lovely consistency, it fell apart a little, but was lovely and silky. It was tasty once cooked too – like a cross between shortcrust pastry and shortbread.

ChocolateDelice48

I got to the end part of the crème brulee section and thought to myself that the recipe sounded very strange. The crème brulee mix wasn’t a thick custard which would set, it was a thin custard which I thought could either be made into an ice cream by freezing or a crème brulee by baking in a water bath – which is the way I usually see it made. This recipe didn’t state anything about baking the crème brulee. Just pour it on top of the biscuit and refrigerate to set. Now, I decided to only test a few and leave the remainder of the mix in a jug in the fridge to make into proper crème brulee if it didn’t set.

Surprise, surprise, it didn’t set. My two biscuits in the cookie cutters were not tight enough and almost all the crème brulee mix drained out of them. My made-up mould consisting of a cut up overhead projector sheet, held the mix in on top of the biscuit, but it was too runny and would have run everywhere if I had undone the plastic.

ChocolateDelice66

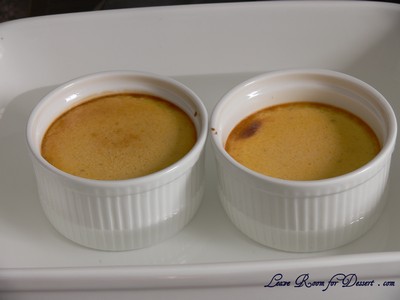
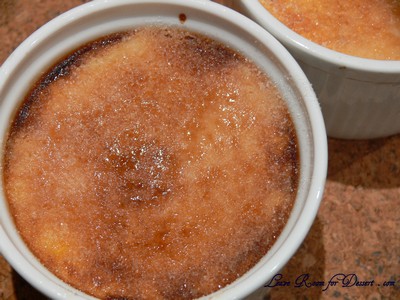
I decided to place all my remaining mix into 2 ramekins and placed the ramekins into a small lasagne dish with enough water in it to come half way up the ramekins and baked them for 20-30 minutes at around 150C. Once cooked (just set), I removed the ramekins from the oven and cooled them in the fridge for a few hours. Place one heaped teaspoon of caster sugar on top of each and place under a very hot grill until the sugar caramelises (or use a blowtorch if you have one). Serve immediately.

ChocolateDelice65

ChocolateDelice02

After cooking my crème brulee’s, I decided to watch the episode of MasterChef again (as I was a little distracted while watching it the first time). I watched carefully and saw Eamon placing what looked exactly like the crème brulee mix into a lined tray and into the oven. He even mentioned his biscuit was cooling and his crème brulee was in the oven – but no mention of this in the recipe 🙁

I thought about stopping here and not continuing. But how could I? I was still concerned about the gelatine leaf, but hopefully it would be alright…

ChocolateDelice49

Ok – so I made it again!!

This time things went ok. I still had a few problems, but the overall result was gorgeous. I was concerned it would be too rich, although the combination of all components worked wonderfully together.

I made the biscuit base and crème brulee the night before.

The biscuit base worked well (I rolled it out to fit a normal baking tray). It does crumble a bit while working with it. I cut 10cm diameter circles (6 in total) – although they could have easily been smaller, as the dessert was a little difficult for some to finish.

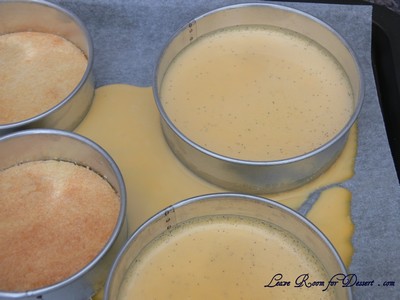
I cooked the crème brulee in a 23cm x 34 cm (2-3 cm high) baking paper lined tray for 25-30 minutes at 150C. This was then cooled overnight.

I made the chocolate cream (although didn’t use it all) using 2.5 titanium strength gelatine leaves (total 10g) (one titanium leaf is supposed to set 250ml liquid).

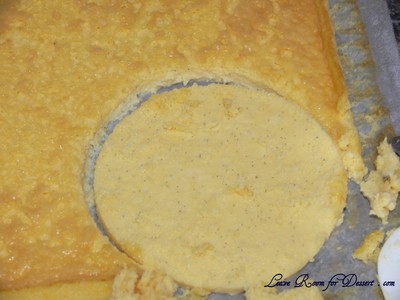
This was then cooled for 30minutes or more while I placed the crème brulee on the biscuit base. Firstly I scraped off the top layer of crème brulee, then cut it using a cookie cutter and carefully placed it on the biscuit base (most fell apart and I tried to spread it around evenly).

ChocolateDelice09

ChocolateDelice11

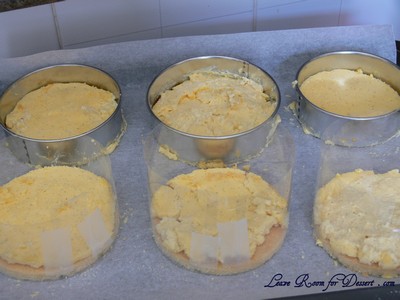
I used cookie cutters and plastic overhead projector films/sheets to hold in the crème brulee and cream, the cookie cutters worked better, although the films worked well enough.

The cream was poured over the crème brulee and left to set in the fridge (for an hour or so).

ChocolateDelice14

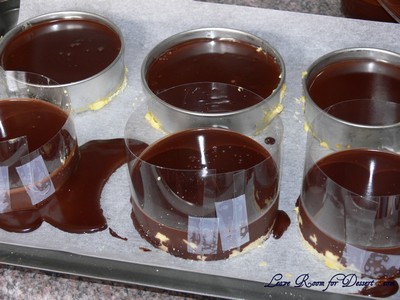
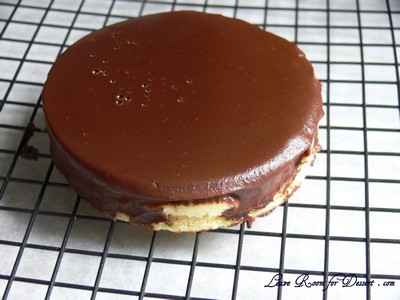
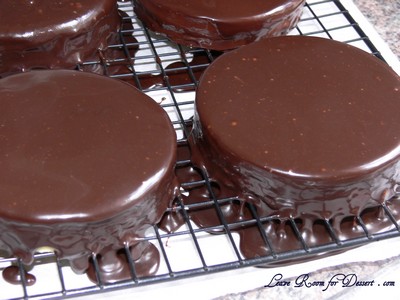
Prepare the glaze (I used half the quantity, which was just enough to cover all 6 delices). Let it cool and once the cream is set, remove cookie cutter (Eamon used a blow torch, although I don’t have one yet, so I carefully pushed the cookie base up). Pour the glaze on top and cool in the fridge.

ChocolateDelice15

ChocolateDelice19

Roast the almonds (I forgot to do this), then place them around the set delice.

Melt the white chocolate (I used 100g, but you could use less). Drizzle over the top and cool.

ChocolateDelice32

I had a little bit of a problem with the sugar in the caramel. I tried to melt it over low or medium heat, but it didn’t dissolve. I continued to cook it and the water evaporated and the sugar became quite dry. Although after continuing to cook it on medium/high heat, eventually it started to caramelise (without dissolving first). Take it off the heat and stir in the cream, a bit at a time if need be (be careful as this bubbles up a lot), then whisk in the remaining cream and butter. Cool a bit before serving.

ChocolateDelice51

Chocolate Delice

Recipe from Eamon Sullivan on Celebrity MasterChef 2009
For my tips see above and some are also in the recipe below in italics

Biscuit Base
250g plain flour
150g unsalted butter
100g caster sugar
Pinch salt
1 egg

Crème brulee
375g thickened cream
135mls milk
2 vanilla beans, scraped
7 egg yolks
1 whole egg
60g caster sugar

Chocolate cream
190g thickened cream
190g boiling water
60g cocoa powder
150g white chocolate
125g dark chocolate
15g gelatine leaf (I used 2.5 titanium strength gelatine leaves ~10g total)

Chocolate glaze (I made half this quantity)
340g dark chocolate
230mls thickened cream
165g glucose syrup
30mls water
¼ cup flaked almonds
200g white chocolate

Salted caramel
250g caster sugar
50mls water
150mls thickened cream
150g unsalted butter
Sea salt flakes

Preheat the oven to180C.

For the biscuit base, place the flour, butter, sugar and salt in a food processor and process to a breadcrumb consistency. Add the egg and process again to combine. Tip out onto a clean flat surface and roll into a smooth dough, wrap in cling film and set aside to rest for 10 minutes. Once rested use a rolling pin to roll into a 1cm thick rectangle shape; place onto a baking tray lined with baking paper and bake in the oven for 15-20 minutes. Allow to cool then using a circular cutter cut out biscuit bases, set aside.

ChocolateDelice58

ChocolateDelice59

ChocolateDelice62

For the crème brulee, combine the cream, milk and vanilla beans in a saucepan and place over a medium heat, bring to the boil then remove from heat. Strain into a clean saucepan. Place the egg yolks, whole egg and sugar into a bowl and using an electric hand beater whisk until thick and pale, pour half the heated milk mixture into the egg mixture and whisk continuously. Pour the mixture into the saucepan of remaining milk and place over a low heat, cook for 3-5 minutes stirring continuously. Pour into a jug and cool slightly. Place the biscuit bases on a baking tray lined with baking paper, place a ring mould onto the bases and pour the crème brulee into the moulds(I cooked mine for 25-30 minutes at 150C – see tips above), place in the refrigerator until set.

ChocolateDelice60

ChocolateDelice61

ChocolateDelice07

ChocolateDelice08

ChocolateDelice09

ChocolateDelice13

For the chocolate cream, pour the cream into a saucepan and place over a medium heat, bring to the boil, whisk the cocoa in the boiling water and add to the cream, continue to whisk, add the white chocolate and stir until melted, add the dark chocolate and continue to stir until chocolate has melted, bring the mixture to the boil then remove from heat. Place the gelatine sheet in a small bowl of cold water to soak for a few minutes, using hands squeeze out all moisture, add to the warm chocolate mixture and whisk to combine.

ChocolateDelice14

For the chocolate glaze, pour the cream into a saucepan and place over a medium heat, bring to the boil, reduce heat and add the chocolate, glucose syrup and water, whisk continuously until chocolate has melted and a smooth sauce is created.

Place the almonds on a baking tray and place in the oven until lightly golden.

Bring a saucepan of water to the boil, then reduce to a simmer. Place the white chocolate in a bowl, place the bowl over the water and melt the chocolate, spoon the melted chocolate into a piping bag.

For the salted caramel, place the sugar and water in a saucepan and place over a medium heat, stir until the sugar has melted then allow to simmer until caramel has formed. Whisk in the cream then continue to whisk in the butter, whisk to a thick glossy sauce.

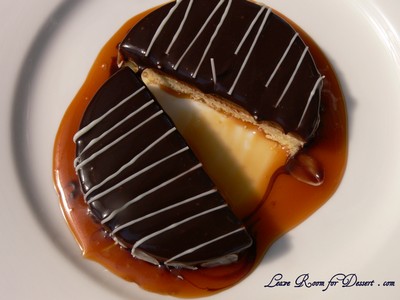
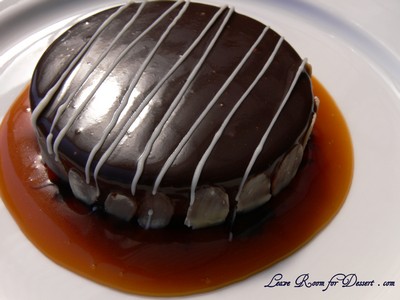
To prepare the delice, pour the chocolate cream over the set brulee and allow to set. Remove the moulds and pour over the chocolate glaze. Allow glaze to set. Place toasted almonds around the edges of each delice. Drizzle the white chocolate in stripes over the delice.

ChocolateDelice20

To serve, spoon caramel sauce onto a serving plate and sprinkle with a small pinch of sea salt, top with the delice to serve.
ChocolateDelice47

Strawberries and Cream with White Chocolate Sponge and Ice Cream

Saturday, November 7th, 2009

StrawberryCreamMasterChef07

When I saw Katrina Kanetani from Pier walk into the MasterChef kitchen on Wednesday night I was so excited as I knew desserts would be on the menu. Katrina was named Chef of the Year in 2007 and is the head Pastry Chef at the three-hatted restaurant Pier, how could I not be excited to see what creations the celebrity contestants had to choose from.

StrawberryCreamMasterChef24

I thought both desserts Katrina revealed were gorgeous. How could you choose? Being a chocoholic I was obviously eager to get the recipe for the chocolate dessert – a chocolate brulee. But, after saying that, the strawberry, cream, sponge and tuile creation looked marvellous (this was the chosen dessert).

StrawberryCreamMasterChef08

Even better? I actually had most of the ingredients at home (couldn’t find sumac, though). So I had decided, printed the recipe off the day after the show and started planning how I would fit it in on the weekend, without making the whole day full of cooking and dirtying the kitchen, like I tend to do.

StrawberryCreamMasterChef16

So I made the ice cream the night before, chilled the custard on ice and placed it in my ice cream maker. It looked gorgeous (and tasted beautiful). I placed it in the freezer overnight and left it out for 10 minutes or more for it to soften.

StrawberryCreamMasterChef18

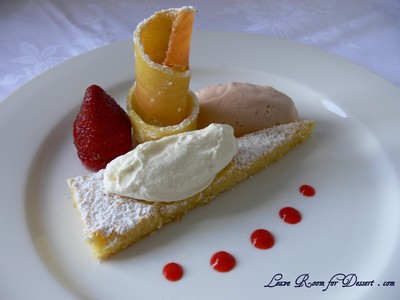
Everything on the plate worked fantastically together. It looked amazing too. I couldn’t believe I actually got it quite close to the actual dessert. I had a few problems with the tuile, mainly the fact my baking trays decided to buckle under the heat, causing the tuile mixture to be uneven. Overall I was very happy with my result.

StrawberryCreamMasterChef12

Aren’t my dinner guests tonight going to be happy? 😛

StrawberryCreamMasterChef15

Strawberries and Cream with White Chocolate Sponge and Ice Cream

Recipe by Katrina Kanetani as seen on Celebrity MasterChef 2009

Strawberry Ice-cream
180g strawberries, hulled, halved
360ml cream
5 egg yolks, reserve whites
120g caster sugar

White chocolate sponge cake

135g white coverture chocolate, broken up
125g unsalted butter, softened
5 egg yolks
4 egg whites
90g caster sugar
60g plain flour, sifted

Tuile
50g plain flour
60g caster sugar
35g icing sugar
Pinch salt
4 egg whites
65g butter, melted

Chantilly cream
200ml cream
1 tbs icing sugar
½ tsp vanilla bean extract

Strawberries

3 large strawberries, hulled
2 tsp icing sugar
½ tsp sumac (I left this out as I had none)

To serve
Icing sugar
Sumac (I left this out as I had none)
(Some of the strawberry puree – see method for ice cream)

To make the strawberry ice-cream, puree the strawberries in a small food processor and pass through a sieve. Reserve 1 tablespoon of the puree for serving. Place the cream in a small saucepan and heat over medium heat to just below boiling point. Whisk the egg yolks and sugar together in a large bowl. Gradually pour the hot cream into the yolk mixture, while whisking continuously until all the cream is added. Transfer the mixture into a clean medium saucepan and cook over low heat, stirring until custard thickens and coats the back of a spoon (mixture will be about 84°C). Strain custard through a fine sieve and place over a bowl of iced water, whisking until cold.

StrawberryCreamMasterChef26

Stir through the remaining strawberry puree.

StrawberryCreamMasterChef27

Transfer ½ cup of the ice-cream base into a cream canister and charge twice, shaking vigorously after each charge (I didn’t do this part as I wasn’t sure where it should be used for serving, plus I didn’t have the equipment. I placed it all in the ice cream maker.). Refrigerate cream canister until ready to serve. Pour remaining ice-cream base into a chilled ice cream maker and churn for about 20 minutes. Remove from ice cream maker and place in the blast chiller for about 10 minutes or until firm. (I placed mine in the freezer overnight)
StrawberryCreamMasterChef29

To make the white chocolate sponge cake, preheat oven to 160°C fan forced. Grease and line a 4cm deep baking tray (mine was 4.5cm x 21cm x 31cm). Place the chocolate in a glass bowl and place over a saucepan of simmering water. Stir with a metal spoon until melted. Transfer to a large bowl and cool. Add the butter to the cooled chocolate and beat until smooth. Stir in egg yolks and mix until well combined.

Using an electric hand beater, whip the egg whites to soft peaks. Add the sugar and continue beating until it forms stiff peaks.

StrawberryCreamMasterChef30

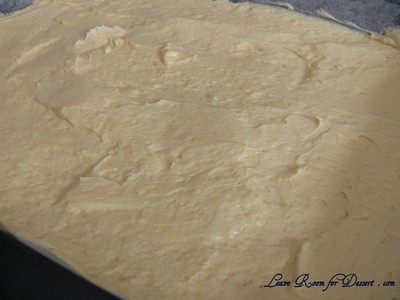
Fold the egg white mixture into the white chocolate and mix well. Gently fold in the flour. Spread the cake onto prepared baking tray until 2cm thick.

StrawberryCreamMasterChef01

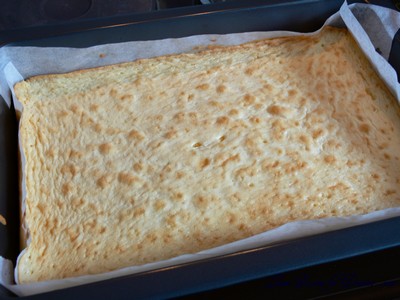
Bake for 10 minutes or until cooked (until skewer comes outs clean)(mine took 20-25 minutes). Allow to cool in pan then turn cake onto a board and remove baking paper. Turn cake over, top side up. Cut out a 3cm x 15cm x 15cm triangle. Reserve sponge triange and off-cuts for serving.
StrawberryCreamMasterChef03

To make the tuile, grease and line 2 flat baking trays with baking paper. Sift the flour, sugars and salt into a bowl. Mix in the egg whites and butter. Place in the blast chiller for 10 minutes (I placed it in the freezer for 15 minutes). Spread a thin layer of batter onto one of the prepared trays and bake for 8 minutes (tuile should be set but not browned yet) (I did this at 160C fan forced). Using a sharp knife, cut the tuile, lengthways into 5cm wide strips. Turn onto the second prepared tray, separated slightly and return to oven until golden brown. While still hot, twist the tuiles and allow to cool to your desired shape.
To make the Chantilly cream, place the cream, icing sugar and vanilla in a bowl and beat with an electric beater until soft peaks form; refrigerate.
To prepare the strawberries, slice strawberries into 3mm thick rounds. Place the strawberry slices, sugar and sumac in a bowl and toss to coat all side of the strawberries.

To serve, dust the sponge cake triangle with icing sugar and place in the centre of the serving plate. Place a quinell of Chantilly cream on top of sponge triangle and sprinkle the cream and some of the plate with a little sumac. Rebuild strawberry next to the sponge so bottom becomes the top. Place a small piece of squashed off cut sponge on the plate to stand the ice-cream on. With a warmed spoon, take a quinell of strawberry ice-cream and place it on top of the squashed sponge (squashed sponge should not be visible – it is just use to hold the ice-cream). Dust the tuile with icing sugar and place in the centre of the plate. (I used a piping bag to make the strawberry puree into smallish dots on the plate)

StrawberryCreamMasterChef21

Triple Chocolate Praline Tart

Monday, August 17th, 2009

triplechocolatepralinetart03

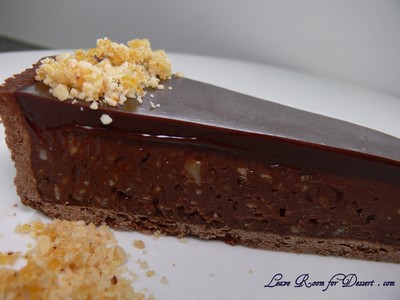
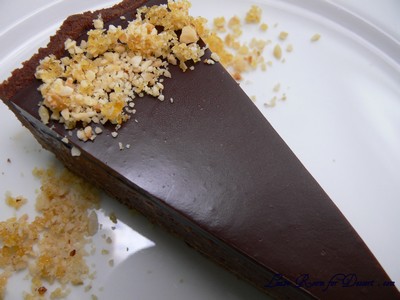
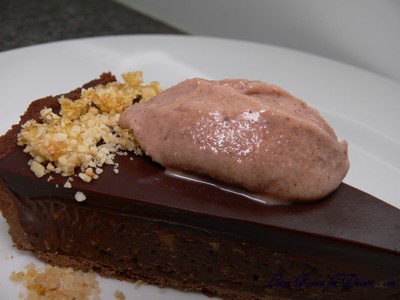
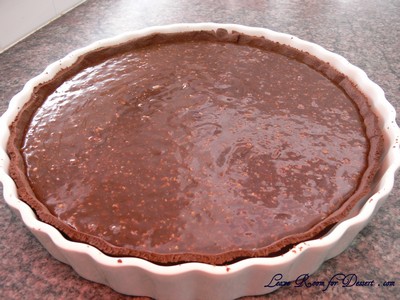
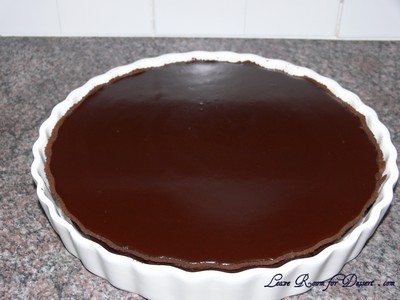
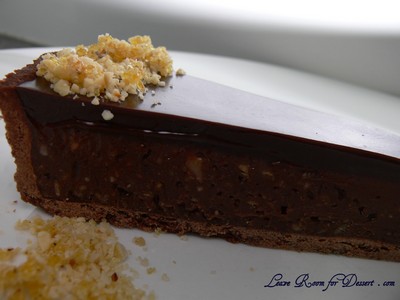
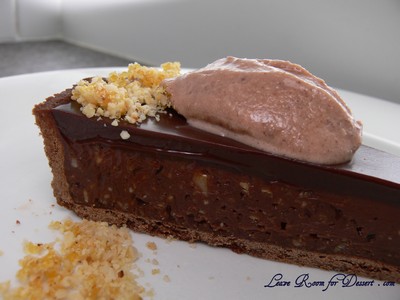
On the cover of Gourmet Traveller a few months ago was one of the most tempting chocolate tarts I have ever seen. Gorgeous rich shiny chocolate on top of a chocolate, hazelnut praline mousse and crispy chocolate pastry. How could I resist making this?

triplechocolatepralinetart05

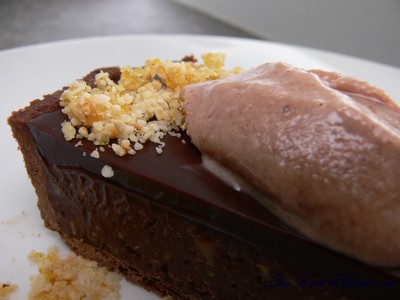
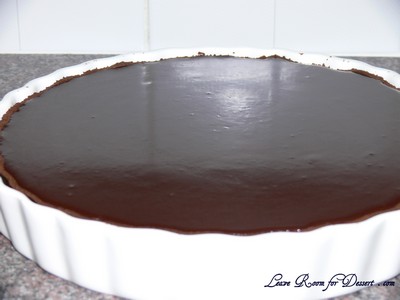
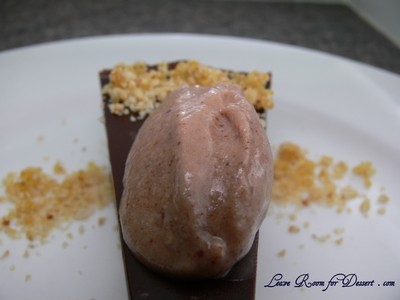
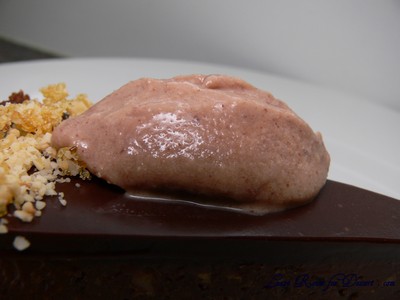
Even though I felt I should serve this with vanilla ice cream, I really wanted to serve it with baci gelato and the combination was fantastic! The tart was rich and relatively soft, with a crisp pastry. The chocolate ganche on top was beautiful and very reflective, the hazelnut praline gave the tart a lovely crunch and all layers worked fantastically together.

triplechocolatepralinetart11

A loose bottomed tart tin would have been very helpful in getting out the tart slices, as I had a few problems with removing the first few. Each part of the tart was quite easy, you just need to organise your time a bit, to make sure it’s ready on time. We had some leftovers, as this is a very rich tart, and it tastes gorgeous on the days afterward, so if you didn’t have time to make it on the day I would consider making it the day before.

triplechocolatepralinetart07

Triple Chocolate Praline Tart
Recipe from Gourmet Traveller (my hints in italics)

Serves: 16

160ml pouring cream
40ml milk
200g dark chocolate (61% cocoa solids), finely chopped

Chocolate pastry
200g plain flour
60g pure icing sugar, sifted
30g Dutch-process cocoa
100g cold butter, coarsely chopped
2 egg yolks
(I had to add 2 tablespoons of cold water at the end for it to form a dough)

Milk chocolate praline filling
150g hazelnuts, roasted and skins removed
175g raw caster sugar
300ml pouring cream
400g milk chocolate, finely chopped

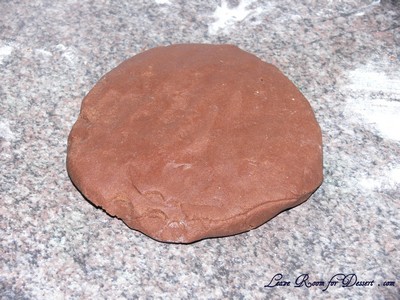
For chocolate pastry, process flour, icing sugar and cocoa in a food processor until combined. Add butter, process until mixture resembles fine crumbs, then add egg yolks, process to combine. (If you need to add some cold water add it now and process, I needed to do this as it was very crumbly). Turn onto a lightly floured work surface and bring pastry together with the heel of your hand. Wrap in plastic wrap, refrigerate for 1 hour to rest.

triplechocolatepralinetart13

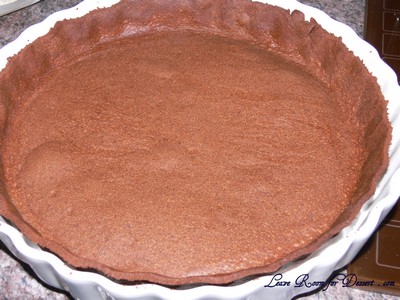
Preheat oven to 180°C. Roll out pastry on a lightly floured surface to 3mm thick and line a 28cm-diameter loose-bottomed tart tin, trimming edges (I used a quiche dish as that’s all I had). Refrigerate for 1 hour, then blind bake for 8-10 minutes (place a piece of baking paper in the tart and add rice, beans or weights), remove paper and weights and bake until dry and crisp (8-10 minutes).

triplechocolatepralinetart16

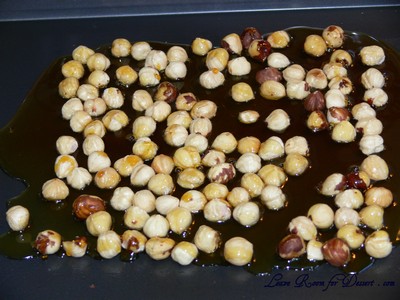
Meanwhile, for praline filling, spread hazelnuts on an oiled baking tray, set aside. Combine sugar and 60ml water in a small saucepan, stir over medium-high heat until sugar dissolves. Bring to the boil, cook until dark caramel in colour (4-5 minutes), pour over nuts. Stand until cool and set (8-10 minutes), process in a food processor until finely ground, set aside.

triplechocolatepralinetart15

Bring cream to the simmer in a small saucepan over medium heat, add chocolate, stir until smooth, remove from heat, stir in two-thirds of praline mixture (reserve remaining to serve). Spoon into pastry case, smooth top, refrigerate until just set (1½-2 hours).

triplechocolatepralinetart17

Combine cream and milk in a small saucepan, bring to the simmer over medium-high heat. Add dark chocolate, remove from heat, stir until smooth. Spread over tart, refrigerate until just set (45 minutes-1 hour). Cut into wedges with a hot knife and serve immediately scattered with reserved praline. (I would also suggest serving this with vanilla ice cream, whipped cream or baci gelato).

triplechocolatepralinetart19

triplechocolatepralinetart20

triplechocolatepralinetart02

triplechocolatepralinetart12

triplechocolatepralinetart10

Baci Gelato

Thursday, August 13th, 2009

bacigelato02

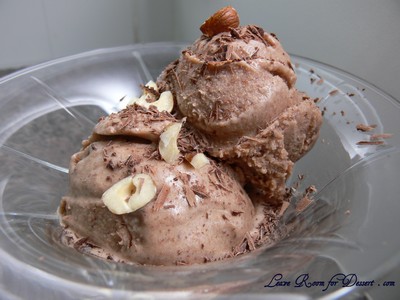
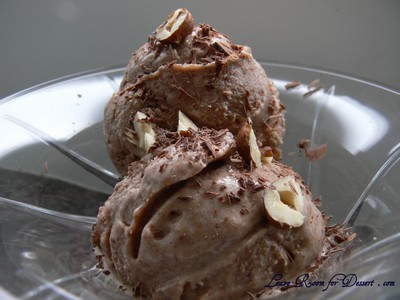
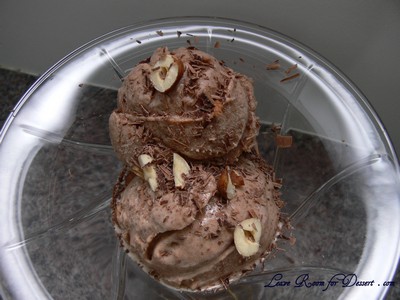
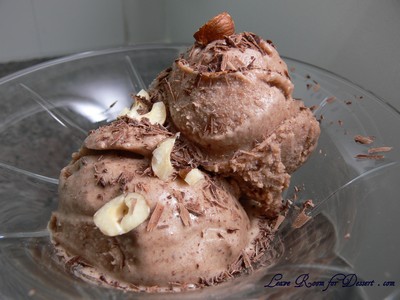
When I received my ice cream maker a few years ago, one of the first things I wanted to make was a ferrero rocher gelato or ice cream. I tried to find a recipe, but ended up with a quite solid very rich ice cream – which was not what I wanted at all. I was hoping for a beautifully soft lightly chocolate hazelnut flavoured gelato.

When I saw this baci gelato in my delicious magazine, I was extremely excited to try it (even though I have yet to make a good vanilla ice cream, it’s still on my list).

bacigelato04

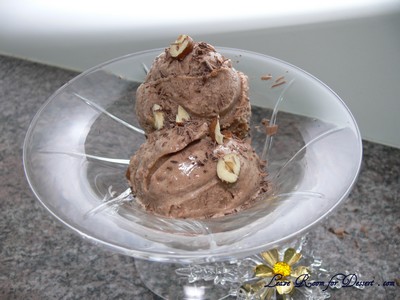
This was absolutely gorgeous!!! All I wanted was more and more gelato! Unfortunately I had made it a little late in the day and not cooled it enough for my ice cream machine, resulting in the machine stopping its churning and I then had to continue beating the gelato every 2 hours. When it was time to serve the gelato with a lovely chocolate tart, it wasn’t completely frozen, but the colder edges tasted absolutely fantastic! The following days it still tasted wonderful… now, when can I make it again…? 😛

bacigelato05

Baci Gelato
Recipe from delicious magazine May 2009 (some of my hints/changes are in italics)

Consider making this the day before (or early) and placing the ice cream mix in the fridge or on ice to cool before putting it in the ice cream maker.

Serves: 6 (when served with a chocolate tart, it serves 12 or more)

2 cups (500ml) pure (thin) cream
2 cups (500ml) milk
1 vanilla bean, split, seeds scraped (I used 1 teaspoon vanilla essence)
300g caster sugar (split into 2 x 150g lots)
5 egg yolks
220g Nutella or other hazelnut spread (It was cold here, so I place it in a bowl over hot water)
Cocoa powder, to dust (if desired)

Place the cream, milk, vanilla pod and seeds (or essence) and 150g sugar in a pan over medium heat, stirring to dissolve sugar. Bring to just below boiling point, then remove from the heat.

Beat the yolks and remaining 150g caster sugar with electric beaters (in a large bowl) until pale. Slowly add the hot cream mixture, whisking well to combine. Pour into a clean large saucepan and cook gently over low heat for 3-4 minutes, stirring constantly until the mixture is thick enough to coat the back of a spoon. Remove from the heat and discard the vanilla pod. Stir in the Nutella until well combined.

Pour mixture into a shallow container. Freeze for 2 hours or until frozen at the edges. Remove and beat with electric beaters, then return to the container and refreeze. Repeat 2 or 3 times, then freeze for 4 hours or until firm. Alternatively, churn mixture in an ice cream machine according to manufactures instructions.

Scoop gelato into bowls and serve by itself or with White Chocolate slab (recipe also in delicious magazine), or with a slice of Triple Chocolate Praline Tart.

bacigelato06

bacigelato01

triplechocolatepralinetart091