Cakes, Slices and Biscuits

Triple Chocolate Cheesecake with Salted Peanut Caramel

Tuesday, October 9th, 2012

Everyone has had the experience when they see a photo of food they just have to make. I started sending emails titled: “I want this” when I saw this cake. I only had to find time and an occasion. And what better occasion than a surprise morning tea for a wonderful friend who was off to get married.

Making the cake wasn’t difficult, each part was quite easy and didn’t take long, although you do need time for it to set between each layer.

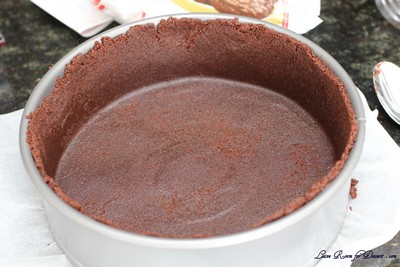
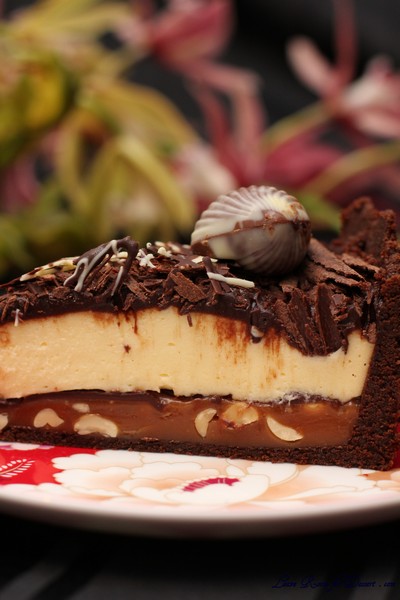
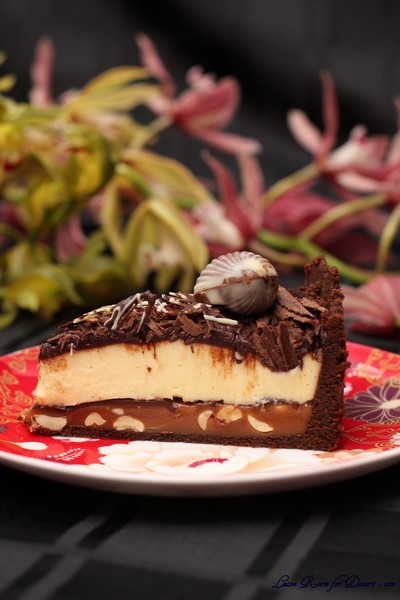
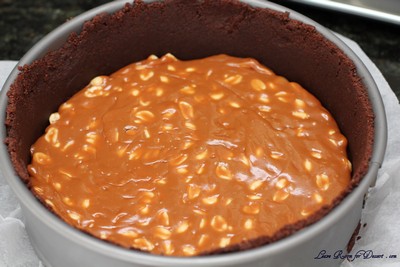
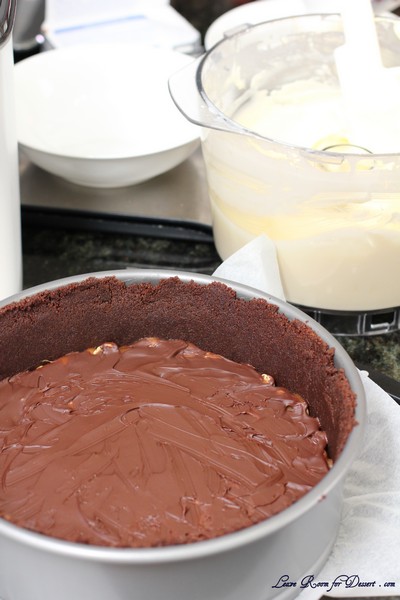
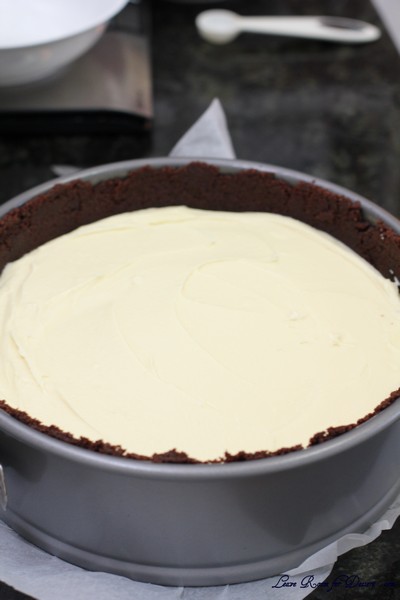
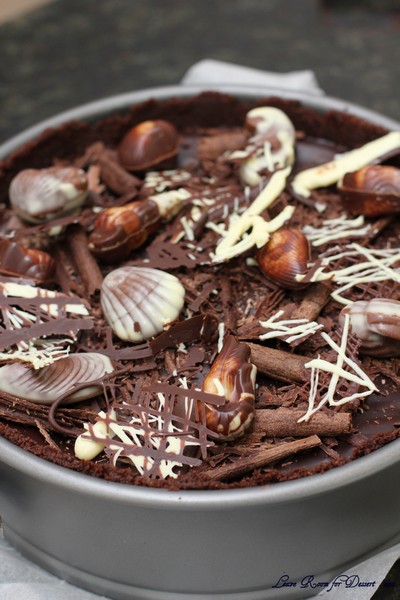
I made the biscuit base and had that in the fridge while I made the caramel, then left this for most of the day, made the chocolate layer and whilst the chocolate was in the fridge I made the cream cheese part. I left this overnight and put the final touches on the cake after work. (If you want to do this at night, it will take 3 nights). I left off the Italian meringue due to someone having an egg allergy, and instead covered it in chocolate curls and bought sea shell chocolates.

The biggest difficulty with this cake was cutting it. I think I may have cooked my caramel too long, and when stored in the fridge it became very hard and difficult to cut (it was fine to eat though, and was not too hard to chew). This is something I would be a bit more careful about next time, although I am not sure how I would tell the right consistency, as the caramel was quite runny when warm. The cake is best served chilled, but the caramel is far easier to cut when at room temperature.

I would definitely make this cake again, the flavours worked so beautifully together, and you only need a very small serve (after I ate a piece, I could not eat anything else at the morning tea).

P.S. The photos of this cake were from the piece I managed to bring back home from work so Nick could try some of the cake. It was not cold anymore by this stage, and so was easy to cut.

Triple-choc cheesecake with salted peanut caramel

Australian Good Taste – April 2012 , Page 8
Original Recipe by Michelle Southan

This recipe is adapted, with the removal of the Italaian meringue

Melted butter, to grease
400g plain chocolate biscuits
150g butter, melted
5g butter, extra
260g Dark Cooking Chocolate, finely chopped
150g White Cooking Chocolate, finely chopped
375g cream cheese, at room temperature
100g (1/2 cup) caster sugar
310ml (11/4 cups) thickened cream
1 1/2 tbs hot water
3 tsp gelatine powder

Salted peanut caramel

315g (11/2 cups) caster sugar
185ml (3/4 cup) water
250ml (1 cup) double cream
120g (3/4 cup) salted roasted peanuts, coarsely chopped

Chocolate curls and sea shell chocolates for decoration

Release the base from a 6cm-deep, 22cm (base measurement) springform pan and invert. Brush with butter. Line the base with non-stick baking paper, allowing the edge to overhang. Secure the base back into the pan.

Process the biscuits in a food processor until finely crushed. Add the butter and process until well combined. Transfer to the prepared pan. Use a straight-sided glass to spread and press the mixture firmly over the base and side. Place in the fridge to chill.

To make the salted peanut caramel, stir the sugar and water in a large saucepan over low heat for 5 minutes or until the sugar dissolves. Increase heat to high. Bring to the boil. Boil, without stirring, brushing down the side of the pan occasionally with a wet pastry brush, for 18-20 minutes or until deep golden. Remove from heat. Stir in the cream. Place over medium heat. Cook, stirring constantly, for 2 minutes. Set aside for 30 minutes to cool. Stir in peanuts. Spoon over the biscuit base. Smooth the surface. Place in the fridge for 3 hours or until firm.

Place the extra butter and 60g of the dark chocolate in a small microwave-safe bowl. Cook, stirring every 30 seconds, on High/ 800watts/100% for 11/2 minutes or until melted and smooth. Spread over the caramel to cover. Set aside for 10 minutes to set.

Stir the white chocolate in a small heatproof bowl over a saucepan half-filled with simmering water (make sure the bowl doesn’t touch the water) until smooth. Set aside for 5 minutes to cool slightly.

Process the cream cheese, sugar and 185ml (3/4 cup) of the cream in a food processor until smooth. Add the white chocolate and process until well combined.

Place the hot water in a small heatproof bowl and sprinkle with the gelatine. Place bowl in a slightly larger heatproof bowl filled with boiling water. Set aside, stirring occasionally, for 5 minutes or until the gelatine dissolves. Remove smaller bowl from larger bowl and set aside for 5 minutes to cool slightly. add to cream cheese mixture. Process until well combined. Pour cream cheese mixture over dark chocolate. Cover pan with plastic wrap and place in fridge for 4 hours to set.

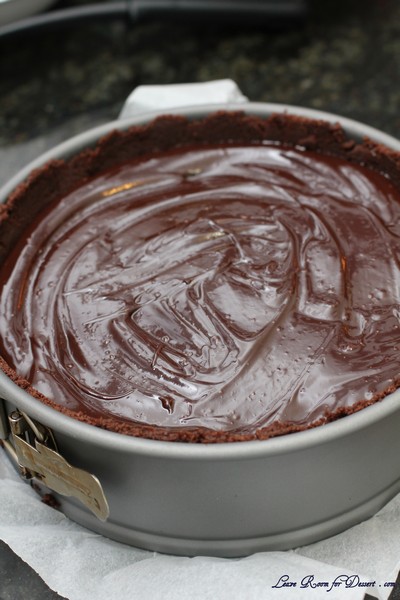
Stir remaining dark chocolate and cream in a saucepan over low heat until smooth. Pour over cheesecake. Place in the fridge for 1 hour to set.

Decorate the top with chocolate curls or shavings, or patterns and sea shells.

Filled Pate a Choux Swans – Daring Bakers Challenge August 2012

Monday, August 27th, 2012

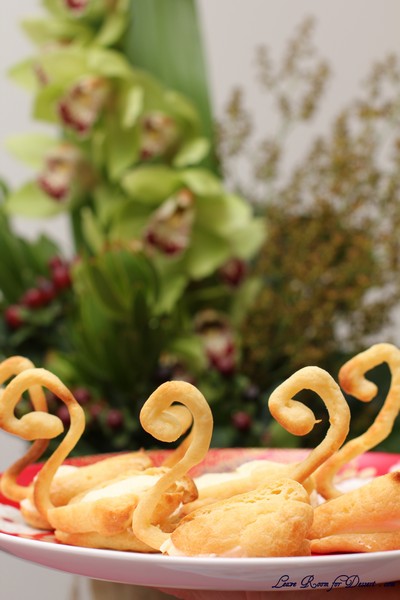
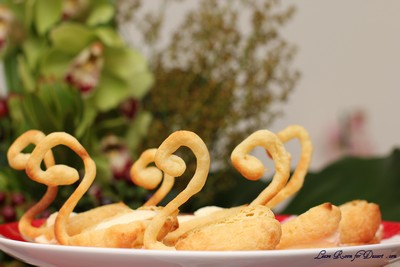
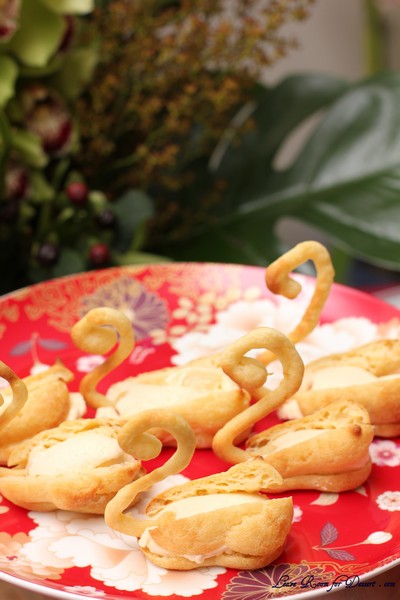
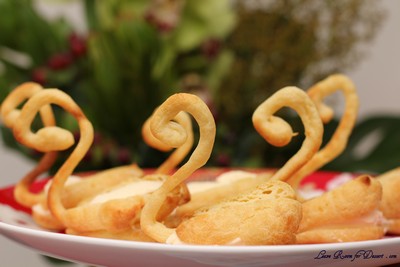
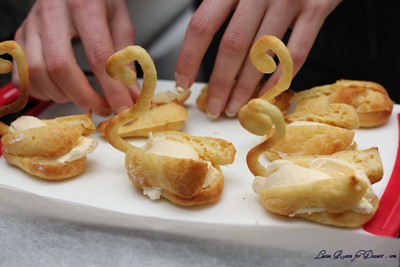
Kat of The Bobwhites was our August 2012 Daring Baker hostess who inspired us to have fun in creating pate a choux shapes, filled with crème patisserie or Chantilly cream. We were encouraged to create swans or any shape we wanted and to go crazy with filling flavors allowing our creativity to go wild!

I have made a tower of profiteroles before, but never a Swan (or other animal). One of the things I love about the croquembouche is the toffee and custard combination, and I think these swans would have looked lovely with toffee on their wings (but I didn’t have time to try it).

When I started this challenge, last night, I didn’t have many people to share the dessert with, so decided to halve the recipe for the choux pastry, as I find they don’t last very well overnight – and this recipe didn’t have any toffee (like the croquembouche), which helps disguise day old choux pastry. I found this recipe did not turn out how it should. The flour added to the butter/water mix didn’t form a solid enough dough. I am not sure if this is due to the amount of water or that it wasn’t boiling (the butter was just melted). This in turn made the final choux pastry quite liquidy. I placed it back on low/medium heat and whisked vigorously, it eventually became solid enough to pipe – although didn’t cook as nicely as it should.

I made the full amount of the vanilla creme, as I always love custards, although this is much lighter and creamier than the normal custard I would make, so after filling the few swans I made, I placed the vanilla creme in the freezer to see how it goes 🙂

I was surprised at how the swans turned out, when I had made the different sections I thought it would look nothing like a swan, but I was happy with the look and taste (and short time required by) the challenge.

Recipe Source: Good Housekeeping Illustrated Guide to Cooking, 1980 edition.

Vanilla Creme

1 tablespoon (15 ml) (7 gm) (1/4 oz) (1 envelope) unflavored gelatin
½ cup (120 ml) (115 gm) (4 oz) sugar
2 tablespoons (30 ml) (18 gm) (2/3 oz) all-purpose (plain) flour
4 large egg yolks, well beaten
1 cup (240 ml) milk
1 teaspoon (5 ml) vanilla extract
1 cup (240 ml) heavy (whipping) cream (about 35% butterfat)

In a medium saucepan combine gelatin, flour, and sugar. Mix very well.
Add milk and egg yolks and turn heat to medium-low. Stir almost constantly until mixture is thick enough to cover the back of your spatula or spoon. This should take about 10 minutes.
Once thick, immediately dump into a bowl, straining the mixture if you are concerned about lumps of cooked egg.
Add the vanilla, and mix in well.
Cover the surface to prevent a skin from forming, and chill for about 45 minutes. You do not want the mixture to set, just to continue thickening.
Now is a good time to begin your choux paste.
In a large bowl, beat cream until light peaks form. Carefully fold the vanilla mixture into the whipped cream until the mixture is well-blended and fairly smooth.
Refrigerate mixture if not using immediately.

Pate a choux

(cannot be doubled)

½ cup (120 ml) (115 gm) (4 oz) butter
1 cup (240 ml) water
¼ teaspoon (1½ gm) salt
1 cup (240 ml) (140 gm) (5 oz) all-purpose flour
4 large eggs

Line at least two baking sheets with silicone mats or parchment paper, or grease pans well.
Preheat oven to moderately hot 375°F/190°C/gas mark 5 .
In a small saucepot, combine butter, water, and salt. Heat over until butter melts, then remove from stove.
Add flour all at once and beat, beat, beat the mixture until the dough pulls away from the sides of the pot.
Add one egg, and beat until well combined. Add remaining eggs individually, beating vigorously after each addition. Resulting mixture should be somewhat glossy, very smooth, and somewhat thick.
Using a ¼” (6 mm) tip on a pastry bag, pipe out about 36 swan heads. You’re aiming for something between a numeral 2 and a question mark, with a little beak if you’re skilled and/or lucky.
Remove the tip from the bag and pipe out 36 swan bodies. These will be about 1.5” (40 mm) long, and about 1” (25 mm) wide. One end should be a bit narrower than the other.
Bake the heads and bodies until golden and puffy. The heads will be done a few minutes before the bodies, so keep a close eye on the baking process.
Remove the pastries to a cooling rack, and let cool completely before filling.

Assembly

Take a swan body and use a very sharp knife to cut off the top 1/3rd to ½.
Cut the removed top down the center to make two wings.
Dollop a bit of filling into the body, insert head, and then add wings.


Your first attempt will probably not look like much, but the more you make, the more your bevy of swans will become a beautiful work of swan art.

Gaytime goes nuts

Sunday, July 29th, 2012

The wonderfully talented Christine Manfield featured on the season finale of MasterChef this year. I haven’t watched much MasterChef this year, but I always have to watch for the dessert in the finale. It never ceases to amaze and I always want to make it.

I watched the contestants eating the dessert with envy, and couldn’t stop saying – I want that dessert. Straight after the finale, I went searching the internet for the recipe, hoping it was featured in a book or magazine. Luckily it was featured on the MasterChef website the next day, and I set to task planning, buying and cooking.
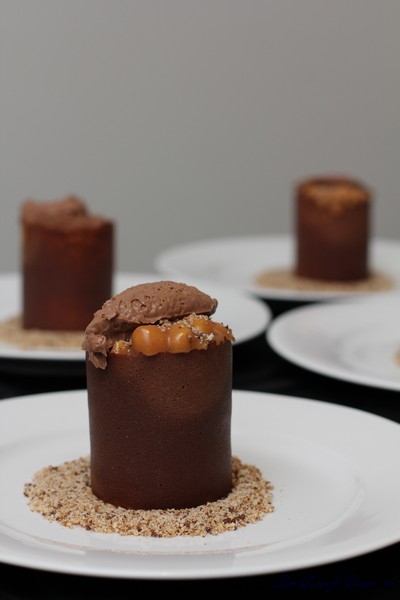
It took me a lot longer to make everything, as I had to cool the ice cream base for most of a day/ overnight before churning. I also had a lot of dishes to wash between making everything. Overall it probably took 1 1/2 – 2 days.

It certainly gives you an even greater appreciation for the beautiful desserts made at top end restaurants, and I am feeling excited at the thought of the next hatted restaurant I go to (I have yet to decide where to go). I can’t wait to go to Universal too. I have wanted to go there for dinner for at least a year or two. Maybe I’ll go there.

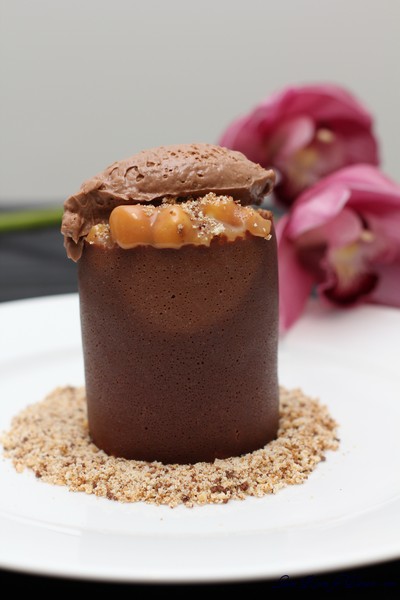
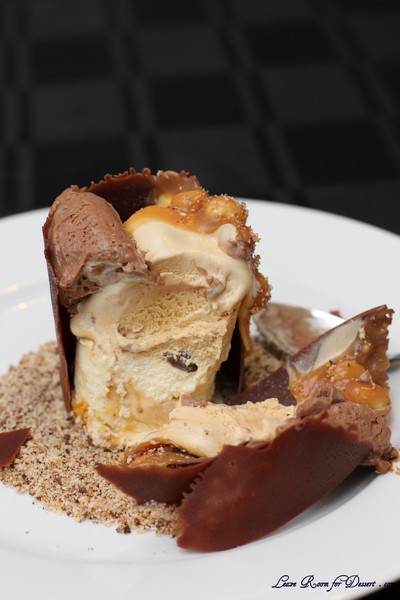
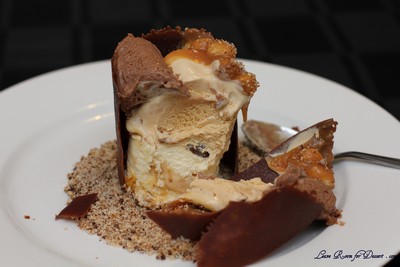
When it comes to this dessert, all I can say is it is wonderful (and quite rich). The components worked beautifully together and it looks gorgeous.
My notes on the recipe:
It makes a lot more than 4 serves. (Maybe 10-16?)

I needed to use my 2 ice cream makers twice! The honeycomb ice cream made around 2L of liquid before churning, and the caramel ice cream made a bit over 1L before churning. If you don’t have two ice cream makers, you may prefer to halve the honeycomb recipe, or be ready to mix the ice cream every hour or so in the freezer.

For the ice cream, I filled a 19cm square tin (approx 3-4cm height) for each ice cream. I could not have put the ice cream in half a tin as I think it wouldn’t have held its shape. Even with filling up the two tins, I had ice cream left over.

I made my own fondant icing using this recipe

I could not find wafer balls and had to use maltesers and honeycomb balls instead.

I did not have access to the 250g Valrhona gianduja hazelnut chocolate, so used 50g nutella + 100g milk chocolate + 100g dark chocolate. (I am sure the Valrhona gianduja hazelnut chocolate would have tasted amazing). The mousse ended up being quite chocolatey and not very hazelnut-y.

I also didn’t have Valrhona Caramelia chocolate, so used some Calebaut chocolate and milk cooking chocolate.

I am not sure of the strength of the gelatine leaves I had, so I used 1 1/2 leaves which weighed 6g.

I don’t have a thermomix, so made the anglaise the same way I made the ice cream base. (heat the cream, beat the egg yolks with the sugar, add the hot cream, pour this into the saucepan and heat until 80-84C.)

I cooked the ice cream bases in the saucepans rather than a bowl over water, as this is how I normally make ice cream.

Be careful with the caramel ice cream (I am not sure whether adding some of the ice cream base to the caramel would be a better idea, than adding the caramel to the ice cream base.) When I made it the way it said here, the caramel splattered out of the pot and a little bit landed on my arm. Be careful of your eyes and keep children away from hot caramel as it can cause nasty burns.

I made my own template out of paper – it was a bit flimsy though, cardboard might have been better.

I needed to sieve quite a lot of the chocolate caramel over the template, and place it in the oven for a while (1-2min) for it to completely melt.

Hopefully these tips will help anyone attempting to make this dessert at home.

Please enjoy the dessert if you make it, or if you go to Universal!

Gaytime goes nuts

Recipe by: Christine Manfield
Serves: 4 (I think it serves at least 10 people)
Recipe found on MasterChef website

Honeycomb
360g caster sugar
120g glucose
60ml water
15g bicarbonate of soda

Honeycomb ice cream
700ml pure cream
750ml milk
8 egg yolks
300g caster sugar
250g chopped honeycomb

Caramel ice cream

300g caster sugar
75ml water
750ml pure cream
375ml milk
9 egg yolks
90g caster sugar

Base anglaise
50g egg yolks
25g caster sugar
125ml pure cream
125ml milk

Hazelnut chocolate mousse

150g base anglaise
2 leaves gold-leaf gelatine, softened in cold water
250g Valrhona gianduja hazelnut chocolate, chopped
200ml pure cream, whipped to soft peaks

Hazelnut caramel
200ml pure cream
75g glucose
½ vanilla bean, split
100g caster sugar
25g unsalted butter, chopped
1½ cups hazelnuts, roasted and peeled, coarsely chopped
Vanilla salt, to taste

Chocolate collar wafers
240g liquid/pouring fondant sugar
160g glucose
160g Valrhona Caramelia chocolate, chopped

Gaytime Dust
50g chocolate ripple biscuits
150g sponge fingers (savoiardi)
30g hard nougat
20g honeycomb

chocolate wafer balls to serve

1. For honeycomb, line a deep large baking tray with baking paper.

2. Place sugar, glucose and water in large saucepan and cook, stirring occasionally over medium heat until sugar dissolves.

3. Bring to the boil, without stirring, then cook until mixture just begins to change colour. Agitate the pan to circulate the colour. You want a very pale yellow colour (as when the bi-carb is added the honeycomb will cook quickly and burn).

4. Remove the pan from the heat, add bi-carb and whisk quickly. Pour into prepared tray and leave to cool.

5. Break into large chunks and store in airtight container until required.

6. For honeycomb ice cream, place cream and milk in a saucepan and bring to a gentle boil.

7. Whisk yolks and sugar in a metal bowl until thicken and pale, gradually pour in hot cream and whisk constantly to combine.

8. Place the bowl over a saucepan of simmering water, ensuring water doesn’t touch the base of the bowl. Cook the custard, stirring with a wooden spoon until mixture coats the back of the spoon.

9. Cool over a bowl of iced water or in a shallow tray in the blast chiller until cold.

10. Pour into a pacojet cannister. N.B. Make sure it is not filled above the safety line. You need to allow room for the ice cream to expand. Place cannister in blast freezer until set solid in the centre, about 1 hour 30 minutes or overnight in a freezer. Churn in pacojet. N.B. Make sure you press the release button before removing from machine or you will damage the machine. If you don’t have a pacojet, churn in an ice-cream machine following manufacturer instructions.

11. Line a 16x25cm base-measurement 3cm-deep slice tin with cling wrap or baking paper. Fold honeycomb through churned ice cream. Spread ice cream into one half of the tin. Make sure you have enough for 4 x 4.5cm disks. The caramel ice cream will fill the other half.

12. Place in blast freezer until firm. When firm, use a round cookie cutter to cut out 4.5cm discs, place on a tray and blast freeze discs until firm.
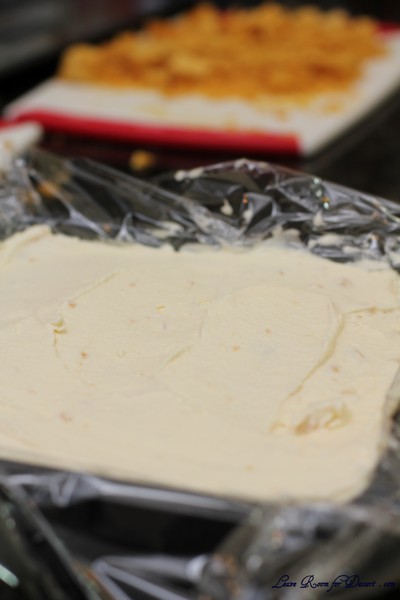
13. For caramel ice cream, place sugar and water in a saucepan over a medium heat and bring to the boil, agitating occasionally to ensure sugar is dissolved before mixture reaches the boil. Continue to boil until mixture reaches a deep caramel colour.

14. Meanwhile, place cream and milk in a saucepan and bring to a gentle boil.

15. Whisk yolks and sugar in a metal bowl until thicken and pale, gradually pour in hot cream and whisk constantly to combine.

16. Place the bowl over a saucepan of simmering water, ensuring water doesn’t touch the base of the bowl. Cook the custard, stirring with a wooden spoon until mixture coats the back of the spoon.

17. Pour in hot caramel and whisk until smooth and combined. Cool over a bowl of iced water or in a shallow tray in the blast chiller or freezer until cold.

18. Pour into a pacojet cannister. N.B. Make sure it is not filled above the safety line. You need to allow room for the ice cream to expand. Place cannister in blast freezer until set solid in the centre, about 1 hour 30 minutes or overnight in a freezer. Churn in pacojet. N.B. Make sure you press the release button before removing from machine or you will damage the machine. If you don’t have a pacojet churn in an ice-cream machine following manufacturer instructions.

19. Spread into the unfilled half of the 16 x 25cm base measurement 3cm-deep slice tin. Make sure you have enough for 4 x 4.5cm disks. When firm, use a round cookie cutter to cut out 4.5cm discs, place on a tray and blast freeze until firm.

20. For anglaise, to operate thermomix, press time first, then temperature, then speed. Place egg yolks and sugar in thermo jug, set 20 seconds, then speed 7.

21. Add cream and milk, and set for 7.5 minutes, then 80°C button and then speed 4. Light will stop flashing once anglaise comes up to temperature.

22. For hazelnut chocolate mousse, pour 80°C base anglaise into a large metal bowl, add softened gelatine, stirring to dissolve the gelatine, then cool over ice to 45°C.

23. While anglaise is cooling, place chocolate in a metal bowl over water bath and heat to 45°C.

24. Fold melted chocolate through anglaise until combined. Cool completely over a bowl of iced water, fold in whipped cream.

25. Divide into 2 plastic rectangle containers and refrigerate until firm. Do not blast freeze as it weakens the gelatine structure.

26. For hazelnut caramel, place cream, glucose and vanilla bean in a saucepan over a medium heat until simmering.

27. Make a dry caramel by melting sugar in a deep frying pan over a medium heat. Bring to the boil, and continue to cook, agitating the pan occasionally until sugar reaches a caramel colour.

28. Pour in warmed cream mixture, stir to combine and cook for 5 minutes until caramel dissolves.

29. Add butter and stir to combine. Remove from heat and cool, stirring occasionally.

30. To serve, combine a few tablespoons of chopped nuts with a few tablespoons of caramel and season with vanilla salt to taste.
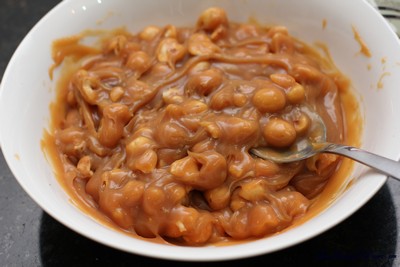
31. For chocolate collar wafers, preheat oven to 200°C. Place a silver oven tray upside down in oven and allow to become very hot.

32. Place fondant sugar and glucose in a saucepan and cook to 180°C. Add chocolate and mix until smooth, making a homogenous paste. Spread onto a silicone mat, roll to 5mm thick with a silicone rolling pin and leave to cool. Break set toffee into pieces and transfer to a bowl.

33. Take 1/3 of toffee and place in a mortar and pestle. Pound to rough 1cm pieces and transfer to a thermo mix or blender. Blitz to a fine powder. Tap jug on a bench to loosen and blitz for a further 10-15 seconds.

34. Spoon some of the powder into a fine sieve, place a rectangular 20 x 7.5cm stencil over a silicone mat on a flat baking tray that has one end open for easy transfer. Sieve mixture over stencil to 1-2mm thick. The powder should just be level with the thickness of the stencil.
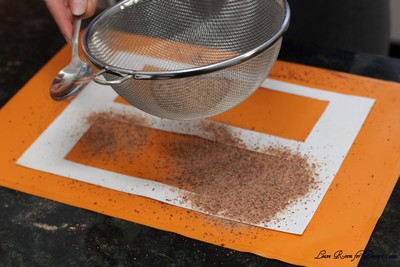
35. Place one finger at one end of the stencil to keep in place and gently lift the opposite end, ensuring not to indent the powder. Lift the stencil away completely.

36. Take the upside down oven tray from the oven and place upside down on a flat bench. Gently slide the powder-covered mat onto the tray and allow powder to melt completely, this will take 60-90 seconds. If the powder doesn’t melt together completely place in the oven for 15-30 seconds.

37. Run a small crank spatula over the wafer to check consistency. You want it to be set and cool enough to be pliable and easy to roll but not hot enough that it stretches easily.

38. Lift up one end by gently flicking it with the spatula, lay a 5.5cm base-diameter squeezy bottle over hot wafer and roll up around the bottle. Gently press the join to the hot mat to seal and gently ease off the bottle. Repeat until you have the desired amount of wafer cylinders.

39. For gaytime dust, blitz together to a fine crumb.

To assemble:

A bowl of gaytime dust
A tray of ice cream rounds, 4x honey comb and 4x caramel rounds
A small bowl or plate of chocolate wafer balls

Chocolate wafer collars
A small bowl of caramel
Chopped roasted hazelnuts
Vanilla salt
3 dessert spoons, for serving
A palette knife
A white cloth
A bowl of warm water, for quenelling

1. Place a spoonful of gaytime dust in the centre of a serving plate and flatten a central circle large enough to fit the chocolate collar wafer.

2. Take a round of honeycomb ice cream and place it in the centre. Dip the caramel ice cream in the chocolate wafer balls and place on top.

3. Gently ease the chocolate wafer collar over the ice cream to encase and fill with a little bit more ice cream if required to bring it to 1cm below the top of the collar.

4. Combine the hazelnuts and caramel and season to taste with vanilla salt. Spoon on to the ice cream to cover and bring to the top of the collar.
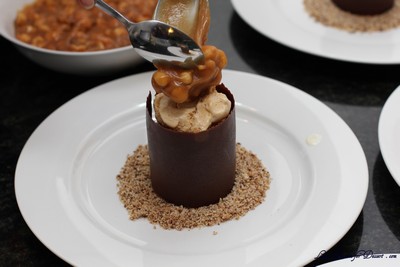
5. Place a spoonful of gay time dust over the caramel and top with a quenelle of mousse.

Seedy Crisps – Daring Bakers Challenge July 2012

Friday, July 27th, 2012

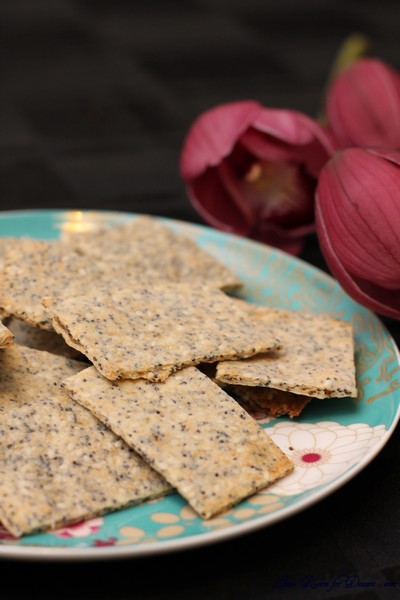
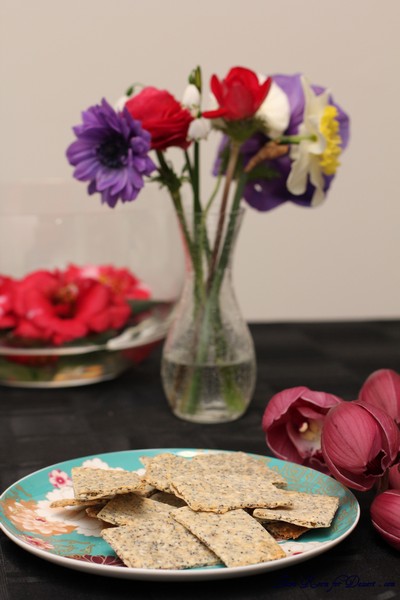
Our July 2012 Daring Bakers’ Host was Dana McFarland and she challenged us to make homemade crackers! Dana showed us some techniques for making crackers and encouraged to use our creativity to make each cracker our own by using ingredients we love.

There are some things you never even consider making. For some this may be ice cream, marshmallow, nougat or maybe a crouquembouche. I didn’t realise until this month, that I had never thought of making crackers before.

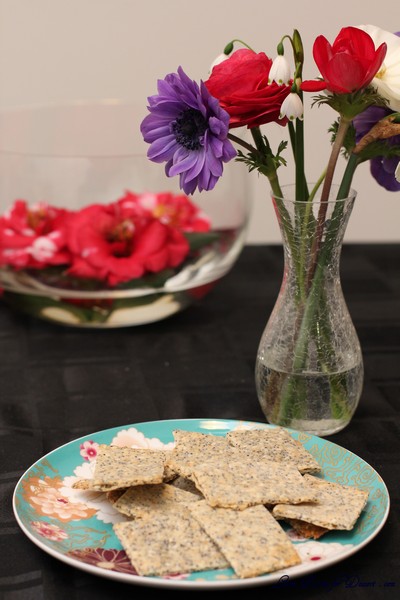
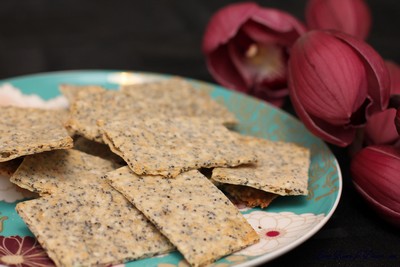
Whilst making the crackers or seedy crisps, I wasn’t sure how they would turn out. I couldn’t imagine their taste. When the first taste was taken, I understood why this challenge was chosen.

When everyone else tried these crisps, they were gobbled up quite quickly, with brie and dips. There was a lot of suggestion to make it again, possibly to serve it with the spinach dip.

Thanks Dana for a wonderful challenge I never expected.

Seedy Crisps

(Roll with pasta rollers or by hand)

Recipe Source: Brown, Alton (2011). Good Eats 3:The Early Years, “Seedy Crisps”. Stewart, Tabori & Chang, New York, NY.

Servings: Varies depending on thickness; approximately 50 crackers

1 cup (240 ml) (140 gm/5 oz) whole wheat four
1 cup (240 ml) 140 gm/5 oz) all-purpose (plain) flour
1/3 cup (80 ml) (50 gm) (1¾ oz)poppy seeds
1/3 cup (80 ml) (40 gm) (1¼ oz) sesame seeds
1½ teaspoons (7½ ml) (9 gm) table salt
1½ teaspoons (7½ ml) (8 gm) baking powder
3 tablespoons (45 ml) olive oil
¾ cup plus 1 tablespoon (195 ml) (6½ fl oz) water

1. Mix the flours, seeds, salt and baking powder in a large bowl.
2. Add the oil and stir until combined.
3. Add the water until the dough comes together.
4. Kneed the dough 5 or 6 times and allow to rest, covered, on the counter for 15 minutes. You can also chill the dough at this point and come back later.
5. Preheat the oven to hot 450°F/230°C/gas mark 8.
6. Working with a quarter of the dough at a time, either use a rolling pin to reach a desired thickness (thick or thin) or roll out in your pasta rollers. If you use pasta rollers, ensure the dough is well-floured so as not to stick.
7. Place strips of dough on a sheet pan lined with parchment.
8. If the crackers are thick, bake for 7minutes, flip them over and bake for 7 minutes more. Then cut or break into crackers shapes while still warm. Return to the oven for a further 5 minutes until crispy.
9. If not crispy enough when cooled, crackers can be returned to the oven.
10. Store in an airtight container and eat within 2 weeks

Battenberg Cake – Daring Bakers Challenge June 2012

Wednesday, June 27th, 2012

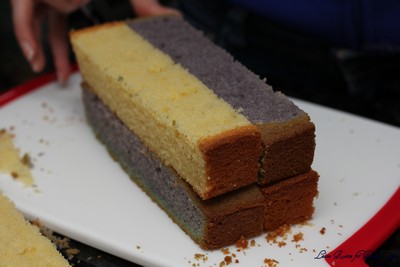
Mandy of What The Fruitcake?! came to our rescue last minute to present us with the Battenberg Cake challenge! She highlighted Mary Berry’s techniques and recipes to allow us to create this unique little cake with ease.
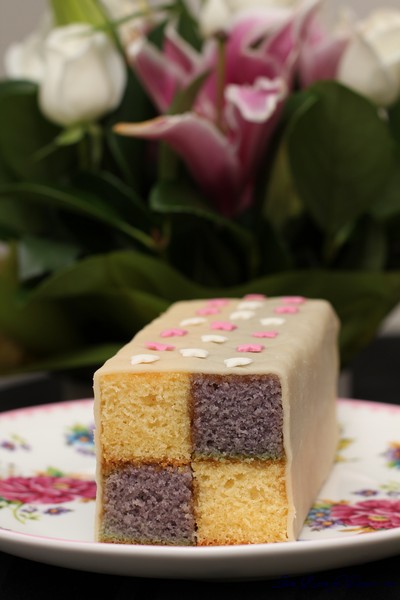
I was just about to go to bed when I thought – what’s the date today – whoops, it’s the day to post our Daring Bakers Challenge for the month.


You see, I have been away for most of the month on a two week road trip – which I’d love to post a few non-food related pics soon, and also let you know about some of the great places to see and places to eat too. So it seemed quite far away from when I made this cake at the beginning of the month.

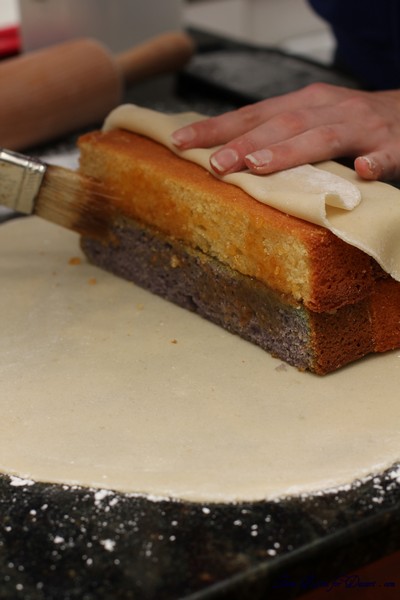
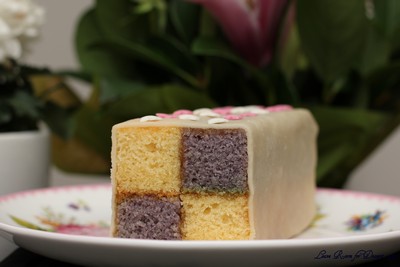
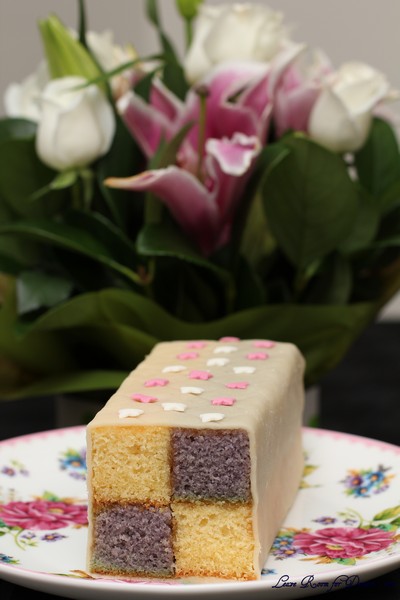
It was extremely fun to make such a pretty cake and also see some of the specialized tins people use to make the Battenberg cake. One change I would make is to use something in place or on top of the marzipan. I found the one I bought (which is quite common in supermarkets) was a little see-through and detracted being an off-white colour. I think a fondant or ready rolled icing may have been nice, or possibly some of the other options given by Mandy.
Traditional Battenberg

Recipe Source:
Traditional Battenberg adapted from Mary Berry’s “Baking Bible”

Servings: +- 8

Ingredients
¾ cup (1½ sticks) 175gm / 6 oz Unsalted Butter, softened & cut in cubes
¾ cup / 175gm / 6 oz Caster Sugar
1¼ cups / 175gm / 6 oz Self-Raising Flour (***see end of doc on how to make your own)
3 Large Eggs, room temp
½ cup / 65gm/ 2 1/3 oz Ground Almonds (Can be substituted with ground rice)
3/4 tsp / 3½ gm Baking Powder
½ tsp / 2½ ml Vanilla Extract
1/4 tsp (1¼ ml) Almond Extract
Red Food Colouring, paste, liquid or gel

To Finish
1/3 cup (80 ml) 100gm /3 ½ oz Apricot Jam
1 cup / 225gm / 8 oz Marzipan, natural or yellow

Directions:
1. Preheat oven to moderate 350°F/180°C/160°C Fan Assisted/Gas Mark 4
2. Grease an 8”/20cm square baking tin with butter
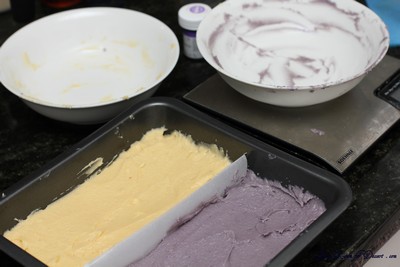
3. Line the tin with parchment paper, creating a divide in the middle with the parchment (or foil)
– Tip: See photos or watch video above for detailed instructions
4. OR Prepare Battenberg tin by brushing the tin with melted butter and flouring
5. Whisk together the dry ingredients then combine with the wet ingredients in a large bowl and beat together just until the ingredients are combined and the batter is smooth
6. Spoon half the mixture into the one side of the prepared baking tin
7. Add a few drops of red food liquid/gel/paste to the remaining batter, stir until the colour is thoroughly distributed, add more colour if needed
8. Spoon the pink batter into the other half of the prepared baking tin
9. Smooth the surface of the batter with a spatula, making sure batter is in each corner


10. Bake for 25-30mins until the cake is well risen, springs back when lightly touched and a toothpick comes out clean (it should shrink away from the sides of the pan)
11. Leave to cool in the tin for a few minutes before turning out to cool thoroughly on a wire rack
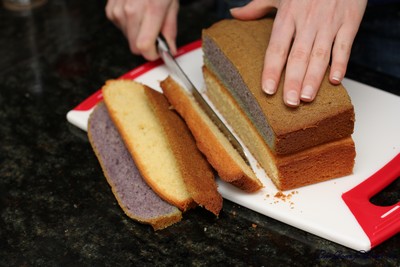
12. Once completely cool, trim the edges of the cake with a long serrated knife
13. Cut each coloured sponge in half lengthways so that you are left with four long strips of sponge

14. Neaten the strips and trim as necessary so that your checkered pattern is as neat and even as possible

15. Gently heat the apricot jam and pass through a small sieve

16. Brush warmed jam onto the strips of cake to stick the cake together in a checkered pattern (one yellow next to one pink. On top of that, one pink next to one yellow)
– Tip: See photos for detailed instructions
17. Dust a large flat surface with icing sugar then roll the marzipan in an oblong shape that is wide enough to cover the length of the cake and long enough to completely wrap the cake
18. Brush the top of the cake with apricot jam
19. Place the cake on the marzipan, jam side down
– Tip: Either in the middle or to the one side of the marzipan
20. Brush the remaining three sides with jam
21. Press the marzipan around the cake, making sure the join is either neatly in the one corner, or will be underneath the cake once turned over

– Tip: If you put the sponge to the one side of the marzipan, I found it easiest to “roll” the sponge over and over onto the marzipan instead of lifting the marzipan up onto the sponge
22. Carefully flip the cake over so that the seam is under the cake and score the top of the cake with a knife, you can also crimp the top corners with your fingers to decorate
23. Neaten the ends of the cake and remove excess marzipan by trimming off a small bit of cake on both ends to reveal the pattern

Challah – Daring Bakers Challenge May 2012

Sunday, May 27th, 2012

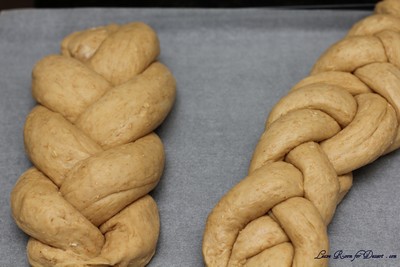
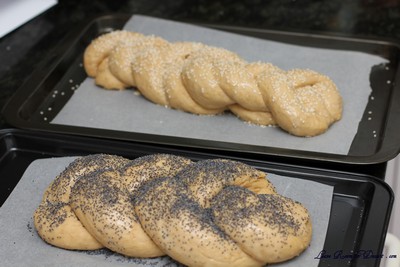
May’s Daring Bakers’ Challenge was pretty twisted – Ruth from The Crafts of Mommyhood challenged us to make challah! Using recipes from all over, and tips from “A Taste of Challah,” by Tamar Ansh, she encouraged us to bake beautifully braided breads.

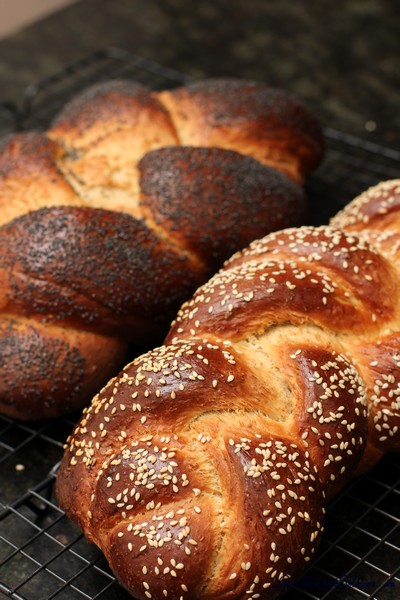
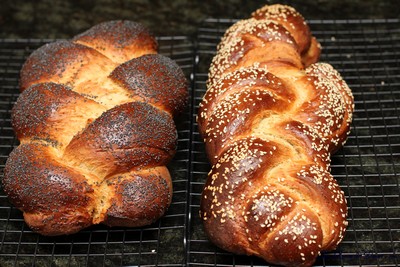
I could not be happier with how my challah turned out this month. As I have never tried challah before, I can’t tell you how close this recipe is to bought ones, although I can tell you everyone who tried it was very happy with the taste and texture, and it was eaten quite quickly.

As it contains egg, it doesn’t last as long as other breads do, and would require an air-tight container, although is best eaten on the day of making.

It can be eaten by itself, which is how we mainly ate it (before dinner…), with leftovers being eaten grilled, or with caramelised balsamic vinegar and dukkah.

Thanks to our host this month, who gave three recipes for people to try, although I only got around to making one.

My anemone flowers are coming up at the moment, just before winter (I think I planted them in March). They are a beautiful addition to the garden at this time when some other plants are dying off before winter. Although I am not sure what time they will flower next year, as I thought they were going to flower in spring.

Ruth’s “Go-To” Whole Wheat Challah

(adapted from Tammy’s recipes)
Servings: 12

Ingredients
2 (.25 oz.) packages (4½ teaspoons) (22½ ml) (15 gm) (½ oz) dry yeast
1 cup (240 ml) warm water (100°F/38°C)
½ cup (120 ml) (100 gm) (3½ oz) brown sugar, firmly packed
½ cup (one stick) (120 ml) (115 gm/4 oz) margarine or unsalted butter – room temperature
2 tsp. (10 ml) (15 gm) (½ oz) salt
3 large eggs
2 cups (480 ml) (280 gm/10 oz) whole wheat flour
2 cups (480 ml) (280 gm/10 oz) all-purpose flour
½ cup (120 ml) (50 gm) (1¾ oz) rolled oats (Old Fashioned work just fine!)
Additional flour for kneading (½ to 1 cup) (120 to 240 ml) (70 to 140 gm) (2½ to 5 oz)
1 egg beaten with 1 tsp. water for glaze

Directions:

1. In the bowl of your stand mixer, dissolve yeast in warm water. Allow to stand about 5 minutes until creamy/foamy.
2. With paddle attachment beat 3 eggs, sugar, margarine (or butter), whole wheat flour, all purpose flour and oats into the yeast mixture. Or, if mixing by hand (ok, spoon), combine eggs and margarine/butter with yeast mixture until well mixed. Add flours and oats and mix until it becomes difficult to mix.
3. Once combined, switch to the dough hook and knead for 5 to 10 minutes until smooth and elastic, adding flour as/if needed. If kneading by hand, this should take about 10-12 minutes.
4. Form dough into a round, compact ball. Turn in oiled bowl, cover with a kitchen/tea towel. Let rise in warm area (I put it in the oven with the light on) until doubled, approx. 2 hours.
5. Once dough has doubled, punch down. Recover with towel, allow to rise again for an hour, but even 30 minutes will be fine if you’re in a hurry.
6. Punch the dough down again, divide in two.
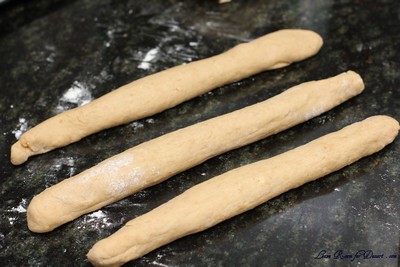
7. Shape each half as desired (3, 4 or 6 strand braid, rolls, etc.). Place shaped loaves onto parchment covered baking trays. Cover with the towel and allow to rise another hour.

8. Preheat oven to 350 degrees.
9. Brush loaves with egg wash. (Sprinkle with vanilla sugar/sesame seeds/poppy seeds/other topping here if desired)
10. Bake 30 to 40 min. until the loaf sounds hollow when tapped on the bottom.

11. Transfer loaves to a wire rack to cool before serving.

Armenian Nazook & Nutmeg Cake – Daring Bakers Challenge April 2012

Saturday, April 28th, 2012


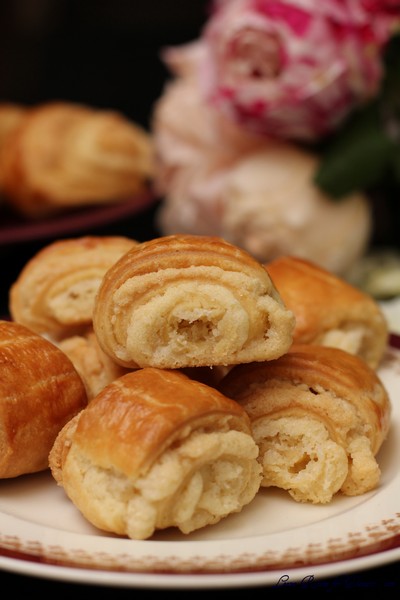
The Daring Bakers’ April 2012 challenge, hosted by Jason at Daily Candor, were two Armenian standards: nazook and nutmeg cake. Nazook is a layered yeasted dough pastry with a sweet filling, and nutmeg cake is a fragrant, nutty coffee-style cake.

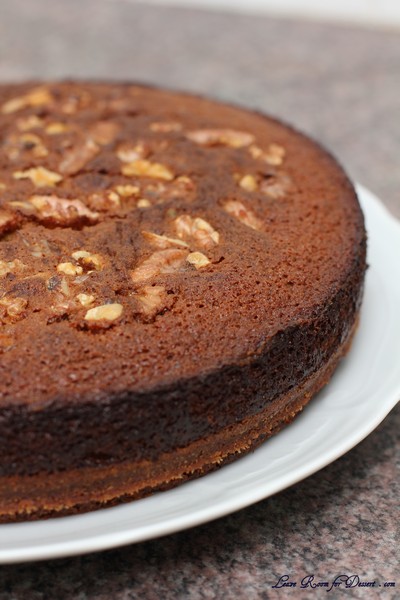
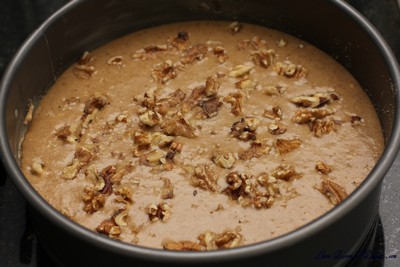
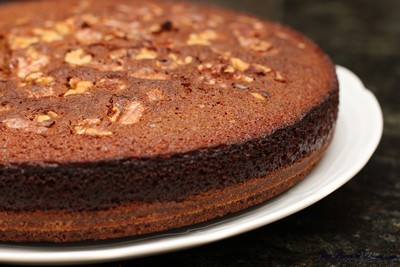
I love a fragrant slice of Armenian nutmeg cake. My mum has been making it for years, since I was a child, and now I have also been making it (although can’t seem to get it as perfect as my Mum’s). Like most cakes, there are always changes people make to recipes, and our recipe differed from the one mentioned here in two ways that I can think of.

This cake has walnuts on top, whereas ours has slivered almonds. Both are a great addition to the cake. The other change my Mum made to the original recipe she was given by a friend, was only using 1/3 of the mixture for the base, making a thinner base (depending on your preference, this may be an improvement, or perhaps not), I’ll leave it up to you to decide. I enjoyed making the nutmeg cake to someone else’s recipe and obviously enjoyed eating it, as it has a lovely spiced flavour.

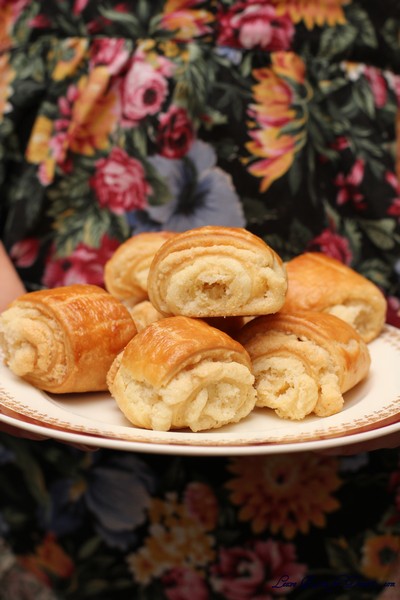
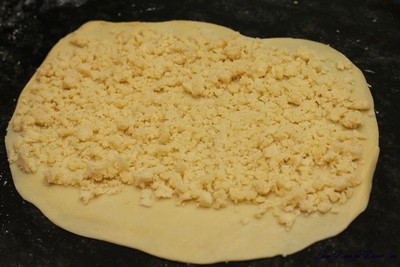
The Nazook was an exciting addition to this months challenge, and was the first of the two recipes for me to try. The pastry was quite easy to make, which I placed in the fridge overnight (it required quite a bit of work to get it soft enough to roll though as it was quite solid). The mixture for the inside and the assembly was also quite easy. When the pastries came out of the oven the fillings had come out a bit, and didn’t look as together as I had expected. The taste was lovely, and they were best eaten on the day of making.

Jason’s Recipe Source: The nazook is my Aunt Aida’s recipe. I’ve tried a LOT of nazook, and have to say hers is the best I’ve tried. The Armenian nutmeg cake is adapted from a recipe for the same in The Commonsense Cookery Book, by the NSW Cookery Teachers’ Scholarship Fund.

Nazook

Yields 40 pieces

Pastry dough

3 cups (720 ml) (420 gm/15 oz) all-purpose (plain) flour, sifted
2½ teaspoons (12½ ml) (7 gm) (¼ oz) (1 packet) active dry yeast
1 cup (240 ml) (225 gm/8 oz) sour cream
1 cup (2 sticks) (240 ml) (225 gm/8 oz) softened butter (room temperature)

Filling

1 1/2 cups (360 ml) (210 gm) (7½ oz) all-purpose (plain) flour, sifted
1 1/2 cups (360 ml) (340 gm/12 oz) sugar
3/4 cup (1½ sticks) (180 ml) (170 gm/6 oz) softened butter (room temperature)
2 teaspoons (10 ml) vanilla extract

Wash

1-2 egg yolks (for the wash; alternatively, some yogurt, egg whites, or a whole egg)

Directions:

Make the Pastry Dough
1. Place the sifted flour into a large bowl.
2. Add the dry yeast, and mix it in.
3. Add the sour cream, and the softened butter.
4. Use your hands, or a standing mixer with a paddle attachment, to work it into a dough.
5. If using a standing mixer, switch to a dough hook. If making manually, continue to knead for about 10 minutes, or until the dough no longer sticks to the bowl or your hands. If it remains very sticky, add some flour, a little at a time.
6. Cover the dough and refrigerate for 3-5 hours, or overnight if you like.

Make the filling
7. Mix the flour, sugar, and the softened butter in a medium bowl.
8. Add the vanilla extract.
9. Mix the filling until it looks like clumpy, damp sand. It should not take long. Set aside.

Make the nazook
10. Preheat the oven to moderate 350°F/175°C/gas mark 4.
11. Cut the refrigerated dough into quarters.
12. Form one of the quarters into a ball. Dust your working surface with a little flour.
13. Roll out the dough into a large rectangle or oval. The dough should be thin, but not
transparent.

14. Spread 1/4 of the filling mixture across the rolled-out dough in an even layer. Try to spread the filling as close as possible to the edges on the short sides, but keep some of pastry dough uncovered (1 inch/2.5 cm) along the long edges.

15. From one of the long sides, start slowly rolling the dough across. Be careful to make sure the filling stays evenly distributed. Roll all the way across until you have a long, thin loaf.

16. Pat down the loaf with your palm and fingers so that it flattens out a bit (just a bit).
17. Apply your egg yolk wash with a pastry brush.

18. Use your crinkle cutter (or knife) to cut the loaf into 10 equally-sized pieces. Put onto an ungreased cookie sheet.

19. Place in a preheated moderate oven for about 30 minutes, until the tops are a rich, golden brown.

20. Allow to cool and enjoy!

Armenian Nutmeg Cake

Makes one 9”/23cm cake which yields 12 servings

Ingredients

1 cup (240 ml) milk (I use whole, but nonfat or lowfat should be fine; non-dairy might work just fine, as well)
1 teaspoon (5 ml) (5 gm) baking soda
2 cups (480 ml) (280 gm/10 oz) all-purpose (plain) flour (I suspect pastry flour or another low-gluten flour might even work better to achieve a light, fluffy crumb)
2 teaspoons (10 ml) (10 gm) (⅓ oz) baking powder (I used single-acting, because it’s aluminum-free, and it turned out fantastic)
2 cups (480 ml) (400 gm/14 oz) brown sugar, firmly packed
3/4 cup (1½ sticks) (180 ml) (170 gm/6 oz) butter, preferably unsalted, cubed
1/2 cup (120 ml) (55 gm/2 oz) walnut pieces, may need a little more
1 to 1-1/2 teaspoons (5 to 7 ½ ml) (5 to 8 gm) ground nutmeg (try to grate it fresh yourself; the aroma is enchanting)
1 egg

Directions:

Directions – the Traditional Way (The Fast, Easy Way further down)
1. Preheat your oven to moderate 350°F/175°C/gas mark 4.
2. Mix the baking soda (not baking powder; that’s for the next step) into the milk. Set it aside.
3. Sift together the flour and the baking powder into a large bowl. One sift is fine
4. Add the brown sugar. Go ahead and mix the flour and brown sugar together. Or not.
5. Toss in the cubed butter.

6. Mash the butter with a fork into the dry ingredients (you can also use your fingers if you want). You’ll want to achieve a more-or-less uniform, tan-colored crumbly mixture.

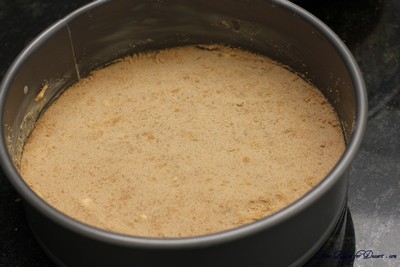
7. Take HALF of this resulting crumbly mixture into your springform (9”/23cm) pan. Press a crust out of it using your fingers and knuckles. It will be easy.

8. Crack an egg into a mixer or bowl.
9. Toss the nutmeg in with the egg.
10. Start mixing slowly with a whisk attachment and then increase to medium speed, or mix with a hand whisk if you’re doing it manually. Once it’s mixed well and frothy (about 1 minute using a standing mixer, or about 2-3 minutes of vigorous beating with a whisk), pour in the milk and baking soda mixture. Continue to mix until uniform.
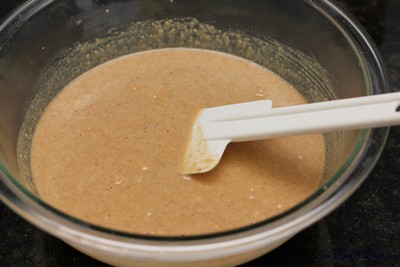
11. Pour in the rest of the crumbly mixture. Mix that well, with either a paddle attachment, or a spatula. Or continue to use the whisk; it won’t make much of a difference, since the resulting batter is very liquidy.

12. Pour the batter over the base in the springform pan.

13. Gently sprinkle the walnut pieces over the batter.

14. Bake in a preheated moderate oven for about 30-40 minutes. You’ll know it’s done when the top is a golden brown, and an inserted toothpick comes out clean.
15. Allow to cool in the pan, and then release. Enjoy!

An Even Easier Way…if you have a Food Processor

1. Preheat your oven to moderate 350°F/175°C/gas mark 4 .
2. Mix the baking soda (not baking powder) into the milk. Set aside.
3. Put the flour, baking powder, and the brown sugar into your food processor. Pulse until uniformly mixed.
4. Toss in the cubed butter. Pulse until uniformly mixed into tan-colored crumbs.
5. Pour HALF of the crumbs into your springform (9”/23cm) pan. Press out a crust using your fingers and knuckles.
6. Crack the egg into the food processor with the rest of the crumbs still in it.
7. Grate 1 to 1-1/2 teaspoon of nutmeg. Toss that into the food processor, too. Pulse until well-incorporated.
8. Pour in the milk and baking soda mixture. Continue to mix until a slightly lumpy tan batter is formed.
9. Pour the batter over the crust in the springform pan.
10. Gently sprinkle the walnut pieces over the batter.
11. Bake in a preheated moderate oven for 30-40 minutes. It’s ready when the top is golden brown, and when it passes the toothpick test (comes out clean).
12. Cool the cake in the pan, and then dig in. Yum yum!

Freezing/Storage Instructions/Tips: Nazook will keep in an airtight container at room temperature for a couple of weeks, and the Armenian nutmeg cake will keep (covered) at room temperature for 2-3 days. Both taste even better still warm from the oven.

Allow to cool completely before attempting to freeze. Nazook will freeze best if put in a freezer bag with all the air squeezed out. Armenian Nutmeg Cake will also freeze fairly well if completely sealed. Both can be frozen for up to 3 months.

Additional Information:

Both recipes might be able to be adapted to be gluten-free and/or vegan, although I have not tried myself. Gluten-free flour, coconut oil (instead of butter), pureed silken tofu (instead of sour cream), and nut milk (instead of egg yolk) might be useful starting points.

Quick Bread – Daring Bakers Challenge February 2012

Monday, February 27th, 2012


The Daring Bakers’ February 2012 host was – Lis! Lisa stepped in last minute and challenged us to create a quick bread we could call our own. She supplied us with a base recipe and shared some recipes she loves from various websites and encouraged us to build upon them and create new flavor profiles.

Could there be a better occasion to make the Daring Bakers Challenge than for a picnic overlooking the Harbour Bridge and Opera House, and listening to great music?

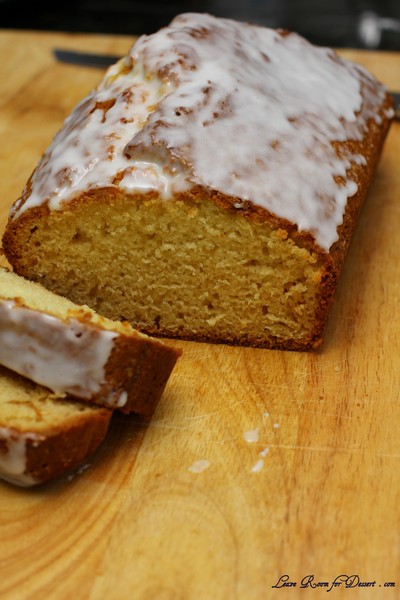
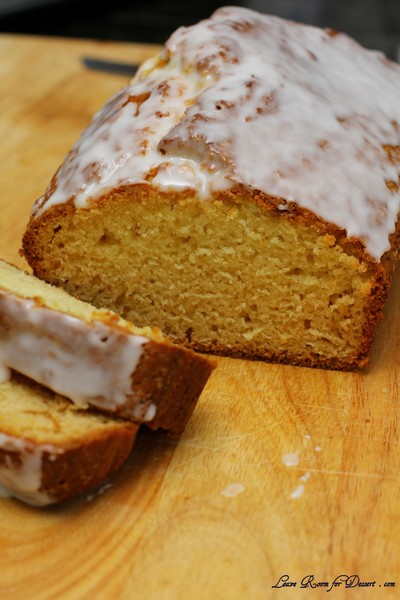
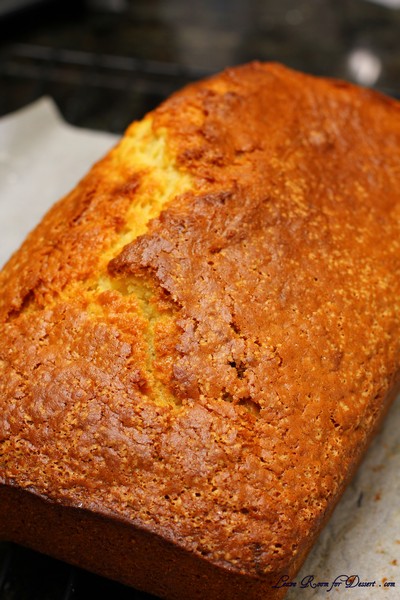
Well this last weekend, I quickly (hence the name) made the quick bread recipe given for our challenge this month. I looked through the ingredients and wondered how it would actually be a ‘bread’ – it really had cake ingredients and a sweet topping.

The quick bread was easy to make and tasted quite lovely. It had a texture that I couldn’t quite place, although others managed to pick the texture to be something like cornbread.

I must admit I did almost eat half the bread/cake in the afternoon, so not much sharing occurred 🙂

Thanks Lis for the recipe! It was great to have a quick and tasty challenge.

Basic Quick Bread

Makes one 9” x 5” (23×13 cm) loaf
Recipe from Sara Schewe

2 cups (480 ml) (250 gm/9 oz) all-purpose (plain) flour
1 cup (240 ml) (225 gm/8 oz) granulated sugar
1 teaspoon (5 ml) (5 gm) baking soda
1/2 teaspoon (2½ ml) (3 gm) fine sea salt or table salt
1 cup (240 ml) buttermilk or soured milk*
1 large egg
1/4 cup (60 ml) mild- or non-flavored oil, like canola
1 teaspoon (5 ml) flavored extract, such as vanilla or almond

for the glaze
1/3 cup (80 ml) (35 gm/1-1/3 oz) confectioners’ (icing) sugar
1-2 teaspoons (5-10 ml) milk

Directions:

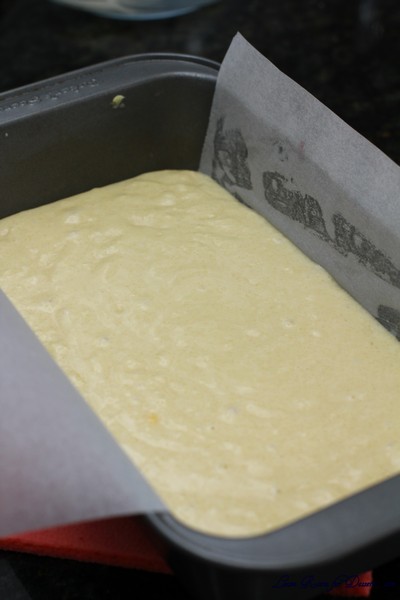
Preheat oven to moderate 350ºF/180ºC/gas mark 4. Grease a 9×5 inch (23×13 centimeter) loaf pan with butter and line with parchment paper cut to fit the length and width of the pan, with enough overhang to allow easy removal after baking. Grease the top sheet of parchment.
In large bowl, whisk flour, sugar, baking soda and salt to combine. Make a well in the center and set aside.
Lightly whisk (butter)milk, egg, oil, and extract to combine. Pour into well and stir until just mixed into a batter. The batter will be lumpy and may still show a few streaks of flour.
Pour batter into prepared pan. Bake for 40-50 minutes, or until a cake tester comes out clean. Cool in pan on wire rack for 10 minutes, then remove from pan and cool completely before slicing. Drizzle with glaze, if desired.

For the glaze: Slowly whisk confectioners’ (icing) sugar and half of the milk, adding more milk as needed to thin the glaze to the desired consistency.

Note: To make soured milk, combine 1 cup milk (240 ml) with 1 tablespoon (15 ml) vinegar or lemon juice and let sit for 10 minutes.

Scones – Daring Bakers Challenge January 2012

Friday, January 27th, 2012

Audax Artifex was our January 2012 Daring Bakers’ host. Aud worked tirelessly to master light and fluffy scones (a/k/a biscuits) to help us create delicious and perfect batches in our own kitchens!

After News Years and Christmas, everyone wants a break from cooking don’t they? Well, not us, or at least that’s not what happened. We decided to have some friends over for a Garden Party so lots of cooking (and cleaning) happened in what was supposed to be a relaxing start to the New Year. Then some big birthdays came up, more desserts, Australia Day – I tried out a new lamington recipe, and of course the Daring Bakers Challenge.

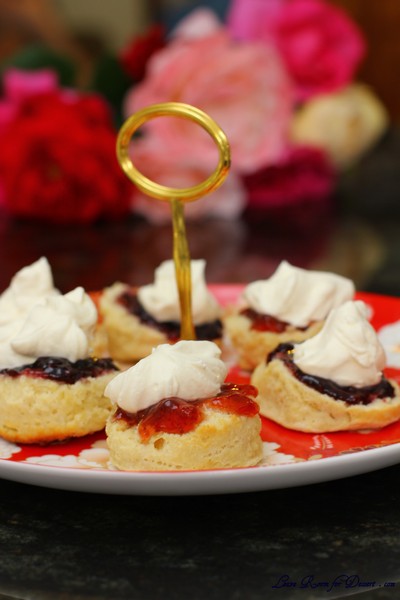
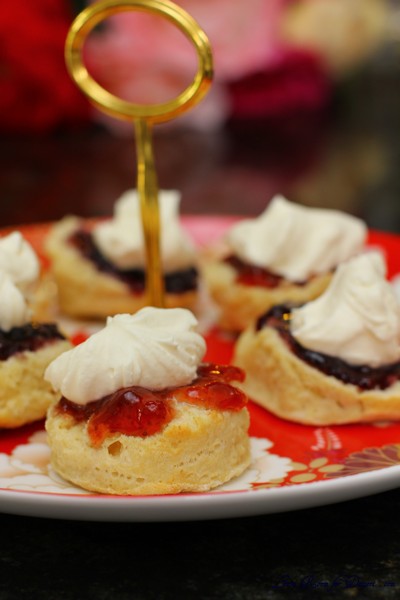
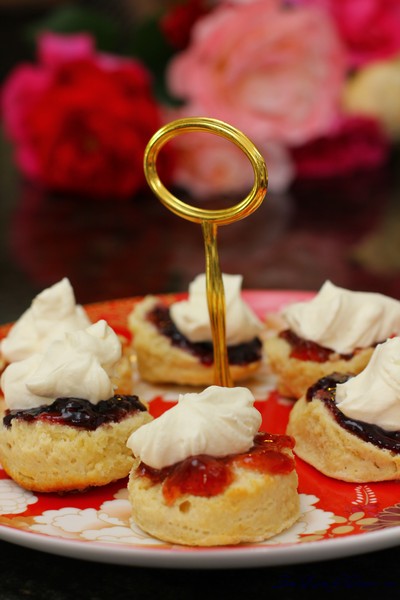
Luckily for me, the challenge just happens to be easy, affordable, quick and extremely tasty. I love fresh scones, they are probably one of my favourite foods. They must have a large slathering of jam and cream on top too. Although I must admit, I could not resist the scones once they came out of the oven. I took a bite of the smallest scone and fell into buttery bliss.

Audax, did an amazing job with this recipe and had certainly done his research on the matter and how to make different textured and flavoured scones.

Thanks to Audax for a great (and thankfully quick) challenge this month. I always love seeing your creations from the challenges!

Basic Scones (a.k.a. Basic Biscuits)

Servings: about eight 2-inch (5 cm) scones or five 3-inch (7½ cm) scones
Recipe can be doubled – I doubled this recipe and would recommend doing so. I hope it can be tripled or quadrupled – as I loved the taste so much.

Ingredients:
1 cup (240 ml) (140 gm/5 oz) plain (all-purpose) flour
2 teaspoons (10 ml) (10 gm) (⅓ oz) fresh baking powder
¼ teaspoon (1¼ ml) (1½ gm) salt
2 tablespoons (30 gm/1 oz) frozen grated butter (or a combination of lard and butter)
approximately ½ cup (120 ml) cold milk
optional 1 tablespoon milk, for glazing the tops of the scones

Directions:
1. Preheat oven to very hot 475°F/240°C/gas mark 9.
2. Triple sift the dry ingredients into a large bowl. (If your room temperature is very hot refrigerate the sifted ingredients until cold.)
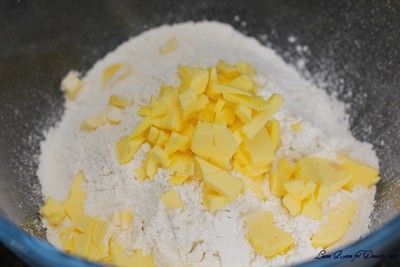
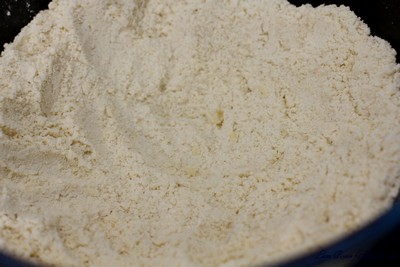
3. Rub the frozen grated butter (or combination of fats) into the dry ingredients until it resembles very coarse bread crumbs with some pea-sized pieces if you want flaky scones or until it resembles coarse beach sand if you want tender scones.

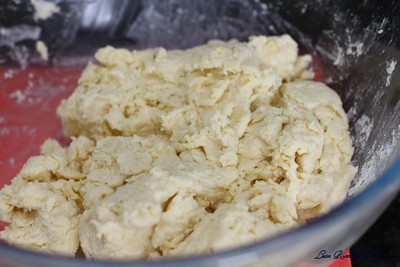
4. Add nearly all of the liquid at once into the rubbed-in flour/fat mixture and mix until it just forms a sticky dough (add the remaining liquid if needed). The wetter the dough the lighter the scones (biscuits) will be!


5. Turn the dough out onto a lightly floured board, lightly flour the top of the dough. To achieve an even homogeneous crumb to your scones knead very gently about 4 or 5 times (do not press too firmly) the dough until it is smooth. To achieve a layered effect in your scones knead very gently once (do not press too firmly) then fold and turn the kneaded dough about 3 or 4 times until the dough has formed a smooth texture. (Use a floured plastic scraper to help you knead and/or fold and turn the dough if you wish.)
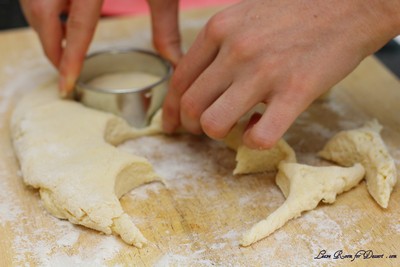
6. Pat or roll out the dough into a 6 inch by 4 inch rectangle by about ¾ inch thick (15¼ cm by 10 cm by 2 cm thick). Using a well-floured 2-inch (5 cm) scone cutter (biscuit cutter), stamp out without twisting six 2-inch (5 cm) rounds, gently reform the scraps into another ¾ inch (2 cm) layer and cut two more scones (these two scones will not raise as well as the others since the extra handling will slightly toughen the dough). Or use a well-floured sharp knife to form squares or wedges as you desire.

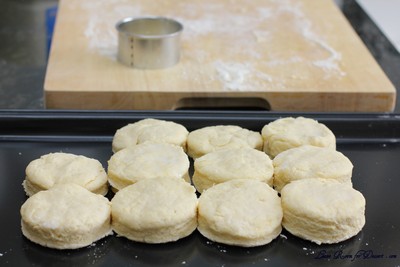
7. Place the rounds just touching on a baking dish if you wish to have soft-sided scones or place the rounds spaced widely apart on the baking dish if you wish to have crisp-sided scones. Glaze the tops with milk if you want a golden colour on your scones or lightly flour if you want a more traditional look to your scones.

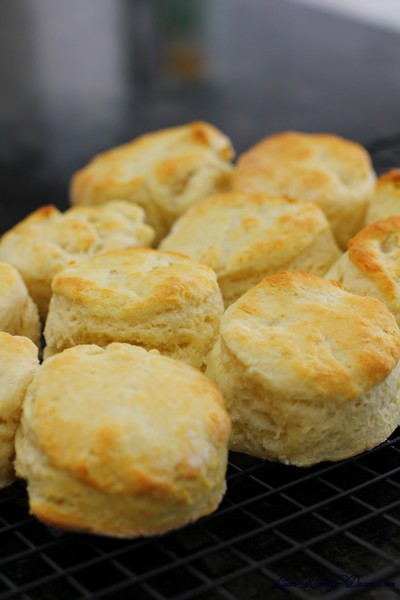
8. Bake in the preheated very hot oven for about 10 minutes (check at 8 minutes since home ovens at these high temperatures are very unreliable) until the scones are well risen and are lightly coloured on the tops. The scones are ready when the sides are set.

9. Immediately place onto cooling rack to stop the cooking process, serve while still warm.

Variations on the Basic recipe
Buttermilk – follow the Basic recipe above but replace the milk with buttermilk, add ¼ teaspoon of baking soda, increase the fat to 4 tablespoons, in Step 3 aim of pea-sized pieces of fat coated in flour, in Step 5 fold and turn the dough, rounds are just touching in the baking dish, glaze with buttermilk.
Australian Scone Ring (Damper Ring) – follow the Basic recipe above but decrease the fat to 1 tablespoon, in Step 3 aim of fine beach sand sized pieces of fat coated in flour, in Step 5 knead the dough, in Step 7 form seven rounds into a ring shape with the eighth round as the centre, glaze with milk.
Cream – follow the Basic recipe above but replace the milk with cream, add ¼ teaspoon of baking soda, in Step 3 aim of beach sand sized pieces of fat coated in flour, in Step 5 knead the dough, rounds are just touching in the baking dish, glaze with cream.
Cheese and Chive – follow the Basic recipe above but add ¼ teaspoon of baking soda, after Step 2 add ½ teaspoon sifted mustard powder, ¼ teaspoon sifted cayenne pepper (optional), ½ cup (60 gm/2 oz) grated cheese and 2 tablespoons finely chopped chives into the sifted ingredients, in Step 3 aim of beach sand sized pieces of fat coated in flour, in Step 5 knead the dough, rounds are widely spaced in the baking dish, sprinkle the rounds with cracked pepper.
Fresh Herb – follow the Basic recipe above but after Step 3 add 3 tablespoons finely chopped herbs (such as parsley, dill, chives etc).
Sweet Fruit – follow the Basic recipe above but after Step 3 add ¼ cup (45 gm) dried fruit (e.g. sultanas, raisins, currents, cranberries, cherries etc) and 1 tablespoon (15 gm) sugar.
Wholemeal – follow the Basic recipe above but replace half of the plain flour with wholemeal flour.
Wholemeal and date – follow the Basic recipe above but replace half of the plain flour with wholemeal flour and after Step 3 add ¼ cup (45 gm) chopped dates and 1 tablespoon (15 gm) sugar.

Sans Rival – Daring Bakers Challenge November 2011

Sunday, November 27th, 2011

Catherine of Munchie Musings was our November Daring Bakers’ host and she challenged us to make a traditional Filipino dessert – the delicious Sans Rival cake! And for those of us who wanted to try an additional Filipino dessert, Catherine also gave us a bonus recipe for Bibingka which comes from her friend Jun of Jun-blog.

I can’t believe how close the Christmas and New Year holidays are. This year I was so sure I was going to make a fruit cake – not for myself, but for some of the special people in my life who do like or love fruit cake… I had grand plans of soaking the dried fruit in alcohol for weeks before making the cake and then allowing the taste to mature. I’m not even sure if this is the right way of going about making a fruit cake – so would love any tips from readers who can point me in the direction of some great (and maybe some that are also quick) tasty fruit cake recipes.

If I don’t get around to making fruit cake, I think there are already orders in for custard filled profiteroles with toffee. Hopefully a new Christmas tradition for our family – I know I love it.

I’m also hoping the next daring bakers challenge will be a non time consuming one, due to every weekend being filled with social activities, and days filled with work I want to get done before the quick break.

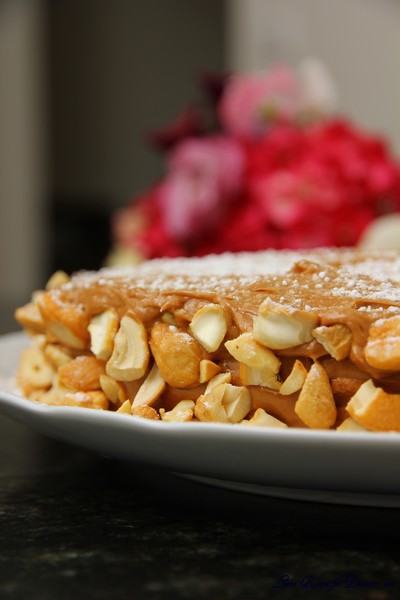
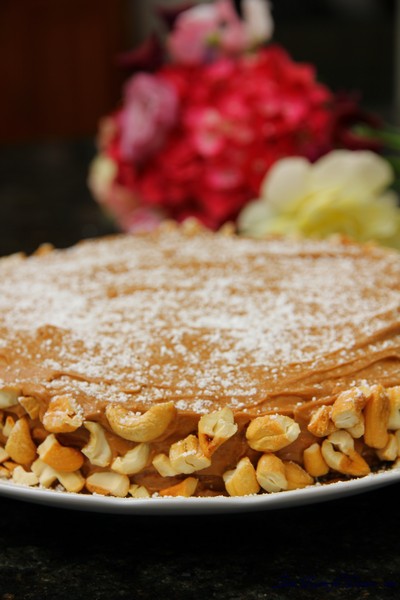
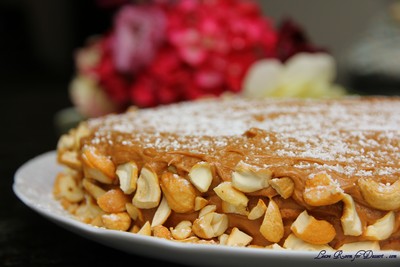
Luckily for this challenge, I decided to make it as soon as possible, and am glad I did, as the weekends filled up fast. I decided to make the chocolate Sans Rival, and found it to be lovely, but quite rich – it worked well with some vanilla ice cream to cut the richness.

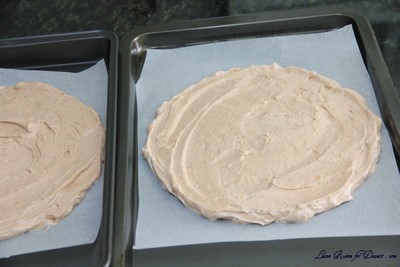
The meringue was very difficult for me to get right, as I only have two spots for trays in the oven, and needed to make 4 layers – I did these on trays rather than cake pans, as I didn’t want to wash up between each bake. I also think I made the buttercream on a particularly hot day, causing a bit more of a butter taste than I would prefer.

You can also see in the background a bouquet I made from flowers from my garden, including a “red” hydrangea, sweet peas and some roses I planted back in July and have now been flowering beautifully.

Thanks to our host for this month, I understand how much effort must go into organising these challenges.

Sans Rival

Servings: 12

Ingredients
10 large egg whites, room temp
1 cup (240 ml) (225 gm) (8 oz) white granulated sugar
1 teaspoon (5 ml) (3 gm) cream of tartar
¼ cup (60 ml) (20 gm) (2/3 oz) Dutch processed cocoa (optional and not traditional)
2 cups (480 ml) (240 gm) (8½ oz) chopped, toasted cashews (about 2/3 finely ground, and 1/3 chopped for decorations)

Directions:
Note: You will need four layers which will mean that you might have to bake in two batches. Be sure to use fresh parchment paper and cooled pans for each batch.

1. Preheat oven to moderate 325°F/160°C/gas mark 3.
2. Line cake pan bottoms with parchment paper and butter and flour the sides really well.
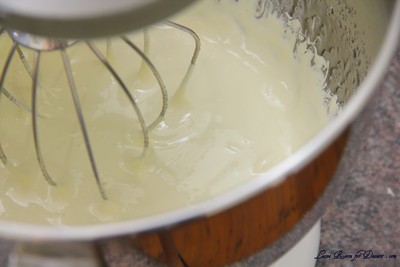
3. In a large clean, dry glass or metal mixing bowl, beat egg whites on medium until foamy (2 mins.). Sprinkle with cream of tartar. Gradually add sugar, a couple of tablespoons at a time, continuing to beat now at high speed until stiff shiny peaks form. (about 7-10 mins.)

4. Fold in nuts, reserving enough to use for decoration.

(Note the more finely ground for folding into meringue. The coarsely ground for is decoration of finished cake.)

5. Divide meringue into four equal parts. Spread in pans, evenly to edges. If doing batches, use fresh parchment paper and cooled pans for each batch.

6. Bake in preheated oven for 30 minutes, or until golden brown. Remove the meringue from the baking pans while still hot; allow to cool slightly. Peel off the parchment paper while it is still warm, it is difficult to remove sometimes when they have completely cooled.

7. When cool, trim edges so that all 4 meringue layers are uniformly shaped. Set aside.

French Buttercream:

Ingredients
5 large egg yolks, room temperature
1 cup (240 ml) (225 gm) (8 oz) white granulated sugar
1/4 cup (60 ml) water
1¼ cup (300 ml) (2½ sticks) (285 gm) (10 oz) unsalted butter, room temperature
Optional Flavorings: 2 oz (55 gm) unsweetened chocolate, melted, or 1½ teaspoon (7 ½ ml) almond extract, or 1½ teaspoon (7 ½ ml) vanilla extract, or any flavor you like

Directions:
1. Put the egg yolks in a mixing bowl. Beat at high speed until the yolks have doubled in volume and are a lemon yellow.
2. Put the sugar and water in a heavy pan and cook over medium heat, stirring the sides down only until all the sugar is dissolved and the syrup reaches 235°F/112°C (or thread stage).
3. With the mixer on high, very slowly pour the syrup down the sides of the bowl, until all has been added. Be careful as the very hot syrup could burn you if it splashes from the beaters. Continue beating on high until the mixture is ROOM TEMPERATURE (about 15 mins). Still on high, beat in the soft, room temperature butter a tablespoon at a time. Add flavoring after you beat in the butter. Refrigerate the buttercream for at least an hour, and whip it smooth just before you use it.

Assembly:
Set bottom meringue on cake board with a dab of butter cream to hold it in place. Spread a thin layer of buttercream and then place another meringue on top. Repeat with a thin layer of buttercream, meringue, thin layer of buttercream, meringue, and finally buttercream the top and sides. Decorate with reserved nuts.

Refrigerate until ready to serve. It is easier to cut cold. May freeze.