Breads

Croissants – Daring Bakers Challenge September 2011

Tuesday, September 27th, 2011

The Daring Bakers go retro this month! Thanks to one of our very talented non-blogging members, Sarah, the Daring Bakers were challenged to make Croissants using a recipe from the Queen of French Cooking, none other than Julia Child!

If I could eat croissants for breakfast (almost) every morning, I think that would be a great way to start the day.

Seeing as though this recipe was quite long and involved (with many rest periods), it meant I would have to settle for having fresh (you can’t get any more fresh) croissants for morning tea.

And what better way than with a picnic? Almost all other weekends this month have been lovely, and we have had a few family picnics out in the backyard. This last weekend, the rain poured down non-stop and the temperature dropped, so we set up picnic rugs in the lounge room in front of the fire and ate croissants indoors, appreciating the dry and the warmth.

The croissants were delicious. Absolutely amazing. The recipe was easy to follow, although was time consuming because of the resting periods for the dough/pastry.

I think I may have made the butter a little too warm while working it, causing a few butter chunks to be seen through the pastry, rather than a smooth layer, although you could not notice it once baked.

I will definitely be making these again, when my second-hand/new (new for me) large granite bench-top is installed – I’m super excited!

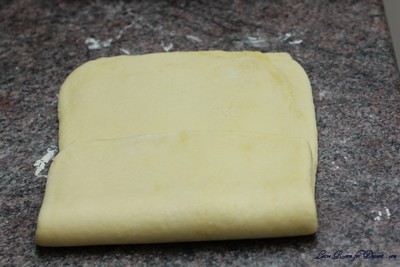
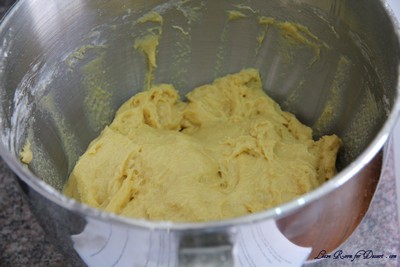
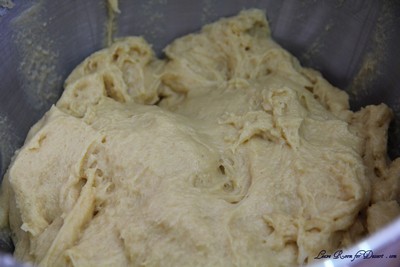
Here is a good video of Julia Child making croissants, it should help along with the photos below.

Thanks to our host for this month’s challenge, I’m so glad I have made croissants again – with a great recipe.

P.S. I made double quantity (didn’t really change the technique until I came to step 42, where I cut it into 4)

Croissants

Servings: 12 croissants

Ingredients
¼ oz (7 gm) of fresh yeast, or 1¼ teaspoon (6¼ ml/4 gm) of dry-active yeast (about ½ sachet)
3 tablespoons (45 ml) warm water (less than 100°F/38°C)
1 teaspoon (5 ml/4½ gm) sugar
1 3/4 cups (225 gm/½ lb) of strong plain flour (I used Polish all-purpose flour, which is 13% protein)
2 teaspoons (10 ml/9 gm) sugar
1½ teaspoon (7½ ml/9 gm) salt
½ cup (120 ml/¼ pint) milk (I am not sure if the fat content matters. I used 2%)
2 tablespoons (30 ml) tasteless oil (I used generic vegetable oil)
½ cup (120 ml/1 stick/115 gm/¼ lb) chilled, unsalted butter
1 egg, for egg wash

Directions:

1. Mix the yeast, warm water, and first teaspoon of sugar in a small bowl. Leave aside for the yeast and sugar to dissolve and the yeast to foam up a little.
2. Measure out the other ingredients
3. Heat the milk until tepid (either in the microwave or a saucepan), and dissolve in the salt and remaining sugar
4. Place the flour in a large bowl.
5. Add the oil, yeast mixture, and milk mixture to the flour
6. Mix all the ingredients together using the rubber spatula, just until all the flour is incorporated
7. Turn the dough out onto a floured surface, and let it rest a minute while you wash out the bowl
8. Knead the dough eight to ten times only. The best way is as Julia Child does it in the video (see below). It’s a little difficult to explain, but essentially involves smacking the dough on the counter (lots of fun if you are mad at someone) and removing it from the counter using the pastry scraper.
9. Place the dough back in the bowl, and place the bowl in the plastic bag
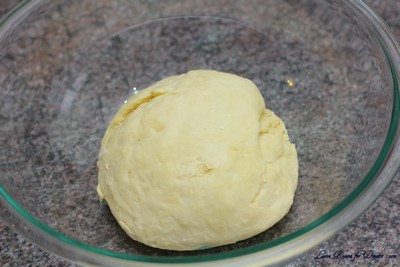
10. Leave the bowl at approximately 75°F/24°C for three hours, or until the dough has tripled in size.
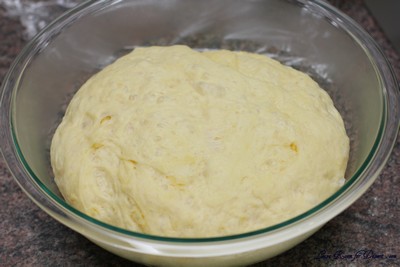
11. After the dough has tripled in size, remove it gently from the bowl, pulling it away from the sides of the bowl with your fingertips.
12. Place the dough on a lightly floured board or countertop, and use your hands to press it out into a rectangle about 8 by 12 inches (20cm by 30cm).
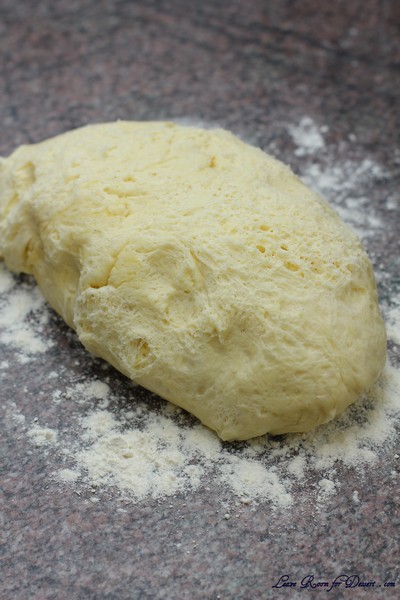
13. Fold the dough rectangle in three, like a letter (fold the top third down, and then the bottom third up)

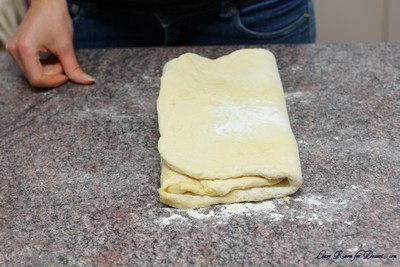
14. Place the dough letter back in the bowl, and the bowl back in the plastic bag.
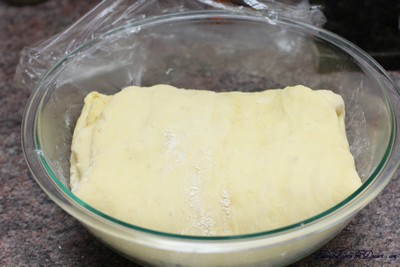

15. Leave the dough to rise for another 1.5 hours, or until it has doubled in size. This second rise can be done overnight in the fridge.

16. Place the double-risen dough onto a plate and cover tightly with plastic wrap. Place the plate in the fridge while you prepare the butter.
17. Once the dough has doubled, it’s time to incorporate the butter
18. Place the block of chilled butter on a chopping board.
19. Using the rolling pin, beat the butter down a little, till it is quite flat.
20. Use the heel of your hand to continue to spread the butter until it is smooth. You want the butter to stay cool, but spread easily. (I spread it onto plastic wrap when it was easy to spread to make it easier to get onto the dough)
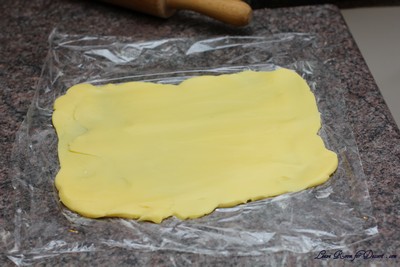
21. Remove the dough from the fridge and place it on a lightly floured board or counter. Let it rest for a minute or two.
22. Spread the dough using your hands into a rectangle about 14 by 8 inches (35 cm by 20 cm).
23. Remove the butter from the board, and place it on the top half of the dough rectangle.
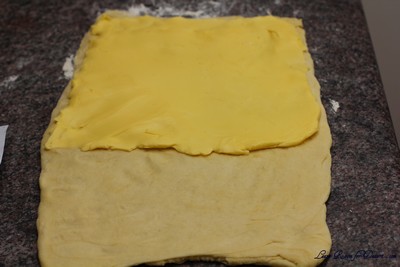

24. Spread the butter all across the top two-thirds of the dough rectangle, but keep it ¼ inch (6 mm) across from all the edges.
25. Fold the top third of the dough down, and the bottom third of the dough up. (I folded the bottom half up first)
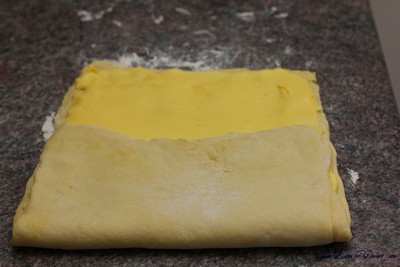

26. Turn the dough package 90 degrees, so that the top flap is to your right (like a book).
27. Roll out the dough package (gently, so you don’t push the butter out of the dough) until it is again about 14 by 8 inches (35 cm by 20 cm).
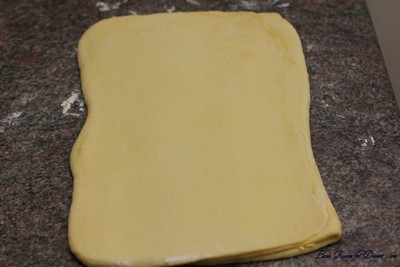
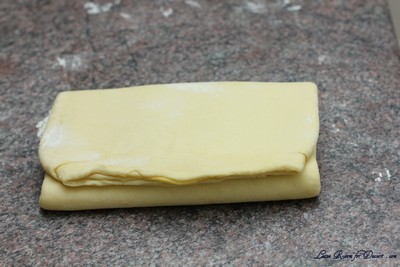
28. Again, fold the top third down and the bottom third up.
29. Wrap the dough package in plastic wrap, and place it in the fridge for 2 hours.

30. After two hours have passed, take the dough out of the fridge and place it again on the lightly floured board or counter.
31. Tap the dough with the rolling pin, to deflate it a little
32. Let the dough rest for 8 to 10 minutes
33. Roll the dough package out till it is 14 by 8 inches (35 cm by 20 cm).
34. Fold in three, as before
35. Turn 90 degrees, and roll out again to 14 by 8 inches (35 cm by 20 cm).
36. Fold in three for the last time, wrap in plastic, and return the dough package to the fridge for two more hours (or overnight, with something heavy on top to stop it from rising)

37. It’s now time to cut the dough and shape the croissants
38. First, lightly butter your baking sheet so that it is ready
39. Take the dough out of the fridge and let it rest for ten minutes on the lightly floured board or counter
40. Roll the dough out into a 20 by 5 inch rectangle (51 cm by 12½ cm).
41. Cut the dough into two rectangles (each 10 by 5 inches (25½ cm by 12½ cm))
42. Place one of the rectangles in the fridge, to keep the butter cold
43. Roll the second rectangle out until it is 15 by 5 inches (38 cm by 12½ cm).
44. Cut the rectangle into three squares (each 5 by 5 inches (12½ cm by 12½ cm))
45. Place two of the squares in the fridge
46. The remaining square may have shrunk up a little bit in the meantime. Roll it out again till it is nearly square
47. Cut the square diagonally into two triangles.
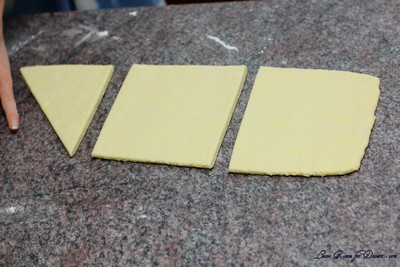
48. Stretch the triangle out a little, so it is not a right-angle triangle, but more of an isosceles.
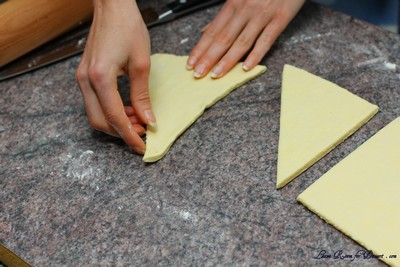

(or you can cut them like this to begin with: )

49. Starting at the wide end, roll the triangle up towards the point, and curve into a crescent shape.
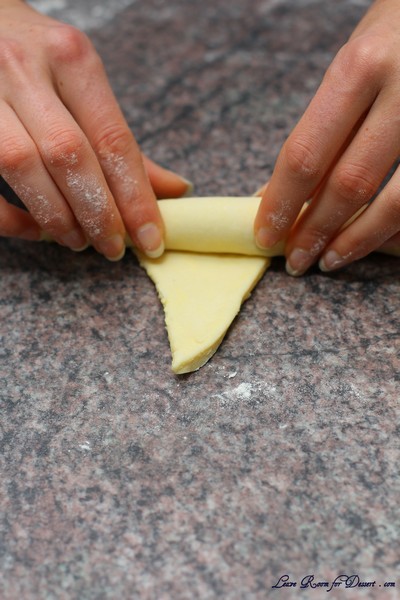

50. Place the unbaked croissant on the baking sheet

51. Repeat the process with the remaining squares of dough, creating 12 croissants in total.
52. Leave the tray of croissants, covered lightly with plastic wrap, to rise for 1 hour

53. Preheat the oven to very hot 475°F/240°C/gas mark 9.
54. Mix the egg with a teaspoon of water
55. Spread the egg wash across the tops of the croissants.
56. Put the croissants in the oven for 12 to 15 minutes, until the tops are browned nicely
57. Take the croissants out of the oven, and place them on a rack to cool for 10 minutes before serving.

Chocolate Chip Stollen – Daring Bakers Challenge December 2010

Monday, December 27th, 2010

The 2010 December Daring Bakers’ challenge was hosted by Penny of Sweet Sadie’s Baking. She chose to challenge Daring Bakers’ to make Stollen. She adapted a friend’s family recipe and combined it with information from friends, techniques from Peter Reinhart’s book………and Martha Stewart’s demonstration.

We hosted a lovely lunch on Boxing Day this year. The day started off with rain, then went a little cold, got quite hot and then rained at night. I’m glad for the few hours of cool weather (we are currently experiencing a strange Summer here in Sydney), as we had the oven and BBQ on for the meals. We started with beautiful cheeses from Formaggi Ocello. For lunch we had gammon, lamb and roast chicken, with a garden salad, bok choy salad, pumpkin, beetroot and walnut salad.

And for dessert…

We had profiteroles, a triple chocolate cheese cake, a pavlova, fruit and berries, an almond slice and a chocolate chip stollen.

This was the only opportunity for me to make this month’s Daring Bakers Challenge. The month has been full of Christmas and end of year parties and get-togethers, along with all the shopping for presents. I got some lovely cookbooks, clothes and a gorgeous Le Creseut pot.

I considered making the stollen to the original recipe – as there are a couple people in my family who really enjoy fruit breads, although after taking a vote on whether to make the original version or a choc chip version – there was a resounding vote for the choc chip version.

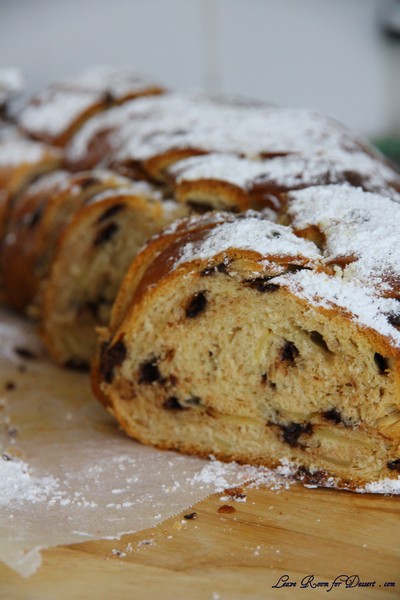
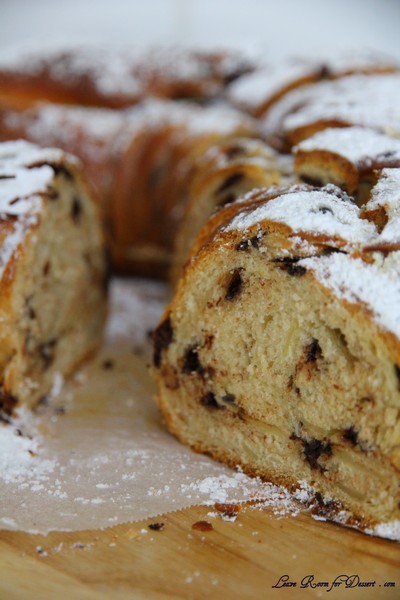
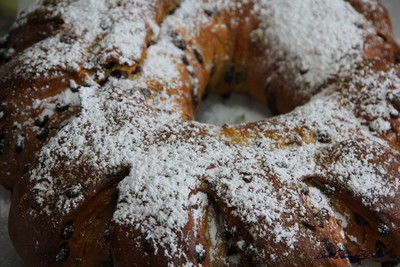
I thought it may turn out like choc chip hot cross buns – and it was quite similar. It was great an hour out of the oven and great toasted with a bit of butter a day or two after.

Everyone was quite impressed with this as part of our dessert menu. I hope everyone had a great Christmas and have a fantastic New Years.

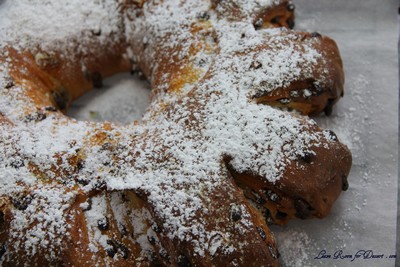
Chocolate Chip Stollen Wreath

my changes in italics

Makes one large wreath or two traditional shaped Stollen loaves. Serves 10-12 people

¼ cup (60ml) lukewarm water (110º F / 43º C)
2 packages (4 1/2 teaspoons) (22 ml) (14 grams) (1/2 oz) active dry yeast
1 cup (240 ml) milk
10 tablespoons (150 ml) (140 grams) unsalted butter (can use salted butter)
5½ cups (1320 ml) (27 ozs) (770 grams) all-purpose (plain) flour (Measure flour first – then sift- plus extra for dusting)
½ cup (120 ml) (115 gms) sugar
¾ teaspoon (3 ¾ ml) (4 ½ grams) salt (if using salted butter there is no need to alter this salt measurement)
1 teaspoon (5 ml) (6 grams) cinnamon
3 large eggs, lightly beaten
Grated zest of 1 lemon and 1 orange (I left this out)
2 teaspoons (10 ml) (very good) vanilla extract
1 teaspoon (5 ml) lemon extract or orange extract (I left this out)
¾ cup (180 ml) (4 ¾ ozs) (135 grams) mixed peel (link below to make your own) (I left this out)
1 cup (240 ml) (6 ozs) (170 gms) firmly packed raisins (I used approx 1 1/2 cups choc chips – 250g)
3 tablespoons (45ml) rum (I left this out)
12 red glacé cherries (roughly chopped) for the color and the taste. (optional) (I left this out)
1 cup (240 ml) (3 ½ ozs) (100 grams) flaked almonds
Melted unsalted butter for coating the wreath
Confectioners’ (icing) (powdered) sugar for dusting wreath

Note: If you don’t want to use alcohol, double the lemon or orange extract or you could use the juice from the zested orange.

Soak the raisins (I left this out)
In a small bowl, soak the raisins in the rum (or in the orange juice from the zested orange) and set aside. See Note under raisins.

To make the dough:

Pour ¼ cup (60 ml) warm water into a small bowl, sprinkle with yeast and let stand 5 minutes. Stir to dissolve yeast completely.

In a small saucepan, combine 1 cup (240 ml) milk and 10 tablespoons (150 ml) butter over medium – low heat until butter is melted. Let stand until lukewarm, about 5 minutes.

Lightly beat eggs in a small bowl and add lemon and vanilla extracts.

In a large mixing bowl (4 qt) (4 liters) (or in the bowl of an electric mixer with paddle attachment), stir together the flour, sugar, salt, cinnamon, orange and lemon zests.

Then stir in (or mix on low speed with the paddle attachment) the yeast/water mixture, eggs and the lukewarm milk/butter mixture. This should take about 2 minutes. It should be a soft, but not sticky ball. When the dough comes together, cover the bowl with either plastic or a tea cloth and let rest for 10 minutes.

Add in the mixed peel, soaked fruit and almonds and mix with your hands or on low speed to incorporate. Here is where you can add the cherries if you would like. Be delicate with the cherries or all your dough will turn red!

Sprinkle flour on the counter, transfer the dough to the counter, and begin kneading (or mixing with the dough hook) to distribute the fruit evenly, adding additional flour if needed. The dough should be soft and satiny, tacky but not sticky. Knead for approximately 8 minutes (6 minutes by machine). The full six minutes of kneading is needed to distribute the dried fruit and other ingredients and to make the dough have a reasonable bread-dough consistency. You can tell when the dough is kneaded enough – a few raisins will start to fall off the dough onto the counter because at the beginning of the kneading process the dough is very sticky and the raisins will be held into the dough but when the dough is done it is tacky which isn’t enough to bind the outside raisins onto the dough ball.

My KitchenAid couldn’t fit this in it, so I kneaded it by hand

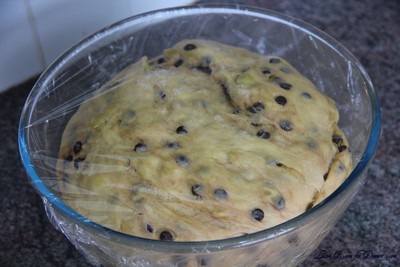
Lightly oil a large bowl and transfer the dough to the bowl, rolling around to coat it with the oil. Cover the bowl with plastic wrap.
Put it in the fridge overnight. The dough becomes very firm in the fridge (since the butter goes firm) but it does rise slowly… the raw dough can be kept in the refrigerator up to a week and then baked on the day you want.

Shaping the Dough and Baking the Wreath

Let the dough rest for 2 hours after taking out of the fridge in order to warm slightly.

Line a sheet pan with parchment paper.

Preheat oven to moderate 350°F/180°C/gas mark 4 with the oven rack on the middle shelf.

Punch dough down, roll into a rectangle about 16 x 24 inches (40 x 61 cms) and ¼ inch (6 mm) thick.

Starting with a long side, roll up tightly, forming a long, thin cylinder.

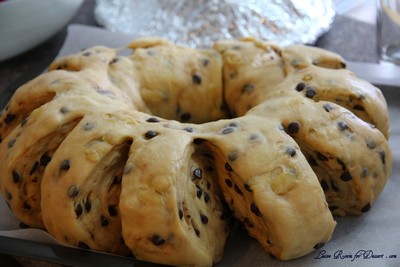
Transfer the cylinder roll to the sheet pan. Join the ends together, trying to overlap the layers to make the seam stronger and pinch with your fingers to make it stick, forming a large circle. You can form it around a bowl to keep the shape.

Using kitchen scissors, make cuts along outside of circle, in 2-inch (5 cm) intervals, cutting 2/3 of the way through the dough.

Twist each segment outward, forming a wreath shape. Mist the dough with spray oil and cover loosely with plastic wrap.

Proof for approximately 2 hours at room temperature, or until about 1½ times its original size.

Bake the stollen for 20 minutes, then rotate the pan 180 degrees for even baking and continue to bake for 20 to 30 minutes (Mine took approx 40min in total). The bread will bake to a dark mahogany color, should register 190°F/88°C in the center of the loaf, and should sound hollow when thumped on the bottom.

Transfer to a cooling rack and brush the top with melted butter while still hot.

Immediately tap a layer of powdered sugar over the top through a sieve or sifter.

Wait for 1 minute, then tap another layer over the first.

The bread should be coated generously with the powdered sugar.

Let cool at least an hour before serving. Coat the stollen in butter and icing sugar three times, since this many coatings helps keeps the stollen fresh – especially if you intend on sending it in the mail as Christmas presents!

When completely cool, store in a plastic bag. Or leave it out uncovered overnight to dry out slightly, German style.

The stollen tastes even better in a couple of days and it toasts superbly…. so delicious with butter and a cup of tea….mmmmm

Storage
The more rum and the more coatings of butter and sugar you use the longer it will store.
The following is for the recipe as written and uses the 45 mls of rum and two coatings of butter and icing sugar
1. Stollen freezes beautifully about 4 months
2. The baked stollen stores well for 2 weeks covered in foil and plastic wrap on the counter at room temperature and
3. One month in the refrigerator well covered with foil and plastic wrap.

Ciabatta Bread

Wednesday, October 6th, 2010

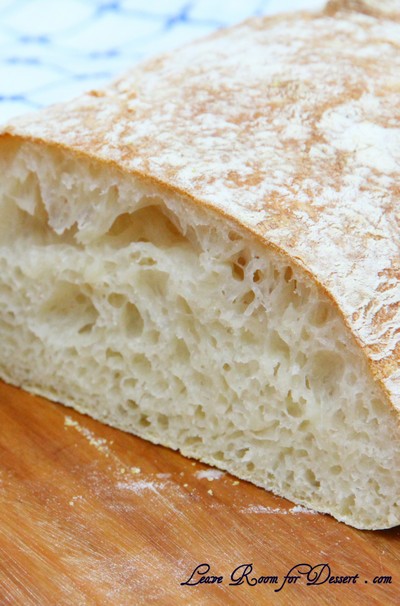
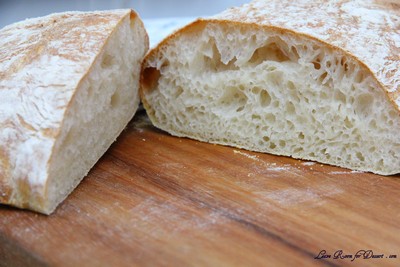
I’ve always had problems making bread at home. They nearly never end up with the same fluffy lovely texture the bought ones do. So I couldn’t be more excited to share with you all, the great ciabatta bread method Nick found. I know I have told so many people about it – and they have been very patient waiting for the recipe – so here it is (finally).

I had heard a while back about the no-knead bread. It sounds delicious and I still intend to make it one or two days when I have the time. This is a quick no-knead ciabatta bread and I don’t know why it’s called that, as there is quite a lot of kneading done by the KitchenAid. I wouldn’t want to do it by hand – as the mixture is just way too sticky.

Another plus it that you don’t need any special flour for it. Plain flour works beautifully.

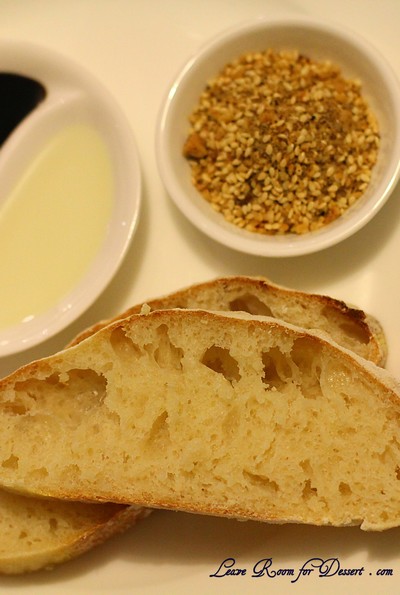
I hope more people try it – as there’s almost nothing better than dunking some fresh gorgeous ciabatta bread into olive oil, caramelised balsamic vinegar and dukkah.

Ciabatta Bread

Recipe by Nick based on Jason’s Quick Coccodrillo Ciabatta Bread and Food Wishes Video

**Note: Takes 3-8 hours or overnight with proving. (Nick has made it in 3 hours at the shortest time, although it works in 6 hours and even overnight!)

Makes: one loaf, and can easily be doubled to make two loaves

250g plain flour
1 teaspoon dry yeast
1 teaspoon salt
1 teaspoon sugar
250ml warm water

plain flour and polenta for dusting plastic wrap and baking paper lined tray

Place all dry ingredients into a bowl for a KitchenAid or mix master, with a dough hook attached. Whisk or mix the dry ingredients, then add the warm water and mix with the dough hook for 10 minutes. You may want to stop the mixer and scrape the bottom and sides of the bowl to ensure that all of the dry ingredients have come away from the sides. You should really notice the texture and consitency of the dough change after 10 minutes of mixing, going from gluggy to stretchy and bandy.

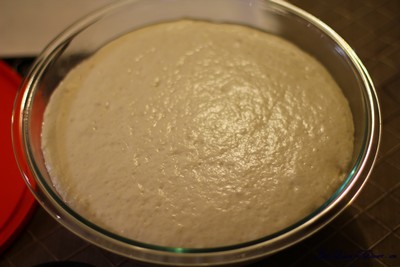
Pour the mixture into a large lightly oiled bowl. Cover with a lid, tea towel or plastic wrap and leave in a warm place for 3-6 hours or overnight.

Sprinkle some water onto a clean counter surface and lay out a piece of plastic wrap onto the wet surface. This stops the plastic wrap from moving around. Sift some plain flour onto the plastic wrap to give an even coating (slightly smaller than the size of a baking tray). Cover your baking tray with a piece of baking paper, then sift a similar sized patch of flour onto the baking paper. Then sprinkle some polenta onto the flour on top of the baking paper. The flour on the plastic wrap will stop the dough sticking to the plastic, and the flour and polenta on the baking paper will end up on the underside of the bread, giving it a good texture and flavour.

The mixture should have tripled in size after proving, and will be sticky and full of air bubbles. Pour the mixture onto the flour covered plastic wrap and shape the dough into a loaf roughly 30cm x 15cm. It’s best to pop any really large air-bubbles in the dough. Carefully lift the plastic wrap with the dough on top and flip the loaf on the flour and polenta covered baking paper, then remove the plastic wrap. Re-shape the dough into a loaf shape again on the tray if required.

Leave the dough to sit in a warm spot for 15 minutes to 1 hour.

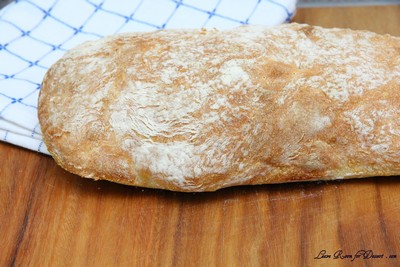
Cook at 250C for approximately 20 minutes, until the outside has formed a nice crust and makes a hollow sound when tapped.

Allow to cool to a temperature you’re able to handle, then slice up and serve with a meal – or for a lovely starter serve with a good olive oil and caramelised balsamic vinegar, and perhaps dukkah too.

If you make two loaves, you can easily store one in a tea towel overnight. Place on a baking tray and reheat in the oven at 180C for 5-10 minutes, before serving. It’s almost as good as freshly baked.

Steamed Barbecued Pork Buns – Char Siu Bao

Sunday, February 14th, 2010

PorkBuns18

Happy Chinese New Year! The year of the Tiger has just begun and I decided to celebrate by making my first ever steamed barbeque pork buns.

PorkBuns20

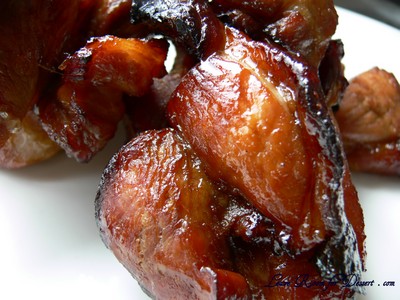
The thing I love about barbecued pork buns is how sweet they are. I tend to add a tablespoon of sugar or more to most savoury dishes I make, although these go one step further – and I’m not complaining. 🙂
PorkBuns28

They do go well with other yum cha dishes as well, like some dumplings I recently made and I’ll have to post on them when I’ve perfected the recipes a bit more…

PorkBuns23

Enjoy! And Happy Chinese New Year! (I hope those who are celebrating Valentines Day also have a great day and weekend!)

PorkBuns25

Recipes altered by me from a number of websites.

Barbeque Pork

Makes enough for 48 buns, or Serves: 4

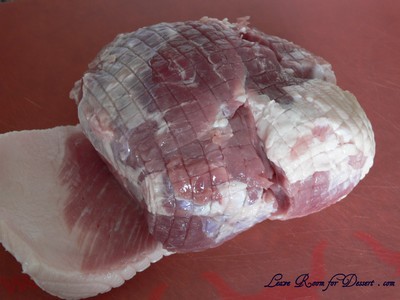
1 kg boned pork shoulder roast, large pieces of fat removed
½ cup hoisin sauce
½ cup soy sauce
1/ cup rice wine vinegar
1/3 cup honey
1 tablespoon sugar

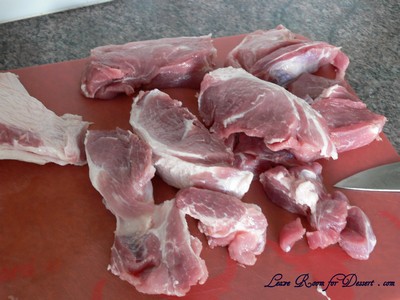
Slice the pork into 2-3 cm thick slices. Mix together all other ingredients and place in a bowl. Add the pork and marinate for a few hours, or preferably overnight.

PorkBuns30

PorkBuns32

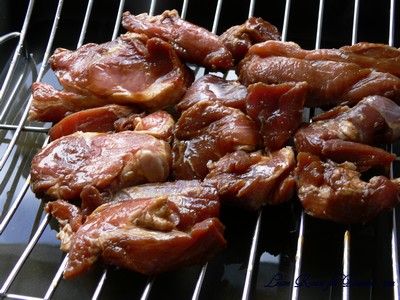
Preheat the oven to 200C and pour some water into a large roasting pan (not enough to reach the metal roasting rack). Place the pork on the roasting rack over the water. Cook for 10 minutes, then reduce the heat to 160C and cook for a further 30-40 minutes, turning and brushing on more marinade for a few times.

PorkBuns33

PorkBuns35

Once cooked, serve as is, or slice up. Alternatively, save it for pork buns, by allowing it to cool and using it once cooled or after storing in the fridge.

PorkBuns39

Barbeque Pork Filling

Makes enough for 24 buns

500g barbeque pork, (see recipe above) diced
1 spring onion/ shallot, finely sliced or chopped
1 garlic clove, crushed
1 tablespoon vegetable oil
1 tablespoon soy sauce
2 tablespoons hoisin sauce
2 tablespoons oyster sauce
2 tablespoons brown sugar
1 tablespoon honey
1½ tablespoons cornflour mixed with ¼ cup water

Mix together the soy sauce, hoisin sauce, oyster sauce, brown sugar and honey.

Heat a small saucepan or wok on medium/high heat. Add the oil, then the sliced spring onion. Cook for ½ minute, add the garlic and stir for 1 minute. Add the pork, stir for ½ minute, then add the sauce, mix, followed by the cornflour mixed with water.

Once the mixture comes together, about 1 minute. Remove from heat and allow to cool, for use in the pork buns later.

PorkBuns07

Bun Dough

Makes: 24

1 cup lukewarm water
1 teaspoon caster sugar
1 tablespoon yeast (~7g)
4 cups plain flour
1/3 cup white sugar
1½ teaspoons salt
2 tablespoons vegetable oil
½ cup boiling water

Mix together the lukewarm water, caster sugar and yeast in a large bowl. Leave for 10-20 minutes for the yeast to activate, while you get the rest of your ingredients ready.

PorkBuns05

Mix together the boiling water with the white sugar, salt and vegetable oil. Stir to dissolve the sugar and cool the water. Cool until lukewarm.

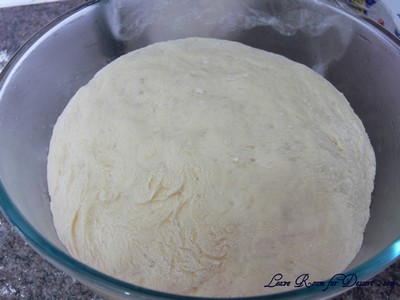
Add 3½ cups of the flour and the warm water to the yeast mixture. Mix to form a dough and then turn out onto a bench with the remaining ½ cup flour on it. Knead for a few minutes until the dough comes together nicely. Place in a large lightly oiled bowl and cover with plastic wrap or a tea towel. Leave for 1-2 hours in a warm place, until the dough has risen to double its size.

PorkBuns06

PorkBuns08

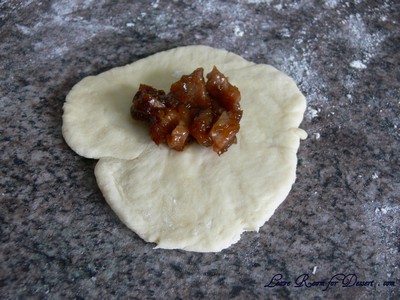
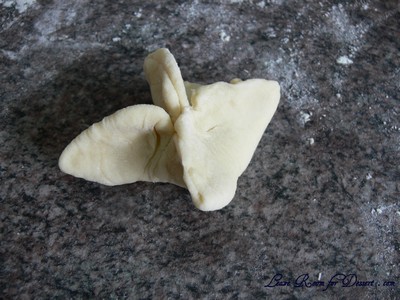
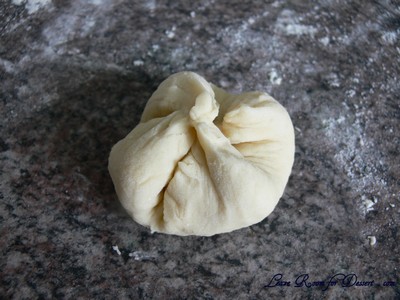
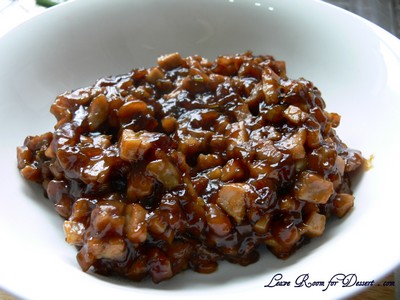
Tip the dough onto a lightly floured bench and lightly knead. Divide dough into 2 portions. Roll out one portion into a cylinder shape which is easy to divide. Divide into 12 portions. Roll out each portion into a small circle, large enough to fit a teaspoon of pork filling in the middle and to pull four sides of the circle, or pleat the edges to enclose the filling. Twist the top of the dough to seal the bun. Do the same with the remaining dough and mixture.
PorkBuns10

PorkBuns11

PorkBuns12

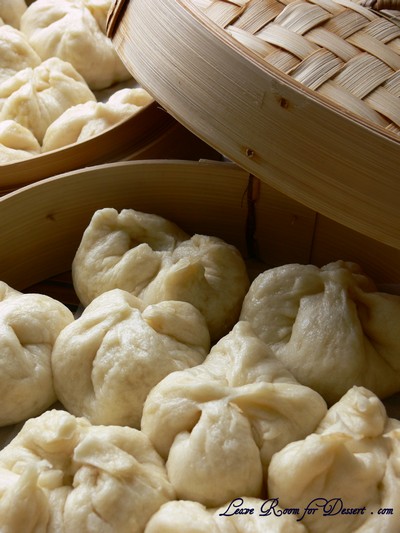
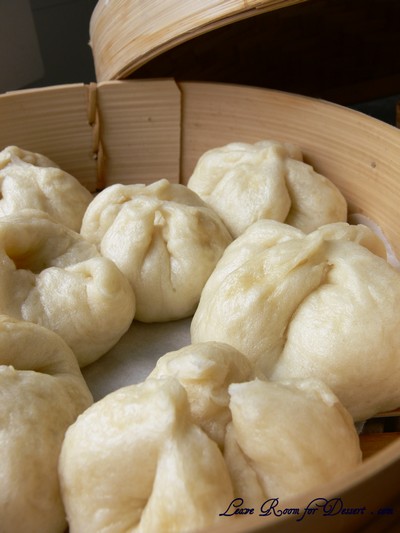
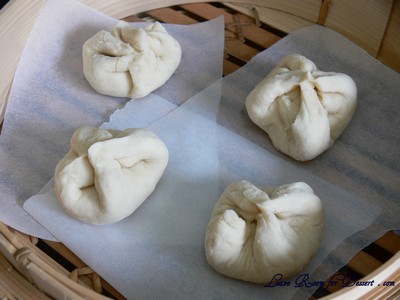
Place completed buns on pieces of baking paper in a bamboo steamer and cook straight away or leave for up to an hour before steaming over boiling water for 10 minutes. Serve.

PorkBuns09

PorkBuns15

PorkBuns29

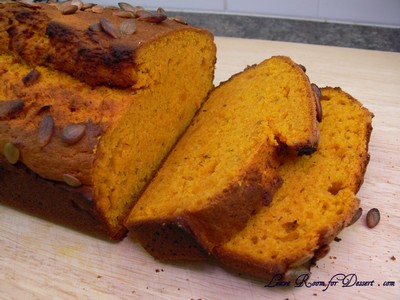
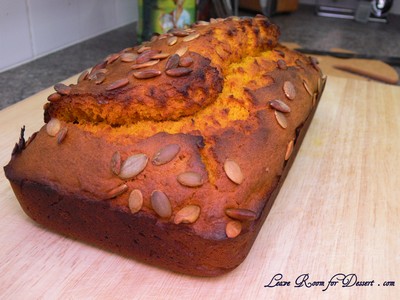
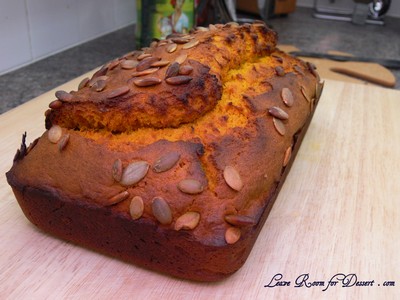
Spicy Pumpkin Bread

Friday, August 21st, 2009

spicypumpkinbread07

Nick loves making breads… Naan bread, tortillas, bread rolls… and I love eating bread!!!! Therefore, I would say we work very well together 🙂

So when Nick said he wanted to make some pumpkin bread, I was all for it!

He was a little suspicious that it was an actual bread due to the exception of yeast… can you really have a bread without yeast? Maybe…

spicypumpkinbread05

Either way, it is a lovely savoury pumpkin bread (or loaf) with a brilliant orange colour, great flavours of spices and works especially well for morning tea or with a meal.

Spicy Pumpkin Bread
Recipe slightly adapted from Taste.com.au

Melted butter, to grease
300g (2 cups) self-raising flour
1/2 teaspoon salt
1/2 teaspoon mild chilli powder
1/2 teaspoon cumin seeds
1 teaspoon cumin powder
1 teaspoon coriander powder
1 teaspoon sweet paprika
1 teaspoon cinnamon powder
450g (1 cup) mashed cooked pumpkin
125ml (1/2 cup) milk
60g butter, melted, cooled
2 eggs, lightly whisked
2 tablespoons pepitas (pumpkin seed kernels)

Preheat oven to 180°C. Brush an 11 x 21cm (base measurement) loaf pan with melted butter to lightly grease. Sift the flour, salt and spices into a large bowl. Make a well in the centre.

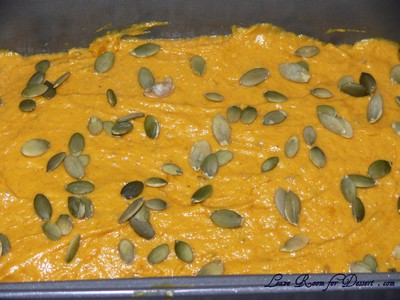
Place the pumpkin, milk, butter and egg in a jug, and use a whisk to stir until well combined. Add the pumpkin mixture to the flour mixture, and stir with a large metal spoon until just combined. Spoon the mixture into the prepared pan and smooth the surface. Sprinkle evenly with pepitas.

spicypumpkinbread02

Bake in preheated oven for 35-40 minutes or until a skewer inserted into the centre comes out clean. Remove from oven. Set aside in the pan for 5 minutes before turning onto a wire rack to cool.

spicypumpkinbread06

Note: You’ll need to steam about 500g peeled, deseeded, chopped pumpkin for this recipe. This bread is great for sandwiches and as an accompaniment to a chargrilled lamb salad.

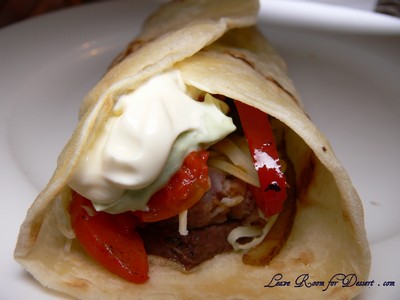
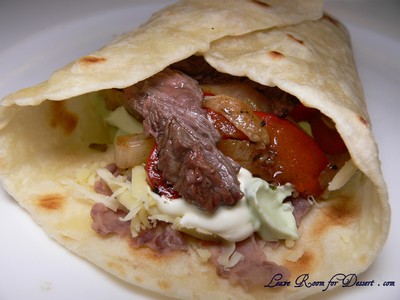
Fajitas and Tortillas

Tuesday, August 11th, 2009

fajhitastortillas01

Now when it came to making some Fajita’s and homemade Tortillas, we went straight to the internet to see what advice there was and how easy tortillas were to make (we had made naan bread before, so were interested to see how it compared).

We found a great set of videos on youtube by Chef Jason Hill, which were very detailed and are brilliant for anyone wanting to learn how to make either fajitas and fajita marinade, tortillas, guacamole, salsa and many more recipes.

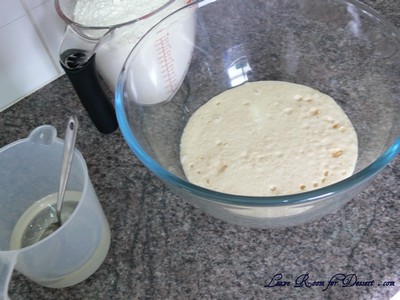
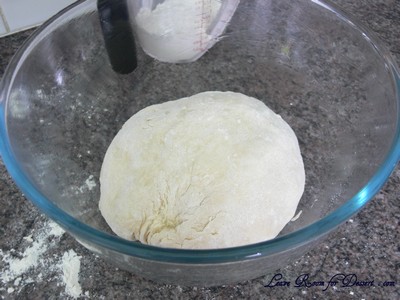
The tortillas were a lot easier than we were expecting. With only four ingredients and a few steps (mix, rest, roll, cook) it was easy and quite cheap to make and tasted much better than the bought tortillas.
fajhitastortillas10

The fajita marinade was full of great flavours and extremely fresh and lovely. We’ve already made this twice, but it’s certainly on the list of meals to make again and again…. Hope you all enjoy!

The meat for the fajitas takes a while to marinate, therefore start making that first.

Fajitas and Tortillas
Recipes adapted from Chef Jason Hill on youtube

Tortillas
Makes: 12-16 (Serves 6-8)

4 cups plain flour
1/8 teaspoon baking powder
½ cup vegetable shortening or butter (113g butter)
1½ teaspoons salt
1–1¼ cups warm water

Put flour, baking powder and shortening or butter together into a bowl. Work together with hands for a few minutes until you get a coarse meal.

Mix the salt in with the warm water and then add it to the flour mix. Mix it to form a dough – add the extra ¼ cup water if need be, I found this to be necessary. Work together to form a ball. Cover and rest for 20 minutes.

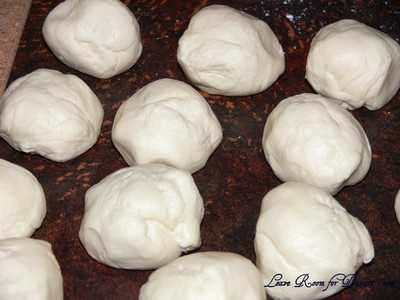
Break into 12-16 little balls. Preheat fry pan or crepe pan to medium heat.

fajhitastortillas02

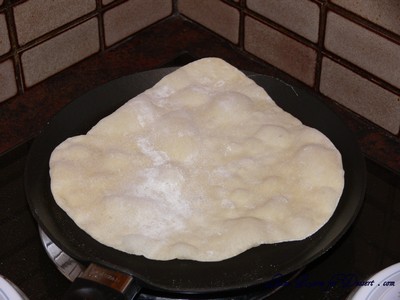
Roll out balls on lightly floured work surface until a thin round tortilla is formed. Place on preheated saucepan and cook until the underside starts to brown 15-30seconds. Turn over and cook the other side.

fajhitastortillas04

fajhitastortillas05

fajhitastortillas06

Once cooked, place on half a tea towel and cover with the rest of the tea towel to keep warm, cook the fajita filling at this stage.

Fajitas
Makes enough for 12-16 tortillas

1 tablespoon olive oil
500g steak (we used rump), sliced
1 onion, peeled and sliced
2 red capsicums, deseeded and cut into strips
1 green capsicum, deseeded and cut into strips

Guacamole
Sour cream
Grated Cheese
re-fried beans (see recipe below)


Fajita marinade

1 cup water
1 teaspoon oregano
1 teaspoon white pepper
1 teaspoon salt
1 teaspoon cumin
1 teaspoon chilli powder
pinch cloves, ground
4 cloves crushed garlic
¼ cup red wine vinegar
½ cup olive oil
Small bunch of cilantro/coriander
Juice of 1 lemon
Juice of 1 orange

Put water in a bowl; add juices to water, then all other ingredients except the olive oil. Whisk in the olive oil slowly. Let it sit for 30 minutes before using.

Marinate the meat for 30minutes – 1 hour.

Heat a wok or pan to medium high. Place oil in pan and add onions, cooking for 5 minutes, until slightly translucent. Add a few tablespoons of the fajita marinade. Add capsicums and cook for 5 minutes. Remove and place in a bowl.

Add the marinated meat in a few batches and cook until just browned. Keep cooked batches covered while you finish the cooking. Remove all the meat and add the remaining marinade, cook until bubbling. Add vegetables to warm up and absorb some marinade.

Place a tortilla on a plate, add some of the meat, vegetables, grated cheese, guacamole and sour cream in a line in the centre, leaving room at one edge to fold up. Once the bottom is folded up, fold in the sides and eat.

fajhitastortillas09

fajhitastortillas11

Re-fried Beans
Nick’s recipe

1 can (400g) red kidney beans (or whole Pinto beans, if you can find them), rinsed in water
1 onion, finely diced
2-3 cloves garlic, crushed
1 tablespoon olive oil

Cook the onion in olive oil until translucent, then add the garlic. Cook for a few more minutes, then add the beans. Heat through, then use a potato masher and mash the beans until it forms a thick paste-like mixture. Serve with fajitas.