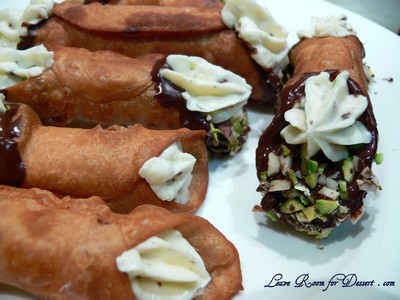
Chocolate

Orange Tian – Daring Bakers Challenge March 2010

Saturday, March 27th, 2010

OrangeTian11

The 2010 March Daring Baker’s challenge was hosted by Jennifer of Chocolate Shavings. She chose Orange Tian as the challenge for this month, a dessert based on a recipe from Alain Ducasse’s Cooking School in Paris.

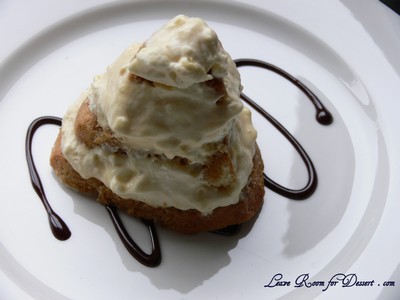
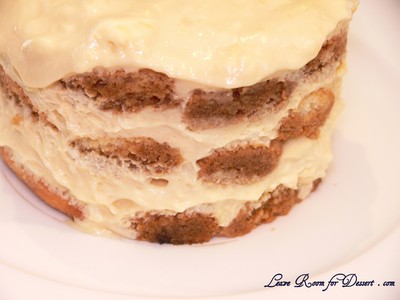
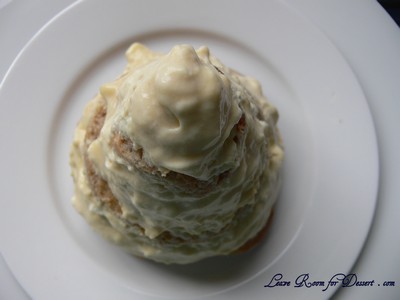
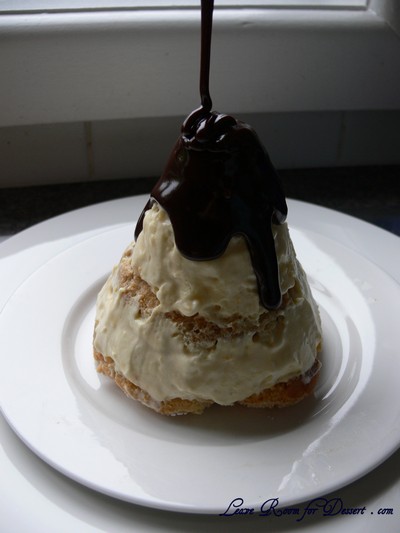
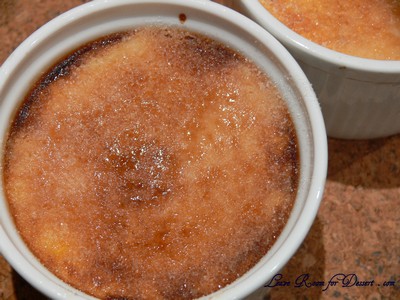
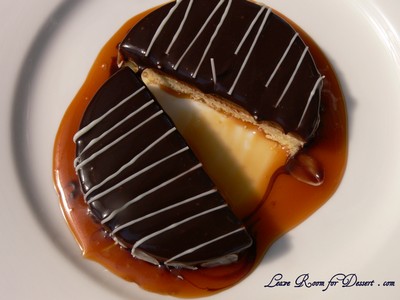
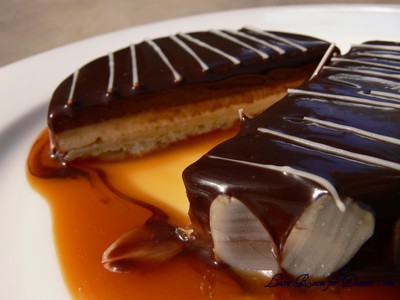
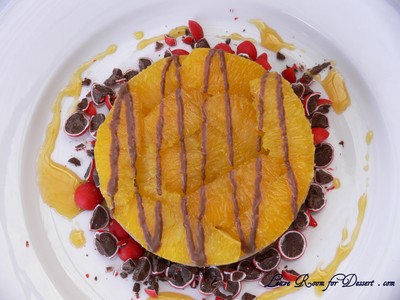
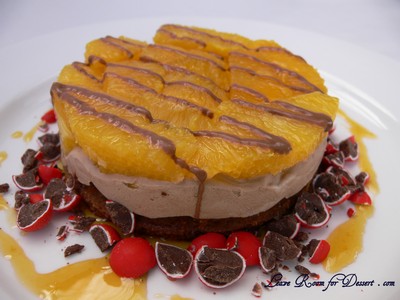
I don’t use oranges much in my desserts, except for fruit salads, so the concept of this dessert was difficult to grasp. I decided to make the dessert as written, along with adding chocolate to half the mix and serving with Jaffas to make choc orange dessert.
OrangeTian31

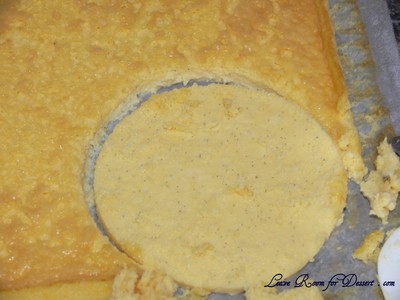
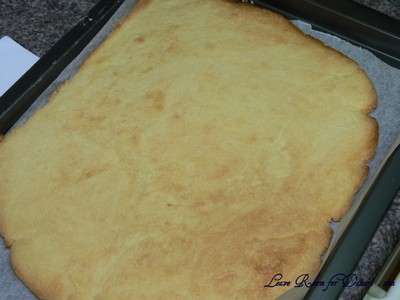
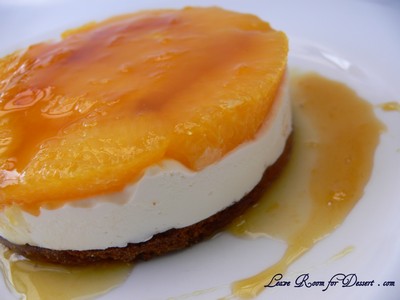
There were many components to this challenge, including the marmalade – which Nick was very excited that I would be making. He loves marmalade, especially chunky marmalade, so I decided to make it chunky – a little too chunky for me. The pate sable was lovely and easy to make, although I needed to cut the pieces again after cooking to ensure they fit in moulds.

I had a touch of trouble with the caramel, as it melted and caramelised at the same time, so when I added the orange juice it clumped a heap and I had to cook it until the clumps of sugar dissolved again.
OrangeTian24

I tried both the normal and chocolate version, although think I prefer other desserts and flavour combinations. The others who tried it thought it was quite nice – even prefering the original flavour over the chocolate version.

Thanks again to our host Jennifer for this challenge. I found the flavour combinations very interesting, and have learnt quite a bit from the experience.
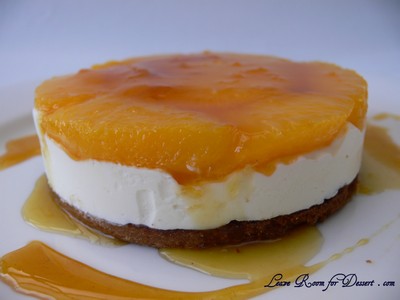
OrangeTian17

Orange Tian

Dessert based on a recipe from Alain Ducasse’s Cooking School in Paris

For the Pate Sablee:

2 medium-sized egg yolks at room temperature
granulated sugar 6 tablespoons + 1 teaspoon; 2.8 oz; 80 grams
vanilla extract ½ teaspoon
Unsalted butter ¼ cup + 3 tablespoons; 3.5 oz; 100 grams ice cold, cubed
Salt 1/3 teaspoon; 2 grams
All-purpose flour 1.5 cup + 2 tablespoons; 7 oz; 200 grams
baking powder 1 teaspoon ; 4 grams

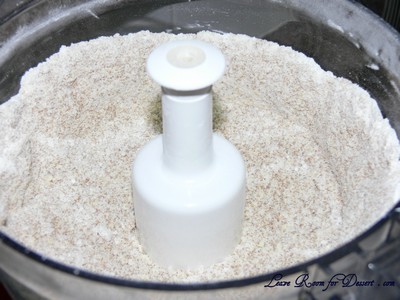
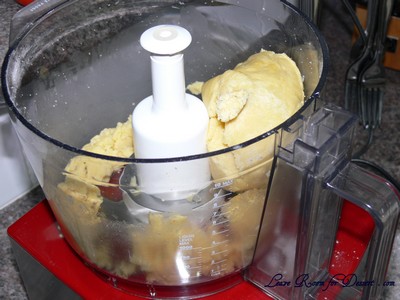
Put the flour, baking powder, ice cold cubed butter and salt in a food processor fitted with a steel blade.

In a separate bowl, add the eggs yolks, vanilla extract and sugar and beat with a whisk until the mixture is pale. Pour the egg mixture in the food processor.

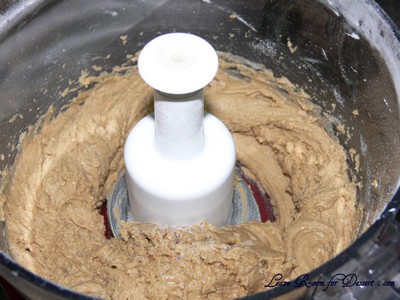
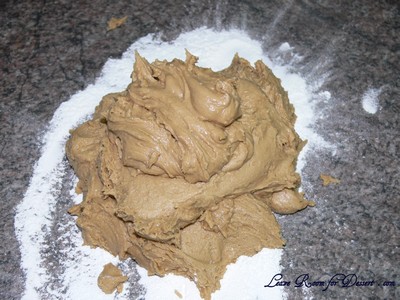
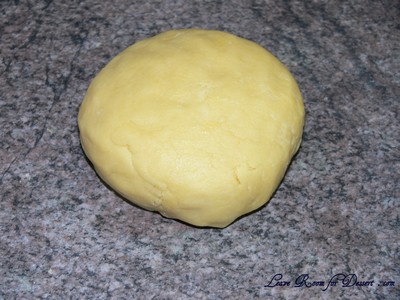
Process until the dough just comes together. If you find that the dough is still a little too crumbly to come together, add a couple drops of water and process again to form a homogenous ball of dough. Form into a disc, cover with plastic wrap and leave to rest in the fridge for 30 minutes.
Preheat your oven to 350 degree Fahrenheit.

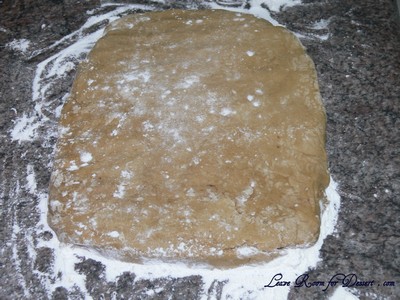
Roll out the dough onto a lightly floured surface until you obtain a ¼ inch thick circle.

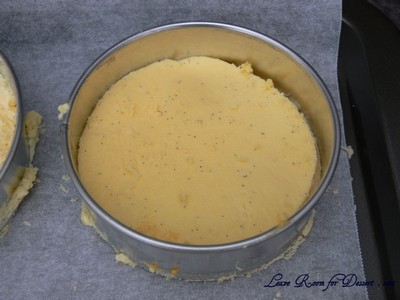
Using your cookie cutter, cut out circles of dough and place on a parchment (or silicone) lined baking sheet. Bake for 20 minutes or until the circles of dough are just golden.

For the Marmalade:

Freshly pressed orange juice ¼ cup + 3 tablespoons; 3.5 oz; 100 grams
1 large orange used to make orange slices
cold water to cook the orange slices
pectin 5 grams
granulated sugar: use the same weight as the weight of orange slices once they are cooked

Finely slice the orange. Place the orange slices in a medium-sized pot filled with cold water. Simmer for about 10 minutes, discard the water, re-fill with cold water and blanch the oranges for another 10 minutes.

Blanch the orange slices 3 times. This process removes the bitterness from the orange peel, so it is essential to use a new batch of cold water every time when you blanch the slices.

Once blanched 3 times, drain the slices and let them cool.

Once they are cool enough to handle, finely mince them (using a knife or a food processor).

Weigh the slices and use the same amount of granulated sugar . If you don’t have a scale, you can place the slices in a cup measurer and use the same amount of sugar.

In a pot over medium heat, add the minced orange slices, the sugar you just weighed, the orange juice and the pectin. Cook until the mixture reaches a jam consistency (10-15 minutes).

Transfer to a bowl, cover with plastic wrap and put in the fridge.
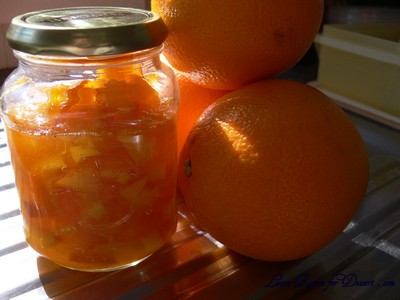
OrangeTian03

For the Orange Segments:

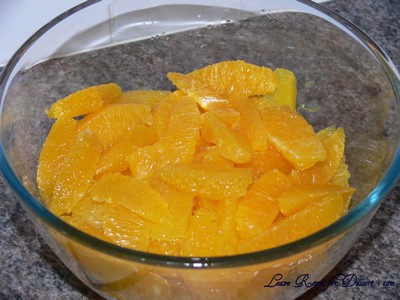
For this step you will need 8 oranges.

Cut the oranges into segments over a shallow bowl and make sure to keep the juice. Add the segments to the bowl with the juice.
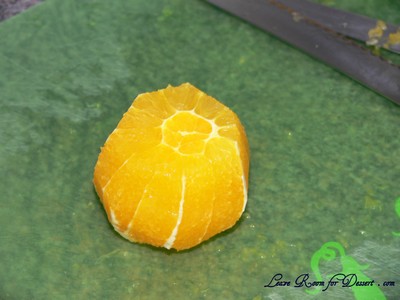
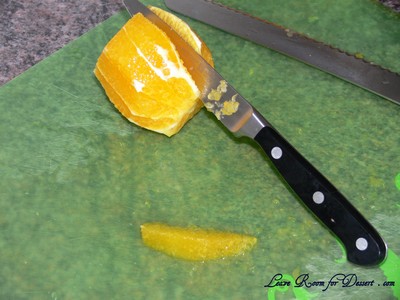
OrangeTian07

OrangeTian08

OrangeTian09

For the Caramel:

granulated sugar 1 cup; 7 oz; 200 grams
orange juice 1.5 cups + 2 tablespoons; 14 oz; 400 grams

Place the sugar in a pan on medium heat and begin heating it.

Once the sugar starts to bubble and foam, slowly add the orange juice. As soon as the mixture starts boiling, remove from the heat and pour half of the mixture over the orange segments.

Reserve the other half of the caramel mixture in a small bowl — you will use this later to spoon over the finished dessert. When the dessert is assembled and setting in the freezer, heat the kept caramel sauce in a small saucepan over low heat until it thickens and just coats the back of a spoon (about 10 minutes). You can then spoon it over the orange tians.

[Tip: Be very careful when making the caramel — if you have never made caramel before, I would suggest making this step while you don’t have to worry about anything else. Bubbling sugar is extremely, extremely hot, so make sure you have a bowl of ice cold water in the kitchen in case anyone gets burnt!]

For the Whipped Cream:

heavy whipping cream 1 cup; 7 oz; 200 grams
3 tablespoons of hot water
1 teaspoon Gelatine
1 tablespoon of confectioner’s sugar
orange marmalade (see recipe above) 1 tablespoon
I folded 50g melted and cooled dark chocolate to this whipped cream for my choc orange version

In a small bowl, add the gelatine and hot water, stirring well until the gelatine dissolves. Let the gelatine cool to room temperature while you make the whipped cream. Combine the cream in a chilled mixing bowl. Whip the cream using a hand mixer on low speed until the cream starts to thicken for about one minute. Add the confectioner sugar. Increase the speed to medium-high. Whip the cream until the beaters leave visible (but not lasting) trails in the cream, then add the cooled gelatine slowly while beating continuously. Continue whipping until the cream is light and fluffy and forms soft peaks. Transfer the whipped cream to a bowl and fold in the orange marmalade.
[Tip: Use an ice cold bowl to make the whipped cream in. You can do this by putting your mixing bowl, cream and beater in the fridge for 20 minutes prior to whipping the cream.]

Assembling the Dessert:

Make sure you have some room in your freezer. Ideally, you should be able to fit a small baking sheet or tray of desserts to set in the freezer.

Line a small tray or baking sheet with parchment paper or a silicone sheet. Lay out 6 cookie cutters onto the parchment paper/silicone.

Drain the orange segments on a kitchen towel.

Have the marmalade, whipped cream and baked circles of dough ready to use.

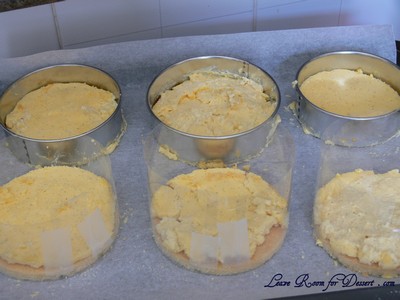
Arrange the orange segments at the bottom of each cookie cutter. Make sure the segments all touch either and that there are no gaps. Make sure they fit snuggly and look pretty as they will end up being the top of the dessert. Arrange them as you would sliced apples when making an apple tart.
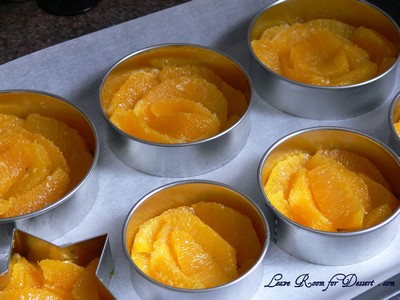
OrangeTian18

Once you have neatly arranged one layer of orange segments at the bottom of each cookie cutter, add a couple spoonfuls of whipped cream and gently spread it so that it fills the cookie cutter in an even layer. Leave about 1/4 inch at the top so there is room for dough circle.
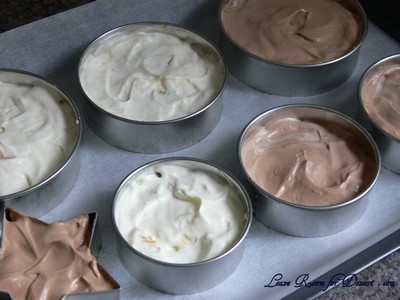
OrangeTian19

Using a butter knife or small spoon, spread a small even layer of orange marmalade on each circle of dough.

Carefully place a circle of dough over each ring (the side of dough covered in marmalade should be the side touching the whipping cream). Gently press on the circle of dough to make sure the dessert is compact.
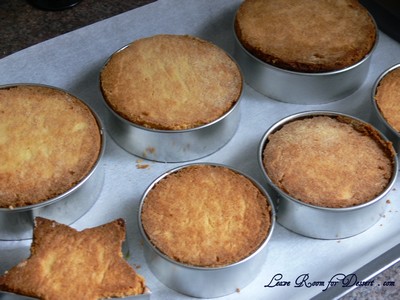
OrangeTian10

Place the desserts to set in the freezer to set for 10 minutes. (I left mine in the freezer for a few hours, and stored leftover ones in there too)

Using a small knife, gently go around the edges of the cookie cutter to make sure the dessert will be easy to unmold. Gently place your serving plate on top of a dessert (on top of the circle of dough) and turn the plate over. Gently remove the cookie cutter, add a spoonful of caramel sauce and serve immediately.
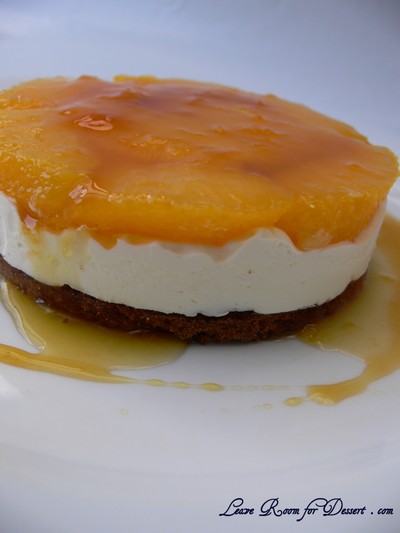
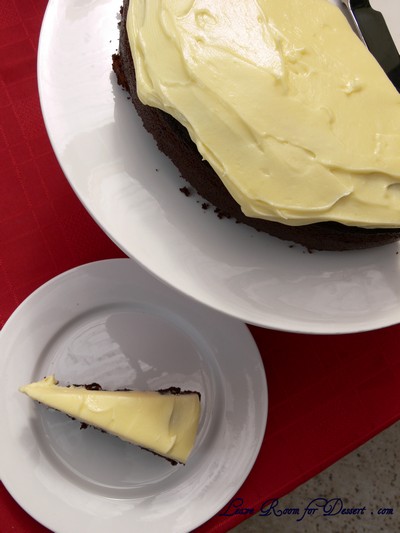
OrangeTian29

Chocolate Guinness Cake

Wednesday, March 17th, 2010

GuinessCake07

Happy Saint Patrick’s Day!

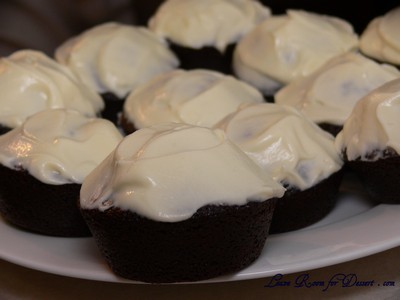
I remember trying a chocolate Guinness cake in my later years of University when a friend brought one in (we had cake days every Friday). I was a little apprehensive (as I don’t like beer), but once I was convinced to try it, I haven’t looked back. I have been spreading the word, trying to convince as many friends and family as possible (some are more difficult to convince than you would imagine) to try it and that’s all it takes to get most people hooked.

GuinessCake04

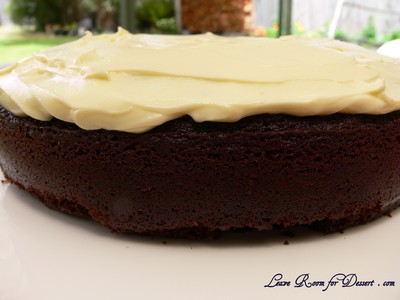
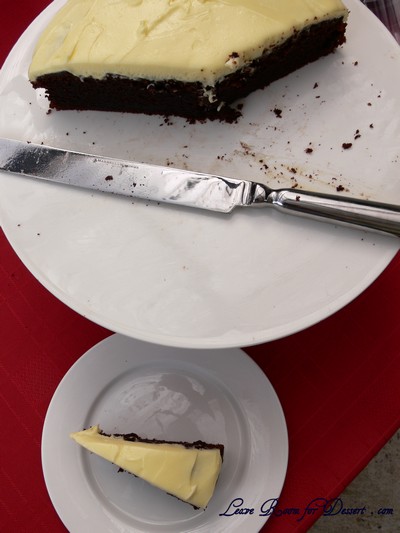
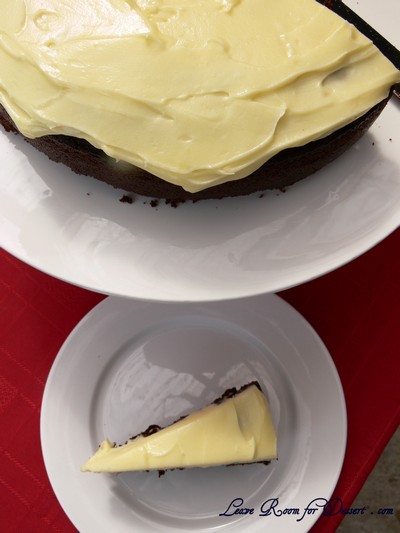
It even looks like a poured out Guinness, and you can be sure guys and girls alike will be intrigued by having beer in a cake.

GuinessCake06

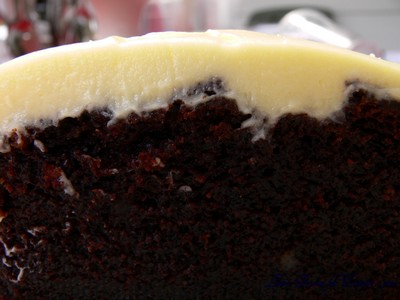
The best aspect of this cake has to be how lovely and moist it is. Coming in a close second (or equal first) is the great flavour combination of the chocolate with a very slight Guinness flavour (trust me, I don’t like normal beer, let alone Guinness – but I [and other non-beer-drinkers] really enjoy this cake) and the creamy icing.

GuinessCake09

I wish I had a slice right now…
[By the way, you can freeze it, iced and everything – it makes the perfect easy snack for work, school or shopping].

GuinessCake27

Chocolate Guinness Cake

Recipe taken from the internet years ago… can’t remember the site sorry

butter for pan
1 cup Guinness Stout
10 tablespoons butter (10oz or 300g)
¾ cup cocoa
2 cups caster sugar
¾ cup sour cream
2 large eggs
1 tablespoon vanilla extract or imitation vanilla – it works just as well in this
2 cups plain flour
2½ teaspoons baking soda (bi-carb soda)

Icing
1¼ cups icing sugar mixture or icing suger
8oz (240g) cream cheese at room temperature
½ cup heavy (thickened) cream

Heat oven to 180ºC (160ºC fan forced). Butter a 22cm (9-inch) spring-form pan and line with baking paper.

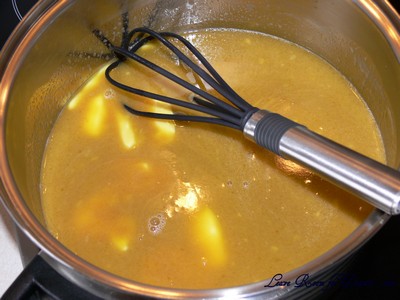
In a large saucepan, combine Guinness and butter. Place over medium-low heat until butter melts, then remove from heat. Add cocoa and superfine sugar, and whisk to blend.

GuinessCake13

In a small bowl, combine sour cream, eggs and vanilla; mix well.

GuinessCake12

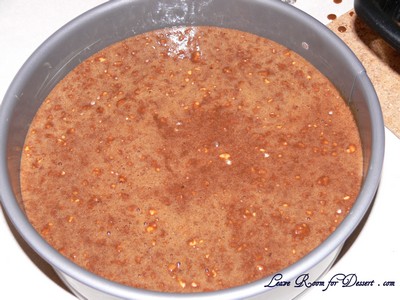
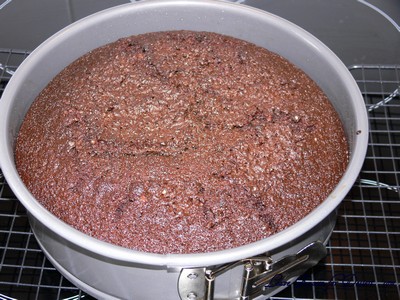
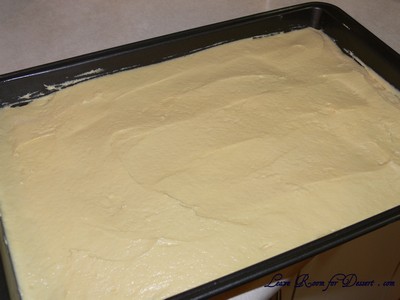
Add to Guinness mixture. Add flour and baking soda, and whisk again until smooth. Pour into buttered pan, and bake until risen and firm, 45 minutes to one hour. Place pan on a wire rack and cool completely in pan.

Yes, it is very liquidy - don't worry - this will make it moist.

Yes, it is very liquidy - don't worry - this will make it moist.

GuinessCake22

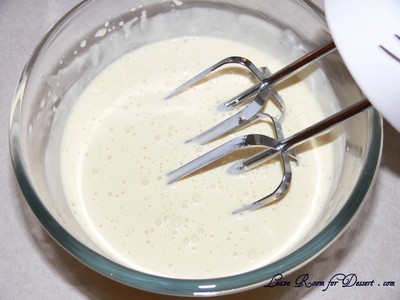
Icing: Mix cream cheese with electric mixer and blend until smooth. Add cream, then sifted icing mixture and mix until smooth and spreadable. Also add a little cocoa powder to give the icing the murky look of the Guinness frothy if you like.

Remove cake from pan and place on a platter or cake stand. Ice top of cake only, so it resembles a frothy pint of Guinness.
Makes one 9-inch cake, 12 servings.

My Note: To use up a whole 440 ml can of Guinness multiply the recipe by 1.5 times. Pour 2/3 mixture into cake tin and the rest into approximately 24 patty cases or 12 large muffin cases. (cook these for 15-20 minutes). Make 1 quantity of icing as this should cover both the cake and patty cakes. Slices of cake and muffins can be frozen and thawed when you have a craving.

Rough Quantities for 1.5x normal quantity (1 x 22cm cake + 12 muffins)
butter for pan
440ml can (approx 1½ or 1¾ cups) Guinness Stout
15 tablespoons butter (450g)
1 1/8 cup cocoa (Or one heaped cup)
3 cups caster sugar
1 1/8 cup (approx 300g carton) sour cream
3 large eggs
1½ tablespoon vanilla extract or imitation vanilla
3 cups plain flour
3¾ teaspoons baking soda (bi-carb soda)

GuinessCake08

Tiramisu – Daring Bakers Challenge February 2010

Saturday, February 27th, 2010

Tiramisu37

The February 2010 Daring Bakers’ challenge was hosted by Aparna of My Diverse Kitchen and Deeba of Passionate About Baking. They chose Tiramisu as the challenge for the month. Their challenge recipe is based on recipes from The Washington Post, Cordon Bleu at Home and Baking Obsession.

Tiramisu30

We were not given one challenge this month – but three! We were to make our own mascarpone, ladyfinger / savoiardi biscuits and finally construct a tiramisu (which in itself had pastry cream and zabaglione components).

Tiramisu20

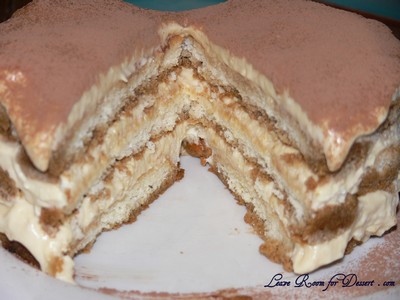
Not being a huge coffee lover, I thought this would be a good opportunity to try a chocolate only tiramisu, and noticed there weren’t many recipes that catered for only chocolate tiramisu without any coffee flavouring. I decided to make up my own dipping sauce for the biscuits – which is the only portion which contains coffee. I just substituted some cocoa, sugar and baileys for the coffee.

Tiramisu63

As for the mascarpone, it was great to finally make it. It was so easy to make and tasted lovely. And what did I do with the leftovers? Well, a dollop on some pasta or pumpkin soup, made it much tastier (although not healthier…)

Tiramisu31

I enjoyed the chocolate tiramisu, with the coffee drinkers preferring the coffee tiramisu that I made. Although, I probably wouldn’t make the tiramisu again, as I love other desserts more – and have a long long list of desserts I’d still love to make.

Tiramisu39

I’d like to thank Aparna and Deeba for a great challenge (or number of challenges) this month! I managed to make quite a number of things I have wanted to make and never found the time. 🙂

Tiramisu70

P.S. I realised after reading others’ results, that many froze their tiramisu’s before removing any moulds. I didn’t with mine and therefore the tiramisu started melting quite fast and didn’t stay well in their moulds.

Tiramisu

(Recipe source: Carminantonio’s Tiramisu from The Washington Post, July 11 2007 )
This recipe makes 6 servings

For the zabaglione:
2 large egg yolks
3 tablespoons sugar/50gms
1/4 cup/60ml Marsala wine (or port or coffee)
1/4 teaspoon/ 1.25ml vanilla extract
1/2 teaspoon finely grated lemon zest

For the vanilla pastry cream:
1/4 cup/55gms sugar
1 tablespoon/8gms all purpose flour
1/2 teaspoon finely grated lemon zest
1/2 teaspoon/ 2.5ml vanilla extract
1 large egg yolk
3/4 cup/175ml whole milk

For the whipped cream:
1 cup/235ml chilled heavy cream (we used 25%)
1/4 cup/55gms sugar
1/2 teaspoon/ 2.5ml vanilla extract

To assemble the tiramisu:
2 cups/470ml brewed espresso, warmed
1 teaspoon/5ml rum extract (optional)
1/2 cup/110gms sugar
1/3 cup/75gms mascarpone cheese
36 savoiardi/ ladyfinger biscuits (you may use less)
2 tablespoons/30gms unsweetened cocoa powder
My note: To make this with no coffee flavour, replace the espresso and rum with 2 teaspoons cocoa powder, 2 teaspoons of baileys and 2 cups warm water – add together with the sugar for a chocolate alternative for dipping the biscuits.

For the zabaglione:
Heat water in a double boiler. If you don’t have a double boiler, place a pot with about an inch of water in it on the stove. Place a heat-proof bowl in the pot making sure the bottom does not touch the water.

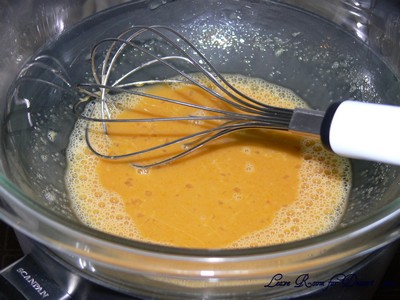
In a large mixing bowl (or stainless steel mixing bowl), mix together the egg yolks, sugar, the Marsala (or espresso/ coffee), vanilla extract and lemon zest. Whisk together until the yolks are fully blended and the mixture looks smooth.

Tiramisu08

Transfer the mixture to the top of a double boiler or place your bowl over the pan/ pot with simmering water. Cook the egg mixture over low heat, stirring constantly, for about 8 minutes or until it resembles thick custard. It may bubble a bit as it reaches that consistency.

Tiramisu11

Let cool to room temperature and transfer the zabaglione to a bowl. Cover and refrigerate at least 4 hours or overnight, until thoroughly chilled.

For the pastry cream:
Mix together the sugar, flour, lemon zest and vanilla extract in a medium heavy-bottomed saucepan. To this add the egg yolk and half the milk. Whisk until smooth.
Now place the saucepan over low heat and cook, stirring constantly to prevent the mixture from curdling.

Tiramisu09

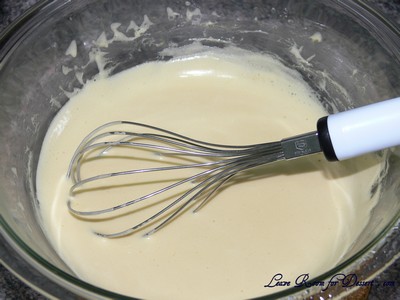
Add the remaining milk a little at a time, still stirring constantly. After about 12 minutes the mixture will be thick, free of lumps and beginning to bubble. (If you have a few lumps, don’t worry. You can push the cream through a fine-mesh strainer.)

Tiramisu10
Transfer the pastry cream to a bowl and cool to room temperature. Cover with plastic film and refrigerate at least 4 hours or overnight, until thoroughly chilled.

For the whipped cream:
Combine the cream, sugar and vanilla extract in a mixing bowl. Beat with an electric hand mixer or immersion blender until the mixture holds stiff peaks. Set aside.

To assemble the tiramisu:
Have ready a rectangular serving dish (about 8″ by 8″ should do) or one of your choice.

Mix together the warm espresso, rum extract and sugar in a shallow dish, whisking to mix well. Set aside to cool.

In a large bowl, beat the mascarpone cheese with a spoon to break down the lumps and make it smooth. This will make it easier to fold. Add the prepared and chilled zabaglione and pastry cream, blending until just combined. Gently fold in the whipped cream. Set this cream mixture aside.

Tiramisu14

Now to start assembling the tiramisu.
Workings quickly, dip 12 of the ladyfingers in the sweetened espresso, about 1 second per side. They should be moist but not soggy. Immediately transfer each ladyfinger to the platter, placing them side by side in a single row. You may break a lady finger into two, if necessary, to ensure the base of your dish is completely covered.

Spoon one-third of the cream mixture on top of the ladyfingers, then use a rubber spatula or spreading knife to cover the top evenly, all the way to the edges.

Repeat to create 2 more layers, using 12 ladyfingers and the cream mixture for each layer. Clean any spilled cream mixture; cover carefully with plastic wrap and refrigerate the tiramisu overnight.
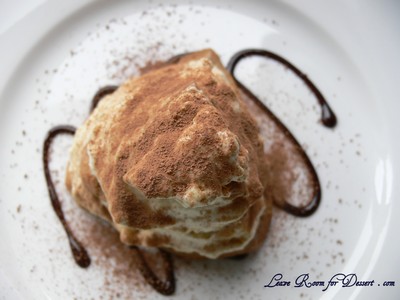
To serve, carefully remove the plastic wrap and sprinkle the tiramisu with cocoa powder using a fine-mesh strainer or decorate as you please. Cut into individual portions and serve.

Mascarpone Cheese

(Source: Vera’s Recipe for Homemade Mascarpone Cheese)
This recipe makes 12oz/ 340gm of mascarpone cheese

474ml (approx. 500ml)/ 2 cups whipping (36 %) pasteurized (not ultra-pasteurized), preferably organic cream (between 25% to 36% cream will do)
1 tablespoon fresh lemon juice

Bring 1 inch of water to a boil in a wide skillet. Reduce the heat to medium-low so the water is barely simmering. Pour the cream into a medium heat-resistant bowl, then place the bowl into the skillet. Heat the cream, stirring often, to 190 F. If you do not have a thermometer, wait until small bubbles keep trying to push up to the surface.

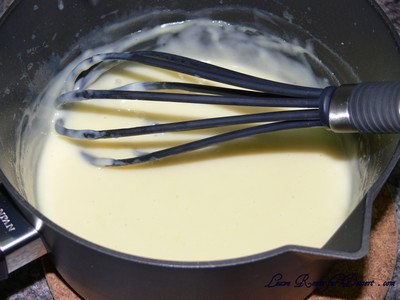
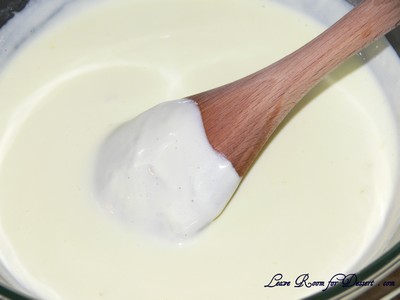
It will take about 15 minutes of delicate heating. Add the lemon juice and continue heating the mixture, stirring gently, until the cream curdles. Do not expect the same action as you see during ricotta cheese making. All that the whipping cream will do is become thicker, like a well-done crème anglaise. It will cover a back of your wooden spoon thickly.

Tiramisu76

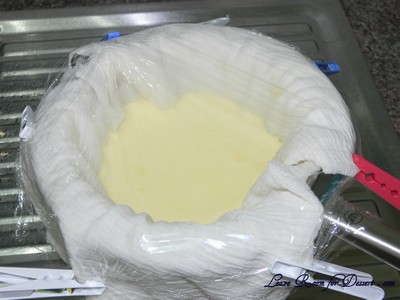
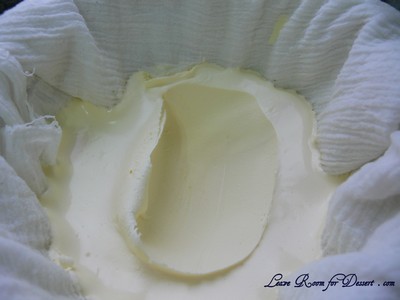
You will see just a few clear whey streaks when you stir. Remove the bowl from the water and let cool for about 20 minutes. Meanwhile, line a sieve with four layers of dampened cheesecloth and set it over a bowl. Transfer the mixture into the lined sieve. Do not squeeze the cheese in the cheesecloth or press on its surface (be patient, it will firm up after refrigeration time). Once cooled completely, cover with plastic wrap and refrigerate (in the sieve) overnight or up to 24 hours.

Tiramisu77

Tiramisu80

Vera’s notes: The first time I made mascarpone I had all doubts if it’d been cooked enough, because of its custard-like texture. Have no fear, it will firm up beautifully in the fridge, and will yet remain lusciously creamy.

Keep refrigerated and use within 3 to 4 days.

Ladyfingers / Savoiardi Biscuits

(Source: Recipe from Cordon Bleu At Home)
This recipe makes approximately 24 big ladyfingers or 45 small (2 1/2″ to 3″ long) ladyfingers.

3 eggs, separated
6 tablespoons /75gms granulated sugar
3/4 cup/95gms cake flour, sifted (or 3/4 cup all purpose flour + 2 tbsp corn starch)
6 tablespoons /50gms confectioner’s sugar,

Preheat your oven to 350 F (175 C) degrees, then lightly brush 2 baking sheets with oil or softened butter and line with parchment paper.

Beat the egg whites using a hand held electric mixer until stiff peaks form. Gradually add granulate sugar and continue beating until the egg whites become stiff again, glossy and smooth.
In a small bowl, beat the egg yolks lightly with a fork and fold them into the meringue, using a wooden spoon. Sift the flour over this mixture and fold gently until just mixed. It is important to fold very gently and not overdo the folding. Otherwise the batter would deflate and lose volume resulting in ladyfingers which are flat and not spongy.

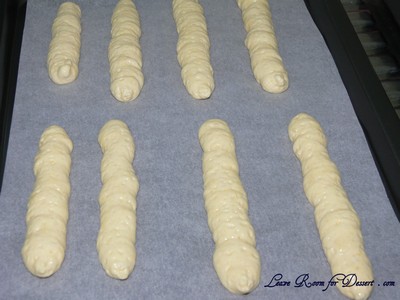
Fit a pastry bag with a plain tip (or just snip the end off; you could also use a Ziploc bag) and fill with the batter. Pipe the batter into 5″ long and 3/4″ wide strips leaving about 1″ space in between the strips.

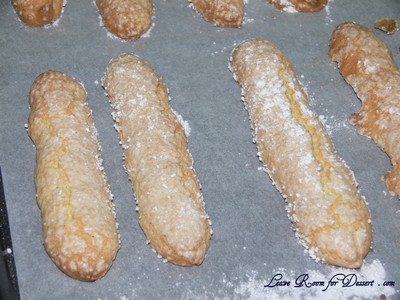
Sprinkle half the confectioner’s sugar over the ladyfingers and wait for 5 minutes. The sugar will pearl or look wet and glisten. Now sprinkle the remaining sugar. This helps to give the ladyfingers their characteristic crispness.

Tiramisu04

Hold the parchment paper in place with your thumb and lift one side of the baking sheet and gently tap it on the work surface to remove excess sprinkled sugar.
Bake the ladyfingers for 10 minutes, then rotate the sheets and bake for another 5 minutes or so until the puff up, turn lightly golden brown and are still soft.

Tiramisu06

Allow them to cool slightly on the sheets for about 5 minutes and then remove the ladyfingers from the baking sheet with a metal spatula while still hot, and cool on a rack.
Store them in an airtight container till required. They should keep for 2 to 3 weeks.

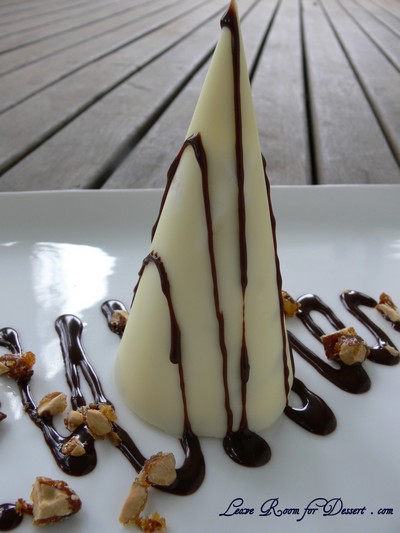
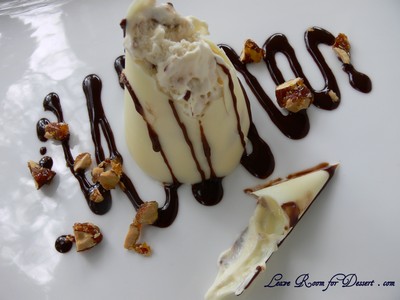
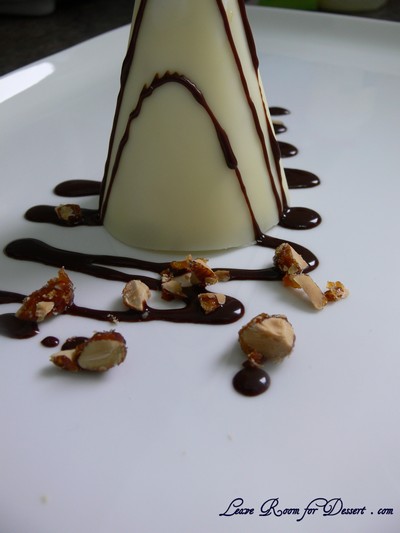
White Chocolate Cones with Nougat and Vienna Almond Semifreddo

Tuesday, February 23rd, 2010

SemifreddoViennaAlmond26

I am very excited to have come to the end of my first year of food blogging. What better way to celebrate, than by posting the recipe of the dessert in my header (at least the one at the moment – it may change in the future).

SemifreddoViennaAlmond29

I love the look of this dessert. It looks like something that could be served in a restaurant and tastes like that’s where it belongs. Many people have asked for this recipe, so it’s about time I posted it.

SemifreddoViennaAlmond21

This recipe took me two nights to prepare, although each step was quite easy and little work is required on the night of a dinner party – which is exactly how I like it, more time spent with guests the better. I made the Vienna almonds the first night, although these could easily be bought. The second night involved making the chocolate cones and assembling everything, with only the chocolate sauce made on serving night.

SemifreddoViennaAlmond30

This dessert tastes lovely. Like a soft vanilla ice cream with crunches of toffee Vienna almonds and hits of nougat. It works so well. I hope you enjoy it.

SemifreddoViennaAlmond16

White Chocolate Cones with Nougat and Vienna Almond Semifreddo

Recipe adapted from a magazine tear-out

Serves: 10-12

300-370g white chocolate
2 eggs
1/3 cup caster sugar
400ml thickened cream
1 teaspoon vanilla
150g soft almond nougat, chopped or ripped finely
150g Vienna almonds, chopped
Chocolate sauce for serving:
50ml cream or thickened cream
60g dark chocolate, in pieces

To make cones:
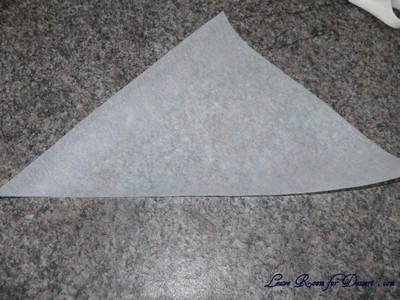
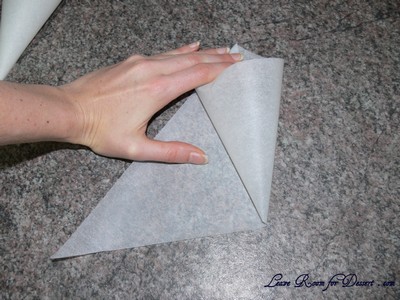
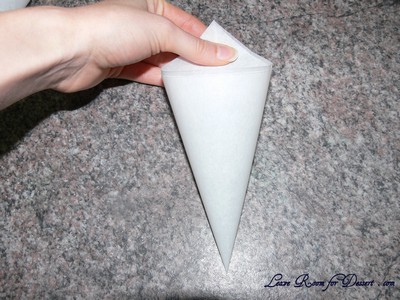
Cut five or six 25cm squares out of baking paper. Fold squares diagonally and cut to form 10-12 triangles. Place the triangle on the bench so the longest flat side is closest to you and the main point is facing away. Pull and twist the point on the right hand side up to join with the main point. Pull the left hand side point around the first twist to make the cone. Staple in place. Cut around on the bottom to make a smooth edge and ensure the cone stands upright. You may need some holders for your cones – either use glasses, if they will fit – or fold a piece of paper in half length ways and twist to form a cylinder, staple in place (it will look like a toilet roll holder).

SemifreddoViennaAlmond12

SemifreddoViennaAlmond13

SemifreddoViennaAlmond14

SemifreddoViennaAlmond15

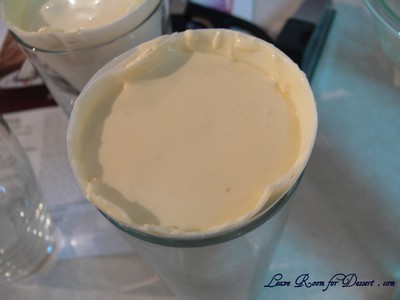
Melt the white chocolate in a bowl over simmering water. Use the back of a spoon to coat the inside of the cones with an even layer of chocolate. (If it is too hot, make a smaller cone out of paper or cardboard to hold the baking paper cone). Stand cones in a glass or made holder.

SemifreddoViennaAlmond03

Beat thickened cream in a medium bowl until softly whipped. Beat the eggs with the sugar and vanilla in a large bowl until lighter in colour and thickened. Fold the cream lightly into the egg mixture, half way through, add the nougat and around 100g Vienna almonds and finish folding through.

SemifreddoViennaAlmond07

SemifreddoViennaAlmond08

Scoop the mixture into each of the cones and place in the freezer for a few hours or overnight, until firm.

To serve:
Place the dark chocolate and cream in a bowl and heat in a microwave in 10sec 50% power bursts, stirring between each burst, until the chocolate has melted and combined with the cream. Place in a piping bag/squeeze bottle or make a piping bag by using a plastic zip lock bag or by making another cone out of baking paper and cutting off the end.

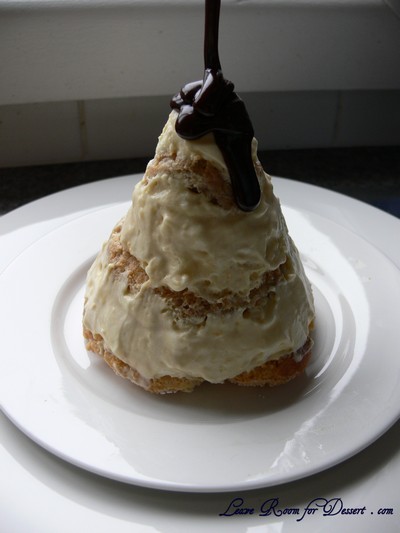
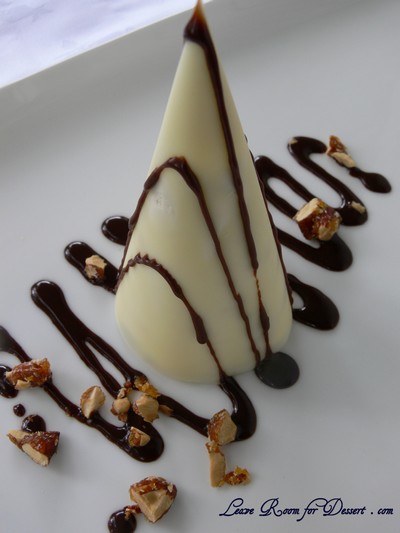
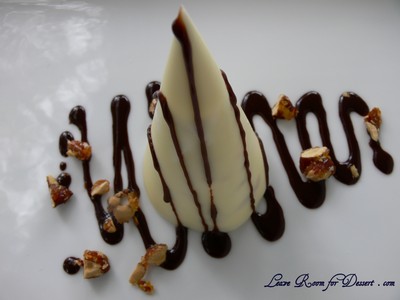
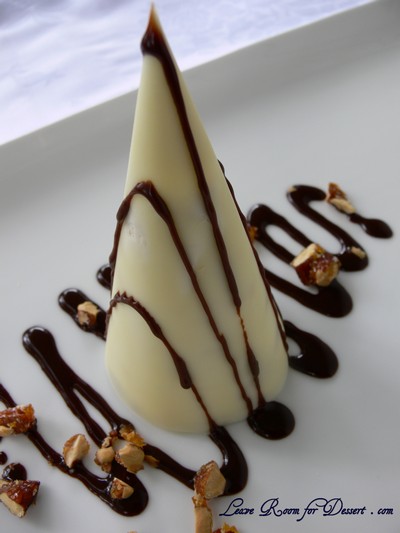
Remove baking paper from white chocolate cones and place on the plate. Drizzle with chocolate sauce and scatter the remaining Vienna almonds. Serve.

SemifreddoViennaAlmond27

Gluten-Free Graham Wafers and Nanaimo Bars – Daring Bakers Challenge January 2010

Wednesday, January 27th, 2010

GrahamWafers&NanaimoBars12

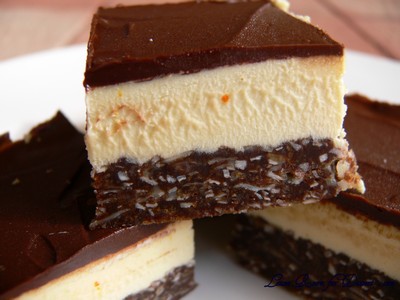
The January 2010 Daring Bakers’ challenge was hosted by Lauren of Celiac Teen. Lauren chose Gluten-Free Graham Wafers and Nanaimo Bars as the challenge for the month. The sources she based her recipe on are 101 Cookbooks and www.nanaimo.ca.

GrahamWafers&NanaimoBars13

I always get excited seeing the new Daring Bakers challenge. I think I start most of my posts with something along those lines…

GrahamWafers&NanaimoBars18

This was a different challenge for two reasons. It was gluten free and we were making a classic Canadian dessert – one which I had never heard of.

GrahamWafers&NanaimoBars23

I’ve always tried to convince myself to make more gluten free products, as I would like to have a few recipes that are suitable for any friends or family who may be celiac or have a gluten intolerance. This is why I was really looking forward to this recipe.

GrahamWafers&NanaimoBars16

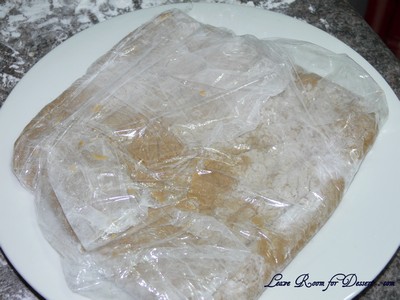
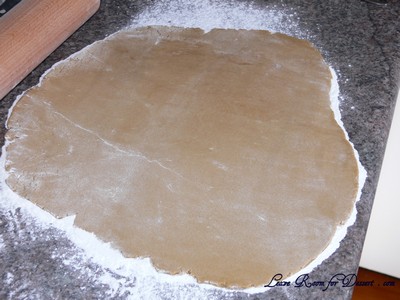
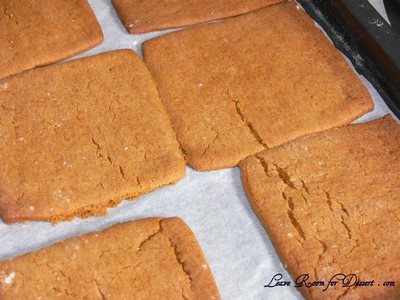
Starting with the Graham Wafers – I found the dough was quite sticky, and very difficult to even get into plastic and into the fridge (it probably didn’t help with our humidity and heat). It rolled out very nicely, although I had to work quickly as it started melting very quickly. The aroma from the oven was just lovely, a combination of honey, vanilla and brown sugar. All in all the wafers/biscuits were ok, I probably wouldn’t make them again, unless to make the nanaimo bars.

GrahamWafers&NanaimoBars15

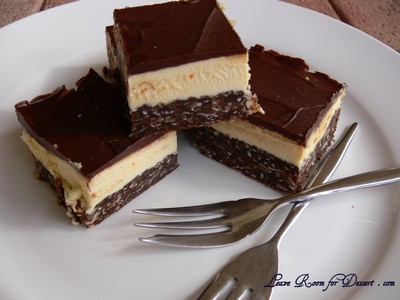
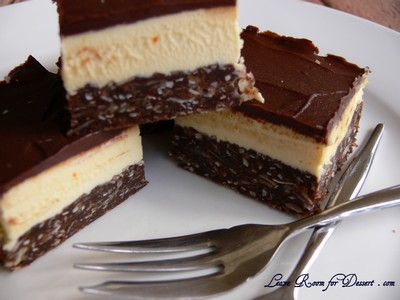
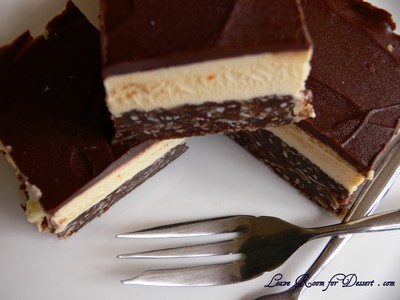
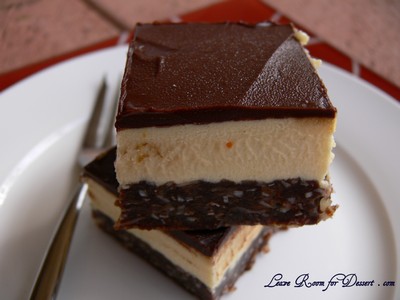
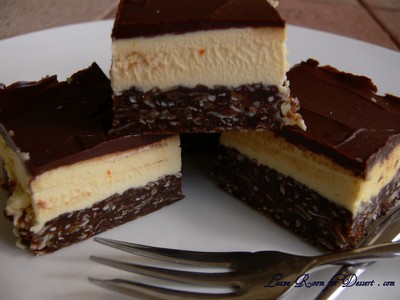
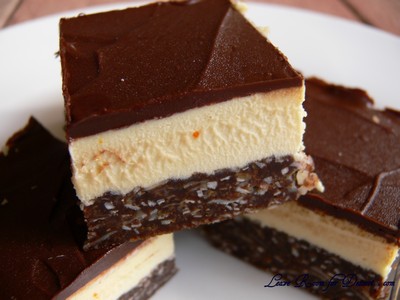
The Nanaimo bars are very nice and quite easy to make. I was expecting the middle layer to be a bit more custard-like, although the butter cream was very nice.

GrahamWafers&NanaimoBars17

Thanks again to Lauren for the great challenge. I’m glad I’ve made some more gluten free sweets and am looking forward to expanding my repertoire.

P.S. Those red/orange spots in the butter cream are from the custard powder.

Gluten-Free Graham Wafers

1 cup (138 g) (4.9 ounces) Sweet rice flour (also known as glutinous rice flour) (I found 138g was 1¼ – 1½ cups)
¾ cup (100 g) (3.5 ounces) Tapioca Starch/Flour (I found 100g was 1 cup)
½ cup (65 g) (2.3 ounces) Sorghum Flour (I used normal rice flour)
1 cup (200 g) (7.1 ounces) Dark Brown Sugar, Lightly packed
1 teaspoon (5 mL) Baking soda
¾ teaspoon (4 mL ) Kosher Salt
7 tablespoons (100 g) (3 ½ ounces) Unsalted Butter (Cut into 1-inch cubes and frozen)
1/3 cup (80 mL) Honey, Mild-flavoured such as clover.
5 tablespoons (75 mL) Whole Milk
2 tablespoons (30 mL) Pure Vanilla Extract

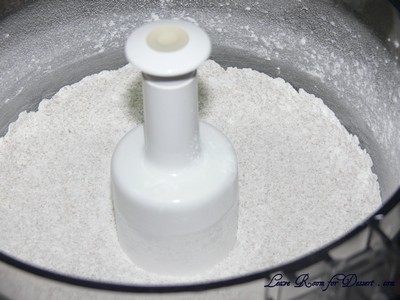
In the bowl of a food processor fitted with a steel blade, combine the flours, brown sugar, baking soda, and salt. Pulse on low to incorporate.

GrahamWafers&NanaimoBars25

Add the butter and pulse on and off, until the mixture is the consistency of a coarse meal. If making by hand, combine aforementioned dry ingredients with a whisk, then cut in butter until you have a coarse meal. No chunks of butter should be visible.

GrahamWafers&NanaimoBars26

In a small bowl or liquid measuring cup, whisk together the honey, milk and vanilla. Add to the flour mixture until the dough barely comes together. It will be very soft and sticky.

GrahamWafers&NanaimoBars27

Turn the dough onto a surface well-floured with sweet rice flour and pat the dough into a rectangle about 1 inch thick. Wrap in plastic and chill until firm, about 2 hours, or overnight.

GrahamWafers&NanaimoBars28

GrahamWafers&NanaimoBars29

GrahamWafers&NanaimoBars01

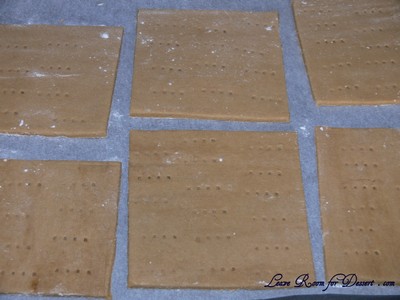
Divide the dough in half and return one half to the refrigerator. Sift an even layer of sweet rice flour onto the work surface and roll the dough into a long rectangle, about 1/8 inch thick. The dough will be quite sticky, so flour as necessary. Cut into 4 by 4 inch squares. Gather the scraps together and set aside. Place wafers on one or two parchment-lined baking sheets. Chill until firm, about 30 to 45 minutes. Repeat with the second batch of dough.

GrahamWafers&NanaimoBars02

GrahamWafers&NanaimoBars03

Adjust the rack to the upper and lower positions and preheat oven to 350 degrees Fahrenheit (180 degrees Celsius).

Gather the scraps together into a ball, chill until firm, and re-roll. Dust the surface with more sweet rice flour and roll out the dough to get a couple more wafers.

Prick the wafers with toothpick or fork, not all the way through, in two or more rows.

Bake for 25 minutes, until browned and slightly firm to the touch, rotating sheets halfway through to ensure even baking. Might take less, and the starting location of each sheet may determine its required time. The ones that started on the bottom browned faster.

GrahamWafers&NanaimoBars04

When cooled completely, place enough wafers in food processor to make 1¼ cups (300 mL/ 160g) of crumbs. Another way to do this is to place in a large ziplock bag, force all air out and smash with a rolling pin until wafers are crumbs.

Nanaimo Bars

For Nanaimo Bars — Bottom Layer
½ cup (115 g) (4 ounces) Unsalted Butter
¼ cup (50 g) (1.8 ounces) Granulated Sugar
5 tablespoons (75 mL) Unsweetened Cocoa
1 Large Egg, Beaten
1¼ cups (300 mL) (160 g) (5.6 ounces) Gluten Free Graham Wafer Crumbs (See recipe above)
½ cup (55 g) (1.9 ounces) Almonds (Any type, Finely chopped)
1 cup (130 g) (4.5 ounces) Coconut (Shredded, sweetened or unsweetened) (I found 1 cup weighed ~65g)
For Nanaimo Bars — Middle Layer
½ cup (115 g) (4 ounces) Unsalted Butter
2 tablespoons and 2 teaspoons (40 mL) Heavy Cream
2 tablespoons (30 mL) Vanilla Custard Powder (Such as Bird’s. Vanilla pudding mix may be substituted.)
2 cups (254 g) (8.9 ounces) Icing Sugar
For Nanaimo Bars — Top Layer
4 ounces (115 g) Semi-sweet chocolate
2 tablespoons (28 g) (1 ounce) Unsalted Butter

For bottom Layer: Melt unsalted butter, sugar and cocoa in top of a double boiler. Add egg and stir to cook and thicken. Remove from heat. Stir in crumbs, nuts and coconut. Press firmly into an ungreased 8 by 8 inch pan.

GrahamWafers&NanaimoBars05

GrahamWafers&NanaimoBars06

GrahamWafers&NanaimoBars07

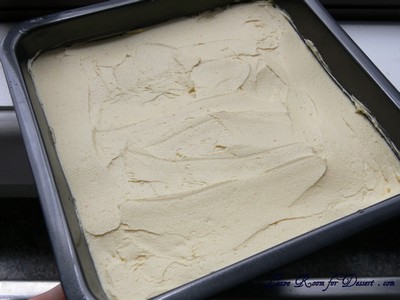
For Middle Layer: Cream butter, cream, custard powder, and icing sugar together well. Beat until light in colour. Spread over bottom layer.

GrahamWafers&NanaimoBars08

GrahamWafers&NanaimoBars10

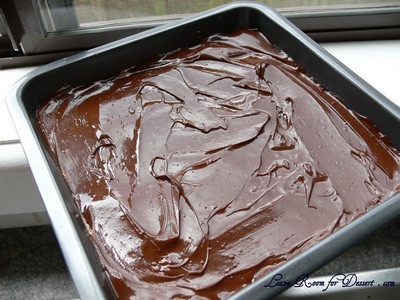
For Top Layer: Melt chocolate and unsalted butter over low heat. Cool. Once cool, pour over middle layer and chill.

GrahamWafers&NanaimoBars11

Additional Information:
These bars freeze very well, so don’t be afraid to pop some into the freezer.
The graham wafers may be kept in an airtight container for up to 2 weeks. Mine lasted about that long.
If making the graham crackers with wheat, replace the gluten-free flours (tapioca starch, sweet rice flour, and sorghum flour) with 2 ½ cups plus 2 tbsp of all-purpose wheat flour, or wheat pastry flour. Watch the wheat-based graham wafers very closely in the oven, as they bake faster than the gluten-free ones, sometimes only 12 minutes.
For the Nanaimo Bars, if making with wheat, replace the gluten-free graham wafer crumbs with equal parts wheat graham wafer crumbs!

GrahamWafers&NanaimoBars14

Lamingtons

Tuesday, January 26th, 2010

Lamingtons 11

Happy Australia Day!

Lamingtons 09

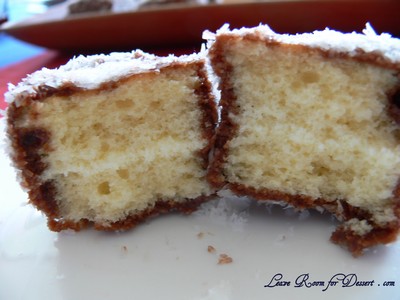
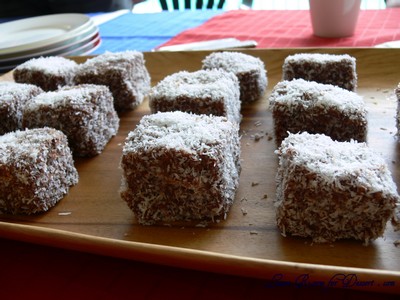
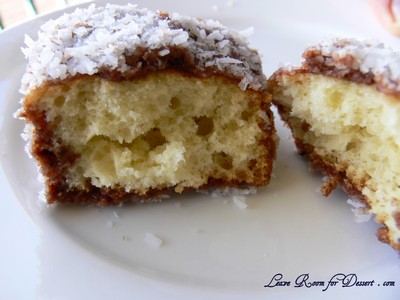
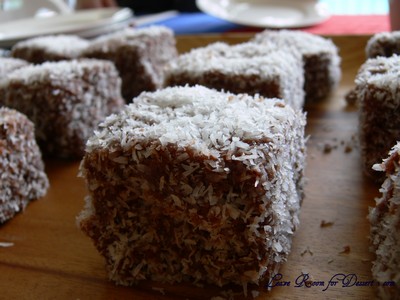
I thought I would celebrate by posting one of Australia’s favourite cakes – the Lamington. It is said to have originated in Queensland around the 1900’s, where Lord Lamington’s (the governor at the time) chef was given short notice to provide food for guests. He quickly dipped some old sponge in chocolate and coconut and the guests enjoyed it immensely.

Lamingtons 12

Lamingtons are a part of our history, present and future. Schools and other organisations often fund-raise by selling lamingtons in “lamington drives”.

Lamingtons 08

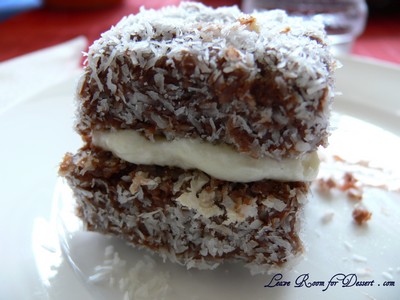
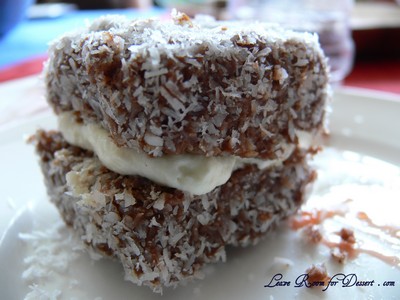
You can serve them plain or with a thin amount of jam and/or some lovely whipped cream in the middle of the sponge.

Time to go have our BBQ… (and I won’t be having shrimp or prawns on the BBQ – but I will be having lamb tonight).

Lamingtons 10

Lamingtons

(recipe adapted from the recipe that came with the Lamington tin I bought)

125g butter
2/3 cup sugar
2 eggs
2 cups self raising flour
½ teaspoon salt
¾ cup milk
½ teaspoon vanilla essence

Chocolate Icing
30g butter
½ cup boiled water
4 cups icing sugar or icing mixture
2/3 cup cocoa
½ teaspoon vanilla essence
3 cups desiccated coconut

Cream butter and sugar until light and fluffy. Add eggs, one at a time, beating well between each addition. Sift flour and salt. Add alternately with milk to mixture. Add vanilla essence. Blend well but do not over beat. Add a little more or less milk if necessary to form a soft dropping consistency. Spread evenly into a lightly greased lamington tray.

Lamingtons 16

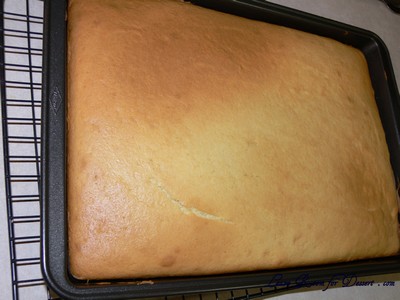
Bake in moderate oven 180˚C for 25-35 minutes or until cooked.
Turn out and cool on a cake rack. (You can use it straight away or leave it in an airtight container overnight).

Lamingtons 17

Cut into 32 squares.

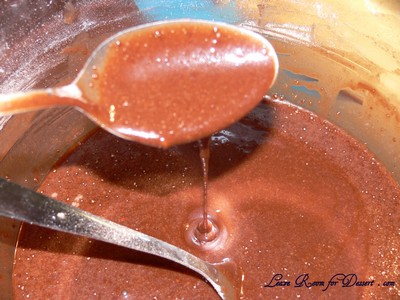
For chocolate icing – melt butter in ¼ cup boiling water. Sift icing sugar with cocoa. Add liquid, mixing well. Add vanilla essence. The icing must be thin so that squares of cake can be readily coated. Add sufficient boiling water to form this consistency.

Lamingtons 22

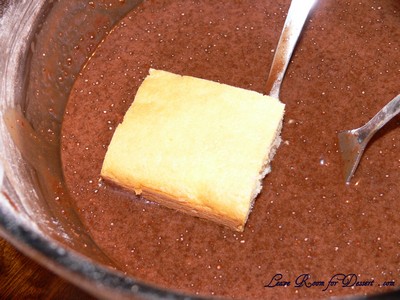
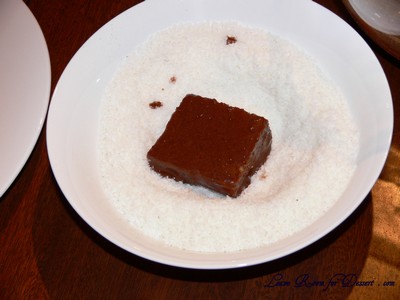
Dip and roll each square into the chocolate icing and let it soak for 15 sec or more and then roll in coconut. If you want to put strawberry jam and/or whipped cream in the cake, slice the sponge through the middle and spread over the cream. Dip carefully in the chocolate mix. Alternatively (if the sponge moves around too much), cut the sponge in half when already coated and then fill with cream.

Lamingtons 01

Lamingtons 23

Lamingtons 13

Chocolate Swirl Croquembouche

Tuesday, December 29th, 2009

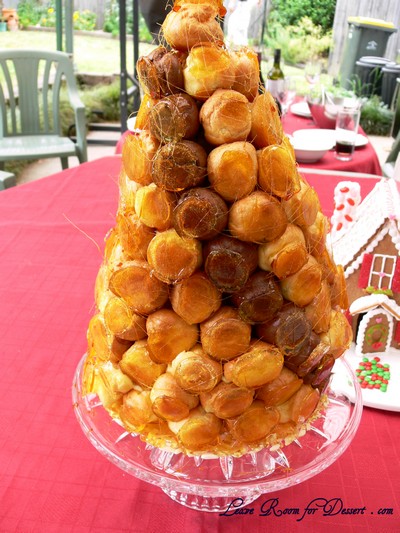
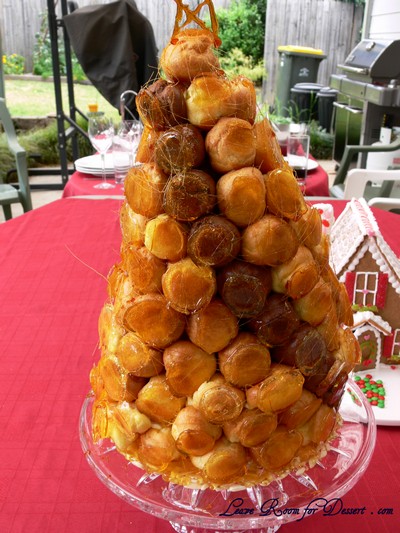
ChocSwirlCroquembouche13

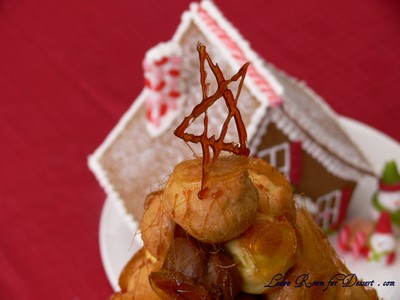
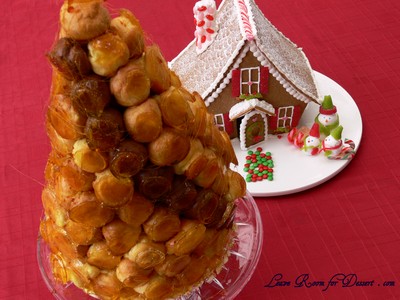
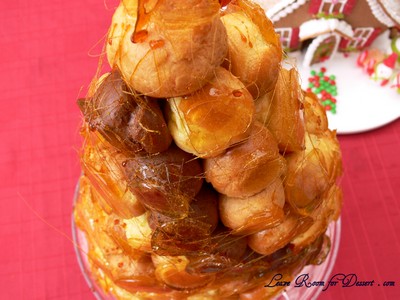
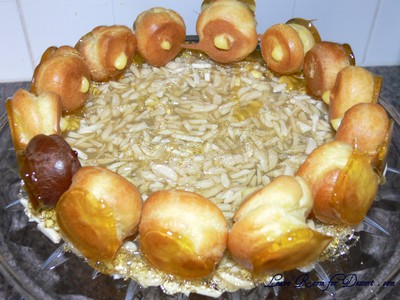
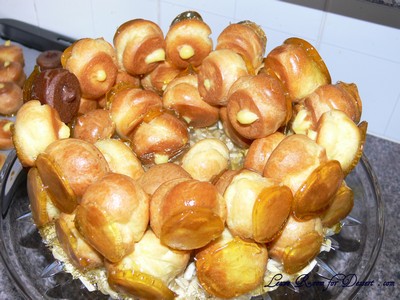
I started craving croquembouche again after the second last celebrity MasterChef. I was craving it so bad, that I didn’t think I could wait until Christmas (which is when I had planned to make my next croquembouche) to eat a custard or pastry cream filled profiterole with the lovely caramel or toffee crunch.

ChocSwirlCroquembouche15

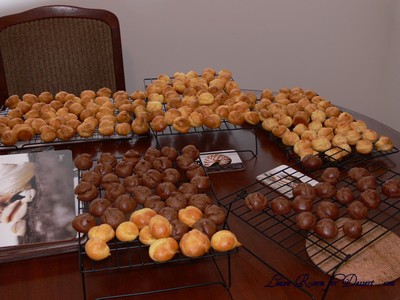
The chocolate delice challenge was taking up my time and weekends were being filled so fast with dinners, outings and a gingerbread house, I didn’t know if I would get any Christmas shopping done (I didn’t get much done, lucky I have a wonderful mum and sisters who did most of it, and whom I thanked with this lovely croquembouche along with the rest of Christmas lunch).

ChocSwirlCroquembouche20

For Christmas I decided to make Adriano Zumbo’s chocolate swirl croquembouche, as I was intrigued by the chocolate profiteroles, but I still wanted the original gorgeous profiteroles too.

ChocSwirlCroquembouche17

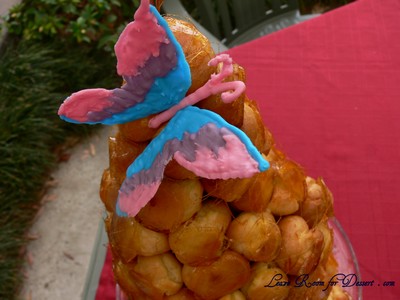
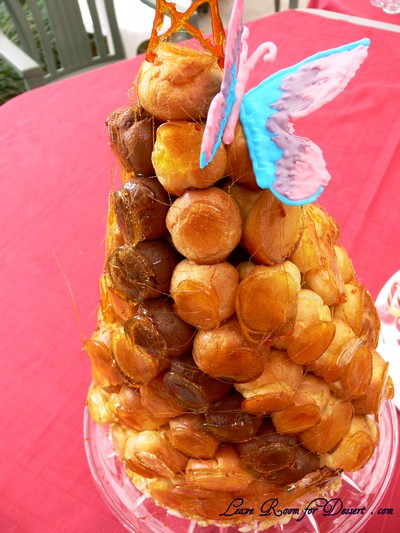
Others and myself looked around quite a bit to find isomalt and the white food white colouring, but were unable to find any in shops – a few places online look as though they sell it. So, instead I decided to make some royal icing butterflies to go on top (using the leftovers from my gingerbread house).

ChocSwirlCroquembouche22

After comparing these quantities to those from the first croquembouche, I decided to cook half the quantity of choux pastry (for the normal and chocolate ones) and a bit more than half the caramel (although I should have made the full quantity of caramel/toffee, as I was making the base and the extra was required for this). I think it’s better to have left over custard than profiterole cases and toffee.

ChocSwirlCroquembouche14

The half amount of choux pastry made almost the perfect number of profiteroles for the vanilla pastry cream. I ended up with a decent amount of chocolate pastry cream left over, but I’m not complaining – as both pastry creams are delicious.

ChocSwirlCroquembouche18

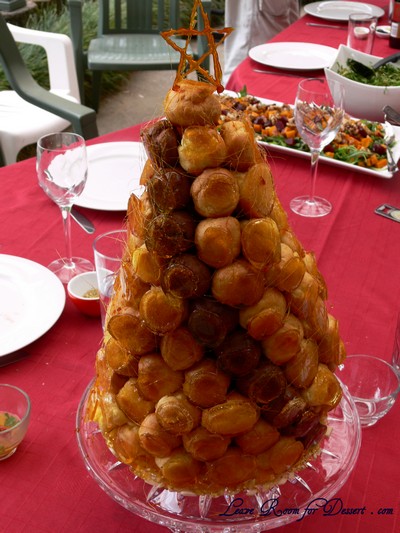
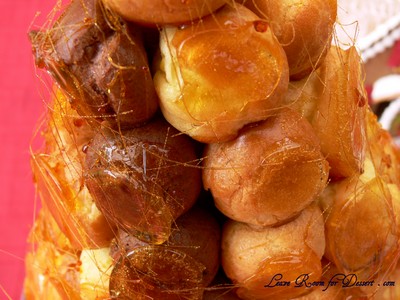
I ended up making quite a large filled croquembouche this time around, although probably wouldn’t recommend one quite as large, as mine only lasted long enough for the photos before crashing down. The next day all the caramel/toffee had dissolved into a large sticky puddle, even though the profiteroles were in an air tight container. We had a large amount of humidity on Christmas day.

ChocSwirlCroquembouche16

I’m really happy I tried the chocolate swirl croquembouche, although think I would stick to the normal one in future, and make the tower a bit smaller.

ChocSwirlCroquembouche21

Chocolate Swirl Croquembouche

Recipe slightly adapted from Adriano Zumbo’s recipe on Celebrity MasterChef 2009

Serves: 12 (I think it serves 20 or more)

Vanilla pastry cream
2 litres milk
500g egg yolks (from around 30 large or extra large eggs)
500g sugar
200g cornflour
200g butter
2 vanilla beans, split, seed scraped out

Chocolate pastry cream
750g of the vanilla pastry cream
375g cream
190g Cocoa Barry 72% Venezuela Chocolate (I used 100g 70% Lindt Chocolate + 90g dark cooking chocolate)

Choux pastry (this is half the quantity from the original recipe and made around 130 profiteroles)
212 ml water
265 ml milk
10g sugar
10g salt
200g butter
265 g plain flour
8 eggs

Chocolate choux pastry (this is half the quantity from the original recipe and made around 40 chocolate profiteroles)
80ml water
100ml milk
4g sugar
4g salt
75g butter
75g flour
25g Barry cocoa powder
3 eggs

Caramel
1kg sugar
300ml water
400g glucose
250g chopped almonds

Decorations (optional)
200g isomalt
20ml water
A few drops of food colouring
Selection of food colouring

1. To make the pastry cream: place milk and vanilla beans into a large saucepan. Heat gently over medium heat until milk almost boils. Remove from heat, discard vanilla beans and set aside. Beat egg yolks, sugar and cornflour with electric beaters until thick and pale. Gradually whisk in the warm milk and return mixture to the same pan. Stir over medium heat until the custard boils. Remove from heat and pour onto flat tray, spread out to cool rapidly. Cover the surface of the custard closely with cling film, to prevent a skin from forming. Use a candy thermometer to check temperature of custard. When mixture has reached 55ºC, stir through butter and refrigerate, still covered, until completely cooled.

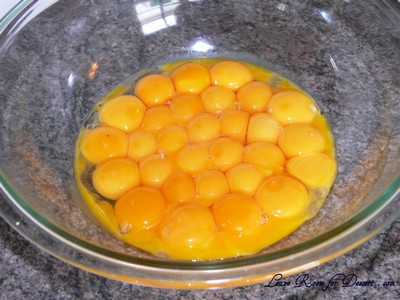
30 egg yolks - the most I've ever used

30 egg yolks - the most I've ever used

ChocSwirlCroquembouche26

The custard mixture was too much for the bowl I had. So I whisked in 1 litre of the milk mixture into the bowl with the egg yolks and sugar, before straining it all back into the remaining 1 litre of milk in the saucepan.

ChocSwirlCroquembouche27

2. To make the chocolate pastry cream: place 750g of cooled vanilla pastry cream, chocolate and cream in a saucepan and reboil. Pour onto a tray, cover with cling film and refrigerate until completely cooled.

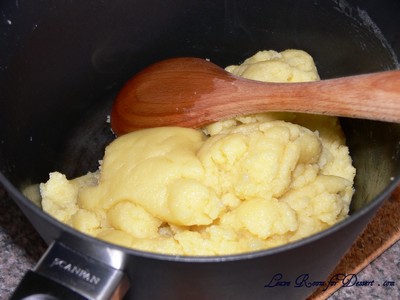
3. To make the choux pastry: preheat the oven to 210ºC convection. Lightly grease 2-3 large oven trays and set aside. Combine the water, milk, sugar, salt and butter in a large heavy-based saucepan and bring to the boil. Remove from the heat and using a wooden spoon quickly beat in the flour. Return saucepan to the heat and continue beating until the mixture comes together and pulls away from the sides of the pan. Cook stirring over low heat for a further 1-2 minutes to cook out the flour. Remove from heat and allow to cool slightly.

ChocSwirlCroquembouche28

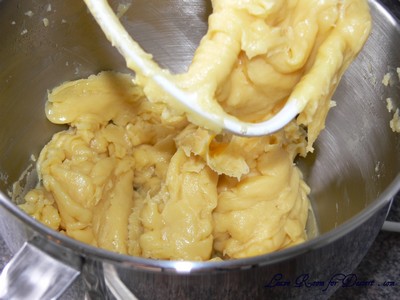
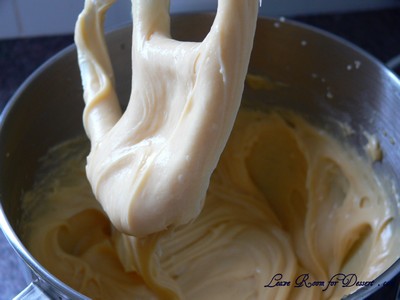
4. Using hand beaters, beat the mixture to release any more heat. (I used my KitchenAid to get rid of a lot of the heat before adding the eggs). Gradually add the eggs, one at a time. Beat well between each addition until all the eggs have been added and the mixture is thick and glossy (a spoon should be able to stand upright in it). Beat for several more minutes, or until thickened.

Half way through the eggs

Half way through the eggs

ChocSwirlCroquembouche32

5. To make the chocolate choux pastry: repeat step 3 & 4 to make chocolate choux pastry adding the cocoa powder with the flour.

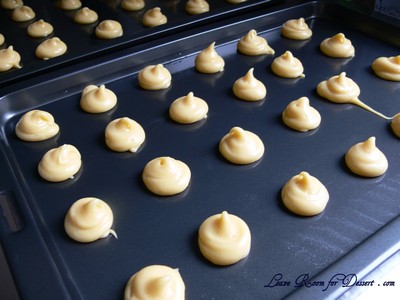
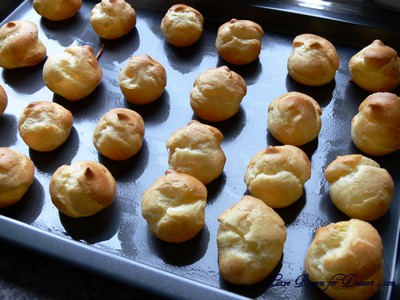
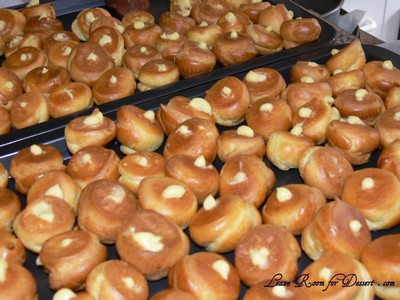
6. Spoon the mixtures, in batches, into piping bags fitted with a 1.25-1.5cm nozzle. Cover remaining pastry with cling film. Pipe mixture onto trays about 2.5cm x 2cm high leaving room for spreading. Bake for 25-30 minutes, in batches, or until firm and hollow when tapped. Transfer puffs to wire racks.

ChocSwirlCroquembouche34

ChocSwirlCroquembouche01

ChocSwirlCroquembouche07

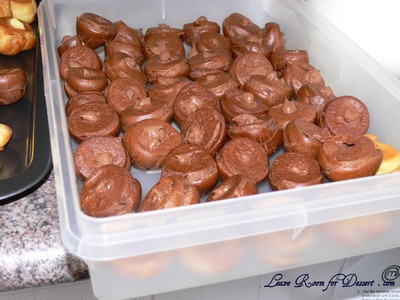
7. Spoon custards into separate piping bags with a nozzle less than 1cm. Poke a small hole in the base of each puff and fill choux pastry with vanilla pastry cream and chocolate choux with chocolate pastry cream. Set aside.

ChocSwirlCroquembouche08

ChocSwirlCroquembouche10

8. For the caramel: grease a cake ring with cooking spray. Combine water and sugar in a saucepan until it boils. Add glucose, and cook until syrup turns a caramel colour. Remove from the heat and dip the base of the pan in a bowl of cold water to cool slightly. Pour just enough caramel to cover almonds and mix well; pour almond caramel into ring to form a 5mm base. This is the base for the croquembouche.

9. Dip the puff bases (I dipped the tops of the profiteroles) in enough toffee to coat and place upside down on a tray lined with silicon paper or silpat mat. (I used baking paper, which worked reasonable well).

10. Combine isomalt and water in a medium saucepan and bring to the boil over high heat. Using a candy thermometer, bring mixture to 160ºC. Remove from heat and add white food colouring. Mix well; mixture will turn completely white. Slowly add drop by drop of colours and swirl pan to mix slightly. Pour into silpat moulds, reserving 1-2 tablespoons of mixture. Stand butterflies for 5 minutes or until hardened.

ChocSwirlCroquembouche05

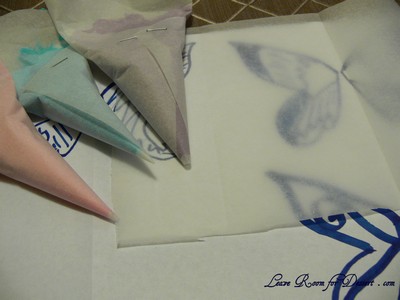
I improvised and made royal icing butterflies, by piping different coloured royal icing onto baking paper – be careful – they are fragile (two of my three fell apart.

ChocSwirlCroquembouche06

11. To assemble: oil the inside of the croquembouche cone. Dip the sides of the puff balls in the toffee one at a time and place around the inside of the cone in a single row. Place one chocolate ball in each row, to the bottom right of previous chocolate ball. Continue adding rows of vanilla balls and single chocolate balls until the cone is filled and the chocolate balls forms 2 spirals pattern. Place a small amount of caramel on the last balls inside the cone. Place base inside the cone, gently invert cone and slide off the metal cone. Using reserved isomalt mixture, dip butterflies into mixture and fix to top of croquembouche.

Note: I built my croquembouche from scratch, although it was too tall to stand by itself. I may have needed to use more toffee to hold it together. I would make a smaller one in the future.

ChocSwirlCroquembouche11

ChocSwirlCroquembouche12

ChocSwirlCroquembouche14

Chocolate Delice

Wednesday, December 9th, 2009

ChocolateDelice45

I was contemplating making the chocolate swirl croquembouche on the second last episode of Celebrity MasterChef, although that will have to wait until the Christmas holiday. I instead decided to make Eamon Sullivan’s Chocolate Delice, which scored the highest, 30/30 from the judges.

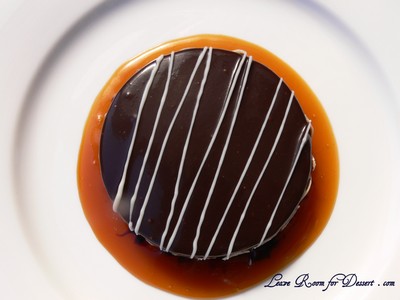
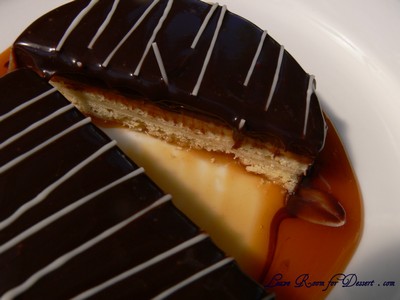
It sounded fantastic, like an upmarket Mars bar. Biscuit, crème brulee, chocolate cream, chocolate ganache and salted caramel sauce – it does sound good, doesn’t it?

ChocolateDelice31

I also thought I could make it over two days and this would make it a lot easier. I decided to follow the recipe exactly (even though it doesn’t state the strength of the gelatine leaf – I’ve been wrong before just assuming Chef’s mean gold strength).

The biscuit came first and was a lovely consistency, it fell apart a little, but was lovely and silky. It was tasty once cooked too – like a cross between shortcrust pastry and shortbread.

ChocolateDelice48

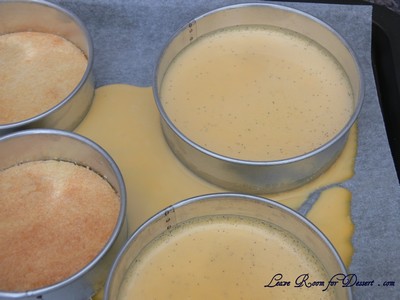
I got to the end part of the crème brulee section and thought to myself that the recipe sounded very strange. The crème brulee mix wasn’t a thick custard which would set, it was a thin custard which I thought could either be made into an ice cream by freezing or a crème brulee by baking in a water bath – which is the way I usually see it made. This recipe didn’t state anything about baking the crème brulee. Just pour it on top of the biscuit and refrigerate to set. Now, I decided to only test a few and leave the remainder of the mix in a jug in the fridge to make into proper crème brulee if it didn’t set.

Surprise, surprise, it didn’t set. My two biscuits in the cookie cutters were not tight enough and almost all the crème brulee mix drained out of them. My made-up mould consisting of a cut up overhead projector sheet, held the mix in on top of the biscuit, but it was too runny and would have run everywhere if I had undone the plastic.

ChocolateDelice66

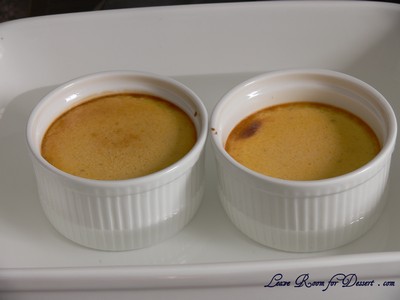
I decided to place all my remaining mix into 2 ramekins and placed the ramekins into a small lasagne dish with enough water in it to come half way up the ramekins and baked them for 20-30 minutes at around 150C. Once cooked (just set), I removed the ramekins from the oven and cooled them in the fridge for a few hours. Place one heaped teaspoon of caster sugar on top of each and place under a very hot grill until the sugar caramelises (or use a blowtorch if you have one). Serve immediately.
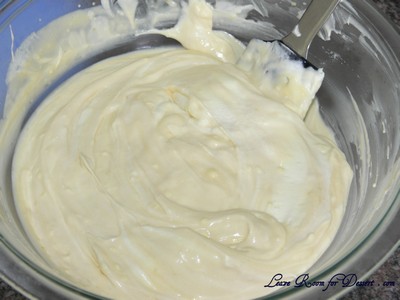
ChocolateDelice65

ChocolateDelice02

After cooking my crème brulee’s, I decided to watch the episode of MasterChef again (as I was a little distracted while watching it the first time). I watched carefully and saw Eamon placing what looked exactly like the crème brulee mix into a lined tray and into the oven. He even mentioned his biscuit was cooling and his crème brulee was in the oven – but no mention of this in the recipe 🙁

I thought about stopping here and not continuing. But how could I? I was still concerned about the gelatine leaf, but hopefully it would be alright…

ChocolateDelice49

Ok – so I made it again!!

This time things went ok. I still had a few problems, but the overall result was gorgeous. I was concerned it would be too rich, although the combination of all components worked wonderfully together.

I made the biscuit base and crème brulee the night before.

The biscuit base worked well (I rolled it out to fit a normal baking tray). It does crumble a bit while working with it. I cut 10cm diameter circles (6 in total) – although they could have easily been smaller, as the dessert was a little difficult for some to finish.

I cooked the crème brulee in a 23cm x 34 cm (2-3 cm high) baking paper lined tray for 25-30 minutes at 150C. This was then cooled overnight.

I made the chocolate cream (although didn’t use it all) using 2.5 titanium strength gelatine leaves (total 10g) (one titanium leaf is supposed to set 250ml liquid).

This was then cooled for 30minutes or more while I placed the crème brulee on the biscuit base. Firstly I scraped off the top layer of crème brulee, then cut it using a cookie cutter and carefully placed it on the biscuit base (most fell apart and I tried to spread it around evenly).

ChocolateDelice09

ChocolateDelice11

I used cookie cutters and plastic overhead projector films/sheets to hold in the crème brulee and cream, the cookie cutters worked better, although the films worked well enough.

The cream was poured over the crème brulee and left to set in the fridge (for an hour or so).

ChocolateDelice14

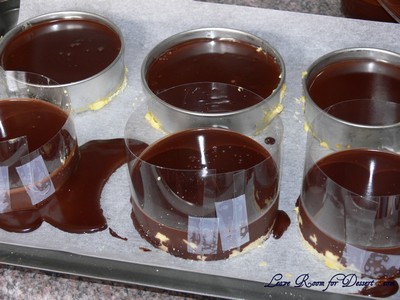
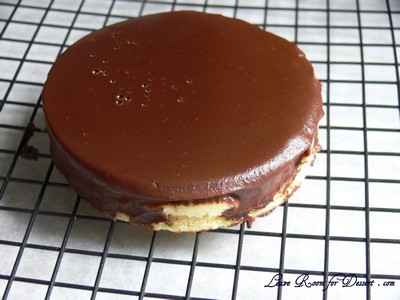
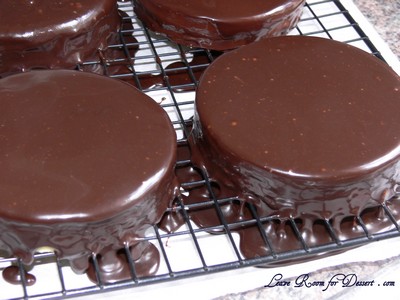
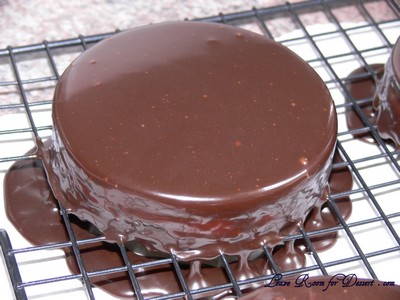
Prepare the glaze (I used half the quantity, which was just enough to cover all 6 delices). Let it cool and once the cream is set, remove cookie cutter (Eamon used a blow torch, although I don’t have one yet, so I carefully pushed the cookie base up). Pour the glaze on top and cool in the fridge.

ChocolateDelice15

ChocolateDelice19

Roast the almonds (I forgot to do this), then place them around the set delice.

Melt the white chocolate (I used 100g, but you could use less). Drizzle over the top and cool.

ChocolateDelice32

I had a little bit of a problem with the sugar in the caramel. I tried to melt it over low or medium heat, but it didn’t dissolve. I continued to cook it and the water evaporated and the sugar became quite dry. Although after continuing to cook it on medium/high heat, eventually it started to caramelise (without dissolving first). Take it off the heat and stir in the cream, a bit at a time if need be (be careful as this bubbles up a lot), then whisk in the remaining cream and butter. Cool a bit before serving.

ChocolateDelice51

Chocolate Delice

Recipe from Eamon Sullivan on Celebrity MasterChef 2009
For my tips see above and some are also in the recipe below in italics

Biscuit Base
250g plain flour
150g unsalted butter
100g caster sugar
Pinch salt
1 egg

Crème brulee
375g thickened cream
135mls milk
2 vanilla beans, scraped
7 egg yolks
1 whole egg
60g caster sugar

Chocolate cream
190g thickened cream
190g boiling water
60g cocoa powder
150g white chocolate
125g dark chocolate
15g gelatine leaf (I used 2.5 titanium strength gelatine leaves ~10g total)

Chocolate glaze (I made half this quantity)
340g dark chocolate
230mls thickened cream
165g glucose syrup
30mls water
¼ cup flaked almonds
200g white chocolate

Salted caramel
250g caster sugar
50mls water
150mls thickened cream
150g unsalted butter
Sea salt flakes

Preheat the oven to180C.

For the biscuit base, place the flour, butter, sugar and salt in a food processor and process to a breadcrumb consistency. Add the egg and process again to combine. Tip out onto a clean flat surface and roll into a smooth dough, wrap in cling film and set aside to rest for 10 minutes. Once rested use a rolling pin to roll into a 1cm thick rectangle shape; place onto a baking tray lined with baking paper and bake in the oven for 15-20 minutes. Allow to cool then using a circular cutter cut out biscuit bases, set aside.

ChocolateDelice58

ChocolateDelice59

ChocolateDelice62

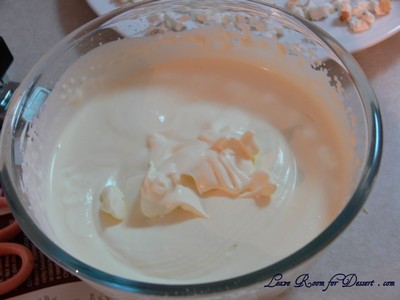
For the crème brulee, combine the cream, milk and vanilla beans in a saucepan and place over a medium heat, bring to the boil then remove from heat. Strain into a clean saucepan. Place the egg yolks, whole egg and sugar into a bowl and using an electric hand beater whisk until thick and pale, pour half the heated milk mixture into the egg mixture and whisk continuously. Pour the mixture into the saucepan of remaining milk and place over a low heat, cook for 3-5 minutes stirring continuously. Pour into a jug and cool slightly. Place the biscuit bases on a baking tray lined with baking paper, place a ring mould onto the bases and pour the crème brulee into the moulds(I cooked mine for 25-30 minutes at 150C – see tips above), place in the refrigerator until set.
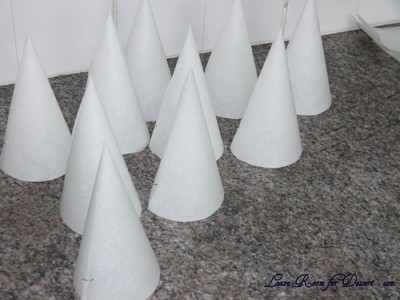
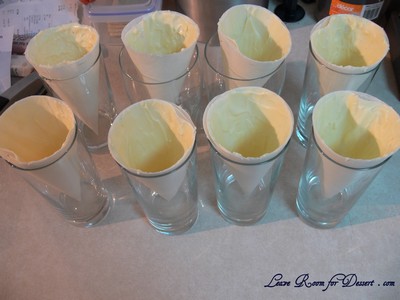
ChocolateDelice60

ChocolateDelice61

ChocolateDelice07

ChocolateDelice08

ChocolateDelice09

ChocolateDelice13

For the chocolate cream, pour the cream into a saucepan and place over a medium heat, bring to the boil, whisk the cocoa in the boiling water and add to the cream, continue to whisk, add the white chocolate and stir until melted, add the dark chocolate and continue to stir until chocolate has melted, bring the mixture to the boil then remove from heat. Place the gelatine sheet in a small bowl of cold water to soak for a few minutes, using hands squeeze out all moisture, add to the warm chocolate mixture and whisk to combine.

ChocolateDelice14

For the chocolate glaze, pour the cream into a saucepan and place over a medium heat, bring to the boil, reduce heat and add the chocolate, glucose syrup and water, whisk continuously until chocolate has melted and a smooth sauce is created.

Place the almonds on a baking tray and place in the oven until lightly golden.

Bring a saucepan of water to the boil, then reduce to a simmer. Place the white chocolate in a bowl, place the bowl over the water and melt the chocolate, spoon the melted chocolate into a piping bag.

For the salted caramel, place the sugar and water in a saucepan and place over a medium heat, stir until the sugar has melted then allow to simmer until caramel has formed. Whisk in the cream then continue to whisk in the butter, whisk to a thick glossy sauce.

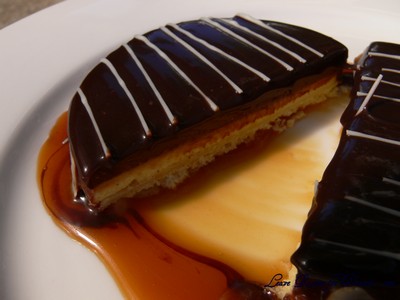
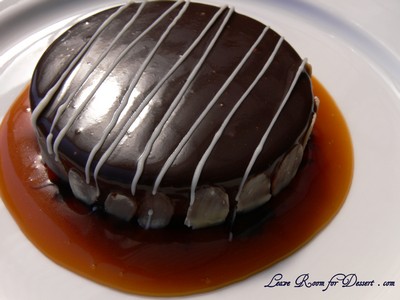
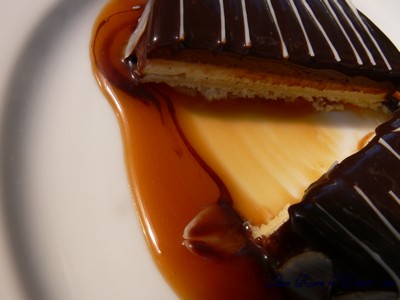
To prepare the delice, pour the chocolate cream over the set brulee and allow to set. Remove the moulds and pour over the chocolate glaze. Allow glaze to set. Place toasted almonds around the edges of each delice. Drizzle the white chocolate in stripes over the delice.

ChocolateDelice20

To serve, spoon caramel sauce onto a serving plate and sprinkle with a small pinch of sea salt, top with the delice to serve.

ChocolateDelice47

Toblerone Cocktail

Thursday, December 3rd, 2009

TobleroneCocktail09

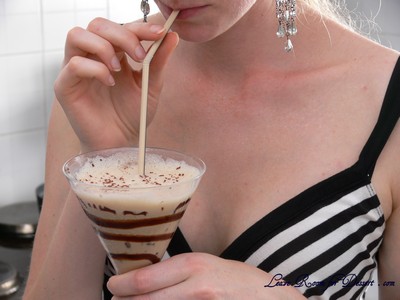
I enjoy cocktails that don’t taste like too much alcohol. Most people would say I would therefore like almost all cocktails, although that isn’t the case. I like a few – and this is my favourite!!

TobleroneCocktail04

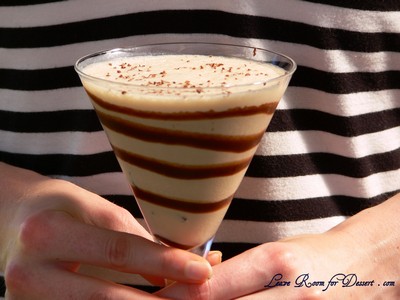
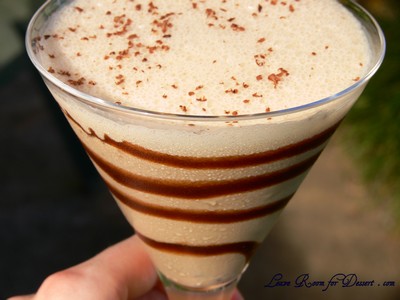
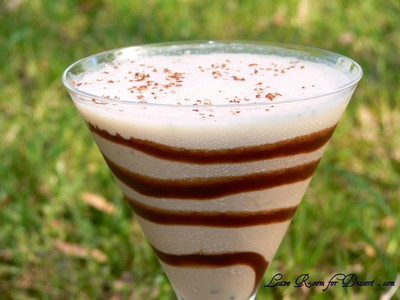
It could almost be a dessert in itself, but I do enjoy it at any time and with (almost) any meal – it tastes just like a chocolate milkshake – only alcoholic 😛

TobleroneCocktail02

Don’t get me wrong, I don’t drink it all the time. But once in a while, it’s a nice treat and will be lovely in our hot weather.

TobleroneCocktail14

Toblerone Cocktail

Recipe by me – Anita @ Leave Room for Dessert

Serves: 1 large cocktail or 2 in martini glasses

½ shot (15ml) Kahlua
½ shot (15ml) Baileys
½ shot (15ml) Frangelico
½ shot (15ml) dark Crème de Caco (if you don’t have this, either omit it or add another 1/2 shot of Baileys)
½ cup (125 ml) milk
2-3 scoops ice cream
Chocolate sauce
Handful ice cubes (4 large ice cubes)

Place all ingredients in a blender and blend until smooth.

Cannoli – Daring Bakers Challenge November 2009

Friday, November 27th, 2009

CannoliDaringBakers09

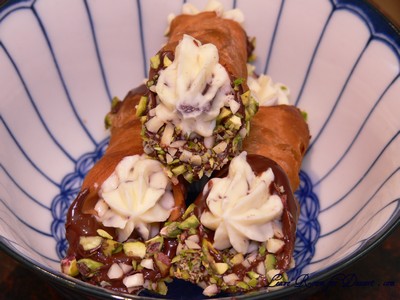
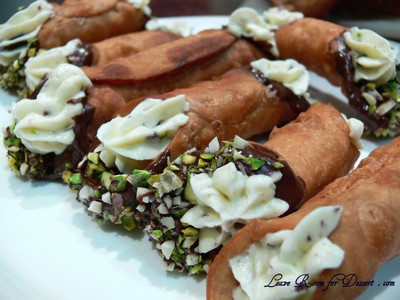
The November 2009 Daring Bakers Challenge was chosen and hosted by Lisa Michele of Parsley, Sage, Desserts and Line Drives. She chose the Italian Pastry, Cannolo (Cannoli is plural), using the cookbooks Lidia’s Italian-American Kitchen by Lidia Matticchio Bastianich and The Sopranos Family Cookbook by Allen Rucker; recipes by Michelle Scicolone, as ingredient/direction guides. She added her own modifications/changes, so the recipe is not 100% verbatim from either book.

CannoliDaringBakers14

Yippee. I had plans to make some cannoli so long ago when I hosted my first cooking class with my family. Unfortunately I didn’t have any metal cannoli tubes/forms, plus – it was probably a bit difficult to make cannoli from scratch plus dinner on a work night.

CannoliDaringBakers08

All I know is I was excited to finally be making cannoli from scratch, even though I had never eaten a bought cannoli before.

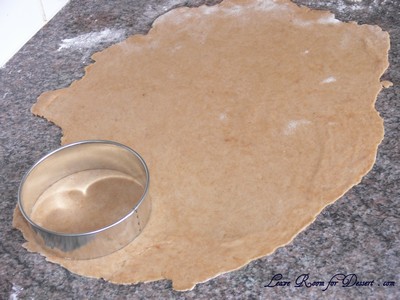
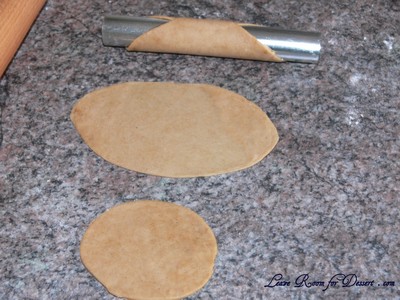
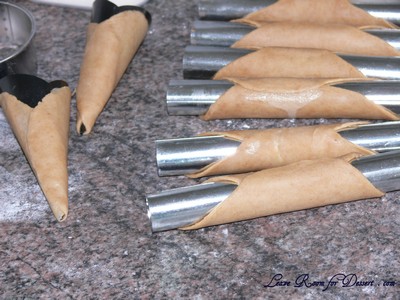
I found the dough a bit difficult to roll out, as it kept springing back. Even when it had been rolled out thinly, cut in a circle, rolled into an oval and wrapped around the cannoli tube, it still continued to shrink and resulted in a few quite small/thickish cannoli tubes. This didn’t change how they fried up, they were still great.

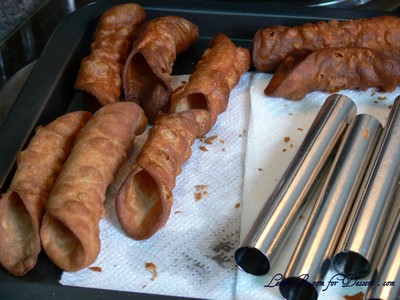
I also found they cooked very quickly – 30sec or less at 170-180C and they were perfectly cooked.

CannoliDaringBakers10

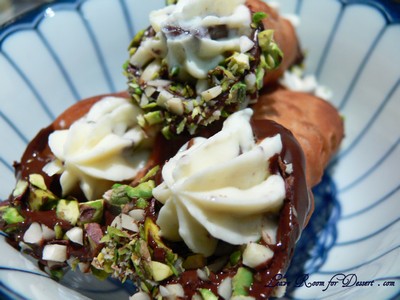
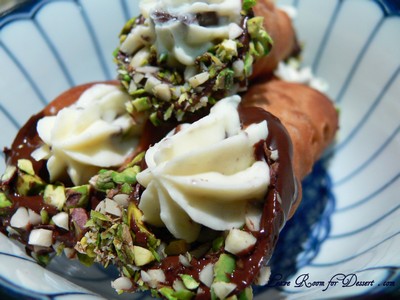
Overall, I was quite happy with the cannoli tubes. They went extremely well with the sweet ricotta, pistachio and chocolate filling and lasted very well (not filled) in a sealed container for a few days.

I don’t think it was quite up to the standard of the bought cannoli I tried a day after making these (for a friend’s birthday morning tea). But they were still fantastic. Would I make them again? I might look for a recipe that isn’t as hard to roll out or perhaps use the pasta machine to make it quite thin. I’d also only do it when I’m not in a rush (which I was this time when I was frying the shells, and it seemed to take ages).

CannoliDaringBakers16

Lidisano’s Cannoli

Makes 22-24 4-inch cannoli
Prep time:
Dough – 2 hours and 10-20 minutes, including resting time, and depending on whether you do it by hand or machine.
Filling – 5-10 minutes plus chilling time (about 2 hours or more)
Frying – 1-2 minutes per cannoli
Assemble – 20–30 minutes

CANNOLI SHELLS

2 cups (250 grams/16 ounces) all-purpose flour
2 tablespoons(28 grams/1 ounce) sugar
1 teaspoon (5 grams/0.06 ounces) unsweetened baking cocoa powder
1/2 teaspoon (1.15 grams/0.04 ounces) ground cinnamon
1/2 teaspoon (approx. 3 grams/0.11 ounces) salt
3 tablespoons (42 grams/1.5 ounces) vegetable or olive oil
1 teaspoon (5 grams/0.18 ounces) white wine vinegar
Approximately 1/2 cup (approx. 59 grams/approx. 4 fluid ounces/approx. 125 ml) sweet Marsala or any white or red wine you have on hand
1 large egg, separated (you will need the egg white but not the yolk)
Vegetable or any neutral oil for frying – about 2 quarts (8 cups/approx. 2 litres)
1/2 cup (approx. 62 grams/2 ounces) toasted, chopped pistachio nuts, mini chocolate chips/grated chocolate and/or candied or plain zests, fruits etc.. for garnish
Confectioners’ sugar

Note – If you want a chocolate cannoli dough, substitute a few tablespoons of the flour (about 25%) with a few tablespoons of dark, unsweetened cocoa powder (Dutch process) and a little more wine until you have a workable dough (Thanks to Audax).

CANNOLI FILLING
2 lbs (approx. 3.5 cups/approx. 1 kg/32 ounces) ricotta cheese, drained
1 2/3 cups cup (160 grams/6 ounces) confectioner’s sugar, (more or less, depending on how sweet you want it), sifted
1/2 teaspoon (1.15 grams/0.04 ounces) ground cinnamon
1 teaspoon (4 grams/0.15 ounces) pure vanilla extract or the beans from one vanilla bean
3 tablespoons (approx. 28 grams/approx. 1 ounce) finely chopped good quality chocolate of your choice
2 tablespoons (12 grams/0.42 ounces) of finely chopped, candied orange peel, or the grated zest of one small to medium orange (I added 2 tablespoons chopped slivered almonds)
3 tablespoons (23 grams/0.81 ounce) toasted, finely chopped pistachios

Note – If you want chocolate ricotta filling, add a few tablespoons of dark, unsweetened cocoa powder to the above recipe, and thin it out with a few drops of warm water if too thick to pipe.

DIRECTIONS FOR SHELLS:
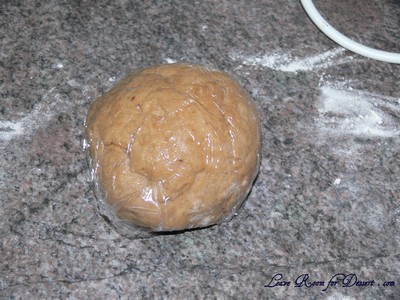
In the bowl of an electric stand mixer or food processor, combine the flour, sugar, cocoa, cinnamon, and salt. Stir in the oil, vinegar, and enough of the wine to make a soft dough. Turn the dough out onto a lightly floured surface and knead until smooth and well blended, about 2 minutes. Shape the dough into a ball. Cover with plastic wrap and let rest in the fridge from 2 hours to overnight.

CannoliDaringBakers18

Cut the dough into two pieces. Keep the remaining dough covered while you work. Lightly flour a large cutting or pastry board and roll the dough until super thin, about 1/16 to 1/8” thick (An area of about 13 inches by 18 inches should give you that). Cut out 3 to 5-inch circles (3-inch – small/medium; 4-inch – medium/large; 5-inch;- large. Your choice). Roll the cut out circle into an oval, rolling it larger and thinner if it’s shrunk a little.

CannoliDaringBakers01

CannoliDaringBakers02

Oil the outside of the cannoli tubes (You only have to do this once, as the oil from the deep fry will keep them well, uhh, oiled..lol). Roll a dough oval from the long side (If square, position like a diamond, and place tube/form on the corner closest to you, then roll) around each tube/form and dab a little egg white on the dough where the edges overlap. (Avoid getting egg white on the tube, or the pastry will stick to it.) Press well to seal. Set aside to let the egg white seal dry a little.

CannoliDaringBakers03

In a deep heavy saucepan, pour enough oil to reach a depth of 3 inches, or if using an electric deep-fryer, follow the manufacturer’s directions. Heat the oil to 375°F (190 °C) on a deep fry thermometer, or until a small piece of the dough or bread cube placed in the oil sizzles and browns in 1 minute. Have ready a tray or sheet pan lined with paper towels or paper bags.

Carefully lower a few of the cannoli tubes into the hot oil. Do not crowd the pan. Fry the shells until golden, about 2 minutes (mine took less than 30sec @ 170-180 °C), turning them so that they brown evenly.
Lift a cannoli tube with a wire skimmer or large slotted spoon, out of the oil. Using tongs, grasp the cannoli tube at one end. Very carefully remove the cannoli tube with the open sides straight up and down so that the oil flows back into the pan. Place the tube on paper towels or bags to drain. Repeat with the remaining tubes. While they are still hot, grasp the tubes with a potholder and pull the cannoli shells off the tubes with a pair of tongs, or with your hand protected by an oven mitt or towel. Let the shells cool completely on the paper towels. Place shells on cooling rack until ready to fill.
CannoliDaringBakers04

Repeat making and frying the shells with the remaining dough. If you are reusing the cannoli tubes, let them cool before wrapping them in the dough.

Pasta Machine method:
Divide the dough into 4 equal pieces. Starting at the middle setting, run one of the pieces of dough through the rollers of a pasta machine. Lightly dust the dough with flour as needed to keep it from sticking. Pass the dough through the machine repeatedly, until you reach the highest or second highest setting. The dough should be about 4 inches wide and thin enough to see your hand through

Continue rolling out the remaining dough. If you do not have enough cannoli tubes for all of the dough, lay the pieces of dough on sheets of plastic wrap and keep them covered until you are ready to use them.

Roll, cut out and fry the cannoli shells as according to the directions above.

DIRECTIONS FOR FILLING:
Line a strainer with cheesecloth. Place the ricotta in the strainer over a bowl, and cover with plastic wrap and a towel. Weight it down with a heavy can, and let the ricotta drain in the refrigerator for several hours to overnight.

In a bowl with electric mixer, beat ricotta until smooth and creamy. Beat in confectioner’s sugar, cinnamon, vanilla and blend until smooth. Transfer to another bowl and stir in chocolate, zest and nuts. Chill until firm.(The filling can be made up to 24 hours prior to filling the shells. Just cover and keep refrigerated).

ASSEMBLE THE CANNOLI:
When ready to serve..fill a pastry bag fitted with a 1/2-inch plain or star tip, or a ziplock bag, with the ricotta cream. If using a ziplock bag, cut about 1/2 inch off one corner. Insert the tip in the cannoli shell and squeeze gently until the shell is half filled. Turn the shell and fill the other side. You can also use a teaspoon to do this, although it’s messier and will take longer.

Press or dip cannoli in chopped pistachios, grated chocolate/mini chocolate chips, candied fruit or zest into the cream at each end. Dust with confectioner’s sugar and/or drizzles of melted chocolate if desired.

CannoliDaringBakers06

TIPS AND NOTES:
– Dough must be stiff and well kneaded

– Rolling the dough to paper thinness, using either a rolling pin or pasta machine, is very important. If the dough is not rolled thin enough, it will not blister, and good cannoli should have a blistered surface.

– Initially, this dough is VERY stubborn, but keep rolling, it eventually gives in. Before cutting the shapes, let the dough rest a bit, covered, as it tends to spring back into a smaller shapes once cut. Then again, you can also roll circles larger after they’re cut, and/or into ovals, which gives you more space for filling.

– Your basic set of round cutters usually doesn’t contain a 5-inch cutter. Try a plastic container top, bowl etc, or just roll each circle to 5 inches. There will always be something in your kitchen that’s round and 5-inches if you want large cannoli.

– Oil should be at least 3 inches deep and hot – 360°F-375°F, or you’ll end up with greasy shells. I prefer 350°F – 360°F because I felt the shells darkened too quickly at 375°F.

– If using the cannoli forms, when you drop the dough on the form into the oil, they tend to sink to the bottom, resulting in one side darkening more. Use a slotted spoon or skimmer to gently lift and roll them while frying.

– DO NOT crowd the pan. Cannoli should be fried 2-4 at a time, depending on the width of your saucepan or deep fryer. Turn them once, and lift them out gently with a slotted spoon/wire skimmer and tongs. Just use a wire strainer or slotted spoon for flat cannoli shapes.

– When the cannoli turns light brown – uniform in color, watch it closely or remove it. If it’s already a deep brown when you remove it, you might end up with a really dark or slightly burnt shell.

– Depending on how much scrap you have left after cutting out all of your cannoli shapes, you can either fry them up and sprinkle with confectioner’s sugar for a crispy treat, or let the scraps rest under plastic wrap and a towel, then re-roll and cut more cannoli shapes.

– Push forms out of cannoli very gently, being careful not to break the shells as they are very delicate. DO NOT let the cannoli cool on the form, or you may never get it off without it breaking. Try to take it off while still hot. Hold it with a cloth in the center, and push the form out with a butter knife or the back of a spoon.

– When adding the confectioner’s sugar to the filling..TASTE. You may like it sweeter than what the recipe calls for, or less sweet, so add in increments.

– Fill cannoli right before serving! If you fill them an hour or so prior, you’ll end up with soggy cannoli shells.

– If you want to prepare the shells ahead of time, store them in an airtight container, then re-crisp in a 350°F (176 °C) oven for a few minutes, before filling.

– Practice makes perfect. My first batch of shells came out less than spectacular, and that’s an understatement. As you go along, you’ll see what will make them more aesthetically pleasing, and adjust accordingly when rolling. My next several batches turned out great. Don’t give up!!