Cakes, Slices and Biscuits

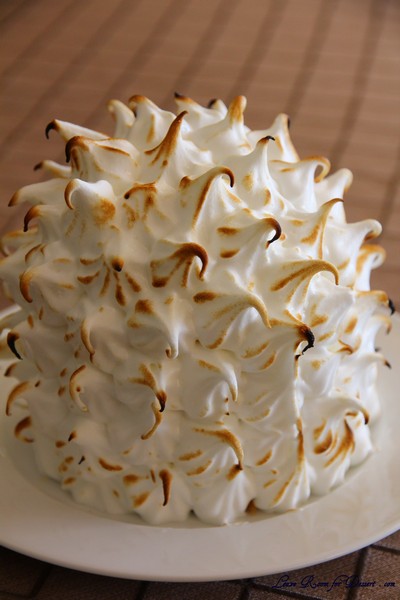
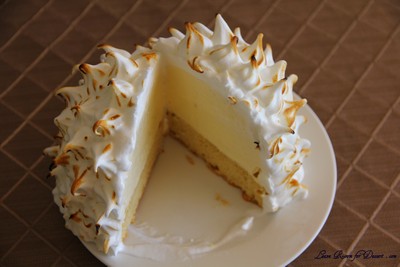
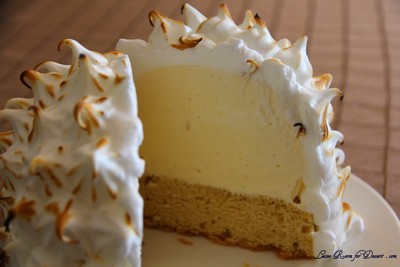
Baked Alaska and Ice Cream Petit Fours – Daring Bakers Challenge August 2010

Friday, August 27th, 2010

The August 2010 Daring Bakers’ challenge was hosted by Elissa of 17 and Baking. For the first time, The Daring Bakers partnered with Sugar High Fridays for a co-event and Elissa was the gracious hostess of both. Using the theme of beurre noisette, or browned butter, Elissa chose to challenge Daring Bakers to make a pound cake to be used in either a Baked Alaska or in Ice Cream Petit Fours. The sources for Elissa’s challenge were Gourmet magazine and David Lebovitz’s “The Perfect Scoop”.

Two sweets I have never made were chosen for this month’s Daring Bakers challenge. We could do both or just one, and as I had done neither previously and wanted to try them both. I went with both, especially considering that there were two common components between these desserts, meaning I just had to increase the cake and ice cream quantity, and not make too many extra components.

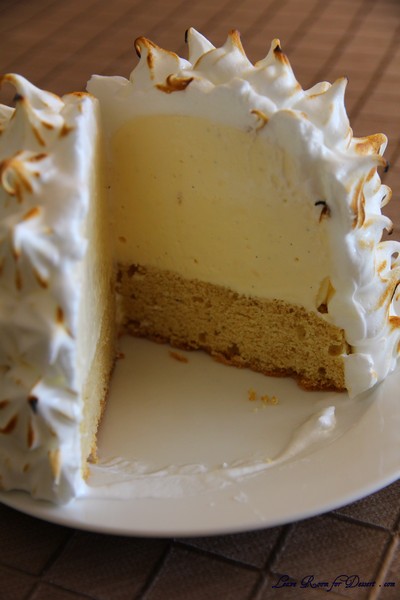
I was surprised by how many people one Baked Alaska from a reasonably small tea cup actually served. You could easily serve 2-4 people with one Baked Alaska, and with the petit fours being served up with them, I was cutting it into eight. This meant one of them stayed in the freezer (covered in plastic) for a week before my family got around to eating it. And it was still good.

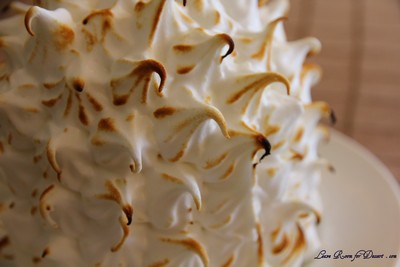
I tried both torching the meringue using a blow torch and placing it in a hot oven for 4 minutes. The torching was a heap of fun, although the oven actually made the meringue beautifully crispy on the outside. I’m not a huge fan of not-fully cooked meringue and this was a little off-putting for me, although others couldn’t get enough of it.

The cake was lovely the day it came out of the oven, the burnt butter flavour worked so well. I found as the days went on and refrigeration and freezing were required, it became a little staler than I would have preferred.

Although I was extremely looking forward to the petit fours, they didn’t turn out how I had hoped. They were too large, the cake kept coming away from the ice cream and they were too difficult to coat. Taste-wise they were great – but I wouldn’t bother doing them individually again…

Thanks again to our host this month – I always enjoy the challenges.

Baked Alaska and Ice Cream Petit Fours

Recipe Source: The brown butter pound cake recipe is adapted from the October 2009 edition of Gourmet. The vanilla ice cream is from ice cream genius David Lebovitz, adapted from The Perfect Scoop. The chocolate glaze for the petit fours is a larger adapted version of this ganache from Godiva Chocolate and the meringue for the Baked Alaska is a larger version of this meringue from Gourmet, May 1995.

Vanilla Ice Cream

1 cup (250ml) whole milk
A pinch of salt
3/4 cup (165g) sugar
1 vanilla bean, split lengthwise OR 2 teaspoons (10ml) pure vanilla extract
2 cups (500ml) heavy (approx 35% butterfat) cream
5 large egg yolks
1 teaspoon (5ml) pure vanilla extract

Heat the milk, salt, and sugar in a medium saucepan until the liquid steams. Scrape out the seeds of the vanilla bean with a paring knife and add to the milk, along with the bean pod. Cover, remove from heat, and let infuse for an hour. (If you do not have a vanilla bean, simply heat the milk, salt, and sugar in a medium saucepan until the liquid steams, then let cool to room temperature.)

Set up an ice bath by placing a 2-quart (2 litre) bowl inside a large bowl partially filled with water and ice. Put a strainer on top of the smaller bowl and pour in the cream.

In another bowl, lightly beat the egg yolks together. Reheat the milk in the medium saucepan until warmed, and then gradually pour ¼ cup warmed milk into the yolks, constantly whisking to keep the eggs from scrambling. Once the yolks are warmed, scrape the yolk and milk mixture back into the saucepan of warmed milk and cook over low heat. Stir constantly and scrape the bottom with a spatula until the mixture thickens into a custard which thinly coats the back of the spatula.

Strain the custard into the heavy cream and stir the mixture until cooled. Add the vanilla extract (1 teaspoon [5ml] if you are using a vanilla bean; 3 teaspoons [15ml] if you are not using a vanilla bean) and refrigerate until thoroughly chilled, preferably overnight.

Remove the vanilla bean and freeze in an ice cream maker. If you don’t have an ice cream maker, you can make it without a machine. See instructions from David Lebovitz: http://www.davidlebovitz.com/archives/2007/07/making_ice_crea_1.html

Brown Butter Pound Cake
The pound cake calls for cake flour. You can make 1 cup of cake flour by placing 2 tablespoons of corn starch in a 1 cup measure, and filling to the top with all purpose flour.

19 tablespoons (9.5 oz) (275g) unsalted (sweet) butter
2 cups (200g) sifted cake flour (not self-rising; sift before measuring) (See “Note” section for cake flour substitution)
1 teaspoon (5g) baking powder
1/2 teaspoon (3g) salt
1/2 cup (110g) packed light brown sugar
1/3 (75g) cup granulated sugar
4 large eggs
1/2 teaspoon pure vanilla extract

Preheat the oven to 325°F/160°C and put a rack in the center. Butter and flour a 9”x9” (23cmx23cm) square pan.

Place the butter in a 10” (25cm) skillet over medium heat. Brown the butter until the milk solids are a dark chocolate brown and the butter smells nutty. (Don’t take your eyes off the butter in case it burns.) Pour into a shallow bowl and chill in the freezer until just congealed, 15-30 minutes.

Whisk together cake flour, baking powder, and salt.

Beat the brown butter, light brown sugar, and granulated sugar in an electric mixer until light and fluffy, about 2 minutes. Beat in the eggs one at a time, mixing well, and then the vanilla extract.

Stir in the flour mixture at low speed until just combined.

Scrape the batter into the greased and floured 9”x9” (23cmx23cm) square pan. Smooth the top with a rubber spatula and rap the pan on the counter. Bake until golden brown on top and when a toothpick inserted into the center comes out clean, about 25 minutes.

Cool in the pan 10 minutes. Run a knife along the edge and invert right-side-up onto a cooling rack to cool completely.

Chocolate Glaze (For the Ice Cream Petit Fours)

9 ounces (250g) dark chocolate, finely chopped
1 cup (250 ml) heavy (approx 35% butterfat) cream
1 1/2 tablespoons (32g) light corn syrup, Golden syrup, or agave nectar
2 teaspoons (10ml) vanilla extract

Stir the heavy cream and light corn syrup in a small saucepan over medium heat until it comes to a boil. Remove from heat and add the dark chocolate. Let sit 30 seconds, then stir to completely melt the chocolate. Stir in the vanilla and let cool until tepid before glazing the petit fours.

Meringue (For the Baked Alaska)

8 large egg whites
½ teaspoon (3g) cream of tartar
½ teaspoon (3g) salt
1 cup (220g) sugar

Beat the egg whites, cream of tartar, and salt on high speed in an electric mixer until soft peaks form. Beat in the sugar gradually in a slow stream until stiff peaks form.

Assembly Instructions – Ice Cream Petit Fours

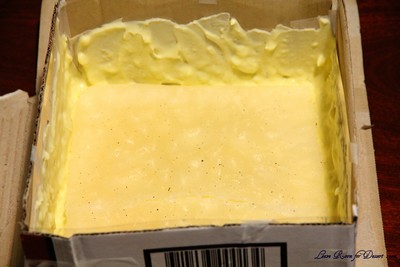
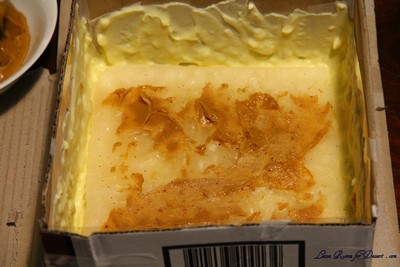
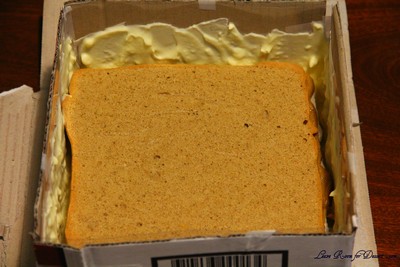
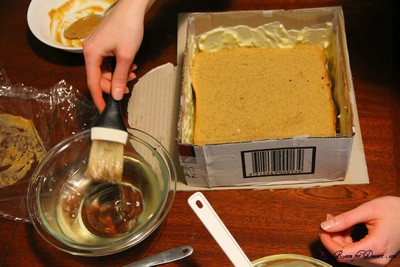
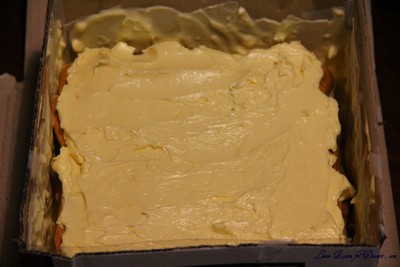
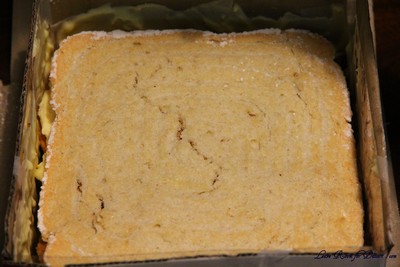
Line a 9”x9” (23cmx23cm) pan with plastic wrap, so that no sides of the pan are exposed and so there is some extra plastic wrap hanging off the sides. Spread 1 ¾ to 2 cups (450ml to 500ml) ice cream into the pan. Cover with more plastic wrap and freeze several hours.

Once the brown butter pound cake has completely cooled, level the top with a cake leveler or a serrated knife. Then split the cake in half horizontally to form two thin layers.

Unwrap the frozen ice cream. Flip out onto one of the layers of cake and top with the second layer of cake. Wrap well in plastic wrap and return to the freezer overnight.

Make the chocolate glaze (see above.)

While the glaze cools, trim ¾” (2cm) off each side of the ice cream cake to leave a perfectly square 7.5” (19cm) ice cream cake. Cut the cake into twenty five petit fours, each 1.5”x1.5” (4cmx4cm).

Glaze the petit fours one at a time: place a petit four on a fork and spoon chocolate glaze over it.

Place the petit fours on a parchment-lined baking sheet and return to the freezer for one hour.

Assembly Instructions – Baked Alaska

Line four 4” (10cm) diameter tea cups with plastic wrap, so that plastic wrap covers all the sides and hangs over the edge. Fill to the top with ice cream. Cover the top with the overhanging plastic wrap and freeze for several hours, or until solid.

Level the top of the brown butter pound cake with a serrated knife or with a cake leveler. Cut out four 4” (10cm) diameter circles from the cake. Discard the scraps or use for another purpose.

Make the meringue (see above.)

Unwrap the ice cream “cups” and invert on top of a cake round. Trim any extra cake if necessary.

Pipe the meringue over the ice cream and cake, or smooth it over with a spatula, so that none of the ice cream or cake is exposed. Freeze for one hour or up to a day.

Burn the tips of the meringue with a cooking blow torch. Or, bake the meringue-topped Baked Alaskas on a rimmed baking sheet in a 500°F/260°C oven for 5 minutes until lightly golden. Serve immediately.
V8 Cake

Sunday, July 25th, 2010

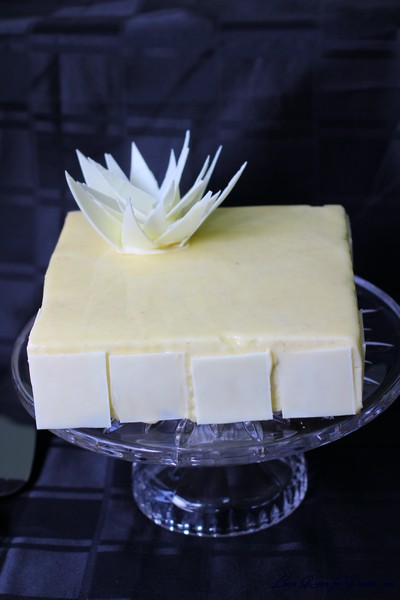
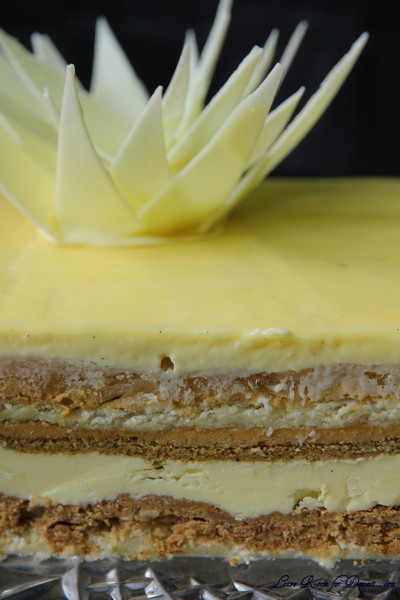
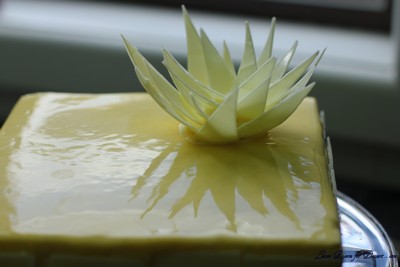
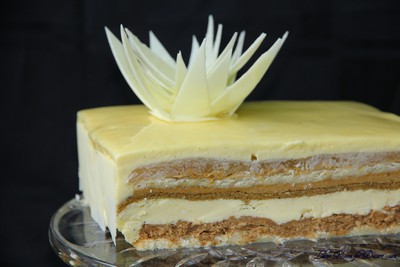
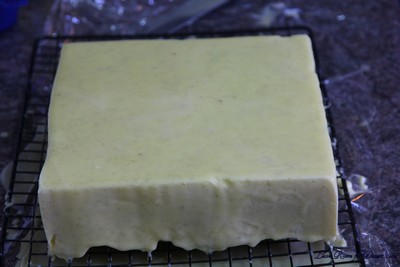
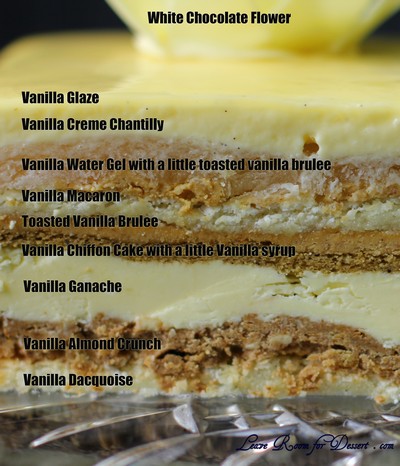
Yes, that’s right. I decided to make Adriano Zumbo’s V8 cake. Not a car cake as might be thought by the name, but a gorgeous cake composed of eight different layers of vanilla. Vanilla crème chantilly, toasted vanilla brulee, vanilla water gel, vanilla glaze, vanilla ganache, vanilla macaron, vanilla dacquoise, vanilla chiffon cake, vanilla almond crunch… hmmm.. that’s 9 layers… oh well.

After the pressure test episode on MasterChef, I had loads of people coming up and asking whether I would be making the cake – with all of them hoping to get a chance to try it.

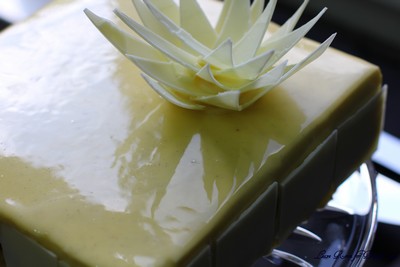
I haven’t made anything from this series of MasterChef, even though there was one other dish that looked very gorgeous and tasty. So, I decided to make this cake (unfortunately not using all the beans used here, and substituting vanilla essence for some – as they are quite expensive). I also didn’t use any of the titanium dioxide in the glaze or chocolate. I know this would have made a gorgeous colour, but it would have been difficult to get a hold of, and I thought that 12.5g was a little large for the cake. The cake still looked gorgeous, without the brilliant white look.

I am glad tonight’s episode is the last MasterChef, as hopefully I can get a bit of my time back – I haven’t been visiting people blogs, getting enough sleep, blogging as much as I’d like and experimenting with some of my own creations.

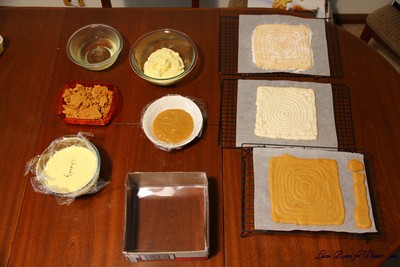
My notes on making this cake:
I didn’t use all the vanilla beans, due to expense. I used half the number here + vanilla essence.
I made my own almond praline paste – not sure if it’s what it’s supposed to be like, the recipe is at the bottom of this page.
I made my own miroir glaze – this recipe is also at the end – it makes more than required (about 1/3 extra).
I didn’t use Titanium dioxide – the cake still looked gorgeous.
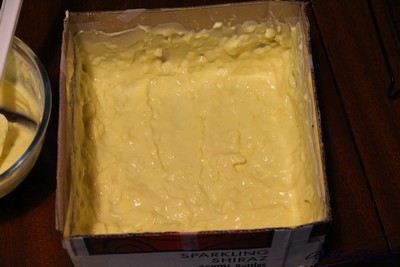
I made my own 20cm acetate box – cutting out a 20cm x 20cm square + 4 20cm x 9cm recatangles (although these were too large and could have been 20cm x 7cm). Sticky tape the rectangles to each side of the square, then sticky tape together. Use cardboard for supports on the bottom and each end.)
You can use projector sheets or sheets that cover the front of a book for acetate in this recipe.
I thought the ganache was a bit more difficult to get smooth than more traditional ganaches (pouring hot cream over the chocolate). Although with lots of pressure from the food processor – it came together in the end. I would suggest cutting it up finely to begin with, otherwise cream goes everywhere. This also made around 1/3 too much I think.
In place of the 1.5g gellanin the vanilla water gel, I used 2 sheets gold gelatine (4-5g) to get a jelly layer.
I used All Bran wheat flakes instead of the pailette feuillitine, but only 20g of it.
There was way too much vanilla syrup. I would suggest doing 1/4 of the recipe or less.
There was too much brown sugar crumble – this could have been cut by half.
There could have been a bit more vanilla creme chantilly made, as this was a little short for me… Make 1/4-1/2 more.

Enjoy!! If you decide to make it 🙂

V8 Cake

Recipe by Adriano Zumbo on MasterChef Australia 2010 (series 2)
see my notes above

2 vanilla beans
100g blanched almonds
Sugar spheres, to serve

Vanilla crème chantilly
4g gold strength gelatine leaves
590g thickened cream
1 vanilla bean, seeds scraped
175g caster sugar
24g cold water

Toasted vanilla brulee

3 egg yolks
50g dark brown sugar
250g thickened cream
1 vanilla bean
1 tsp vanilla extract

Vanilla water gel
250g water
38g caster sugar
1.5g gellan
1 vanilla bean, split, seeds scraped

Vanilla glaze
9.5g gelatine leaves
60g cold water
40g glucose liquid
35g water
250g caster sugar
400g thickened cream
1 vanilla bean, split, seeds scraped
150g miroir glaze (specialty cold-application patisserie glaze)
7.5g titanium dioxide (white colourant, powdered)

Vanilla ganache
300g white couverture chocolate
185g thickened cream
2 tsp vanilla extract
1/2 vanilla bean, split, seeds scraped
95g unsalted butter, softened

Brown sugar crumble
50g unsalted butter
50g plain flour
50g dark brown sugar
50g almond meal
¼ scraped vanilla bean

Vanilla macaron
53g egg whites
50g pure icing sugar
150g TPT (equal parts sifted almond meal and sifted pure icing sugar)
½ scraped vanilla bean

Vanilla dacquoise
60g egg whites
43g caster sugar
65g almond meal
40g pure icing sugar, sifted
1 vanilla bean, split, seeds scraped
½ tsp vanilla extract

Vanilla chiffon cake

17.5g plain flour
1 roasted and finely ground vanilla bean
1.25 (21g) egg yolks
5g dark brown sugar
17.5g water
15g canola oil
45g egg whites
22.5g caster sugar
2.5g rice flour

Vanilla almond crunch

45g milk couverture chocolate
90g almond praline paste
90g pure almond paste
18g unsalted butter
45g brown sugar crumble
45g pailette feuillitine (crunchy wheat flakes)
18g toasted diced almonds
1 roasted and finely ground vanilla bean
2g sea salt
¼ scraped vanilla bean

Vanilla syrup
125g caster sugar
250g water
½ vanilla bean, split
1 tsp vanilla extract

White chocolate flower and tiles
500g white couverture chocolate, grated or finely chopped
5g titanium dioxide

Please note – you will need precision scales. The vanilla crème chantilly, vanilla glaze, brown sugar crumble, and vanilla syrup can all be made ahead of time.

1. Preheat oven to 160°C.

2. To make the roasted vanilla beans, place 2 vanilla beans in oven until burnt and charcoal in texture. Grind to a fine powder in a mortar and pestle or spice grinder. Cover and set aside.

3. To make the pure almond paste, place 100g blanched almonds on a baking tray and bake for 10 minutes or until deep golden. Grind to a coarse paste. Cover and set aside.

4. To make the vanilla crème chantilly, cut gelatine into small squares, soak in the cold water. Place cream, vanilla and sugar in a saucepan and bring to the boil. Remove from the heat and allow to cool to 70-80°C, and then stir through the gelatine and water mixture until dissolved. Place in a container, cover the surface with cling wrap and place in the fridge.

5. For the toasted vanilla brulee, mix yolks and sugar in a bowl by hand with a whisk until just combined. Add cream and vanilla bean to a small saucepan and bring to the boil, pour a little over the eggs while stirring, then add the remaining liquid including vanilla bean. Puree with a hand blender until smooth and pour into a shallow baking tray about 25 x 38cm. Place into the oven and cook until just set, about 10 minutes, then increase oven to 200°C and bake until it forms a golden brown crust, about 5 minutes. It should look slightly split when removed from the oven. Scrape mixture into a thermomix, blender, or small food processor and blend to a smooth paste. Set aside in a small bowl, covering the surface of the brulee with cling wrap so it doesn’t form a skin. Reduce oven temperature to 160°C.

6. To make the vanilla water gel, place a lined 18cm square cake tin in the fridge to chill. Boil all ingredients in saucepan whilst whisking until dissolved and mixture starts to thicken. To test if set, drop about a teaspoon of liquid into a metal bowl, it should thicken slightly. It will thicken on cooling. To speed up cooling, pour into a metal bowl and set aside for 5 minutes. Pour into chilled cake tin and place in the freezer until solid, about 30 minutes. Remove from mould and keep gel in freezer.

7. For the vanilla glaze, soak the gelatine leaves in cold water until softened. Drain, squeezing out any excess water. Boil glucose, water and sugar until 165°C, brushing around the sides of the saucepan with a pastry brush dipped in cold water as you go. Do not allow caramel to take on any colour. In another saucepan, bring cream and vanilla seeds to boil and then add to the sugar syrup. Mix through, then allow to cool to 70°C and add softened gelatine, stirring well. Add miroir glaze and titanium dioxide and blend well. Strain, then freeze until set. Reheat to 35°C when glazing the cake.

8. For the vanilla ganache, place all ingredients in a blender and mix until smooth and creamy. Cover closely with cling wrap and set aside until needed.

9. To make the brown sugar crumble, place all ingredients in an electric mixer and beat mix until dough forms. ‘Grate’ through a cooling rack with a lined baking tray sitting underneath to catch the crumble then bake in the oven for about 10 minutes until golden.

10. To make the vanilla macaron, draw an 18cm square on a piece of baking paper placed on a baking tray. Using an electric mixer or hand beaters, whisk egg whites on high speed until soft peaks form then slowly add pure icing sugar, checking it has dissolved in between additions until you have stiff glossy peaks. Stir through TPT with vanilla seeds. Spoon mixture into a piping bag fitted with a 5mm nozzle. Pipe into the pencilled frame using a continuous snaking motion to fill the entire square. Let a skin form and then bake for 10 minutes at 160°C until golden. Remove from oven, slide baking paper off tray and place on kitchen bench. Increase oven temperature to 180°C.

11. To make the vanilla dacquoise, draw an 18cm square on a piece of baking paper placed on a baking tray. In an electric mixer fitted with whisk attachment, whisk egg whites on high speed until soft peaks form then slowly add caster sugar, beating until you have stiff glossy peaks. Mix almond meal with icing sugar, vanilla seeds and extract, gently fold through egg whites. Spoon into a piping bag fitted with a 5mm nozzle. Pipe into the pencilled frame using a continuous snaking motion to fill the entire square. Dust with icing sugar, let sit 2 minutes then dust again. Bake at 180°C 10-12 minutes or until golden. Remove from oven, slide baking paper off tray and place on kitchen bench. Reduce oven temperature to 160°C.

12. To make the vanilla chiffon cake, draw an 18cm square on a piece of baking paper placed on a baking tray. Mix flour, roasted vanilla bean powder, egg yolks, brown sugar, water and oil in a bowl until combined. Whisk egg whites in an electric mixer on high speed until soft peaks form then slowly add the sugar and rice flour, beating until you have stiff, glossy peaks. Fold the meringue through the batter gently. Spoon into a piping bag fitted with a 5mm nozzle. Pipe into the pencilled frame using a continuous snaking motion to fill the entire square. Bake in the oven set at 160°C until golden, about 15 minutes.

13. To make the vanilla almond crunch, melt milk chocolate, add almond praline and the pure almond paste and mix well. Melt butter and take to nut brown (noissette) stage. Add crumble and fueilletine flakes and mix through praline mixture, then fold through burnt butter, followed by toasted almonds, crushed vanilla beans, sea salt and scraped vanilla seeds. Smooth a 5mm layer over vanilla dacquoise and set aside.

14. To make the vanilla syrup, bring all ingredients to the boil, then allow to cool.

15. To make the white chocolate tiles and flower, bring 5cm of water in a medium saucepan to the boil, turn off the heat and sit a metal bowl with 300g of the chocolate over the water. Stir until just melted then remove bowl to the bench and add about 100g more chocolate to bring the temperature down. Stir vigorously until the chocolate has melted, if the chocolate does not feel cold to the touch, add the remaining 100g chocolate to bring down the temperature. Add titanium dioxide and mix well. Keep stirring well to remove all lumps. If the chocolate mixture feels cold to the touch, spread a small, thin layer onto a small piece of baking paper. Set aside for about 3-4 minutes, it will start to harden if it is tempered correctly. If the chocolate becomes too thick and the temperature is too low, gently reheat the mixture in the bowl set over the saucepan of steaming water, but it still needs to be cold.

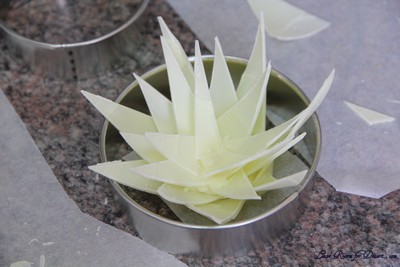
16. When the chocolate is tempered, to make the flower, spread a thin layer, about 2-3mm thick on 2 pieces of acetate (30 x 40cm) using a large palette knife. Once the chocolate has almost set, on one sheet of acetate carefully mark 3 strips lengthways on the strips, about 7-9cm-wide. Mark thin triangles in each strip. These form the flower petals. Place a piece of baking paper over the top, and wrap around a rolling pin or similar cylinder and allow to completely harden.

17. On the other sheet use a ruler to mark out 4 ½ cm squares. Place a piece of baking paper over the top and invert onto a board or clean work surface to completely harden.

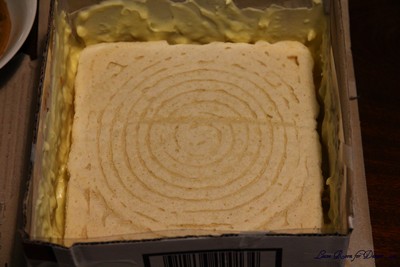
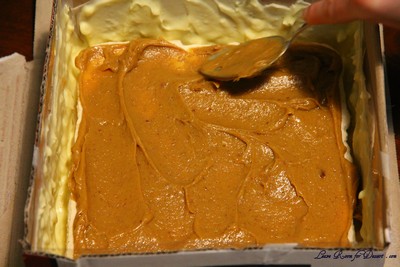
18. To assemble the cake, in a 20cm acetate-lined straight-sided cake tin spread a 5-10mm layer of Chantilly crème around base and sides of tin. Chill in freezer until firm. Lay vanilla gel at the base of the tin and smear with a tiny amount of brulee so that macaron layer will stick to the gel. Lay macaron layer over brulee smear. Cover macaron layer with an even 5mm of brulee. Place chiffon cake over brulee layer. Brush chiffon cake with a little vanilla syrup. Spread a 5mm layer of ganache over chiffon cake. Invert the dacquoise/crunch layers so the vanilla almond crunch layer is sandwiched next to the ganache and the dacquoise is facing up. The dacquoise will become the base of the cake.

19. Fill in any gaps with Chantilly cream, then place in the freezer for 30-60 minutes until firm. Place a large piece of cling wrap on the bench and place a cooling rack on top. Remove the cake from the chiller and invert onto the cooling rack. Heat sides of cake tin gently with a blow torch to help release the mould from the cake. Remove any acetate. Smooth top and sides if necessary with a palette knife. Pouring generously and using a palette knife, spread the vanilla glaze evenly over the top and sides, completely covering the surface. Using a large palette knife transfer the cake to a cake stand and place the chocolate tiles around the cake.

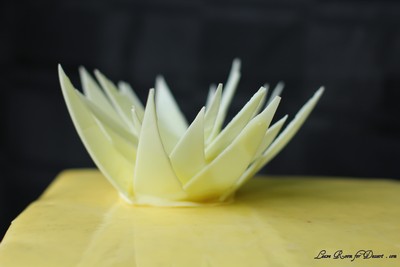
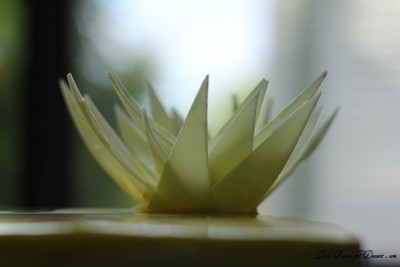
20. To assemble the flower spread a small amount of melted tempered chocolate onto a small piece of baking paper and use this as a base to stick the petals, starting in the centre, working outwards to create a flower. Using choco-cool will help ‘fix’ the petals in place and firm up the chocolate base. Place chocolate flower on top of the cake and decorate the top of the cake with a few sugar spheres.

Almond Praline
Recipe by Anita @ Leave Room for Dessert

50g caster sugar
60g blanched slivered almonds

Roast the almonds for 5-10mins at 160°C. Heat the sugar on high, until the sugar starts browning around the outside. Gently stir in the un-melted sugar, until it is all caramelised in colour. Pour over the roasted almonds. Allow to cool, then blend in a food processor. (It won’t go into the same paste texture as the almond paste above).

Miroir Glaze
Recipe by Anita @ Leave Room for Dessert

2 gold gelatine leaves (4g)
220g water
60g caster sugar
30g glucose

Place the gelatine leaves into cold water to soak for 5 minutes. Heat the water, caster sugar and glucose in a small saucepan until it starts to boil. Remove from heat and let it cool to 70°C. Squeeze excess water from gelatine leaves, place in saucepan and stir until dissolved. Transfer to a bowl and allow to cool slightly before storing in the fridge.

Gluten Free Carrot, Zucchini and Apple Cake

Wednesday, June 23rd, 2010

When I was asked by Haystac whether I wanted to try out some of the gluten free products by Vitarium, I was excited to work with gluten free flour.

The texture was a lot finer, and to me resembled a something similar to the texture of cornflour. I was given both self raising flour and a packet mix of Chocolate Ripple biscuits to try. I’d like to pass on the Chocolate Ripple biscuit packet mix to someone who would like it (and live in Australia) – so please leave a comment and let me know if you’d like it and why.

Photo from Vitarium website

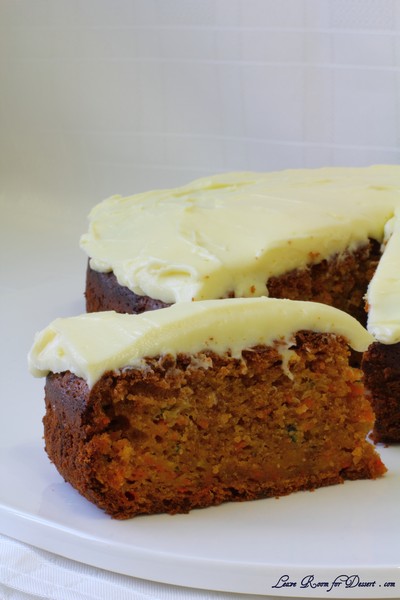
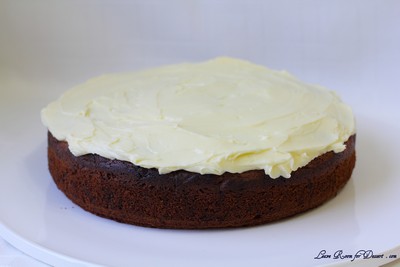
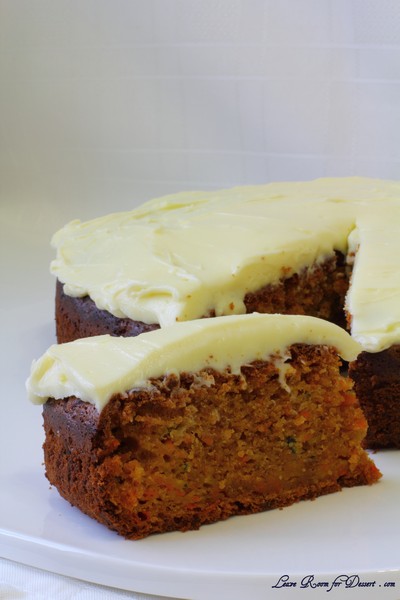
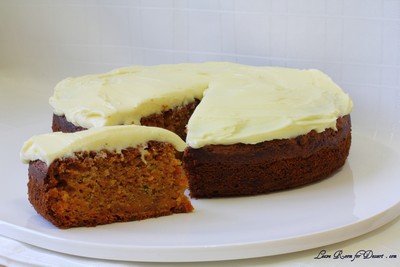
I decided to make something in-between a carrot cake and zucchini cake, even though I’ve never tried a zucchini cake, plus I wanted to add some grated apple too. And what is a carrot cake without the gorgeous icing? (Still a lovely carrot cake 🙂 ) But I decided to add the icing – just because it works so well and everyone loves it 😛

I have just submitted this recipe to the The Great Vitarium Gluten Free Bake Off which has just started and has some amazing prizes – check it out and wish me luck 🙂 I also want to wish all the other contestants luck for this competition, and think it is fantastic there will be such a great new range of recipes for those requiring gluten free diets.

Now, I’d love to have a try with the plain flour…

Gluten Free Carrot, Zucchini and Apple Cake

Recipe by Anita @ Leave Room for Dessert

1 1/2 cups brown sugar
1 cup vegetable oil
4 eggs
2 cups Vitarium gluten free self-raising flour
1 1/2 teaspoons ground cinnamon
1/2 teaspoon ground ginger
230g grated carrot
100g grated zucchini, excess liquid removed
50g grated apple, after excess liquid is removed
2/3 cup walnuts (optional, I didn’t use these)

250g cream cheese, at room temperature
1 cup pure icing sugar, sifted
1 teaspoon vanilla essence

Preheat oven to 160C.

In a large mixer, beat together the oil and brown sugar for 2-3 minutes. Add the eggs one at a time, beating well in between additions. Sift in the flour, cinnamon and ginger and mix for one minute. Mix in the grated carrot, zucchini, apple and walnuts (if using). Pour into a greased and lined 22cm round tin. Cook in preheated oven for 1 hour 20 minutes or until a skewer inserted in the centre comes out clean.

Allow to cool for 10 minutes in the tin, then transfer to a wire rack and allow to cool completely before icing.

For the icing, beat the cream cheese until light and fluffy. Add the icing sugar in two lots, beating well between additions. Add the vanilla essence and mix to combine. Spread over cooled cake and serve.

Mum’s Trifle

Saturday, June 5th, 2010

MumsTrifle4

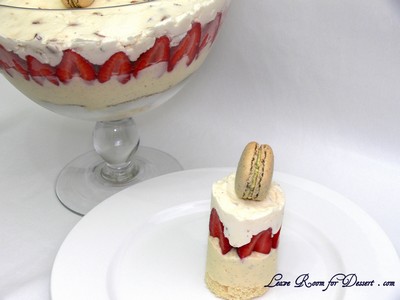
For my Mum’s birthday a couple of months ago, I designed a trifle just for her.

MumsTrifle7

Although I don’t normally make trifles, I’ll make anything that my Mum wants for her birthday. So a trifle once or twice a year is not much to ask or give.

MumsTrifle8

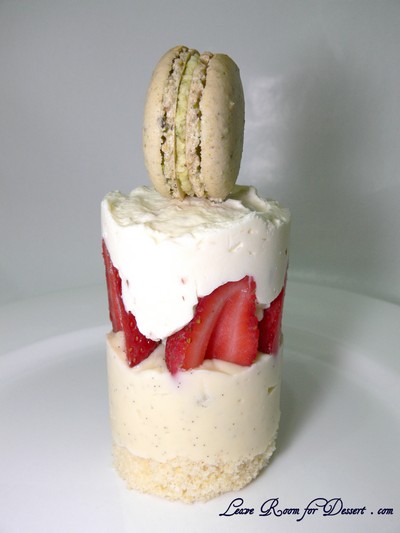
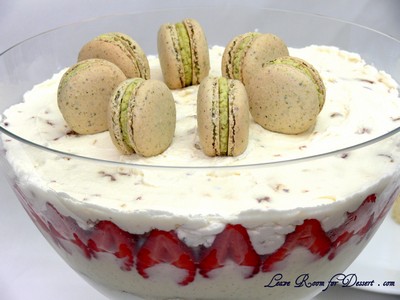
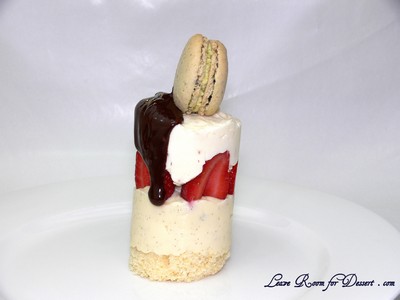
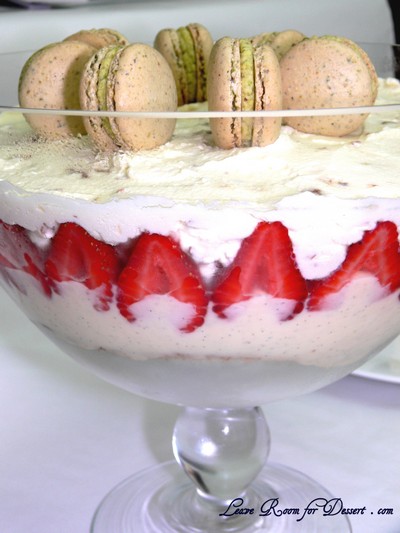
I decided to make the trifle layered and served in a cylindrical shape – making an individual portion and a cuter chic-styled trifle. And what would make a trifle more modern than pretty pistachio macarons!

MumsTrifle1

The individual portion was frozen, and without enough time to allow it to thaw after removal of the acetate, it was eaten frozen – I hear it was lovely frozen. I ate a scoop from the bowl and thought all the flavours worked extremely well together.

Mum’s Trifle

Recipe by Anita @ Leave Room for Dessert

Serves: 10

Vanilla Sponge
4 eggs
150g (1 cup) self raising flour
150g (3/4 cup) caster sugar
40g (1/4 cup) cornflour
1 teaspoon vanilla essence

Custard
4 egg yolks
125g caster sugar
20g cornflour
250ml cream
350ml milk
1 vanilla bean, scraped

2 punnets strawberries, cored and sliced in half

Vienna almond and nougat cream
100g nougat, chopped
150g Vienna almonds, chopped
1 teaspoon vanilla essence
600ml thickened cream
1/4 cup icing sugar mixture

Pistachio macarons, for serving – see my recipe here

Chocolate Sauce
100g dark chocolate
80ml cream
1 tablespoon Kahlua, optional

For the sponge, preheat oven to 180°C. Beat together the eggs and caster sugar for 4 minutes or until light, fluffy and increased in size. Beat in the vanilla essence. Fold in the sifted flour and cornflour. Pour into a baking paper lined tray. Cook for 20-25 minutes or until cooked through. Allow to cool for 10 minutes in the tin and then remove and allow to cool fully on a cooling rack.

For the custard, whisk the yolks, cornflour and caster sugar in a saucepan. Once smooth, whisk in the cream slowly, then the milk. Place mixture on medium heat and cook until the mixture has thickened or starts to boil. Remove from heat and pour into a bowl and let cool slightly. Place cling film over the custard – touching the custard so it prevents a skin forming.

For the Vienna almond and nougat cream, whip the cream with the vanilla and icing sugar mixture until thick peaks are formed. Fold through the chopped Vienna almond and nougat.

For the Chocolate Sauce, heat the cream in saucepan, until it just starts to bubble. Pour the cream over the chopped chocolate. Add the Kahlua or other alcohol at this point, if using. Whisk or stir until smooth. This is best made just before serving.

To assemble:
Cut the sponge base to fit the serving bowl. Alternatively, cut 5cm diameter rounds from the cake (it may need to be cut in half depending on how tall the sponge is). Cut some acetate or projector film into 8-10cm high and approx 17cm wide (or enough to fit around the sponge/5cm cutting circles). Make the acetate into cylinders around the sponge or 5cm rounds and hold in place with sticky tape, with the sponge at the bottom of the cylinder.

If desired, you can brush the sponge with any liqueur you like.

Next, pour the custard on top of the sponge, smooth the top and place in the fridge for 30 minutes. Place any individual portions in the freezer and set until the top of the custard is firm.

Place the cut strawberries around the edge of the glass dish or acetate strips and the remaining ones in the middle.

Cover with Vienna almond, nougat cream. Smooth the top and place in the fridge to set for a few hours before serving. For individual portions, place back in the freezer (otherwise the acetate won’t come off easily).

To serve: Remove acetate from any individual trifles. Place pistachio macarons on top of the trifle and serve with the chocolate sauce in a pourer.

MumsTrifle6

Croquembouche (Piece Montée) – Daring Bakers Challenge May 2010

Thursday, May 27th, 2010

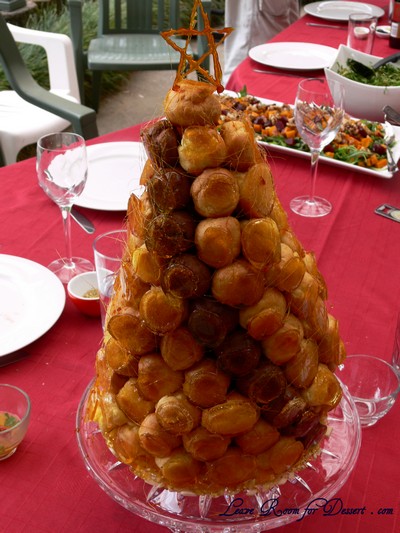
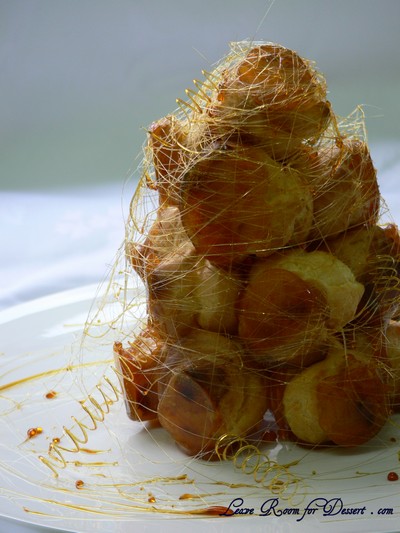
The May 2010 Daring Bakers’ challenge was hosted by Cat of Little Miss Cupcake. Cat challenged everyone to make a piece montée, or croquembouche, based on recipes from Peter Kump’s Baking School in Manhattan and Nick Malgieri.

I’ve made two croquembouches’ so far, the original one from Masterchef and the chocolate swirl one, also from MasterChef. So, when I found out this month’s challenge was also a croquembouche I was both a bit indifferent, and also excited.

First of all, the slight disappointment was due to it not being something new. Although the excitement came from knowing how gorgeous the custard filled profiteroles with lovely crunchy toffee are. My family and I cannot resist croquembouche, although the next Christmas or event I make it for, I’ll just be pouring the caramel over the top and not building a cone shaped tower.

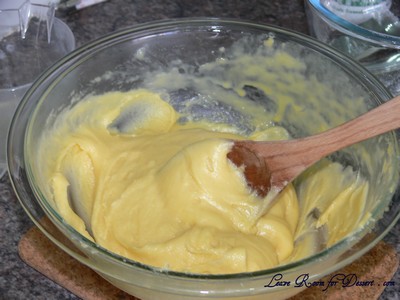
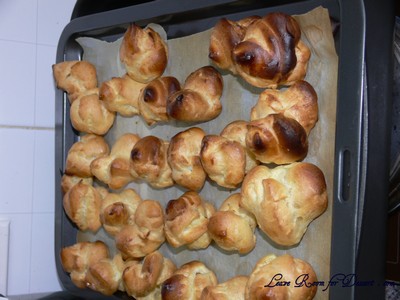
The other excitement came from trying the different recipes, I was hoping for a harder choux pastry, one which was a bit crunchy and kept its shape quite well. I think this choux pastry recipe may have succeeded in this, although I still need to learn my oven better, as they were cooked in 10-15 minutes, almost burning, so I couldn’t leave them in the oven to dry out longer, for fear of losing them.

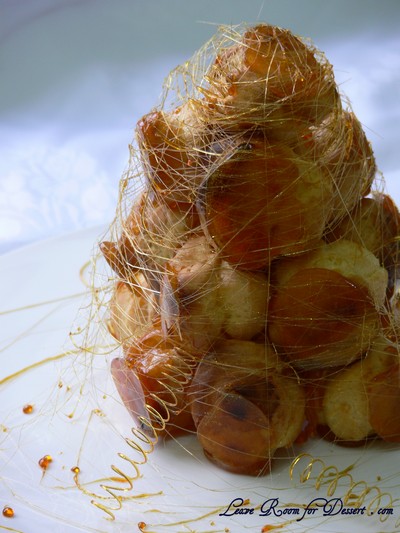
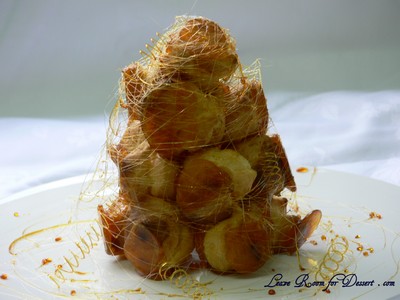
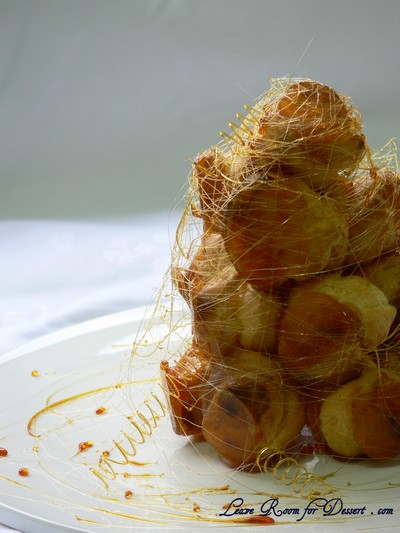
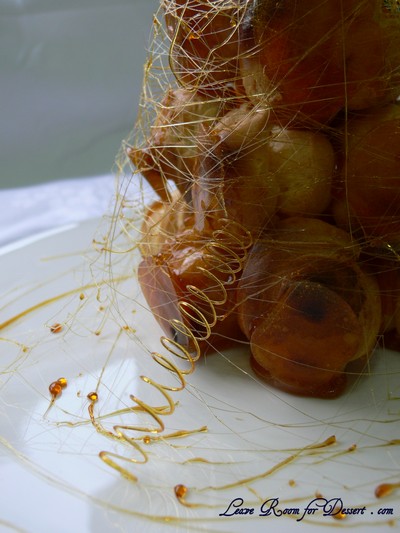
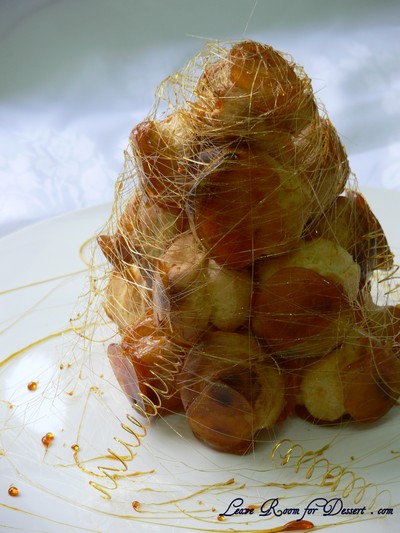
For my own challenge, I decided to try making cute little caramel corkscrews. Using a spoon, I spun the caramel around a clean knife (sharpening) steel. And they worked! I had to keep heating and cooling the caramel though to make it the right consistency – which was quite difficult to figure out.

Unfortunately for the presentation, the lovely caramel strands around the outside started beading within 20 minutes and by the time we ate the croquembouche, a few hours afterwards, there were no strands to be seen. I’m not sure whether this was due to the humidity we had here, or whether the glucose added to caramel contributes to the stability of the caramel.

Overall, I was very excited making this again, and I think it made the perfect quantity (even though people asked – where’s the rest of it?). The different components themselves are relatively easy, and I will consider making it more often, now that I won’t be making trays and trays worth of profiteroles, and a large lasagna dish filled with custard.

Croquembouche (Piece Montée)

Recipe Source: Peter Kump’s Baking School in Manhattan and were originally created by famed pastry chef, Nick Malgieri.

Vanilla Crème Patissiere (Half Batch) [I made a full batch – double this – although I think I could have made 1.5 batches – three times this]
1 cup (225 ml.) whole milk
2 Tbsp. cornstarch / cornflour
6 Tbsp. (100 g.) sugar – I used caster sugar
1 large egg
2 large egg yolks
2 Tbsp. (30 g.) unsalted butter
1 Tsp. Vanilla

Dissolve cornstarch in ¼ cup of milk. Combine the remaining milk with the sugar in a saucepan; bring to boil; remove from heat.

Beat the whole egg, then the yolks into the cornstarch mixture. Pour 1/3 of boiling milk into the egg mixture, whisking constantly so that the eggs do not begin to cook.

Return the remaining milk to boil. Pour in the hot egg mixture in a stream, continuing whisking.

Continue whisking (this is important – you do not want the eggs to solidify/cook) until the cream thickens and comes to a boil. Remove from heat and beat in the butter and vanilla.

Pour cream [Crème Patissiere] into a stainless steel/ceramic bowl. Press plastic wrap firmly against the surface. Chill immediately and until ready to use.

Pate a Choux (Yield: About 28) [Mine made more than 50]
¾ cup (175 ml.) water
6 Tbsp. (85 g.) unsalted butter
¼ Tsp. salt
1 Tbsp. sugar
1 cup (125 g.) all-purpose flour
4 large eggs

For Egg Wash: 1 egg and pinch of salt

Pre-heat oven to 425◦F/220◦C degrees. Line two baking sheets with parchment paper.

Preparing batter:
Combine water, butter, salt and sugar in a saucepan over medium heat. Bring to a boil and stir occasionally. At boil, remove from heat and sift in the flour, stirring to combine completely.

Return to heat and cook, stirring constantly until the batter dries slightly and begins to pull away from the sides of the pan.

Transfer to a bowl and stir with a wooden spoon 1 minute to cool slightly. [A KitchenAid works so well for this]

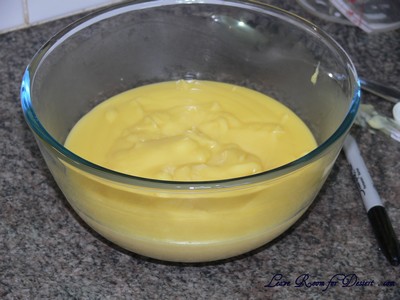
Add 1 egg. The batter will appear loose and shiny.

After mixing in the first egg

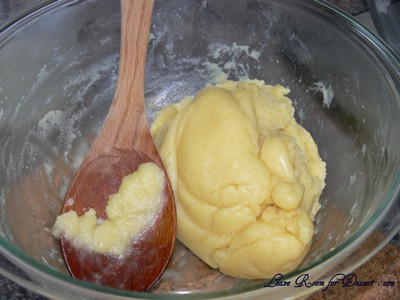
As you stir, the batter will become dry-looking like lightly buttered mashed potatoes.

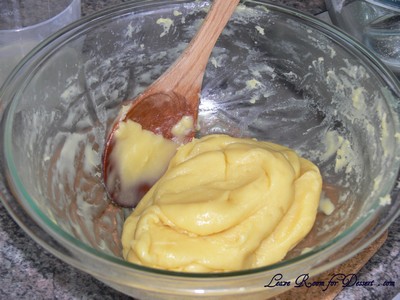
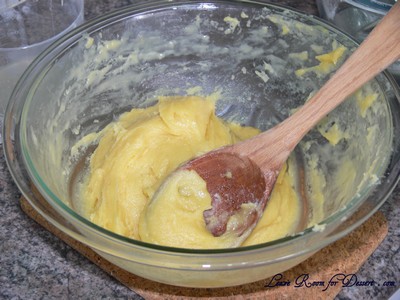
It is at this point that you will add in the next egg. Repeat until you have incorporated all the eggs.

After mixing in the second egg

After mixing in the third egg

After the fourth and final egg

Piping:
Transfer batter to a pastry bag fitted with a large open tip (I piped directly from the bag opening without a tip). Pipe choux about 1 inch-part in the baking sheets. Choux should be about 1 inch high about 1 inch wide.

Using a clean finger dipped in hot water, gently press down on any tips that have formed on the top of choux when piping. You want them to retain their ball shape, but be smoothly curved on top.

Brush tops with egg wash (1 egg lightly beaten with pinch of salt).

Baking:
Bake the choux at 425◦F/220◦C degrees until well-puffed and turning lightly golden in color, about 10 minutes. [mine cooked in 15 minutes total]

Lower the temperature to 350◦F/180◦C degrees and continue baking until well-colored and dry, about 20 minutes more. Remove to a rack and cool.

Can be stored in a airtight box overnight.

Filling:
When you are ready to assemble your piece montée, using a plain pastry tip, pierce the bottom of each choux. Fill the choux with pastry cream using either the same tip or a star tip, and place on a paper-lined sheet. Choux can be refrigerated briefly at this point while you make your glaze.

Use one of these to top your choux and assemble your piece montée.

Hard Caramel Glaze: [I needed 1.5 – 2 times this recipe, as I stirred it too early]
1 cup (225 g.) sugar
½ teaspoon lemon juice

Combine sugar and lemon juice in a saucepan with a metal kitchen spoon stirring until the sugar resembles wet sand. Place on medium heat; heat without stirring until sugar starts to melt around the sides of the pan and the center begins to smoke. Begin to stir sugar. Continue heating, stirring occasionally until the sugar is a clear, amber color. Remove from heat immediately; place bottom of pan in ice water to stop the cooking. Use immediately.
Assembly of your Piece Montée:
You may want to lay out your unfilled, unglazed choux in a practice design to get a feel for how to assemble the final dessert. For example, if making a conical shape, trace a circle (no bigger than 8 inches) on a piece of parchment to use as a pattern. Then take some of the larger choux and assemble them in the circle for the bottom layer. Practice seeing which pieces fit together best.

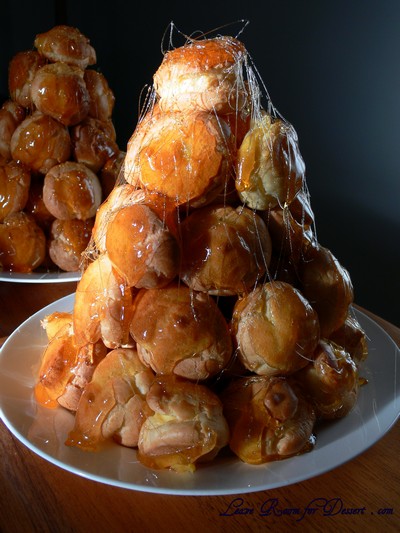
Once you are ready to assemble your piece montée, dip the top of each choux in your glaze (careful it may be still hot!), and start assembling on your cake board/plate/sheet. Continue dipping and adding choux in levels using the glaze to hold them together as you build up.

When you have finished the design of your piece montée, you may drizzle with remaining glaze or use ribbons, sugar cookie cut-outs, almonds, flowers, etc. to decorate. Have fun and enjoy! Bon appétit!

Pistachio Macarons

Sunday, May 9th, 2010

PistachioMacaron03

Happy Mother’s Day!

PistachioMacaron07

Even though these lovely pistachio macarons weren’t made for Mother’s Day – they were made for my Mum – on her birthday. They were the decorations for the dessert I made for her (a while ago now), I hope to post it soon. For the main meal on her birthday, we made the most awesome beef bourguignon pie – using Julia Child’s recipe (here is the recipe, if you don’t have the book). It was AMAZING! It took a while to prepare, but was worth it – it doesn’t get any better.

PistachioMacaron01

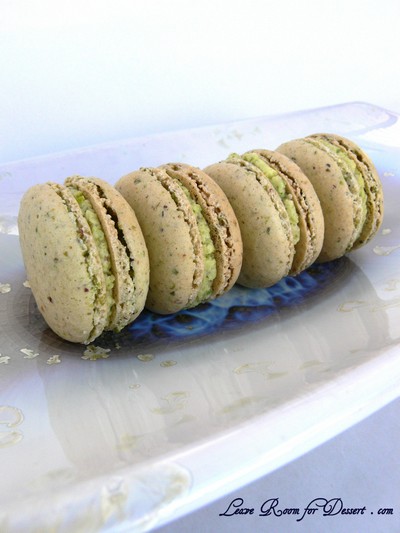
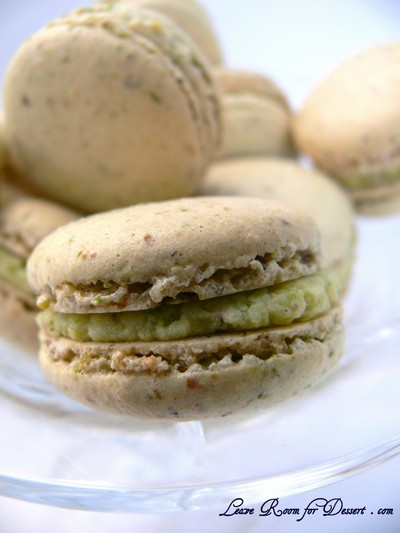
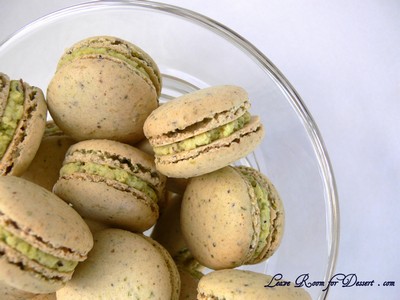
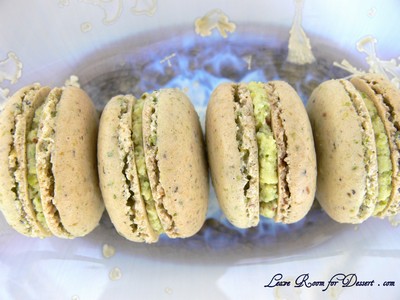
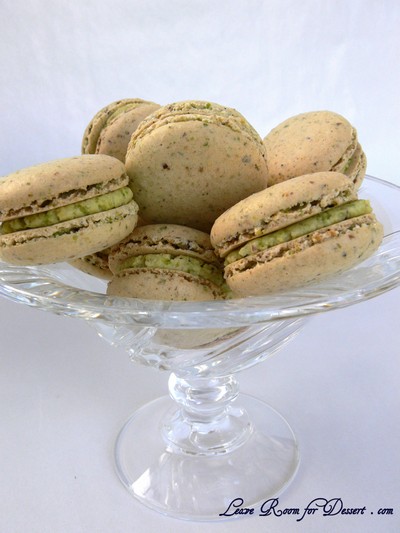
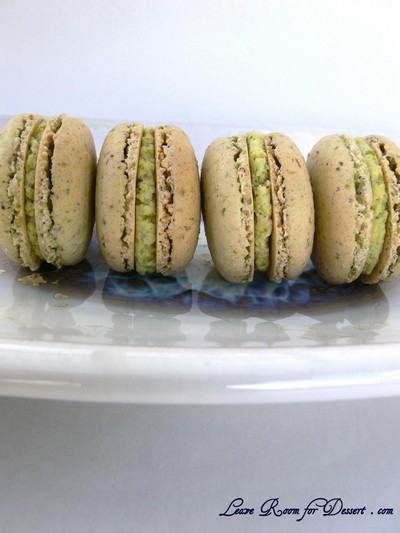
These home made pistachio macarons turned out just how I wanted. Cute little feet (the frill at the base of the macaron), slightly crisp on the outside, a lovely chewy centre and a wonderfully tasty pistachio flavour.

PistachioMacaron05

These would be perfect for a kitchen tea, high tea, baby shower or petit fours after a meal.

PistachioMacaron06

Pistachio Macarons

Recipe by Anita @ Leave Room for Dessert

Makes 46 sandwiched macarons

120g egg whites (aged for a day or two – covered in the fridge then brought to room temperature, or left at room temperature if the weather’s cool)
90g caster sugar
220g pure icing sugar
80g almond meal
80g pistachios

Pistachio butter cream
80g butter, at room temperature
160g icing sugar
50g pistachio

Process the icing sugar, pistachios and almond meal in a food processor until very finely ground, like dust. Sift and set aside.

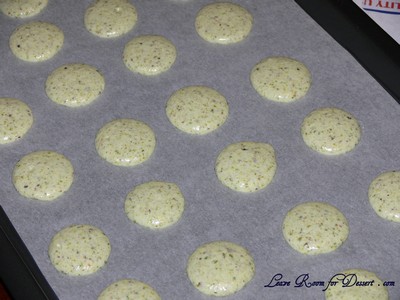
Beat egg whites until frothy, add the caster sugar whilst continuing to beat the egg whites on high until it forms a glossy thick meringue. Beat and fold the icing sugar and nut mixture into the meringue until the mixture flows and when the mixture is piped, any peaks sink back after a few minutes. Pipe 3-4cm circles on lined baking trays. Leave at room temperature for 30 minutes or more to form a skin.

PistachioMacaron02

Preheat oven to 150°C and cook macarons for 10 minutes or until slightly coloured, crisp on the outside and chewy on the inside. Allow to cool and then fill with the pistachio butter cream or another filling.

For the pistachio butter cream, cream the butter until light and fluffy. Process the pistachios with the icing sugar until finely ground. Beat the pistachio sugar into the butter in batches. When all the pistachio sugar is incorporated it is ready to fill the macarons. If it isn’t spreadable, add a touch of milk and mix until smooth.

PistachioMacaron04

Butterscotch Steamed Pudding – Daring Bakers Challenge April 2010

Tuesday, April 27th, 2010

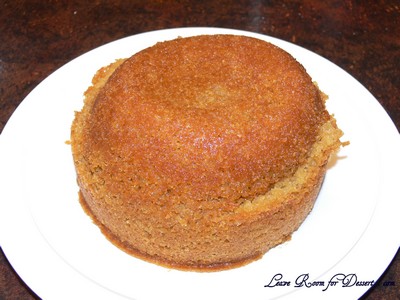
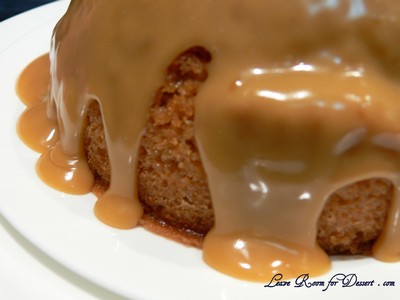
SteamedPudding01

The April 2010 Daring Bakers’ challenge was hosted by Esther of The Lilac Kitchen. She challenged everyone to make a traditional British pudding using, if possible, a very traditional British ingredient: suet.

SteamedPudding17

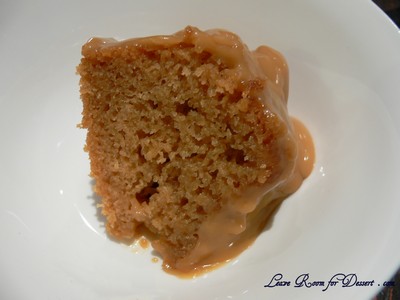
In this month’s challenge we were asked to go a step further in the ingredients we use and use suet in the steamed pudding we were making. After deciding to make a steamed sweet sponge pudding, I decided on using a substitute for the suet – although after having trouble in the cold isle of the supermarket trying to find what I could use as a substitute, I gave in to using butter as my base.

A lot of people know I am a huge fan of self saucing puddings, so I was extremely excited to find out how this differed in taste or texture to the ones I normally make. Personally I enjoy the cake-like fluffy texture of a self-saucing pudding to the more chewy textured steamed pudding. I also find it’s a lot easier to see whether a self-saucing pudding is ready to be eaten – as the steamed pudding has a cover to take off before you can test it.

SteamedPudding07

I thought many recipes I looked through needed some photos on the covering and tying of the handle for top of the pudding, as I found some descriptions a bit confusing. Although my mum found this helpful video tutorial (a How-To) for pudding assembly.
SteamedPudding03

A big thanks to Esther for hosting this challenge and taking me outside my comfort zone (even if I didn’t get around to using suet…).

Butterscotch Steamed Pudding

Recipe adapted from Steamed Treacle Sponge Pudding by Delia Smith

Serves: 6-8

175g butter
175g brown sugar
1 teaspoon vanilla essence
3 eggs
175g self-raising flour
1 teaspoon baking powder

Sauce
1/2 cup brown sugar
2 tablespoons custard powder
1/2 cup milk
1/2 cup cream (you could use more milk here if you don’t have cream)

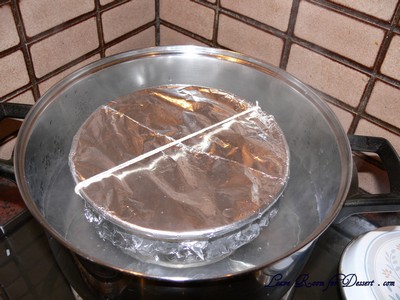
Grease a 1.2L pudding dish. Place a steamer, bowl, or egg rings in a large saucepan (large enough to fit your pudding dish, with gaps at the side) and fill with enough water to come half-way up the sides of the pudding dish. Place on low/medium heat.

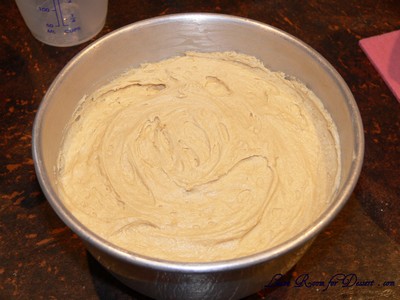
Cream the butter and the brown sugar until light and fluffy. Beat in the vanilla essence. Add the eggs one at a time, beating in between additions. Beat in the sifted flour and baking powder.
SteamedPudding10

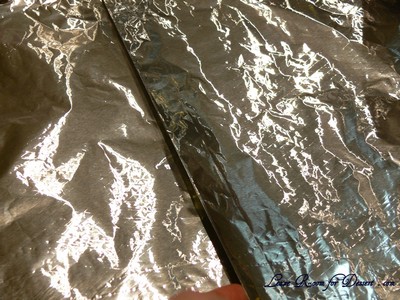
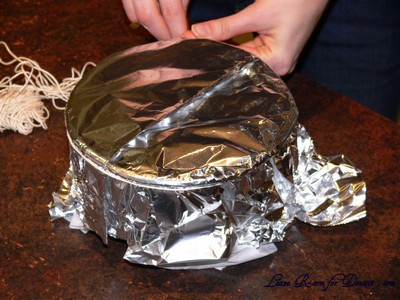
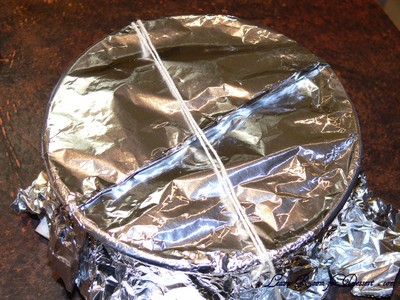
Pour mixture into greased pudding dish, smooth the top. Place a sheet of aluminum foil over a piece of grease-proof paper (approx 40cm x 30cm). Make one pleat (approx 2 cm) in the centre. Place the pleated paper and foil on top of the pudding (grease-proof paper side on the inside near the pudding, the foil on the outside). Turn the edges over, making a tight seal on the dish. Tie a piece of string around the dish – under the lip, keeping the foil tightly against the dish. Tie another piece of string (from the string under the lip) over the top to create a handle. (Watch this video).

SteamedPudding11

SteamedPudding12

SteamedPudding13

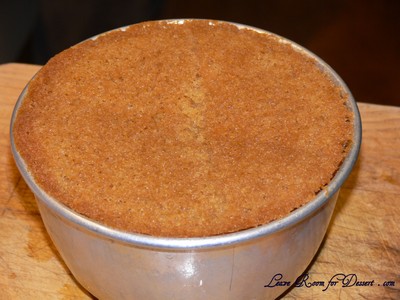
Place the pudding on top of the steamer in the saucepan. Heat on low for 2 hours, checking the water comes halfway up the dish. Once cooked remove from saucepan, sit for 5 minutes, then turn out.

SteamedPudding14

SteamedPudding15

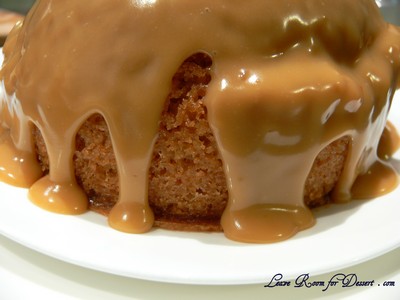
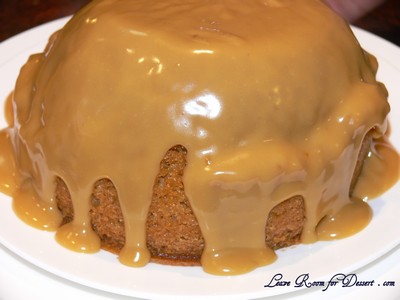
Nothing a bit of sauce won't cover up :)

Nothing a bit of sauce won't cover up 🙂

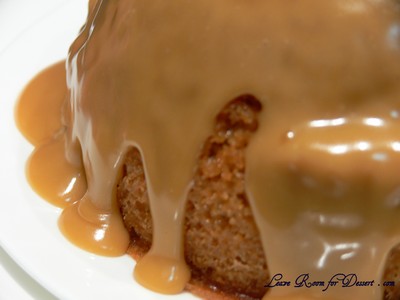
For the sauce, combine all ingredients in a saucepan over medium/high heat and continue to stir until the sauce thickens. Pour over the steamed pudding and serve.

SteamedPudding04

Vanilla Mousse Tart with Strawberries and Macaron

Tuesday, April 13th, 2010

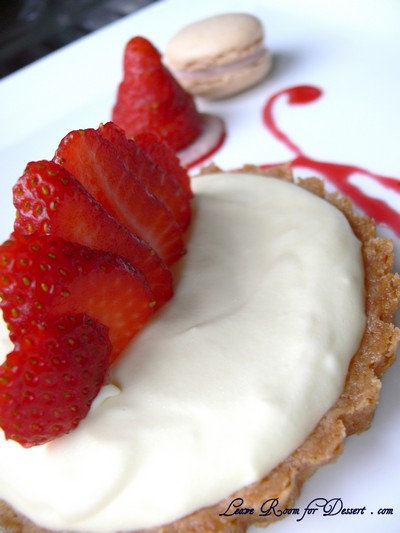
VanillaMousseTart11
In an effort to make sure I am fully prepared for my trip to Melbourne for a cooking class this weekend, I decided to make my own pâte sablée, mousse and macarons. The other things I was planning to make, like Italian meringue and glazes, were left behind due to time restrictions, so I hope I have enough experience to help and not hinder the others attending the class. I only mention this, as it is a level 2 class – and I haven’t done level 1. I look forward to telling everyone about the course when I get back and have some lovely photos.

VanillaMousseTart09

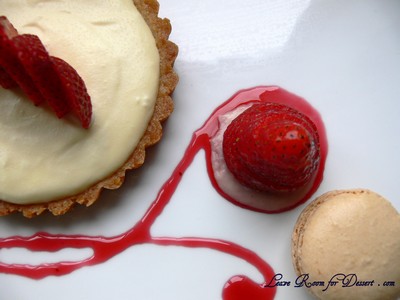
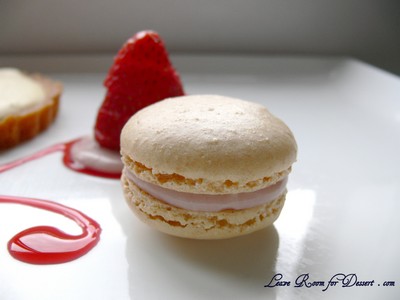
I was ecstatic with the results for my macarons. They had cute little “feet” (the little raised area on the bottom), they had a nice smooth top of the shell, there was no hole under the shell, and they came off the baking paper easily. (Well this is after I made the stupid mistake of trying to cook them in the oven with something else – I won’t tell you what it was [as it caused a very humid oven], but I would suggest cooking a tray at a time, with nothing else in the oven).

VanillaMousseTart07

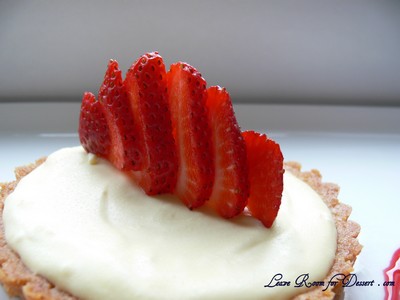
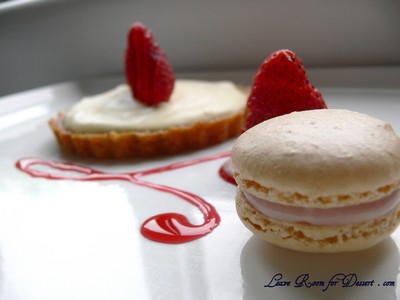
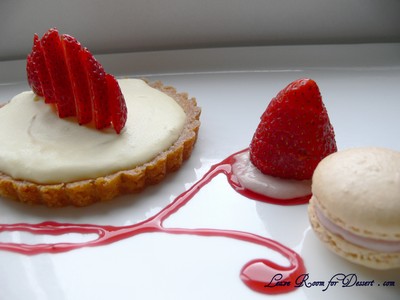
The vanilla mousse tart was lovely and paired very well with the fresh strawberries and mixed berry sauce.

VanillaMousseTart10

Vanilla Mousse Tart with Strawberries and Macaron

Recipe by Anita @ Leave Room for Dessert

Pâte Sablée:
1/4 cup plain flour
1/4 cup icing sugar
1/8 cup almond meal
62g butter, chilled and chopped
pinch salt
1 tablespoon milk (less or more may be required) (an egg is often used to bind the pastry, although with such a small amount, I thought it might be too sticky)

Vanilla Mousse:
1 egg yolk
1 1/2 tablespoons caster sugar
1/4 cup milk
1/3 teaspoon vanilla essence
1/2 teaspoon gelatin
2 tablespoons water
2/3 cup cream

Macarons:
1 egg white (30g) (I normally “age” my egg whites, covered at room temperature or in the fridge overnight)
2 tablespoons (22g) caster sugar
1/4 cup + 1 tablespoon (55g) pure icing sugar
1/4 cup + 1 teaspoon (40g) almond meal

Macaron filling:

a few tablespoons vanilla mousse mixed with a few teaspoons of mixed berry jus

Mixed Berry Sauce:
60g mixed berries (fresh or frozen, thawed)
1/3 cup caster sugar
1/2 cup water

Strawberries to serve

Pâte Sablée:
Process the flour, icing sugar, almonds and salt in a food processor. Place the butter in with the flour and process until it resembles fine breadcrumbs. Add enough milk for the mixture to just come together into a dough that just holds together. Form the dough into a disc and place in the fridge for 30 minutes. Remove from fridge and roll out to a few millimetres thickness (enough to fit two small round tart tins – around 12cm diameter). Place the dough in the tart tins, pressing lightly to fill the tin. Cut off excess dough. Place in the fridge for 30 minutes. Preheat oven to 180C. Cook pâte sablée for 10 minutes or until golden. Allow to cool before filling.

Vanilla Mousse:

Add gelatine to water. Bring the milk almost to the boil in a small saucepan. Whisk together the egg yolks, sugar and vanilla essence until lighter in colour. Pour the milk into the egg yolk mixture, whisking continuously. Pour the mixture back into the saucepan and cook on low/medium heat until the mixture coats the back of a spoon. Remove from heat and stir in gelatine. Allow to cool.

Whip the cream until light peaks form. Fold half of the cream into the cooled custard mixture. Fold lightly into the remaining cream. Spoon the mousse into the cooled tart shells and allow to set in the fridge for a few hours. (Leave some of the mousse for the macaron filling).

VanillaMousseTart05

Macarons:
Whisk the egg whites in a clean bowl with electric beaters on medium. Once the egg whites become frothy, slowly add the caster sugar, while continuously beating. Continue beating the egg whites until the mixture becomes a thick, glossy meringue, which holds it’s shape. Sift in the icing sugar combined with the almond meal on top of the meringue. Fold and beat the almond meal mixture into the meringue, just until any peaks you create in the mixture sink back. Don’t overbeat the mixture once it is flowing nicely (underbeating can also cause the biscuits to be too meringue like or have a peak on them).

Spoon mixture into a piping bag and pipe circles (3-4 cm diameter) onto a baking paper lined baking tray (make sure this is flat or the mixture will run). Let the macarons sit at room temperature for 30 min or more to allow the top to form a skin (this will help the macaron to rise from the bottom and not split the lovely shell).

Preheat oven to 150C (my oven is fan-forced, although you’ll need to check what temperature works for your oven). Place baking trays in the oven (one at a time, depending on your oven – if mine has two trays in there, the macarons do not colour evenly). Cook for approximately 10 minutes, or until lightly coloured, with a lightly crisp shell and soft on the inside.

Once cooled, you can fill them with the berry mousse filling.

Mixed Berry Sauce:
Puree the berries with some of the water. Strain through a sieve and add to a small saucepan with sugar and remaining water. Cook on medium or high heat until the mixture has become thicker and reduced to 1/2 or 1/3 cup. This may take 10 minutes (more or less depending on the size of your saucepan).

VanillaMousseTart04

Orange and Poppy Seed Cake – Guest Bloggers: Sarah and Jeremy

Thursday, April 8th, 2010


Sarah is a lovely friend, who had given some thought to starting up her own food blog. Although with University, placements, study, work, sport, seeing family and friends, cooking and (my most dreaded task) cleaning, there’s not a heap of time to create and manage a blog. Wow, she does do a lot, I don’t know how she fits it all in.

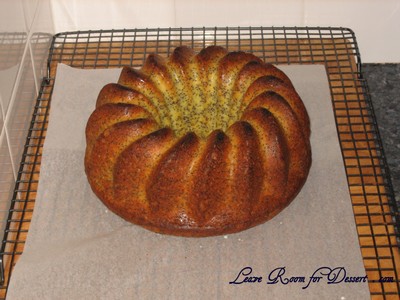
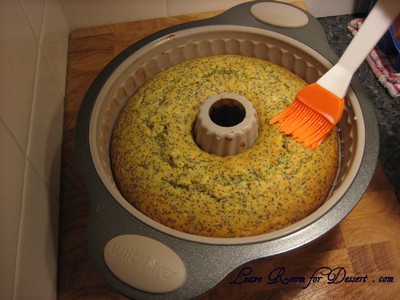
I suggested to her that if she ever wanted to post anything I’d be happy to have her guest blog on my site. And here they are, my first guest food bloggers – please welcome Sarah and Jeremy. They have chosen a lovely orange and poppyseed cake, which is a bit different to the one I normally make, which has a vanilla flavoured cake with a small hint of orange in the frosting. This cake has lovely strong orange flavours throughout and is perfect for parties or even taking to work. I’ll pass over to Sarah and Jeremy now… (sorry it’s taken me so long to post it)

SarahOrangePoppyseed01

Hi! We are Sarah and Jeremy, and Sarah works with Anita. We have been promising this guest blog for ages and have finally got ourselves organised. We have gone with something simple and relatively easy that stores well and is different from Anita’s usual fare. We hope that you enjoy!

Orange and Poppyseed Cake

Recipe adapted from Family Circle cooking book

1 large orange
⅔ cup milk, warm
½ cup poppy seed
250g unsalted butter
1½ cups caster sugar
3 eggs, slightly beaten
3 cups SR flour
Extra ⅓ cup milk, cold
Icing sugar for dusting

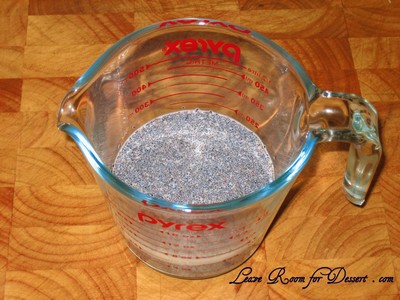
Place poppy seeds and warm milk in a bowl and soak for an hour. (or until your orange is cooked, cooled and puréed – as explained below).

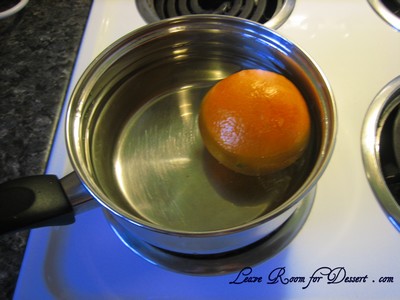
SarahOrangePoppyseed03

Place whole orange in a saucepan and cover with water. Bring to the boil, reduce heat and simmer for 20 minutes. It is ok if the water does not completely cover the orange (as seen in the picture), just turn it occasionally and let it cook a little longer (until the rind is soft).

SarahOrangePoppyseed02

When the orange is soft and easy to prick with a fork, turn the heat off and leave the orange in the hot water for a further 20 minutes.

Drain, and rinse under cold water. Cool for 1 hour. If pushed for time, we sometimes cut up the orange and place in the freezer until cool).

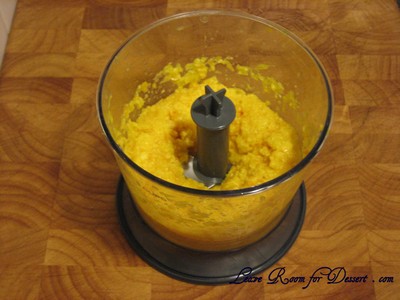
Cut the cooled orange into eighths (do not peel); remove seeds and blend until smooth.

SarahOrangePoppyseed04

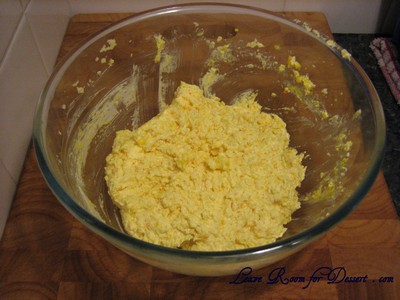
Cream the butter and sugar.

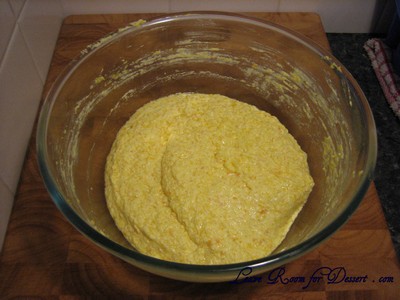
Beat in puréed orange – the mixture will look lumpy.

SarahOrangePoppyseed05

Beat in the eggs.

SarahOrangePoppyseed06

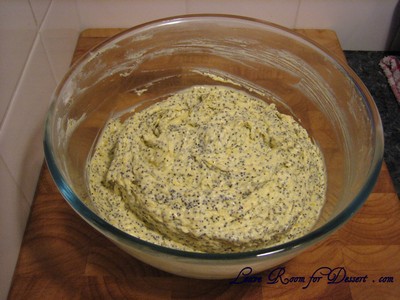
Sieve in flour and stir in poppy seed and milk mixture.

SarahOrangePoppyseed07

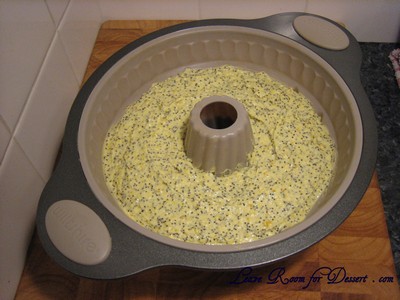
Spoon mixture into greased 24cm ring tin – fluted is good. This is a large cake mixture, so you will need a large ring tin (we use a silicone ring tin, which makes it really easy to turn out).

SarahOrangePoppyseed08

Bake at 180˚C for 45 min, or until a skewer comes out clean.

Remove from oven and immediately, whilst the cake is still in the tin, brush with half the extra milk using a pastry brush. This extra milk makes the cake lovely and moist.

SarahOrangePoppyseed09

Leave cake in tin for 5 min before turning out.

Brush with remaining milk and leave to cool.

SarahOrangePoppyseed01

When cool, lightly dust with icing sugar.

This cake is best kept in the fridge, but freezes really well. We regularly put a quarter of this cake in the freezer for a future date, and just allow it to defrost in the fridge.

Chocolate Chip Hot Cross Bun (Bread) and Butter Pudding

Sunday, April 4th, 2010

ChocChipBunPudding21

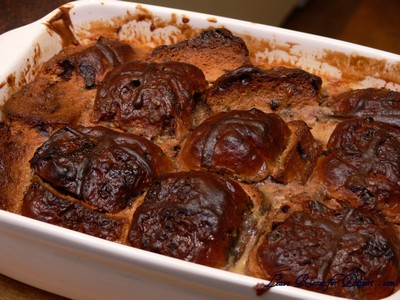
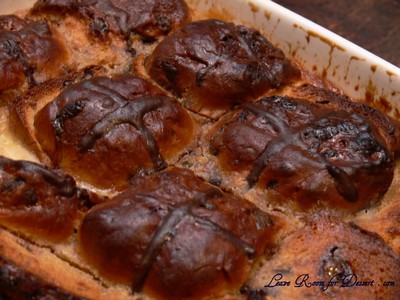
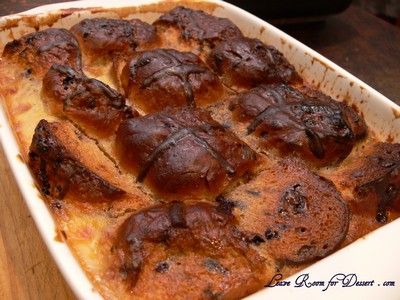
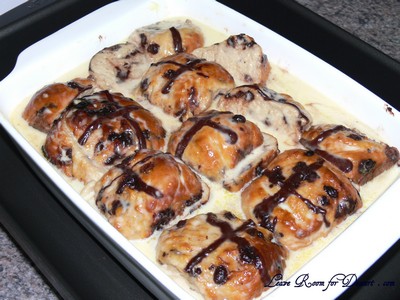
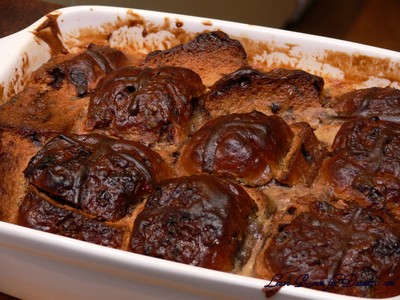
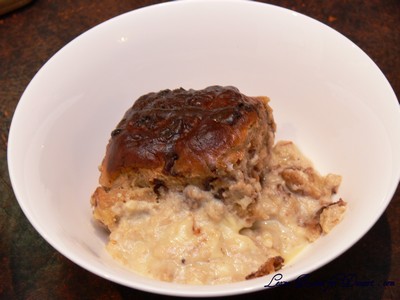
Here’s an idea for those who have ended up with too many choc chip or traditional hot cross buns after Easter. In case you didn’t freeze them, or aren’t going to warm them under the grill over the next few days, try this version of a bread and butter pudding – where the bread is the hot cross buns – or in my case, chocolate chip hot cross buns.

ChocChipBunPudding08

This is a great Easter dessert that should keep everyone happy. Happy Easter everyone!

ChocChipBunPudding16

Chocolate Chip Hot Cross Bun (Bread) and Butter Pudding

Recipe from Anita @ Leave Room for Dessert

9 chocolate chip hot cross buns (bought or made – see the recipe I use here)
50g butter, softened
5 eggs
1 cup caster sugar
500ml milk
500ml cream
1 tablespoon vanilla essence
Icing sugar to dust or melted white chocolate drizzled to serve

Grease an oven-proof dish with some of the butter. Cut the hot cross buns into two or three slices (leaving the tops intact). Spread the cut slides with the butter and lay them reassembled in the baking dish.

Heat the milk, cream and vanilla essence in a small/medium saucepan until almost at the boil. Whisk the caster sugar with the eggs in a large bowl. Slowly pour the warm cream and milk mixture into the egg and sugar mix, whisking constantly, until combined.

Pour the egg and milk mixture into dish with the hot cross buns. Let it sit for at least 30 minutes to allow the mixture to be soaked into the buns. (It can be stored in the fridge at this stage for a few hours, or until ready to cook). Make sure you press the buns down into the mixture a few times to make sure the top soak in the liquid (as they float to the top).

Preheat oven to 170C. Place the dish with the pudding mix into a larger dish and fill the larger dish halfway with warm/hot water. Cook for 1 hour or more until the custard is cooked (insert a knife into the custard to see if it is cooked – it will come out quite clean if cooked, or will have liquid custard if more time is needed. Alternatively move a bun to the side to check the bottom of the dish see if the custard is still runny liquid).

ChocChipBunPudding06

Remove from oven and let sit for 5 minutes. Enjoy with ice cream or Easter eggs.

ChocChipBunPudding20

ChocChipBunPudding27