Recipes

Quick Bread – Daring Bakers Challenge February 2012

Monday, February 27th, 2012


The Daring Bakers’ February 2012 host was – Lis! Lisa stepped in last minute and challenged us to create a quick bread we could call our own. She supplied us with a base recipe and shared some recipes she loves from various websites and encouraged us to build upon them and create new flavor profiles.

Could there be a better occasion to make the Daring Bakers Challenge than for a picnic overlooking the Harbour Bridge and Opera House, and listening to great music?

Well this last weekend, I quickly (hence the name) made the quick bread recipe given for our challenge this month. I looked through the ingredients and wondered how it would actually be a ‘bread’ – it really had cake ingredients and a sweet topping.

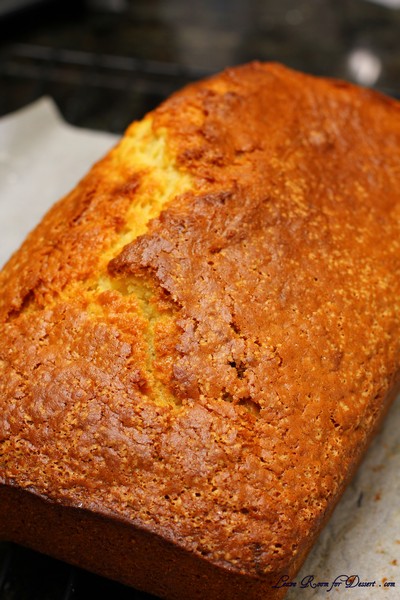
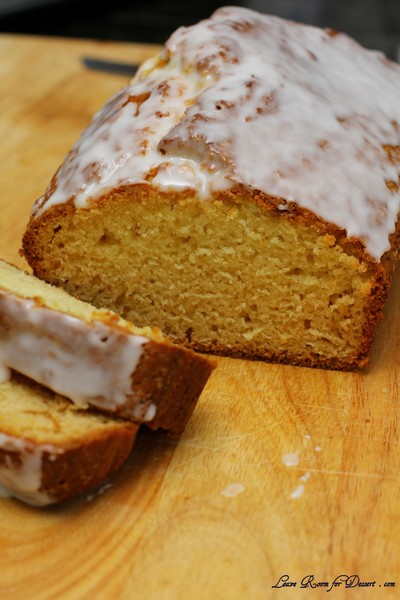
The quick bread was easy to make and tasted quite lovely. It had a texture that I couldn’t quite place, although others managed to pick the texture to be something like cornbread.

I must admit I did almost eat half the bread/cake in the afternoon, so not much sharing occurred 🙂

Thanks Lis for the recipe! It was great to have a quick and tasty challenge.

Basic Quick Bread

Makes one 9” x 5” (23×13 cm) loaf
Recipe from Sara Schewe

2 cups (480 ml) (250 gm/9 oz) all-purpose (plain) flour
1 cup (240 ml) (225 gm/8 oz) granulated sugar
1 teaspoon (5 ml) (5 gm) baking soda
1/2 teaspoon (2½ ml) (3 gm) fine sea salt or table salt
1 cup (240 ml) buttermilk or soured milk*
1 large egg
1/4 cup (60 ml) mild- or non-flavored oil, like canola
1 teaspoon (5 ml) flavored extract, such as vanilla or almond

for the glaze
1/3 cup (80 ml) (35 gm/1-1/3 oz) confectioners’ (icing) sugar
1-2 teaspoons (5-10 ml) milk

Directions:

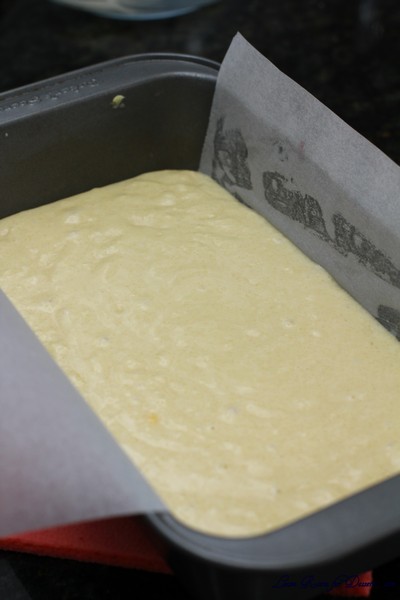
Preheat oven to moderate 350ºF/180ºC/gas mark 4. Grease a 9×5 inch (23×13 centimeter) loaf pan with butter and line with parchment paper cut to fit the length and width of the pan, with enough overhang to allow easy removal after baking. Grease the top sheet of parchment.
In large bowl, whisk flour, sugar, baking soda and salt to combine. Make a well in the center and set aside.
Lightly whisk (butter)milk, egg, oil, and extract to combine. Pour into well and stir until just mixed into a batter. The batter will be lumpy and may still show a few streaks of flour.
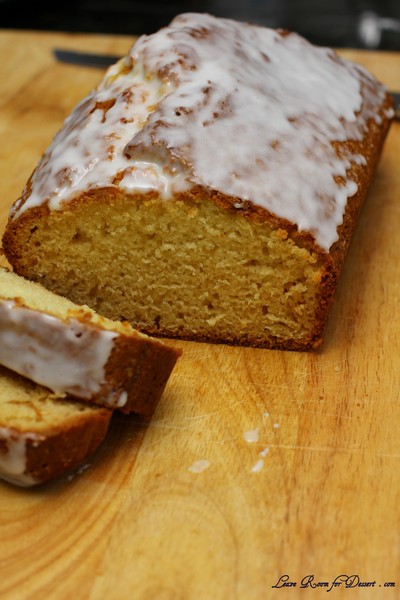
Pour batter into prepared pan. Bake for 40-50 minutes, or until a cake tester comes out clean. Cool in pan on wire rack for 10 minutes, then remove from pan and cool completely before slicing. Drizzle with glaze, if desired.

For the glaze: Slowly whisk confectioners’ (icing) sugar and half of the milk, adding more milk as needed to thin the glaze to the desired consistency.

Note: To make soured milk, combine 1 cup milk (240 ml) with 1 tablespoon (15 ml) vinegar or lemon juice and let sit for 10 minutes.

Scones – Daring Bakers Challenge January 2012

Friday, January 27th, 2012

Audax Artifex was our January 2012 Daring Bakers’ host. Aud worked tirelessly to master light and fluffy scones (a/k/a biscuits) to help us create delicious and perfect batches in our own kitchens!

After News Years and Christmas, everyone wants a break from cooking don’t they? Well, not us, or at least that’s not what happened. We decided to have some friends over for a Garden Party so lots of cooking (and cleaning) happened in what was supposed to be a relaxing start to the New Year. Then some big birthdays came up, more desserts, Australia Day – I tried out a new lamington recipe, and of course the Daring Bakers Challenge.

Luckily for me, the challenge just happens to be easy, affordable, quick and extremely tasty. I love fresh scones, they are probably one of my favourite foods. They must have a large slathering of jam and cream on top too. Although I must admit, I could not resist the scones once they came out of the oven. I took a bite of the smallest scone and fell into buttery bliss.

Audax, did an amazing job with this recipe and had certainly done his research on the matter and how to make different textured and flavoured scones.

Thanks to Audax for a great (and thankfully quick) challenge this month. I always love seeing your creations from the challenges!

Basic Scones (a.k.a. Basic Biscuits)

Servings: about eight 2-inch (5 cm) scones or five 3-inch (7½ cm) scones
Recipe can be doubled – I doubled this recipe and would recommend doing so. I hope it can be tripled or quadrupled – as I loved the taste so much.

Ingredients:
1 cup (240 ml) (140 gm/5 oz) plain (all-purpose) flour
2 teaspoons (10 ml) (10 gm) (⅓ oz) fresh baking powder
¼ teaspoon (1¼ ml) (1½ gm) salt
2 tablespoons (30 gm/1 oz) frozen grated butter (or a combination of lard and butter)
approximately ½ cup (120 ml) cold milk
optional 1 tablespoon milk, for glazing the tops of the scones

Directions:
1. Preheat oven to very hot 475°F/240°C/gas mark 9.
2. Triple sift the dry ingredients into a large bowl. (If your room temperature is very hot refrigerate the sifted ingredients until cold.)
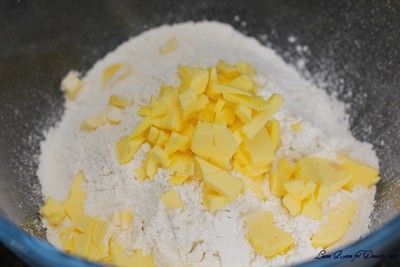
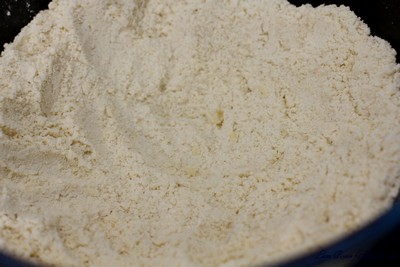
3. Rub the frozen grated butter (or combination of fats) into the dry ingredients until it resembles very coarse bread crumbs with some pea-sized pieces if you want flaky scones or until it resembles coarse beach sand if you want tender scones.

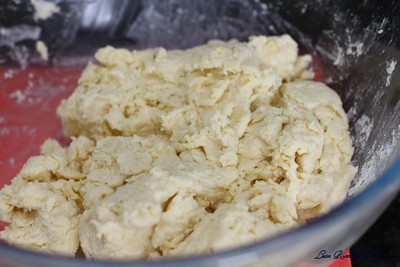
4. Add nearly all of the liquid at once into the rubbed-in flour/fat mixture and mix until it just forms a sticky dough (add the remaining liquid if needed). The wetter the dough the lighter the scones (biscuits) will be!


5. Turn the dough out onto a lightly floured board, lightly flour the top of the dough. To achieve an even homogeneous crumb to your scones knead very gently about 4 or 5 times (do not press too firmly) the dough until it is smooth. To achieve a layered effect in your scones knead very gently once (do not press too firmly) then fold and turn the kneaded dough about 3 or 4 times until the dough has formed a smooth texture. (Use a floured plastic scraper to help you knead and/or fold and turn the dough if you wish.)
6. Pat or roll out the dough into a 6 inch by 4 inch rectangle by about ¾ inch thick (15¼ cm by 10 cm by 2 cm thick). Using a well-floured 2-inch (5 cm) scone cutter (biscuit cutter), stamp out without twisting six 2-inch (5 cm) rounds, gently reform the scraps into another ¾ inch (2 cm) layer and cut two more scones (these two scones will not raise as well as the others since the extra handling will slightly toughen the dough). Or use a well-floured sharp knife to form squares or wedges as you desire.

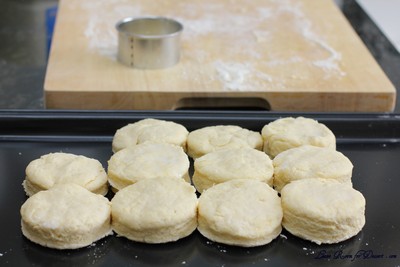
7. Place the rounds just touching on a baking dish if you wish to have soft-sided scones or place the rounds spaced widely apart on the baking dish if you wish to have crisp-sided scones. Glaze the tops with milk if you want a golden colour on your scones or lightly flour if you want a more traditional look to your scones.

8. Bake in the preheated very hot oven for about 10 minutes (check at 8 minutes since home ovens at these high temperatures are very unreliable) until the scones are well risen and are lightly coloured on the tops. The scones are ready when the sides are set.

9. Immediately place onto cooling rack to stop the cooking process, serve while still warm.

Variations on the Basic recipe
Buttermilk – follow the Basic recipe above but replace the milk with buttermilk, add ¼ teaspoon of baking soda, increase the fat to 4 tablespoons, in Step 3 aim of pea-sized pieces of fat coated in flour, in Step 5 fold and turn the dough, rounds are just touching in the baking dish, glaze with buttermilk.
Australian Scone Ring (Damper Ring) – follow the Basic recipe above but decrease the fat to 1 tablespoon, in Step 3 aim of fine beach sand sized pieces of fat coated in flour, in Step 5 knead the dough, in Step 7 form seven rounds into a ring shape with the eighth round as the centre, glaze with milk.
Cream – follow the Basic recipe above but replace the milk with cream, add ¼ teaspoon of baking soda, in Step 3 aim of beach sand sized pieces of fat coated in flour, in Step 5 knead the dough, rounds are just touching in the baking dish, glaze with cream.
Cheese and Chive – follow the Basic recipe above but add ¼ teaspoon of baking soda, after Step 2 add ½ teaspoon sifted mustard powder, ¼ teaspoon sifted cayenne pepper (optional), ½ cup (60 gm/2 oz) grated cheese and 2 tablespoons finely chopped chives into the sifted ingredients, in Step 3 aim of beach sand sized pieces of fat coated in flour, in Step 5 knead the dough, rounds are widely spaced in the baking dish, sprinkle the rounds with cracked pepper.
Fresh Herb – follow the Basic recipe above but after Step 3 add 3 tablespoons finely chopped herbs (such as parsley, dill, chives etc).
Sweet Fruit – follow the Basic recipe above but after Step 3 add ¼ cup (45 gm) dried fruit (e.g. sultanas, raisins, currents, cranberries, cherries etc) and 1 tablespoon (15 gm) sugar.
Wholemeal – follow the Basic recipe above but replace half of the plain flour with wholemeal flour.
Wholemeal and date – follow the Basic recipe above but replace half of the plain flour with wholemeal flour and after Step 3 add ¼ cup (45 gm) chopped dates and 1 tablespoon (15 gm) sugar.

Sourdough – Update from December Daring Bakers Challenge

Thursday, January 26th, 2012

I made the sourdough from the December Daring Bakers Challenge very soon after my last post about it. Although it did not really turn out particularly well, so I sort of held back on this post. And the next challenge is to be posted in tomorrow!

Back to the sourdough. After having the sourdough starter go mouldy whilst I was sick, I made sure this one didn’t. The starter was nice and bubbly and certainly smelt quite sour, so I was hoping I had nice active yeast in the mix.

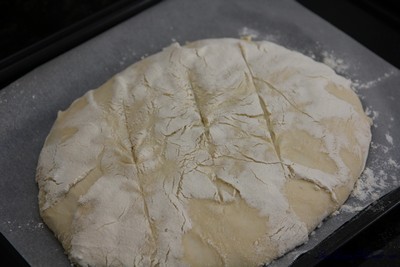
My First Sourdough - not so great looking

My first bread came out of the oven – and it hadn’t risen as much as I had hoped, I still crossed my fingers, although after cutting it through, we found it was still quite dough-y inside. Nice flavour, but texture was all wrong. I still have the starter dough though, and Nick has been making bread every weekend with it – although adding yeast to it – and it has been rising quite well. I wish I could part more information for you on troubleshooting, although as a newbie myself, I am just going to try and keep the starter and continue to feed it and hope the yeast becomes happier. At the moment I have it in the fridge, as I am a little scared I will forget about it on the bench and it will mould again.

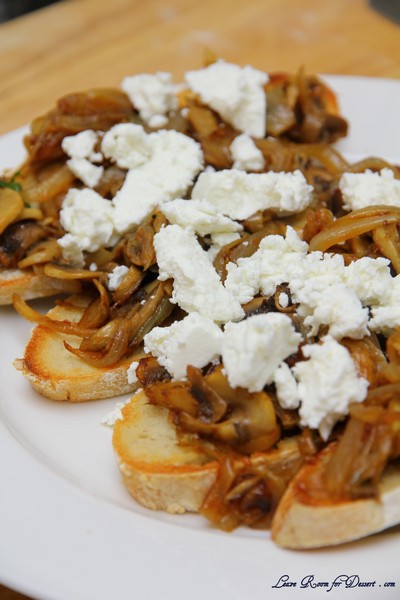
Even though the texture of this first bread was not so great, I still made the mushrooms from the given recipes and added some goats cheese on top, and you could hardly notice the bread’s heaviness once it was grilled and had a lovely topping on it.

Nick's sourdough - with a little yeast added

Thanks to our host (Jessica of My Recipe Project) for last month’s challenge – we are finally making sourdough – and I might just have the confidence to make more starter doughs…? 🙂

French Country Bread

Servings: 1 large loaf plus extra wheat starter for further baking

Wheat Starter – Day 1:
Ingredients
4 1/2 tablespoons (70 ml) (40 gm/1 ½ oz) stoneground breadmaking whole-wheat or graham flour
3 tablespoons (45 ml) water
Total scant ½ cup (115 ml) (3 oz/85 gm)

Directions:
1. In a Tupperware or plastic container, mix the flour and water into a paste.
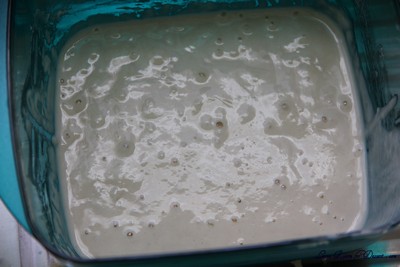
2. Set the lid on top gently, cover with a plastic bag, to prevent messes in case it grows more than expected!
3. Set somewhere warm (around 86 F if possible). I sometimes put mine on a windowsill near a radiator, but even if it’s not that warm, you’ll still get a starter going – it might just take longer.

Wheat Starter – Day 2:
Ingredients
4 1/2 tablespoons (70 ml) (40 gm/1 ½ oz) stoneground breadmaking whole-wheat or graham flour
3 tablespoons (45 ml) water
scant 1/2 cup (115 ml) (3 oz/85 gm) starter from Day 1
Total scant cup (230 ml) (6 oz/170 gm)

Directions:
1. Stir the flour and water into the mixture from Day 1, cover, and return to its warm place.

Wheat Starter – Day 3:
Ingredients
4 1/2 tablespoons (70 ml) (40 gm/1 ½ oz) stoneground breadmaking whole-wheat or graham flour
4 teaspoons (20 ml) water
scant 1 cup (230 ml) (6 oz/170 gm) starter from Day 2
Total 1⅓ cup (320 ml) (230 gm/8-1/10 oz)

Directions:
1. Stir the flour and water into the mixture from Day 2, cover, and return to its warm place.

Wheat Starter – Day 4:
Ingredients
3/4 cup plus 1½ tablespoons (205 ml) (120 gm/4 ¼ oz) unbleached all-purpose flour
1/2 cup less 4 teaspoons (100 ml) water
1⅓ cup (320 ml) (230 gm/8 oz) starter from Day 3
Total scant 2⅔ cup (625 ml) (440 gm/15½ oz)

Directions:
1. Stir the flour and water into the mixture from Day 3, cover, and return to its warm place. At this point it should be bubbling and smell yeasty. If not, repeat this process for a further day or so until it is!

French Country Bread
Stage 1: Refreshing the leaven
Ingredients
1 cup less 1 tablespoon (225 ml) (160 gm/5 ⅔ oz) wheat Leaven Starter
6 tablespoons less 1 teaspoon (85 ml) (50 gm/1¾ oz) stoneground bread making whole-wheat or graham flour
1 cup plus 2 teaspoons (250 ml) (150 gm/5 ⅓ oz) unbleached all purpose flour
1/2 cup (120 ml) water
Production Leaven Total 2¾ cups plus 4 teaspoons (680 ml) (480 gm /1 lb 1 oz)

Directions:
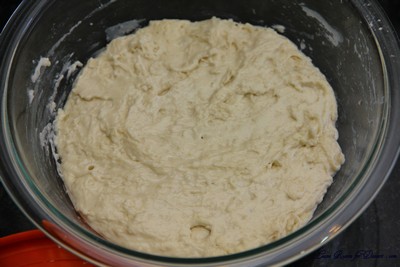
1. Mix everything into a sloppy dough. It may be fairly stiff at this stage. Cover and set aside for 4 hours, until bubbling and expanded slightly.

French Country Bread

Stage 2: Making the final dough
Ingredients
3/4 cup less 1 teaspoon (175 ml) (100 gm/3 ½ oz) stoneground breadmaking whole-wheat or graham flour, plus more for dusting
2 cups plus 2 tablespoons (510 ml) (300gm/10 ½ oz) unbleached all-purpose flour
1¼ teaspoons (7½ ml) (7 gm/¼ oz) sea salt or ⅔ teaspoon (3⅓ ml) (3 gm/⅛ oz) table salt
1 ¼ cups (300 ml) water
1 ¾ cups (425 ml) (300 gm/10 ½ oz) production leaven – this should leave some (1 cup) for your next loaf.
Total 6 cups less 2 tablespoons 1415 ml (1007 gm/35 ½ oz/2 lb 3½ oz)

Directions:
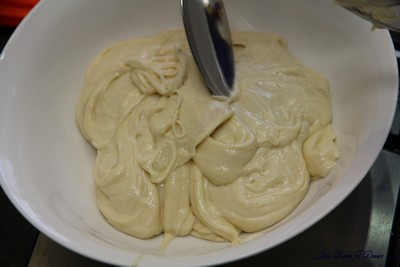
1. Mix the dough with all the ingredients except the production leaven. It will be a soft dough.
2. Knead on an UNFLOURED surface for about 8-10 minutes, getting the tips of your fingers wet if you need to. You can use dough scrapers to stretch and fold the dough at this stage, or air knead if you prefer. Basically, you want to stretch the dough and fold it over itself repeatedly until you have a smoother, more elastic dough.
See my demonstration here: http://www.youtube.com/watch?v=OqS3raEGdwk
3. Smooth your dough into a circle, then scoop your production leaven into the centre. You want to fold the edges of the dough up to incorporate the leaven, but this might be a messy process. Knead for a couple minutes until the leaven is fully incorporated in the dough. See my demonstration here: http://www.youtube.com/watch?v=UPO97R4iO4U

production leaven

4. Spread some water on a clean bit of your work surface and lay the dough on top. Cover with an upturned bowl, lining the rim of the bowl with a bit of water. Leave for an hour, so that the gluten can develop and the yeasts can begin to aerate the dough.
5. Once your dough has rested, you can begin to stretch and fold it. Using wet hands and a dough scraper, stretch the dough away from you as far as you can without breaking it and fold it back in on itself. Repeat this in each direction, to the right, towards you, and to the left. This will help create a more ‘vertical’ dough, ready for proofing. See my demonstration here: http://www.youtube.com/watch?v=rDoJRCMfclE
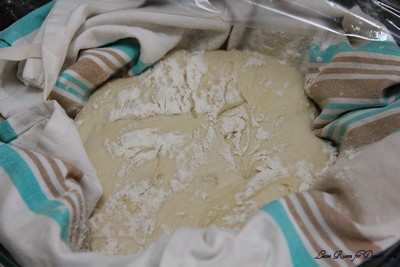
6. Heavily flour a banneton/proofing basket with whole wheat flour and rest your dough, seam side up, in the basket. Put the basket in a large plastic bag, inflate it, and seal it. Set aside somewhere warm for 3-5 hours, or until it has expanded a fair bit. It is ready to bake when the dough responds to a gently poke by slowly pressing back to shape.

7. Preheat the oven to hot 425°F/220°C/gas mark 7. Line a baking sheet with parchment, then carefully invert the dough onto the sheet. I like to put the baking sheet on top of the basket, then gently flip it over so as to disturb the dough as little as possible. Make 2-3 cuts on top of the loaf and bake for 40-50 minutes, reducing the temperature to moderately hot 400°F/200°C/gas mark 6 after 10 minutes.

8. Cool on a cooling rack.

Garlic and Oregano Roasted Mushrooms and Pancetta on Toasted Sourdough

Servings: 4

Ingredients
4 large or 8 medium field mushrooms, sliced
2 red onions, peeled and cut into wedges
2 garlic cloves, peeled and sliced
4 sprigs oregano, leaves only
100 gm (3 ½ oz) pancetta, cubed (optional)
2 tablespoons (30 ml) extra virgin olive oil
4 slices sourdough bread
butter, for spreading
freshly ground black pepper
sea salt

Directions:
1. Preheat the oven to moderately hot 400°F/200°C/gas mark 6. Place the mushrooms on an oiled baking sheet, with onion wedges scattered beneath them. Sprinkle over the garlic, oregano, and pancetta, drizzle with olive oil and season with black pepper and sea salt. Roast for 25 minutes until the mushrooms are tender.
2. Toast your bread in the toaster. Butter the toast, and then pile your mushroom mixture on top.

A Twist: Instead of roasting your mushrooms, you can also sauté them in a pan and, just before serving, stir in a dash of cream for a rich, warm treat!

Sans Rival – Daring Bakers Challenge November 2011

Sunday, November 27th, 2011

Catherine of Munchie Musings was our November Daring Bakers’ host and she challenged us to make a traditional Filipino dessert – the delicious Sans Rival cake! And for those of us who wanted to try an additional Filipino dessert, Catherine also gave us a bonus recipe for Bibingka which comes from her friend Jun of Jun-blog.

I can’t believe how close the Christmas and New Year holidays are. This year I was so sure I was going to make a fruit cake – not for myself, but for some of the special people in my life who do like or love fruit cake… I had grand plans of soaking the dried fruit in alcohol for weeks before making the cake and then allowing the taste to mature. I’m not even sure if this is the right way of going about making a fruit cake – so would love any tips from readers who can point me in the direction of some great (and maybe some that are also quick) tasty fruit cake recipes.

If I don’t get around to making fruit cake, I think there are already orders in for custard filled profiteroles with toffee. Hopefully a new Christmas tradition for our family – I know I love it.

I’m also hoping the next daring bakers challenge will be a non time consuming one, due to every weekend being filled with social activities, and days filled with work I want to get done before the quick break.

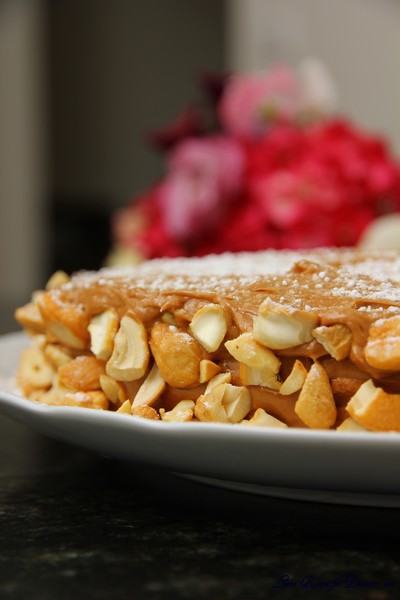
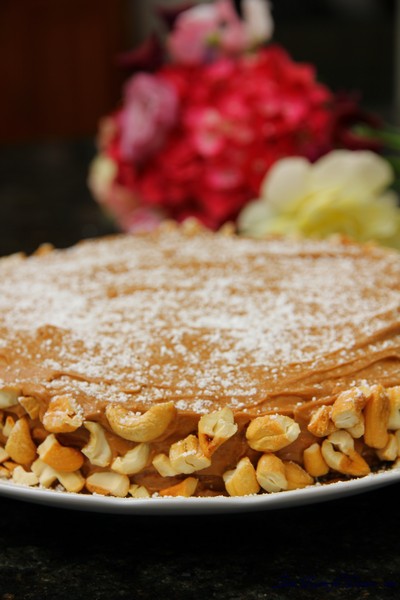
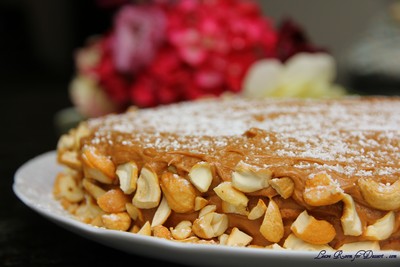
Luckily for this challenge, I decided to make it as soon as possible, and am glad I did, as the weekends filled up fast. I decided to make the chocolate Sans Rival, and found it to be lovely, but quite rich – it worked well with some vanilla ice cream to cut the richness.

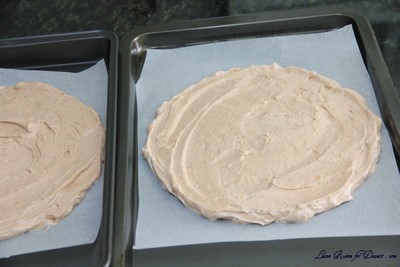
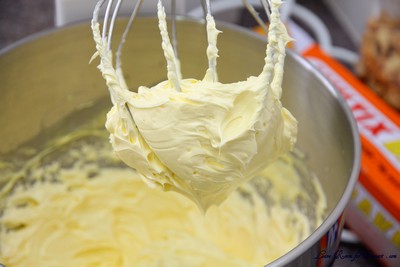
The meringue was very difficult for me to get right, as I only have two spots for trays in the oven, and needed to make 4 layers – I did these on trays rather than cake pans, as I didn’t want to wash up between each bake. I also think I made the buttercream on a particularly hot day, causing a bit more of a butter taste than I would prefer.

You can also see in the background a bouquet I made from flowers from my garden, including a “red” hydrangea, sweet peas and some roses I planted back in July and have now been flowering beautifully.

Thanks to our host for this month, I understand how much effort must go into organising these challenges.

Sans Rival

Servings: 12

Ingredients
10 large egg whites, room temp
1 cup (240 ml) (225 gm) (8 oz) white granulated sugar
1 teaspoon (5 ml) (3 gm) cream of tartar
¼ cup (60 ml) (20 gm) (2/3 oz) Dutch processed cocoa (optional and not traditional)
2 cups (480 ml) (240 gm) (8½ oz) chopped, toasted cashews (about 2/3 finely ground, and 1/3 chopped for decorations)

Directions:
Note: You will need four layers which will mean that you might have to bake in two batches. Be sure to use fresh parchment paper and cooled pans for each batch.

1. Preheat oven to moderate 325°F/160°C/gas mark 3.
2. Line cake pan bottoms with parchment paper and butter and flour the sides really well.
3. In a large clean, dry glass or metal mixing bowl, beat egg whites on medium until foamy (2 mins.). Sprinkle with cream of tartar. Gradually add sugar, a couple of tablespoons at a time, continuing to beat now at high speed until stiff shiny peaks form. (about 7-10 mins.)

4. Fold in nuts, reserving enough to use for decoration.

(Note the more finely ground for folding into meringue. The coarsely ground for is decoration of finished cake.)

5. Divide meringue into four equal parts. Spread in pans, evenly to edges. If doing batches, use fresh parchment paper and cooled pans for each batch.

6. Bake in preheated oven for 30 minutes, or until golden brown. Remove the meringue from the baking pans while still hot; allow to cool slightly. Peel off the parchment paper while it is still warm, it is difficult to remove sometimes when they have completely cooled.

7. When cool, trim edges so that all 4 meringue layers are uniformly shaped. Set aside.

French Buttercream:

Ingredients
5 large egg yolks, room temperature
1 cup (240 ml) (225 gm) (8 oz) white granulated sugar
1/4 cup (60 ml) water
1¼ cup (300 ml) (2½ sticks) (285 gm) (10 oz) unsalted butter, room temperature
Optional Flavorings: 2 oz (55 gm) unsweetened chocolate, melted, or 1½ teaspoon (7 ½ ml) almond extract, or 1½ teaspoon (7 ½ ml) vanilla extract, or any flavor you like

Directions:
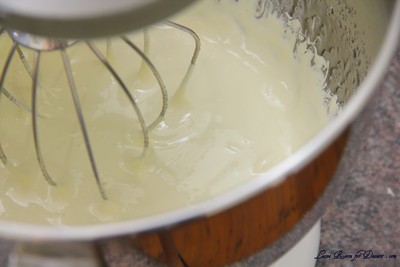
1. Put the egg yolks in a mixing bowl. Beat at high speed until the yolks have doubled in volume and are a lemon yellow.
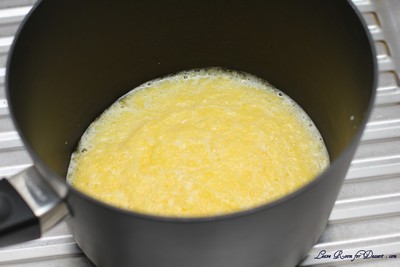
2. Put the sugar and water in a heavy pan and cook over medium heat, stirring the sides down only until all the sugar is dissolved and the syrup reaches 235°F/112°C (or thread stage).
3. With the mixer on high, very slowly pour the syrup down the sides of the bowl, until all has been added. Be careful as the very hot syrup could burn you if it splashes from the beaters. Continue beating on high until the mixture is ROOM TEMPERATURE (about 15 mins). Still on high, beat in the soft, room temperature butter a tablespoon at a time. Add flavoring after you beat in the butter. Refrigerate the buttercream for at least an hour, and whip it smooth just before you use it.

Assembly:
Set bottom meringue on cake board with a dab of butter cream to hold it in place. Spread a thin layer of buttercream and then place another meringue on top. Repeat with a thin layer of buttercream, meringue, thin layer of buttercream, meringue, and finally buttercream the top and sides. Decorate with reserved nuts.

Refrigerate until ready to serve. It is easier to cut cold. May freeze.

Povitica – Daring Bakers Challenge October 2011

Thursday, October 27th, 2011

The Daring Baker’s October 2011 challenge was Povitica, hosted by Jenni of The Gingered Whisk. Povitica is a traditional Eastern European Dessert Bread that is as lovely to look at as it is to eat!

I have a long list of desserts I would love to make, and I am slowly getting through them, although so many times I log in to see what we are making for the Daring Bakers and find I have never heard of the dish we will be making.
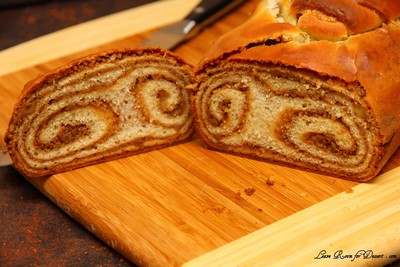
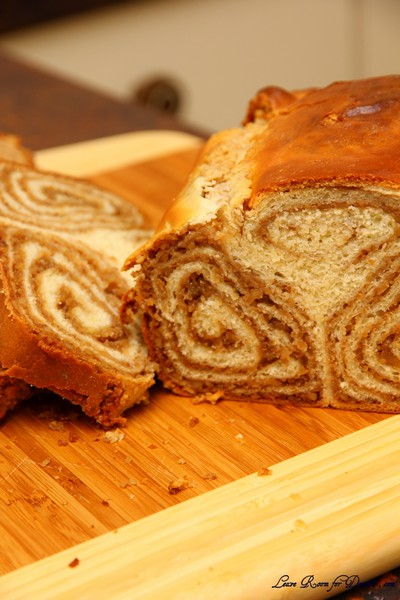
I had never heard of a Povitica before this challenge, and neither had anyone I shared the two loaves I made with. Although, when I found out it was a nut bread I thought it sounded similar to the yeasted meringue coffee cake we made in March, and in many ways it was.

Both had a lovely walnut filling swirled through the bread. The recipe for the povitica was lovely – the dough rolled beautifully and thin, and rolling it to make the swirls was quite satisfying. I found the filling a little difficult to spread, and found adding a bit more warm milk helped, although the easiest way was to use a spatula and only put it on small sections at a time, to reduce the risk of tearing the dough.
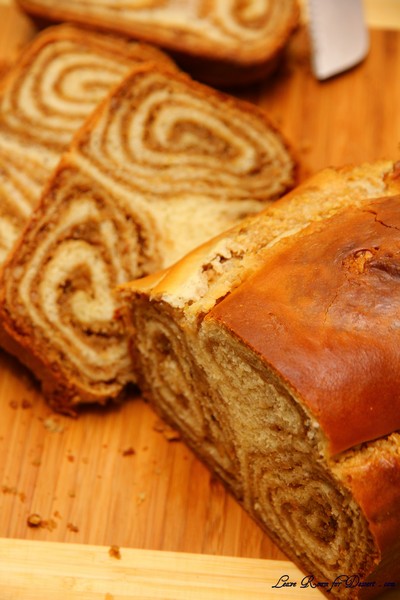
It is a great cake alternative for someone who does not enjoy sweet cakes. For the top glaze, I used a little milk instead of the coffee mixture, and the top looked beautiful.

In the following photos hopefully you will see my lovely new* big granite benchtop – it was installed just in time for this challenge. I want to thank my Dad so much for all the hard work he has done making my kitchen more useable. I also want to thank Arthur for the benchtop and cupboards.
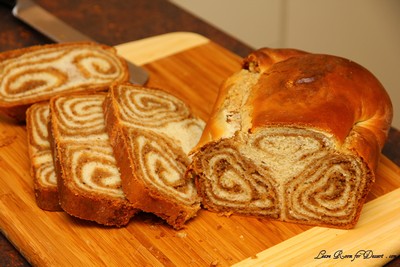
Povitica

(makes 4 loaves)
Recipe source: Jenni of The Gingered Whisk

To activate the Yeast:
2 Teaspoons (10 ml/9 gm) Sugar
1 Teaspoon (5 ml/3 gm) All-Purpose (Plain) Flour
½ Cup (120ml) Warm Water
2 Tablespoons (30ml/14 gm/½ oz/2 sachets) Dry Yeast

Dough:
2 Cups (480ml) Whole Milk
¾ Cup (180 ml/170gm/6 oz) Sugar
3 Teaspoons (15 ml/18 gm/2/3 oz) Table Salt
4 Large Eggs
½ Cup (120ml/115 gm/one stick/4 oz) Unsalted Butter, melted
8 cups (1.92 l/1.12 kg/39½ oz/2½ lb) All-Purpose Flour, measure first then sift, divided

Walnut Filling:
7 Cups (1.68 l/1.12 kg/2.5 lbs) Ground English Walnuts
1 Cup (240ml) Whole Milk
1 Cup (240ml/225 gm/2 sticks/8 oz) Unsalted Butter
2 Whole Eggs, Beaten
1 Teaspoon (5ml) Pure Vanilla Extract
2 Cups (480ml/450 gm/16 oz) Sugar
1 Teaspoon (5 ml/4 gm) Unsweetened Cocoa Powder
1 Teaspoon (5 ml/3 gm) Cinnamon

Topping:
½ Cup (120 ml) Cold STRONG Coffee
2 Tablespoons (30 ml/28 gm/1 oz) Granulated Sugar
Melted Butter

To Activate Yeast:
1. In a small bowl, stir 2 teaspoons sugar, 1 teaspoon flour, and the yeast into ½ cup warm water and cover with plastic wrap.
2. Allow to stand for 5 minutes

To Make the Dough:
3. In a medium saucepan, heat the milk up to just below boiling (about 180°F/82°C), stirring constantly so that a film does not form on the top of the milk. You want it hot enough to scald you, but not boiling. Allow to cool slightly, until it is about 110°F/43°C.
4. In a large bowl, mix the scalded milk, ¾ cup (180 gm/170 gm/6 oz) sugar, and the salt until combined.
5. Add the beaten eggs, yeast mixture, melted butter, and 2 cups (480 ml/280 gm/10 oz) of flour.

6. Blend thoroughly and slowly add remaining flour, mixing well until the dough starts to clean the bowl.

7. Turn dough out onto floured surface and knead, gradually adding flour a little at a time, until smooth and does not stick. Note: I did not use all 8 cups of flour
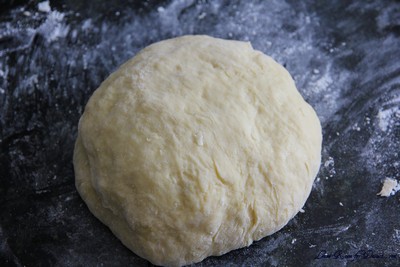
8. Divide the dough into 4 equal pieces (they will each weight about 1.25 pounds/565 grams)
9. Place dough in 4 lightly oiled bowls, cover loosely with a layer of plastic wrap and then a kitchen towel and let rise an hour and a half in a warm place, until doubled in size.

To Make the Filling
10. In a large bowl mix together the ground walnuts, sugar, cinnamon and cocoa.
11. Heat the milk and butter to boiling.
12. Pour the liquid over the nut/sugar mixture.
13. Add the eggs and vanilla and mix thoroughly.
14. Allow to stand at room temperature until ready to be spread on the dough.
15. If the mixture thickens, add a small amount of warm milk.

To Roll and Assemble the Dough:
16. Spread a clean sheet or cloth over your entire table so that it is covered.
17. Sprinkle with a couple of tablespoons to a handful of flour (use flour sparingly)
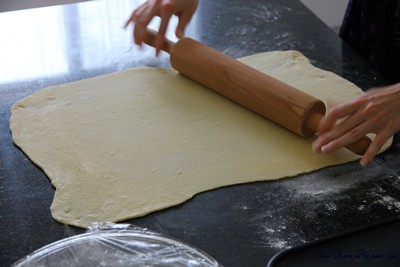
18. Place the dough on the sheet and roll the dough out with a rolling pin, starting in the middle and working your way out, until it measures roughly 10-12 inches (25½ cm by 30½ cm) in diameter.

19. Spoon 1 to 1.5 teaspoons (5ml to 7 ½ ml/4 gm to 7 gm) of melted butter on top. (I didn’t do this)
20. Using the tops of your hands, stretch dough out from the center until the dough is thin and uniformly opaque. You can also use your rolling pin, if you prefer.
21. As you work, continually pick up the dough from the table, not only to help in stretching it out, but also to make sure that it isn’t sticking.
22. When you think it the dough is thin enough, try to get it a little thinner. It should be so thin that you can see the color and perhaps the pattern of the sheet underneath.
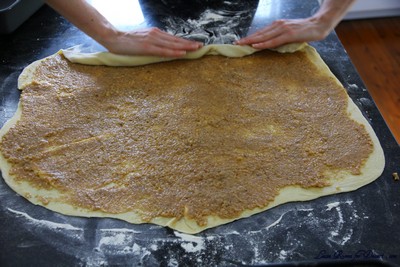
23. Spoon filling evenly over dough until covered.

24. Lift the edge of the cloth and gently roll the dough like a jelly roll.
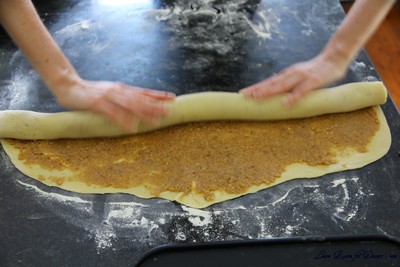
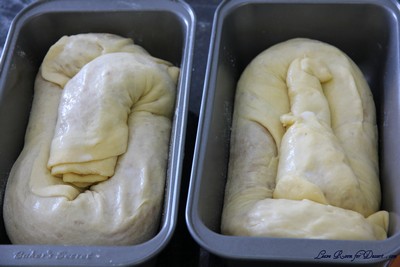
25. Once the dough is rolled up into a rope, gently lift it up and place it into a greased loaf pan in the shape of a “U”, with the ends meeting in the middle. You want to coil the dough around itself, as this will give the dough its characteristic look when sliced.
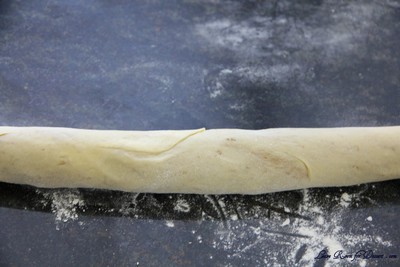
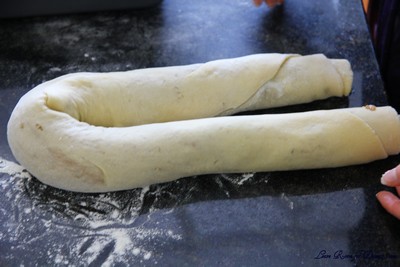
26. Repeat with remaining three loaves, coiling each rope of dough in its own loaf pan.
27. Brush the top of each loaf with a mixture of ½ cup (120 ml) of cold STRONG coffee and 2 tablespoons (30ml/28 gm/1 oz) of sugar. If you prefer, you can also use egg whites in place of this.

28. Cover pans lightly will plastic wrap and allow to rest for approximately 15 minutes.
29. Preheat oven to moderate 350°F/180°C/gas mark 4.
30. Remove plastic wrap from dough and place into the preheated oven and bake for approximately 15 minutes.
31. Turn down the oven temperature to slow 300°F/150°C/gas mark 2 and bake for an additional 45 minutes, or until done.
32. Remove bread from oven and brush with melted butter.
33. Check the bread at 30 minutes to ensure that the bread is not getting too brown. You may cover the loaves with a sheet of aluminum foil if you need to.
34. Remove from the oven and allow to cool on a wire rack for 20-30 minutes, still in the bread pan. Remember, the bread weighs about 2.5 and it needs to be able to hold its own weight, which is difficult when still warm and fresh out of the oven. Allowing it to cool in the pan helps the loaf to hold its shape.
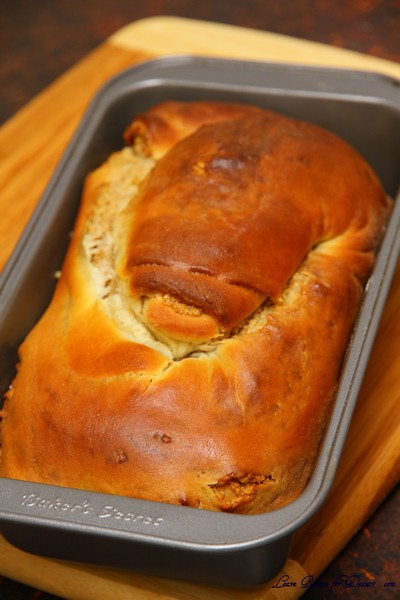

35. It is recommended that the best way to cut Povitica loaves into slices is by turning the loaf upside down and slicing with a serrated knife.

Smaller batch measurements courtesy of Audax
Half Batch Dough Ingredients (Makes two loaves each 1.25 lbs/565 grams)
To activate the Yeast:
1 Teaspoon (5 ml/4 ½ gm) Sugar
½ Teaspoon (2½ ml/1½ gm) All-Purpose (Plain) Flour
¼ Cup (60 ml) Warm Water
1 Tablespoon (15 ml/7 gm/¼ oz/1 sachet) Dry Yeast

Dough:
1 Cup (240 ml) Whole Milk
6 Tablespoons (90 ml/85 gm/3 oz) Sugar
1½ Teaspoons (7½ ml/9 gm/1/3 oz) Table Salt
2 Large Eggs
¼ Cup (60 ml/60 gm/½ stick/2 oz) Unsalted Butter, melted
4 cups (960 ml/560 gm/19¾ oz/1¼ lb) All-Purpose Flour, measure first then sift, divided

Topping:
¼ Cup (60 ml) Cold STRONG Coffee
1 Tablespoon (15 ml/14 gm/½ oz) Granulated Sugar
Melted Butter

Half Batch Filling Ingredients (enough filling for the two loaves(
3½ Cups (840 ml/560 gm/1¼ lb/20 oz) Ground English Walnuts
½ Cup (120 ml) Whole Milk
½ Cup (120 ml/115 gm/1 stick/4 oz) Unsalted Butter
1 Whole Egg, Beaten
½ Teaspoon (2½ ml) Pure Vanilla Extract
1 Cup (240 ml/225 gm/8 oz) Sugar
½ Teaspoon (2½ ml/2 gm) Unsweetened Cocoa Powder
½ Teaspoon (2½ ml/1½ gm) Cinnamon

Quarter Batch Dough Ingredients (Makes one loaf 1.25 lbs/565 grams)
To activate the Yeast:
½ Teaspoon (2½ ml/2¼ gm) Sugar
¼ Teaspoon (1¼ ml/¾ gm) All-Purpose (Plain) Flour
2 Tablespoons (30 ml) Warm Water
1½ Teaspoons (7½ ml/3½ gm/0.125 oz/½ sachet) Dry Yeast

Dough:
½ Cup (120 ml) Whole Milk
3 Tablespoons (45 ml/43 gm/1½ oz) Sugar
¾ Teaspoon (3¾ ml/9 gm/0.17 oz) Table Salt
1 Large Egg
1 tablespoon (30 ml/30 gm/¼ stick/1 oz) Unsalted Butter, melted
2 cups (480 ml/280 gm/10 oz/0.62 lb) All-Purpose Flour, measure first then sift, divided

Topping:
2 Tablespoons (30 ml) Cold STRONG Coffee
1½ Teaspoons (7½ ml/7 gm/¼ oz) Granulated Sugar
Melted Butter

Quarter Batch Filling Ingredients (enough filling for one loaf)
1¾ Cups (420 ml/280 gm/10 oz) Ground English Walnuts
¼ Cup (60 ml) Whole Milk
¼ Cup (60 ml/58 gm/½ stick/2 oz) Unsalted Butter
1 Egg Yolk From A Large Egg, Beaten
¼ Teaspoon (1¼ ml) Pure Vanilla Extract
½ Cup (120 ml/115 gm/4 oz) Sugar
¼ Teaspoon (1¼ ml/1 gm) Unsweetened Cocoa Powder
¼ Teaspoon (1¼ ml/¾ gm) Cinnamon

Storage:
There are several options for storing (and eating) your four loaves of Povitica:

• The Povitica will keep fresh for 1 week at room temperature.
• The Povitica will keep fresh for 2 weeks if refrigerated.
• The Povitica can be frozen for up to three months when wrapped a layer of wax paper followed by a layer of aluminum foil. It is recommended to not freeze Povitica with cream cheese fillings as it doesn’t hold up to being thawed really well – it crumbles.
Pineapple Sorbet and Tropical Granita with Fruit Salad

Thursday, October 6th, 2011


Daylight savings has just begun, it is no longer dark when I get home from work (and only mildly darker when I leave). I am able to stop and smell the roses (and this is not just a saying in my case, as my first roses are opening for the season, and it just so happens to be a double delight rose).

It is starting to feel like summer, with the all the extra light, although I would not wish Spring gone too soon – as it is my favourite season.

More fruits are coming back in season, and we can start eating icy cold sorbets again.

As pineapples are one of my favourite fruits, I started making this pineapple sorbet at least a year ago now. It can certainly be eaten by itself, although it also pairs perfectly with this refreshing tropical granita and the fruit salad.

This is certainly a great way to make a fruit salad stand out a bit more and grab attention.

I have tried to plate the fruit salad artistically. It is simpler to serve it in a bowl, but it looks very pretty this way.

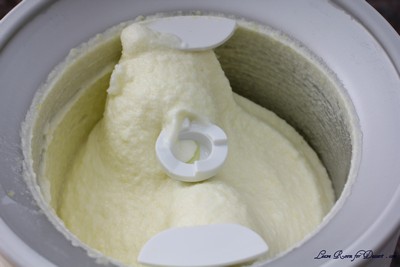
I have only tried the sorbet using an ice cream maker and it becomes almost creamy in texture. It’s amazing how the colour changes too, lightening up and becoming whiter as the mixture thickens. I am sure you could make it using the alternate method of removing the mix from the freezer and mixing it every hour for 3 or more hours and returning to the freezer. Although I am unsure as to whether it will result in the same creamy texture.

I am entering this recipe into a competition held by King of Fruit, a Queensland based business that supplies fresh pineapple to most outlets in Australia. I was lucky enough to be sent 3 lovely pineapples to inspire some recipes. If you have a chance, please check it out and vote for me 🙂 ( I think you only get one vote per email address.)

I have also entered my Herb and Orange Chicken with Pineapple and Capsicum served with Pomegranate, Orange and Baby Spinach Salad recipe into the competition.

Pineapple Sorbet and Tropical Granita with Fruit Salad

Recipe by Anita @ Leave Room for Dessert

Serves: 4 (with some leftover sorbet and granita)

Pineapple Sorbet

Makes: 1-1.4L sorbet

650g pineapple, cut into pieces
200g sugar (white sugar or castor sugar) (1 cup)
200ml water

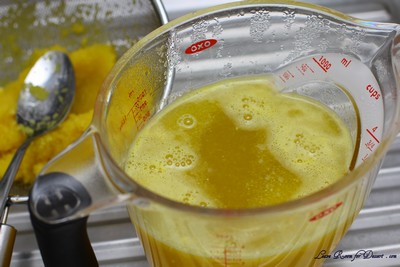
Process the pineapple in a food processor. Place the pureed pineapple, sugar and water into a medium saucepan and cook on medium/high heat until the sugar is dissolved and the mixture comes to the boil (this may be difficult to see as the pureed pineapple can create a layer at the top). Boil for 5minutes, then strain into a bowl or jug. Allow to cool and refrigerate for a few hours or preferably overnight until very chilled.

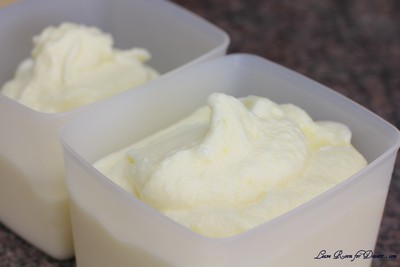
Churn in ice cream maker according to instructions of machine. Eat straight away or freeze in a sealable container until ready to serve. Lasts at least 2 weeks in the freezer.

Tropical Granita

150g caster sugar (3/4 cup)
500 ml water (2 cups)
150g pineapple, cut into pieces
100g strawberries, cut in half
100g passionfruit pulp, fresh or frozen

Process the pineapple and strawberries in a food processor. Place the sugar, water, passionfruit pulp and pureed pineapple and strawberries into a medium saucepan (you can use the saucepan that was used for the pineapple sorbet if you want to save on washing up). Bring to the boil on medium/high and continue to boil for 5min. Remove from heat and allow to cool.

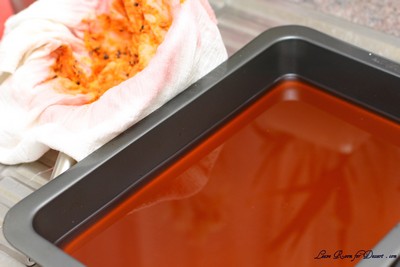
Place a piece of muslin cloth over a sieve, place this over a large pan that will take more than 1L of liquid (20cm x 30cm x 5cm). Pour the granita mix into the muslin cloth and allow the liquid to pass through. Use a spoon to help more liquid through, or use your hands to squeeze excess liquid out. If you don’t have muslin cloth, using a sieve on its own will work fine.

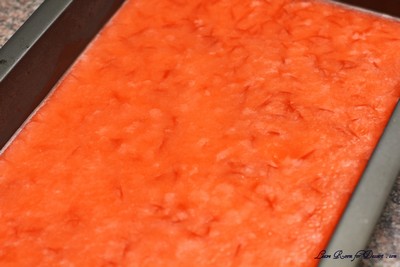
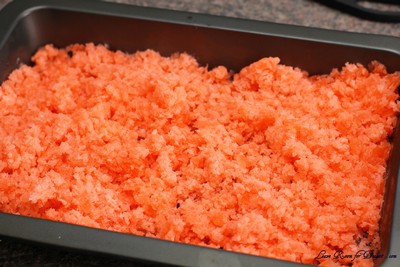
Place the pan in the freezer until solid (overnight). Use a fork to scratch the granita into fluffy ice crystals. Return to the freezer for another 2 hours (if longer, place in a sealed container) before serving.

Fruit Salad

2 slices pineapple, cut into wedges
1-2 apples (I used pink lady apples), cut into slices
2 oranges, peeled and cut into segments
1 punnet (125g) blueberries
1-2 punnets (250g – 500g) strawberries, cut in half or quarters
1-2 bananas, sliced

Mix all fruit together in a bowl or place artistically on a plate.

To serve the Pineapple Sorbet and Tropical Granita with Fruit Salad, prepare the fruit salad and place the pineapple sorbet on top. Place the granita on the fruit salad just before serving.

Any component of this dessert can be served independently.

Croissants – Daring Bakers Challenge September 2011

Tuesday, September 27th, 2011

The Daring Bakers go retro this month! Thanks to one of our very talented non-blogging members, Sarah, the Daring Bakers were challenged to make Croissants using a recipe from the Queen of French Cooking, none other than Julia Child!

If I could eat croissants for breakfast (almost) every morning, I think that would be a great way to start the day.

Seeing as though this recipe was quite long and involved (with many rest periods), it meant I would have to settle for having fresh (you can’t get any more fresh) croissants for morning tea.

And what better way than with a picnic? Almost all other weekends this month have been lovely, and we have had a few family picnics out in the backyard. This last weekend, the rain poured down non-stop and the temperature dropped, so we set up picnic rugs in the lounge room in front of the fire and ate croissants indoors, appreciating the dry and the warmth.

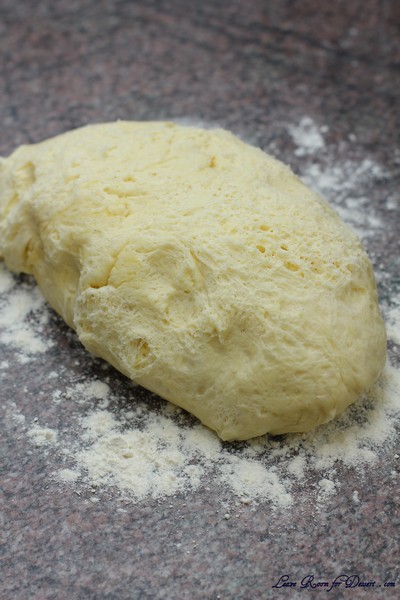
The croissants were delicious. Absolutely amazing. The recipe was easy to follow, although was time consuming because of the resting periods for the dough/pastry.

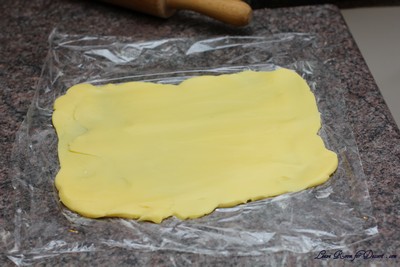
I think I may have made the butter a little too warm while working it, causing a few butter chunks to be seen through the pastry, rather than a smooth layer, although you could not notice it once baked.

I will definitely be making these again, when my second-hand/new (new for me) large granite bench-top is installed – I’m super excited!

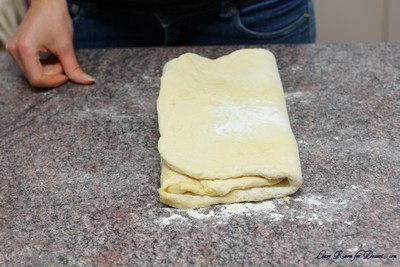
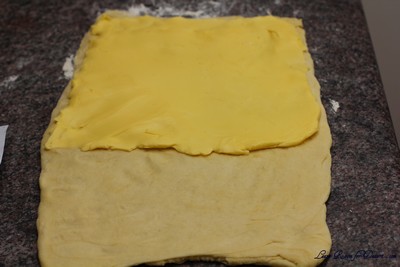
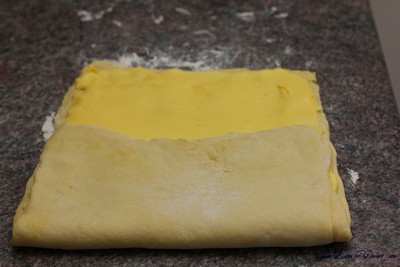
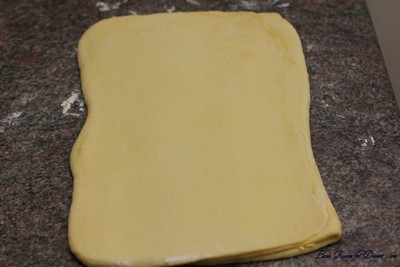
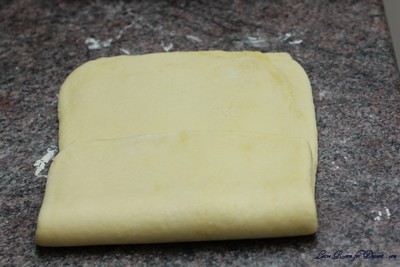
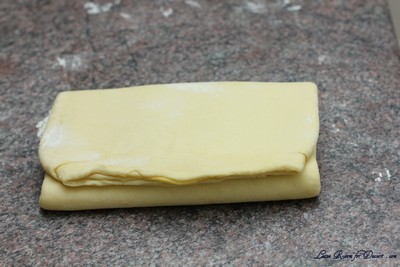
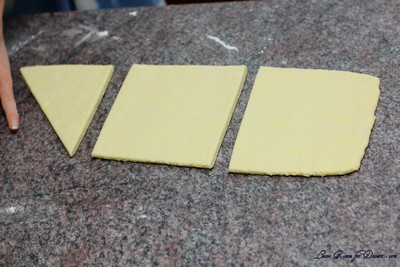
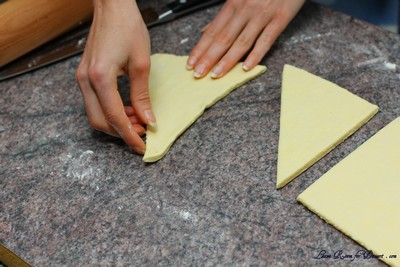
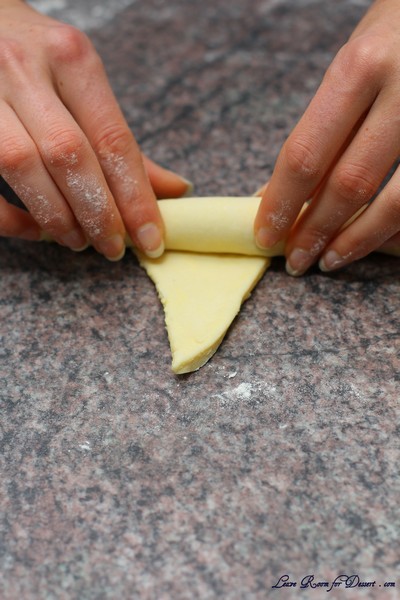
Here is a good video of Julia Child making croissants, it should help along with the photos below.

Thanks to our host for this month’s challenge, I’m so glad I have made croissants again – with a great recipe.

P.S. I made double quantity (didn’t really change the technique until I came to step 42, where I cut it into 4)

Croissants

Servings: 12 croissants

Ingredients
¼ oz (7 gm) of fresh yeast, or 1¼ teaspoon (6¼ ml/4 gm) of dry-active yeast (about ½ sachet)
3 tablespoons (45 ml) warm water (less than 100°F/38°C)
1 teaspoon (5 ml/4½ gm) sugar
1 3/4 cups (225 gm/½ lb) of strong plain flour (I used Polish all-purpose flour, which is 13% protein)
2 teaspoons (10 ml/9 gm) sugar
1½ teaspoon (7½ ml/9 gm) salt
½ cup (120 ml/¼ pint) milk (I am not sure if the fat content matters. I used 2%)
2 tablespoons (30 ml) tasteless oil (I used generic vegetable oil)
½ cup (120 ml/1 stick/115 gm/¼ lb) chilled, unsalted butter
1 egg, for egg wash

Directions:

1. Mix the yeast, warm water, and first teaspoon of sugar in a small bowl. Leave aside for the yeast and sugar to dissolve and the yeast to foam up a little.
2. Measure out the other ingredients
3. Heat the milk until tepid (either in the microwave or a saucepan), and dissolve in the salt and remaining sugar
4. Place the flour in a large bowl.
5. Add the oil, yeast mixture, and milk mixture to the flour
6. Mix all the ingredients together using the rubber spatula, just until all the flour is incorporated
7. Turn the dough out onto a floured surface, and let it rest a minute while you wash out the bowl
8. Knead the dough eight to ten times only. The best way is as Julia Child does it in the video (see below). It’s a little difficult to explain, but essentially involves smacking the dough on the counter (lots of fun if you are mad at someone) and removing it from the counter using the pastry scraper.
9. Place the dough back in the bowl, and place the bowl in the plastic bag

10. Leave the bowl at approximately 75°F/24°C for three hours, or until the dough has tripled in size.

11. After the dough has tripled in size, remove it gently from the bowl, pulling it away from the sides of the bowl with your fingertips.
12. Place the dough on a lightly floured board or countertop, and use your hands to press it out into a rectangle about 8 by 12 inches (20cm by 30cm).

13. Fold the dough rectangle in three, like a letter (fold the top third down, and then the bottom third up)


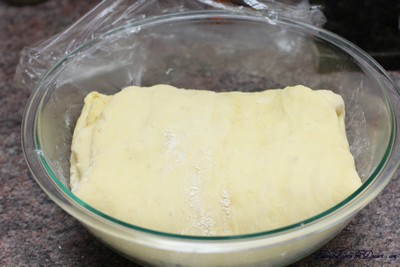
14. Place the dough letter back in the bowl, and the bowl back in the plastic bag.


15. Leave the dough to rise for another 1.5 hours, or until it has doubled in size. This second rise can be done overnight in the fridge.

16. Place the double-risen dough onto a plate and cover tightly with plastic wrap. Place the plate in the fridge while you prepare the butter.
17. Once the dough has doubled, it’s time to incorporate the butter
18. Place the block of chilled butter on a chopping board.
19. Using the rolling pin, beat the butter down a little, till it is quite flat.
20. Use the heel of your hand to continue to spread the butter until it is smooth. You want the butter to stay cool, but spread easily. (I spread it onto plastic wrap when it was easy to spread to make it easier to get onto the dough)

21. Remove the dough from the fridge and place it on a lightly floured board or counter. Let it rest for a minute or two.
22. Spread the dough using your hands into a rectangle about 14 by 8 inches (35 cm by 20 cm).
23. Remove the butter from the board, and place it on the top half of the dough rectangle.


24. Spread the butter all across the top two-thirds of the dough rectangle, but keep it ¼ inch (6 mm) across from all the edges.
25. Fold the top third of the dough down, and the bottom third of the dough up. (I folded the bottom half up first)


26. Turn the dough package 90 degrees, so that the top flap is to your right (like a book).
27. Roll out the dough package (gently, so you don’t push the butter out of the dough) until it is again about 14 by 8 inches (35 cm by 20 cm).


28. Again, fold the top third down and the bottom third up.
29. Wrap the dough package in plastic wrap, and place it in the fridge for 2 hours.

30. After two hours have passed, take the dough out of the fridge and place it again on the lightly floured board or counter.
31. Tap the dough with the rolling pin, to deflate it a little
32. Let the dough rest for 8 to 10 minutes
33. Roll the dough package out till it is 14 by 8 inches (35 cm by 20 cm).
34. Fold in three, as before
35. Turn 90 degrees, and roll out again to 14 by 8 inches (35 cm by 20 cm).
36. Fold in three for the last time, wrap in plastic, and return the dough package to the fridge for two more hours (or overnight, with something heavy on top to stop it from rising)

37. It’s now time to cut the dough and shape the croissants
38. First, lightly butter your baking sheet so that it is ready
39. Take the dough out of the fridge and let it rest for ten minutes on the lightly floured board or counter
40. Roll the dough out into a 20 by 5 inch rectangle (51 cm by 12½ cm).
41. Cut the dough into two rectangles (each 10 by 5 inches (25½ cm by 12½ cm))
42. Place one of the rectangles in the fridge, to keep the butter cold
43. Roll the second rectangle out until it is 15 by 5 inches (38 cm by 12½ cm).
44. Cut the rectangle into three squares (each 5 by 5 inches (12½ cm by 12½ cm))
45. Place two of the squares in the fridge
46. The remaining square may have shrunk up a little bit in the meantime. Roll it out again till it is nearly square
47. Cut the square diagonally into two triangles.

48. Stretch the triangle out a little, so it is not a right-angle triangle, but more of an isosceles.


(or you can cut them like this to begin with: )

49. Starting at the wide end, roll the triangle up towards the point, and curve into a crescent shape.


50. Place the unbaked croissant on the baking sheet

51. Repeat the process with the remaining squares of dough, creating 12 croissants in total.
52. Leave the tray of croissants, covered lightly with plastic wrap, to rise for 1 hour

53. Preheat the oven to very hot 475°F/240°C/gas mark 9.
54. Mix the egg with a teaspoon of water
55. Spread the egg wash across the tops of the croissants.
56. Put the croissants in the oven for 12 to 15 minutes, until the tops are browned nicely
57. Take the croissants out of the oven, and place them on a rack to cool for 10 minutes before serving.

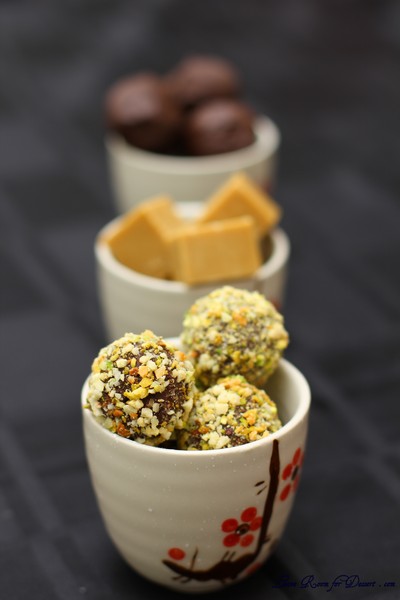
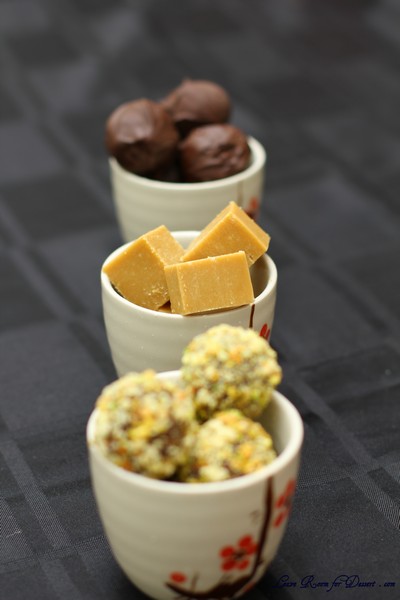
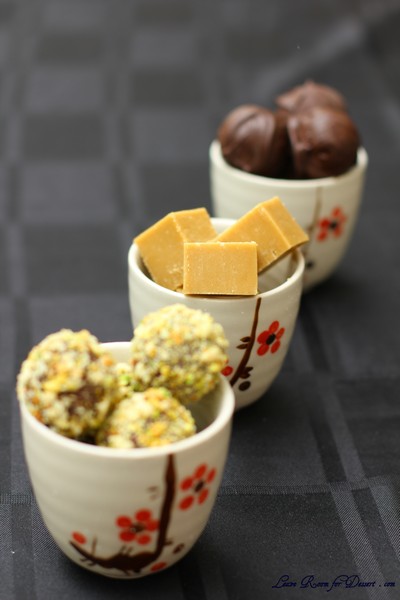
Chocolate Truffles and Peanut Butter Fudge – Daring Bakers Challenge August 2011

Saturday, August 27th, 2011

The August 2011 Daring Bakers’ Challenge was hosted by Lisa of Parsley, Sage, Desserts and Line Drive and Mandy of What the Fruitcake?!. These two sugar mavens challenged us to make sinfully delicious candies! This was a special challenge for the Daring Bakers because the good folks at http://www.chocoley.com offered an amazing prize for the winner of the most creative and delicious candy!

I have just been away for a fabulous 2 week holiday, leaving the rainy Sydney weather and enjoying beautiful 25 degree days in Port Douglas and the sand under my feet. I hope to give a short post on a few of my recommendations of restaurants and activities for those who are going there on a holiday soon.

We came home to lawn that needed mowing and the destruction of the first tulips I have planted in our garden, some fresias, irises, jonquils and snowflakes. We think it was either cockatoos, rabbits or a dog that destroyed some of the flowers and plants, but I am so excited about the flowers that weren’t destroyed and hope to post some of those pics soon as well.
I should get started talking about this month’s challenge though, and I must admit my delight at the array of recipes we were given to choose from for this challenge. We needed to make a chocolate and non-chocolate sweet, and were given methods for tempering chocolate, making truffles, chocolate coated sweets, filled chocolate, jellies and fudge.

Two of the recipes that I really wanted to make required specialised equipment and/or ingredients, which I did not have time to source before the challenge was due, although I am thinking of looking on the internet to find the moulds and ingredients so I can make these in the future.

Due to time constraints, I decided to make some of the easier looking recipes, and I have never made fudge before, so this was also an exciting new recipe to try. I found the truffle recipe a lot easier than a previous truffle recipe I have tried, and the fudge was easy as well, not needing a thermometer.

I woke up this morning and thought perhaps I would just coat my truffles in crushed nuts, but decided to push past my troubles with tempering chocolate, and tried to temper some of the nicest chocolate I have ever bought, using my marble slab. Unfortunately I still have some way to go before I manage to temper chocolate correctly, although I guess practice makes perfect…

Thanks to this month’s hosts. Everyone who has tried these sweets has loved the challenge, and loved that I’m a member of the Daring Bakers! 🙂
Milk Chocolate & Hazelnut Praline Truffles

Servings: Makes +- 30 truffles, recipe easily doubled or halved
Adapted from the Cook’s Academy Curriculum, Dublin
Active Time: 1 – 2hrs
Ganache Setting Time: 2 – 4hrs or Overnight

Praline Ingredients:
½ cup (120 ml/2 oz/60 gm) hazelnuts, shelled & skinned (or a combination of nuts, hazelnuts, almonds, pistachios)
½ cup (120 ml/4 oz/115 gm) granulated white sugar
2 tablespoons (30 ml) water

Making the praline and ganache. Once set, making balls of the set ganache then rolling in crushed hazelnuts
Directions:

1. Preheat oven to moderate 180°C / 160°C Fan Assisted (convection oven); 350°F / 320°F convection / Gas Mark 4
2. Place whole hazelnut on a non-stick baking tray and dry roast for 10mins
3. Allow to cool
4. Place hazelnuts in a clean dry kitchen towel and rub to remove the skins
5. Line a baking tray with parchment paper or a silicon mat
6. Place the skinned hazelnuts onto the prepared tray
7. Combine the sugar and water in a saucepan over medium low heat, stirring until the sugar is dissolved
8. Turn the heat up and bring to the boil (do not stir), brushing down the sides of the pot with a pastry brush dipped in water to remove any sugar crystals
9. Boil until the mixture turns amber (160°C – 170°C / 320°F- 340°F on a candy thermometer)
10. Remove from heat immediately and pour the syrup over the hazelnuts
11. Allow to cool completely
12. Break into small pieces
13. Transfer pieces to a food processor and process until desired texture, either fine or rough
14. Set aside

Ganache Ingredients
1¾ cup (9 oz. / 255 g) Milk chocolate, finely chopped
½ cup (4 oz. / 125 ml) Double/Heavy Cream (36% – 46% butterfat content)
2-3 Tablespoons (1-1 ½ oz. / 30ml – 45 ml) Frangelico Liqueur, optional

½ – 1 cup Crushed or Ground Roasted Hazelnuts for coating (I used pistachio and almonds)

Directions:
1. Finely chop the milk chocolate
2. Place into a heatproof medium sized bowl
3. Heat cream in a saucepan until just about to boil
4. Pour the cream over the chocolate and stir gently until smooth and melted
5. Allow to cool slightly, about 10 minutes
6. Stir in the praline and (optional) liqueur
7. Leave to cool and set overnight or for a few hours in the fridge
8. Bring to room temperature to use

Forming the truffles:
1. Using teaspoons or a melon baller, scoop round balls of ganache
2. Roll them between the palms of your hands to round them off
Tip: Handle them as little as possible to avoid melting
Tip: I suggest wearing food safe latex gloves, less messy and slightly less heat from your hands
3. Finish off by rolling the truffle in the crushed roasted hazelnuts
Tip: You can also roll them in hazelnut praline
4. Place on parchment paper and leave to set
Tip: They look great when put into small petit four cases and boxed up as a gift!

Peanut Butter Fudge

Prep Time: 15 mins
Total Time: 20 mins
Yield: 64 squares

Ingredients:
1/2 cup (120ml/115g / 4oz.) Unsalted Butter
2 1/4 cups (540ml/450g / 16oz.) firmly packed Brown Sugar
1/2 cup (120ml) Milk
3/4 cup (180ml/200g / 7oz.) smooth Peanut Butter
1 teaspoon (5ml) Vanilla Extract
3 1/2 cups (840ml/425g / 15oz.) Confectioners’ (Icing) Sugar

Directions:
1. Place butter into a medium saucepan and melt it over medium heat.
2. Add brown sugar and milk, stirring.
3. Boil for 2 minutes, stirring frequently.
4. Remove from heat.
5. Mix in peanut butter and vanilla.
6. Place confectioners’ sugar into a large mixing bowl.
7. Pour hot peanut butter mixture over confectioners’ sugar and beat until smooth.
8. Pour fudge into an 8 by 8 inch (20cm by 20cm) pan.
9. Chill until firm, about 1 hour.
10. Cut into 1-inch (25 mm) squares.

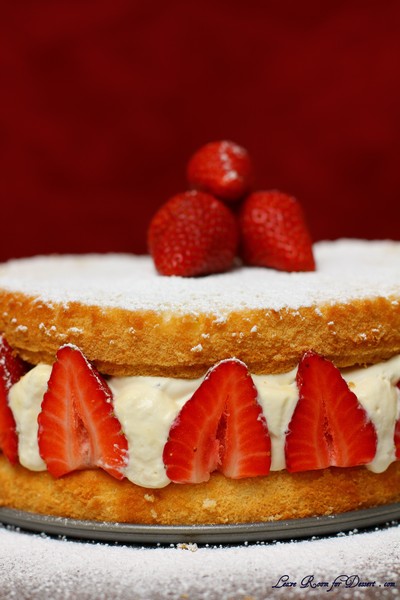
Strawberry Fraisier – Daring Bakers Challenge July 2011

Wednesday, July 27th, 2011


Jana of Cherry Tea Cakes was our July Daring Bakers’ host and she challenges us to make Fresh Frasiers inspired by recipes written by Elisabeth M. Prueitt and Chad Robertson in the beautiful cookbook Tartine.

I’m glad this challenge came this month and not the previous month, as we have just started getting beautiful strawberries back into the fruit stores.

The challenge was quite good, especially being able to make all three components after work, then assemble it the morning, for a lovely weekend dessert.

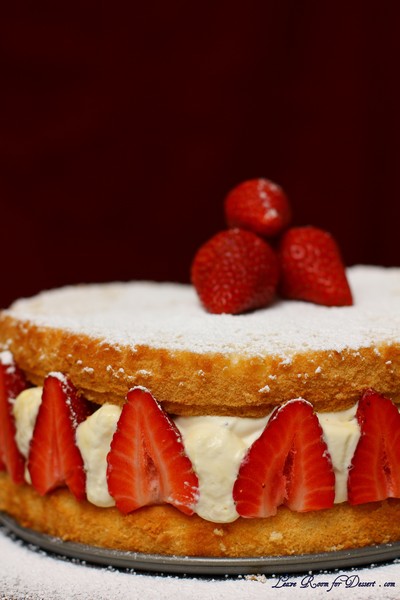
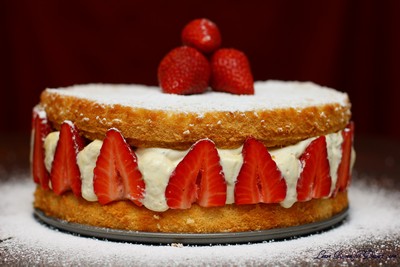
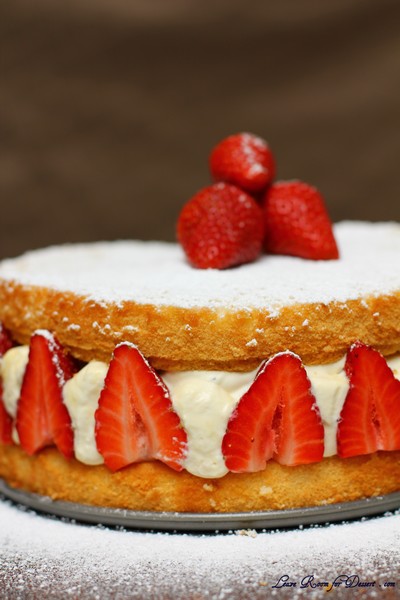
I had my fingers crossed that the fraisier would stay up by itself once the plastic wrap was removed, but unfortunately it collapsed quite a lot when the first cut was made. I’m not entirely sure where I went wrong, so I may have to do a bit more research.

I used a bigger tin than the one used in the recipe (22cm vs 20cm) and found the cake sunk a bit in the middle once it cooled.
I also needed at least double the pastry cream filling – although only figured this out once it was too late to make more – so I used whipped cream in the middle of the filling. (this extra may have been needed because I used a bigger tin, or very large strawberries.) I didn’t use the almond paste either, as I had none.

It was a beautiful dessert that everyone enjoyed and I would consider making again, although trialling out the filling, to make sure it stayed together more when serving.

Basic Chiffon Cake

1 cup + 2 tablespoons (270 ml) (5½ oz/155 gm) all-purpose flour
1 teaspoon (5 ml) (4 gm) baking powder
3/4 cups (180 ml) (6 oz /170 gm) sugar
1/2 teaspoon (2½ ml) (1½ gm) salt, preferably kosher
1/4 cup (2 fl oz/60 ml) vegetable oil
3 large egg yolks
⅓ cup + 1 tablespoon (3.17 fl oz/95 ml) water
1 teaspoon (5 ml) pure vanilla extract
3/4 teaspoon (3¾ ml) (3 gm) lemon zest, grated
5 large egg whites
¼ teaspoon (1¼ ml) (1 gm) cream of tartar

Directions:

Preheat the oven to moderate 325°F (160°C/gas mark 3).
Line the bottom of an 8-inch (20 cm) spring form pan with parchment paper. Do not grease the sides of the pan.
In a large mixing bowl, stir together the flour and baking powder. Add in all but 3 tablespoons (45 ml.) of sugar, and all of the salt. Stir to combine.
In a small bowl combine the oil, egg yolks, water, vanilla and lemon zest. Whisk thoroughly.
Combine with the dry ingredients and mix thoroughly for about one minute, or until very smooth.
Put the egg whites into a stand mixer, and beat on medium speed using a whisk attachment on a medium speed, until frothy. Add cream of tartar and beat on a medium speed until the whites hold soft peaks. Slowly add the remaining sugar and beat on a medium-high speed until the whites hold firm and form shiny peaks.
Using a grease free rubber spatula, scoop about ⅓ of the whites into the yolk mixture and fold in gently. Gently fold in the remaining whites just until combined.
Pour the batter into the prepared pan. Bake for 45 to 55 minutes or until toothpick inserted into the center comes out clean.
Removed the cake from the oven and allow to cool in the pan on a wire rack.
To unmold, run a knife around the sides to loosen the cake from the pan and remove the spring form sides. Invert the cake and peel off the parchment paper. Refrigerate for up to four days.

Pastry Cream Filling

1 cup (8 fl oz/250 ml) whole milk
1/2 teaspoon (2½ ml) pure vanilla extract
1/8 teaspoon (1/2 ml) (¼ gm) salt, preferably kosher
2 tablespoons (30 ml) (10 gm)cornstarch
1/4 cup (60 ml) (2 oz/55 gm) sugar
1 large egg (I used 2 egg yolks – as there were extra from the cake)
2 tablespoons (30 ml) (1 oz/30 gm) unsalted butter
3/4 teaspoon (3¾ ml) (4 gm) gelatin
1/2 tablespoon (7½ ml) water
1 cup (8 fl oz/250 ml) heavy cream

Directions:

Pour the milk, vanilla, and salt into a heavy sauce pan. Place over medium-high heat and scald, bringing it to a near boiling point. Stir occasionally.
Meanwhile, in a stand mixer add the cornstarch and sugar. Whisk to combine
Add the eggs to the sugar and cornstarch and whisk until smooth.
When the milk is ready, gently and slowly while the stand mixer is whisking, pour the heated milk down the side of the bowl into the egg mixture.
Pour the mixture back into the warm pot and continue to cook over a medium heat until the custard is thick, just about to boil and coats the back of a spoon.
Remove from heat and pass through a fine mesh sieve into a large mixing bowl. Allow to cool for ten minutes stirring occasionally.
Cut the butter into four pieces and whisk into the pastry cream a piece at a time until smooth.
Cover the cream with plastic wrap, pressing the plastic wrap onto the top of the cream to prevent a skin from forming. Chill in the refrigerator for up to five days.
In a small dish, sprinkle the gelatin over the water and let stand for a few minutes to soften.
Put two inches (55 mm) of water into a small sauce pan and bring to a simmer over a medium heat.
Measure 1/4 cup (2 oz/60 ml) of the chilled pastry cream into a small stainless steel bowl that will sit across the sauce pan with the simmering water, without touching the water.
Heat the cream until it is 120 F (48.8 C). Add the gelatin and whisk until smooth. Remove from the water bath, and whisk the remaining cold pastry cream in to incorporate in two batches.
In a stand mixer, fitted with the whisk attachment, whip the cream until it holds medium-stiff peaks. Immediately fold the whipped cream into the pastry cream with a rubber spatula.

Simple Syrup

1/3 cup (2⅔ fl oz/80 ml) (2⅔ oz/75 gm) of sugar, flavored or white
1/3 cup (2⅔ fl oz/80 ml) of water
+ 1 teaspoon vanilla essence

Directions:

Combine the water and sugar in a medium saucepan.
Bring the mixture to a boil and let the sugar dissolve. Stirring is not necessary, but will not harm the syrup.
Remove the syrup from the heat and cool slightly.
Transfer syrup to a lidded container or jar that can be stored in the refrigerator. Simple syrup can be stored for up to one month.

Fraisier Assembly

Components:
1 baked 8 inch (20 cm) chiffon cake
1 recipe pastry cream filling
⅓ cup (80 ml) simple syrup or flavored syrup
2 lbs (900 g) strawberries
confectioners’ sugar for dusting
½ cup (120 ml) (5 oz/140 gm) almond paste

Directions:

Line the sides of a 8-inch (20 cm) spring form pan with plastic wrap. Do not line the bottom of the pan.
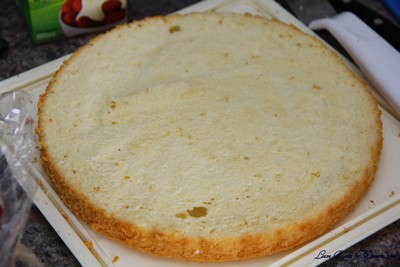
Cut the cake in half horizontally to form two layers.


Fit the bottom layer into the prepared spring form pan. Moisten the layer evenly with the simple syrup. When the cake has absorbed enough syrup to resemble a squishy sponge, you have enough.
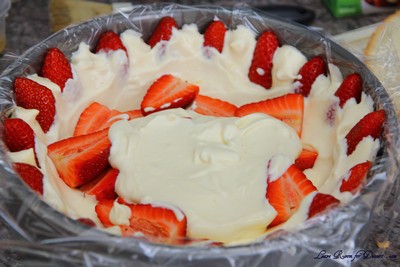
Hull and slice in half enough strawberries to arrange around the sides of the cake pan. Place the cut side of the strawberry against the sides of the pan, point side up forming a ring.
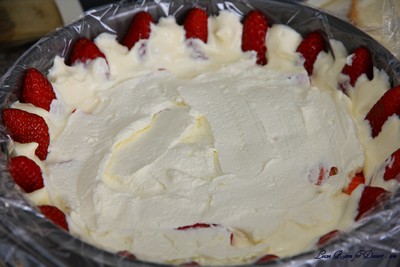
Pipe cream in-between strawberries and a thin layer across the top of the cake.
Hull and quarter your remaining strawberries and place them in the middle of the cake. Cover the strawberries and entirely with the all but 1 tbsp. (15 ml) of the pastry cream.


Place the second cake layer on top and moisten with the simple syrup.
Lightly dust a work surface with confectioners’ sugar and roll out the almond paste to a 10-inch (25 cm) round 1/16 inch (1.5 mm) thick. Spread the remaining 1 tablespoon (15 ml) of pastry cream on the top of the cake and cover with the round of almond paste.
Cover with plastic wrap and refrigerate for at least 4 hours.
To serve release the sides of the spring form pan and peel away the plastic wrap.
Serve immediately or store in the refrigerator for up to 3 days.

Vegetable Burgers with Chilli Mayo

Sunday, July 10th, 2011


There are some recipes that once tried, just need to be shared with others.

I love burgers, my Mum and Nick both make great beef burger patties, and I will often order chicken schnitzel burgers and beef burgers when out for dinner or lunch. I never tend to buy vegetable burgers, as I’ve had a few dry and tasteless ones in the past.

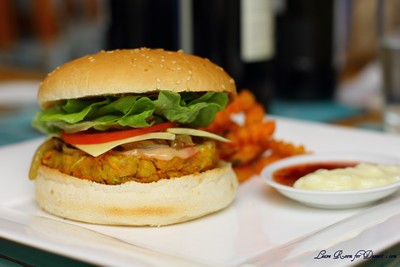
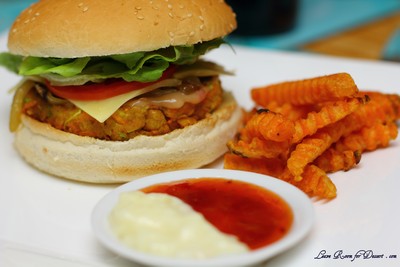
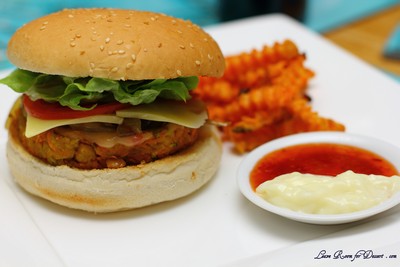
Trying these though, have changed my mind totally on the vegetable burger, and I have my sister to thank. It was easy to make (and would have been easier if I had taken my food processor around) and tasted amazing. No one could wait to have them for lunches the next day too, which meant we couldn’t try freezing them (as that would be a great dinner to take out of the freezer, just thaw and cook). I guess this means we will just have to make them again 🙂

The patty was a little more delicate in structure than a normal patty, and this slightly worsened for the lunch meals, although perhaps we needed to pat out some of the liquid. Nonetheless – what an amazing dinner and lunch!

I think it’s about time we made another batch – let me know if you get a chance to try them 🙂

Vegetable Burgers with Chilli Mayo

Recipe adapted from Best Recipes

Makes approximately 12 burger patties

1 tablespoon olive oil, approx
1 onion, diced finely + a pinch of salt
2 x 400g can chickpeas, rinsed in water, drained and patted dry, then roughly chopped or processed
1 sweet potato, peeled and grated
1 zucchini, grated
2 carrots, peeled and grated
2 teaspoons curry powder
3 teaspoons vegetable stock powder
2 eggs, lightly beaten
1 1/2 cups bread crumbs
2 tablespoons vegetable or olive oil for frying

6 tablespoons sweet chilli sauce
6 tablespoons mayonaise

12 burger buns
1 lettuce (6-12 leaves, sliced or torn)
2-3 tomatoes, sliced
2 tablespoons olive oil
3 onions, sliced + a pinch of salt
avocado, sliced, optional
sweet potato chips to serve, optional

Heat oil at medium heat in a medium saucepan, cook the diced onion, stirring occasionally until caramelised (will take about 10 minutes or more). Once caramelised, remove from heat and cool. Make caramelised onions for on top of the patty in the same saucepan with the 3 sliced onions and extra oil (will take more than 10 minutes) – Allow this to cook on low whilst making the patty mixture.

For the vegetable patty, mix the caramelised diced onions, chickpeas, sweet potato, zucchini, carrot, curry powder, vegetable stock powder, eggs and bread crumbs. Allow to stand for 10minutes, if the mixture is too moist, squeeze out excess liquid, or pat with a paper towel.

Divide the mixture into 12 equal portions, roll and then pat into patties the same size/width as the burger buns. Heat a large saucepan or frypan on medium/high heat and cook the patties in a small amount of oil until cooked through, turning once the first side is nicely browned.

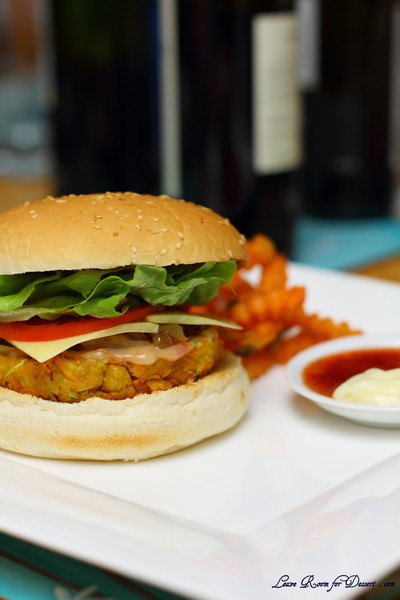
Place the cooked patty on a grilled burger bun and top with chilli sauce mixed with mayonnaise, caramelised onion, lettuce, avocado and tomato. Serve with sweet potato chips or a salad.