Recipes

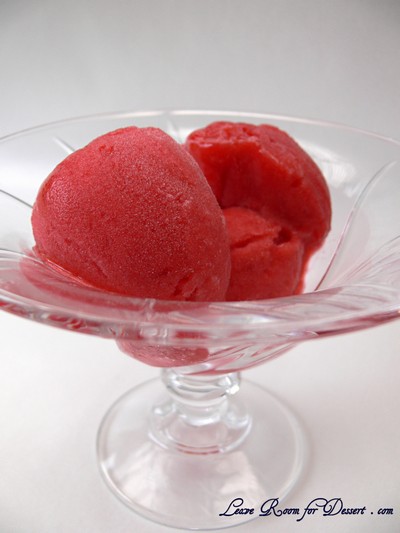
Raspberry Sorbet

Tuesday, March 30th, 2010

RaspberrySorbet05

Is it too close to Winter for me to post this recipe? I say, no. At the moment in Sydney we are having very odd whether. It is surprisingly warm, a month into Autumn.

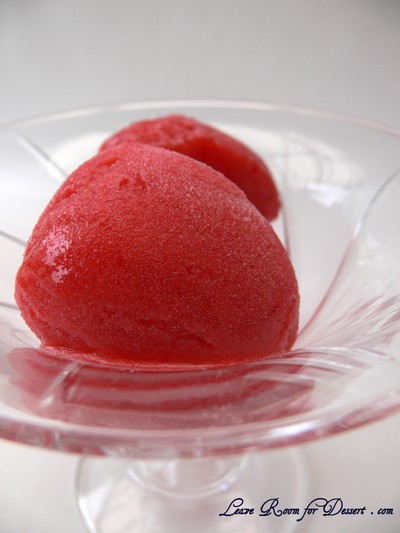
I had been wanting to make a sorbet for quite a while, when the opportunity came crashing through my door – a faulty freezer had caused a family members frozen raspberries to thaw (along with a range of other frozen goods). Rather than throwing them out – yes, that was their plan, I put up my hand and said “but I can make some raspberry sorbet with that”.

RaspberrySorbet01

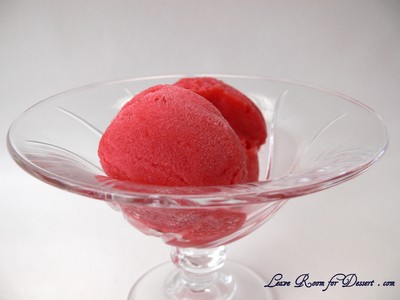
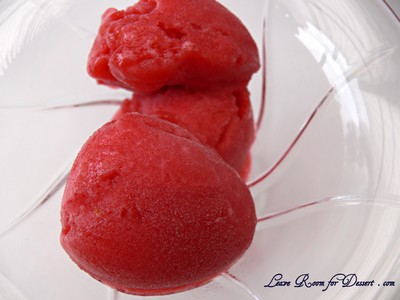
I was surprised at how lovely this sorbet was – sweet and full of flavour. Now time to expand my repertoire of sorbet flavours – well… maybe next summer…

RaspberrySorbet06

Raspberry Sorbet

Recipe from Anita @ Leave Room for Dessert

500g raspberries
1 orange, juiced
2/3 cup caster sugar
¾ cup water

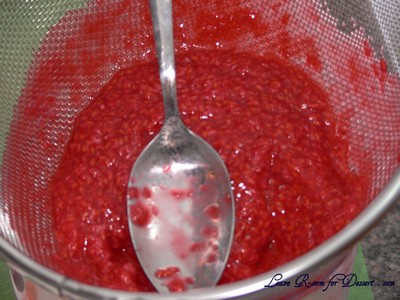
Puree the raspberries in a food processor, and then pass through a fine sieve into a large bowl, keeping the juice and discarding the seeds. Mix in the orange juice.

RaspberrySorbet02

Place the water and caster sugar in a saucepan and heat on medium/high heat until the sugar has dissolved. Bring the sugar water to the boil and boil for 3 minutes. Remove from the heat and allow to cool slightly.

Whisk the sugar mixture into the sieved raspberry puree and cool down in the sink with ice cubes and cold water. Once cooled, churn in an ice cream maker as per instruction manual and then freeze in a suitable container. If you don’t have an ice cream maker, place in a suitable freezer container and freeze for a few hours at a time, whisking or using a fork, to break up larger ice crystals. Continue to mix until it is too frozen to mix further.

5-10 minutes prior to serving, remove the sorbet from the freezer to allow easier dishing of the sorbet.

RaspberrySorbet03

Orange Tian – Daring Bakers Challenge March 2010

Saturday, March 27th, 2010

OrangeTian11

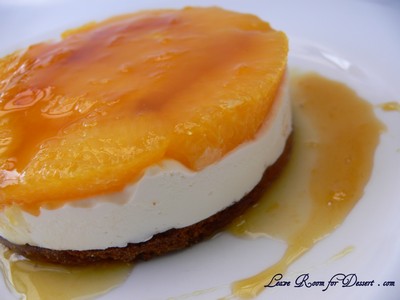
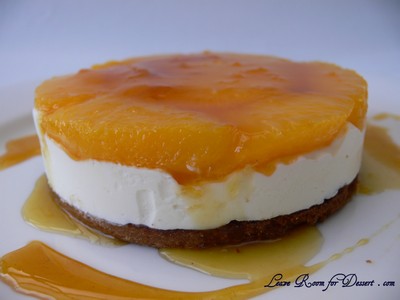
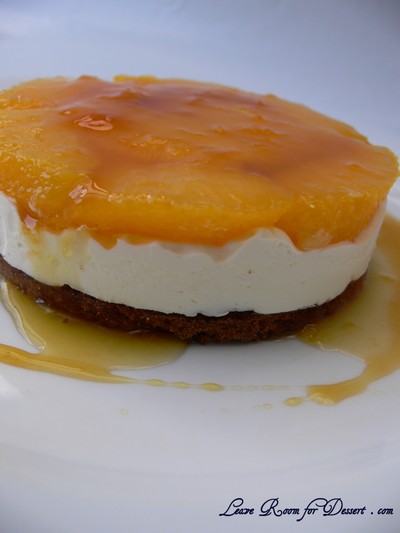
The 2010 March Daring Baker’s challenge was hosted by Jennifer of Chocolate Shavings. She chose Orange Tian as the challenge for this month, a dessert based on a recipe from Alain Ducasse’s Cooking School in Paris.

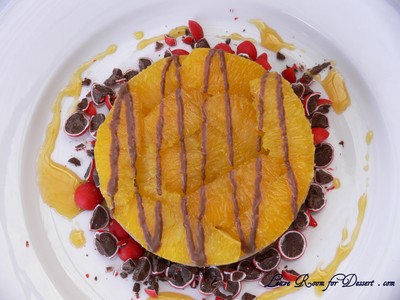
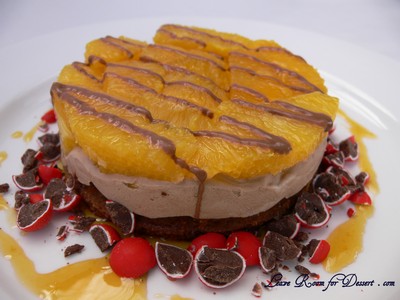
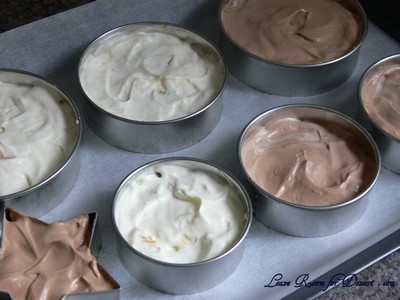
I don’t use oranges much in my desserts, except for fruit salads, so the concept of this dessert was difficult to grasp. I decided to make the dessert as written, along with adding chocolate to half the mix and serving with Jaffas to make choc orange dessert.

OrangeTian31

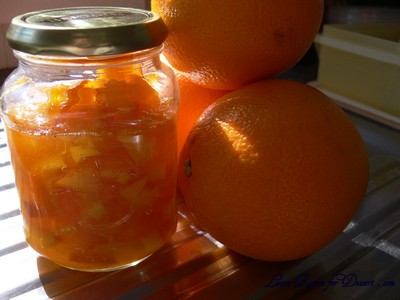
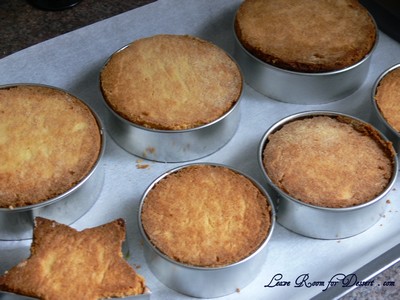
There were many components to this challenge, including the marmalade – which Nick was very excited that I would be making. He loves marmalade, especially chunky marmalade, so I decided to make it chunky – a little too chunky for me. The pate sable was lovely and easy to make, although I needed to cut the pieces again after cooking to ensure they fit in moulds.

I had a touch of trouble with the caramel, as it melted and caramelised at the same time, so when I added the orange juice it clumped a heap and I had to cook it until the clumps of sugar dissolved again.

OrangeTian24

I tried both the normal and chocolate version, although think I prefer other desserts and flavour combinations. The others who tried it thought it was quite nice – even prefering the original flavour over the chocolate version.

Thanks again to our host Jennifer for this challenge. I found the flavour combinations very interesting, and have learnt quite a bit from the experience.

OrangeTian17

Orange Tian

Dessert based on a recipe from Alain Ducasse’s Cooking School in Paris

For the Pate Sablee:

2 medium-sized egg yolks at room temperature
granulated sugar 6 tablespoons + 1 teaspoon; 2.8 oz; 80 grams
vanilla extract ½ teaspoon
Unsalted butter ¼ cup + 3 tablespoons; 3.5 oz; 100 grams ice cold, cubed
Salt 1/3 teaspoon; 2 grams
All-purpose flour 1.5 cup + 2 tablespoons; 7 oz; 200 grams
baking powder 1 teaspoon ; 4 grams

Put the flour, baking powder, ice cold cubed butter and salt in a food processor fitted with a steel blade.

In a separate bowl, add the eggs yolks, vanilla extract and sugar and beat with a whisk until the mixture is pale. Pour the egg mixture in the food processor.

Process until the dough just comes together. If you find that the dough is still a little too crumbly to come together, add a couple drops of water and process again to form a homogenous ball of dough. Form into a disc, cover with plastic wrap and leave to rest in the fridge for 30 minutes.
Preheat your oven to 350 degree Fahrenheit.

Roll out the dough onto a lightly floured surface until you obtain a ¼ inch thick circle.

Using your cookie cutter, cut out circles of dough and place on a parchment (or silicone) lined baking sheet. Bake for 20 minutes or until the circles of dough are just golden.

For the Marmalade:

Freshly pressed orange juice ¼ cup + 3 tablespoons; 3.5 oz; 100 grams
1 large orange used to make orange slices
cold water to cook the orange slices
pectin 5 grams
granulated sugar: use the same weight as the weight of orange slices once they are cooked

Finely slice the orange. Place the orange slices in a medium-sized pot filled with cold water. Simmer for about 10 minutes, discard the water, re-fill with cold water and blanch the oranges for another 10 minutes.

Blanch the orange slices 3 times. This process removes the bitterness from the orange peel, so it is essential to use a new batch of cold water every time when you blanch the slices.

Once blanched 3 times, drain the slices and let them cool.

Once they are cool enough to handle, finely mince them (using a knife or a food processor).

Weigh the slices and use the same amount of granulated sugar . If you don’t have a scale, you can place the slices in a cup measurer and use the same amount of sugar.

In a pot over medium heat, add the minced orange slices, the sugar you just weighed, the orange juice and the pectin. Cook until the mixture reaches a jam consistency (10-15 minutes).

Transfer to a bowl, cover with plastic wrap and put in the fridge.

OrangeTian03

For the Orange Segments:

For this step you will need 8 oranges.

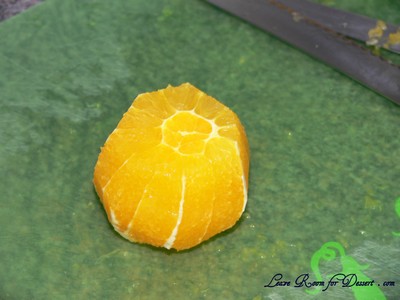
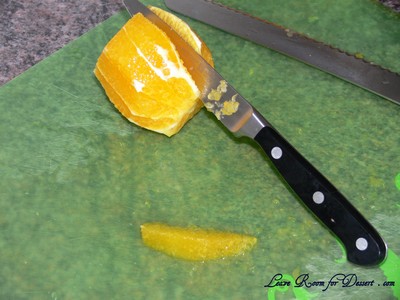
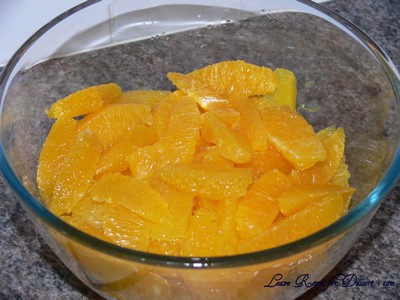
Cut the oranges into segments over a shallow bowl and make sure to keep the juice. Add the segments to the bowl with the juice.

OrangeTian07

OrangeTian08

OrangeTian09

For the Caramel:

granulated sugar 1 cup; 7 oz; 200 grams
orange juice 1.5 cups + 2 tablespoons; 14 oz; 400 grams

Place the sugar in a pan on medium heat and begin heating it.

Once the sugar starts to bubble and foam, slowly add the orange juice. As soon as the mixture starts boiling, remove from the heat and pour half of the mixture over the orange segments.

Reserve the other half of the caramel mixture in a small bowl — you will use this later to spoon over the finished dessert. When the dessert is assembled and setting in the freezer, heat the kept caramel sauce in a small saucepan over low heat until it thickens and just coats the back of a spoon (about 10 minutes). You can then spoon it over the orange tians.

[Tip: Be very careful when making the caramel — if you have never made caramel before, I would suggest making this step while you don’t have to worry about anything else. Bubbling sugar is extremely, extremely hot, so make sure you have a bowl of ice cold water in the kitchen in case anyone gets burnt!]

For the Whipped Cream:

heavy whipping cream 1 cup; 7 oz; 200 grams
3 tablespoons of hot water
1 teaspoon Gelatine
1 tablespoon of confectioner’s sugar
orange marmalade (see recipe above) 1 tablespoon
I folded 50g melted and cooled dark chocolate to this whipped cream for my choc orange version

In a small bowl, add the gelatine and hot water, stirring well until the gelatine dissolves. Let the gelatine cool to room temperature while you make the whipped cream. Combine the cream in a chilled mixing bowl. Whip the cream using a hand mixer on low speed until the cream starts to thicken for about one minute. Add the confectioner sugar. Increase the speed to medium-high. Whip the cream until the beaters leave visible (but not lasting) trails in the cream, then add the cooled gelatine slowly while beating continuously. Continue whipping until the cream is light and fluffy and forms soft peaks. Transfer the whipped cream to a bowl and fold in the orange marmalade.
[Tip: Use an ice cold bowl to make the whipped cream in. You can do this by putting your mixing bowl, cream and beater in the fridge for 20 minutes prior to whipping the cream.]

Assembling the Dessert:

Make sure you have some room in your freezer. Ideally, you should be able to fit a small baking sheet or tray of desserts to set in the freezer.

Line a small tray or baking sheet with parchment paper or a silicone sheet. Lay out 6 cookie cutters onto the parchment paper/silicone.

Drain the orange segments on a kitchen towel.

Have the marmalade, whipped cream and baked circles of dough ready to use.

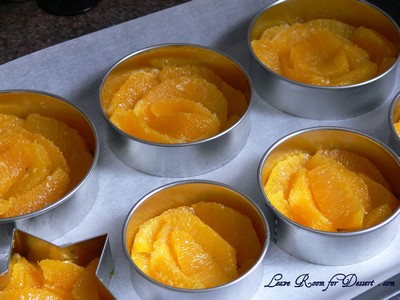
Arrange the orange segments at the bottom of each cookie cutter. Make sure the segments all touch either and that there are no gaps. Make sure they fit snuggly and look pretty as they will end up being the top of the dessert. Arrange them as you would sliced apples when making an apple tart.

OrangeTian18

Once you have neatly arranged one layer of orange segments at the bottom of each cookie cutter, add a couple spoonfuls of whipped cream and gently spread it so that it fills the cookie cutter in an even layer. Leave about 1/4 inch at the top so there is room for dough circle.

OrangeTian19

Using a butter knife or small spoon, spread a small even layer of orange marmalade on each circle of dough.

Carefully place a circle of dough over each ring (the side of dough covered in marmalade should be the side touching the whipping cream). Gently press on the circle of dough to make sure the dessert is compact.

OrangeTian10

Place the desserts to set in the freezer to set for 10 minutes. (I left mine in the freezer for a few hours, and stored leftover ones in there too)

Using a small knife, gently go around the edges of the cookie cutter to make sure the dessert will be easy to unmold. Gently place your serving plate on top of a dessert (on top of the circle of dough) and turn the plate over. Gently remove the cookie cutter, add a spoonful of caramel sauce and serve immediately.

OrangeTian29

Chocolate Guinness Cake

Wednesday, March 17th, 2010

GuinessCake07

Happy Saint Patrick’s Day!

I remember trying a chocolate Guinness cake in my later years of University when a friend brought one in (we had cake days every Friday). I was a little apprehensive (as I don’t like beer), but once I was convinced to try it, I haven’t looked back. I have been spreading the word, trying to convince as many friends and family as possible (some are more difficult to convince than you would imagine) to try it and that’s all it takes to get most people hooked.

GuinessCake04

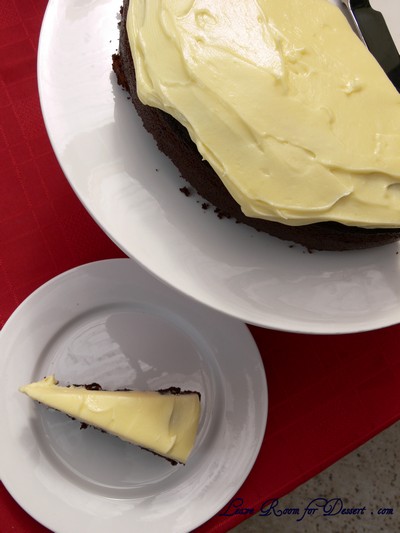
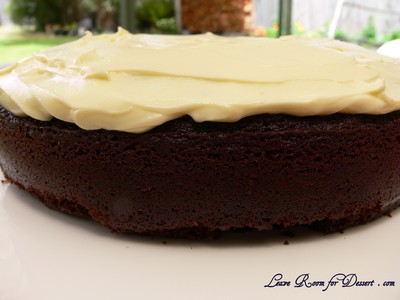
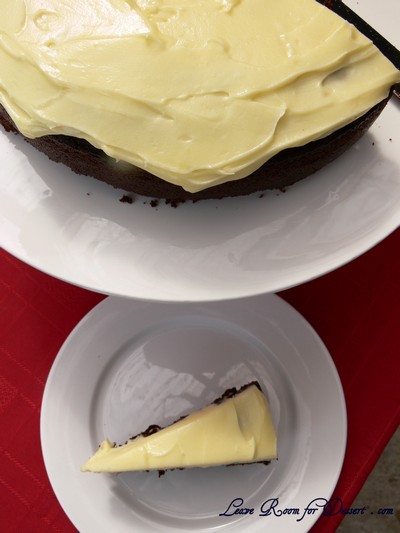
It even looks like a poured out Guinness, and you can be sure guys and girls alike will be intrigued by having beer in a cake.

GuinessCake06

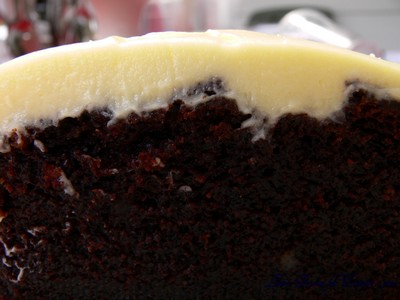
The best aspect of this cake has to be how lovely and moist it is. Coming in a close second (or equal first) is the great flavour combination of the chocolate with a very slight Guinness flavour (trust me, I don’t like normal beer, let alone Guinness – but I [and other non-beer-drinkers] really enjoy this cake) and the creamy icing.

GuinessCake09

I wish I had a slice right now…
[By the way, you can freeze it, iced and everything – it makes the perfect easy snack for work, school or shopping].

GuinessCake27

Chocolate Guinness Cake

Recipe taken from the internet years ago… can’t remember the site sorry

butter for pan
1 cup Guinness Stout
10 tablespoons butter (10oz or 300g)
¾ cup cocoa
2 cups caster sugar
¾ cup sour cream
2 large eggs
1 tablespoon vanilla extract or imitation vanilla – it works just as well in this
2 cups plain flour
2½ teaspoons baking soda (bi-carb soda)

Icing
1¼ cups icing sugar mixture or icing suger
8oz (240g) cream cheese at room temperature
½ cup heavy (thickened) cream

Heat oven to 180ºC (160ºC fan forced). Butter a 22cm (9-inch) spring-form pan and line with baking paper.

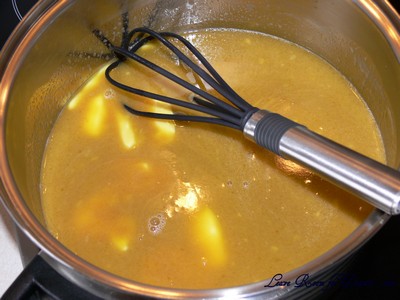
In a large saucepan, combine Guinness and butter. Place over medium-low heat until butter melts, then remove from heat. Add cocoa and superfine sugar, and whisk to blend.

GuinessCake13

In a small bowl, combine sour cream, eggs and vanilla; mix well.

GuinessCake12

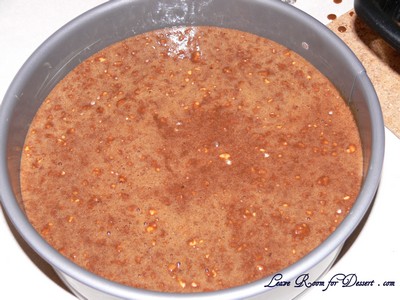
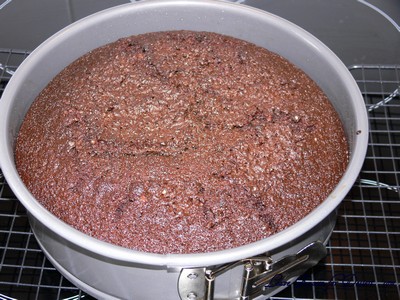
Add to Guinness mixture. Add flour and baking soda, and whisk again until smooth. Pour into buttered pan, and bake until risen and firm, 45 minutes to one hour. Place pan on a wire rack and cool completely in pan.

Yes, it is very liquidy - don't worry - this will make it moist.

Yes, it is very liquidy - don't worry - this will make it moist.

GuinessCake22

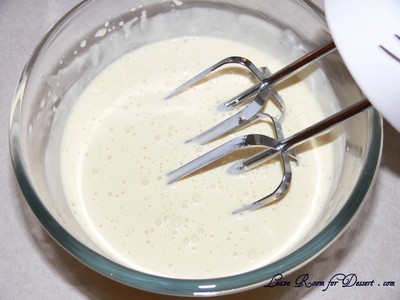
Icing: Mix cream cheese with electric mixer and blend until smooth. Add cream, then sifted icing mixture and mix until smooth and spreadable. Also add a little cocoa powder to give the icing the murky look of the Guinness frothy if you like.

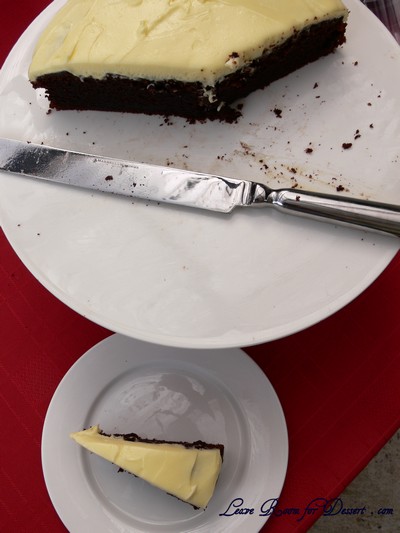
Remove cake from pan and place on a platter or cake stand. Ice top of cake only, so it resembles a frothy pint of Guinness.
Makes one 9-inch cake, 12 servings.

My Note: To use up a whole 440 ml can of Guinness multiply the recipe by 1.5 times. Pour 2/3 mixture into cake tin and the rest into approximately 24 patty cases or 12 large muffin cases. (cook these for 15-20 minutes). Make 1 quantity of icing as this should cover both the cake and patty cakes. Slices of cake and muffins can be frozen and thawed when you have a craving.

Rough Quantities for 1.5x normal quantity (1 x 22cm cake + 12 muffins)
butter for pan
440ml can (approx 1½ or 1¾ cups) Guinness Stout
15 tablespoons butter (450g)
1 1/8 cup cocoa (Or one heaped cup)
3 cups caster sugar
1 1/8 cup (approx 300g carton) sour cream
3 large eggs
1½ tablespoon vanilla extract or imitation vanilla
3 cups plain flour
3¾ teaspoons baking soda (bi-carb soda)

GuinessCake08

Spinach and Sour Cream Dip

Wednesday, March 10th, 2010

SpinachDip08

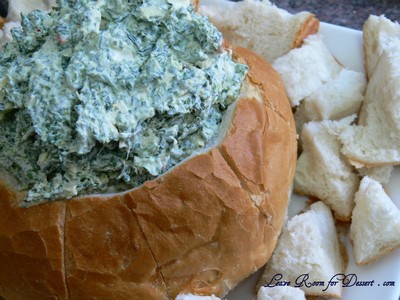
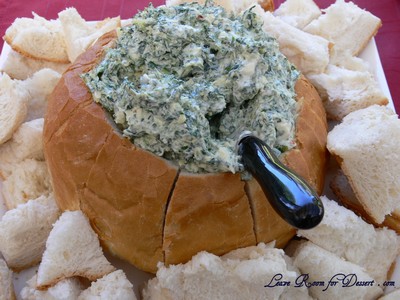
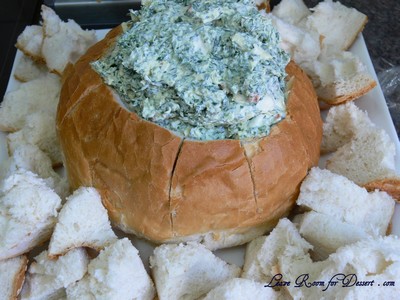
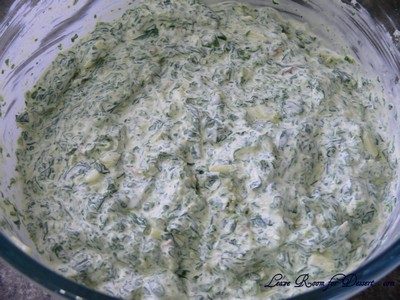
This dip is high on the list of dips we make for parties. Even though it may not sound the tastiest (with a packet of spinach in it) – it really is quite lovely. Even those who don’t like spinach will go back to more!

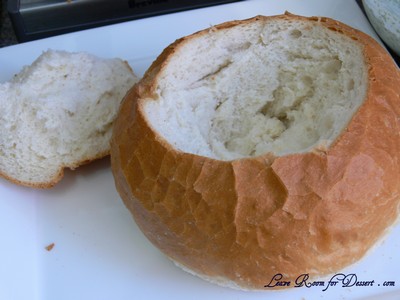
The dip can be served in a number of ways, with some Lebanese bread (which has been spread with a herb butter, cooked in the oven and then chopped up to biscuit size). Alternatively, you can scoop out cob of bread and serve the dip in the middle, with friends and family tearing off edges of the cob and dipping it into the dip. You can also heat the dip up in the cob for a few minutes in the oven.

SpinachDip09

And what’s even better is it can be made the night before, so it firms up a bit in the fridge. I love being able to have things organised – it takes out a lot of the hassle and stress which could have been felt on the party date, if you had to prepare everything that morning.

On another note – I can’t believe how busy this year has been (and is)!! I have weekends booked up until late April, with a heap of big birthdays, weddings, hen’s nights, the taste of Sydney (Thursday-Sunday, in case you haven’t heard), Easter, ANZAC day and a quick visit to Melbourne for a French cake cooking class (very exciting!!).

SpinachDip07

Spinach and Sour Cream Dip

Recipe source unknown (possibly a friend of a friend of the family?)

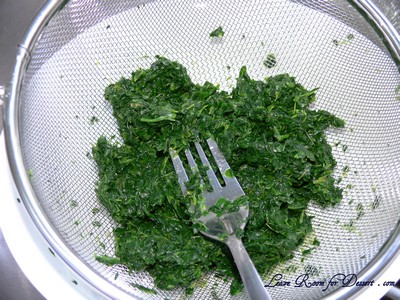
1 box (250g) finely chopped frozen spinach – thawed then excess water squeezed out with hands or a sieve.
1 carton (300g) sour cream
½ cup grated cheese
1 packet spring vegetable soup mix (Continental brand – we found this is nicer than some other brands)
2-3 tablespoons mayonnaise
1 small packet pine nuts (toasted) (optional)

SpinachDip01

Mix ingredients together, sprinkle pine nuts on top. Serve in a cob or on Pita/Lebanese bread.

SpinachDip04

Better made the day before and the dip stored in the fridge (but scooped into the cob just before serving).

SpinachDip06

Tiramisu – Daring Bakers Challenge February 2010

Saturday, February 27th, 2010

Tiramisu37

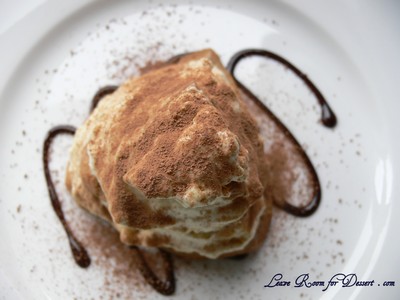
The February 2010 Daring Bakers’ challenge was hosted by Aparna of My Diverse Kitchen and Deeba of Passionate About Baking. They chose Tiramisu as the challenge for the month. Their challenge recipe is based on recipes from The Washington Post, Cordon Bleu at Home and Baking Obsession.
Tiramisu30

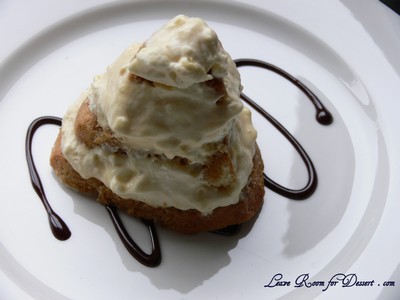
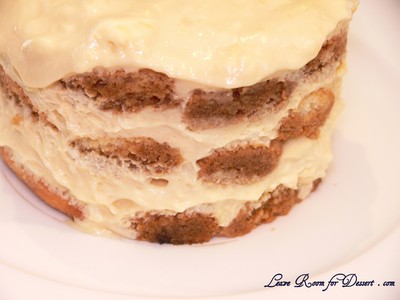
We were not given one challenge this month – but three! We were to make our own mascarpone, ladyfinger / savoiardi biscuits and finally construct a tiramisu (which in itself had pastry cream and zabaglione components).
Tiramisu20

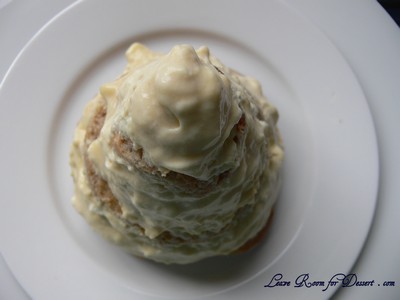
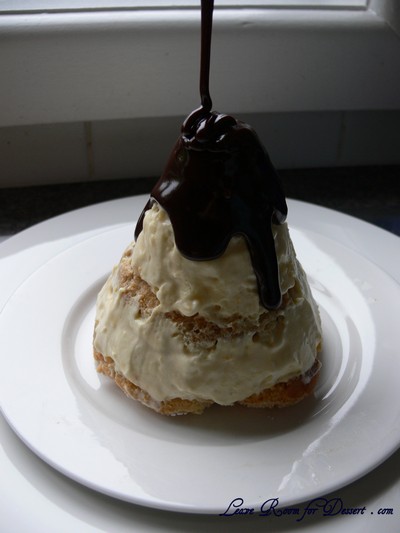
Not being a huge coffee lover, I thought this would be a good opportunity to try a chocolate only tiramisu, and noticed there weren’t many recipes that catered for only chocolate tiramisu without any coffee flavouring. I decided to make up my own dipping sauce for the biscuits – which is the only portion which contains coffee. I just substituted some cocoa, sugar and baileys for the coffee.
Tiramisu63

As for the mascarpone, it was great to finally make it. It was so easy to make and tasted lovely. And what did I do with the leftovers? Well, a dollop on some pasta or pumpkin soup, made it much tastier (although not healthier…)
Tiramisu31

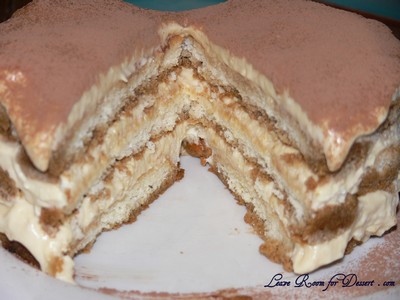
I enjoyed the chocolate tiramisu, with the coffee drinkers preferring the coffee tiramisu that I made. Although, I probably wouldn’t make the tiramisu again, as I love other desserts more – and have a long long list of desserts I’d still love to make.
Tiramisu39

I’d like to thank Aparna and Deeba for a great challenge (or number of challenges) this month! I managed to make quite a number of things I have wanted to make and never found the time. 🙂
Tiramisu70

P.S. I realised after reading others’ results, that many froze their tiramisu’s before removing any moulds. I didn’t with mine and therefore the tiramisu started melting quite fast and didn’t stay well in their moulds.

Tiramisu

(Recipe source: Carminantonio’s Tiramisu from The Washington Post, July 11 2007 )
This recipe makes 6 servings

For the zabaglione:
2 large egg yolks
3 tablespoons sugar/50gms
1/4 cup/60ml Marsala wine (or port or coffee)
1/4 teaspoon/ 1.25ml vanilla extract
1/2 teaspoon finely grated lemon zest

For the vanilla pastry cream:
1/4 cup/55gms sugar
1 tablespoon/8gms all purpose flour
1/2 teaspoon finely grated lemon zest
1/2 teaspoon/ 2.5ml vanilla extract
1 large egg yolk
3/4 cup/175ml whole milk

For the whipped cream:
1 cup/235ml chilled heavy cream (we used 25%)
1/4 cup/55gms sugar
1/2 teaspoon/ 2.5ml vanilla extract

To assemble the tiramisu:
2 cups/470ml brewed espresso, warmed
1 teaspoon/5ml rum extract (optional)
1/2 cup/110gms sugar
1/3 cup/75gms mascarpone cheese
36 savoiardi/ ladyfinger biscuits (you may use less)
2 tablespoons/30gms unsweetened cocoa powder
My note: To make this with no coffee flavour, replace the espresso and rum with 2 teaspoons cocoa powder, 2 teaspoons of baileys and 2 cups warm water – add together with the sugar for a chocolate alternative for dipping the biscuits.

For the zabaglione:
Heat water in a double boiler. If you don’t have a double boiler, place a pot with about an inch of water in it on the stove. Place a heat-proof bowl in the pot making sure the bottom does not touch the water.

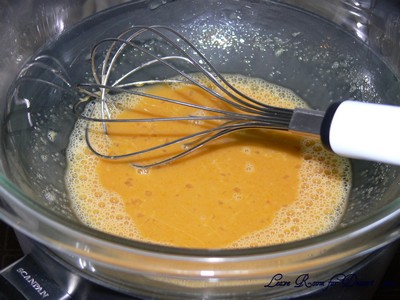
In a large mixing bowl (or stainless steel mixing bowl), mix together the egg yolks, sugar, the Marsala (or espresso/ coffee), vanilla extract and lemon zest. Whisk together until the yolks are fully blended and the mixture looks smooth.
Tiramisu08

Transfer the mixture to the top of a double boiler or place your bowl over the pan/ pot with simmering water. Cook the egg mixture over low heat, stirring constantly, for about 8 minutes or until it resembles thick custard. It may bubble a bit as it reaches that consistency.
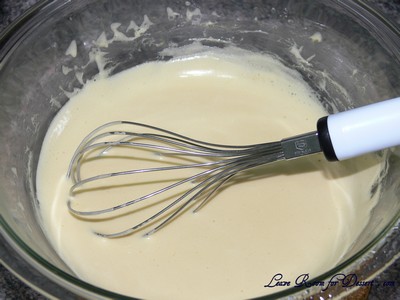
Tiramisu11

Let cool to room temperature and transfer the zabaglione to a bowl. Cover and refrigerate at least 4 hours or overnight, until thoroughly chilled.

For the pastry cream:
Mix together the sugar, flour, lemon zest and vanilla extract in a medium heavy-bottomed saucepan. To this add the egg yolk and half the milk. Whisk until smooth.
Now place the saucepan over low heat and cook, stirring constantly to prevent the mixture from curdling.
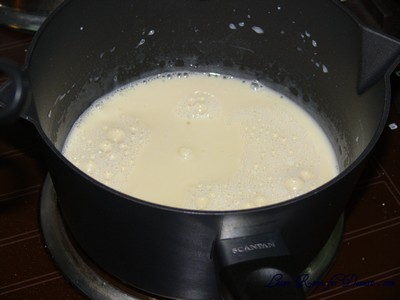
Tiramisu09

Add the remaining milk a little at a time, still stirring constantly. After about 12 minutes the mixture will be thick, free of lumps and beginning to bubble. (If you have a few lumps, don’t worry. You can push the cream through a fine-mesh strainer.)
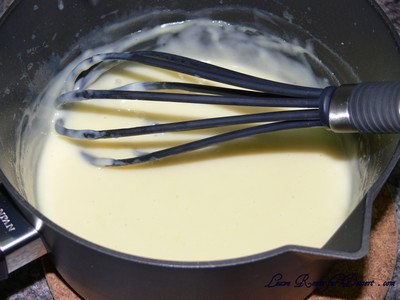
Tiramisu10
Transfer the pastry cream to a bowl and cool to room temperature. Cover with plastic film and refrigerate at least 4 hours or overnight, until thoroughly chilled.

For the whipped cream:
Combine the cream, sugar and vanilla extract in a mixing bowl. Beat with an electric hand mixer or immersion blender until the mixture holds stiff peaks. Set aside.

To assemble the tiramisu:
Have ready a rectangular serving dish (about 8″ by 8″ should do) or one of your choice.

Mix together the warm espresso, rum extract and sugar in a shallow dish, whisking to mix well. Set aside to cool.

In a large bowl, beat the mascarpone cheese with a spoon to break down the lumps and make it smooth. This will make it easier to fold. Add the prepared and chilled zabaglione and pastry cream, blending until just combined. Gently fold in the whipped cream. Set this cream mixture aside.
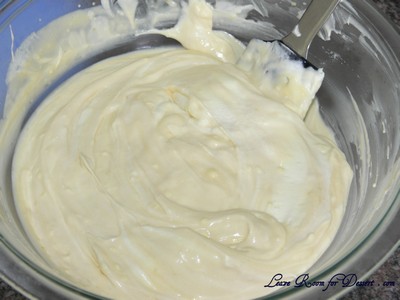
Tiramisu14

Now to start assembling the tiramisu.
Workings quickly, dip 12 of the ladyfingers in the sweetened espresso, about 1 second per side. They should be moist but not soggy. Immediately transfer each ladyfinger to the platter, placing them side by side in a single row. You may break a lady finger into two, if necessary, to ensure the base of your dish is completely covered.

Spoon one-third of the cream mixture on top of the ladyfingers, then use a rubber spatula or spreading knife to cover the top evenly, all the way to the edges.

Repeat to create 2 more layers, using 12 ladyfingers and the cream mixture for each layer. Clean any spilled cream mixture; cover carefully with plastic wrap and refrigerate the tiramisu overnight.
To serve, carefully remove the plastic wrap and sprinkle the tiramisu with cocoa powder using a fine-mesh strainer or decorate as you please. Cut into individual portions and serve.

Mascarpone Cheese

(Source: Vera’s Recipe for Homemade Mascarpone Cheese)
This recipe makes 12oz/ 340gm of mascarpone cheese

474ml (approx. 500ml)/ 2 cups whipping (36 %) pasteurized (not ultra-pasteurized), preferably organic cream (between 25% to 36% cream will do)
1 tablespoon fresh lemon juice

Bring 1 inch of water to a boil in a wide skillet. Reduce the heat to medium-low so the water is barely simmering. Pour the cream into a medium heat-resistant bowl, then place the bowl into the skillet. Heat the cream, stirring often, to 190 F. If you do not have a thermometer, wait until small bubbles keep trying to push up to the surface.

It will take about 15 minutes of delicate heating. Add the lemon juice and continue heating the mixture, stirring gently, until the cream curdles. Do not expect the same action as you see during ricotta cheese making. All that the whipping cream will do is become thicker, like a well-done crème anglaise. It will cover a back of your wooden spoon thickly.
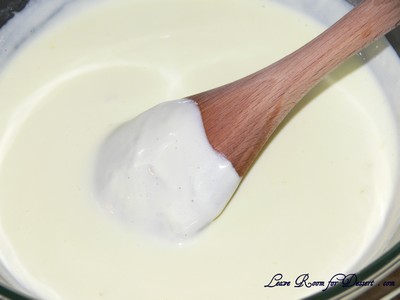
Tiramisu76

You will see just a few clear whey streaks when you stir. Remove the bowl from the water and let cool for about 20 minutes. Meanwhile, line a sieve with four layers of dampened cheesecloth and set it over a bowl. Transfer the mixture into the lined sieve. Do not squeeze the cheese in the cheesecloth or press on its surface (be patient, it will firm up after refrigeration time). Once cooled completely, cover with plastic wrap and refrigerate (in the sieve) overnight or up to 24 hours.
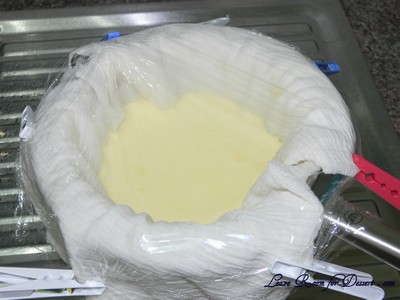
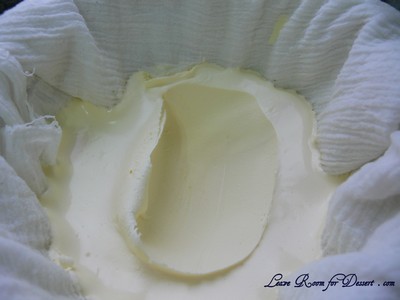
Tiramisu77

Tiramisu80

Vera’s notes: The first time I made mascarpone I had all doubts if it’d been cooked enough, because of its custard-like texture. Have no fear, it will firm up beautifully in the fridge, and will yet remain lusciously creamy.

Keep refrigerated and use within 3 to 4 days.

Ladyfingers / Savoiardi Biscuits

(Source: Recipe from Cordon Bleu At Home)
This recipe makes approximately 24 big ladyfingers or 45 small (2 1/2″ to 3″ long) ladyfingers.

3 eggs, separated
6 tablespoons /75gms granulated sugar
3/4 cup/95gms cake flour, sifted (or 3/4 cup all purpose flour + 2 tbsp corn starch)
6 tablespoons /50gms confectioner’s sugar,

Preheat your oven to 350 F (175 C) degrees, then lightly brush 2 baking sheets with oil or softened butter and line with parchment paper.

Beat the egg whites using a hand held electric mixer until stiff peaks form. Gradually add granulate sugar and continue beating until the egg whites become stiff again, glossy and smooth.
In a small bowl, beat the egg yolks lightly with a fork and fold them into the meringue, using a wooden spoon. Sift the flour over this mixture and fold gently until just mixed. It is important to fold very gently and not overdo the folding. Otherwise the batter would deflate and lose volume resulting in ladyfingers which are flat and not spongy.

Fit a pastry bag with a plain tip (or just snip the end off; you could also use a Ziploc bag) and fill with the batter. Pipe the batter into 5″ long and 3/4″ wide strips leaving about 1″ space in between the strips.

Sprinkle half the confectioner’s sugar over the ladyfingers and wait for 5 minutes. The sugar will pearl or look wet and glisten. Now sprinkle the remaining sugar. This helps to give the ladyfingers their characteristic crispness.
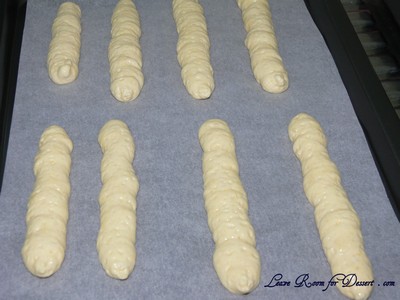
Tiramisu04

Hold the parchment paper in place with your thumb and lift one side of the baking sheet and gently tap it on the work surface to remove excess sprinkled sugar.
Bake the ladyfingers for 10 minutes, then rotate the sheets and bake for another 5 minutes or so until the puff up, turn lightly golden brown and are still soft.

Tiramisu06

Allow them to cool slightly on the sheets for about 5 minutes and then remove the ladyfingers from the baking sheet with a metal spatula while still hot, and cool on a rack.
Store them in an airtight container till required. They should keep for 2 to 3 weeks.
White Chocolate Cones with Nougat and Vienna Almond Semifreddo

Tuesday, February 23rd, 2010

SemifreddoViennaAlmond26

I am very excited to have come to the end of my first year of food blogging. What better way to celebrate, than by posting the recipe of the dessert in my header (at least the one at the moment – it may change in the future).

SemifreddoViennaAlmond29

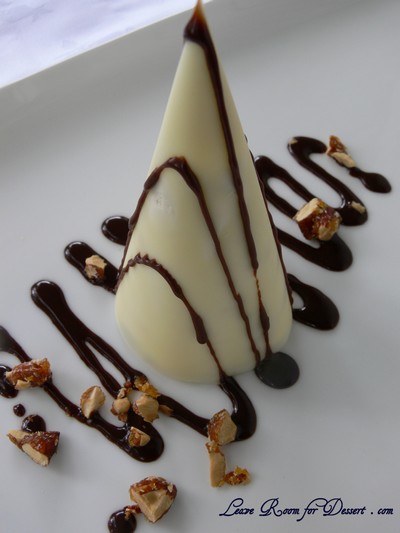
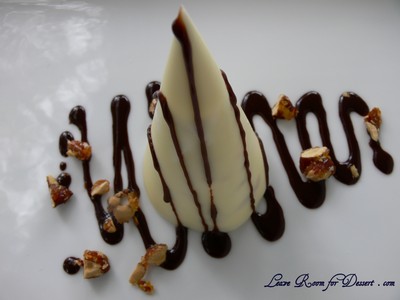
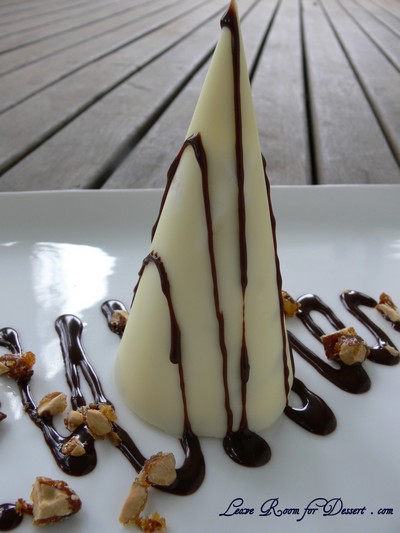
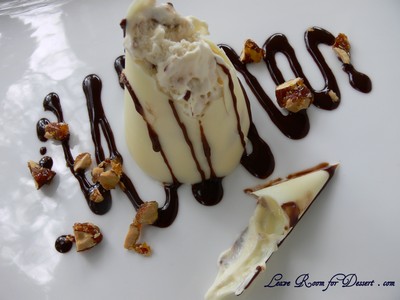
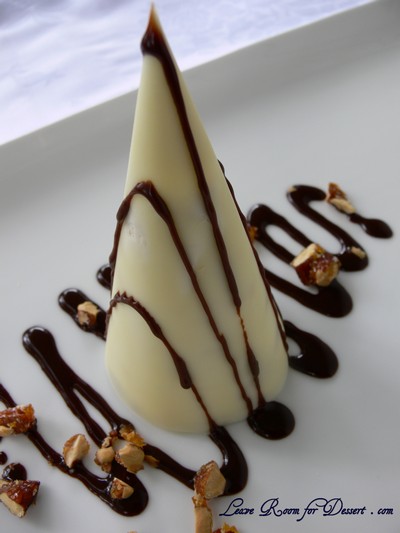
I love the look of this dessert. It looks like something that could be served in a restaurant and tastes like that’s where it belongs. Many people have asked for this recipe, so it’s about time I posted it.

SemifreddoViennaAlmond21

This recipe took me two nights to prepare, although each step was quite easy and little work is required on the night of a dinner party – which is exactly how I like it, more time spent with guests the better. I made the Vienna almonds the first night, although these could easily be bought. The second night involved making the chocolate cones and assembling everything, with only the chocolate sauce made on serving night.

SemifreddoViennaAlmond30

This dessert tastes lovely. Like a soft vanilla ice cream with crunches of toffee Vienna almonds and hits of nougat. It works so well. I hope you enjoy it.

SemifreddoViennaAlmond16

White Chocolate Cones with Nougat and Vienna Almond Semifreddo

Recipe adapted from a magazine tear-out

Serves: 10-12

300-370g white chocolate
2 eggs
1/3 cup caster sugar
400ml thickened cream
1 teaspoon vanilla
150g soft almond nougat, chopped or ripped finely
150g Vienna almonds, chopped
Chocolate sauce for serving:
50ml cream or thickened cream
60g dark chocolate, in pieces

To make cones:
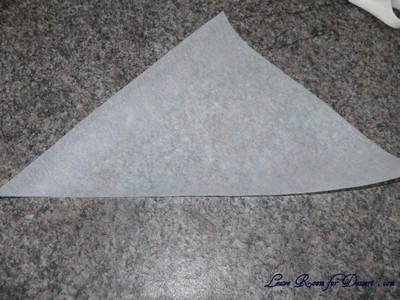
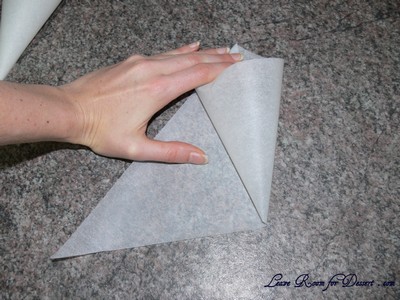
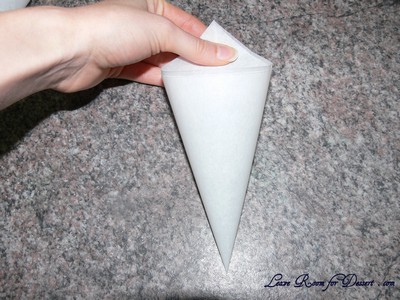
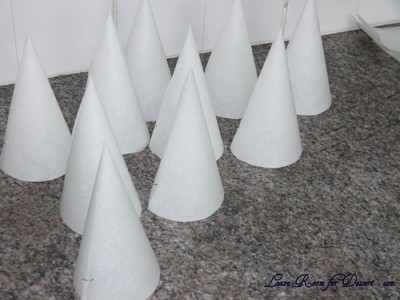
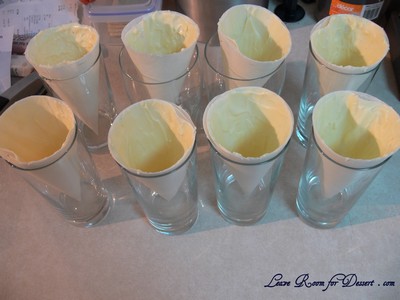
Cut five or six 25cm squares out of baking paper. Fold squares diagonally and cut to form 10-12 triangles. Place the triangle on the bench so the longest flat side is closest to you and the main point is facing away. Pull and twist the point on the right hand side up to join with the main point. Pull the left hand side point around the first twist to make the cone. Staple in place. Cut around on the bottom to make a smooth edge and ensure the cone stands upright. You may need some holders for your cones – either use glasses, if they will fit – or fold a piece of paper in half length ways and twist to form a cylinder, staple in place (it will look like a toilet roll holder).
SemifreddoViennaAlmond12

SemifreddoViennaAlmond13

SemifreddoViennaAlmond14

SemifreddoViennaAlmond15

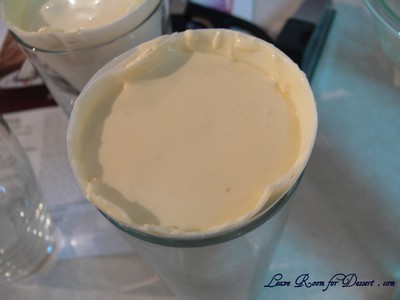
Melt the white chocolate in a bowl over simmering water. Use the back of a spoon to coat the inside of the cones with an even layer of chocolate. (If it is too hot, make a smaller cone out of paper or cardboard to hold the baking paper cone). Stand cones in a glass or made holder.

SemifreddoViennaAlmond03

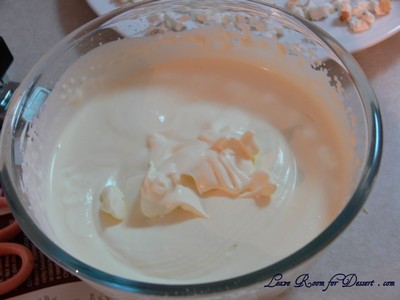
Beat thickened cream in a medium bowl until softly whipped. Beat the eggs with the sugar and vanilla in a large bowl until lighter in colour and thickened. Fold the cream lightly into the egg mixture, half way through, add the nougat and around 100g Vienna almonds and finish folding through.

SemifreddoViennaAlmond07

SemifreddoViennaAlmond08

Scoop the mixture into each of the cones and place in the freezer for a few hours or overnight, until firm.

To serve:
Place the dark chocolate and cream in a bowl and heat in a microwave in 10sec 50% power bursts, stirring between each burst, until the chocolate has melted and combined with the cream. Place in a piping bag/squeeze bottle or make a piping bag by using a plastic zip lock bag or by making another cone out of baking paper and cutting off the end.

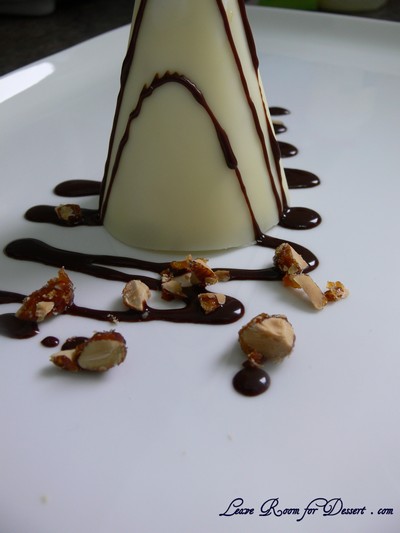
Remove baking paper from white chocolate cones and place on the plate. Drizzle with chocolate sauce and scatter the remaining Vienna almonds. Serve.

SemifreddoViennaAlmond27

Vienna Almonds

Saturday, February 20th, 2010

ViennaAlmonds10

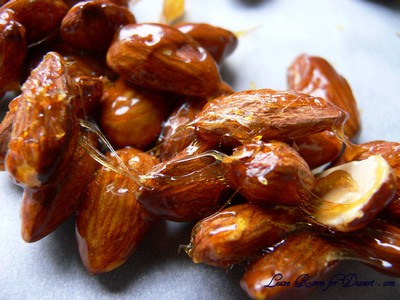
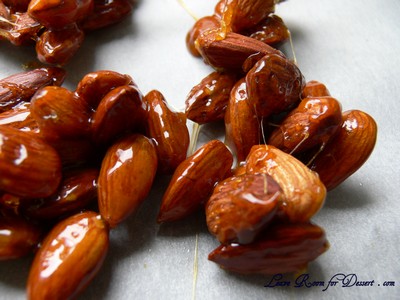
I love Vienna Almonds. In the basement of the Queen Victoria Building, sweet caramelised nuts can be smelt by people walking to or from Town Hall station. I am very tempted every time I walk by there to pick up some of their tasty macadamia, cashews or almonds coated in lovely caramel. Other little stalls used to make Vienna almonds around Christmas, but I can no longer find any of them set up, so if you’re not able to get your hands on some… make them yourself.

ViennaAlmonds06

These are not too hard to make (I say after only succeeding on my third try – this was years ago now, and I had no sugar thermometer). I tended to lack a bit of patience with some things and waiting for sugar water to caramelize and turn golden is a bit scary. I thought it was changing colour a lot earlier than it was and then the whole thing was stuffed up – the almonds were left coated in chunks of sugar (let me know if you want to see my failed attempts). I also found if I hadn’t roasted the almonds, the extra moisture or oils would also cause havoc with the caramel.

ViennaAlmonds12

They taste great by themselves or incorporated in desserts (see my next recipe…). I’m sure you could also use macadamias or cashews in this recipe, it is on my long list of things to make.

Vienna Almonds

Recipe from A self-proclaimed foodaholic (I think this is where I found the recipe – it was so long ago, I didn’t take note). My changes in italics

250g whole blanched almonds (I use raw almonds as this is what I am used to)
125g caster sugar
60 ml water
1 vanilla bean (or ½ teaspoon vanilla essence or imitation vanilla)
10g butter
pinch salt

Roast the almonds in the oven for 15 minutes to remove the oil and add some colour to it. The oil will prevent the caramel from sticking to the almonds, so, the oil should be removed by roasting it, or blanching it.

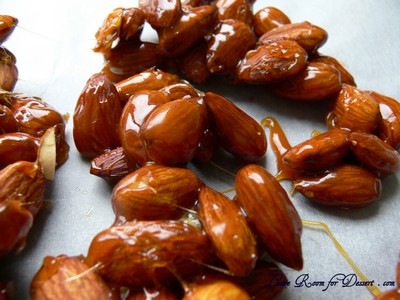
Cook sugar, water and vanilla beans without stirring to about 124°C. that should be when the colour is slowly turning to golden brown. Be careful not to burn it. Then add in the almonds and then stir so that the almonds are well coated with caramel. Stir in butter. Pour out onto oiled surface or baking paper and separate them.

ViennaAlmonds11

Steamed Barbecued Pork Buns – Char Siu Bao

Sunday, February 14th, 2010

PorkBuns18

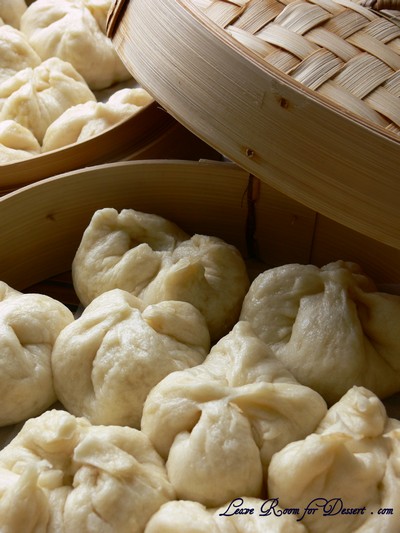
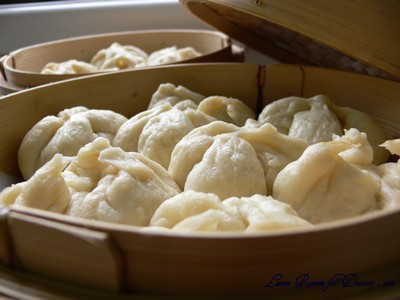
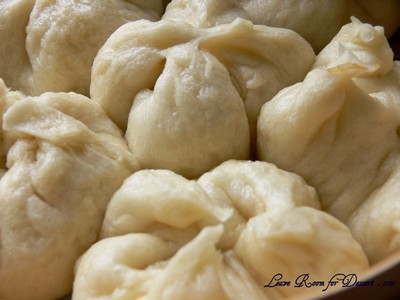
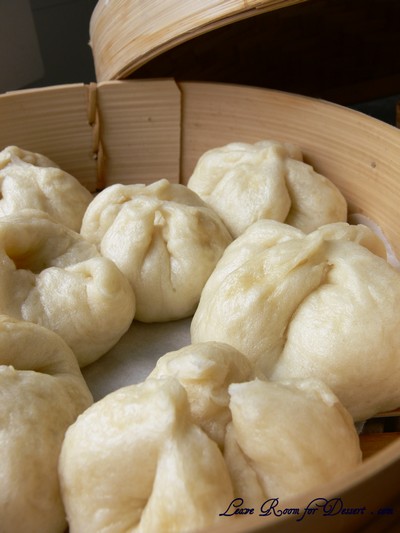
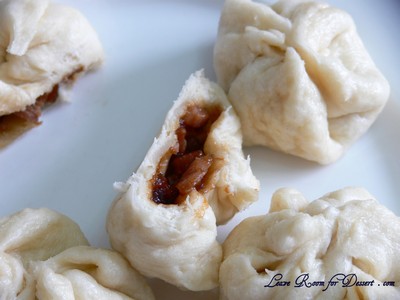
Happy Chinese New Year! The year of the Tiger has just begun and I decided to celebrate by making my first ever steamed barbeque pork buns.

PorkBuns20

The thing I love about barbecued pork buns is how sweet they are. I tend to add a tablespoon of sugar or more to most savoury dishes I make, although these go one step further – and I’m not complaining. 🙂

PorkBuns28

They do go well with other yum cha dishes as well, like some dumplings I recently made and I’ll have to post on them when I’ve perfected the recipes a bit more…

PorkBuns23

Enjoy! And Happy Chinese New Year! (I hope those who are celebrating Valentines Day also have a great day and weekend!)

PorkBuns25

Recipes altered by me from a number of websites.

Barbeque Pork

Makes enough for 48 buns, or Serves: 4

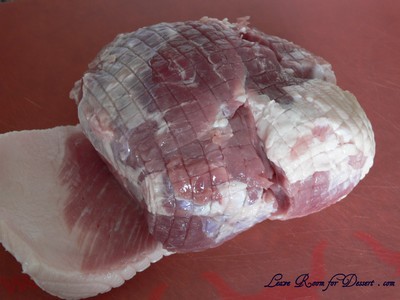
1 kg boned pork shoulder roast, large pieces of fat removed
½ cup hoisin sauce
½ cup soy sauce
1/ cup rice wine vinegar
1/3 cup honey
1 tablespoon sugar

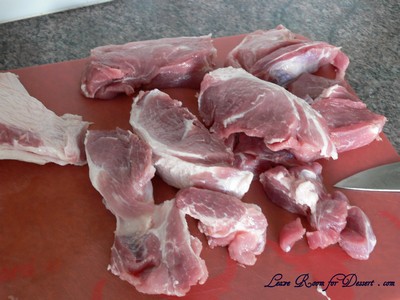
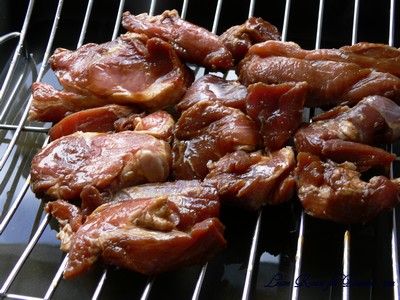
Slice the pork into 2-3 cm thick slices. Mix together all other ingredients and place in a bowl. Add the pork and marinate for a few hours, or preferably overnight.

PorkBuns30

PorkBuns32

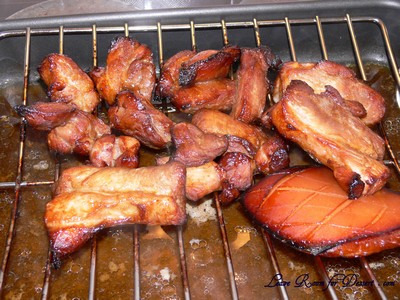
Preheat the oven to 200C and pour some water into a large roasting pan (not enough to reach the metal roasting rack). Place the pork on the roasting rack over the water. Cook for 10 minutes, then reduce the heat to 160C and cook for a further 30-40 minutes, turning and brushing on more marinade for a few times.

PorkBuns33

PorkBuns35

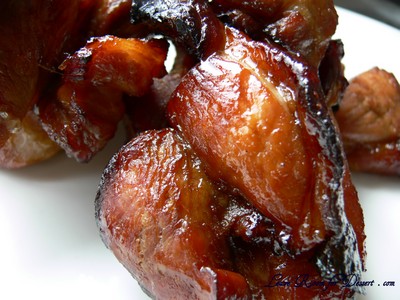
Once cooked, serve as is, or slice up. Alternatively, save it for pork buns, by allowing it to cool and using it once cooled or after storing in the fridge.

PorkBuns39

Barbeque Pork Filling

Makes enough for 24 buns

500g barbeque pork, (see recipe above) diced
1 spring onion/ shallot, finely sliced or chopped
1 garlic clove, crushed
1 tablespoon vegetable oil
1 tablespoon soy sauce
2 tablespoons hoisin sauce
2 tablespoons oyster sauce
2 tablespoons brown sugar
1 tablespoon honey
1½ tablespoons cornflour mixed with ¼ cup water

Mix together the soy sauce, hoisin sauce, oyster sauce, brown sugar and honey.

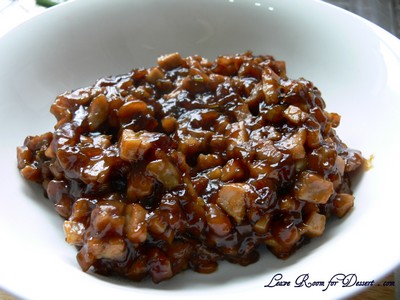
Heat a small saucepan or wok on medium/high heat. Add the oil, then the sliced spring onion. Cook for ½ minute, add the garlic and stir for 1 minute. Add the pork, stir for ½ minute, then add the sauce, mix, followed by the cornflour mixed with water.

Once the mixture comes together, about 1 minute. Remove from heat and allow to cool, for use in the pork buns later.

PorkBuns07

Bun Dough

Makes: 24

1 cup lukewarm water
1 teaspoon caster sugar
1 tablespoon yeast (~7g)
4 cups plain flour
1/3 cup white sugar
1½ teaspoons salt
2 tablespoons vegetable oil
½ cup boiling water

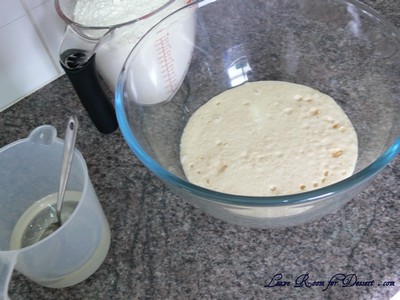
Mix together the lukewarm water, caster sugar and yeast in a large bowl. Leave for 10-20 minutes for the yeast to activate, while you get the rest of your ingredients ready.

PorkBuns05

Mix together the boiling water with the white sugar, salt and vegetable oil. Stir to dissolve the sugar and cool the water. Cool until lukewarm.

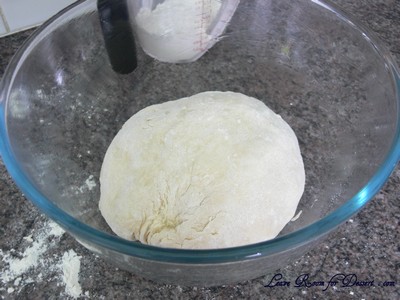
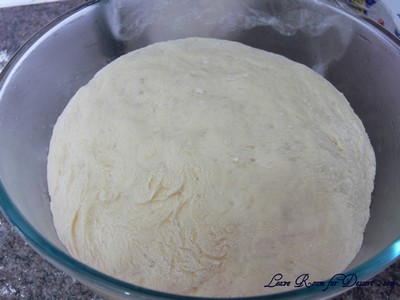
Add 3½ cups of the flour and the warm water to the yeast mixture. Mix to form a dough and then turn out onto a bench with the remaining ½ cup flour on it. Knead for a few minutes until the dough comes together nicely. Place in a large lightly oiled bowl and cover with plastic wrap or a tea towel. Leave for 1-2 hours in a warm place, until the dough has risen to double its size.

PorkBuns06

PorkBuns08

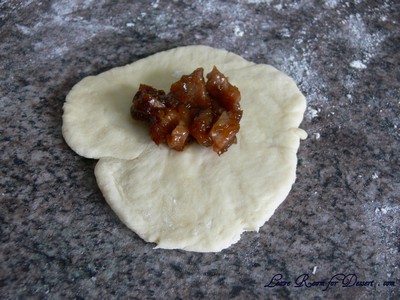
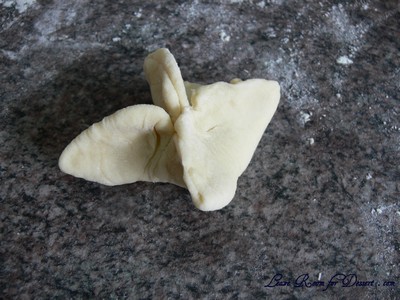
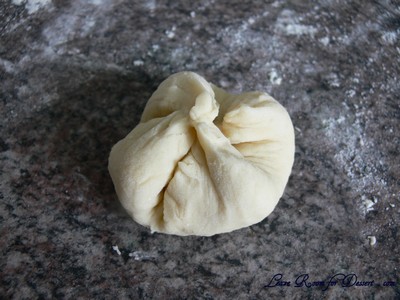
Tip the dough onto a lightly floured bench and lightly knead. Divide dough into 2 portions. Roll out one portion into a cylinder shape which is easy to divide. Divide into 12 portions. Roll out each portion into a small circle, large enough to fit a teaspoon of pork filling in the middle and to pull four sides of the circle, or pleat the edges to enclose the filling. Twist the top of the dough to seal the bun. Do the same with the remaining dough and mixture.

PorkBuns10

PorkBuns11

PorkBuns12

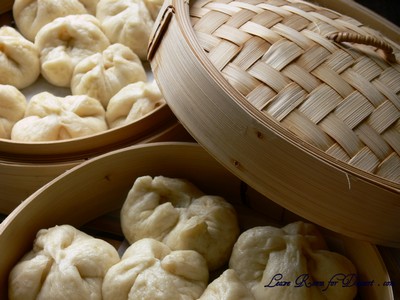
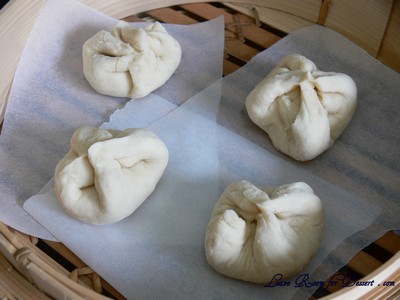
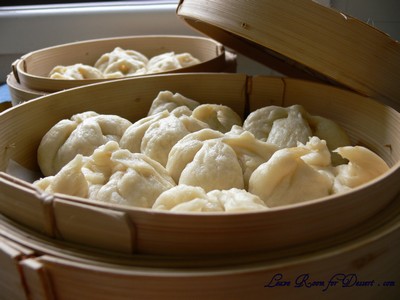
Place completed buns on pieces of baking paper in a bamboo steamer and cook straight away or leave for up to an hour before steaming over boiling water for 10 minutes. Serve.

PorkBuns09

PorkBuns15

PorkBuns29

Golabki – Minced Cabbage Rolls – Cooking Class 14

Tuesday, February 9th, 2010

IMG_4907_tn

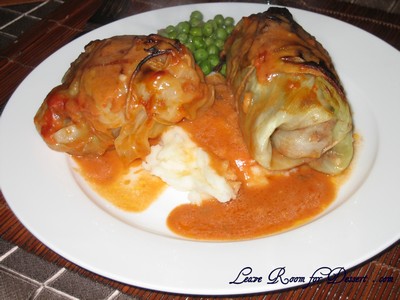
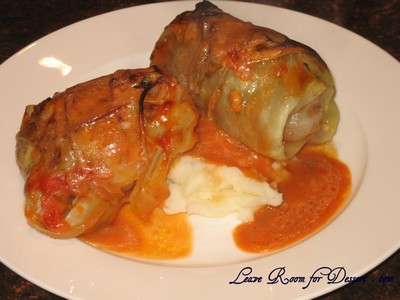
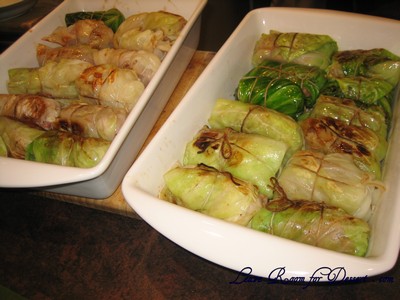
When I heard we were having “Gwomkes” or “Gwonkys” I was intrigued, as I had no idea what it was. I tried searching for it on the internet, although it’s not spelled the way it’s pronounced. It was actually Golabki (pronounced ga-WUMP-kee), a traditional Polish minced cabbage roll made from meat wrapped in lightly boiled cabbage leaves.

I was very happy to hear we would be making Polish food, as I haven’t tried much at all, even with it being a part of my heritage (if you have any Polish recipes or cookbooks you’d recommend, please send them through to me, as I’d love to explore Polish food more).

IMG_4898_tn

Overall, everyone loved the golabki’s. They tasted great, no complaints on that front. They did mess up a lot of dishes, but a lot of good food does. I’d love to make them again, this time boiling the cabbage whole, as we took off the leaves individually and they tore a bit. Also, making it for fewer people would lower the hassle of this dish. Another cooking class done… we’ve stopped them for quite a while now, with New Years, holidays and everything getting in the way. Maybe we can pick them back up again…

IMG_4903_tn

Golabki – Minced Cabbage Rolls

also spelled: Golumkies and Golumpkis
Recipe by my Dad with inspiration from my Babcia’s recipe.

Serves: 10 or more

2 kg finely minced beef
0.25 kg sausage mince
1 cup of cooked white rice
2 eggs
1 mid-size white onion finely chopped
White cooking cotton and/or tooth picks
12 to 14 cabbage leaves (possibly double depending upon size – we used a full cabbage)
Salt & Pepper
1 tablespoon butter
2 tins of tomato puree
80g butter
500ml full cream milk
½ cup plain flour

Cook the rice using the absorption method (Heat 1 teaspoon of butter in a saucepan on high. Add 1 cup rice and stir. Add 1.5 cups boiling water. Reduce heat to low and cook for 20 minutes).

As the rice is cooking, boil at least 3 litres of water.

Mix both meats together with the onion and egg. Add salt & pepper to taste. When the rice is cooked, add it to the meat mixture and mix it through.

Take 12 cabbage leaves and remove the core from each leaf. (Depending upon the size of the leaf then double the amount of leaves may be required and then they would be doubled up in the making of the rolls). We found out afterwards, it would be much easier to cut the core from the cabbage and boil the entire thing. This will make the leaves come away a lot easier, as our ones broke quite easily.

When the water is boiling, add a teaspoon of salt to the water. Place each of the cabbage leaves in the 3 litres of boiling water to blanch them. After approximately 3 minutes, take each leaf out of the boiling water. Shake off the excess water and place the cabbage leaf on a cutting board.

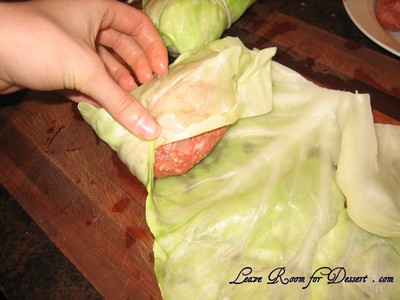
Take the meat mixture and spoon an adequate amount (a tablespoon or two) onto the cabbage leaf.

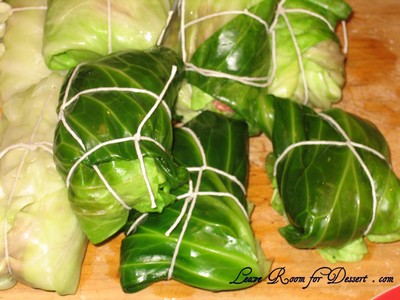
Fold the cabbage leaf onto itself, forming a tight roll. Use the cooking cotton to tie-up the roll so it won’t unravel.
Note: To secure the roll, the cotton tie may have to be tied around the ends as well as the sides of each roll. (If one wishes, a toothpick can be used to secure the roll.)

IMG_4887_tn

IMG_4891_tn

Turn on the oven and set the temperature to 180C.

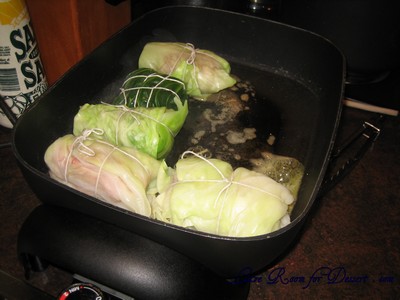
Add a tablespoon of butter (or more) to a frying pan on medium heat and melt the butter. Place each roll into the frying pan, turning so that all sides are lightly browned.

IMG_4888_tn

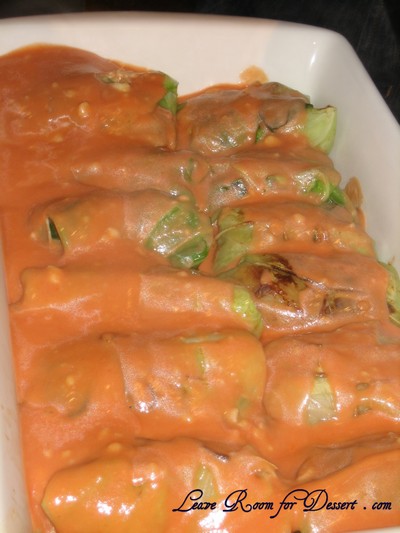
To prepare the sauce, melt 80g butter over medium heat, add the flour and cook for a few minutes, add the milk and whisk until smooth. Whisk in the tomato puree.

As each roll is browned place it into a casserole dish. Pour the sauce over the rolls.

IMG_4893_tn

IMG_4897_tn

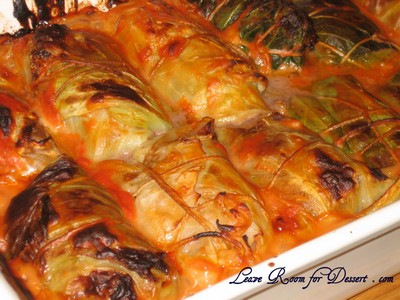
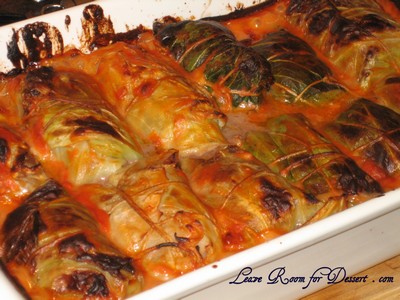
Place the casserole dish into a moderate oven (180C) and cook for 40 minutes. After approximately 20 minutes, take out the casserole dish and turn each roll over. Continue cooking for the remainder of the 40 minutes.

Prepare a side dish of mashed potatoes, carrots and peas/beans to suit.

After the second 20 minutes, remove casserole dish and take each roll and place it on a plate. Add the side dishes. Spoon out the sauce from the casserole dish, covering the rolls and side dishes to taste.

Serve it and enjoy it.

IMG_4899_tn

Herb and Orange Chicken with Pineapple and Capsicum served with Pomegranate, Orange and Baby Spinach Salad

Tuesday, February 2nd, 2010

HerbChickenSalsa05

We are so lucky in Australia with our beautiful range of lovely, fresh fruit and vegetables. The pineapples this year have been spectacularly sweet and perfect. I haven’t been able to go past them in the supermarkets or fruit shops.

HerbChickenSalsa16

Then there is the trouble of trying not to eat an entire pineapple between two people in one sitting! It’s so tempting and lovely, the only reason I am able to stop myself is because I know I’ll want some the next day too!

HerbChickenSalsa06

Pineapples go well in fruit salads and a lot of sweet dishes and desserts, although surprisingly goes perfectly well with a fruit inspired, partly savoury, main meal.

HerbChickenSalsa09

One particular reason for my trial of this dish was to broaden the variety of salads I will eat, along with using some pomegranate seeds, which I haven’t really experimented with that much.

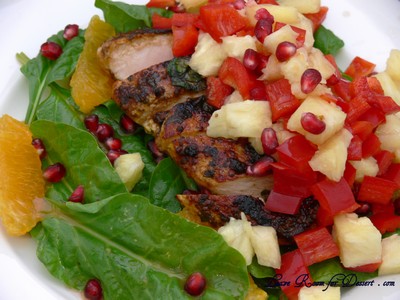
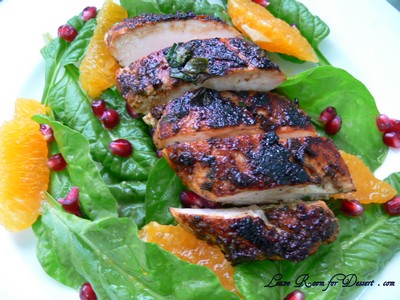
All in all, the flavours work beautifully together and this is a lovely summer dinner. It tastes like a wonderfully healthy main meal with great textures and flavours.

HerbChickenSalsa02

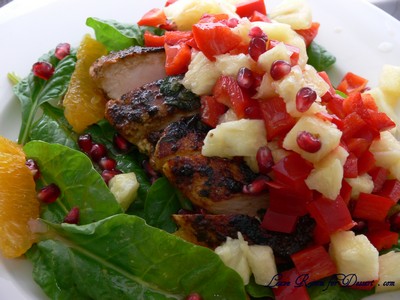
Herb and Orange Chicken with Pineapple and Capsicum served with Pomegranate, Orange and Baby Spinach Salad

Recipes by me – Anita @ Leave Room for Dessert

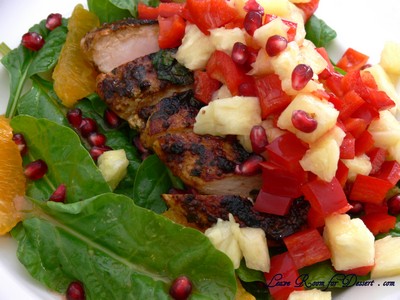
Herb and Orange Chicken

Serves: 4

2 chicken breasts (cut through or left whole)
1 orange, juiced
2 cloves garlic, crushed
2 sprigs parsley, chopped
6 chives, chopped
3 oregano leaves, chopped
18 leaves basil, chopped
1 tablespoon honey

Place all ingredients in a bowl and marinate overnight.

Heat a non-stick pan on medium/high and cook the chicken on both sides, until cooked through. (Slice the chicken through the middle, if you would prefer to make the cooking easier and quicker)

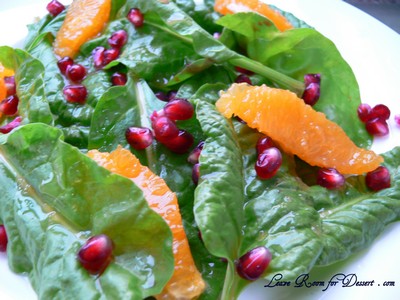
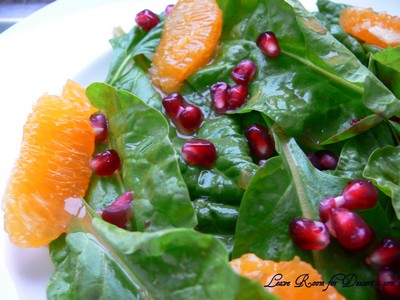
Pomegranate, Orange and Baby Spinach Salad

Serves: 4

2 handfuls baby spinach
1/2 pomegranate, seeded (60 seeds juiced or popped to get 2 teaspoons)
2 orange (1 segmented, 1 juiced)
1 teaspoon caster sugar

Place the washed baby spinach on a plate. Mix the sugar with the juice of half the orange and the teaspoon of pomegranate juice for dressing. Place the orange segments and pomegranate seeds on the spinach. Pour dressing over salad.

HerbChickenSalsa10

Pineapple and Capsicum addition

Serves: 4
1 red capscium, diced
2 slices pineapple diced
1-2 slices pineapple, cut into quarters (optional – for cooking with the chicken to get caramelised pineapple)

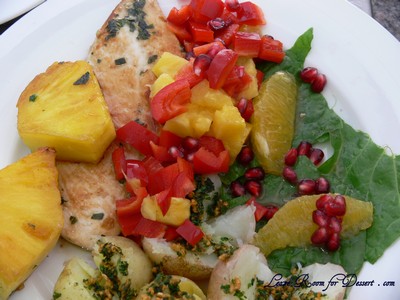
Place combined capsicum and pineapple on the cooked chicken.

If you are caramelising some pineapple, add it to the pan with the half cooked chicken (so it’s not cooking in raw meat juice), or cook separately on medium heat until both sides of the pineapple are caramelised.

HerbChickenSalsa04