Daring Bakers

Macarons – Daring Bakers Challenge October 2009

Tuesday, October 27th, 2009

Macarons04

The 2009 October Daring Bakers’ challenge was brought to us by Ami S. She chose macarons from Claudia Fleming’s The Last Course: The Desserts of Gramercy Tavern as the challenge recipe.

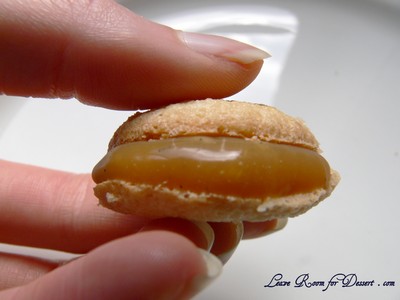
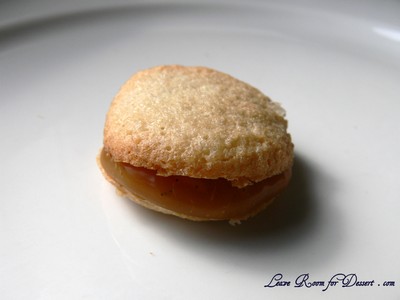
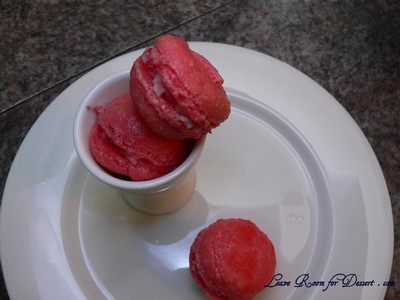
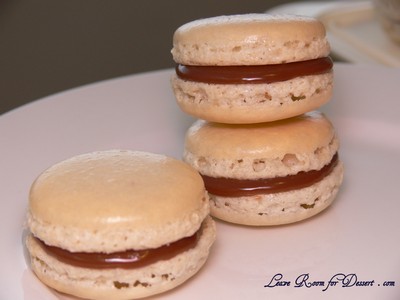
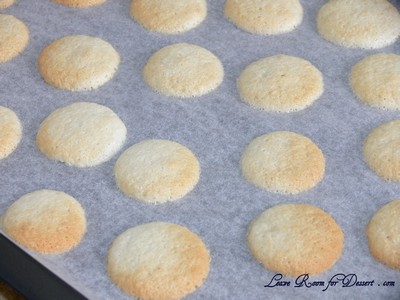
Unfortunately, my two attempts at this recipe were quite disappointing. I had made macarons a few times before (not having perfected them…yet), so I thought I would manage quite well and hoped that this would be the perfect recipe and the macarons would look gorgeous. This was not the case. My macarons looked worse than all other trials – including my first one, when I didn’t even know what they should look like. The macarons didn’t form “feet”, didn’t have a nice crisp top – they just puffed a bit in the oven then the top dried a bit and they sunk back down. Fortunately they were still moist and tasted quite good.

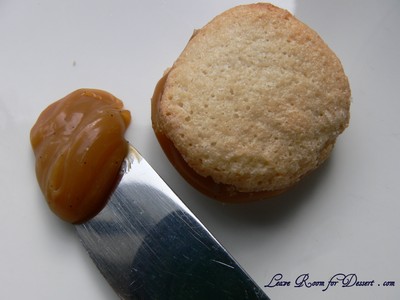
For the filling, I made salted caramel which had mixed reviews. Most people enjoyed it immensely, others found it extra sweet, and I just found the taste a bit strange, I think I’m just not a caramel liking person, unfortunately. I like butterscotch, flavours, so I’m not sure why I don’t like caramel?

Macarons03

I made two batches of this recipe, as I thought the first time it mustn’t have worked because, perhaps I didn’t beat my meringue mixture enough (as it says stiff peaks and other recipes state glossy meringue), or that drying them out in the oven caused the problems that occurred. Neither seemed to be the cause, I decided to keep beating the meringue, but it just would not form a glossy meringue. Either I put my KitchenAid on too fast and over beat the meringue, added my sugar too late or there may not have been enough sugar to form the meringue, although I’m not totally sure.

I have decided to share all my previous macaron experiences with you all, to give you an idea of problems I have had through each recipe, as well as give everyone suggestions for recipes they may or may not like to try. I never got around to posting these (apart from the latest one), as each had something slightly wrong with it (not necessarily the recipe, most are my mistakes while learning and trying to achieve the perfect macaron, inside and out).

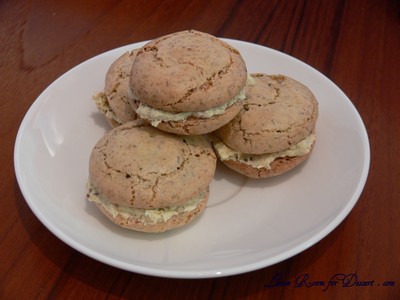
The following photo was my first ever attempt at macarons and was Nigella Lawson’s pistachio macarons from How to be a domestic goddess. The recipe did not state to leave the macarons to form a skin, resulting in biscuit looking macarons. This flavour was beautiful and as I recall the inside texture was also lovely, with the only problem being the look. They had half the recipes’ pistachio buttercream in them (the full amount is way too much, like stated on many other blogs).

Macarons06

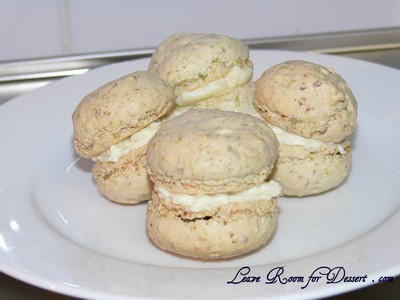
After reading many more macaron tips, I had decided to trial out the pistachio macarons using Syrup and Tang’s French meringue method (replacing the almond meal for pistachio meal). After leaving them to sit for half and hour the formed quite lovely macarons that probably could have been beaten a few more times, for a better look and because they were a bit meringue-y still. Also – half almond, half pistachio may have worked better. I filled these with a rosewater buttercream. (For the buttercream: 25g butter, 1/4 cup cream, 1/2 cup icing sugar and 1/8 teaspoon rose water – beat the butter till soft and lightened in colour. Beat in the cream, then the sifted icing sugar or mixture with the rose water).

Macarons08

I had heard that the Italian meringue method was by far the most reliable and best around, I used Syrup and Tang’s Italian meringue method for these macarons. The two problems I had (apart from my enthusiasm with the pink food colouring) were the sugar syrup forming large chunks when drizzled into the egg white mix, as well as bumpy tops. The first problem may have occurred as my sugar thermometer didn’t reach into the sugar syrup, so I had to keep tipping the saucepan up to read the temperature. This disruption may be the cause of the sugar lumps. The second problem may have been able to be fixed by beating the mix a few more times. I would like to try this again as the inside was lovely and moist, filled the entire shell and seemed the perfect consistency. These were filled with white chocolate and raspberry ganache from Gourmet Traveller.

Macarons09

The recipe that produced the most beautiful macaron was Helen’s from Tartlette. Helen’s recipe produced a gorgeous glossy smooth top with pretty feet. My only problem with these were a bit of a hole under the shell of the macaron – could this be an oven problem? I filled these with a simple chocolate ganache.

Macarons12

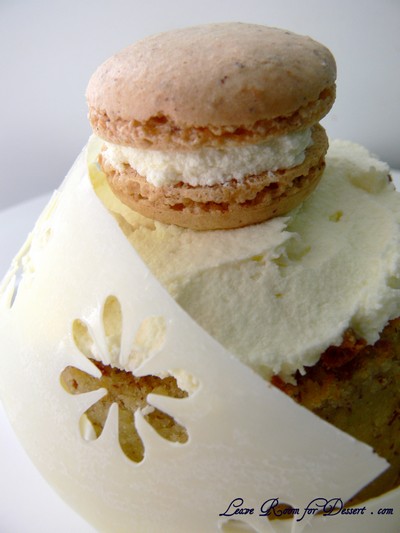
My latest trial were hazelnut macarons, which had a beautiful flavour, although were lacking slightly in appearance.

WhiteChocHazelnut09

Macarons

Recipe adapted by Ami S from Claudia Felming’s The Last Course.

Confectioners’ (Icing) sugar: 2 ¼ cups (225 g, 8 oz.)
Almond flour: 2 cups (190 g, 6.7 oz.)
Granulated sugar: 2 tablespoons (25 g , .88 oz.) (I used castor sugar)
Egg whites: 5 (Have at room temperature) (I aged mine overnight at room temperature, covered in a paper towel)

Preheat the oven to 200°F (93°C). Combine the confectioners’ sugar and almond flour in a medium bowl. If grinding your own nuts, combine nuts and a cup of confectioners’ sugar in the bowl of a food processor and grind until nuts are very fine and powdery.

Beat the egg whites in the clean dry bowl of a stand mixer until they hold soft peaks. Slowly add the granulated sugar and beat until the mixture holds stiff peaks.

Sift a third of the almond flour mixture into the meringue and fold gently to combine. If you are planning on adding zest or other flavorings to the batter, now is the time. Sift in the remaining almond flour in two batches. Be gentle! Don’t overfold, but fully incorporate your ingredients.

Spoon the mixture into a pastry bag fitted with a plain half-inch tip (Ateco #806). You can also use a Ziploc bag with a corner cut off. It’s easiest to fill your bag if you stand it up in a tall glass and fold the top down before spooning in the batter.

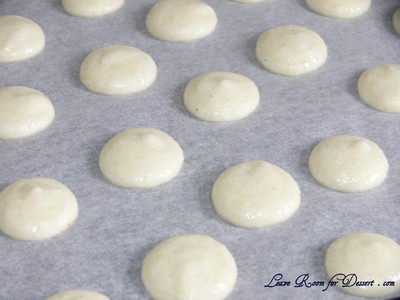
Pipe one-inch-sized (2.5 cm) mounds of batter onto baking sheets lined with nonstick liners (or parchment paper).

Macarons13

Bake the macaroon for 5 minutes. Remove the pan from the oven and raise the temperature to 375°F (190°C). Once the oven is up to temperature, put the pans back in the oven and bake for an additional 7 to 8 minutes, or lightly colored. (I also tried leaving them at room temperature for 30 mins at room temperature, bu they still didn’t rise like they should).

Macarons01

Cool on a rack before filling.

I filled my macarons with salted caramel

Salted Caramel

Recipe from Chef Pang Kok Keong on Chubby Hubby’s blog

200g sugar
1 vanilla pod
200g cream
3.75g fleur de sel (I used salt flakes, as that’s all I had 🙁 )
140g butter, chilled

In a 1 litre heavy based pot, cook the sugar, stirring all the time to get an even caramel. Then add in the vanilla pod, scraped. Add in the warm cream a bit at a time as it will bubble up and splatter. Then add in the fleur de sel. Stir to make sure all the caramel has dissolved. Cool the mixture to approximately 40 degrees Celsius. Add in the well chilled butter, cut into cubes. Using an immersion blender, blend in the butter till you achieve a smooth glossy paste. Line the surface of the caramel with plastic wrap or greaseproof paper to prevent a skin from forming and chill in the fridge until needed.

Macarons05

Sydney Daring Bakers Meet-up at NewsCaf

Thursday, October 1st, 2009

newscaf03

I really enjoyed meeting up with a group of the Daring Bakers in Sydney a couple weekends ago. Audax organised a lunch, which was attended by many bloggers, many of whom I hadn’t met and some that I had. All the bloggers were friendly and knowledgeable, and we shared many stories about baking, the Daring Bakers challenges we’ve had in the past and ones we expect might arise in the future. We also discussed books, restaurants and who the lucky people are who get all the lovely food we make for the challenges and our blogs. It was great talking with like-minded baking enthusiasts, and I would love to meet up again.

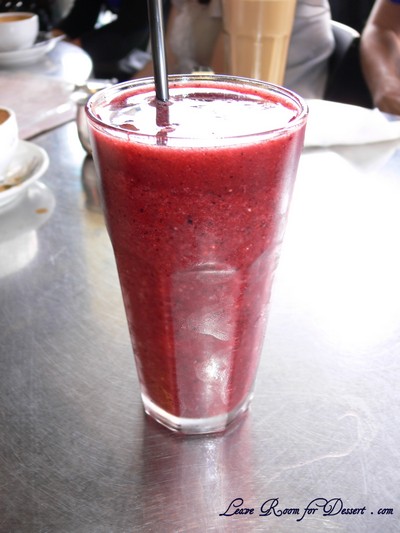
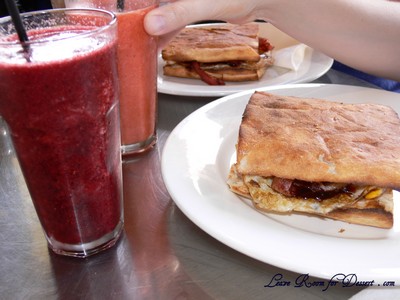
We went to NewsCaf in Newtown for a hearty lunch. I had been contemplating having a croissant for lunch, but after seeing pancakes on the menu (I do love my pancakes), my decision was made. I was also looking forward to some pear nectar, as I thought that would be nice and refreshing, although there was none available. So I decided on the Wildberry Frappe. The frappe was nice and fruity, with a slightly sweet flavour and overall strong berry flavour.

newscaf07

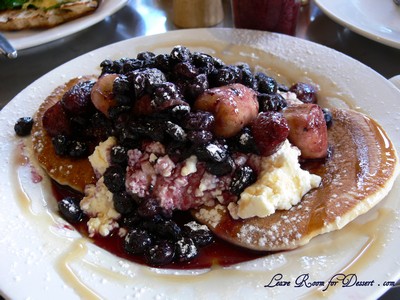
When my pancakes came out, I was impressed with the generosity of toppings. The two pancakes were covered in a mound of blueberries, strawberries, banana, ricotta and maple syrup. The flavours worked very well together. I love ricotta with pancakes, and the bananas and tartness of the berries complemented the sweet maple syrup well. The only thing I could have asked for to improve it, may have been a touch more maple syrup – I tend to have quite a bit on pancakes.

newscaf06

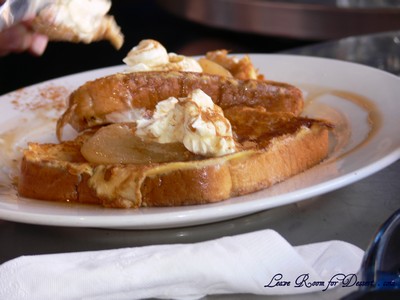
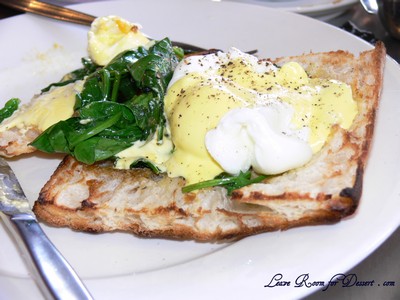
Everyone else’s meals also looked very generous. Bacon and egg rolls, croissants, eggs benedict’s and French toast were some of the other meals ordered.

newscaf02

newscaf01

Thanks again to Audax for organising the meet up. It was great to finally meet you and many other enthusiastic Daring Bakers.

newscaf08

Here’s a list of the Daring Bakers who attended:

Audax @ Audax Artifex

Karen @ Citrus and Candy

Steph @ Raspberri Cupcakes

Lucy @ Lucy Cooks

Lexi and Biff @ Fat Little Dumplings

Lisa @ Spicy Ice cream

Kim @ All Consuming Food

Trissa @ Trissalicious

NewsCaf
267 King St
Newtown 2042 NSW
Phone: (02) 9565 1951

Vols-au-Vents – Daring Bakers Challenge September 2009

Sunday, September 27th, 2009

volauvonts22

The September 2009 Daring Bakers’ challenge was hosted by Steph of A Whisk and a Spoon. She chose the French treat, Vols-au-Vent based on the Puff Pastry recipe by Michel Richard from the cookbook Baking With Julia by Dorie Greenspan.
volauvonts05

I was a bit intimidated seeing puff pastry was one of the chosen recipes for this month’s Daring Bakers challenge, but also excited to finally be “pushed” into making it.

Steph, our lovely host for this month, provided a great video showing how to make the puff pastry and it was brilliant! I would strongly recommend anyone wanting to make this or any other puff pastry recipe, to first watch the video.

I was just amazed at how easy the puff pastry was to make and roll, it didn’t take as long as I expected either (maybe 2-3 hours – mostly consisting of resting). The pastry looked perfect, very similar to the one on the video – lovely and smooth.
volauvonts06

I think the biggest problem for me was doing the vol-au-vent cases on a busy day – and this made it feel like it was taking forever. Plus the fact that I was making three different fillings…

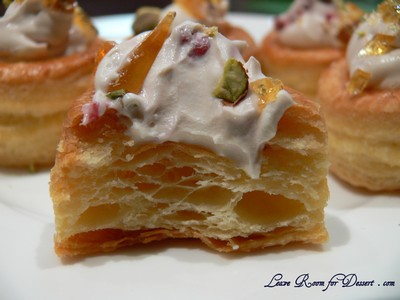
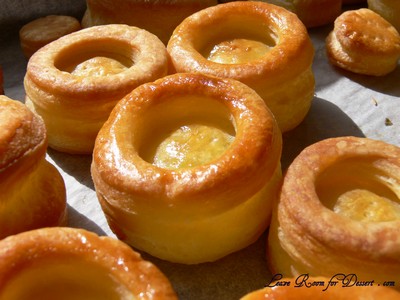
Apart from the restricted time, the vol-au-vents turned out very well. They looked just like bought vol-au-vents and all the fillings were thoroughly enjoyed (once I tweaked my chicken and mushroom filling – a request from a family member).
volauvonts09

I am definitely thinking of making some more puff pastry after being pleasantly surprised by this recipe, although I think it might have to involved custard this time… like perhaps my Portuguese Custard Tarts. Not many things can be more rewarding than custard with pastry.

Forming and Baking the Vols-au-Vent

Yield: 1/3 of the puff pastry recipe below will yield about 8-10 1.5” vols-au-vent or 4 4” vols-au-vent

-well-chilled puff pastry dough (recipe below)
-egg wash (1 egg or yolk beaten with a small amount of water)
-your filling of choice

Line a baking sheet with parchment and set aside.

Using a knife or metal bench scraper, divide your chilled puff pastry dough into three equal pieces. Work with one piece of the dough, and leave the rest wrapped and chilled. (If you are looking to make more vols-au-vent than the yield stated above, you can roll and cut the remaining two pieces of dough as well…if not, then leave refrigerated for the time being or prepare it for longer-term freezer storage. See the “Tips” section below for more storage info.)
volauvonts18

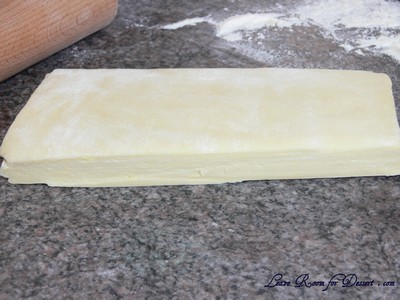
On a lightly floured surface, roll the piece of dough into a rectangle about 1/8 to 1/4-inch (3-6 mm) thick. Transfer it to the baking sheet and refrigerate for about 10 minutes before proceeding with the cutting.

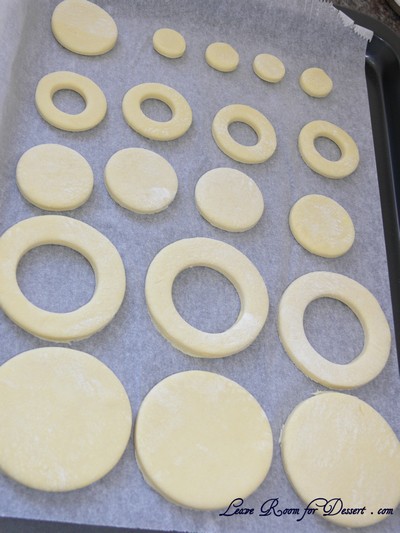
(This assumes you will be using round cutters, but if you do not have them, it is possible to cut square vols-au-vents using a sharp chef’s knife.) For smaller, hors d’oeuvre sized vols-au-vent, use a 1.5” round cutter to cut out 8-10 circles. For larger sized vols-au-vent, fit for a main course or dessert, use a 4” cutter to cut out about 4 circles. Make clean, sharp cuts and try not to twist your cutters back and forth or drag your knife through the dough. Half of these rounds will be for the bases, and the other half will be for the sides. (Save any scrap by stacking—not wadding up—the pieces…they can be re-rolled and used if you need extra dough. If you do need to re-roll scrap to get enough disks, be sure to use any rounds cut from it for the bases, not the ring-shaped sides.)

Using a ¾-inch cutter for small vols-au-vent, or a 2- to 2.5-inch round cutter for large, cut centers from half of the rounds to make rings. These rings will become the sides of the vols-au-vent, while the solid disks will be the bottoms. You can either save the center cut-outs to bake off as little “caps” for you vols-au-vent, or put them in the scrap pile.
volauvonts01

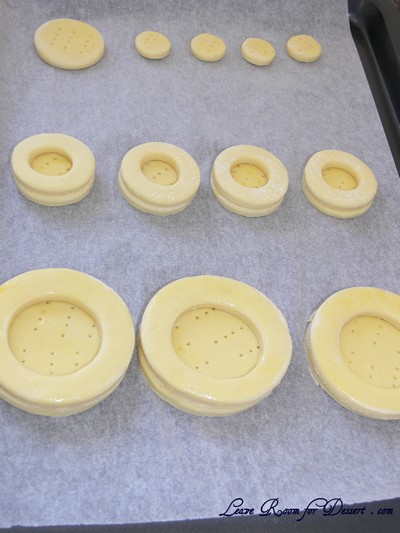
Dock the solid bottom rounds with a fork (prick them lightly, making sure not to go all the way through the pastry) and lightly brush them with egg wash. Place the rings directly on top of the bottom rounds and very lightly press them to adhere. Brush the top rings lightly with egg wash, trying not to drip any down the sides (which may inhibit rise). If you are using the little “caps,” dock and egg wash them as well.
volauvonts02

Refrigerate the assembled vols-au-vent on the lined baking sheet while you pre-heat the oven to 400ºF (200ºC). (You could also cover and refrigerate them for a few hours at this point.)

Once the oven is heated, remove the sheet from the refrigerator and place a silicon baking mat (preferred because of its weight) or another sheet of parchment over top of the shells. This will help them rise evenly. Bake the shells until they have risen and begin to brown, about 10-15 minutes depending on their size. Reduce the oven temperature to 350ºF (180ºC), and remove the silicon mat or parchment sheet from the top of the vols-au-vent. If the centers have risen up inside the vols-au-vent, you can gently press them down. Continue baking (with no sheet on top) until the layers are golden, about 15-20 minutes more. (If you are baking the center “caps” they will likely be finished well ahead of the shells, so keep an eye on them and remove them from the oven when browned.)

Remove to a rack to cool. Cool to room temperature for cold fillings or to warm for hot fillings.
volauvonts04

Fill and serve.

*For additional rise on the larger-sized vols-au-vents, you can stack one or two additional ring layers on top of each other (using egg wash to “glue”). This will give higher sides to larger vols-au-vents, but is not advisable for the smaller ones, whose bases may not be large enough to support the extra weight.

*Although they are at their best filled and eaten soon after baking, baked vols-au-vent shells can be stored airtight for a day.

*Shaped, unbaked vols-au-vent can be wrapped and frozen for up to a month (bake from frozen, egg-washing them first).

Michel Richard’s Puff Pastry Dough

From: Baking with Julia by Dorie Greenspan
Yield: 2-1/2 pounds dough

Steph’s note: This recipe makes more than you will need for the quantity of vols-au-vent stated above. While I encourage you to make the full recipe of puff pastry, as extra dough freezes well, you can halve it successfully if you’d rather not have much leftover.

There is a wonderful on-line video from the PBS show “Baking with Julia” that accompanies the book. In it, Michel Richard and Julia Child demonstrate making puff pastry dough (although they go on to use it in other applications). They do seem to give slightly different ingredient measurements verbally than the ones in the book…I listed the recipe as it appears printed in the book.

2-1/2 cups (12.2 oz/ 354 g) unbleached all-purpose flour
1-1/4 cups (5.0 oz/ 142 g) cake flour
1 tbsp. salt (you can cut this by half for a less salty dough or for sweet preparations)
1-1/4 cups (10 fl oz/ 300 ml) ice water
1 pound (16 oz/ 454 g) very cold unsalted butter

plus extra flour for dusting work surface

Mixing the Dough:

Check the capacity of your food processor before you start. If it cannot hold the full quantity of ingredients, make the dough into two batches and combine them.

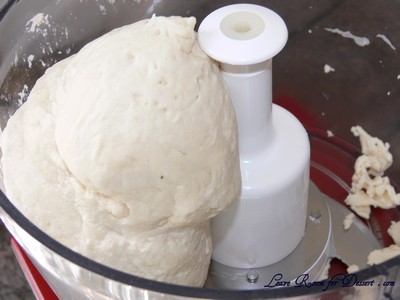
Put the all-purpose flour, cake flour, and salt in the work bowl of a food processor fitted with a metal blade and pulse a couple of times just to mix. Add the water all at once, pulsing until the dough forms a ball on the blade. The dough will be very moist and pliable and will hold together when squeezed between your fingers. (Actually, it will feel like Play-Doh.)
volauvonts10

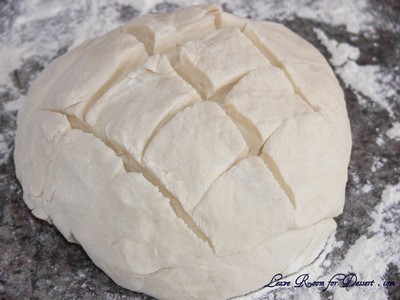
Remove the dough from the machine, form it into a ball, with a small sharp knife, slash the top in a tic-tac-toe pattern. Wrap the dough in a damp towel and refrigerate for about 5 minutes.
volauvonts11

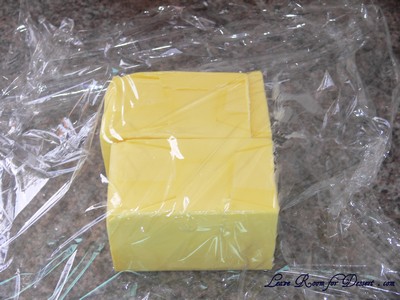
Meanwhile, place the butter between 2 sheets of plastic wrap and beat it with a rolling pin until it flattens into a square that’s about 1″ thick. Take care that the butter remains cool and firm: if it has softened or become oily, chill it before continuing.
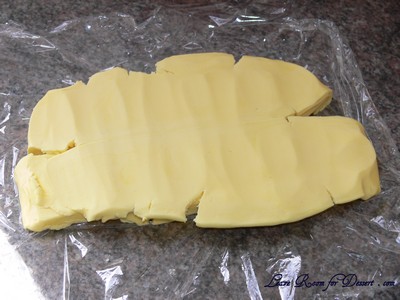
volauvonts12

volauvonts13

Incorporating the Butter:

Unwrap the dough and place it on a work surface dusted with all-purpose flour (A cool piece of marble is the ideal surface for puff pastry) with your rolling pin (preferably a French rolling pin without handles), press on the dough to flatten it and then roll it into a 10″ square. Keep the top and bottom of the dough well floured to prevent sticking and lift the dough and move it around frequently. Starting from the center of the square, roll out over each corner to create a thick center pad with “ears,” or flaps.
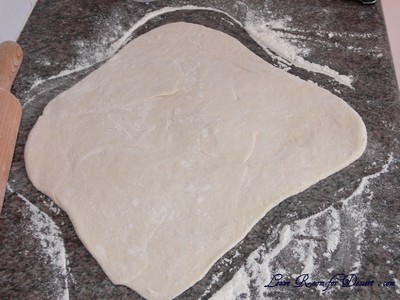
volauvonts14

Place the cold butter in the middle of the dough and fold the ears over the butter, stretching them as needed so that they overlap slightly and encase the butter completely. (If you have to stretch the dough, stretch it from all over; don’t just pull the ends) you should now have a package that is 8″ square.
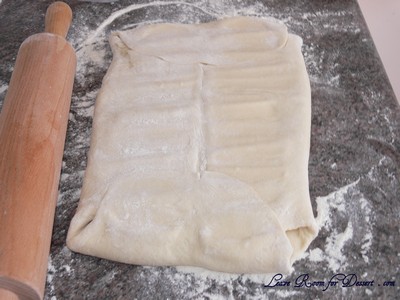
volauvonts15

To make great puff pastry, it is important to keep the dough cold at all times. There are specified times for chilling the dough, but if your room is warm, or you work slowly, or you find that for no particular reason the butter starts to ooze out of the pastry, cover the dough with plastic wrap and refrigerate it . You can stop at any point in the process and continue at your convenience or when the dough is properly chilled.

Making the Turns:

Gently but firmly press the rolling pin against the top and bottom edges of the square (this will help keep it square). Then, keeping the work surface and the top of the dough well floured to prevent sticking, roll the dough into a rectangle that is three times as long as the square you started with, about 24″ (don’t worry about the width of the rectangle: if you get the 24″, everything else will work itself out.) With this first roll, it is particularly important that the butter be rolled evenly along the length and width of the rectangle; check when you start rolling that the butter is moving along well, and roll a bit harder or more evenly, if necessary, to get a smooth, even dough-butter sandwich (use your arm-strength!).
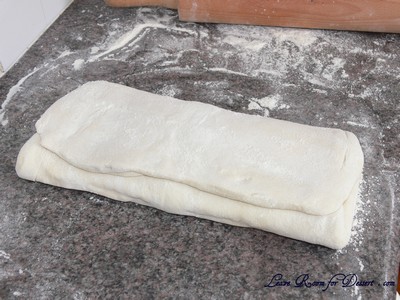
volauvonts16

With a pastry brush, brush off the excess flour from the top of the dough, and fold the rectangle up from the bottom and down from the top in thirds, like a business letter, brushing off the excess flour. You have completed one turn.

Rotate the dough so that the closed fold is to your left, like the spine of a book. Repeat the rolling and folding process, rolling the dough to a length of 24″ and then folding it in thirds. This is the second turn.
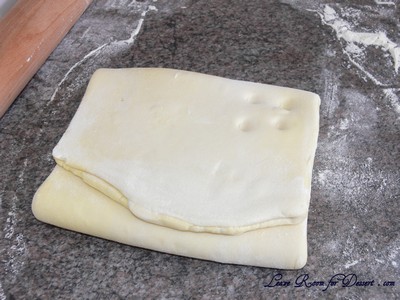
volauvonts17

Chilling the Dough:

If the dough is still cool and no butter is oozing out, you can give the dough another two turns now. If the condition of the dough is iffy, wrap it in plastic wrap and refrigerate it for at least 30 minutes. Each time you refrigerate the dough, mark the number of turns you’ve completed by indenting the dough with your fingertips. It is best to refrigerate the dough for 30 to 60 minutes between each set of two turns.

The total number of turns needed is six. If you prefer, you can give the dough just four turns now, chill it overnight, and do the last two turns the next day. Puff pastry is extremely flexible in this regard. However, no matter how you arrange your schedule, you should plan to chill the dough for at least an hour before cutting or shaping it.
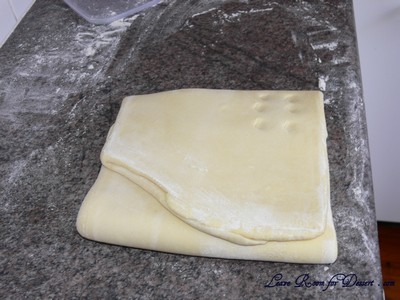
volauvonts20

Steph’s extra tips:

-While this is not included in the original recipe we are using (and I did not do this in my own trials), many puff pastry recipes use a teaspoon or two of white vinegar or lemon juice, added to the ice water, in the détrempe dough. This adds acidity, which relaxes the gluten in the dough by breaking down the proteins, making rolling easier. You are welcome to try this if you wish.

-Keep things cool by using the refrigerator as your friend! If you see any butter starting to leak through the dough during the turning process, rub a little flour on the exposed dough and chill straight away. Although you should certainly chill the dough for 30 to 60 minutes between each set of two turns, if you feel the dough getting to soft or hard to work with at any point, pop in the fridge for a rest.

-Not to sound contradictory, but if you chill your paton longer than the recommended time between turns, the butter can firm up too much. If this seems to be the case, I advise letting it sit at room temperature for 5-10 minutes to give it a chance to soften before proceeding to roll. You don’t want the hard butter to separate into chuncks or break through the dough…you want it to roll evenly, in a continuous layer.

-Roll the puff pastry gently but firmly, and don’t roll your pin over the edges, which will prevent them from rising properly. Don’t roll your puff thinner than about about 1/8 to 1/4-inch (3-6 mm) thick, or you will not get the rise you are looking for.

-Try to keep “neat” edges and corners during the rolling and turning process, so the layers are properly aligned. Give the edges of the paton a scooch with your rolling pin or a bench scraper to keep straight edges and 90-degree corners.

-Brush off excess flour before turning dough and after rolling.

-Make clean cuts. Don’t drag your knife through the puff or twist your cutters too much, which can inhibit rise.

-When egg washing puff pastry, try not to let extra egg wash drip down the cut edges, which can also inhibit rise.

-Extra puff pastry dough freezes beautifully. It’s best to roll it into a sheet about 1/8 to 1/4-inch thick (similar to store-bought puff) and freeze firm on a lined baking sheet. Then you can easily wrap the sheet in plastic, then foil (and if you have a sealable plastic bag big enough, place the wrapped dough inside) and return to the freezer for up to a few months. Defrost in the refrigerator when ready to use.

-You can also freeze well-wrapped, unbaked cut and shaped puff pastry (i.e., unbaked vols-au-vent shells). Bake from frozen, without thawing first.

-Homemade puff pastry is precious stuff, so save any clean scraps. Stack or overlap them, rather than balling them up, to help keep the integrity of the layers. Then give them a singe “turn” and gently re-roll. Scrap puff can be used for applications where a super-high rise is not necessary (such as palmiers, cheese straws, napoleons, or even the bottom bases for your vols-au-vent).

For My Fillings:

Try and fill vol-au-vents on the day they are made.

Salmon and Cream Cheese
120g cream cheese
50ml thickened cream
Juice of 1/2 a small lemon
1 sprig of dill
smoked salmon, cut into 3 x 3 cm squares or similar

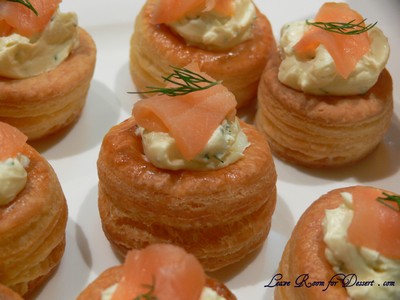
Soften the cream-cheese by mixing vigorously with a spoon. When the cream-cheese has softened, add the lemon juice and cream and mix until combined. Once combined stir in 1/8 teaspoon dill. Spoon into vol-au-vent cases, top with a piece of smoked salmon and a small piece of dill.

volauvonts05

Creamy Chicken and Mushroom
1 small chicken breast, cut in 4 chunks
6 mushrooms, halved and sliced
1 lemon, juice and rind
250ml (1 cup) white wine
3 sprigs of thyme
50g butter
3 tablespoon plain flour
250ml (1 cup) milk
100ml thickened cream

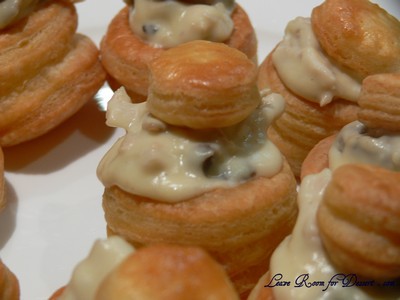
Combine wine, lemon juice, lemon rind, thyme and ¼ cup water in a saucepan. Bring to the boil and add the chicken. Cook for 10 minutes or until cooked. Remove chicken, shred or cut into small pieces and strain juices from pan into a small bowl. Place the pan back onto medium heat and add the mushrooms. Add small amounts of juice to help the mushrooms cook. Once cooked (5-10 minutes), remove and place with chicken.

In a clean saucepan cook the butter on high until bubbling. Add flour and cook for a few minutes. Add the milk and whisk together. Continue to whisk on heat until mixture thickens. Add the cream and remove from stove. Stir in chicken and mushrooms.

Spoon chicken mixture into vol-au-vent cases and place in a 180C preheated oven for 10 minutes or until mixture and cases are heated through. Serve hot/warm.

volauvonts06


White Chocolate and Raspberry Cream

50g white chocolate, chopped finely
250ml (1 cup) thickened cream
20 raspberries (fresh or frozen), chopped

Pistachio Praline
50g pistachios
50g caster sugar
3 tablespoons water

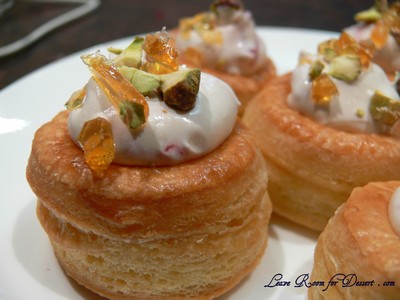
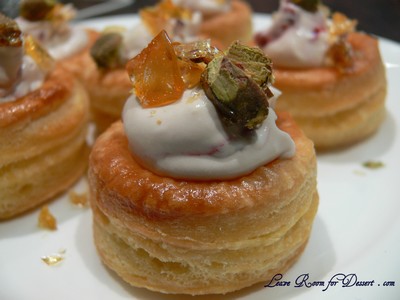
Place cream in a saucepan and just bring to the boil. Pour over chopped white chocolate in a bowl and whisk until chocolate has melted. Cool at room temperature and then cool in the fridge for a few hours. Once cooled, beat the white chocolate cream mix until fluffy. Fold through raspberries. Spoon into vol-au-vent cases and sprinkle with chopped praline.

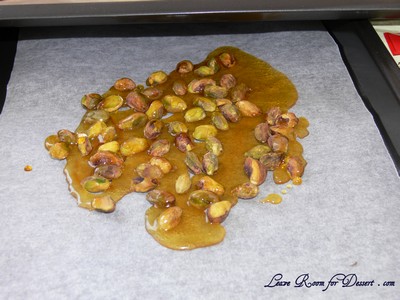
For praline: Roast pistachios in 180C preheated oven for 5-10minutes. Place sugar and water in a small saucepan. Heat on low, stirring until the sugar dissolves. Then turn the heat up to medium-high and cook until golden brown. Pour over pistachios on baking paper and leave to cool. Chop praline into pieces when cooled.
volauvonts03

volauvonts07

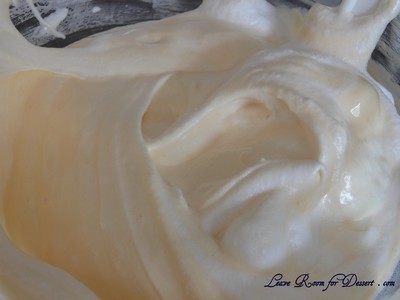
Dobos Torte – Daring Bakers Challenge August 2009

Thursday, August 27th, 2009

dobostorte04

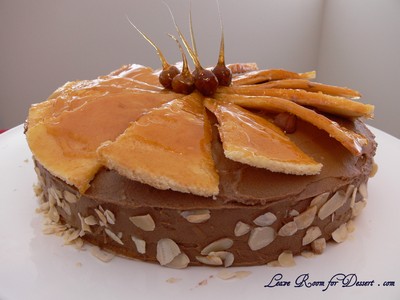
The August 2009 Daring Bakers’ challenge was hosted by Angela of A Spoonful of Sugar and Lorraine of Not Quite Nigella. They chose the spectacular Dobos Torte based on a recipe from Rick Rodgers’ cookbook Kaffeehaus: Exquisite Desserts from the Classic Caffés of Vienna, Budapest, and Prague.

dobostorte10

After seeing a photo of the final product for the Daring Bakers Challenge this month, I got a little scared – although quite excited at the thought of making this beautiful cake or torte. I had never heard of a Dobos Torte (also called Dobos Torta) before, and therefore never tried it – but it looked so gorgeous, it had to be good.

dobostorte12

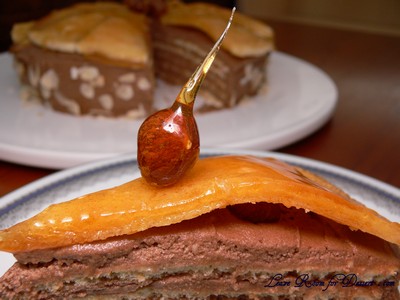
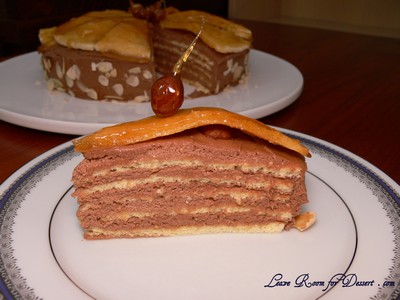
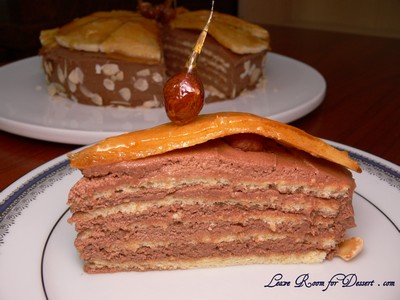
Multiple layers of sponge cake, chocolate buttercream and decorated with sponge covered in toffee or caramel then cut and arranged over the top of the cake… Eeeek.

dobostorte13

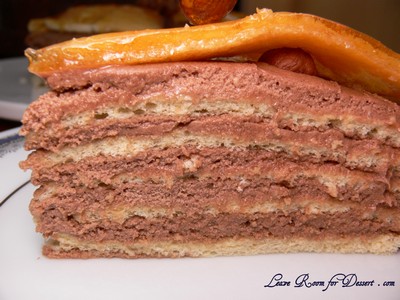
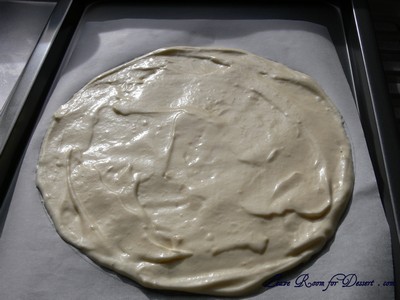
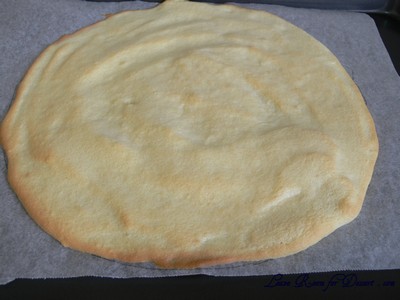
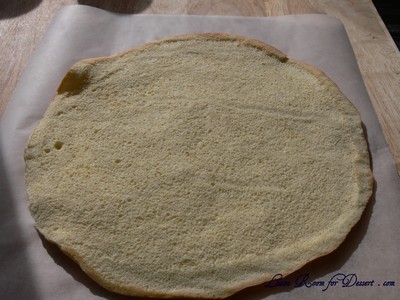
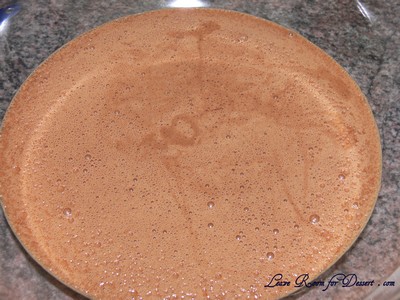
Everything worked quite well, the sponges took a little while, spreading the mixture between 6 trays and cooking them. The buttercream tasted beautiful and buttery with a lovely chocolate flavour.

dobostorte07

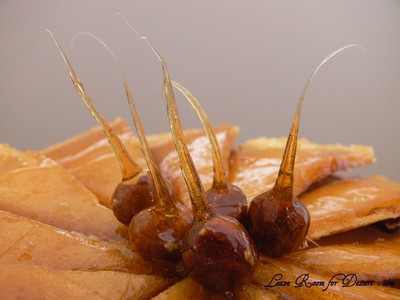
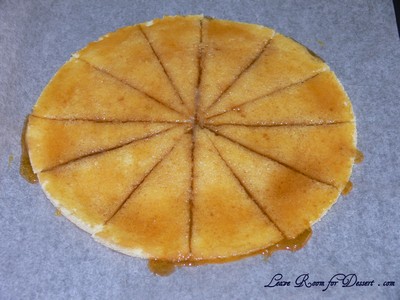
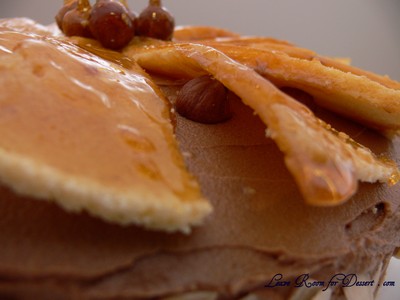
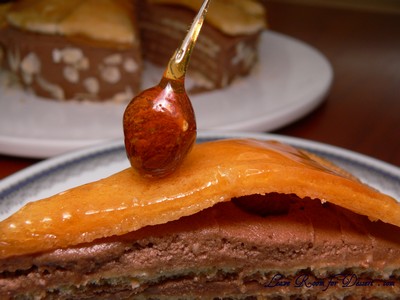
My main problem occurred when making the caramel. I’ve never had caramel do this before, but it was producing heaps of bubbles, they were almost climbing out of the small saucepan I used and made it quite difficult to keep it at a high temperature and also try to see the colour it was changing to. Once it turned a lovely amber colour, I decided to pour it over the sponge and also make some toffee hazelnuts. Although with soft sticky caramel which didn’t want to set/harden… the top layer and hazelnuts didn’t turn out quite how I had wanted. Both were a bit droopy and stuck quite a bit to everyone’s teeth. I would try another caramel recipe for the top, if I were to try it again, perhaps a recipe that says what temperature the caramel should get to.

dobostorte14

Dobos Torte

Equipment
2 baking sheets
9” (23cm) springform tin and 8” cake tin, for templates
mixing bowls (1 medium, 1 large)
a sieve
a double boiler (a large saucepan plus a large heat-proof mixing bowl which fits snugly over the top of the pan)
a small saucepan
a whisk (you could use a balloon whisk for the entire cake, but an electric hand whisk or stand mixer will make life much easier)
metal offset spatula
sharp knife
a 7 1/2” cardboard cake round, or just build cake on the base of a sprinfrom tin.
piping bag and tip, optional

Prep times
Sponge layers: 20 mins prep, 40 mins cooking total if baking each layer individually.
Buttercream: 20 mins cooking. Cooling time for buttercream: about 1 hour plus 10 minutes after this to beat and divide.
Caramel layer: 10-15 minutes.
Assembly of whole cake: 20 minutes

Sponge cake layers
6 large eggs, separated, at room temperature
1 1/3 cups (162g) confectioner’s (icing) sugar, divided
1 teaspoon (5ml) vanilla extract
1 cup plus 2 tablespoons (112g) sifted cake flour (SUBSTITUTE 95g plain flour + 17g cornflour (cornstarch) sifted together)
pinch of salt

Chocolate Buttercream
4 large eggs, at room temperature
1 cup (200g) caster (ultrafine or superfine white) sugar
4oz (110g) bakers chocolate or your favourite dark chocolate, finely chopped
2 sticks plus 2 tablespoons (250g) unsalted butter, at room temperature.

Caramel topping
1 cup (200g) caster (superfine or ultrafine white) sugar
12 tablespoons (180 ml) water
8 teaspoons (40 ml) lemon juice
1 tablespoon neutral oil (e.g. grapeseed, rice bran, sunflower)

Finishing touches
a 7” cardboard round
12 whole hazelnuts, peeled and toasted
½ cup (50g) peeled and finely chopped hazelnuts

Directions for the sponge layers:

NB. The sponge layers can be prepared in advance and stored interleaved with parchment and well-wrapped in the fridge overnight.

1. Position the racks in the top and centre thirds of the oven and heat to 400F (200C).

2. Cut six pieces of parchment paper to fit the baking sheets. Using the bottom of a 9″ (23cm) springform tin as a template and a dark pencil or a pen, trace a circle on each of the papers, and turn them over (the circle should be visible from the other side, so that the graphite or ink doesn’t touch the cake batter.)

3. Beat the egg yolks, 2/3 cup (81g) of the confectioner’s (icing) sugar, and the vanilla in a medium bowl with a mixer on high speed until the mixture is thick, pale yellow and forms a thick ribbon when the beaters are lifted a few inches above the batter, about 3 minutes. (You can do this step with a balloon whisk if you don’t have a mixer.)

4. In another bowl, using clean beaters, beat the egg whites until soft peaks form. Gradually beat in the remaining 2/3 cup (81g) of confectioner’s (icing)sugar until the whites form stiff, shiny peaks. Using a large rubber spatula, stir about 1/4 of the beaten whites into the egg yolk mixture, then fold in the remainder, leaving a few wisps of white visible. Combine the flour and salt. Sift half the flour over the eggs, and fold in; repeat with the remaining flour.

dobostorte16

dobostorte17

dobostorte18

5. Line one of the baking sheets with a circle-marked paper. Using a small offset spatula, spread about 3/4cup of the batter in an even layer, filling in the traced circle on one baking sheet. Bake on the top rack for 5 minutes, until the cake springs back when pressed gently in the centre and the edges are lightly browned. While this cake bakes, repeat the process on the other baking sheet, placing it on the centre rack. When the first cake is done, move the second cake to the top rack. Invert the first cake onto a flat surface and carefully peel off the paper. Slide the cake layer back onto the paper and let stand until cool. Rinse the baking sheet under cold running water to cool, and dry it before lining with another parchment. Continue with the remaining papers and batter to make a total of six layers. Completely cool the layers. Using an 8″ springform pan bottom or plate as a template, trim each cake layer into a neat round. (A small serrated knife is best for this task.)

dobostorte19

dobostorte21

dobostorte20

Directions for the chocolate buttercream:

NB. This can be prepared in advance and kept chilled until required.

1. Prepare a double-boiler: quarter-fill a large saucepan with water and bring it to a boil.

2. Meanwhile, whisk the eggs with the sugar until pale and thickened, about five minutes. You can use a balloon whisk or electric hand mixer for this.

3. Fit bowl over the boiling water in the saucepan (water should not touch bowl) and lower the heat to a brisk simmer. Cook the egg mixture, whisking constantly, for 2-3 minutes until you see it starting to thicken a bit. Whisk in the finely chopped chocolate and cook, stirring, for a further 2-3 minutes.

4. Scrape the chocolate mixture into a medium bowl and leave to cool to room temperature. It should be quite thick and sticky in consistency.

5. When cool, beat in the soft butter, a small piece (about 2 tablespoons/30g) at a time. An electric hand mixer is great here, but it is possible to beat the butter in with a spatula if it is soft enough. You should end up with a thick, velvety chocolate buttercream. Chill while you make the caramel topping.

dobostorte23

Lorraine’s note: If you’re in Winter just now your butter might not soften enough at room temperature, which leads to lumps forming in the buttercream. Male sure the butter is of a very soft texture I.e. running a knife through it will provide little resistance, before you try to beat it into the chocolate mixture. Also, if you beat the butter in while the chocolate mixture is hot you’ll end up with more of a ganache than a buttercream!

Directions for the caramel topping:

1. Choose the best-looking cake layer for the caramel top. To make the caramel topping: Line a jellyroll pan with parchment paper and butter the paper. Place the reserved cake layer on the paper. Score the cake into 12 equal wedges. Lightly oil a thin, sharp knife and an offset metal spatula.

2. Stir the sugar, water and lemon juice in a small saucepan. Bring to a boil over a medium heat, stirring often to dissolve the sugar. Once dissolved into a smooth syrup, turn the heat up to high and boil without stirring, swirling the pan by the handle occasionally and washing down any sugar crystals on the sides of the pan with a wet brush until the syrup has turned into an amber-coloured caramel.

3. The top layer is perhaps the hardest part of the whole cake so make sure you have a oiled, hot offset spatula ready. I also find it helps if the cake layer hasn’t just been taken out of the refrigerator. I made mine ahead of time and the cake layer was cold and the toffee set very, very quickly—too quickly for me to spread it. Immediately pour all of the hot caramel over the cake layer. You will have some leftover most probably but more is better than less and you can always make nice toffee pattern using the extra to decorate. Using the offset spatula, quickly spread the caramel evenly to the edge of the cake layer. Let cool until beginning to set, about 30 seconds. Using the tip of the hot oiled knife (keep re-oiling this with a pastry brush between cutting), cut through the scored marks to divide the caramel layer into 12 equal wedges. Cool another minute or so, then use the edge of the knife to completely cut and separate the wedges using one firm slice movement (rather than rocking back and forth which may produce toffee strands). Cool completely.

dobostorte01

Angela’s note: I recommend cutting, rather than scoring, the cake layer into wedges before covering in caramel (reform them into a round). If you have an 8” silicon round form, then I highly recommend placing the wedges in that for easy removal later and it also ensures that the caramel stays on the cake layer. Once set, use a very sharp knife to separate the wedges.

Assembling the Dobos

1. Divide the buttercream into six equal parts.

2. Place a dab of chocolate buttercream on the middle of a 7 1/2” cardboard round and top with one cake layer. Spread the layer with one part of the chocolate icing. Repeat with 4 more cake layers. Spread the remaining icing on the sides of the cake.

3. Optional: press the finely chopped hazelnuts onto the sides of the cake.

4. Propping a hazelnut under each wedge so that it sits at an angle, arrange the wedges on top of the cake in a spoke pattern. If you have any leftover buttercream, you can pipe rosettes under each hazelnut or a large rosette in the centre of the cake. Refrigerate the cake under a cake dome until the icing is set, about 2 hours. Let slices come to room temperature for the best possible flavour.

dobostorte08

dobostorte11

Storage

Angela’s notes: I am quite happy to store this cake at room temperature under a glass dome, but your mileage may vary. If you do decide to chill it, then I would advise also using a glass dome if you have done. I should also note that the cake will cut more cleanly when chilled.

Variations

Shape:
The traditional shape of a Dobos Torta is a circular cake, but you can vary the shape and size if you want. Sherry Yard in Desserts By The Yard makes a skyscraper Dobos by cutting a full-size cake into four wedges and stacking them to create a tall, sail-shaped cake. Mini Dobos would be very cute, and you could perch a little disc of caramel on top.

Flavour: While we both love the dark chocolate buttercream and this is traditional, we think it would be fun to see what fun buttercreams you all come up with! So, go wild! Or, you could brush each layer with a flavoured syrup if you just want a hint of a second flavour. Cointreau syrup would be divine!

Nuts: These are optional for decoration, so no worries if you’re allergic to them. If you don’t like hazelnuts, then substitute for another variety that you like.

Egg concerns: The cooking process for the buttercream will produce lightly cooked eggs. If you fall into a vulnerable health group then you may wish to use an egg-less buttercream.

Mallows and Milan Cookies – Daring Bakers July 2009

Monday, July 27th, 2009

mallowsandmilan02

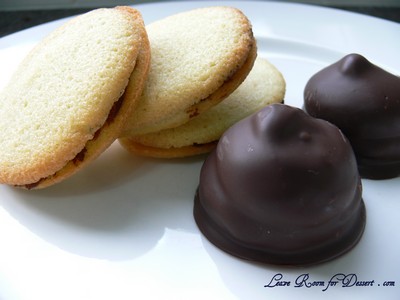
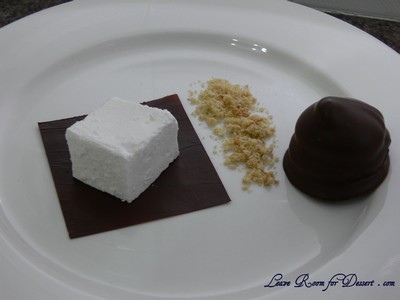
The July Daring Bakers’ challenge was hosted by Nicole at Sweet Tooth. She chose Chocolate Covered Marshmallow Cookies and Milan Cookies from pastry chef Gale Gand of the Food Network.

My artistic version of the mallows :)

My artistic version of the mallows 🙂

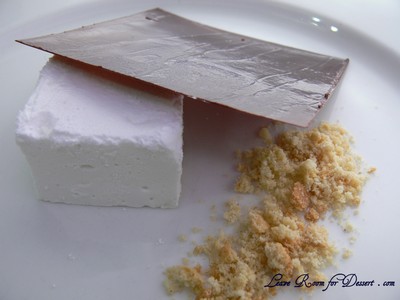
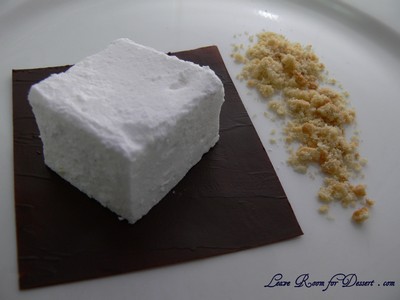
I was very excited when reading this month’s Daring Bakers challenge for two reasons. The first was seeing the Choc Mallows, which I’ve loved eating (called Royals by one company here in Australia) but never thought about making, and was very excited to finally make marshmallow. The second was the Milan Cookies, which I’ve never tasted before, but was very glad they used so many eggwhites. (This may seem a little weird, as many people were asking what they should make with their left over egg yolks, although I already had 18 egg whites left over from making a Crouquembouche – with the most fantastic custard). I froze the egg whites in lots of 6, and this was the perfect amount for one batch of Milan Cookies.

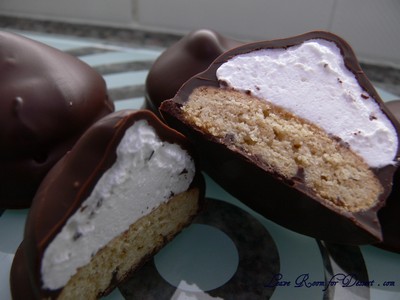
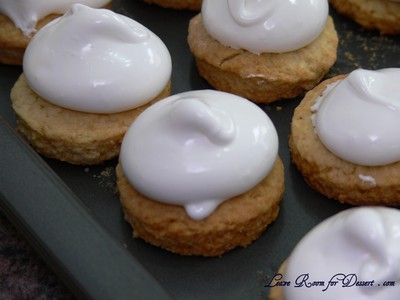
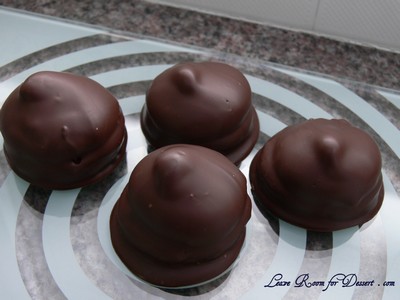
I was extremely happy with how the Mallows turned out – the combination of biscuit and marshmallow covered in dark chocolate was just fantastic and very much similar to those from the shops. I didn’t think the biscuits tasted that great without the other two components and unfortunately the recipe made around double than necessary for the marshmallow and chocolate – so if I were to make it again, I would make half the biscuits.

mallowsandmilan01

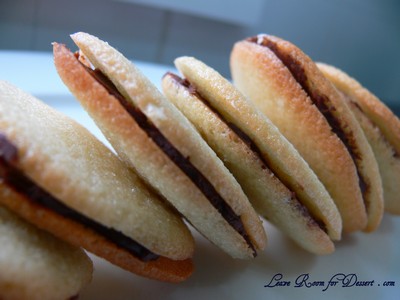
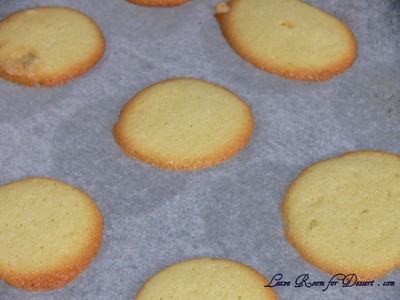
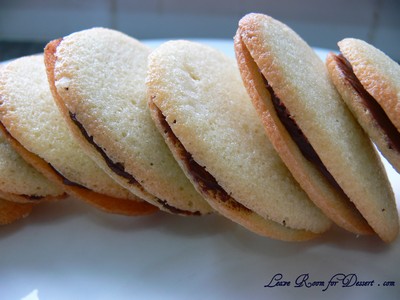
The Milan biscuits tasted lovely, especially (almost) straight out of the oven. Unfortunately I had no lemon essence or orange and therefore had vanilla cookies with a chocolate ganache filling.

mallowsandmilan15

Thanks to Nicole for the great idea and introducing me to two new biscuits and great recipes. I enjoyed the challenge and was very happy with how they both turned out.

mallowsandmilan10

Mallows (Chocolate Covered Marshmallow Cookies)
Recipe courtesy Gale Gand, from Food Network website

Chocolate Covered Marshmallow Cookies
Prep Time: 10 min
Inactive Prep Time: 5 min
Cook Time: 10 min
Serves: about 2 dozen cookies

• 3 cups (375grams/13.23oz) all purpose flour
• 1/2 cup (112.5grams/3.97oz) white sugar
• 1/2 teaspoon salt
• 3/4 teaspoon baking powder
• 3/8 teaspoon baking soda
• 1/2 teaspoon ground cinnamon
• 12 tablespoons (170grams/ 6 oz) unsalted butter
• 3 eggs, whisked together
• Homemade marshmallows, recipe follows
• Chocolate glaze, recipe follows

1. In a mixer with the paddle attachment, blend the dry ingredients.
2. On low speed, add the butter and mix until sandy.
3. Add the eggs and mix until combine.
4. Form the dough into a disk, wrap with clingfilm or parchment and refrigerate at least 1 hour and up to 3 days.
5. When ready to bake, grease a cookie sheet or line it with parchment paper or a silicon mat.
6. Preheat the oven to 375 degrees F (180C)
7. Roll out the dough to 1/8-inch thickness, on a lightly floured surface. Use a 1 to 1 1/2 inches cookie cutter to cut out small rounds of dough.
8. Transfer to the prepared pan and bake for 10 minutes or until light golden brown. Let cool to room temperature.
9. Pipe a “kiss” of marshmallow onto each cookie. Let set at room temperature for 2 hours.

mallowsandmilan07

10. Line a cookie sheet with parchment or silicon mat.
11. One at a time, gently drop the marshmallow-topped cookies into the hot chocolate glaze.
12. Lift out with a fork and let excess chocolate drip back into the bowl.
13. Place on the prepared pan and let set at room temperature until the coating is firm, about 1 to 2 hours.

mallowsandmilan14

Note: if you don’t want to make your own marshmallows, you can cut a large marshmallow in half and place on the cookie base. Heat in a preheated 350-degree oven to slump the marshmallow slightly, it will expand and brown a little. Let cool, then proceed with the chocolate dipping.

Homemade marshmallows:
• 1/4 cup water
• 1/4 cup light corn syrup
• 3/4 cup (168.76 grams/5.95oz) sugar
• 1 tablespoon powdered gelatin
• 2 tablespoons cold water
• 2 egg whites , room temperature
• 1/4 teaspoon pure vanilla extract

1. In a saucepan, combine the water, corn syrup, and sugar, bring to a boil until “soft-ball” stage, or 235 degrees on a candy thermometer.
2. Sprinkle the gelatin over the cold water and let dissolve.
3. Remove the syrup from the heat, add the gelatin, and mix.
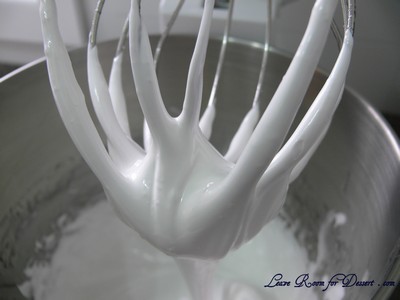
4. Whip the whites until soft peaks form and pour the syrup into the whites.
5. Add the vanilla and continue whipping until stiff.
6. Transfer to a pastry bag.

mallowsandmilan06

Chocolate glaze:
• 12 ounces semisweet chocolate
• 2 ounces cocoa butter or vegetable oil

1. Melt the 2 ingredients together in the top of a double boiler or a bowl set over barely simmering water.

mallowsandmilan12

Milan Cookies
Recipe courtesy Gale Gand, from Food Network website

Milan Cookies
Prep Time: 20 min
Inactive Prep Time: 0 min
Cook Time: 1 hr 0 min
Serves: about 3 dozen cookies

• 12 tablespoons (170grams/ 6 oz) unsalted butter, softened
• 2 1/2 cups (312.5 grams/ 11.02 oz) powdered sugar
• 7/8 cup egg whites (from about 6 eggs)
• 2 tablespoons vanilla extract
• 2 tablespoons lemon extract
• 1 1/2 cups (187.5grams/ 6.61 oz) all purpose flour
• Cookie filling, recipe follows

Cookie filling:
• 1/2 cup heavy cream
• 8 ounces semisweet chocolate, chopped
• 1 orange, zested

1. In a mixer with paddle attachment cream the butter and the sugar.
2. Add the egg whites gradually and then mix in the vanilla and lemon extracts.
3. Add the flour and mix until just well mixed.
4. With a small (1/4-inch) plain tip, pipe 1-inch sections of batter onto a parchment-lined sheet pan, spacing them 2 inches apart as they spread.
5. Bake in a preheated 350 degree (180C) oven for 10 minutes or until light golden brown around the edges. Let cool on the pan.
mallowsandmilan17

6. While waiting for the cookies to cool, in a small saucepan over medium flame, scald cream.
7. Pour hot cream over chocolate in a bowl, whisk to melt chocolate, add zest and blend well.
8. Set aside to cool (the mixture will thicken as it cools).
9. Spread a thin amount of the filling onto the flat side of a cookie while the filling is still soft and press the flat side of a second cookie on top.
10. Repeat with the remainder of the cookies.

mallowsandmilan18

Bakewell Tart… er… Pudding – Daring Bakers Challenge June 2009

Saturday, June 27th, 2009

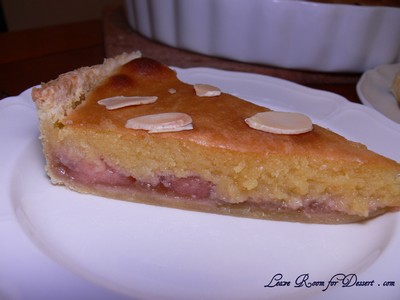
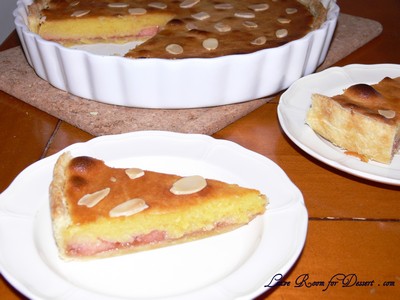
bakewelltart04

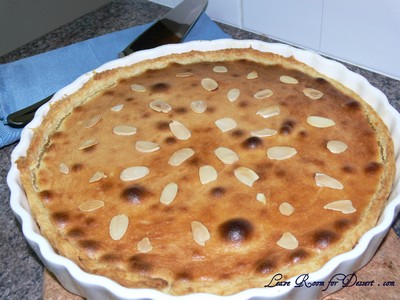
My First Daring Bakers Challenge!! I was so excited to find out what my first challenge would be with the Daring Bakers, and was a little scared when I heard about the different components needed for this tart… er… pudding (as the hosts like to put it). And a Big THANK YOU to the hosts for this month and to the founders and everyone at The Daring Kitchen for all their hard work.

group_w200x150

The June Daring Bakers’ challenge was hosted by Jasmine of Confessions of a Cardamom Addict and Annemarie of Ambrosia and Nectar. They chose a Traditional (UK) Bakewell Tart… er… pudding that was inspired by a rich baking history dating back to the 1800’s in England.

bakewelltart08

Bakewell tarts…er…puddings combine a number of dessert elements but still let you show off your area’s seasonal fruits.

Like many regional dishes there’s no “one way” to make a Bakewell Tart…er…Pudding, but most of today’s versions fall within one of two types. The first is the “pudding” where a layer of jam is covered by an almondy pastry cream and baked in puff pastry. The second is the “tart” where a rich shortcrust pastry holds jam and an almondy sponge cake-like filling.

The version we’re daring you to make is a combination of the two: a sweet almond-flavoured shortcrust pastry, frangipane and jam.

bakewelltart06

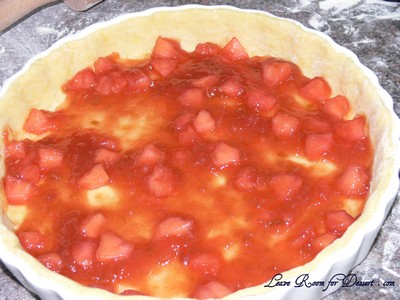
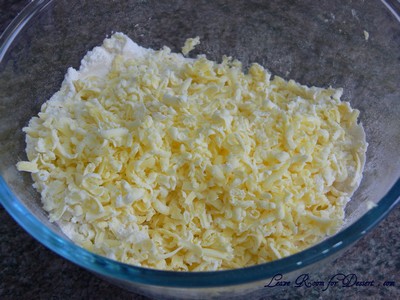
Going by the suggestions given by the lovely hosts, I made the shortcrust pastry by hand (grating chilled butter into flour) and the jam also from scratch using fruits in season – Pink Lady Apple , Rhubarb and Cinnamon Jam. I’m glad I made the effort to make everything from scratch and would certainly make jam again, but would use a food processor for the pastry (Since making this tart, I have made pastry again and the food processor makes a nicer consistency with the pastry compared with what I was able to do by hand).

bakewelltart12

Bakewell Tart…er…pudding

Makes one 23cm (9” tart)
Prep time: less than 10 minutes (plus time for the individual elements)
Resting time: 15 minutes
Baking time: 30 minutes
Equipment needed: 23cm (9”) tart pan or pie tin (preferably with ridged edges) (I used a quiche dish as this is all I had), rolling pin

One quantity sweet shortcrust pastry (recipe follows)
Bench flour
250ml (1cup (8 US fl. oz)) jam or curd, warmed for spreadability
One quantity frangipane (recipe follows)
One handful blanched, flaked almonds

Assembling the tart
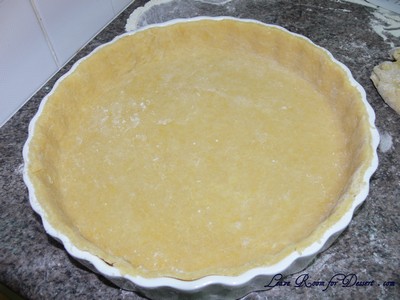
Place the chilled dough disc on a lightly floured surface. If it’s overly cold, you will need to let it become acclimatised for about 15 minutes before you roll it out. Flour the rolling pin and roll the pastry to 5mm (1/4”) thickness, by rolling in one direction only (start from the centre and roll away from you), and turning the disc a quarter turn after each roll. When the pastry is to the desired size and thickness, transfer it to the tart pan, press in and trim the excess dough. Patch any holes, fissures or tears with trimmed bits. Chill in the freezer for 15 minutes.

bakewelltart16

Preheat oven to 200C/400F.

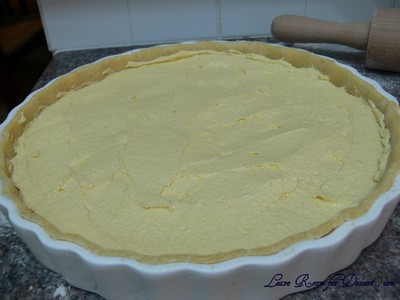
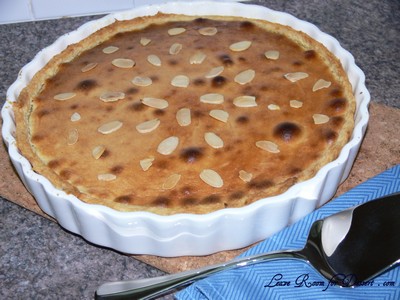
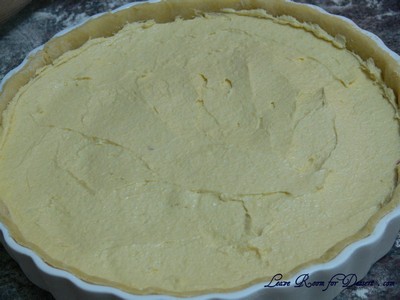
Remove shell from freezer, spread as even a layer as you can of jam onto the pastry base. Top with frangipane, spreading to cover the entire surface of the tart. Smooth the top and pop into the oven for 30 minutes. Five minutes before the tart is done, the top will be poofy and brownish. Remove from oven and strew flaked almonds on top and return to the heat for the last five minutes of baking.

bakewelltart22

bakewelltart02

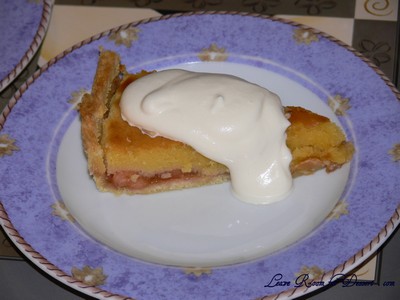
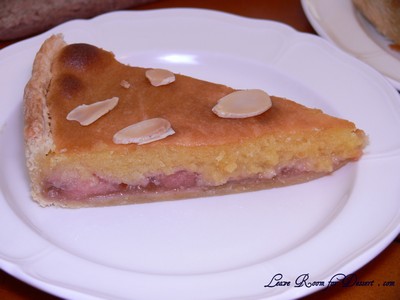
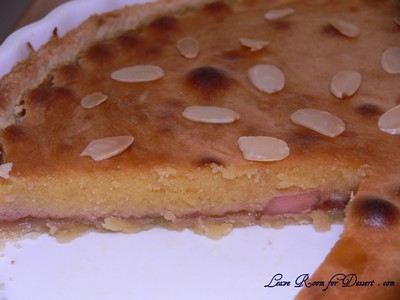
The finished tart will have a golden crust and the frangipane will be tanned, poofy and a bit spongy-looking. Remove from the oven and cool on the counter. Serve warm, with crème fraîche, whipped cream or custard sauce if you wish.

bakewelltart03

When you slice into the tart, the almond paste will be firm, but slightly squidgy and the crust should be crisp but not tough.

bakewelltart11

Jasmine’s notes:
• If you cannot have nuts, you can try substituting Victoria sponge for the frangipane. It’s a pretty popular cake, so you shouldn’t have any troubles finding one in one of your cookbooks or through a Google search. That said, our dear Natalie at Gluten a Go Go has sourced some recipes and linked to them in the related alt.db thread.
• You can use whichever jam you wish, but if you choose something with a lot of seeds, such as raspberry or blackberry, you should sieve them out.
• The jam quantity can be anywhere from 60ml (1/4 cup) to 250ml (1cup), depending upon how “damp” and strongly flavoured your preserves are. I made it with the lesser quantity of home made strawberry jam, while Annemarie made it with the greater quantity of cherry jam; we both had fabulous results. If in doubt, just split the difference and spread 150ml (2/3cup) on the crust.

Annemarie’s notes:
• The excess shortcrust can be rolled out and cut into cookie-shapes (heck, it’s pretty darned close to a shortbread dough).

Sweet shortcrust pastry

Prep time: 15-20 minutes
Resting time: 30 minutes (minimum)
Equipment needed: bowls, box grater, cling film

225g (8oz) all purpose flour
30g (1oz) sugar
2.5ml (½ tsp) salt
110g (4oz) unsalted butter, cold (frozen is better)
2 (2) egg yolks
2.5ml (½ tsp) almond extract (optional – I used vanilla extract instead, like the notes said)
15-30ml (1-2 Tbsp) cold water

Sift together flour, sugar and salt. Grate butter into the flour mixture, using the large hole-side of a box grater. Using your finger tips only, and working very quickly, rub the fat into the flour until the mixture resembles bread crumbs. Set aside.

bakewelltart13

Lightly beat the egg yolks with the almond extract (if using) and quickly mix into the flour mixture. Keep mixing while dribbling in the water, only adding enough to form a cohesive and slightly sticky dough.

Form the dough into a disc, wrap in cling and refrigerate for at least 30 minutes

Jasmine’s notes:
• I make this using vanilla salt and vanilla sugar.
• If you wish, you can substitute the seeds of one vanilla bean, one teaspoon of vanilla paste or one teaspoon of vanilla extract for the almond extract

Frangipane

Prep time: 10-15 minutes
Equipment needed: bowls, hand mixer, rubber spatula

125g (4.5oz) unsalted butter, softened
125g (4.5oz) icing sugar
3 (3) eggs
2.5ml (½ tsp) almond extract
125g (4.5oz) ground almonds
30g (1oz) all purpose flour

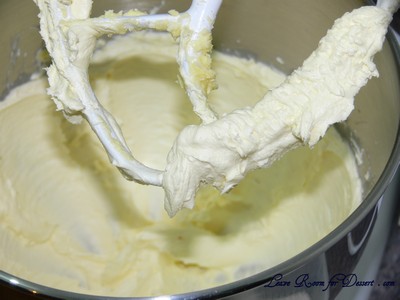
Cream butter and sugar together for about a minute or until the mixture is primrose in colour and very fluffy.

bakewelltart18

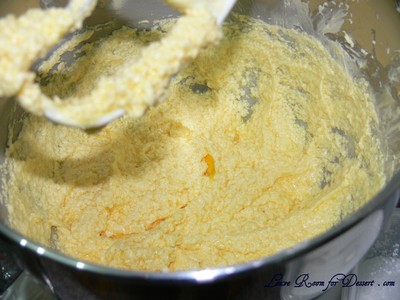
Scrape down the side of the bowl and add the eggs, one at a time, beating well after each addition. The batter may appear to curdle. In the words of Douglas Adams: Don’t panic. Really. It’ll be fine. After all three are in, pour in the almond extract and mix for about another 30 seconds and scrape down the sides again.

bakewelltart21

With the beaters on, spoon in the ground nuts and the flour. Mix well. The mixture will be soft, keep its slightly curdled look (mostly from the almonds) and retain its pallid yellow colour.

bakewelltart01

Annemarie’s notes:
• Add another five minutes or more if you’re grinding your own almonds or if you’re mixing by hand (Heaven help you).

bakewelltart10