Daring Bakers

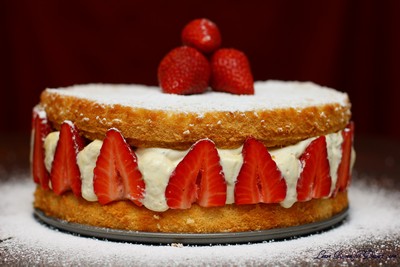
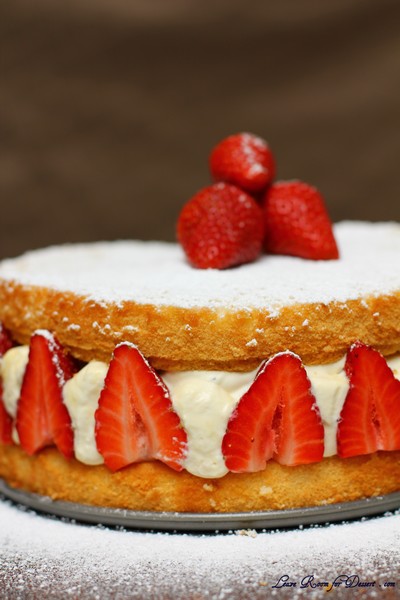
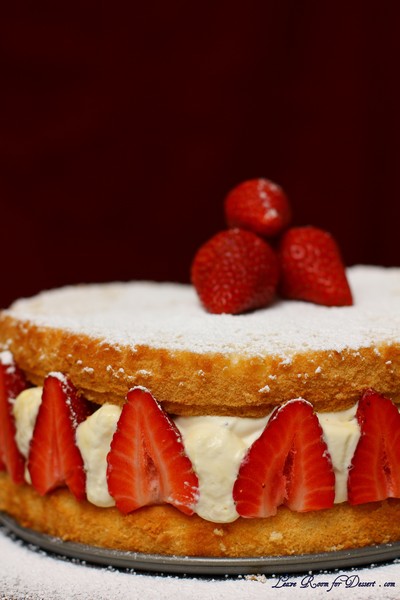
Strawberry Fraisier – Daring Bakers Challenge July 2011

Wednesday, July 27th, 2011


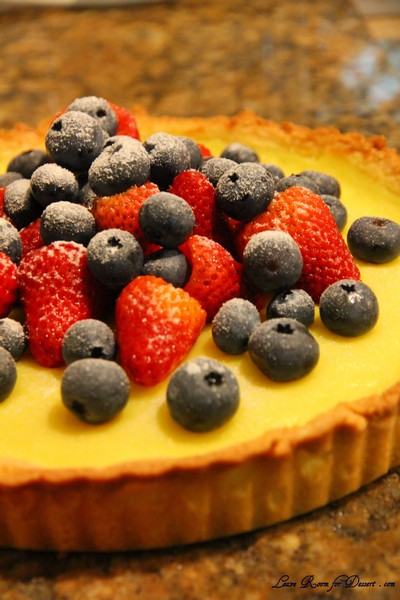
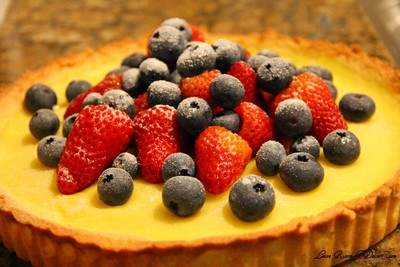
Jana of Cherry Tea Cakes was our July Daring Bakers’ host and she challenges us to make Fresh Frasiers inspired by recipes written by Elisabeth M. Prueitt and Chad Robertson in the beautiful cookbook Tartine.

I’m glad this challenge came this month and not the previous month, as we have just started getting beautiful strawberries back into the fruit stores.

The challenge was quite good, especially being able to make all three components after work, then assemble it the morning, for a lovely weekend dessert.

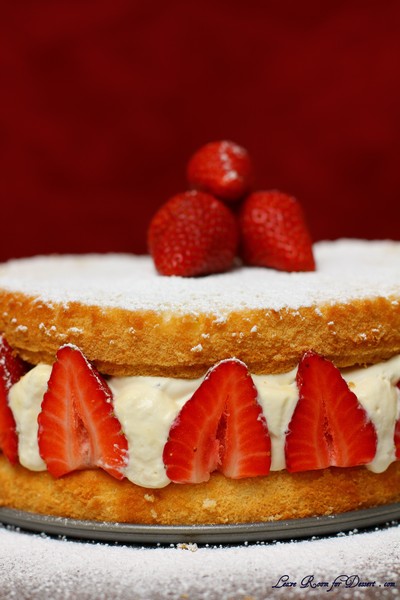
I had my fingers crossed that the fraisier would stay up by itself once the plastic wrap was removed, but unfortunately it collapsed quite a lot when the first cut was made. I’m not entirely sure where I went wrong, so I may have to do a bit more research.

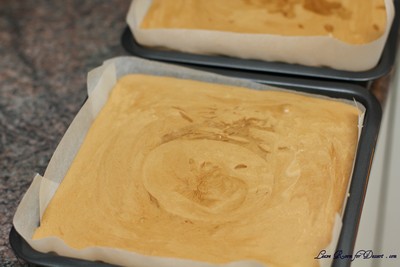
I used a bigger tin than the one used in the recipe (22cm vs 20cm) and found the cake sunk a bit in the middle once it cooled.
I also needed at least double the pastry cream filling – although only figured this out once it was too late to make more – so I used whipped cream in the middle of the filling. (this extra may have been needed because I used a bigger tin, or very large strawberries.) I didn’t use the almond paste either, as I had none.

It was a beautiful dessert that everyone enjoyed and I would consider making again, although trialling out the filling, to make sure it stayed together more when serving.

Basic Chiffon Cake

1 cup + 2 tablespoons (270 ml) (5½ oz/155 gm) all-purpose flour
1 teaspoon (5 ml) (4 gm) baking powder
3/4 cups (180 ml) (6 oz /170 gm) sugar
1/2 teaspoon (2½ ml) (1½ gm) salt, preferably kosher
1/4 cup (2 fl oz/60 ml) vegetable oil
3 large egg yolks
⅓ cup + 1 tablespoon (3.17 fl oz/95 ml) water
1 teaspoon (5 ml) pure vanilla extract
3/4 teaspoon (3¾ ml) (3 gm) lemon zest, grated
5 large egg whites
¼ teaspoon (1¼ ml) (1 gm) cream of tartar

Directions:

Preheat the oven to moderate 325°F (160°C/gas mark 3).
Line the bottom of an 8-inch (20 cm) spring form pan with parchment paper. Do not grease the sides of the pan.
In a large mixing bowl, stir together the flour and baking powder. Add in all but 3 tablespoons (45 ml.) of sugar, and all of the salt. Stir to combine.
In a small bowl combine the oil, egg yolks, water, vanilla and lemon zest. Whisk thoroughly.
Combine with the dry ingredients and mix thoroughly for about one minute, or until very smooth.
Put the egg whites into a stand mixer, and beat on medium speed using a whisk attachment on a medium speed, until frothy. Add cream of tartar and beat on a medium speed until the whites hold soft peaks. Slowly add the remaining sugar and beat on a medium-high speed until the whites hold firm and form shiny peaks.
Using a grease free rubber spatula, scoop about ⅓ of the whites into the yolk mixture and fold in gently. Gently fold in the remaining whites just until combined.
Pour the batter into the prepared pan. Bake for 45 to 55 minutes or until toothpick inserted into the center comes out clean.
Removed the cake from the oven and allow to cool in the pan on a wire rack.
To unmold, run a knife around the sides to loosen the cake from the pan and remove the spring form sides. Invert the cake and peel off the parchment paper. Refrigerate for up to four days.

Pastry Cream Filling

1 cup (8 fl oz/250 ml) whole milk
1/2 teaspoon (2½ ml) pure vanilla extract
1/8 teaspoon (1/2 ml) (¼ gm) salt, preferably kosher
2 tablespoons (30 ml) (10 gm)cornstarch
1/4 cup (60 ml) (2 oz/55 gm) sugar
1 large egg (I used 2 egg yolks – as there were extra from the cake)
2 tablespoons (30 ml) (1 oz/30 gm) unsalted butter
3/4 teaspoon (3¾ ml) (4 gm) gelatin
1/2 tablespoon (7½ ml) water
1 cup (8 fl oz/250 ml) heavy cream

Directions:

Pour the milk, vanilla, and salt into a heavy sauce pan. Place over medium-high heat and scald, bringing it to a near boiling point. Stir occasionally.
Meanwhile, in a stand mixer add the cornstarch and sugar. Whisk to combine
Add the eggs to the sugar and cornstarch and whisk until smooth.
When the milk is ready, gently and slowly while the stand mixer is whisking, pour the heated milk down the side of the bowl into the egg mixture.
Pour the mixture back into the warm pot and continue to cook over a medium heat until the custard is thick, just about to boil and coats the back of a spoon.
Remove from heat and pass through a fine mesh sieve into a large mixing bowl. Allow to cool for ten minutes stirring occasionally.
Cut the butter into four pieces and whisk into the pastry cream a piece at a time until smooth.
Cover the cream with plastic wrap, pressing the plastic wrap onto the top of the cream to prevent a skin from forming. Chill in the refrigerator for up to five days.
In a small dish, sprinkle the gelatin over the water and let stand for a few minutes to soften.
Put two inches (55 mm) of water into a small sauce pan and bring to a simmer over a medium heat.
Measure 1/4 cup (2 oz/60 ml) of the chilled pastry cream into a small stainless steel bowl that will sit across the sauce pan with the simmering water, without touching the water.
Heat the cream until it is 120 F (48.8 C). Add the gelatin and whisk until smooth. Remove from the water bath, and whisk the remaining cold pastry cream in to incorporate in two batches.
In a stand mixer, fitted with the whisk attachment, whip the cream until it holds medium-stiff peaks. Immediately fold the whipped cream into the pastry cream with a rubber spatula.

Simple Syrup

1/3 cup (2⅔ fl oz/80 ml) (2⅔ oz/75 gm) of sugar, flavored or white
1/3 cup (2⅔ fl oz/80 ml) of water
+ 1 teaspoon vanilla essence

Directions:

Combine the water and sugar in a medium saucepan.
Bring the mixture to a boil and let the sugar dissolve. Stirring is not necessary, but will not harm the syrup.
Remove the syrup from the heat and cool slightly.
Transfer syrup to a lidded container or jar that can be stored in the refrigerator. Simple syrup can be stored for up to one month.

Fraisier Assembly

Components:
1 baked 8 inch (20 cm) chiffon cake
1 recipe pastry cream filling
⅓ cup (80 ml) simple syrup or flavored syrup
2 lbs (900 g) strawberries
confectioners’ sugar for dusting
½ cup (120 ml) (5 oz/140 gm) almond paste

Directions:

Line the sides of a 8-inch (20 cm) spring form pan with plastic wrap. Do not line the bottom of the pan.
Cut the cake in half horizontally to form two layers.
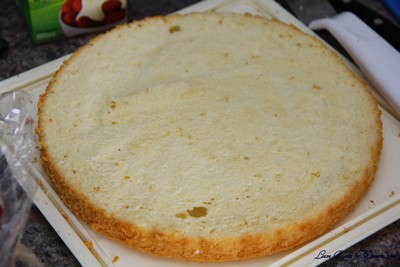

Fit the bottom layer into the prepared spring form pan. Moisten the layer evenly with the simple syrup. When the cake has absorbed enough syrup to resemble a squishy sponge, you have enough.
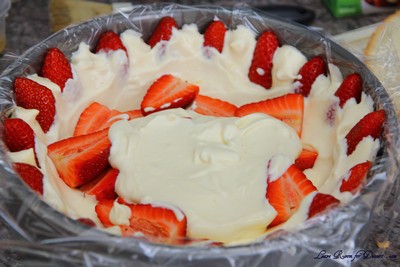
Hull and slice in half enough strawberries to arrange around the sides of the cake pan. Place the cut side of the strawberry against the sides of the pan, point side up forming a ring.
Pipe cream in-between strawberries and a thin layer across the top of the cake.
Hull and quarter your remaining strawberries and place them in the middle of the cake. Cover the strawberries and entirely with the all but 1 tbsp. (15 ml) of the pastry cream.
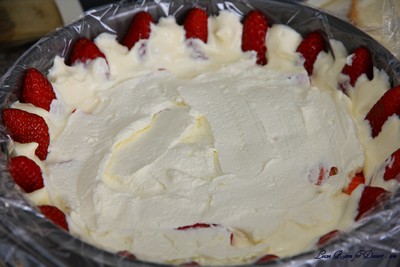

Place the second cake layer on top and moisten with the simple syrup.
Lightly dust a work surface with confectioners’ sugar and roll out the almond paste to a 10-inch (25 cm) round 1/16 inch (1.5 mm) thick. Spread the remaining 1 tablespoon (15 ml) of pastry cream on the top of the cake and cover with the round of almond paste.
Cover with plastic wrap and refrigerate for at least 4 hours.
To serve release the sides of the spring form pan and peel away the plastic wrap.
Serve immediately or store in the refrigerator for up to 3 days.

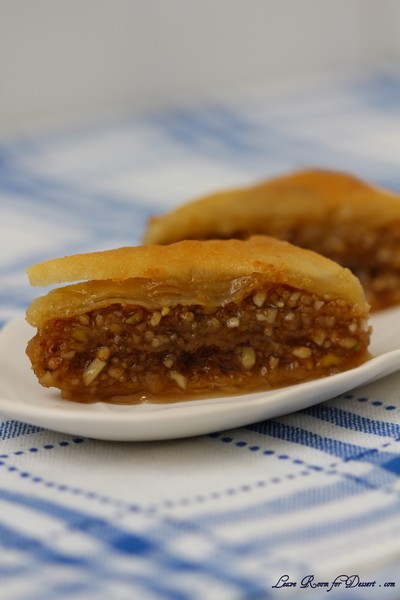
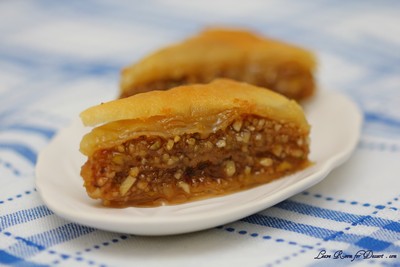
Baklava with Homemade Phyllo Pastry – Daring Bakers Challenge June 2011

Monday, June 27th, 2011

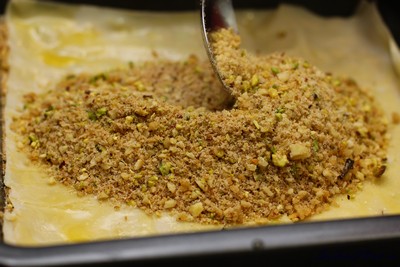
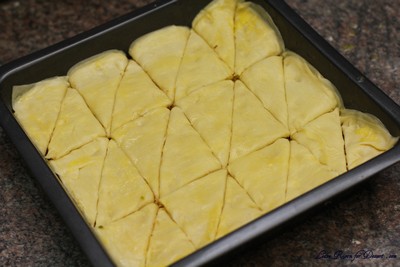
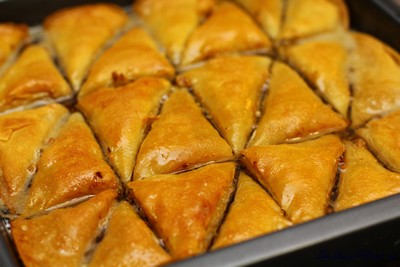
Erica of Erica’s Edibles was our host for the Daring Baker’s June challenge. Erica challenged us to be truly DARING by making homemade phyllo dough and then to use that homemade dough to make Baklava.

I remember first discovering baklava and its gorgeous sweetness. There used to be a very nice place that sold it near restaurants we used to visit often. Unfortunately (or perhaps fortunately), it isn’t as readily available where I live and work at the moment. Therefore, like most of the food I eat, I only get a chance to eat it – if I get the chance to make it (or someone else just happens to buy or bring some along).

I thought this would be an easy challenge for one of the days on the weekend in Winter. Little did I know that the weather would be beautiful – sunny and warm and much better than many of Spring and Autumn days we had. After making the lovely dough and leaving it in the fridge, out into the garden we went and spent most of the day.

This meant I had the leave the dough until a week-night to finish off. So I placed it in the freezer, and forgot to take it out the morning of when I would make my baklava. After a few problems with the dough not thawing quickly, it actually rolled out very nicely and we were able to make 10 sheets from the one quantity of dough.

The rest of the recipe was made whilst the dough was thawing and those elements were completed very easily, especially with the help of the food processor.

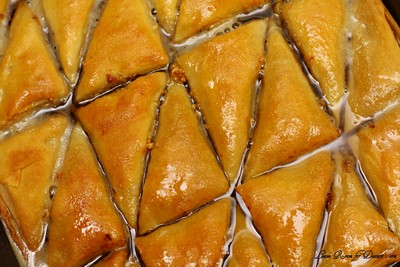
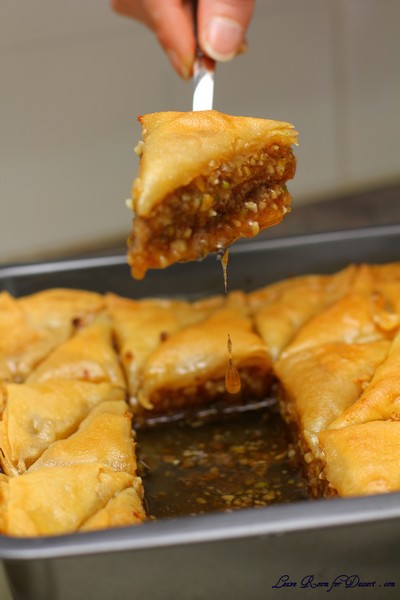
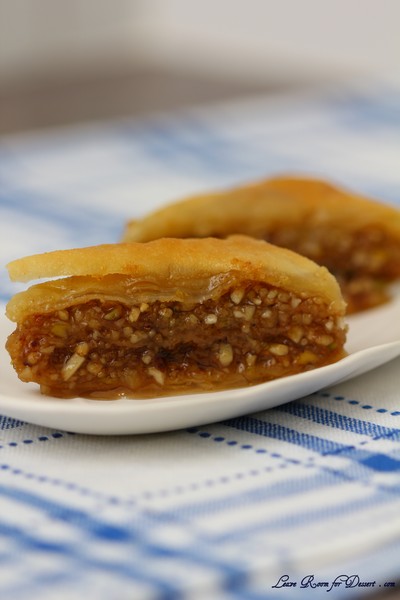
Once I poured the cooled syrup onto the baklava though, it was literally swimming in syrup. By the next morning… it was still swimming is syrup so I transferred the baklava to take-away containers to take in to work, and allow more of the syrup to drain.

Flavour-wise this baklava was gorgeous. Absolutely lovely and I didn’t find it too sweet either, despite it swimming in syrup. The pastry turned out quite nicely and I am glad I made it (although can’t see myself making it many times in the future).

Thanks so much to our host for this months challenge, and making us step outside our comfort zone.

my notes: I made the single recipe and it made 10 sheets for my 20.5cm x 20.5cm x 4.5cm dish, the syrup was probably twice what was needed.

Phyllo Dough

*Note 1: To have enough to fill my 9” x 9” baking dish with 18 layers of phyllo I doubled this recipe.
*Note 2: Single recipe will fill a 8” x 5” baking dish.
*Note 3: Dough can be made a head of time and froze. Just remove from freezer and allow to thaw
and continue making your baklava

1 1/3 cups (320 ml) (185 gm/6½ oz) unbleached all purpose (plain) flour
1/8 teaspoon (2/3 ml) (¾ gm) salt
1/2 cup less 1 tablespoon (105 ml) water, plus more if needed
2 tablespoons (30 ml) vegetable oil, plus additional for coating the dough
1/2 teaspoon (2½ ml) cider vinegar, (could substitute white wine vinegar or red wine vinegar, but could affect the taste)

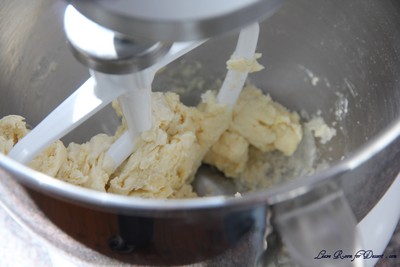
1. In the bowl of your stand mixer combine flour and salt.

2. Mix with paddle attachment.

3. Combine water, oil and vinegar in a small bowl.

4. Add water & oil mixture with mixer on low speed, mix until you get a soft dough, if it appears dry add a little more water (I had to add a tablespoon more)

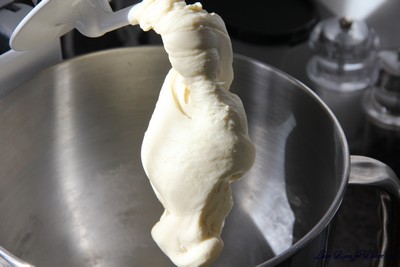
5. Change to the dough hook and let knead approximately 10 minutes. You will end up with beautiful smooth dough. If you are kneading by hand, knead approx. 20 minutes.

6. Remove the dough from mixer and continue to knead for 2 more minutes. Pick up the dough and through it down hard on the counter a few times during the kneading process.

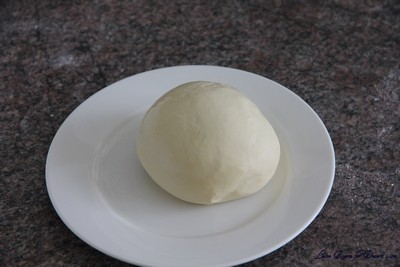
7. Shape the dough into a ball and lightly cover with oil

8. Wrap tightly in plastic wrap and let rest 30-90 minutes, longer is best ( I let mine rest 2 hours and it was perfect)

Rolling your Phyllo

** Remove all rings and jewelry so it does not snag the dough**

Use whatever means you have to get the dough as thin as you can. I have included a fantastic video at the end of the post on how to roll out your phyllo dough, using a wooden dowel, which worked perfectly for me. You may also use a pasta machine if you have one, or a normal rolling pin whatever works for you.

1. Unwrap your dough and cut off a chunk slightly larger then a golf ball. While you are rolling be sure to keep the other dough covered so it doesn’t dry out.

2. Be sure to flour your hands, rolling pin and counter. As you roll you will need to keep adding, don’t worry, you can’t over-flour.

3. Roll out the dough a bit to flatten it out.

4. Wrap the dough around your rolling pin/dowel

5. Roll back and forth quickly with the dough remaining on the dowel (see attached video for a visual, its much easier then it sounds)

6. Remove; notice how much bigger it is!

7. Rotate and repeat until it is as thin as you can it. Don’t worry if you get rips in the dough, as long as you have one perfect one for the top you will never notice.

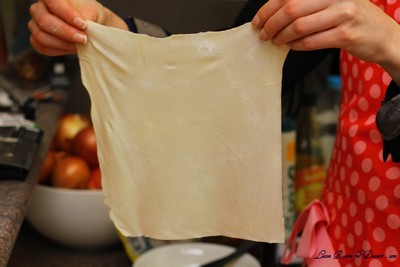
8. When you get it as thin as you can with the rolling pin, carefully pick it up with well floured hands and stretch it on the backs of your hands as you would a pizza dough, just helps make it that much thinner. Roll out your dough until it is transparent. NOTE: you will not get it as thin as the frozen phyllo dough you purchase at the store, it is made by machine

9. Set aside on a well-floured surface. Repeat the process until your dough is used up. Between each sheet again flower well. You will not need to cover your dough with a wet cloth, as you do with boxed dough, it is moist enough that it will not dry out.

Baklava Recipe

Adapted from Alton Brown, The Food Network
30 servings

For the syrup:
· 1 1/4 cups (300 ml) honey
· 1 1/4 cups (300ml) water
· 1 1/4 cups (300 ml) (280 gm/10 oz) sugar
· 1 cinnamon stick
· 1 (2-inch/50 mm) piece fresh citrus peel (lemon or orange work best)
· a few cloves or a pinch or ground clove

When you put your baklava in the oven start making your syrup. When you combine the two, one of them needs to be hot, I find it better when the baklava is hot and the syrup has cooled

1. Combine all ingredients in a medium pot over medium high heat. Stir occasionally until sugar has dissolved

2. Boil for 10 minutes, stir occasionally.

3. Once boiled for 10 minutes remove from heat and strain cinnamon stick and lemon, allow to cool as baklava cooks

Ingredients for the Filling:
1 (5-inch/125 mm piece) cinnamon stick, broken into 2 to 3 pieces or 2 teaspoons (10 ml) (8 gm) ground cinnamon
15 to 20 whole allspice berries ( I just used a few pinches)
3/4 cup (180 ml) (170 gm/6 oz) blanched almonds
3/4 cup (180 ml) (155 gm/5½ oz) raw or roasted walnuts
3/4 cup (180 ml) (140 gm/5 oz) raw or roasted pistachios
2/3 cup (160 ml) (150 gm/ 5 1/3 oz) sugar
phyllo dough (see recipe above)
1 cup (2 sticks) (240 ml) (225g/8 oz) melted butter ** I did not need this much, less then half**

1. Preheat oven to moderate 350°F/180°C/gas mark 4.

2. Combine nuts, sugar and spices in a food processor and pulse on high until finely chopped. If you do not have a food processor chop with a sharp knife as fine as you can. Set aside

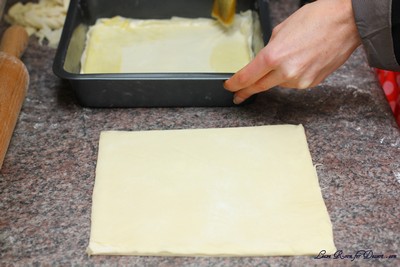
3. Trim your phyllo sheets to fit in your pan

4. Brush bottom of pan with butter and place first phyllo sheet

5. Brush the first phyllo sheet with butter and repeat approximately 5 times ending with butter. (Most recipes say more, but homemade phyllo is thicker so it’s not needed)

6. Sprinkle 1/3 of the nut mixture on top

7. Continue layering phyllo and buttering repeating 4 times
8. Sprinkle 1/3 of the nut mixture on top
9. Continue layering phyllo and buttering repeating 4 times
10. Sprinkle 1/3 of the nut mixture on top

11. Continue layering and buttering phyllo 5 more times. On the top layer, make sure you have a piece of phyllo with no holes if possible, just looks better.
12. Once you have applied the top layer tuck in all the edges to give a nice appearance.

13. With a Sharp knife cut your baklava in desired shapes and number of pieces. If you can’t cut all the ways through don’t worry you will cut again later. A 9×9 pan cuts nicely into 30 pieces. Then brush with a generous layer of butter making sure to cover every area and edge

14. Bake for approximately 30 minutes; remove from oven and cut again this time all the way through. Continue baking for another 30 minutes. (Oven temperatures will vary, you are looking for the top to be a golden brown, take close watch yours may need more or less time in the oven) (Mine took about 40min in total)

15. When baklava is cooked remove from oven and pour the cooled (will still be warmish) syrup evenly over the top, taking care to cover all surfaces when pouring. It looks like it is a lot but over night the syrup will soak into the baklava creating a beautifully sweet and wonderfully textured baklava!

Next morning all syrup is absorbed (my syrup did not absorb much at all)

16. Allow to cool to room temperature. Once cooled cover and store at room temperature. Allow the baklava to sit overnight to absorb the syrup.

17. Serve at room temperature

Freezing/Storage Instructions/Tips: There are a few ways to store your Baklava. It is recommended that you store your baklava at room temperature in an airtight container. Stored at room temperature your baklava will last for up to 2 weeks. You will notice as the days pass it will get a little juicier and chewier. You may choose to store it in the fridge; this will make it a little harder and chewy, but does increase the shelf life. You can also freeze your baklava and then just set it out at room temperature to thaw.

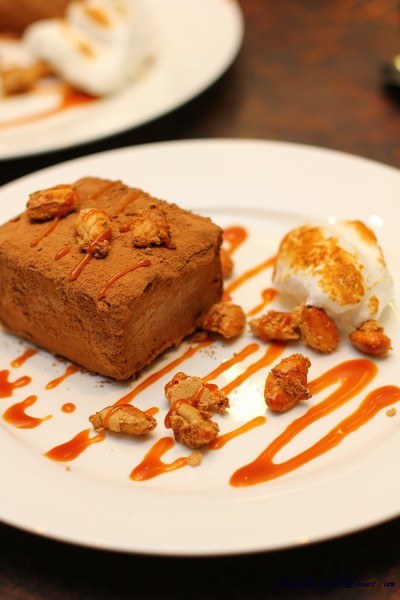
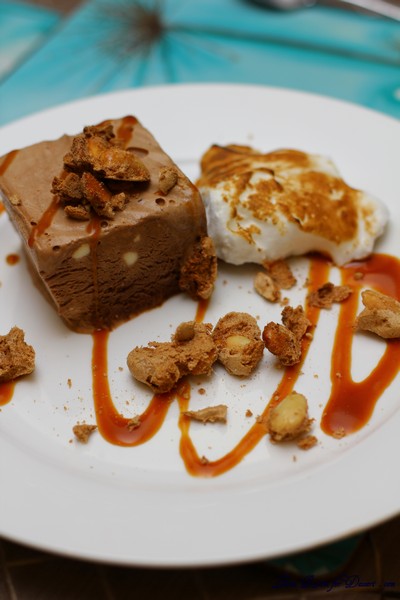
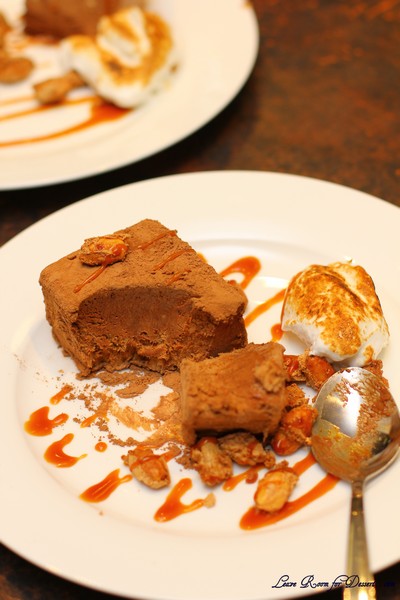
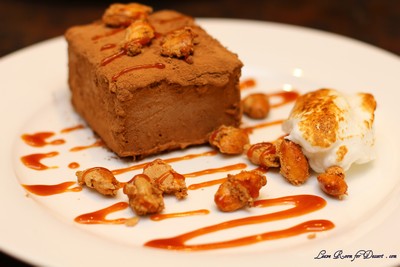
Marquise on Meringue – Daring Bakers Challenge May 2011

Friday, May 27th, 2011

The May 2011 Daring Bakers’ challenge was hosted by Emma of CookCraftGrow and Jenny of Purple House Dirt. They chose to challenge everyone to make a Chocolate Marquise. The inspiration for this recipe comes from a dessert they prepared at a restaurant in Seattle.

This challenge looked very time consuming at first, which is the main reason I put off making it until the last weekend. I was able to make the chocolate marquise the night before, then quickly make all three other components in 30 minutes (all the while making a huge mess in the kitchen).

I thought I had a little trouble with the spiced nuts, although this was the component of the dessert that people liked most and commented on. (I had made the meringue and mixed in the nuts, poured and spread it on a lined tray, then halfway through thought the nuts wouldn’t crisp up, so I took to the meringue with a spoon to expose the almonds so they would brown) – sorry no pics – I couldn’t take photos as I needed one clean hand to feel the sugar dissolving for the torched meringue (check out the recipe below)… 🙂

I still have some of the chocolate marquise in the freezer, and look forward to serving it (although in smaller portions, and probably with more spiced almonds).

It was certainly a well liked challenge by all. Thanks Emma and Jenny!

Chocolate Marquise

Plated marquise
Servings: 18 2.5″x2.5″ cubes (I would say ~24-36)

11 large egg yolks at room temperature
4 large whole eggs
2/3 cup (150 grams/ 5.3 oz) sugar
1/3 cup (2⅔ fluid oz/ 80 ml.) water
Chocolate Base, barely warm (recipe follows)
2 cups (16 fluid oz./ 500 ml.) heavy cream
2 cups Dutch process cocoa powder (for rolling) (Note: We used extra brut, like Hershey’s Special Dark. Make sure it’s a Dutch processed cocoa, not a natural cocoa powder.)
Torched meringue (recipe follows)
Spiced almonds (recipe follows)
Cacao nibs (optional)

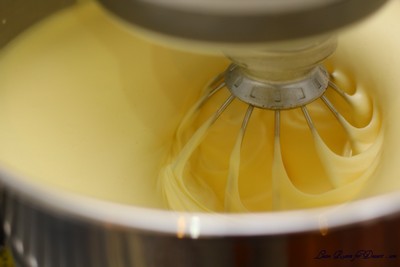
In the bowl of a stand mixer, combine the egg yolks and whole eggs. Whip on high speed until very thick and pale, about 10 – 15 minutes. (It probably only took 5 minutes in my KitchenAid)

When the eggs are getting close to finishing, make a sugar syrup by combining the sugar and water in a small saucepan. Bring the syrup to a boil and then cook to softball stage (235F/115C). If you have a cake tester with a metal loop for a handle, the right stage for the syrup is reached when you can blow a bubble through the loop (as seen in the following pictures).

With the mixer running on low speed, drizzle the sugar syrup into the fluffy eggs, trying to hit that magic spot between the mixing bowl and the whisk.

When all of the syrup has been added (do it fairly quickly), turn the mixer back on high and whip until the bowl is cool to the touch. This will take at least 10 minutes.

In a separate mixing bowl, whip the heavy cream to soft peaks. Set aside.
When the egg mixture has cooled, add the chocolate base to the egg mixture and whisk to combine. Try to get it as consistent as possible without losing all of the air you’ve whipped into the eggs. We used the stand mixer for this, and it took about 1 minute.

Fold 1/3 of the reserved whipped cream into the chocolate mixture to loosen it, and then fold in the remaining whipped cream.

Pour into the prepared pans and cover with plastic wrap (directly touching the mixture so it doesn’t allow in any air).

Freeze until very firm, at least 2 – 4 hours (preferably 6 – 8 hours).
When you’re ready to plate, remove the marquise from the freezer at least 15 minutes before serving. While it’s still hard, remove it from the pan by pulling on the parchment ‘handles’ or by flipping it over onto another piece of parchment. Unmold the frozen marquise

Cut it into cubes and roll the cubes in cocoa powder. These will start to melt almost immediately, so don’t do this step until all of your other plating components (meringue, caramel, spiced nuts, cocoa nibs) are ready. The cubes need to sit in the fridge to slowly thaw so plating components can be done during that time. They don’t need to be ready before the cubes are rolled in the cocoa powder.

Plate with the torched meringue and drizzled caramel sauce, and toss spiced almonds and cocoa nibs around for garnish. You want to handle the cubes as little as possible because they get messy quickly and are difficult to move. However, you want to wait to serve them until they’ve softened completely. The soft pillows of chocolate are what make this dessert so unusual and when combined with the other elements, you’ll get creamy and crunchy textures with cool, spicy, salty, bitter, and sweet sensations on your palate.

Chocolate Base

Servings: n/a – this is an ingredient for the chocolate marquise, not meant to be used separately

12 oz (340 grams/ 1½ cups) bittersweet chocolate (about 70% cocoa)
12 oz (355 ml/ 1½ cups) heavy cream
1/2 teaspoon salt
1/4 teaspoon cayenne (I left this out and used 1/2 teaspoon cinnamon)
1/4 cup (60 ml/ 2 fluid oz.) tequila (I left this out)
1/4 cup (60 ml/ 2 fluid oz.) light corn syrup (I used glucose syrup)
3/4 teaspoon vanilla
1/4 cup (4 tablespoons/ less than an ounce) cocoa powder (we used extra brut, like Hershey’s Special Dark, but any Dutch-processed cocoa would be fine. Do not substitute natural cocoa powder.)
1/8 teaspoon freshly ground black pepper (I left this out)
1 oz unsalted butter (2 tbsps./30 grams), softened

Place the chocolate in a small mixing bowl.

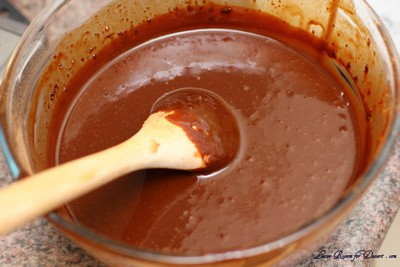
In a double-boiler, warm the cream until it is hot to the touch (but is not boiling). Remove from the heat and pour over the chocolate.

Allow it to sit for a minute or two before stirring. Stir until the chocolate is melted completely and is smooth throughout.

Add the remaining ingredients and stir to combine.

Set aside until cooled to room temperature. Do not refrigerate, as the base needs to be soft when added to the marquise mixture. If you make it the day before, you may need to warm it slightly. Whisk it until it is smooth again before using it in the marquise recipe.

Torched Meringue

Servings: Makes about 4 – 5 cups of meringue. If you aren’t planning on serving *all* of the marquise at once, you might want to scale this recipe back a bit.

11 large egg whites
1 ¾ cups (14 oz or 395 gms) sugar
Splash of apple cider vinegar
1/2 teaspoon vanilla

Combine the egg whites, sugar and vinegar in the bowl of a stand mixer. Using your (clean, washed) hand, reach in the bowl and stir the three together, making sure the sugar is moistened evenly by the egg whites and they make a homogeneous liquid.

Over a saucepan of simmering water, warm the egg white mixture. Use one hand to stir the mixture continuously, feeling for grains of sugar in the egg whites. As the liquid heats up, the sugar will slowly dissolve and the egg whites will thicken. This step is complete when you don’t feel any more sugar crystals in the liquid and it is uniformly warm, nearly hot.

Remove the mixing bowl from the saucepan and return it to the stand mixer with the whisk attachment. Whisk until you reach soft peaks. In the last 10 seconds of mixing, add the vanilla to the meringue and mix thoroughly.

When you’re ready to plate the dessert, spoon the meringue onto a plate (or use a piping bag) and use a blowtorch to broil.

Tequila Caramel

Servings: Makes about 1 cup of caramel

1 cup (8 oz.) sugar
1/2 cup (4 fluid oz./ 120 ml.) water
1 cup (8 fluid oz./ 240 ml.) heavy cream
3/4 teaspoon salt
2 tablespoons tequila (I left this out and used 1 teaspoon vanilla)

In a heavy-bottomed saucepan, combine the sugar and water on medium-high heat. Boil until the water completely evaporates and the sugar caramelizes to a dark mahogany color.

Working quickly, add the cream to the darkened caramel. It will bubble and pop vigorously, so add only as much cream as you can without overflowing the pot.

Return the pot to the stove on low heat and whisk gently to break up any hardened sugar. Add any remaining cream and continue stirring. Gradually, the hard sugar will dissolve and the caramel sauce will continue to darken. When the caramel has darkened to the point you want it, remove it from the heat. Add the salt and tequila and stir to combine. Set aside until ready to serve.

Spiced Almonds

Servings: Makes about 1 cup of spiced almonds

1/2 cup (4 oz.) sugar
1 teaspoon cinnamon
1/4 teaspoon cayenne (I left this out)
1/2 teaspoon salt
1 large egg white
1 cup (145 grams/ 5 oz.) blanched whole almonds

Preheat the oven to 350F. Line a sheet pan with parchment paper or foil.

In a small bowl, combine the sugar, cinnamon, cayenne, and salt.

In a larger mixing bowl whisk the egg white until it’s frothy and thick.

Add the spice mix to the egg white and whisk to combine completely.

Add the nuts to the egg white mixture and toss with a spoon.

Spoon the coated nuts onto the parchment paper-lined baking sheet.

Bake the nuts for 30 minutes, or until they turn light brown. Allow the nuts to cool completely and they will get very crunchy. Set aside until ready to serve.

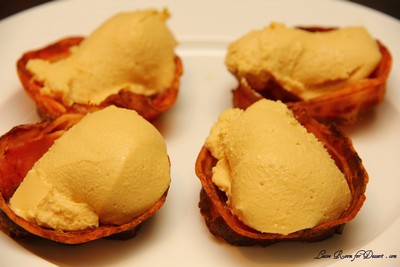
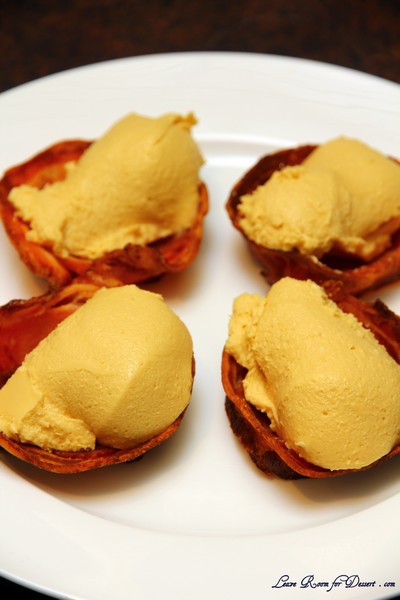
Maple Mousse in Bacon Cup – Daring Bakers Challenge April 2011

Wednesday, April 27th, 2011


The April 2011 Daring Bakers’ challenge was hosted by Evelyne of the blog Cheap Ethnic Eatz. Evelyne chose to challenge everyone to make a maple mousse in an edible container. Prizes are being awarded to the most creative edible container and filling, so vote on your favorite from April 27th to May 27th at http://thedaringkitchen.com!

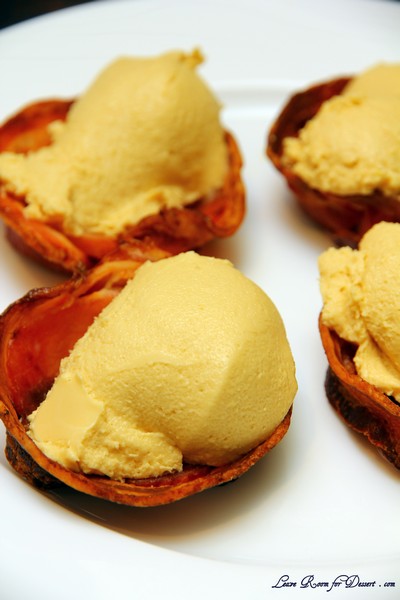
Yes, you read the title correctly. This month’s challenge did in fact involve maple syrup mousse in an edible container. If it were any flavoured mousse in any type of container – I already had a few ideas in mind. Although we have a few compulsory items each month for our Daring Bakers challenge and this month we had to make the maple mousse.

When I told others about this months challenge I must admit I didn’t get too many people saying it sounded like a lovely dish we had to make this month. Many people screwed up their faces at the thought of such a large maple syrup to cream ratio plus the addition of bacon (if you chose that type of edible cup).

There were many suggestions on how to make this beautifully presented and a good flavour combination, although I kept putting off the challenge until the day before it was due – the last day of our long weekend. And by that stage I was drained of cooking – hot cross buns, sorbets, honey comb, ice cream, lamb shoulder, pork belly and a few other experiments in the kitchen.

I decided to go by the recipe which said to use real maple syrup rather than maple flavoured syrup – although here in Australia a good quality real maple syrup costs about $10 for a cup. Yep – a little too expensive for a mousse that I didn’t think I would like that much. So I decided to halve the quantity of mousse.

After tasting the maple mousse (which I had a few troubles with, as I let the maple syrup + gelatine mix cool too much and had to gently re-heat it), we decided to go ahead with the bacon cups, hoping it would cut some of the sweetness.

Unfortunately I don’t think the mousse was for my tastes, although others that tried it, said it was better than they expected. It is quite unlikely I will make this again.

I will have to find time to make my own mousse and edible cups – although I think they will have a chocolate theme.

Thanks to our host this month for making me try something different.

Bacon Cups

Ingredients:
• 24 thin slices good quality bacon (I used 4 slices)

Directions:
1. Pre-heat the oven to 400 degrees F/200 degrees C.
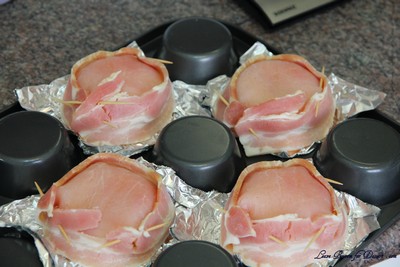
2. Take a muffin pan or 6 small ½ cup capacity heat-proof bowls, turn upside down and carefully form aluminum foil covers on the back of 6 muffin cups or the bowls.
3. Taking 2 strips of bacon at a time crisscross the strips over the backs of the muffin cups and cut to size a tad longer then the bottom part of the cup. Now use 1 to 2 more strips to cover the sides of the muffin cups in a weaving fashion. You want a full tight weave because bacon shrinks a lot. For smaller cups I used a shot glass with a square of bacon for the bottom and I wrapped 1 strip around the side.
4. Tuck the ends of the bacon strips inside otherwise they will curl while cooking. A good idea is to insert 4 toothpicks where the crisscrossed bacon meets in the weave.

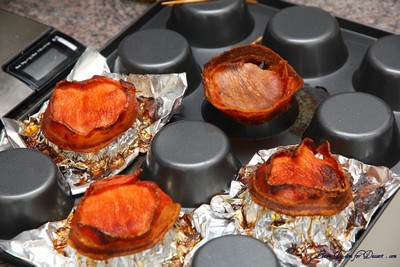
5. Place muffin pan in a cookie tray to catch drippings. Bake in oven for about 25 to 40 minutes, or until the bacon is golden and crisp but not burned.


6. Cool completely, a good hour, before removing your cups delicately from the foil.

Maple Mousse

(I halved this recipe)
Ingredients:
• 1 cup (240 ml/ 8 fluid oz.) pure maple syrup (not maple-flavoured syrup)
• 4 large egg yolks
• 1 package (7g/1 tbsp.) unflavoured gelatine
• 1 1/2 cups (360 ml. g/12 fluid oz) whipping cream (35% fat content)

Directions:
1. Bring maple syrup to a boil then remove from heat.
2. In a large bowl, whisk egg yolks and pour a little bit of the maple syrup in while whisking (this is to temper your egg yolks so they don’t curdle).
3. Add warmed egg yolks to hot maple syrup until well mixed.
4. Measure 1/4 cup of whipping cream in a bowl and sprinkle it with the gelatine. Let it rest for 5 minutes. Place the bowl in a microwave for 45 seconds (microwave for 10 seconds at a time and check it in between) or place the bowl in a pan of barely simmering water, stir to ensure the gelatine has completely dissolved.
5. Whisk the gelatine/whipping cream mixture into the maple syrup mixture and set aside.
6. Whisk occasionally for approximately an hour or until the mixture has the consistency of an unbeaten raw egg white.
7. Whip the remaining cream. Stir 1/4 of the whipped cream into the maple syrup mixture. Fold in the remaining cream and refrigerate for at least an hour.
8. Remove from the fridge and divide equally among your edible containers.

Yeasted Meringue Coffee Cake – Daring Bakers Challenge March 2011

Sunday, March 27th, 2011

The March 2011 Daring Baker’s Challenge was hosted by Ria of Ria’s Collection and Jamie of Life’s a Feast. Ria and Jamie challenged The Daring Bakers to bake a yeasted Meringue Coffee Cake.

Another month, another Daring Bakers Challenge. I remember reading the title of this month’s challenge and thinking – well it must have coffee in it, I’m sure I’ll find a way of substituting something else (like chocolate) for the coffee. Lucky for me, it was actually perfect without alterations, as there was no coffee in the cake, rather it is meant to be eaten whilst drinking coffee – or hot chocolate (in my case).

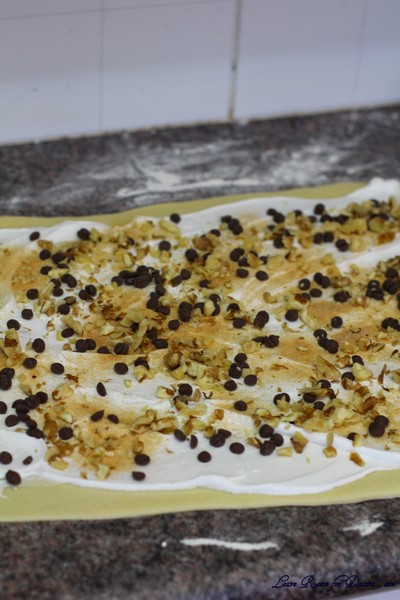
When I told others what this month’s challenge was, I got a two responses – delight (if they were coffee drinkers) and upset (if they hated coffee) in both cases I had to clarify that there was no coffee in the coffee cake. In the end I ended up calling it a yeasted cake with chocolate and walnuts – as to not cause any more confusion.

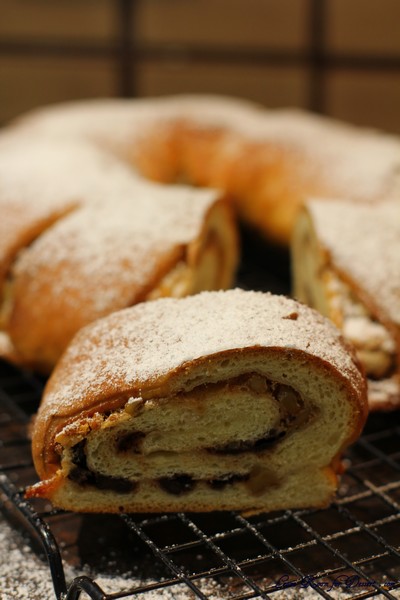
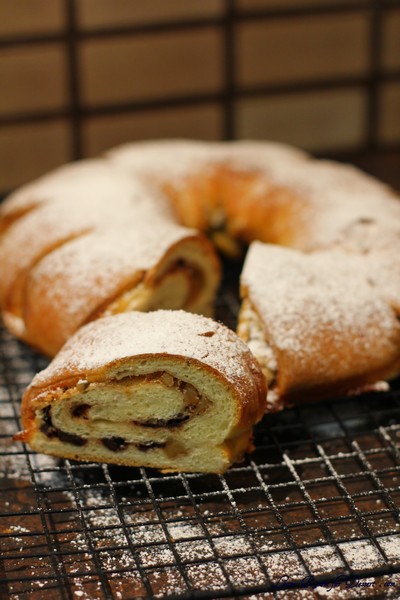
Call it by any name you like, it doesn’t matter. What does matter is the taste, and I had no complaints, with many people saying how lovely it was. I must agree, it was very delicious and fresh, even the day after, or toasted under the grill.

I unfortunately ran out of time whilst making it and decided to place it in the fridge overnight , once fully assembled (at the point where you need to let it rise for the last time then bake). My only thoughts were on the yeasted cake, that it should be fine in the fridge and that it would slowly rise and then I could cook it fresh in the morning. I forgot about the meringue mix inside, and it dissolved in the fridge, leaving a sticky sugary liquid coming out by the morning (the cake itself didn’t rise much either). I cooked it up and no one could not tell anything might have been wrong with it. I would love to try the original method, without putting it in the fridge, and see the effect of the meringue.

Thanks again to our hosts this month, and the team at the Daring Kitchen.

Filled Meringue Coffee Cake

Makes 2 round coffee cakes, each approximately 10 inches in diameter
The recipe can easily be halved to make one round coffee cake

Ingredients
For the yeast coffee cake dough:

4 cups (600 g / 1.5 lbs.) flour
¼ cup (55 g / 2 oz.) sugar
¾ teaspoon (5 g / ¼ oz.) salt
1 package (2 ¼ teaspoons / 7 g / less than an ounce) active dried yeast
¾ cup (180 ml / 6 fl. oz.) whole milk
¼ cup (60 ml / 2 fl. oz. water (doesn’t matter what temperature)
½ cup (135 g / 4.75 oz.) unsalted butter at room temperature
2 large eggs at room temperature

10 strands saffron for Ria’s version (Saffron might be hard to find and it’s expensive, so you can substitute with ½ – 1 teaspoon of ground cardamom or ground nutmeg. Or simply leave it plain like Jamie’s version)

For the meringue:

3 large egg whites at room temperature
¼ teaspoon salt
½ teaspoon vanilla
½ cup (110 g / 4 oz.) sugar

For the filling:

Jamie’s version: (I did this one)
1 cup (110 g / 4 oz.) chopped pecans or walnuts
2 Tablespoons (30 g / 1 oz.) granulated sugar
¼ teaspoon ground cinnamon
1 cup (170 g / 6 oz.) semisweet chocolate chips or coarsely chopped chocolate

Ria’s version:
1 cup (130 g / 5 oz.) chopped cashew nuts
2 Tablespoons (30 g / 1 oz.) granulated sugar
½ teaspoon garam masala (You can make it at home – recipe below – or buy from any Asian/Indian grocery store)
1 cup (170g / 6 oz.) semisweet chocolate chips ( I used Ghirardelli)

Egg wash: 1 beaten egg
Cocoa powder (optional) and confectioner’s sugar (powdered/icing sugar) for dusting cakes

**Garam (means “hot”) masala (means “mixture”) is a blend of ground spices and is used in most Indian savory dishes. It is used in limited quantities while cooking vegetables, meats & eggs. There is no “one” recipe for it as every household has a recipe of their own. Below, I am going to share the recipe which I follow.

4 or 5 sticks (25 g) Cinnamon Sticks (break a stick and open the scroll)
3 ½ tablespoons (25 g / less than an ounce) Cloves, whole
100 g. (3.5 oz.) Fennel seeds
4 tablespoons (25 g / less than an ounce) Cumin seeds
1 ½ tablespoons (10 g / less than half an ounce) Peppercorns
25 g (less than half an ounce) Green Cardamom pods

In a small pan on medium heat, roast each spice individually (it hardly takes a minute) until you get a nice aroma. Make sure you stir it throughout so that it doesn’t burn. As soon as each spice is roasted, transfer it to a bowl to cool slightly. Once they are all roasted, grind into a fine powder by using a coffee grinder, or pestle & mortar. Store in an airtight container and use as needed.

Directions:

Prepare the dough:

In a large mixing bowl, combine 1 ½ cups (230 g) of the flour, the sugar, salt and yeast.

In a saucepan, combine the milk, water and butter and heat over medium heat until warm and the butter is just melted. Ria’s version: add the 10 saffron threads to the warmed liquid and allow to steep off of the heat for 10 minutes. This will give the mixture a distinct aroma and flavor and a yellowish-orange hue.

With an electric mixer on low speed, gradually add the warm liquid to the flour/yeast mixture, beating until well blended. Increase mixer speed to medium and beat 2 minutes. Add the eggs and 1 cup (150 g) flour and beat for 2 more minutes.

Using a wooden spoon, stir in enough of the remaining flour to make a dough that holds together. Turn out onto a floured surface (use any of the 1 ½ cups of flour remaining) and knead the dough for 8 to 10 minutes until the dough is soft, smooth, sexy and elastic, keeping the work surface floured and adding extra flour as needed.

Place the dough in a lightly greased (I use vegetable oil) bowl, turning to coat all sides. Cover the bowl with plastic wrap and a kitchen towel and let rise until double in bulk, 45 – 60 minutes. The rising time will depend on the type of yeast you use.

Prepare your filling:In a small bowl, combine the cinnamon and sugar for the filling if using. You can add the chopped nuts to this if you like, but I find it easier to sprinkle on both the nuts and the chocolate separately.

Once the dough has doubled, make the meringue:
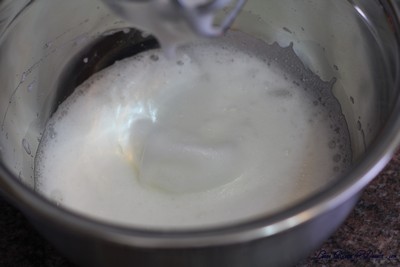
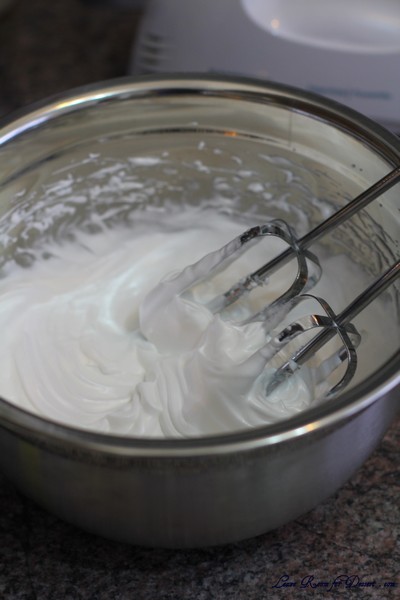
In a clean mixing bowl – ideally a plastic or metal bowl so the egg whites adhere to the side (they slip on glass) and you don’t end up with liquid remaining in the bottom – beat the egg whites with the salt, first on low speed for 30 seconds, then increase to high and continue beating until foamy and opaque. Add the vanilla then start adding the ½ cup sugar, a tablespoon at a time as you beat, until very stiff, glossy peaks form.

Assemble the Coffee Cakes:

Line 2 baking/cookie sheets with parchment paper.

Punch down the dough and divide in half. On a lightly floured surface, working one piece of the dough at a time (keep the other half of the dough wrapped in plastic), roll out the dough into a 20 x 10-inch (about 51 x 25 ½ cm) rectangle. Spread half of the meringue evenly over the rectangle up to about 1/2-inch (3/4 cm) from the edges. Sprinkle half of your filling of choice evenly over the meringue (ex: half of the cinnamon-sugar followed by half the chopped nuts and half of the chocolate chips/chopped chocolate).

Now, roll up the dough jellyroll style, from the long side. Pinch the seam closed to seal. Very carefully transfer the filled log to one of the lined cookie sheets, seam side down. Bring the ends of the log around and seal the ends together, forming a ring, tucking one end into the other and pinching to seal.

Using kitchen scissors or a sharp knife (although scissors are easier), make cuts along the outside edge at 1-inch (2 ½ cm) intervals. Make them as shallow or as deep as desired but don’t be afraid to cut deep into the ring.

Repeat with the remaining dough, meringue and fillings.

Cover the 2 coffee cakes with plastic wrap and allow them to rise again for 45 to 60 minutes.

Preheat the oven to 350°F (180°C).

Brush the tops of the coffee cakes with the egg wash. Bake in the preheated oven for 25 to 30 minutes until risen and golden brown. The dough should sound hollow when tapped.

Remove from the oven and slide the parchment paper off the cookie sheets onto the table. Very gently loosen the coffee cakes from the paper with a large spatula and carefully slide the cakes off onto cooling racks. Allow to cool.

Just before serving, dust the tops of the coffee cakes with confectioner’s sugar as well as cocoa powder if using chocolate in the filling. These are best eaten fresh, the same day or the next day.

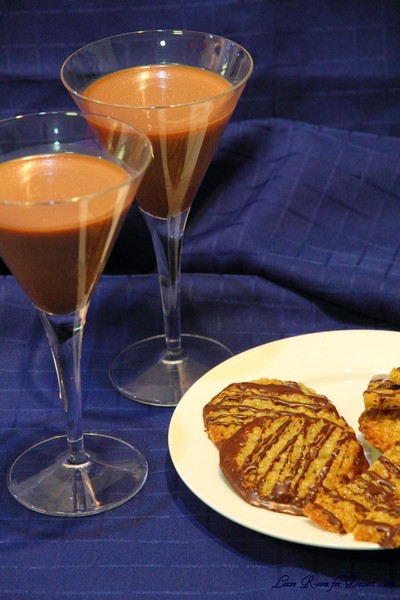
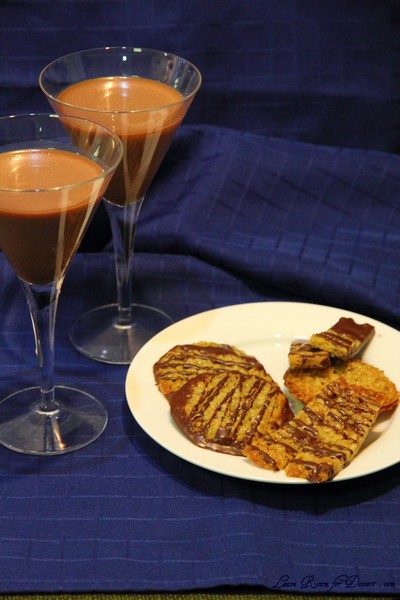
Chocolate Panna cotta with Florentine Cookies – Daring Bakers Challenge February 2011

Sunday, February 27th, 2011

The February 2011 Daring Bakers’ challenge was hosted by Mallory from A Sofa in the Kitchen. She chose to challenge everyone to make Panna Cotta from a Giada De Laurentiis recipe and Nestle Florentine Cookies.

Both the chocolate panna cotta and florentine cookies were a bit hit this month. I was grateful that both were very quick recipes, as I’ve said in previous posts – our garden has gone crazy this spring and summer and we have been spending much of our time trying to sort it out, and the rest of our time has been spent with family. The panna cotta has already been requested again, with some people saying it tasted like a chocolate mousse.

I tried to out-turn the panna cottas – like I have before, although they didn’t have enough gelatine for the tall ones to stand, and the ones from the glasses ended up looking a little naughty (some dark chocolate chocolate fell to the base of the glass – I’ll leave the imagery to your imagination).

Thanks again to the Daring Bakers and our hosts every month!

My notes: I found the panna cotta served 8-10 people. I accidentally made my florentine cookies a little big, so they look a little longer to cook and made a few less than expected. I also made some large rectangles of florentines, so they could be cut into clean rectangles after cooking.

Chocolate Panna Cotta

Recipe adapted from Bon Appetit

1 cup (240 ml) whole milk
1 tablespoon (15 ml) (7 gm) (¼ oz) unflavored powdered gelatin
2 cups (480 ml) whipping cream (30+% butterfat)
½ cup (115 gm) (4 oz) sugar
¾ cup (145 gm)(5 oz) bittersweet or semisweet chocolate
½ teaspoon (2½ ml) vanilla extract

Pour milk into a small bowl, sprinkle gelatin over the top, set aside for 2-5 minutes.

Place a medium saucepan over medium heat, stir in cream, sugar and vanilla. Bring to a low boil.

Add chocolate and whisk until melted. Whisk the milk/gelatin mixture into chocolate cream mixture. Whisk until gelatin has dissolved.

Transfer to ramekins, or nice glasses for serving.

Cover and chill at least 8 hours, or overnight

Nestle Florentine Cookies

Recipe from the cookbook “Nestle Classic Recipes”, and their website.

2/3 cup (160 ml) (150 gm) (5.3 oz) unsalted butter
2 cups (480 ml) (160 gm) (5 2/3 oz) quick oats
1 cup (240 ml) (230 gm) (8 oz) granulated sugar
2/3 cup (160 ml) (95 gm) (3⅓ oz) plain (all purpose) flour
1/4 cup (60 ml) dark corn syrup
1/4 cup (60 ml) whole milk
1 tsp (5 ml) vanilla extract
pinch of salt
1½ cups (360 ml) (250 gm) (9 oz) dark or milk chocolate

Preheat oven to moderately hot 375°F (190°C) (gas mark 5). Prepare your baking sheet with silpat or parchment paper.

Melt butter in a medium saucepan, then remove from the heat.

To the melted butter add oats, sugar, flour, corn syrup, milk, vanilla, and salt. Mix well. Drop a tablespoon full, three inches (75 mm) apart, onto your prepared baking sheet. Flatten slightly with the back of your tablespoon, or use a spatula.

Bake in preheated oven for 6-8 minutes, until cookies are golden brown. Cool completely on the baking sheets.

While the cookies are cooling melt your chocolate until smooth either in the microwave (1 1/2 minutes), or stovetop (in a double boiler, or a bowl that fits atop a saucepan filled with a bit of water, being sure the water doesn’t touch the bottom of the bowl).

Peel the cookies from the silpat or parchment and place face down on a wire rack set over a sheet of wax/parchment paper (to keep counters clean).

Spread a tablespoon of chocolate on the bottom/flat side of your cookie, sandwiching another (flat end) cookie atop the chocolate.

This recipe will make about 2 1/2 – 3 dozen sandwiched Florentine cookies. You can also choose not to sandwich yours, in which case, drizzle the tops with chocolate (over your wax paper).

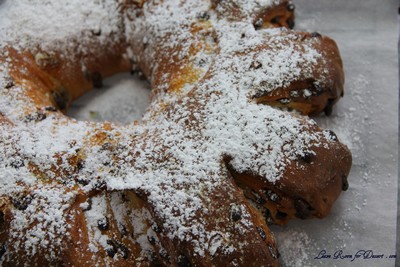
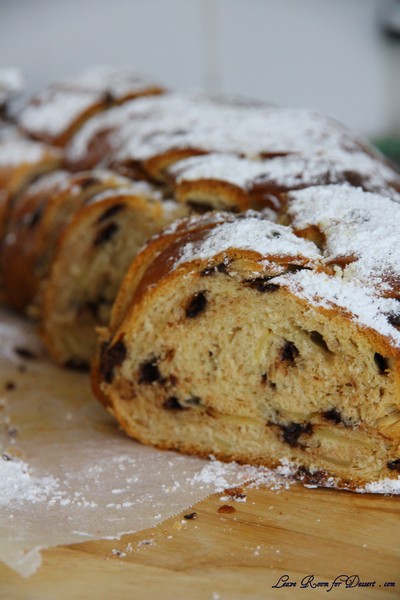
Chocolate Chip Stollen – Daring Bakers Challenge December 2010

Monday, December 27th, 2010

The 2010 December Daring Bakers’ challenge was hosted by Penny of Sweet Sadie’s Baking. She chose to challenge Daring Bakers’ to make Stollen. She adapted a friend’s family recipe and combined it with information from friends, techniques from Peter Reinhart’s book………and Martha Stewart’s demonstration.

We hosted a lovely lunch on Boxing Day this year. The day started off with rain, then went a little cold, got quite hot and then rained at night. I’m glad for the few hours of cool weather (we are currently experiencing a strange Summer here in Sydney), as we had the oven and BBQ on for the meals. We started with beautiful cheeses from Formaggi Ocello. For lunch we had gammon, lamb and roast chicken, with a garden salad, bok choy salad, pumpkin, beetroot and walnut salad.

And for dessert…

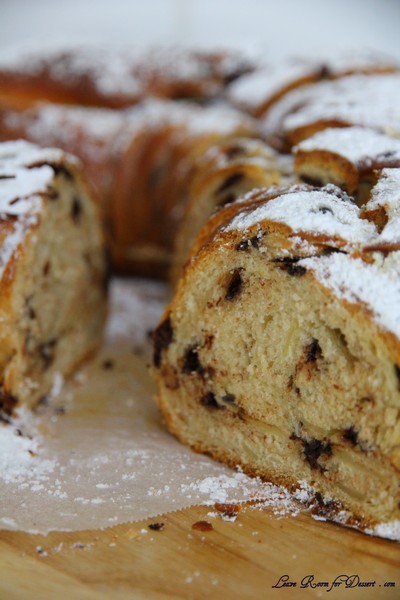
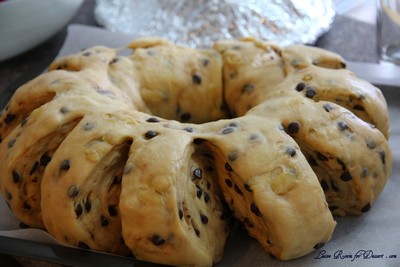
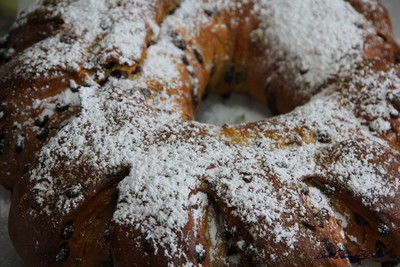
We had profiteroles, a triple chocolate cheese cake, a pavlova, fruit and berries, an almond slice and a chocolate chip stollen.

This was the only opportunity for me to make this month’s Daring Bakers Challenge. The month has been full of Christmas and end of year parties and get-togethers, along with all the shopping for presents. I got some lovely cookbooks, clothes and a gorgeous Le Creseut pot.

I considered making the stollen to the original recipe – as there are a couple people in my family who really enjoy fruit breads, although after taking a vote on whether to make the original version or a choc chip version – there was a resounding vote for the choc chip version.

I thought it may turn out like choc chip hot cross buns – and it was quite similar. It was great an hour out of the oven and great toasted with a bit of butter a day or two after.

Everyone was quite impressed with this as part of our dessert menu. I hope everyone had a great Christmas and have a fantastic New Years.

Chocolate Chip Stollen Wreath

my changes in italics

Makes one large wreath or two traditional shaped Stollen loaves. Serves 10-12 people

¼ cup (60ml) lukewarm water (110º F / 43º C)
2 packages (4 1/2 teaspoons) (22 ml) (14 grams) (1/2 oz) active dry yeast
1 cup (240 ml) milk
10 tablespoons (150 ml) (140 grams) unsalted butter (can use salted butter)
5½ cups (1320 ml) (27 ozs) (770 grams) all-purpose (plain) flour (Measure flour first – then sift- plus extra for dusting)
½ cup (120 ml) (115 gms) sugar
¾ teaspoon (3 ¾ ml) (4 ½ grams) salt (if using salted butter there is no need to alter this salt measurement)
1 teaspoon (5 ml) (6 grams) cinnamon
3 large eggs, lightly beaten
Grated zest of 1 lemon and 1 orange (I left this out)
2 teaspoons (10 ml) (very good) vanilla extract
1 teaspoon (5 ml) lemon extract or orange extract (I left this out)
¾ cup (180 ml) (4 ¾ ozs) (135 grams) mixed peel (link below to make your own) (I left this out)
1 cup (240 ml) (6 ozs) (170 gms) firmly packed raisins (I used approx 1 1/2 cups choc chips – 250g)
3 tablespoons (45ml) rum (I left this out)
12 red glacé cherries (roughly chopped) for the color and the taste. (optional) (I left this out)
1 cup (240 ml) (3 ½ ozs) (100 grams) flaked almonds
Melted unsalted butter for coating the wreath
Confectioners’ (icing) (powdered) sugar for dusting wreath

Note: If you don’t want to use alcohol, double the lemon or orange extract or you could use the juice from the zested orange.

Soak the raisins (I left this out)
In a small bowl, soak the raisins in the rum (or in the orange juice from the zested orange) and set aside. See Note under raisins.

To make the dough:

Pour ¼ cup (60 ml) warm water into a small bowl, sprinkle with yeast and let stand 5 minutes. Stir to dissolve yeast completely.

In a small saucepan, combine 1 cup (240 ml) milk and 10 tablespoons (150 ml) butter over medium – low heat until butter is melted. Let stand until lukewarm, about 5 minutes.

Lightly beat eggs in a small bowl and add lemon and vanilla extracts.

In a large mixing bowl (4 qt) (4 liters) (or in the bowl of an electric mixer with paddle attachment), stir together the flour, sugar, salt, cinnamon, orange and lemon zests.

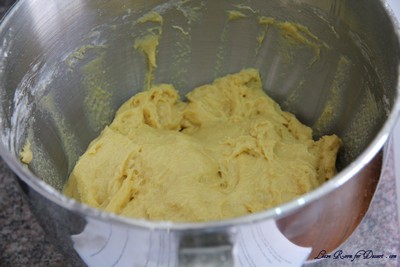
Then stir in (or mix on low speed with the paddle attachment) the yeast/water mixture, eggs and the lukewarm milk/butter mixture. This should take about 2 minutes. It should be a soft, but not sticky ball. When the dough comes together, cover the bowl with either plastic or a tea cloth and let rest for 10 minutes.

Add in the mixed peel, soaked fruit and almonds and mix with your hands or on low speed to incorporate. Here is where you can add the cherries if you would like. Be delicate with the cherries or all your dough will turn red!

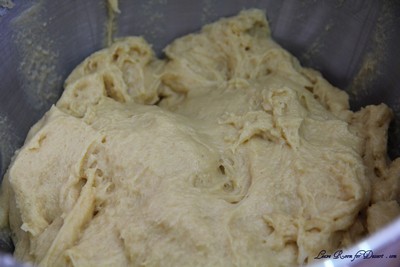
Sprinkle flour on the counter, transfer the dough to the counter, and begin kneading (or mixing with the dough hook) to distribute the fruit evenly, adding additional flour if needed. The dough should be soft and satiny, tacky but not sticky. Knead for approximately 8 minutes (6 minutes by machine). The full six minutes of kneading is needed to distribute the dried fruit and other ingredients and to make the dough have a reasonable bread-dough consistency. You can tell when the dough is kneaded enough – a few raisins will start to fall off the dough onto the counter because at the beginning of the kneading process the dough is very sticky and the raisins will be held into the dough but when the dough is done it is tacky which isn’t enough to bind the outside raisins onto the dough ball.

My KitchenAid couldn’t fit this in it, so I kneaded it by hand

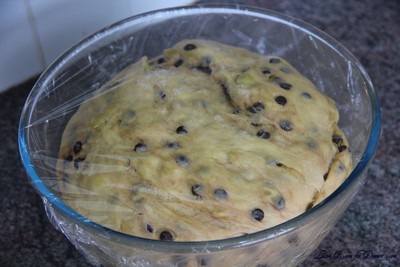
Lightly oil a large bowl and transfer the dough to the bowl, rolling around to coat it with the oil. Cover the bowl with plastic wrap.
Put it in the fridge overnight. The dough becomes very firm in the fridge (since the butter goes firm) but it does rise slowly… the raw dough can be kept in the refrigerator up to a week and then baked on the day you want.

Shaping the Dough and Baking the Wreath

Let the dough rest for 2 hours after taking out of the fridge in order to warm slightly.

Line a sheet pan with parchment paper.

Preheat oven to moderate 350°F/180°C/gas mark 4 with the oven rack on the middle shelf.

Punch dough down, roll into a rectangle about 16 x 24 inches (40 x 61 cms) and ¼ inch (6 mm) thick.

Starting with a long side, roll up tightly, forming a long, thin cylinder.

Transfer the cylinder roll to the sheet pan. Join the ends together, trying to overlap the layers to make the seam stronger and pinch with your fingers to make it stick, forming a large circle. You can form it around a bowl to keep the shape.

Using kitchen scissors, make cuts along outside of circle, in 2-inch (5 cm) intervals, cutting 2/3 of the way through the dough.

Twist each segment outward, forming a wreath shape. Mist the dough with spray oil and cover loosely with plastic wrap.

Proof for approximately 2 hours at room temperature, or until about 1½ times its original size.

Bake the stollen for 20 minutes, then rotate the pan 180 degrees for even baking and continue to bake for 20 to 30 minutes (Mine took approx 40min in total). The bread will bake to a dark mahogany color, should register 190°F/88°C in the center of the loaf, and should sound hollow when thumped on the bottom.

Transfer to a cooling rack and brush the top with melted butter while still hot.

Immediately tap a layer of powdered sugar over the top through a sieve or sifter.

Wait for 1 minute, then tap another layer over the first.

The bread should be coated generously with the powdered sugar.

Let cool at least an hour before serving. Coat the stollen in butter and icing sugar three times, since this many coatings helps keeps the stollen fresh – especially if you intend on sending it in the mail as Christmas presents!

When completely cool, store in a plastic bag. Or leave it out uncovered overnight to dry out slightly, German style.

The stollen tastes even better in a couple of days and it toasts superbly…. so delicious with butter and a cup of tea….mmmmm

Storage
The more rum and the more coatings of butter and sugar you use the longer it will store.
The following is for the recipe as written and uses the 45 mls of rum and two coatings of butter and icing sugar
1. Stollen freezes beautifully about 4 months
2. The baked stollen stores well for 2 weeks covered in foil and plastic wrap on the counter at room temperature and
3. One month in the refrigerator well covered with foil and plastic wrap.

Crostata con la Crema – Daring Bakers Challenge November 2010

Saturday, November 27th, 2010

The 2010 November Daring Bakers’ challenge was hosted by Simona of briciole. She chose to challenge Daring Bakers’ to make pasta frolla for a crostata. She used her own experience as a source, as well as information from Pellegrino Artusi’s Science in the Kitchen and the Art of Eating Well.

Spring is almost over, before it even really begun. This year we had two lovely days of Spring weather at the beginning of September, followed by many days of rain, cold days and lots of windy days.

This last week has been beautiful. Quite warm, but not too hot (I say this, even though I work in an air-conditioned building). Our garden is going crazy – plants and weeds alike. Three plants in particular are quite exciting at the moment: our fig, blueberry and raspberry. All three plants are in their second Spring season and are very happy, we have a number of figs forming, quite a few blueberries and many raspberries.

One thing I didn’t understand when I bought the raspberry is the shop assistance’s advice: Watch out, the raspberry can take over… What? Isn’t that a good thing? Surely people aren’t unhappy about loads of raspberries.

What he should have said was: Watch out, the raspberry sends suckers through the lawn and new plants shoot up more than one metre away from the original plant meaning you have no control of where are how far it will travel… Whoops!! Luckily running the mower over them have stopped new plants forming in the middle of our yard – I hope!

Although my baking (and blogging) has been hindered by the lovely weather and constant maintenance of our yard, this recipe chosen for the daring bakers this month was great, as many components can be made the day or night before, and cooked while everyone is eating dinner.

My family are huge fans of Portuguese custard tarts, so I had no trouble picking pastry cream to fill my tart shell.

I must admit I used the food processor for the dough to make the tart shell. It seemed a bit dry and wasn’t coming together, so I added a touch more egg white (ok, accidentally – a bit more than a touch – making it a little too soft).

I didn’t blind bake my tart, I just added the pastry cream and cooked it for 40 minutes or more, until the pastry cream was set and the pastry golden. The pastry was lovely in texture and taste – very lovely. I thought I needed more pastry cream for the tart, although perhaps because the pastry was a little soft, it shrunk or fell a little at the sides, making it more level with the pastry cream when cooked.

I was very happy with the length of time required for this challenge and was more than happy to try out another pastry and pastry cream recipe – and my family was more than happy to have it for dessert 🙂

Thanks to our host for this month, for trialling so many recipes for people to choose from and be inspired from.

Crostata con la Crema (crostata with pastry cream filling)

Recipe Source: There are many recipes for pasta frolla and different ideas about how to make it. I will give you two versions that I have been using for some time. They have been inspired by those in the book La scienza in cucina e l’arte di mangiare bene by Pellegrino Artusi (1820-1911). The book was first published in 1891, and is available in English translation as Science in the Kitchen and the Art of Eating Well (further details are given in the Additional Information section).

Pasta frolla

1/2 c. minus 1 tablespoon [105 ml, 100 g, 3 ½ oz] superfine sugar (see Note 1) or a scant 3/4 cup [180ml, 90g, 3 oz] of powdered sugar
1 and 3/4 cup [420 ml, 235 g, 8 1/4 oz.] unbleached all-purpose flour
a pinch of salt
1 stick [8 tablespoons / 4 oz. / 115 g] cold unsalted butter, cut into small pieces
grated zest of half a lemon (you could also use vanilla sugar as an option, see Note 2) (I didn’t use this)
1 large egg and 1 large egg yolk, lightly beaten in a small bowl

Note 1: Superfine sugar is often also referred to as ultrafine, baker’s sugar or caster sugar. It’s available in most supermarkets. If you cannot find “superfine” sugar, you can make your own by putting some regular granulated sugar in a food processor or blender and letting it run until the sugar is finely ground.

Note 2: There are different ways of making vanilla sugar. I keep vanilla beans in a jar half-filled with sugar until I need to use them, for example, to make vanilla ice cream. After I remove the split bean from the custard that will go into the ice cream maker, I rinse it, dry it and put it back in the jar with sugar.

Making pasta frolla by hand:

Whisk together sugar, flour and salt in a bowl.

Rub or cut the butter into the flour until the mixture has the consistency of coarse crumbs. You can do this in the bowl or on your work surface, using your fingertips or an implement of choice.

Make a well in the center of the mounded flour and butter mixture and pour the beaten eggs into it (reserve about a teaspoon of the egg mixture for glazing purposes later on – place in the refrigerator, covered, until ready to use).

Add the lemon zest to your flour/butter/egg mixture.

Use a fork to incorporate the liquid into the solid ingredients, and then use your fingertips.

Knead lightly just until the dough comes together into a ball.

Shape the dough into a flat disk and wrap in plastic wrap. Place the dough in the refrigerator and chill for at least two hours. You can refrigerate the dough overnight.

Making pasta frolla with a food processor:

Put sugar, flour, salt, and lemon zest in the food processor and pulse a few times to mix.

Add butter and pulse a few times, until the mixture has the consistency of coarse meal.

Empty food processor’s bowl onto your work surface

See step 3 above and continue as explained in the following steps (minus the lemon zest, which you have already added).

Pastry Cream

2 eggs
1/2 cup caster sugar
500ml milk
1 teaspoon vanilla essence
3 tablespoons plain flour

Heat milk in a saucepan until almost bubbling. Whisk eggs with caster sugar, then whisk in plain flour. Slowly pour half the warm milk over the egg sugar mixture, mixing well to stop the eggs cooking. Pass the egg mixture through a sieve back into the saucepan. Place the saucepan back over medium heat and continue stirring the mixture until it bubbles. Pour the pastry cream into a bowl and place the bowl in a sink or bowl with cold or icy water, add the vanilla essence and stir the pastry cream until cooled. Refrigerate until cool.


Assembling and baking the crostata con la crema:

Heat the oven to 350ºF [180ºC/gas mark 4].

Take the pasta frolla out of the fridge, unwrap it and cut away ¼ of the dough. Reserve this dough to make the lattice top of the crostata. Refrigerate this dough while you work on the tart base.

To help roll the crostata dough, keep the dough on top of the plastic wrap that you had it wrapped in. This can help rolling the dough and can also help when transferring the dough to your pan. You can also use parchment paper for this. However, you can also roll the dough directly on a work surface if you prefer.

Lightly dust the top of the dough and your work surface (if you’re rolling directly on a work surface) with flour. Keep some flour handy to dust the dough as you go along.

If the dough is very firm, start by pressing the dough with the rolling pin from the middle to each end, moving the rolling pin by a pin’s width each time; turn the dough 180 degrees and repeat; when it softens, start rolling.

Roll the dough into a circle about 1/8th inch (3 mm) thick.

If you used the plastic wrap or parchment paper as rolling surface, flip dough over the pan, centering it, and delicately press it all around so the corners are well covered. Peel away the plastic wrap.

Trim the excess dough hanging over the edges of the pan. Press the remaining dough around the border into the sides of the pan making sure the border is an even thickness all the way around.

Prick the bottom of the dough with a fork in several places.

Take out of the fridge the reserved pasta frolla you had cut away earlier. Roll it with your pin and cut into strips or use cookie cutters to make small shapes (this is not traditional, but it looks cute); or roll with your hands into ropes.

Instead of jam or fruit preserves, cover the bottom of the crostata crust evenly with the pastry cream.

Use the prepared strips or rolls of dough to make a lattice over the surface, or decorate with the cut shapes. (Note: You can use dough scraps to make cookies: see the Additional Information section for some pointers)

Brush the border and strips of dough with the reserved beaten eggs. You can add a drop or two of water to the beaten eggs if you don’t have enough liquid.

Put the tart in the oven and bake for 30 minutes.

After 35 minutes, check the tart, and continue baking until the tart is of a nice golden hue. (Note: Every oven is different. In my oven it took 45 minutes to bake the tart until golden.)

When done, remove the tart from the oven and let cool. If you have used a tart pan with a removable bottom, then release the tart base from the fluted tart ring. Make sure the tart is completely cool before slicing and serving.

Cinnamon Doughnuts – Daring Bakers Challenge October 2010

Wednesday, October 27th, 2010


The October 2010 Daring Bakers challenge was hosted by Lori of Butter Me Up. Lori chose to challenge DBers to make doughnuts. She used several sources for her recipes including Alton Brown, Nancy Silverton, Kate Neumann and Epicurious.

Will this year get any busier?? I hope not – but I’m pretty sure it will.

October has been an amazing month. Birthdays always have a huge presence in October – with my family and friends accounting for at least 7 birthdays.

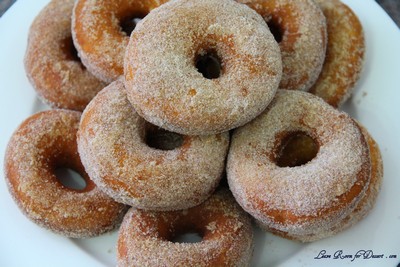
I did manage to fit in the Daring Bakers Challenge this month, though I couldn’t cater to all the requests (custard filled doughnuts didn’t make it). I ended up making the common cinnamon sugared doughnuts – which I often crave whilst out at the shops (and no – I don’t buy them even 10% of the time I want them).

I made these doughnuts the day after my first progressive dinner with friends. It was a lovely long evening with good friends, good food, lots of laughs and full tummies. I bet you can guess what course I cooked for the dinner?
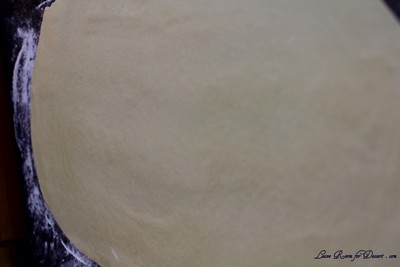
Back to the doughnuts – these were lovely and you couldn’t get them any fresher. They were soft and delicious and even tasted ok the next day.

We tried to encase some chocolate inside some of the leftover dough and fry that, but either the cooking time wasn’t long enough or the dough was thicker (due to more handling) and didn’t cook as well. So, the chocolate filled doughnuts were still a bit raw inside…

I also tried the dough in a mini doughnut maker I was given – although it didn’t work, and I expect the recipe for the doughnut maker works a lot better.

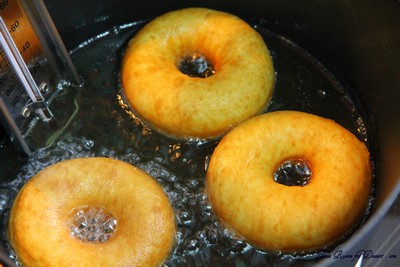
For the recipe I used (and have given below), I felt that there was too much oil used in the saucepan. These doughnuts floated, and therefore you only need the oil a little deeper than half the height of the doughnut.

Even though I loved the doughnuts, I don’t tend to fry many things, mainly due to the excess oil that is often wasted. I did enjoy this challenge though. Thanks to our host for providing so many recipes and ideas for this month’s challenge.

Yeast Doughnuts

Preparation time:
Hands on prep time – 25 minutes
Rising time – 1.5 hours total
Cooking time – 12 minutes

Yield: 20 to 25 doughnuts & 20 to 25 doughnut holes, depending on size

Ingredients
Milk 1.5 cup / 360 ml
Vegetable Shortening 1/3 cup / 80 ml / 70 gm / 2.5 oz (can substitute butter, margarine or lard) – I used butter
Active Dry Yeast 4.5 teaspoon (2 pkgs.) / 22.5 ml / 14 gm / ½ oz
Warm Water 1/3 cup / 80 ml (95°F to 105°F / 35°C to 41°C)
Eggs, Large, beaten 2
White Granulated Sugar ¼ cup / 60 ml / 55 gm / 2 oz
Table Salt 1.5 teaspoon / 7.5 ml / 9 gm / 1/3 oz
Nutmeg, grated 1 tsp. / 5 ml / 6 gm / ¼ oz
All Purpose Flour 4 2/3 cup / 1,120 ml / 650 gm / 23 oz + extra for dusting surface
Canola Oil DEPENDS on size of vessel you are frying in – you want THREE (3) inches of oil (can substitute any flavorless oil used for frying)

Place the milk in a medium saucepan and heat over medium heat just until warm enough to melt the shortening. (Make sure the shortening is melted so that it incorporates well into the batter.)

Place the shortening in a bowl and pour warmed milk over. Set aside.

In a small bowl, sprinkle the yeast over the warm water and let dissolve for 5 minutes. It should get foamy. After 5 minutes, pour the yeast mixture into the large bowl of a stand mixer and add the milk and shortening mixture, first making sure the milk and shortening mixture has cooled to lukewarm.

Add the eggs, sugar, salt, nutmeg, and half of the flour. Using the paddle attachment of your mixer (if you have one), combine the ingredients on low speed until flour is incorporated and then turn the speed up to medium and beat until well combined.

Add the remaining flour, combining on low speed at first, and then increase the speed to medium and beat well.

Change to the dough hook attachment of the mixer and beat on medium speed until the dough pulls away from the bowl and becomes smooth, approximately 3 to 4 minutes (for me this only took about two minutes). If you do not have a dough hook/stand mixer – knead until the dough is smooth and not sticky.

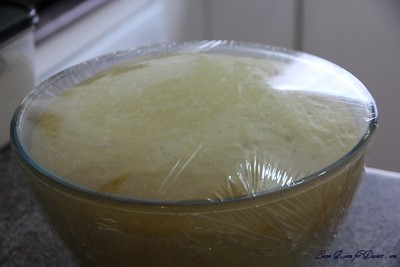
Transfer to a well-oiled bowl, cover, and let rise for 1 hour or until doubled in size.

On a well-floured surface, roll out dough to 3/8-inch (9 mm)thick. (Make sure the surface really is well-floured otherwise your doughnuts will stick to the counter).

Cut out dough using a 2 1/2-inch (65 mm) doughnut cutter or pastry ring or drinking glass and using a 7/8-inch (22 mm) ring for the center whole. Set on floured baking sheet, cover lightly with a tea towel, and let rise for 30 minutes.

Preheat the oil in a deep fryer or Dutch oven to 365 °F/185°C.

Gently place the doughnuts into the oil, 3 to 4 at a time. Cook for 1 minute per side or until golden brown (my doughnuts only took about 30 seconds on each side at this temperature).

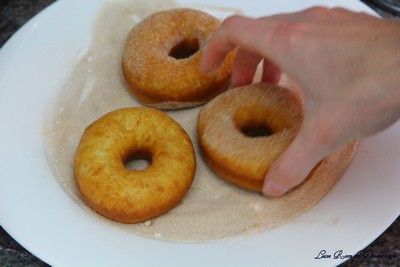
Transfer to a cooling rack placed in baking pan. Allow to cool for 15 to 20 minutes prior to glazing, if desired. Allow to cool slightly before coating in cinnamon sugar.

Cinnamon Sugar:
Mix together ¾ cup caster sugar with ½ teaspoon cinnamon for coating the doughnuts.

Decorated Sugar Cookies – Daring Bakers Challenge September 2010

Monday, September 27th, 2010

The September 2010 Daring Bakers’ challenge was hosted by Mandy of “What the Fruitcake?!” Mandy challenged everyone to make Decorated Sugar Cookies based on recipes from Peggy Porschen and The Joy of Baking.

This challenge came at the perfect time, right before a High Tea that was being held at work. And just before my two week holiday – during which I would certainly not get these made. So I made these cookies right at the beginning of the month (and left it to the last minute to post it).

I tried to do a few different designs on my cookies, although not many turned out as pretty as I would have liked.

One of the mandatory elements for this month’s challenge was that it had to be the theme of September, whatever it means to each of us. For me, September is the start of Spring – my favourite season of the year. We have just had gorgeous flowers appearing in our garden. I recently bought three orchids, and after buying these, we found one in our garden which we had never noticed before. Then I was given oodles of them from both my Grandma and my Mum’s neighbour.

My sweet peas have flowered themselves silly. Last year I found my favourite one and once the seeds dried, I threw them around the garden, without Nick knowing and they have formed a jungle – and I love it.

I also discovered that previous owners have planted daffodils and although they didn’t flower last year, I’m so glad they did this year.

With such fantastic inspiration for this challenge, I tried to make flower inspired cookies. Most of which didn’t turn out as well as planned. Although the love heart ones will just have to symbolise my love of Spring.

The biscuits themselves were quite plain, as expected. For the time, effort and taste I probably won’t make these again, although I always enjoy trying something new.

Thanks again to our host for this month and the daring kitchen team!

Basic Sugar Cookies

Makes Approximately 36x 10cm / 4″ Cookies

200g / 7oz / ½ cup + 6 Tbsp Unsalted Butter, at room temperature
400g / 14oz / 3 cups + 3 Tbsp All Purpose / Plain Flour
200g / 7oz / 1 cup Caster Sugar / Superfine Sugar
1 Large Egg, lightly beaten
5ml / 1 tsp Vanilla Extract / Or seeds from 1 vanilla bean

Cream together the butter, sugar and any flavourings you’re using. Beat until just becoming creamy in texture.
• Tip: Don’t over mix otherwise you’ll incorporate too much air and the cookies will spread during baking, losing their shape.

Beat in the egg until well combined, make sure to scrape down the sides of the bowl. Add the sifted flour and mix on low until a non sticky dough forms.
• Tip: I don’t have a stand mixer so I find it easier to switch to dough hooks at this stage to avoid flour flying everywhere.

Knead into a ball and divide into 2 or 3 pieces.

Roll out each portion between parchment paper to a thickness of about 5mm/1/5 inch (0.2 inch)

Refrigerate for a minimum of 30mins.
• Tip: Recipes commonly just wrap the whole ball of dough in clingwrap and then refrigerate it for an hour or overnight, but by rolling the dough between parchment, this shortens the chilling time and then it’s also been rolled out while still soft making it easier and quicker.

Once chilled, peel off parchment and place dough on a lightly floured surface.

Cut out shapes with cookie cutters or a sharp knife.

Arrange shapes on parchment lined baking sheets and refrigerate for another 30mins to an hour.
• Tip: It’s very important you chill them again otherwise they’ll spread while baking.

Re-roll scraps and follow the above process until all scraps are used up.

Preheat oven to 180°C (160°C Fan Assisted) / 350°F / Gas Mark 4.

Bake until golden around the edges, about 8-15mins depending on the size of the cookies.
• Tip: Bake same sized cookies together otherwise mixing smaller with larger cookies could result in
some cookies being baked before others are done.
• Tip: Rotate baking sheets half way through baking if your oven bakes unevenly.

Leave to cool on cooling racks.

Once completely cooled, decorate as desired.
• Tip: If wrapped in tinfoil/cling wrap or kept in airtight containers in a cool place, un-decorated cookies can last up to a month.

Royal Icing

315g – 375g / 11oz – 13oz / 2½ – 3 cups Icing / Confectioner’s / Powdered Sugar, unsifted
2 Large Egg Whites
10ml / 2 tsp Lemon Juice
5ml / 1 tsp Almond Extract, optional

Beat egg whites with lemon juice until combined.
• Tip: It’s important that the bowls/spoons/spatulas and beaters you use are thoroughly cleaned and grease free.

Sift the icing sugar to remove lumps and add it to the egg whites.
• Tip: I’ve listed 2 amounts of icing sugar, the lesser amount is good for a flooding consistency, and the larger amount is for outlining, but you can add even more for a much thicker consistency good for writing. If you add too much icing sugar or would like to make a thinner consistency, add very small amounts of water, a few drops at a time, until you reach the consistency you need.

Beat on low until combined and smooth.

Use immediately or keep in an airtight container.
• Tip: Royal Icing starts to harden as soon as it’s in contact with air so make sure to cover containers with plastic wrap while not in use.

Decorating Your Cookies: Flooding
“Flooding” a cookie is a technique used when covering a cookie with Royal Icing.
1. You outline the area you want to flood which helps create a dam
2. Then fill or flood inside the area you’ve outlined

Decorating Your Cookies: Royal Icing
The most important thing when it comes to decorating with Royal Icing is the consistency.

There are two ways of flooding your cookies. Some like to do the outline with a thicker icing and then flood with a thinner icing. Some like to use the same icing to do both which saves time and you don’t have to have two different piping bags for each colour you’re using.

The Same Consistency Method
Consistency:

Mix your royal icing according to the recipe/instructions

Drag a knife through the surface of the Royal Icing and count to 10

If the surface becomes smooth between 5 & 10 seconds, the icing is at the correct consistency
• Tip: If your icing is too thick, thin it by adding a few drops of water. Mix, do the 10 second test, then if it’s still too thick, add a few more drops of water, repeat, etc.
• Tip: To thicken your icing, add small amounts of icing sugar until thick enough for the 10 second test


Two Different Consistencies Method

Consistency:

Mix your royal icing according to the recipe/instructions.

Separate into 2 different bowls, one lot of icing for outlining, the other for flooding.

For the outlining icing, drag a knife through the surface of the Royal Icing.

If the surface becomes smooth at around 10 seconds, the icing is at the correct consistency.
• Tip: If your icing is too thick, thin it by adding a few drops of water. Mix, count to 10 seconds, then if it’s still too thick, add a few more drops of water, repeat, etc.
• Tip: To thicken your icing, add small amounts of icing sugar until thick enough for the 10 second test.

For the flooding/filling icing, drag a knife through the surface of the Royal Icing.

If the surface becomes smooth at around 3-4 seconds, the icing is at the correct consistency.
• Tip: If your icing is too thick, thin it by adding a few drops of water. Mix, count to 3-4 seconds, then if it’s still too thick, add a few more drops of water, repeat, etc.
• Tip: To thicken your icing, add small amounts of icing sugar until thick enough for the 3-4 second test.

Colouring
Separate Royal Icing into separate bowls for each colour you plan on using.
• Tip: Make sure to cover the bowls with cling film or a damp cloth to prevent the top from setting and then making lumps

Using a toothpick, add gel or paste colouring to each bowl and mix thoroughly until desired colour is reached
• Tip: You can use liquid food colouring but you might not be able to get the desired strength of colour, liquid colouring will also thin out the icing so you’ll need to add more icing sugar to thicken it again.

Prepping and Filling Your Bag
Attach your icing tips to the piping bags using couplers
• Tip: You don’t need to use a coupler but it makes it easier if you want to change tip sizes
• Tip: A size 1 tip is best for doing intricate details. A size 2 tip is good for some details and outlining. Fill or flood with sizes 2 – 5.
• Tip: You don’t need a piping bag, you can use a parchment cone or ziplock bag with a tiny bit snipped off the corner. I would however recommend getting a piping set if you don’t have one as it will be much easier and more precise.

Stand the piping bags in glasses with the tops of the bags folded over the top of the glass.

Fill your icing bags with each coloured icing.

Tie the ends of the piping bags with elastic bands.

Decorating: Outlining

Fit the piping bag with a size 2 or 3 tip.
• Tip: Or snip a very small bit of the corner off of a parchment cone or Ziploc bag

Hold the piping bag at a 45 degree angle above the cookie where you want to start the outline.

Gently squeeze the piping bag and start moving in the direction you want to outline the cookie.

Start lifting the piping bag away from the cookie so that the flow of icing falls onto the cookie, making it an even and neater outline.

As you start to reach the beginning of the outline, bring the piping tip closer to the surface of the cookie to meet the start of the icing outline.
• Tip: If you’re doing an intricate cookie, like a snow flake, you won’t be able to lift the tip as far away from the cookie.

If you’re doing a different colour border, eg a black border, let the outline dry before flooding. If using the same colour for the outline as you’re flooding with, begin flooding after doing the outline.

Decorating: Flooding
Fit the piping bag with a size 2-5 tip, the bigger the area being filled, the bigger the tip.
• Tip: Or cut slightly more off the corner of a Ziploc bag to create a slightly larger opening.

Quickly zigzag back and forth over the area you want to fill.
• Tip: You need to be quick when flooding the cookie so don’t worry too much if it’s not filled in neatly.

Using a toothpick or clean paintbrush, push the icing around into the gaps that are still remaining.

Either pick up the cookie and tip it from side to side to even out the filling, or lightly bang the cookie down on your kitchen counter.

Decorating: Melding Colours

If you would like to add lines or dots to the base colour that you flooded the cookie with so that they meld and dry as a smooth surface, you need to add the lines/dots/patterns as quickly as possible after flooding and smoothing the surface of the cookie.
• Tip: Make sure to have all the colours you’re planning on using ready and close by so that you can switch between colours quickly

Simply pipe other colours onto the flooded surface in patterns or lines which you can either leave as that or then drag a toothpick through to make marbling patterns.

Decorating: On top of flooding

If you’d like to do other patterns/outlines or writing on top of the flooded surface so that they are raised above the flooded background, simply allow the icing to dry, preferably over night.

Fit the piping bag with tip sizes 1-3.

Pipe patterns or write on top of the dry icing
• Tip: For writing, the consistency of your icing should be thicker rather than thinner, drag a knife through your icing and when the surface smoothes around 12-15 seconds, the consistency is correct.

Packaging and Storing
Once fully decorated, allow cookies to dry for 24 hours in a cool and dry area.

Stack cookies in an airtight container, from largest cookies at the bottom, to smallest and more intricate at the top, with parchment or wax free paper in between the layers.

Store in a cool and dry area with the container’s lid firmly sealed.

Will last for about a month if stored this way.

General Baking Tips
When measuring by volume (cup) always shift/aerate your flour/icing sugar in the container/bag before measuring because it settles as it sits and so you end up with more flour/icing sugar in your cup. I do this by moving the ingredient around with a spoon, whisk or fork.

When measuring flour or icing sugar by volume (cup) never scoop the flour/icing sugar up with the cup otherwise you compress the contents and this can make a big difference in the amount you’re using. Rather, spoon the ingredient into the cup until level with the top.

When measuring baking powder or baking soda, always level off the top of the measuring spoon with something flat (like the back of a knife) as these ingredients need to be accurately measured.

When mixing your ingredients, always follow the recipe instructions, especially when it comes to beating in eggs and flour, so if it specifies to mix until just combined or to beat for 4 minutes, follow the instructions to get best results.

Unless otherwise specified, always have your ingredients at room temperature.

It’s always best to invest in an oven thermometer so that you know exactly the temperature you’re baking at then you can also find out if you have cold or hot spots in your oven.

If you need to rotate your trays midst baking, always allow at least half the baking time to lapse before opening your oven to move baking trays around, this allows time for your baked goods to form a good structure so that they won’t flop.

General Royal Icing Tips
Keep a damp cloth handy while decorating your cookies so that if you’re switching between different icing bags, you can keep the tips covered with the damp cloth so that the icing doesn’t dry and clog them.

If your icing tips do clog, use a toothpick or pin to unclog them.

Always pipe a little bit of royal icing onto a board/paper towel before you begin to make sure there are no air bubbles.

Remember to always cover bowls containing royal icing wither cling wrap, a damp cloth or sealable lid so that the surface doesn’t dry.

Don’t store anything decorated with royal icing in the fridge otherwise the royal icing will become tacky.