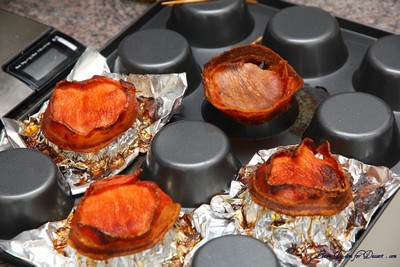
Povitica – Daring Bakers Challenge October 2011

October 27th, 2011

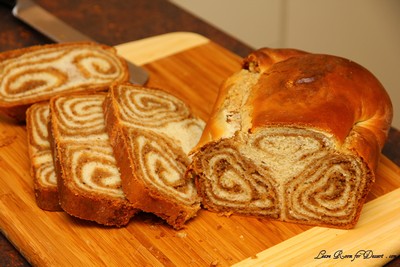
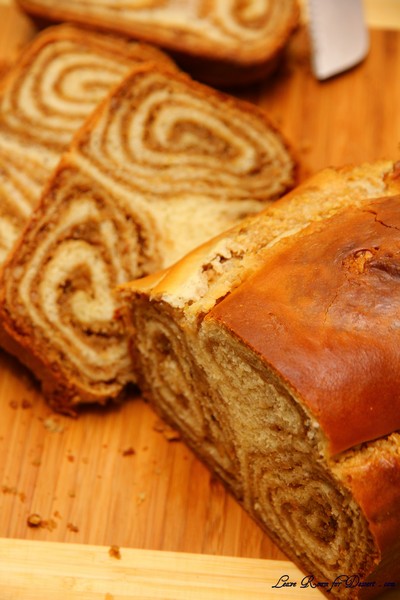
The Daring Baker’s October 2011 challenge was Povitica, hosted by Jenni of The Gingered Whisk. Povitica is a traditional Eastern European Dessert Bread that is as lovely to look at as it is to eat!

I have a long list of desserts I would love to make, and I am slowly getting through them, although so many times I log in to see what we are making for the Daring Bakers and find I have never heard of the dish we will be making.

I had never heard of a Povitica before this challenge, and neither had anyone I shared the two loaves I made with. Although, when I found out it was a nut bread I thought it sounded similar to the yeasted meringue coffee cake we made in March, and in many ways it was.

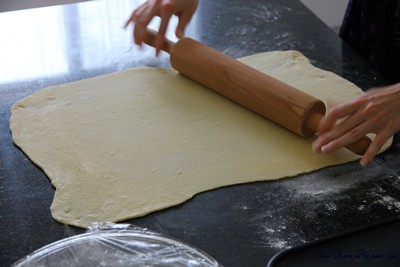
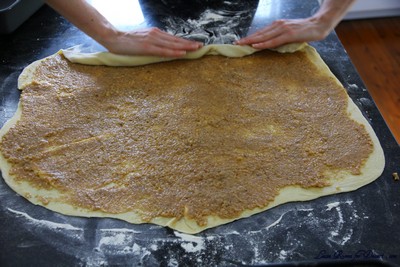
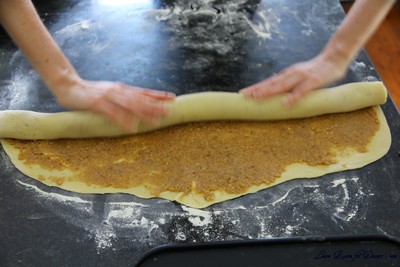
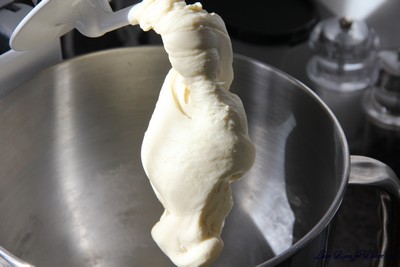
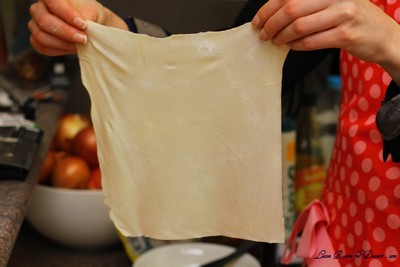
Both had a lovely walnut filling swirled through the bread. The recipe for the povitica was lovely – the dough rolled beautifully and thin, and rolling it to make the swirls was quite satisfying. I found the filling a little difficult to spread, and found adding a bit more warm milk helped, although the easiest way was to use a spatula and only put it on small sections at a time, to reduce the risk of tearing the dough.

It is a great cake alternative for someone who does not enjoy sweet cakes. For the top glaze, I used a little milk instead of the coffee mixture, and the top looked beautiful.

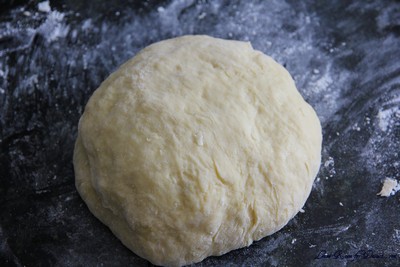
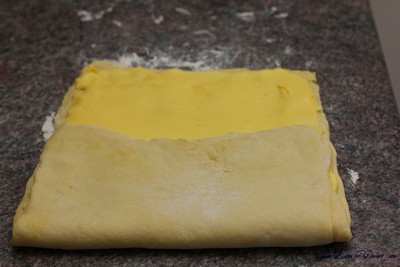
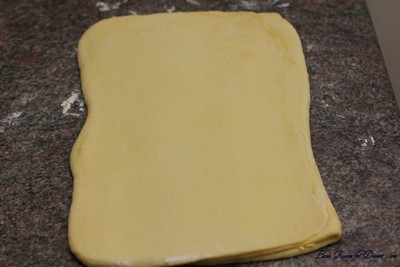
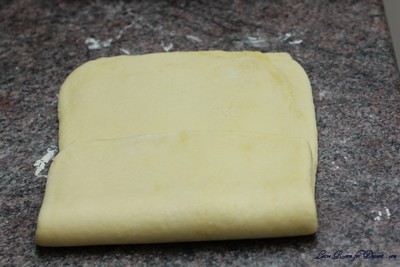
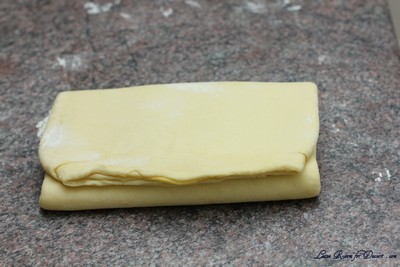
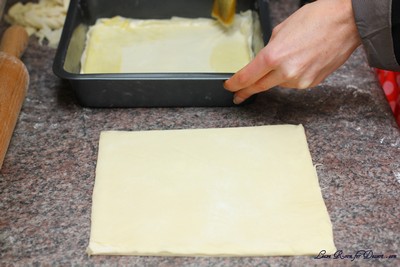
In the following photos hopefully you will see my lovely new* big granite benchtop – it was installed just in time for this challenge. I want to thank my Dad so much for all the hard work he has done making my kitchen more useable. I also want to thank Arthur for the benchtop and cupboards.

Povitica

(makes 4 loaves)
Recipe source: Jenni of The Gingered Whisk

To activate the Yeast:
2 Teaspoons (10 ml/9 gm) Sugar
1 Teaspoon (5 ml/3 gm) All-Purpose (Plain) Flour
½ Cup (120ml) Warm Water
2 Tablespoons (30ml/14 gm/½ oz/2 sachets) Dry Yeast

Dough:
2 Cups (480ml) Whole Milk
¾ Cup (180 ml/170gm/6 oz) Sugar
3 Teaspoons (15 ml/18 gm/2/3 oz) Table Salt
4 Large Eggs
½ Cup (120ml/115 gm/one stick/4 oz) Unsalted Butter, melted
8 cups (1.92 l/1.12 kg/39½ oz/2½ lb) All-Purpose Flour, measure first then sift, divided

Walnut Filling:
7 Cups (1.68 l/1.12 kg/2.5 lbs) Ground English Walnuts
1 Cup (240ml) Whole Milk
1 Cup (240ml/225 gm/2 sticks/8 oz) Unsalted Butter
2 Whole Eggs, Beaten
1 Teaspoon (5ml) Pure Vanilla Extract
2 Cups (480ml/450 gm/16 oz) Sugar
1 Teaspoon (5 ml/4 gm) Unsweetened Cocoa Powder
1 Teaspoon (5 ml/3 gm) Cinnamon

Topping:
½ Cup (120 ml) Cold STRONG Coffee
2 Tablespoons (30 ml/28 gm/1 oz) Granulated Sugar
Melted Butter

To Activate Yeast:
1. In a small bowl, stir 2 teaspoons sugar, 1 teaspoon flour, and the yeast into ½ cup warm water and cover with plastic wrap.
2. Allow to stand for 5 minutes

To Make the Dough:
3. In a medium saucepan, heat the milk up to just below boiling (about 180°F/82°C), stirring constantly so that a film does not form on the top of the milk. You want it hot enough to scald you, but not boiling. Allow to cool slightly, until it is about 110°F/43°C.
4. In a large bowl, mix the scalded milk, ¾ cup (180 gm/170 gm/6 oz) sugar, and the salt until combined.
5. Add the beaten eggs, yeast mixture, melted butter, and 2 cups (480 ml/280 gm/10 oz) of flour.

6. Blend thoroughly and slowly add remaining flour, mixing well until the dough starts to clean the bowl.

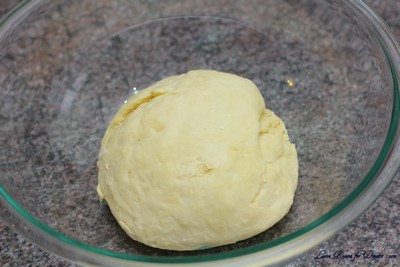
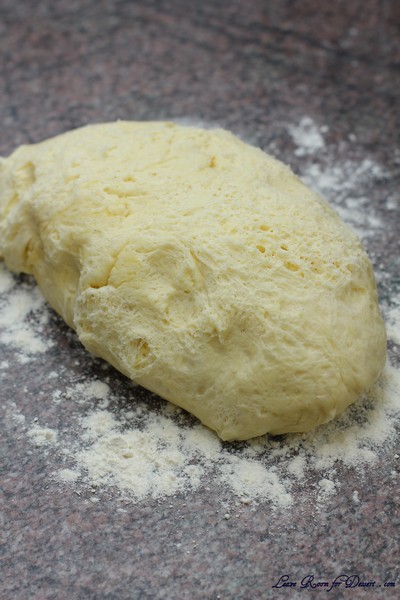
7. Turn dough out onto floured surface and knead, gradually adding flour a little at a time, until smooth and does not stick. Note: I did not use all 8 cups of flour

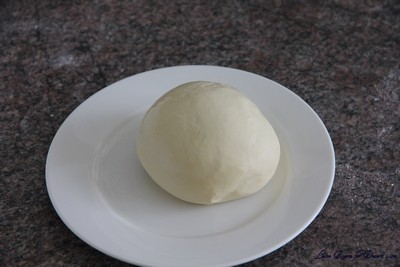
8. Divide the dough into 4 equal pieces (they will each weight about 1.25 pounds/565 grams)
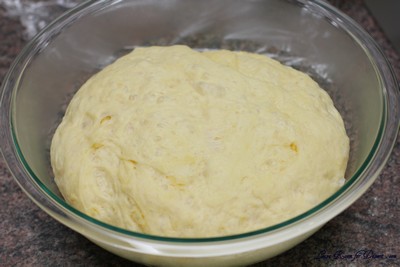
9. Place dough in 4 lightly oiled bowls, cover loosely with a layer of plastic wrap and then a kitchen towel and let rise an hour and a half in a warm place, until doubled in size.

To Make the Filling
10. In a large bowl mix together the ground walnuts, sugar, cinnamon and cocoa.
11. Heat the milk and butter to boiling.
12. Pour the liquid over the nut/sugar mixture.
13. Add the eggs and vanilla and mix thoroughly.
14. Allow to stand at room temperature until ready to be spread on the dough.
15. If the mixture thickens, add a small amount of warm milk.

To Roll and Assemble the Dough:
16. Spread a clean sheet or cloth over your entire table so that it is covered.
17. Sprinkle with a couple of tablespoons to a handful of flour (use flour sparingly)
18. Place the dough on the sheet and roll the dough out with a rolling pin, starting in the middle and working your way out, until it measures roughly 10-12 inches (25½ cm by 30½ cm) in diameter.

19. Spoon 1 to 1.5 teaspoons (5ml to 7 ½ ml/4 gm to 7 gm) of melted butter on top. (I didn’t do this)
20. Using the tops of your hands, stretch dough out from the center until the dough is thin and uniformly opaque. You can also use your rolling pin, if you prefer.
21. As you work, continually pick up the dough from the table, not only to help in stretching it out, but also to make sure that it isn’t sticking.
22. When you think it the dough is thin enough, try to get it a little thinner. It should be so thin that you can see the color and perhaps the pattern of the sheet underneath.

23. Spoon filling evenly over dough until covered.

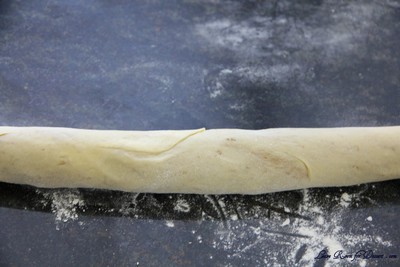
24. Lift the edge of the cloth and gently roll the dough like a jelly roll.


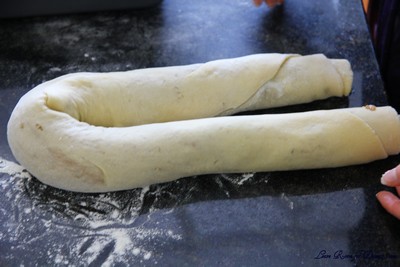
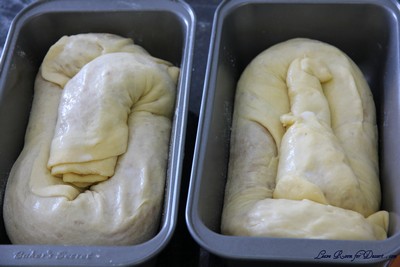
25. Once the dough is rolled up into a rope, gently lift it up and place it into a greased loaf pan in the shape of a “U”, with the ends meeting in the middle. You want to coil the dough around itself, as this will give the dough its characteristic look when sliced.

26. Repeat with remaining three loaves, coiling each rope of dough in its own loaf pan.
27. Brush the top of each loaf with a mixture of ½ cup (120 ml) of cold STRONG coffee and 2 tablespoons (30ml/28 gm/1 oz) of sugar. If you prefer, you can also use egg whites in place of this.

28. Cover pans lightly will plastic wrap and allow to rest for approximately 15 minutes.
29. Preheat oven to moderate 350°F/180°C/gas mark 4.
30. Remove plastic wrap from dough and place into the preheated oven and bake for approximately 15 minutes.
31. Turn down the oven temperature to slow 300°F/150°C/gas mark 2 and bake for an additional 45 minutes, or until done.
32. Remove bread from oven and brush with melted butter.
33. Check the bread at 30 minutes to ensure that the bread is not getting too brown. You may cover the loaves with a sheet of aluminum foil if you need to.
34. Remove from the oven and allow to cool on a wire rack for 20-30 minutes, still in the bread pan. Remember, the bread weighs about 2.5 and it needs to be able to hold its own weight, which is difficult when still warm and fresh out of the oven. Allowing it to cool in the pan helps the loaf to hold its shape.
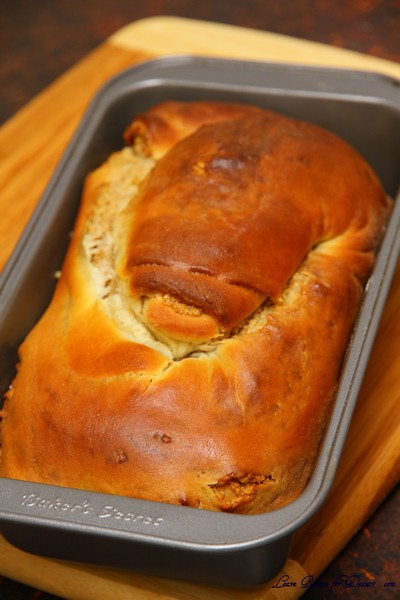

35. It is recommended that the best way to cut Povitica loaves into slices is by turning the loaf upside down and slicing with a serrated knife.

Smaller batch measurements courtesy of Audax
Half Batch Dough Ingredients (Makes two loaves each 1.25 lbs/565 grams)
To activate the Yeast:
1 Teaspoon (5 ml/4 ½ gm) Sugar
½ Teaspoon (2½ ml/1½ gm) All-Purpose (Plain) Flour
¼ Cup (60 ml) Warm Water
1 Tablespoon (15 ml/7 gm/¼ oz/1 sachet) Dry Yeast

Dough:
1 Cup (240 ml) Whole Milk
6 Tablespoons (90 ml/85 gm/3 oz) Sugar
1½ Teaspoons (7½ ml/9 gm/1/3 oz) Table Salt
2 Large Eggs
¼ Cup (60 ml/60 gm/½ stick/2 oz) Unsalted Butter, melted
4 cups (960 ml/560 gm/19¾ oz/1¼ lb) All-Purpose Flour, measure first then sift, divided

Topping:
¼ Cup (60 ml) Cold STRONG Coffee
1 Tablespoon (15 ml/14 gm/½ oz) Granulated Sugar
Melted Butter

Half Batch Filling Ingredients (enough filling for the two loaves(
3½ Cups (840 ml/560 gm/1¼ lb/20 oz) Ground English Walnuts
½ Cup (120 ml) Whole Milk
½ Cup (120 ml/115 gm/1 stick/4 oz) Unsalted Butter
1 Whole Egg, Beaten
½ Teaspoon (2½ ml) Pure Vanilla Extract
1 Cup (240 ml/225 gm/8 oz) Sugar
½ Teaspoon (2½ ml/2 gm) Unsweetened Cocoa Powder
½ Teaspoon (2½ ml/1½ gm) Cinnamon

Quarter Batch Dough Ingredients (Makes one loaf 1.25 lbs/565 grams)
To activate the Yeast:
½ Teaspoon (2½ ml/2¼ gm) Sugar
¼ Teaspoon (1¼ ml/¾ gm) All-Purpose (Plain) Flour
2 Tablespoons (30 ml) Warm Water
1½ Teaspoons (7½ ml/3½ gm/0.125 oz/½ sachet) Dry Yeast

Dough:
½ Cup (120 ml) Whole Milk
3 Tablespoons (45 ml/43 gm/1½ oz) Sugar
¾ Teaspoon (3¾ ml/9 gm/0.17 oz) Table Salt
1 Large Egg
1 tablespoon (30 ml/30 gm/¼ stick/1 oz) Unsalted Butter, melted
2 cups (480 ml/280 gm/10 oz/0.62 lb) All-Purpose Flour, measure first then sift, divided

Topping:
2 Tablespoons (30 ml) Cold STRONG Coffee
1½ Teaspoons (7½ ml/7 gm/¼ oz) Granulated Sugar
Melted Butter

Quarter Batch Filling Ingredients (enough filling for one loaf)
1¾ Cups (420 ml/280 gm/10 oz) Ground English Walnuts
¼ Cup (60 ml) Whole Milk
¼ Cup (60 ml/58 gm/½ stick/2 oz) Unsalted Butter
1 Egg Yolk From A Large Egg, Beaten
¼ Teaspoon (1¼ ml) Pure Vanilla Extract
½ Cup (120 ml/115 gm/4 oz) Sugar
¼ Teaspoon (1¼ ml/1 gm) Unsweetened Cocoa Powder
¼ Teaspoon (1¼ ml/¾ gm) Cinnamon

Storage:
There are several options for storing (and eating) your four loaves of Povitica:

• The Povitica will keep fresh for 1 week at room temperature.
• The Povitica will keep fresh for 2 weeks if refrigerated.
• The Povitica can be frozen for up to three months when wrapped a layer of wax paper followed by a layer of aluminum foil. It is recommended to not freeze Povitica with cream cheese fillings as it doesn’t hold up to being thawed really well – it crumbles.
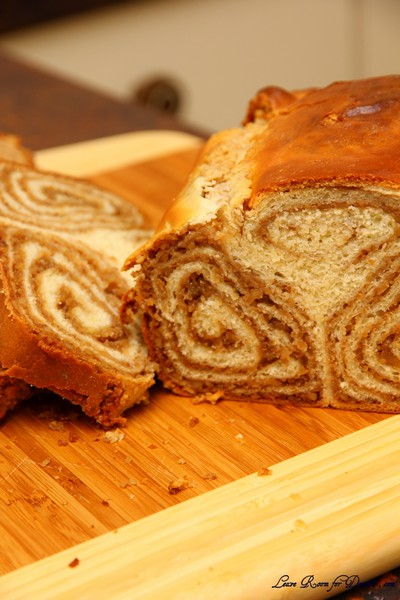
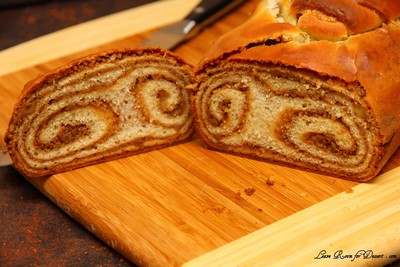
Pineapple Sorbet and Tropical Granita with Fruit Salad

October 6th, 2011


Daylight savings has just begun, it is no longer dark when I get home from work (and only mildly darker when I leave). I am able to stop and smell the roses (and this is not just a saying in my case, as my first roses are opening for the season, and it just so happens to be a double delight rose).

It is starting to feel like summer, with the all the extra light, although I would not wish Spring gone too soon – as it is my favourite season.

More fruits are coming back in season, and we can start eating icy cold sorbets again.

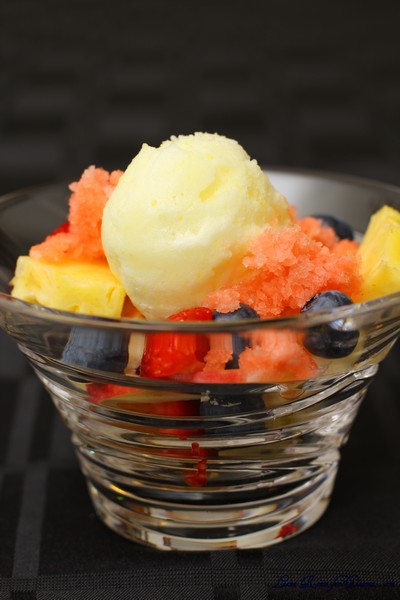
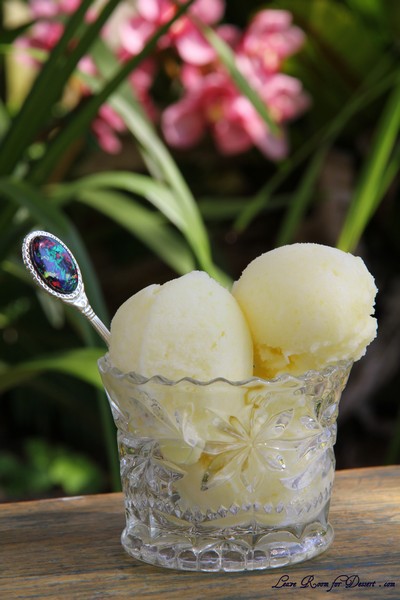
As pineapples are one of my favourite fruits, I started making this pineapple sorbet at least a year ago now. It can certainly be eaten by itself, although it also pairs perfectly with this refreshing tropical granita and the fruit salad.

This is certainly a great way to make a fruit salad stand out a bit more and grab attention.

I have tried to plate the fruit salad artistically. It is simpler to serve it in a bowl, but it looks very pretty this way.

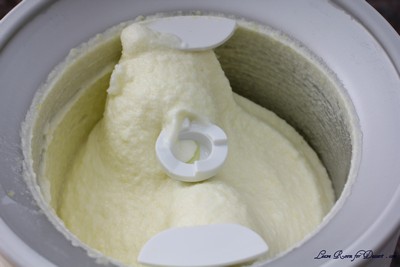
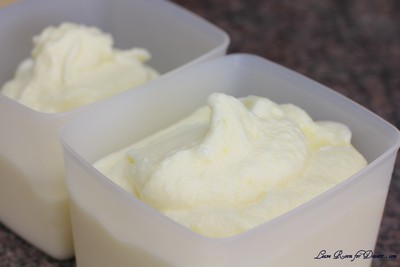
I have only tried the sorbet using an ice cream maker and it becomes almost creamy in texture. It’s amazing how the colour changes too, lightening up and becoming whiter as the mixture thickens. I am sure you could make it using the alternate method of removing the mix from the freezer and mixing it every hour for 3 or more hours and returning to the freezer. Although I am unsure as to whether it will result in the same creamy texture.

I am entering this recipe into a competition held by King of Fruit, a Queensland based business that supplies fresh pineapple to most outlets in Australia. I was lucky enough to be sent 3 lovely pineapples to inspire some recipes. If you have a chance, please check it out and vote for me 🙂 ( I think you only get one vote per email address.)

I have also entered my Herb and Orange Chicken with Pineapple and Capsicum served with Pomegranate, Orange and Baby Spinach Salad recipe into the competition.

Pineapple Sorbet and Tropical Granita with Fruit Salad

Recipe by Anita @ Leave Room for Dessert

Serves: 4 (with some leftover sorbet and granita)

Pineapple Sorbet

Makes: 1-1.4L sorbet

650g pineapple, cut into pieces
200g sugar (white sugar or castor sugar) (1 cup)
200ml water

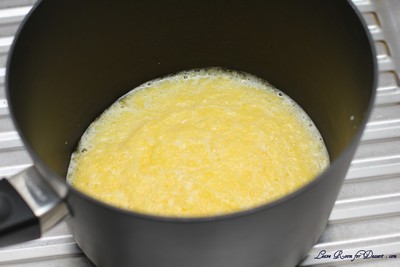
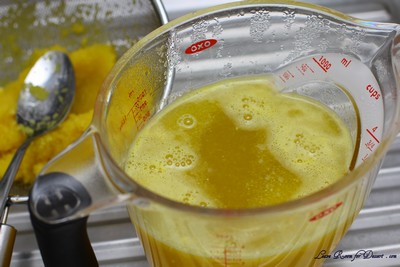
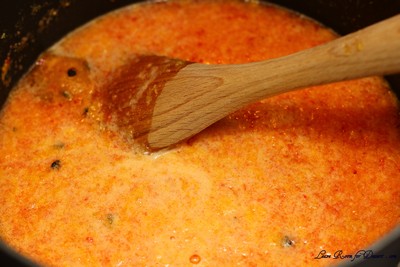
Process the pineapple in a food processor. Place the pureed pineapple, sugar and water into a medium saucepan and cook on medium/high heat until the sugar is dissolved and the mixture comes to the boil (this may be difficult to see as the pureed pineapple can create a layer at the top). Boil for 5minutes, then strain into a bowl or jug. Allow to cool and refrigerate for a few hours or preferably overnight until very chilled.

Churn in ice cream maker according to instructions of machine. Eat straight away or freeze in a sealable container until ready to serve. Lasts at least 2 weeks in the freezer.

Tropical Granita

150g caster sugar (3/4 cup)
500 ml water (2 cups)
150g pineapple, cut into pieces
100g strawberries, cut in half
100g passionfruit pulp, fresh or frozen

Process the pineapple and strawberries in a food processor. Place the sugar, water, passionfruit pulp and pureed pineapple and strawberries into a medium saucepan (you can use the saucepan that was used for the pineapple sorbet if you want to save on washing up). Bring to the boil on medium/high and continue to boil for 5min. Remove from heat and allow to cool.

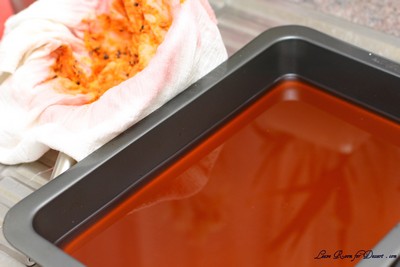
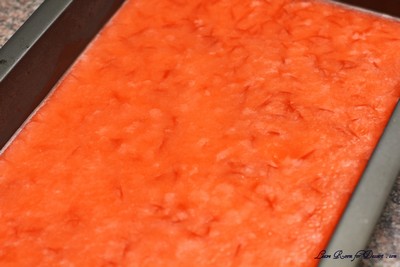
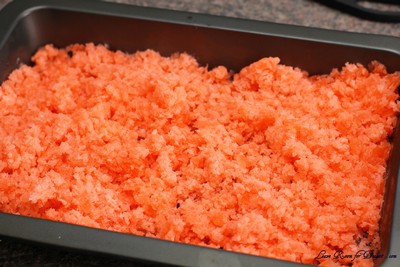
Place a piece of muslin cloth over a sieve, place this over a large pan that will take more than 1L of liquid (20cm x 30cm x 5cm). Pour the granita mix into the muslin cloth and allow the liquid to pass through. Use a spoon to help more liquid through, or use your hands to squeeze excess liquid out. If you don’t have muslin cloth, using a sieve on its own will work fine.

Place the pan in the freezer until solid (overnight). Use a fork to scratch the granita into fluffy ice crystals. Return to the freezer for another 2 hours (if longer, place in a sealed container) before serving.

Fruit Salad

2 slices pineapple, cut into wedges
1-2 apples (I used pink lady apples), cut into slices
2 oranges, peeled and cut into segments
1 punnet (125g) blueberries
1-2 punnets (250g – 500g) strawberries, cut in half or quarters
1-2 bananas, sliced

Mix all fruit together in a bowl or place artistically on a plate.

To serve the Pineapple Sorbet and Tropical Granita with Fruit Salad, prepare the fruit salad and place the pineapple sorbet on top. Place the granita on the fruit salad just before serving.

Any component of this dessert can be served independently.


Croissants – Daring Bakers Challenge September 2011

September 27th, 2011

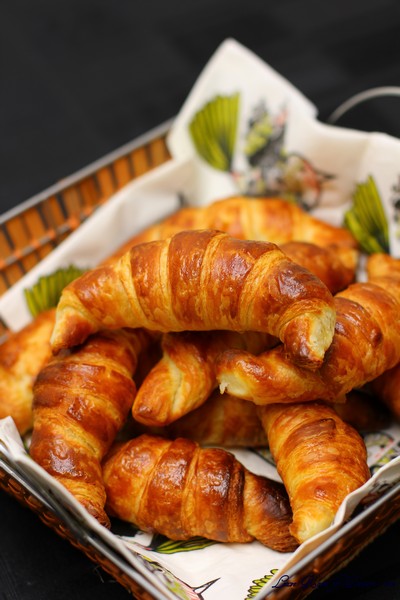
The Daring Bakers go retro this month! Thanks to one of our very talented non-blogging members, Sarah, the Daring Bakers were challenged to make Croissants using a recipe from the Queen of French Cooking, none other than Julia Child!

If I could eat croissants for breakfast (almost) every morning, I think that would be a great way to start the day.

Seeing as though this recipe was quite long and involved (with many rest periods), it meant I would have to settle for having fresh (you can’t get any more fresh) croissants for morning tea.

And what better way than with a picnic? Almost all other weekends this month have been lovely, and we have had a few family picnics out in the backyard. This last weekend, the rain poured down non-stop and the temperature dropped, so we set up picnic rugs in the lounge room in front of the fire and ate croissants indoors, appreciating the dry and the warmth.

The croissants were delicious. Absolutely amazing. The recipe was easy to follow, although was time consuming because of the resting periods for the dough/pastry.

I think I may have made the butter a little too warm while working it, causing a few butter chunks to be seen through the pastry, rather than a smooth layer, although you could not notice it once baked.

I will definitely be making these again, when my second-hand/new (new for me) large granite bench-top is installed – I’m super excited!

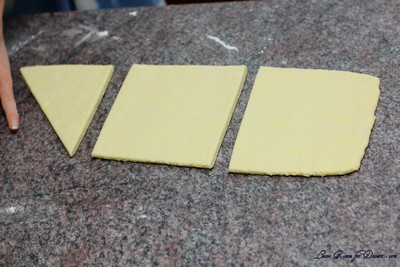
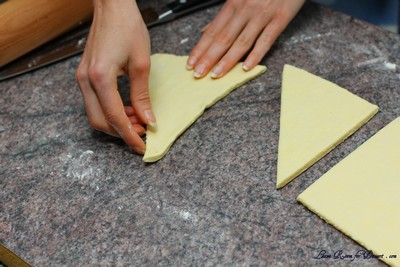
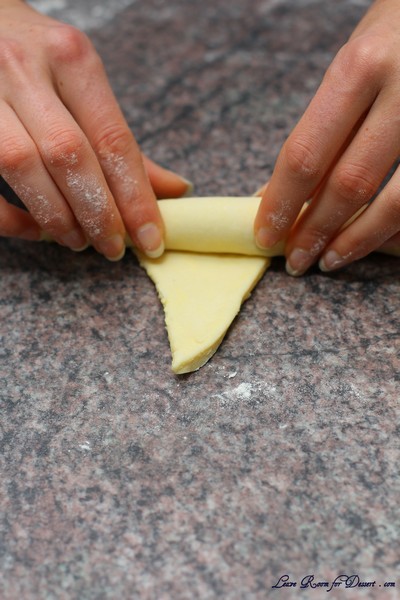
Here is a good video of Julia Child making croissants, it should help along with the photos below.

Thanks to our host for this month’s challenge, I’m so glad I have made croissants again – with a great recipe.

P.S. I made double quantity (didn’t really change the technique until I came to step 42, where I cut it into 4)

Croissants

Servings: 12 croissants

Ingredients
¼ oz (7 gm) of fresh yeast, or 1¼ teaspoon (6¼ ml/4 gm) of dry-active yeast (about ½ sachet)
3 tablespoons (45 ml) warm water (less than 100°F/38°C)
1 teaspoon (5 ml/4½ gm) sugar
1 3/4 cups (225 gm/½ lb) of strong plain flour (I used Polish all-purpose flour, which is 13% protein)
2 teaspoons (10 ml/9 gm) sugar
1½ teaspoon (7½ ml/9 gm) salt
½ cup (120 ml/¼ pint) milk (I am not sure if the fat content matters. I used 2%)
2 tablespoons (30 ml) tasteless oil (I used generic vegetable oil)
½ cup (120 ml/1 stick/115 gm/¼ lb) chilled, unsalted butter
1 egg, for egg wash

Directions:

1. Mix the yeast, warm water, and first teaspoon of sugar in a small bowl. Leave aside for the yeast and sugar to dissolve and the yeast to foam up a little.
2. Measure out the other ingredients
3. Heat the milk until tepid (either in the microwave or a saucepan), and dissolve in the salt and remaining sugar
4. Place the flour in a large bowl.
5. Add the oil, yeast mixture, and milk mixture to the flour
6. Mix all the ingredients together using the rubber spatula, just until all the flour is incorporated
7. Turn the dough out onto a floured surface, and let it rest a minute while you wash out the bowl
8. Knead the dough eight to ten times only. The best way is as Julia Child does it in the video (see below). It’s a little difficult to explain, but essentially involves smacking the dough on the counter (lots of fun if you are mad at someone) and removing it from the counter using the pastry scraper.
9. Place the dough back in the bowl, and place the bowl in the plastic bag

10. Leave the bowl at approximately 75°F/24°C for three hours, or until the dough has tripled in size.

11. After the dough has tripled in size, remove it gently from the bowl, pulling it away from the sides of the bowl with your fingertips.
12. Place the dough on a lightly floured board or countertop, and use your hands to press it out into a rectangle about 8 by 12 inches (20cm by 30cm).

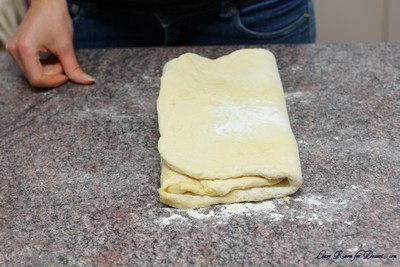
13. Fold the dough rectangle in three, like a letter (fold the top third down, and then the bottom third up)


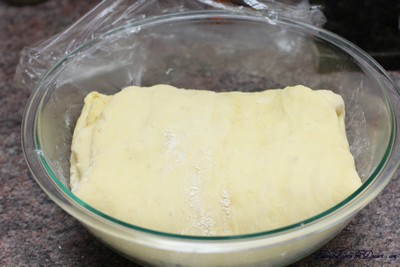
14. Place the dough letter back in the bowl, and the bowl back in the plastic bag.


15. Leave the dough to rise for another 1.5 hours, or until it has doubled in size. This second rise can be done overnight in the fridge.

16. Place the double-risen dough onto a plate and cover tightly with plastic wrap. Place the plate in the fridge while you prepare the butter.
17. Once the dough has doubled, it’s time to incorporate the butter
18. Place the block of chilled butter on a chopping board.
19. Using the rolling pin, beat the butter down a little, till it is quite flat.
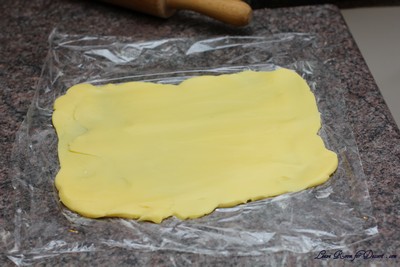
20. Use the heel of your hand to continue to spread the butter until it is smooth. You want the butter to stay cool, but spread easily. (I spread it onto plastic wrap when it was easy to spread to make it easier to get onto the dough)

21. Remove the dough from the fridge and place it on a lightly floured board or counter. Let it rest for a minute or two.
22. Spread the dough using your hands into a rectangle about 14 by 8 inches (35 cm by 20 cm).
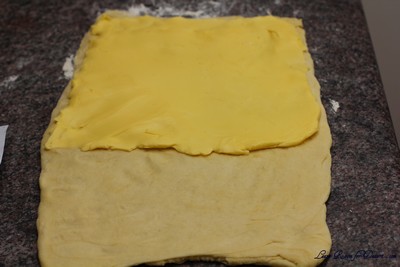
23. Remove the butter from the board, and place it on the top half of the dough rectangle.


24. Spread the butter all across the top two-thirds of the dough rectangle, but keep it ¼ inch (6 mm) across from all the edges.
25. Fold the top third of the dough down, and the bottom third of the dough up. (I folded the bottom half up first)


26. Turn the dough package 90 degrees, so that the top flap is to your right (like a book).
27. Roll out the dough package (gently, so you don’t push the butter out of the dough) until it is again about 14 by 8 inches (35 cm by 20 cm).


28. Again, fold the top third down and the bottom third up.
29. Wrap the dough package in plastic wrap, and place it in the fridge for 2 hours.

30. After two hours have passed, take the dough out of the fridge and place it again on the lightly floured board or counter.
31. Tap the dough with the rolling pin, to deflate it a little
32. Let the dough rest for 8 to 10 minutes
33. Roll the dough package out till it is 14 by 8 inches (35 cm by 20 cm).
34. Fold in three, as before
35. Turn 90 degrees, and roll out again to 14 by 8 inches (35 cm by 20 cm).
36. Fold in three for the last time, wrap in plastic, and return the dough package to the fridge for two more hours (or overnight, with something heavy on top to stop it from rising)

37. It’s now time to cut the dough and shape the croissants
38. First, lightly butter your baking sheet so that it is ready
39. Take the dough out of the fridge and let it rest for ten minutes on the lightly floured board or counter
40. Roll the dough out into a 20 by 5 inch rectangle (51 cm by 12½ cm).
41. Cut the dough into two rectangles (each 10 by 5 inches (25½ cm by 12½ cm))
42. Place one of the rectangles in the fridge, to keep the butter cold
43. Roll the second rectangle out until it is 15 by 5 inches (38 cm by 12½ cm).
44. Cut the rectangle into three squares (each 5 by 5 inches (12½ cm by 12½ cm))
45. Place two of the squares in the fridge
46. The remaining square may have shrunk up a little bit in the meantime. Roll it out again till it is nearly square
47. Cut the square diagonally into two triangles.

48. Stretch the triangle out a little, so it is not a right-angle triangle, but more of an isosceles.


(or you can cut them like this to begin with: )

49. Starting at the wide end, roll the triangle up towards the point, and curve into a crescent shape.


50. Place the unbaked croissant on the baking sheet

51. Repeat the process with the remaining squares of dough, creating 12 croissants in total.
52. Leave the tray of croissants, covered lightly with plastic wrap, to rise for 1 hour

53. Preheat the oven to very hot 475°F/240°C/gas mark 9.
54. Mix the egg with a teaspoon of water
55. Spread the egg wash across the tops of the croissants.
56. Put the croissants in the oven for 12 to 15 minutes, until the tops are browned nicely
57. Take the croissants out of the oven, and place them on a rack to cool for 10 minutes before serving.


Tulips – Spring 2011

September 25th, 2011

This year we have been focusing on making our garden beautiful. I have been overly enthusiastic about the plants I want, and to make things difficult, the garden beds for my roses and bulbs were either not ready (just had palm trees removed), or non-existent…

Tulipa Black Parrot

With a lot of help (if you had noticed, I don’t really have much muscle, so required a LOT of help), the beds were made just in time for me to plant bearded irises, Dutch irises, tulips, daffodils, snowflakes and hyacinths.

Tulipa Attila Graffiti

As our winters don’t get terribly cold in Sydney, Australia, I followed advice and place my bulbs in a fridge for 6-8 weeks (I used a bar fridge which contained no fruit or veg, as these can produce ethylene gas which can hinder growth/flower production). I bought the bulbs on-line (from Broersen Plants) in mid-March and placed them in the fridge after receiving them, then planted in May, and they started to come up in June and were flowering in August (I was expecting them to flower after early September).

Tulipa Antarctica

I must admit they lasted a lot longer than I was expecting in the ground and cut in a vase. Unfortunately some wildlife (possibly cockatoos, rabbits or possums), decided it would be a good idea to try and pull up the flowers to eat out the bulbs (which they succeeded with many snowflakes and freesias), hence my success rate of flowering tulips was not as high as I would have liked.

Tulipa Saigon

I am now waiting for the bulbs to die down. Some of the old tulips have formed seed pod type things, so I will wait and decide what I should do with those if they mature. (I may let them fall to the ground, or may collect them and store them in the fridge next March). I also need to decide whether to dig all the tulips up (after they die back) and protect them somewhere cool to be cooled next year, or whether to cross fingers and hope they get a cold enough winter in the ground… Maybe I will do an experiment and dig up half and leave the other half…

Tulipa Playgirl

Out of the 5 different tulips that I bought – my favourite was the beautiful dark pink – Tulipa Attila Graffiti. (I was expecting my favourites to be Black Parrot and Playgirl, although Attila Graffiti was just too beautiful).

Now I hope you can enjoy the photos of my tulips and they brighten someone else’s day, like they did every night I saw them after coming home from work, and every weekend morning.


Chocolate Truffles and Peanut Butter Fudge – Daring Bakers Challenge August 2011

August 27th, 2011

The August 2011 Daring Bakers’ Challenge was hosted by Lisa of Parsley, Sage, Desserts and Line Drive and Mandy of What the Fruitcake?!. These two sugar mavens challenged us to make sinfully delicious candies! This was a special challenge for the Daring Bakers because the good folks at http://www.chocoley.com offered an amazing prize for the winner of the most creative and delicious candy!

I have just been away for a fabulous 2 week holiday, leaving the rainy Sydney weather and enjoying beautiful 25 degree days in Port Douglas and the sand under my feet. I hope to give a short post on a few of my recommendations of restaurants and activities for those who are going there on a holiday soon.

We came home to lawn that needed mowing and the destruction of the first tulips I have planted in our garden, some fresias, irises, jonquils and snowflakes. We think it was either cockatoos, rabbits or a dog that destroyed some of the flowers and plants, but I am so excited about the flowers that weren’t destroyed and hope to post some of those pics soon as well.
I should get started talking about this month’s challenge though, and I must admit my delight at the array of recipes we were given to choose from for this challenge. We needed to make a chocolate and non-chocolate sweet, and were given methods for tempering chocolate, making truffles, chocolate coated sweets, filled chocolate, jellies and fudge.

Two of the recipes that I really wanted to make required specialised equipment and/or ingredients, which I did not have time to source before the challenge was due, although I am thinking of looking on the internet to find the moulds and ingredients so I can make these in the future.

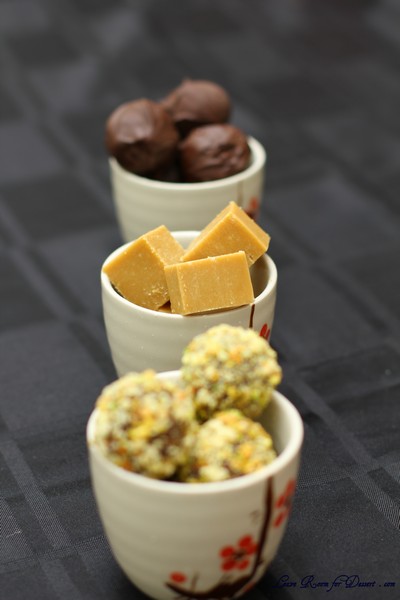
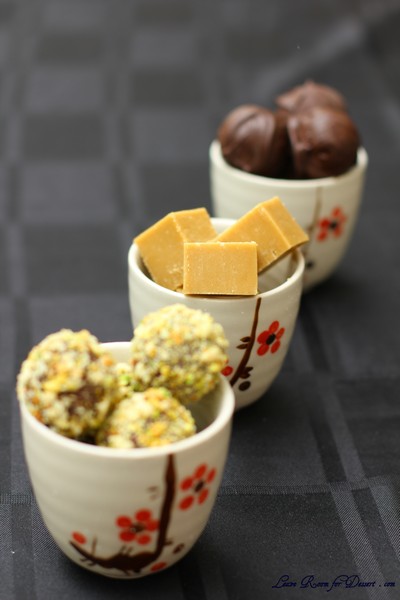
Due to time constraints, I decided to make some of the easier looking recipes, and I have never made fudge before, so this was also an exciting new recipe to try. I found the truffle recipe a lot easier than a previous truffle recipe I have tried, and the fudge was easy as well, not needing a thermometer.

I woke up this morning and thought perhaps I would just coat my truffles in crushed nuts, but decided to push past my troubles with tempering chocolate, and tried to temper some of the nicest chocolate I have ever bought, using my marble slab. Unfortunately I still have some way to go before I manage to temper chocolate correctly, although I guess practice makes perfect…

Thanks to this month’s hosts. Everyone who has tried these sweets has loved the challenge, and loved that I’m a member of the Daring Bakers! 🙂
Milk Chocolate & Hazelnut Praline Truffles

Servings: Makes +- 30 truffles, recipe easily doubled or halved
Adapted from the Cook’s Academy Curriculum, Dublin
Active Time: 1 – 2hrs
Ganache Setting Time: 2 – 4hrs or Overnight

Praline Ingredients:
½ cup (120 ml/2 oz/60 gm) hazelnuts, shelled & skinned (or a combination of nuts, hazelnuts, almonds, pistachios)
½ cup (120 ml/4 oz/115 gm) granulated white sugar
2 tablespoons (30 ml) water

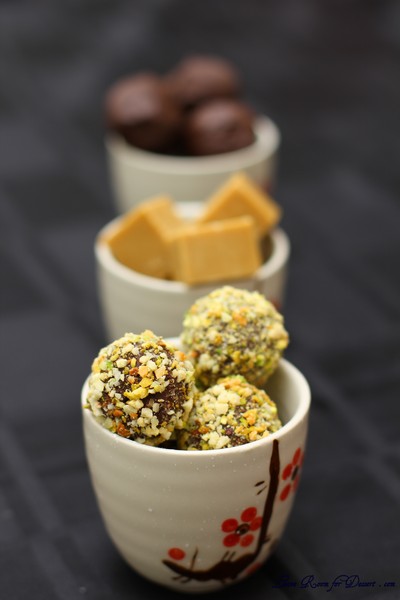
Making the praline and ganache. Once set, making balls of the set ganache then rolling in crushed hazelnuts
Directions:

1. Preheat oven to moderate 180°C / 160°C Fan Assisted (convection oven); 350°F / 320°F convection / Gas Mark 4
2. Place whole hazelnut on a non-stick baking tray and dry roast for 10mins
3. Allow to cool
4. Place hazelnuts in a clean dry kitchen towel and rub to remove the skins
5. Line a baking tray with parchment paper or a silicon mat
6. Place the skinned hazelnuts onto the prepared tray
7. Combine the sugar and water in a saucepan over medium low heat, stirring until the sugar is dissolved
8. Turn the heat up and bring to the boil (do not stir), brushing down the sides of the pot with a pastry brush dipped in water to remove any sugar crystals
9. Boil until the mixture turns amber (160°C – 170°C / 320°F- 340°F on a candy thermometer)
10. Remove from heat immediately and pour the syrup over the hazelnuts
11. Allow to cool completely
12. Break into small pieces
13. Transfer pieces to a food processor and process until desired texture, either fine or rough
14. Set aside

Ganache Ingredients
1¾ cup (9 oz. / 255 g) Milk chocolate, finely chopped
½ cup (4 oz. / 125 ml) Double/Heavy Cream (36% – 46% butterfat content)
2-3 Tablespoons (1-1 ½ oz. / 30ml – 45 ml) Frangelico Liqueur, optional

½ – 1 cup Crushed or Ground Roasted Hazelnuts for coating (I used pistachio and almonds)

Directions:
1. Finely chop the milk chocolate
2. Place into a heatproof medium sized bowl
3. Heat cream in a saucepan until just about to boil
4. Pour the cream over the chocolate and stir gently until smooth and melted
5. Allow to cool slightly, about 10 minutes
6. Stir in the praline and (optional) liqueur
7. Leave to cool and set overnight or for a few hours in the fridge
8. Bring to room temperature to use

Forming the truffles:
1. Using teaspoons or a melon baller, scoop round balls of ganache
2. Roll them between the palms of your hands to round them off
Tip: Handle them as little as possible to avoid melting
Tip: I suggest wearing food safe latex gloves, less messy and slightly less heat from your hands
3. Finish off by rolling the truffle in the crushed roasted hazelnuts
Tip: You can also roll them in hazelnut praline
4. Place on parchment paper and leave to set
Tip: They look great when put into small petit four cases and boxed up as a gift!

Peanut Butter Fudge

Prep Time: 15 mins
Total Time: 20 mins
Yield: 64 squares

Ingredients:
1/2 cup (120ml/115g / 4oz.) Unsalted Butter
2 1/4 cups (540ml/450g / 16oz.) firmly packed Brown Sugar
1/2 cup (120ml) Milk
3/4 cup (180ml/200g / 7oz.) smooth Peanut Butter
1 teaspoon (5ml) Vanilla Extract
3 1/2 cups (840ml/425g / 15oz.) Confectioners’ (Icing) Sugar

Directions:
1. Place butter into a medium saucepan and melt it over medium heat.
2. Add brown sugar and milk, stirring.
3. Boil for 2 minutes, stirring frequently.
4. Remove from heat.
5. Mix in peanut butter and vanilla.
6. Place confectioners’ sugar into a large mixing bowl.
7. Pour hot peanut butter mixture over confectioners’ sugar and beat until smooth.
8. Pour fudge into an 8 by 8 inch (20cm by 20cm) pan.
9. Chill until firm, about 1 hour.
10. Cut into 1-inch (25 mm) squares.


Strawberry Fraisier – Daring Bakers Challenge July 2011

July 27th, 2011


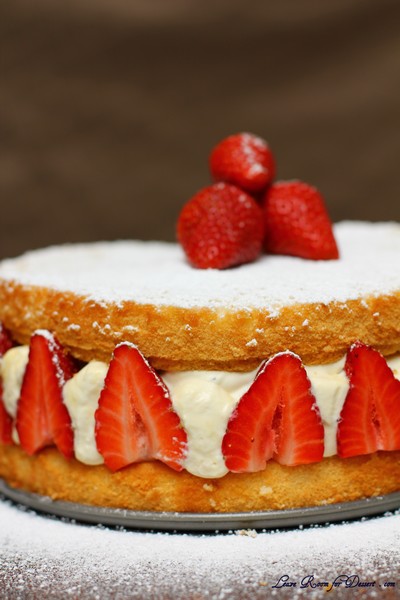
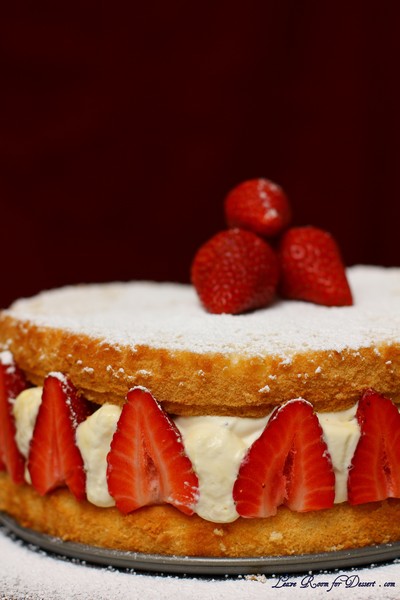
Jana of Cherry Tea Cakes was our July Daring Bakers’ host and she challenges us to make Fresh Frasiers inspired by recipes written by Elisabeth M. Prueitt and Chad Robertson in the beautiful cookbook Tartine.

I’m glad this challenge came this month and not the previous month, as we have just started getting beautiful strawberries back into the fruit stores.

The challenge was quite good, especially being able to make all three components after work, then assemble it the morning, for a lovely weekend dessert.

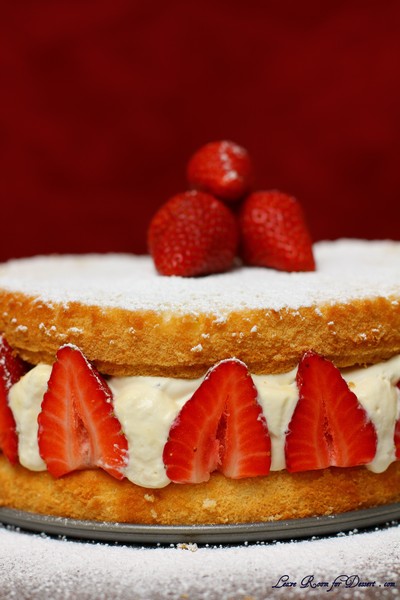
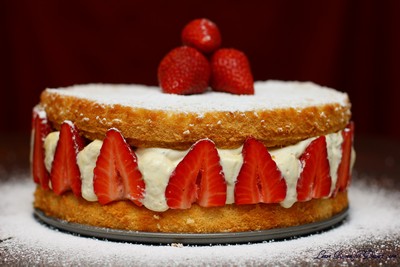
I had my fingers crossed that the fraisier would stay up by itself once the plastic wrap was removed, but unfortunately it collapsed quite a lot when the first cut was made. I’m not entirely sure where I went wrong, so I may have to do a bit more research.

I used a bigger tin than the one used in the recipe (22cm vs 20cm) and found the cake sunk a bit in the middle once it cooled.
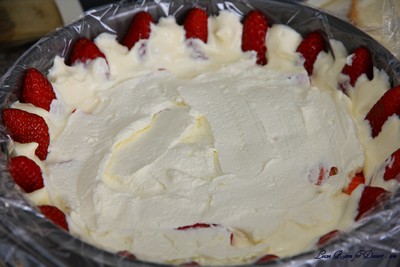
I also needed at least double the pastry cream filling – although only figured this out once it was too late to make more – so I used whipped cream in the middle of the filling. (this extra may have been needed because I used a bigger tin, or very large strawberries.) I didn’t use the almond paste either, as I had none.

It was a beautiful dessert that everyone enjoyed and I would consider making again, although trialling out the filling, to make sure it stayed together more when serving.

Basic Chiffon Cake

1 cup + 2 tablespoons (270 ml) (5½ oz/155 gm) all-purpose flour
1 teaspoon (5 ml) (4 gm) baking powder
3/4 cups (180 ml) (6 oz /170 gm) sugar
1/2 teaspoon (2½ ml) (1½ gm) salt, preferably kosher
1/4 cup (2 fl oz/60 ml) vegetable oil
3 large egg yolks
⅓ cup + 1 tablespoon (3.17 fl oz/95 ml) water
1 teaspoon (5 ml) pure vanilla extract
3/4 teaspoon (3¾ ml) (3 gm) lemon zest, grated
5 large egg whites
¼ teaspoon (1¼ ml) (1 gm) cream of tartar

Directions:

Preheat the oven to moderate 325°F (160°C/gas mark 3).
Line the bottom of an 8-inch (20 cm) spring form pan with parchment paper. Do not grease the sides of the pan.
In a large mixing bowl, stir together the flour and baking powder. Add in all but 3 tablespoons (45 ml.) of sugar, and all of the salt. Stir to combine.
In a small bowl combine the oil, egg yolks, water, vanilla and lemon zest. Whisk thoroughly.
Combine with the dry ingredients and mix thoroughly for about one minute, or until very smooth.
Put the egg whites into a stand mixer, and beat on medium speed using a whisk attachment on a medium speed, until frothy. Add cream of tartar and beat on a medium speed until the whites hold soft peaks. Slowly add the remaining sugar and beat on a medium-high speed until the whites hold firm and form shiny peaks.
Using a grease free rubber spatula, scoop about ⅓ of the whites into the yolk mixture and fold in gently. Gently fold in the remaining whites just until combined.
Pour the batter into the prepared pan. Bake for 45 to 55 minutes or until toothpick inserted into the center comes out clean.
Removed the cake from the oven and allow to cool in the pan on a wire rack.
To unmold, run a knife around the sides to loosen the cake from the pan and remove the spring form sides. Invert the cake and peel off the parchment paper. Refrigerate for up to four days.

Pastry Cream Filling

1 cup (8 fl oz/250 ml) whole milk
1/2 teaspoon (2½ ml) pure vanilla extract
1/8 teaspoon (1/2 ml) (¼ gm) salt, preferably kosher
2 tablespoons (30 ml) (10 gm)cornstarch
1/4 cup (60 ml) (2 oz/55 gm) sugar
1 large egg (I used 2 egg yolks – as there were extra from the cake)
2 tablespoons (30 ml) (1 oz/30 gm) unsalted butter
3/4 teaspoon (3¾ ml) (4 gm) gelatin
1/2 tablespoon (7½ ml) water
1 cup (8 fl oz/250 ml) heavy cream

Directions:

Pour the milk, vanilla, and salt into a heavy sauce pan. Place over medium-high heat and scald, bringing it to a near boiling point. Stir occasionally.
Meanwhile, in a stand mixer add the cornstarch and sugar. Whisk to combine
Add the eggs to the sugar and cornstarch and whisk until smooth.
When the milk is ready, gently and slowly while the stand mixer is whisking, pour the heated milk down the side of the bowl into the egg mixture.
Pour the mixture back into the warm pot and continue to cook over a medium heat until the custard is thick, just about to boil and coats the back of a spoon.
Remove from heat and pass through a fine mesh sieve into a large mixing bowl. Allow to cool for ten minutes stirring occasionally.
Cut the butter into four pieces and whisk into the pastry cream a piece at a time until smooth.
Cover the cream with plastic wrap, pressing the plastic wrap onto the top of the cream to prevent a skin from forming. Chill in the refrigerator for up to five days.
In a small dish, sprinkle the gelatin over the water and let stand for a few minutes to soften.
Put two inches (55 mm) of water into a small sauce pan and bring to a simmer over a medium heat.
Measure 1/4 cup (2 oz/60 ml) of the chilled pastry cream into a small stainless steel bowl that will sit across the sauce pan with the simmering water, without touching the water.
Heat the cream until it is 120 F (48.8 C). Add the gelatin and whisk until smooth. Remove from the water bath, and whisk the remaining cold pastry cream in to incorporate in two batches.
In a stand mixer, fitted with the whisk attachment, whip the cream until it holds medium-stiff peaks. Immediately fold the whipped cream into the pastry cream with a rubber spatula.

Simple Syrup

1/3 cup (2⅔ fl oz/80 ml) (2⅔ oz/75 gm) of sugar, flavored or white
1/3 cup (2⅔ fl oz/80 ml) of water
+ 1 teaspoon vanilla essence

Directions:

Combine the water and sugar in a medium saucepan.
Bring the mixture to a boil and let the sugar dissolve. Stirring is not necessary, but will not harm the syrup.
Remove the syrup from the heat and cool slightly.
Transfer syrup to a lidded container or jar that can be stored in the refrigerator. Simple syrup can be stored for up to one month.

Fraisier Assembly

Components:
1 baked 8 inch (20 cm) chiffon cake
1 recipe pastry cream filling
⅓ cup (80 ml) simple syrup or flavored syrup
2 lbs (900 g) strawberries
confectioners’ sugar for dusting
½ cup (120 ml) (5 oz/140 gm) almond paste

Directions:

Line the sides of a 8-inch (20 cm) spring form pan with plastic wrap. Do not line the bottom of the pan.
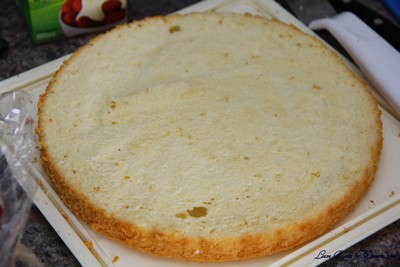
Cut the cake in half horizontally to form two layers.


Fit the bottom layer into the prepared spring form pan. Moisten the layer evenly with the simple syrup. When the cake has absorbed enough syrup to resemble a squishy sponge, you have enough.
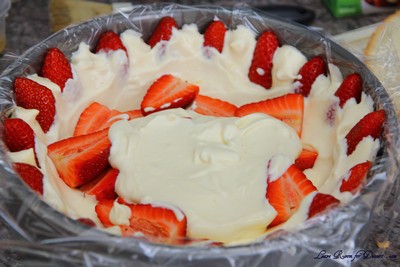
Hull and slice in half enough strawberries to arrange around the sides of the cake pan. Place the cut side of the strawberry against the sides of the pan, point side up forming a ring.
Pipe cream in-between strawberries and a thin layer across the top of the cake.
Hull and quarter your remaining strawberries and place them in the middle of the cake. Cover the strawberries and entirely with the all but 1 tbsp. (15 ml) of the pastry cream.


Place the second cake layer on top and moisten with the simple syrup.
Lightly dust a work surface with confectioners’ sugar and roll out the almond paste to a 10-inch (25 cm) round 1/16 inch (1.5 mm) thick. Spread the remaining 1 tablespoon (15 ml) of pastry cream on the top of the cake and cover with the round of almond paste.
Cover with plastic wrap and refrigerate for at least 4 hours.
To serve release the sides of the spring form pan and peel away the plastic wrap.
Serve immediately or store in the refrigerator for up to 3 days.


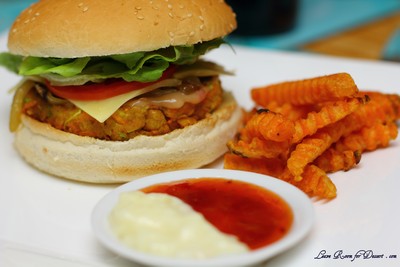
Vegetable Burgers with Chilli Mayo

July 10th, 2011


There are some recipes that once tried, just need to be shared with others.

I love burgers, my Mum and Nick both make great beef burger patties, and I will often order chicken schnitzel burgers and beef burgers when out for dinner or lunch. I never tend to buy vegetable burgers, as I’ve had a few dry and tasteless ones in the past.

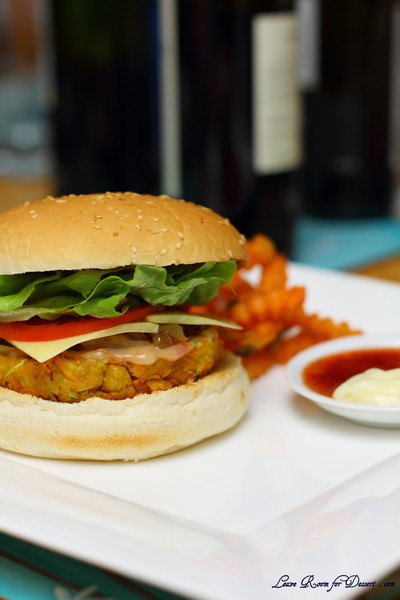
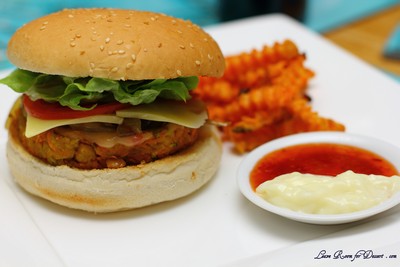
Trying these though, have changed my mind totally on the vegetable burger, and I have my sister to thank. It was easy to make (and would have been easier if I had taken my food processor around) and tasted amazing. No one could wait to have them for lunches the next day too, which meant we couldn’t try freezing them (as that would be a great dinner to take out of the freezer, just thaw and cook). I guess this means we will just have to make them again 🙂

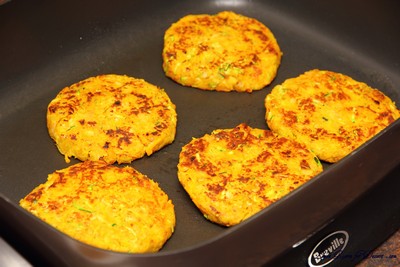
The patty was a little more delicate in structure than a normal patty, and this slightly worsened for the lunch meals, although perhaps we needed to pat out some of the liquid. Nonetheless – what an amazing dinner and lunch!

I think it’s about time we made another batch – let me know if you get a chance to try them 🙂

Vegetable Burgers with Chilli Mayo

Recipe adapted from Best Recipes

Makes approximately 12 burger patties

1 tablespoon olive oil, approx
1 onion, diced finely + a pinch of salt
2 x 400g can chickpeas, rinsed in water, drained and patted dry, then roughly chopped or processed
1 sweet potato, peeled and grated
1 zucchini, grated
2 carrots, peeled and grated
2 teaspoons curry powder
3 teaspoons vegetable stock powder
2 eggs, lightly beaten
1 1/2 cups bread crumbs
2 tablespoons vegetable or olive oil for frying

6 tablespoons sweet chilli sauce
6 tablespoons mayonaise

12 burger buns
1 lettuce (6-12 leaves, sliced or torn)
2-3 tomatoes, sliced
2 tablespoons olive oil
3 onions, sliced + a pinch of salt
avocado, sliced, optional
sweet potato chips to serve, optional

Heat oil at medium heat in a medium saucepan, cook the diced onion, stirring occasionally until caramelised (will take about 10 minutes or more). Once caramelised, remove from heat and cool. Make caramelised onions for on top of the patty in the same saucepan with the 3 sliced onions and extra oil (will take more than 10 minutes) – Allow this to cook on low whilst making the patty mixture.

For the vegetable patty, mix the caramelised diced onions, chickpeas, sweet potato, zucchini, carrot, curry powder, vegetable stock powder, eggs and bread crumbs. Allow to stand for 10minutes, if the mixture is too moist, squeeze out excess liquid, or pat with a paper towel.

Divide the mixture into 12 equal portions, roll and then pat into patties the same size/width as the burger buns. Heat a large saucepan or frypan on medium/high heat and cook the patties in a small amount of oil until cooked through, turning once the first side is nicely browned.

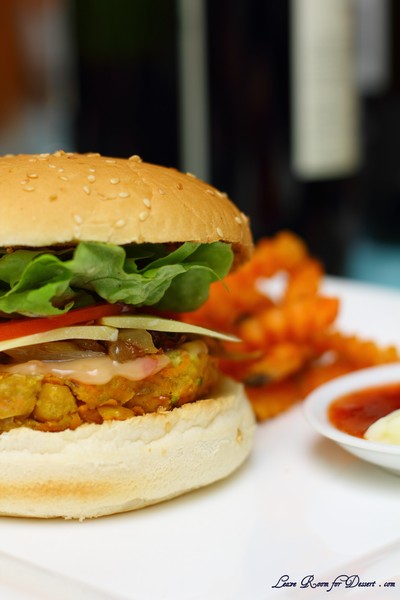
Place the cooked patty on a grilled burger bun and top with chilli sauce mixed with mayonnaise, caramelised onion, lettuce, avocado and tomato. Serve with sweet potato chips or a salad.


Baklava with Homemade Phyllo Pastry – Daring Bakers Challenge June 2011

June 27th, 2011

Erica of Erica’s Edibles was our host for the Daring Baker’s June challenge. Erica challenged us to be truly DARING by making homemade phyllo dough and then to use that homemade dough to make Baklava.

I remember first discovering baklava and its gorgeous sweetness. There used to be a very nice place that sold it near restaurants we used to visit often. Unfortunately (or perhaps fortunately), it isn’t as readily available where I live and work at the moment. Therefore, like most of the food I eat, I only get a chance to eat it – if I get the chance to make it (or someone else just happens to buy or bring some along).

I thought this would be an easy challenge for one of the days on the weekend in Winter. Little did I know that the weather would be beautiful – sunny and warm and much better than many of Spring and Autumn days we had. After making the lovely dough and leaving it in the fridge, out into the garden we went and spent most of the day.

This meant I had the leave the dough until a week-night to finish off. So I placed it in the freezer, and forgot to take it out the morning of when I would make my baklava. After a few problems with the dough not thawing quickly, it actually rolled out very nicely and we were able to make 10 sheets from the one quantity of dough.

The rest of the recipe was made whilst the dough was thawing and those elements were completed very easily, especially with the help of the food processor.

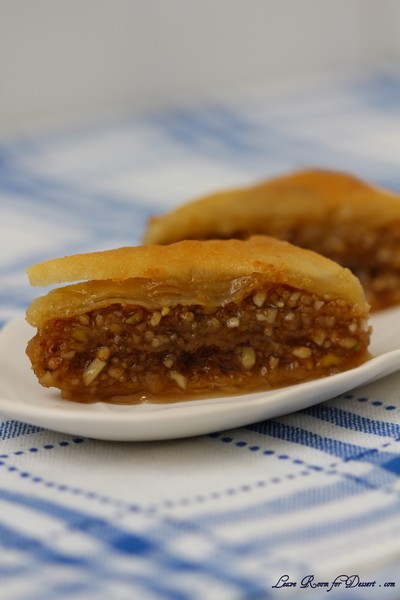
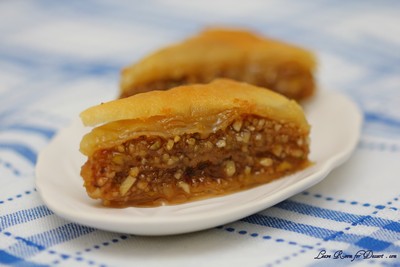
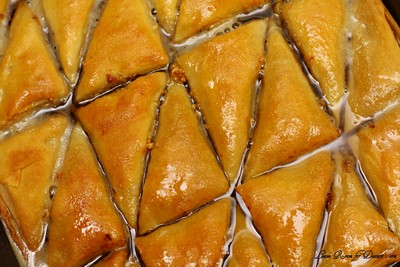
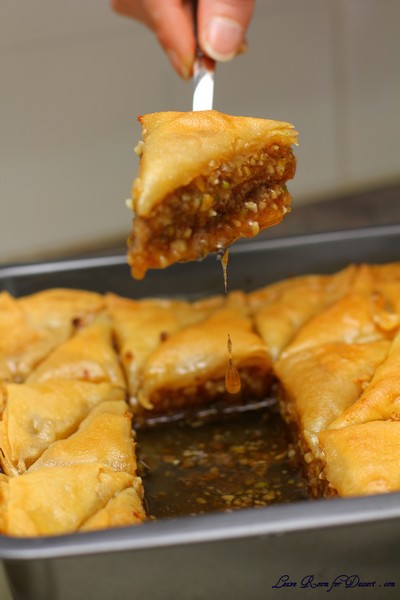
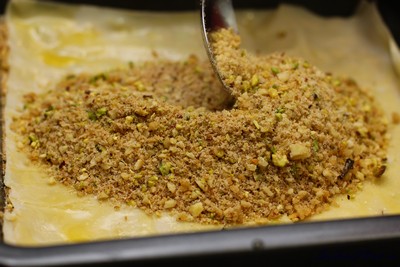
Once I poured the cooled syrup onto the baklava though, it was literally swimming in syrup. By the next morning… it was still swimming is syrup so I transferred the baklava to take-away containers to take in to work, and allow more of the syrup to drain.

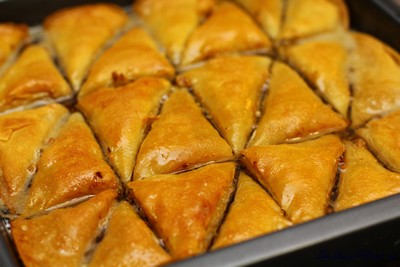
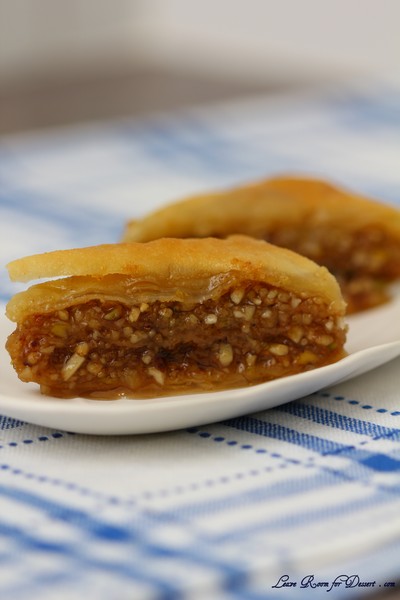
Flavour-wise this baklava was gorgeous. Absolutely lovely and I didn’t find it too sweet either, despite it swimming in syrup. The pastry turned out quite nicely and I am glad I made it (although can’t see myself making it many times in the future).

Thanks so much to our host for this months challenge, and making us step outside our comfort zone.

my notes: I made the single recipe and it made 10 sheets for my 20.5cm x 20.5cm x 4.5cm dish, the syrup was probably twice what was needed.

Phyllo Dough

*Note 1: To have enough to fill my 9” x 9” baking dish with 18 layers of phyllo I doubled this recipe.
*Note 2: Single recipe will fill a 8” x 5” baking dish.
*Note 3: Dough can be made a head of time and froze. Just remove from freezer and allow to thaw
and continue making your baklava

1 1/3 cups (320 ml) (185 gm/6½ oz) unbleached all purpose (plain) flour
1/8 teaspoon (2/3 ml) (¾ gm) salt
1/2 cup less 1 tablespoon (105 ml) water, plus more if needed
2 tablespoons (30 ml) vegetable oil, plus additional for coating the dough
1/2 teaspoon (2½ ml) cider vinegar, (could substitute white wine vinegar or red wine vinegar, but could affect the taste)

1. In the bowl of your stand mixer combine flour and salt.

2. Mix with paddle attachment.

3. Combine water, oil and vinegar in a small bowl.

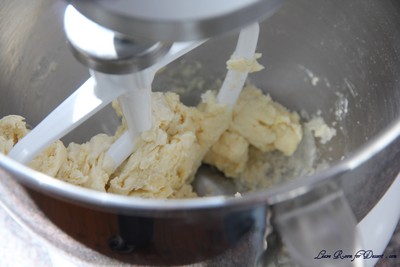
4. Add water & oil mixture with mixer on low speed, mix until you get a soft dough, if it appears dry add a little more water (I had to add a tablespoon more)

5. Change to the dough hook and let knead approximately 10 minutes. You will end up with beautiful smooth dough. If you are kneading by hand, knead approx. 20 minutes.

6. Remove the dough from mixer and continue to knead for 2 more minutes. Pick up the dough and through it down hard on the counter a few times during the kneading process.

7. Shape the dough into a ball and lightly cover with oil

8. Wrap tightly in plastic wrap and let rest 30-90 minutes, longer is best ( I let mine rest 2 hours and it was perfect)

Rolling your Phyllo

** Remove all rings and jewelry so it does not snag the dough**

Use whatever means you have to get the dough as thin as you can. I have included a fantastic video at the end of the post on how to roll out your phyllo dough, using a wooden dowel, which worked perfectly for me. You may also use a pasta machine if you have one, or a normal rolling pin whatever works for you.

1. Unwrap your dough and cut off a chunk slightly larger then a golf ball. While you are rolling be sure to keep the other dough covered so it doesn’t dry out.

2. Be sure to flour your hands, rolling pin and counter. As you roll you will need to keep adding, don’t worry, you can’t over-flour.

3. Roll out the dough a bit to flatten it out.

4. Wrap the dough around your rolling pin/dowel

5. Roll back and forth quickly with the dough remaining on the dowel (see attached video for a visual, its much easier then it sounds)

6. Remove; notice how much bigger it is!

7. Rotate and repeat until it is as thin as you can it. Don’t worry if you get rips in the dough, as long as you have one perfect one for the top you will never notice.

8. When you get it as thin as you can with the rolling pin, carefully pick it up with well floured hands and stretch it on the backs of your hands as you would a pizza dough, just helps make it that much thinner. Roll out your dough until it is transparent. NOTE: you will not get it as thin as the frozen phyllo dough you purchase at the store, it is made by machine

9. Set aside on a well-floured surface. Repeat the process until your dough is used up. Between each sheet again flower well. You will not need to cover your dough with a wet cloth, as you do with boxed dough, it is moist enough that it will not dry out.

Baklava Recipe

Adapted from Alton Brown, The Food Network
30 servings

For the syrup:
· 1 1/4 cups (300 ml) honey
· 1 1/4 cups (300ml) water
· 1 1/4 cups (300 ml) (280 gm/10 oz) sugar
· 1 cinnamon stick
· 1 (2-inch/50 mm) piece fresh citrus peel (lemon or orange work best)
· a few cloves or a pinch or ground clove

When you put your baklava in the oven start making your syrup. When you combine the two, one of them needs to be hot, I find it better when the baklava is hot and the syrup has cooled

1. Combine all ingredients in a medium pot over medium high heat. Stir occasionally until sugar has dissolved

2. Boil for 10 minutes, stir occasionally.

3. Once boiled for 10 minutes remove from heat and strain cinnamon stick and lemon, allow to cool as baklava cooks

Ingredients for the Filling:
1 (5-inch/125 mm piece) cinnamon stick, broken into 2 to 3 pieces or 2 teaspoons (10 ml) (8 gm) ground cinnamon
15 to 20 whole allspice berries ( I just used a few pinches)
3/4 cup (180 ml) (170 gm/6 oz) blanched almonds
3/4 cup (180 ml) (155 gm/5½ oz) raw or roasted walnuts
3/4 cup (180 ml) (140 gm/5 oz) raw or roasted pistachios
2/3 cup (160 ml) (150 gm/ 5 1/3 oz) sugar
phyllo dough (see recipe above)
1 cup (2 sticks) (240 ml) (225g/8 oz) melted butter ** I did not need this much, less then half**

1. Preheat oven to moderate 350°F/180°C/gas mark 4.

2. Combine nuts, sugar and spices in a food processor and pulse on high until finely chopped. If you do not have a food processor chop with a sharp knife as fine as you can. Set aside

3. Trim your phyllo sheets to fit in your pan

4. Brush bottom of pan with butter and place first phyllo sheet

5. Brush the first phyllo sheet with butter and repeat approximately 5 times ending with butter. (Most recipes say more, but homemade phyllo is thicker so it’s not needed)

6. Sprinkle 1/3 of the nut mixture on top

7. Continue layering phyllo and buttering repeating 4 times
8. Sprinkle 1/3 of the nut mixture on top
9. Continue layering phyllo and buttering repeating 4 times
10. Sprinkle 1/3 of the nut mixture on top

11. Continue layering and buttering phyllo 5 more times. On the top layer, make sure you have a piece of phyllo with no holes if possible, just looks better.
12. Once you have applied the top layer tuck in all the edges to give a nice appearance.

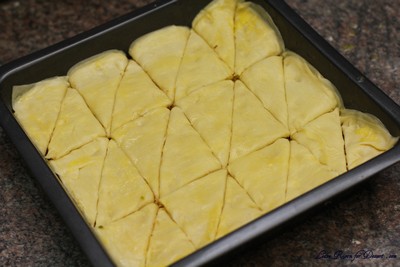
13. With a Sharp knife cut your baklava in desired shapes and number of pieces. If you can’t cut all the ways through don’t worry you will cut again later. A 9×9 pan cuts nicely into 30 pieces. Then brush with a generous layer of butter making sure to cover every area and edge

14. Bake for approximately 30 minutes; remove from oven and cut again this time all the way through. Continue baking for another 30 minutes. (Oven temperatures will vary, you are looking for the top to be a golden brown, take close watch yours may need more or less time in the oven) (Mine took about 40min in total)

15. When baklava is cooked remove from oven and pour the cooled (will still be warmish) syrup evenly over the top, taking care to cover all surfaces when pouring. It looks like it is a lot but over night the syrup will soak into the baklava creating a beautifully sweet and wonderfully textured baklava!

Next morning all syrup is absorbed (my syrup did not absorb much at all)

16. Allow to cool to room temperature. Once cooled cover and store at room temperature. Allow the baklava to sit overnight to absorb the syrup.

17. Serve at room temperature

Freezing/Storage Instructions/Tips: There are a few ways to store your Baklava. It is recommended that you store your baklava at room temperature in an airtight container. Stored at room temperature your baklava will last for up to 2 weeks. You will notice as the days pass it will get a little juicier and chewier. You may choose to store it in the fridge; this will make it a little harder and chewy, but does increase the shelf life. You can also freeze your baklava and then just set it out at room temperature to thaw.


Marquise on Meringue – Daring Bakers Challenge May 2011

May 27th, 2011

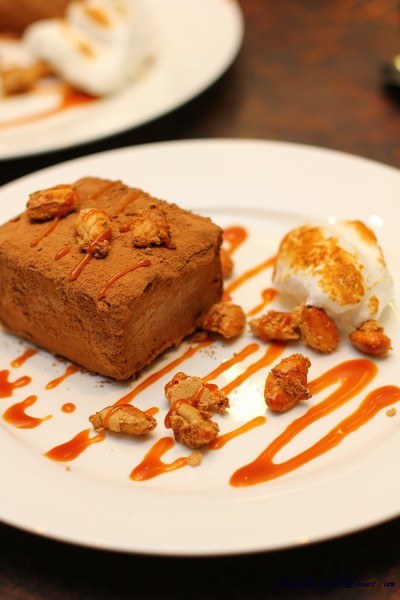
The May 2011 Daring Bakers’ challenge was hosted by Emma of CookCraftGrow and Jenny of Purple House Dirt. They chose to challenge everyone to make a Chocolate Marquise. The inspiration for this recipe comes from a dessert they prepared at a restaurant in Seattle.

This challenge looked very time consuming at first, which is the main reason I put off making it until the last weekend. I was able to make the chocolate marquise the night before, then quickly make all three other components in 30 minutes (all the while making a huge mess in the kitchen).

I thought I had a little trouble with the spiced nuts, although this was the component of the dessert that people liked most and commented on. (I had made the meringue and mixed in the nuts, poured and spread it on a lined tray, then halfway through thought the nuts wouldn’t crisp up, so I took to the meringue with a spoon to expose the almonds so they would brown) – sorry no pics – I couldn’t take photos as I needed one clean hand to feel the sugar dissolving for the torched meringue (check out the recipe below)… 🙂

I still have some of the chocolate marquise in the freezer, and look forward to serving it (although in smaller portions, and probably with more spiced almonds).

It was certainly a well liked challenge by all. Thanks Emma and Jenny!

Chocolate Marquise

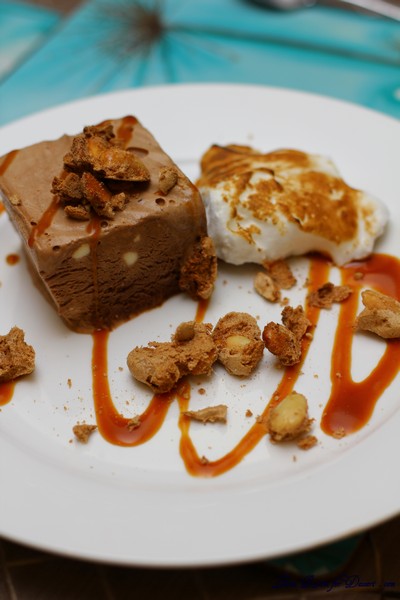
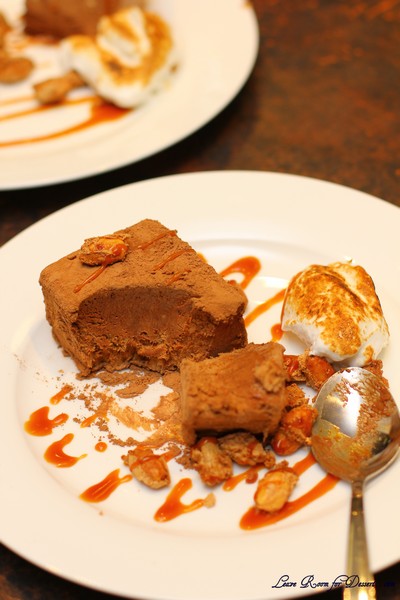
Plated marquise
Servings: 18 2.5″x2.5″ cubes (I would say ~24-36)

11 large egg yolks at room temperature
4 large whole eggs
2/3 cup (150 grams/ 5.3 oz) sugar
1/3 cup (2⅔ fluid oz/ 80 ml.) water
Chocolate Base, barely warm (recipe follows)
2 cups (16 fluid oz./ 500 ml.) heavy cream
2 cups Dutch process cocoa powder (for rolling) (Note: We used extra brut, like Hershey’s Special Dark. Make sure it’s a Dutch processed cocoa, not a natural cocoa powder.)
Torched meringue (recipe follows)
Spiced almonds (recipe follows)
Cacao nibs (optional)

In the bowl of a stand mixer, combine the egg yolks and whole eggs. Whip on high speed until very thick and pale, about 10 – 15 minutes. (It probably only took 5 minutes in my KitchenAid)

When the eggs are getting close to finishing, make a sugar syrup by combining the sugar and water in a small saucepan. Bring the syrup to a boil and then cook to softball stage (235F/115C). If you have a cake tester with a metal loop for a handle, the right stage for the syrup is reached when you can blow a bubble through the loop (as seen in the following pictures).

With the mixer running on low speed, drizzle the sugar syrup into the fluffy eggs, trying to hit that magic spot between the mixing bowl and the whisk.

When all of the syrup has been added (do it fairly quickly), turn the mixer back on high and whip until the bowl is cool to the touch. This will take at least 10 minutes.

In a separate mixing bowl, whip the heavy cream to soft peaks. Set aside.
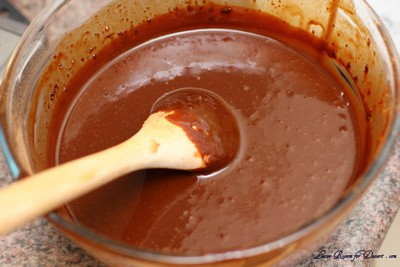
When the egg mixture has cooled, add the chocolate base to the egg mixture and whisk to combine. Try to get it as consistent as possible without losing all of the air you’ve whipped into the eggs. We used the stand mixer for this, and it took about 1 minute.

Fold 1/3 of the reserved whipped cream into the chocolate mixture to loosen it, and then fold in the remaining whipped cream.

Pour into the prepared pans and cover with plastic wrap (directly touching the mixture so it doesn’t allow in any air).

Freeze until very firm, at least 2 – 4 hours (preferably 6 – 8 hours).
When you’re ready to plate, remove the marquise from the freezer at least 15 minutes before serving. While it’s still hard, remove it from the pan by pulling on the parchment ‘handles’ or by flipping it over onto another piece of parchment. Unmold the frozen marquise

Cut it into cubes and roll the cubes in cocoa powder. These will start to melt almost immediately, so don’t do this step until all of your other plating components (meringue, caramel, spiced nuts, cocoa nibs) are ready. The cubes need to sit in the fridge to slowly thaw so plating components can be done during that time. They don’t need to be ready before the cubes are rolled in the cocoa powder.

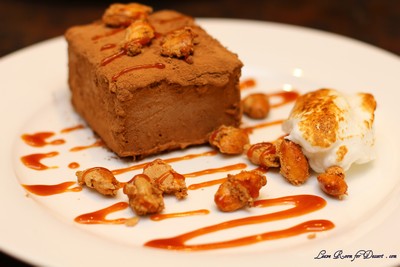
Plate with the torched meringue and drizzled caramel sauce, and toss spiced almonds and cocoa nibs around for garnish. You want to handle the cubes as little as possible because they get messy quickly and are difficult to move. However, you want to wait to serve them until they’ve softened completely. The soft pillows of chocolate are what make this dessert so unusual and when combined with the other elements, you’ll get creamy and crunchy textures with cool, spicy, salty, bitter, and sweet sensations on your palate.

Chocolate Base

Servings: n/a – this is an ingredient for the chocolate marquise, not meant to be used separately

12 oz (340 grams/ 1½ cups) bittersweet chocolate (about 70% cocoa)
12 oz (355 ml/ 1½ cups) heavy cream
1/2 teaspoon salt
1/4 teaspoon cayenne (I left this out and used 1/2 teaspoon cinnamon)
1/4 cup (60 ml/ 2 fluid oz.) tequila (I left this out)
1/4 cup (60 ml/ 2 fluid oz.) light corn syrup (I used glucose syrup)
3/4 teaspoon vanilla
1/4 cup (4 tablespoons/ less than an ounce) cocoa powder (we used extra brut, like Hershey’s Special Dark, but any Dutch-processed cocoa would be fine. Do not substitute natural cocoa powder.)
1/8 teaspoon freshly ground black pepper (I left this out)
1 oz unsalted butter (2 tbsps./30 grams), softened

Place the chocolate in a small mixing bowl.

In a double-boiler, warm the cream until it is hot to the touch (but is not boiling). Remove from the heat and pour over the chocolate.

Allow it to sit for a minute or two before stirring. Stir until the chocolate is melted completely and is smooth throughout.

Add the remaining ingredients and stir to combine.

Set aside until cooled to room temperature. Do not refrigerate, as the base needs to be soft when added to the marquise mixture. If you make it the day before, you may need to warm it slightly. Whisk it until it is smooth again before using it in the marquise recipe.

Torched Meringue

Servings: Makes about 4 – 5 cups of meringue. If you aren’t planning on serving *all* of the marquise at once, you might want to scale this recipe back a bit.

11 large egg whites
1 ¾ cups (14 oz or 395 gms) sugar
Splash of apple cider vinegar
1/2 teaspoon vanilla

Combine the egg whites, sugar and vinegar in the bowl of a stand mixer. Using your (clean, washed) hand, reach in the bowl and stir the three together, making sure the sugar is moistened evenly by the egg whites and they make a homogeneous liquid.

Over a saucepan of simmering water, warm the egg white mixture. Use one hand to stir the mixture continuously, feeling for grains of sugar in the egg whites. As the liquid heats up, the sugar will slowly dissolve and the egg whites will thicken. This step is complete when you don’t feel any more sugar crystals in the liquid and it is uniformly warm, nearly hot.

Remove the mixing bowl from the saucepan and return it to the stand mixer with the whisk attachment. Whisk until you reach soft peaks. In the last 10 seconds of mixing, add the vanilla to the meringue and mix thoroughly.

When you’re ready to plate the dessert, spoon the meringue onto a plate (or use a piping bag) and use a blowtorch to broil.

Tequila Caramel

Servings: Makes about 1 cup of caramel

1 cup (8 oz.) sugar
1/2 cup (4 fluid oz./ 120 ml.) water
1 cup (8 fluid oz./ 240 ml.) heavy cream
3/4 teaspoon salt
2 tablespoons tequila (I left this out and used 1 teaspoon vanilla)

In a heavy-bottomed saucepan, combine the sugar and water on medium-high heat. Boil until the water completely evaporates and the sugar caramelizes to a dark mahogany color.

Working quickly, add the cream to the darkened caramel. It will bubble and pop vigorously, so add only as much cream as you can without overflowing the pot.

Return the pot to the stove on low heat and whisk gently to break up any hardened sugar. Add any remaining cream and continue stirring. Gradually, the hard sugar will dissolve and the caramel sauce will continue to darken. When the caramel has darkened to the point you want it, remove it from the heat. Add the salt and tequila and stir to combine. Set aside until ready to serve.

Spiced Almonds

Servings: Makes about 1 cup of spiced almonds

1/2 cup (4 oz.) sugar
1 teaspoon cinnamon
1/4 teaspoon cayenne (I left this out)
1/2 teaspoon salt
1 large egg white
1 cup (145 grams/ 5 oz.) blanched whole almonds

Preheat the oven to 350F. Line a sheet pan with parchment paper or foil.

In a small bowl, combine the sugar, cinnamon, cayenne, and salt.

In a larger mixing bowl whisk the egg white until it’s frothy and thick.

Add the spice mix to the egg white and whisk to combine completely.

Add the nuts to the egg white mixture and toss with a spoon.

Spoon the coated nuts onto the parchment paper-lined baking sheet.

Bake the nuts for 30 minutes, or until they turn light brown. Allow the nuts to cool completely and they will get very crunchy. Set aside until ready to serve.


Maple Mousse in Bacon Cup – Daring Bakers Challenge April 2011

April 27th, 2011


The April 2011 Daring Bakers’ challenge was hosted by Evelyne of the blog Cheap Ethnic Eatz. Evelyne chose to challenge everyone to make a maple mousse in an edible container. Prizes are being awarded to the most creative edible container and filling, so vote on your favorite from April 27th to May 27th at http://thedaringkitchen.com!

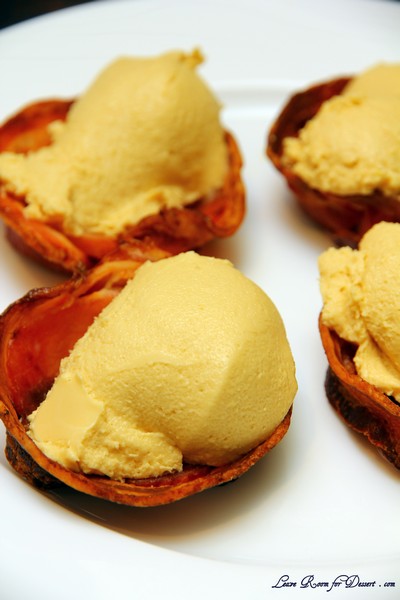
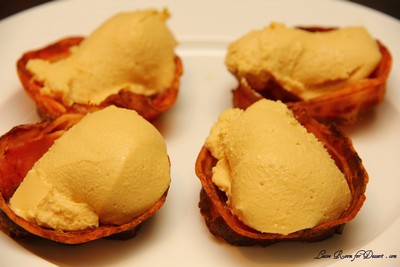
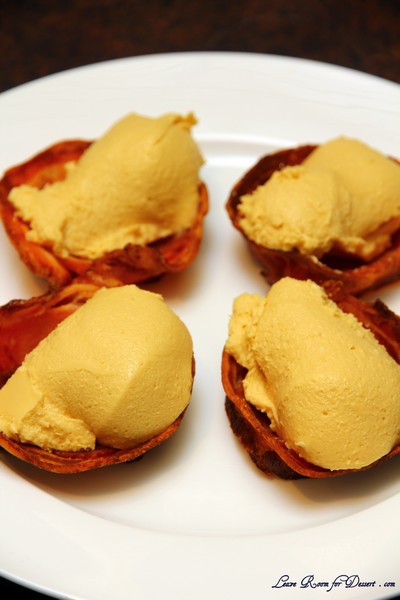
Yes, you read the title correctly. This month’s challenge did in fact involve maple syrup mousse in an edible container. If it were any flavoured mousse in any type of container – I already had a few ideas in mind. Although we have a few compulsory items each month for our Daring Bakers challenge and this month we had to make the maple mousse.

When I told others about this months challenge I must admit I didn’t get too many people saying it sounded like a lovely dish we had to make this month. Many people screwed up their faces at the thought of such a large maple syrup to cream ratio plus the addition of bacon (if you chose that type of edible cup).

There were many suggestions on how to make this beautifully presented and a good flavour combination, although I kept putting off the challenge until the day before it was due – the last day of our long weekend. And by that stage I was drained of cooking – hot cross buns, sorbets, honey comb, ice cream, lamb shoulder, pork belly and a few other experiments in the kitchen.

I decided to go by the recipe which said to use real maple syrup rather than maple flavoured syrup – although here in Australia a good quality real maple syrup costs about $10 for a cup. Yep – a little too expensive for a mousse that I didn’t think I would like that much. So I decided to halve the quantity of mousse.

After tasting the maple mousse (which I had a few troubles with, as I let the maple syrup + gelatine mix cool too much and had to gently re-heat it), we decided to go ahead with the bacon cups, hoping it would cut some of the sweetness.

Unfortunately I don’t think the mousse was for my tastes, although others that tried it, said it was better than they expected. It is quite unlikely I will make this again.

I will have to find time to make my own mousse and edible cups – although I think they will have a chocolate theme.

Thanks to our host this month for making me try something different.

Bacon Cups

Ingredients:
• 24 thin slices good quality bacon (I used 4 slices)

Directions:
1. Pre-heat the oven to 400 degrees F/200 degrees C.
2. Take a muffin pan or 6 small ½ cup capacity heat-proof bowls, turn upside down and carefully form aluminum foil covers on the back of 6 muffin cups or the bowls.
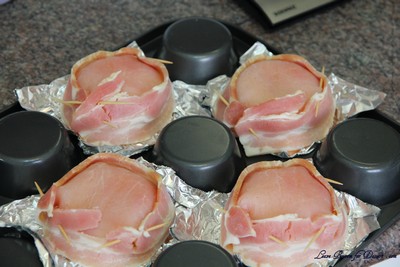
3. Taking 2 strips of bacon at a time crisscross the strips over the backs of the muffin cups and cut to size a tad longer then the bottom part of the cup. Now use 1 to 2 more strips to cover the sides of the muffin cups in a weaving fashion. You want a full tight weave because bacon shrinks a lot. For smaller cups I used a shot glass with a square of bacon for the bottom and I wrapped 1 strip around the side.
4. Tuck the ends of the bacon strips inside otherwise they will curl while cooking. A good idea is to insert 4 toothpicks where the crisscrossed bacon meets in the weave.

5. Place muffin pan in a cookie tray to catch drippings. Bake in oven for about 25 to 40 minutes, or until the bacon is golden and crisp but not burned.


6. Cool completely, a good hour, before removing your cups delicately from the foil.

Maple Mousse

(I halved this recipe)
Ingredients:
• 1 cup (240 ml/ 8 fluid oz.) pure maple syrup (not maple-flavoured syrup)
• 4 large egg yolks
• 1 package (7g/1 tbsp.) unflavoured gelatine
• 1 1/2 cups (360 ml. g/12 fluid oz) whipping cream (35% fat content)

Directions:
1. Bring maple syrup to a boil then remove from heat.
2. In a large bowl, whisk egg yolks and pour a little bit of the maple syrup in while whisking (this is to temper your egg yolks so they don’t curdle).
3. Add warmed egg yolks to hot maple syrup until well mixed.
4. Measure 1/4 cup of whipping cream in a bowl and sprinkle it with the gelatine. Let it rest for 5 minutes. Place the bowl in a microwave for 45 seconds (microwave for 10 seconds at a time and check it in between) or place the bowl in a pan of barely simmering water, stir to ensure the gelatine has completely dissolved.
5. Whisk the gelatine/whipping cream mixture into the maple syrup mixture and set aside.
6. Whisk occasionally for approximately an hour or until the mixture has the consistency of an unbeaten raw egg white.
7. Whip the remaining cream. Stir 1/4 of the whipped cream into the maple syrup mixture. Fold in the remaining cream and refrigerate for at least an hour.
8. Remove from the fridge and divide equally among your edible containers.