Bi Bim Bap – Cooking Class 8

June 5th, 2009

bibimbap07

When Nick chose his next Cooking Class dish, no one had heard of it (and don’t ask me to say it, because I’m sure my Australian accent does it no justice, I’ve already spelt it wrong a couple of times).

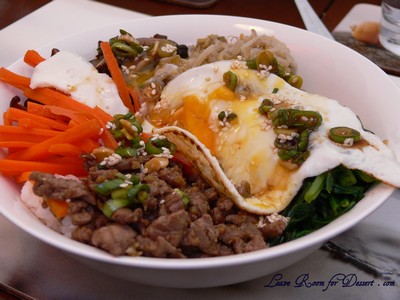
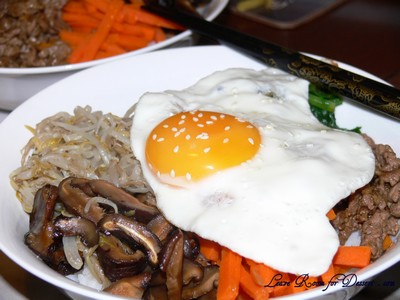
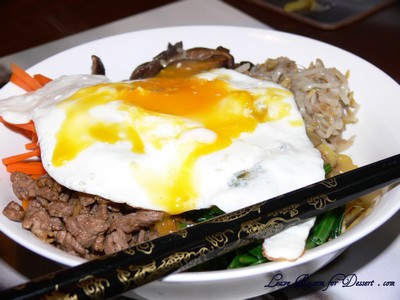
It was described to me as a Korean stir-fry without the actual stir-fry. More of a combination of flavoured vegetables and some beef all cooked separately, then laid onto each person’s bowl of rice, with a fried egg with soft yolk placed on top. Break the yolk and eat different sections, or mix and match.
bibimbap14

It took a bit longer to make then we expected. We had to cook each part separately in the wok, although it was worth it, and the hot rice helped heat up anything that had cooled slightly. Nick was happy with it too, saying it was quite similar to what he had previously tried (even though he’s only tried it once or twice).

Bi Bim Bap
(Recipe adapted from Maangchi)
For 4- 6 servings

1 tablespoon butter
2 cups rice
3 cups boiling water
salt
a package of bean sprouts
a bunch of spinach, sliced in long strips
2 zucchinis, peeled and cut into long thin slices
8 Shiitake mushrooms (if they are dried, you need to soak them for 2 hours), sliced thinly
200 grams of ground beef (about half a pound), or diced beef
3 carrots, peeled and cut into long thin slices
4-6 eggs
soy sauce
6 cloves garlic
sugar
sesame seeds, sesame oil, and vegetable oil
A platter for vegetables

Green onion sauce
4 green onions
½ cup soy sauce
1 tablespoons sesame seeds
2 teaspoon sugar
1 tablespoon sesame oil

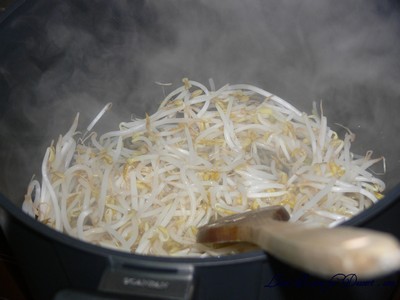
Rinse bean sprouts 3 times and put them in a pot with a cup of water. Add 1 teaspoon of salt and cook for 20 minutes. Half way through add 1 clove of minced garlic, sesame oil and a pinch of salt. Drain and place on platter.
bibimbap16

Heat a medium saucepan on medium/high heat. Add butter and then stir in rice to coat. Add a few pinches of salt, stir, then add boiling water and stir. Once water has come back to the boil, turn down to as low as possible, place the lid on and cook for 15-20 minutes.

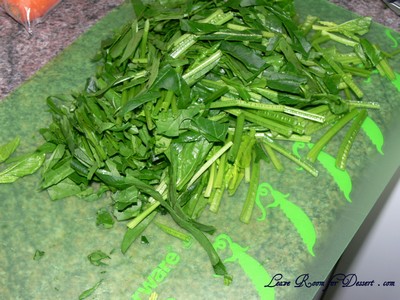
Put spinach in a pot of boiling water and stir it for a minute. Then rinse it in cold water a few times and squeeze it lightly. Mix it with a pinch of salt, 1 teaspoon soy sauce, 1 clove of minced garlic and sesame oil. Put it on the platter.
bibimbap17

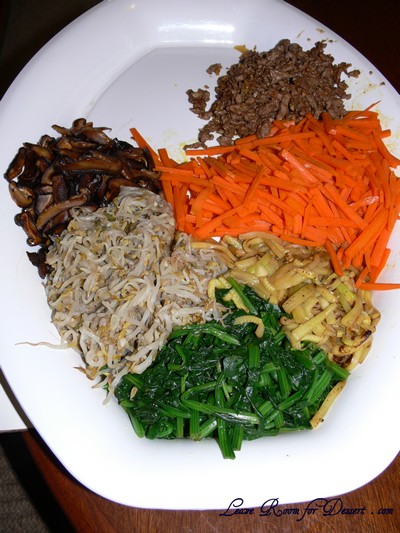
Sprinkle zucchinis with a pinch of salt and mix together. A few minutes later, sauté zucchini in a wok over high heat. When it’s cooked, it will look a little translucent. Put it on the platter.

Sauté shitake mushrooms with 1 teaspoon of vegetable oil in wok. Add 2 teaspoons of soy sauce and 1 or 2 teaspoons of sugar and stir it for 2 minutes. Add some sesame oil, and put it on the platter.

Add some oil to the wok and cook ground beef. Add 4 cloves of minced garlic, 1 tablespoon of soy sauce, ½ tablespoon of sugar, a little grounded black pepper, and sesame oil. Place on platter

Sauté carrots it for 30 seconds and put it on the platter.
bibimbap01

Add a little butter to a pan and cook eggs with sunny side up. (Crack into pan and cook until egg white cooked and yolk still runny).

For the sauce, add all ingredients together and mix.
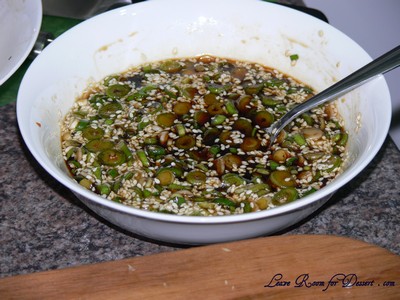
bibimbap23

Spoon rice into bowls and attractively display all your vegetables and meat. Place the sunny side up egg on the centre. Serve it with green onion sauce, sesame oil and hot pepper paste. Lastly, mix it up and eat!
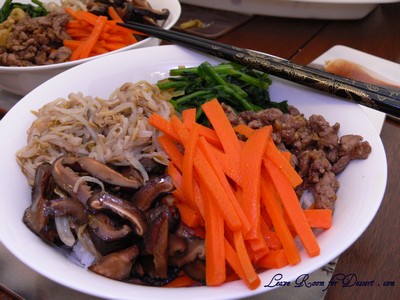
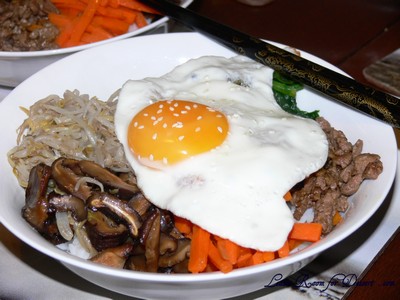
bibimbap03

bibimbap08

bibimbap15


Tomato and Basil Bruschetta

June 3rd, 2009

I’m not the best person at remembering to send someone a recipe they’ve asked for. Unless I get reminded or leave an email in my inbox marked as “unread”, it’s unlikely I’ll get around to it, especially if I haven’t had a chance to type it out. So I felt a bit bad when a friend of mine asked for a Bruschetta recipe and I still haven’t emailed it to her.

bruschetta01

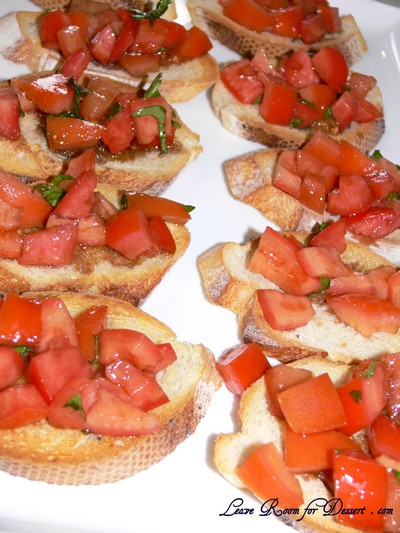
Well here is the Bruschetta recipe I use. It’s nice and quick, with lovely flavours… even for someone who doesn’t like eating raw tomatoes… now who could that be? 😉 De-seeding the tomatoes reduces extra liquid which will cause the bread to soften and go soggy, so make sure you serve very soon after spooning the tomato mix onto the bread.

Tomato and Basil Bruschetta

(Recipe from Super Food Ideas)
Serves: 4

1 loaf day old sourdough bread
2 garlic cloves
¼ cup good-quality extra-virgin olive oil
2 large tomatoes, quartered, deseeded
4 basil leaves, shredded
2 tablespoons olive oil
3 teaspoons balsamic vinegar
salt and pepper to taste

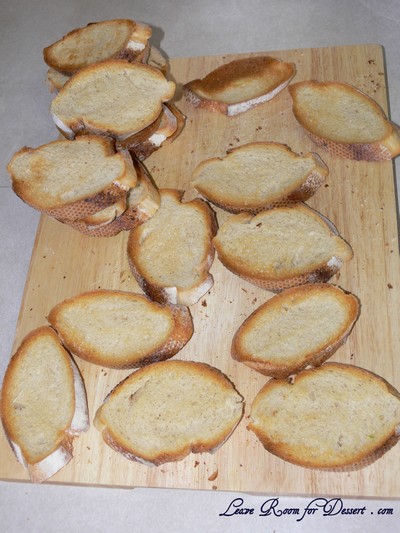
Slice bread into eight, 1cm thick slices (traditionally straight across the bread, not diagonally). Lightly toast (under grill) both sides bread until crisp on outside but soft on side. Cut garlic cloves in half lengthways. Rub cut side of garlic over 1 side of hot bread.

bruschetta03

Drizzle 1½ teaspoons oil over garlic side of bread, Season with salt.

Cut tomato quarters in half again and dice. Place in a bowl. Add basil, oil, vinegar and salt and pepper. Stir gently to combine. Spoon onto toasted bread and serve.

Variation: Replace the fresh tomatoes by combining 1 cup chopped semi-dried tomatoes and ½ cup chopped feta-stuffed olives with the basil.

bruschetta02


Adriano Zumbo – 40 Days and Nights in Paris

May 31st, 2009

May 2009

I have been so excited about going to see Adriano Zumbo’s new collection of cakes and macarons since I heard about the launch 3 weeks ago and got even more excited when I saw a sneak peak preview on Not Quite Nigella!!! Lucky Lorraine!! (I’m secretly [or not so secretly] very jealous! 😉 ).

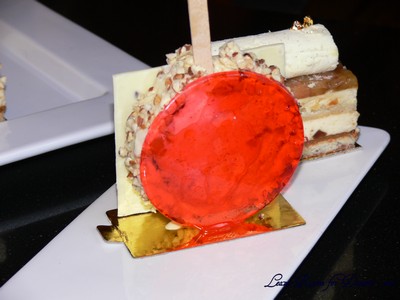
“…….” - Hazelnut meringue, anzac moisture, mint chocolate disc, vanilla apple tatin chantilly, apple tatine compote, isomalt caramel.

“…….” - Hazelnut meringue, anzac moisture, mint chocolate disc, vanilla apple tatin chantilly, apple tatine compote, isomalt caramel.

I have never been to Zumbo’s before and have been reading great reviews about it for the past year. This is also my first time in meeting some fellow food bloggers and my first review of a café. A big thanks to Reem for organising this lovely get together, it was great to finally meet everyone: Reem, Lili, Steph, Chris and Tim, Belle, Trina, Simon, Karen and Susan.

I not only love cakes, biscuits, chocolate, macarons, cream and all other things sweet, but I also love when people present their dishes in a gorgeous way, so I was in for a treat!
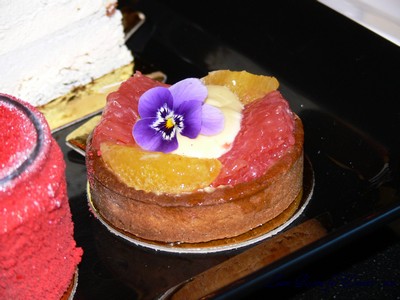
“!” - Smoked rice orange brulee, violet curd, pate sable with mandarin and ruby grapefruit segments.

“!” - Smoked rice orange brulee, violet curd, pate sable with mandarin and ruby grapefruit segments.

After seeing the preview I had an idea of definite cakes to try, the chocolate ‘popcorn’ stack and the Mille Feuille … and don’t forget the lovely range of macarons.

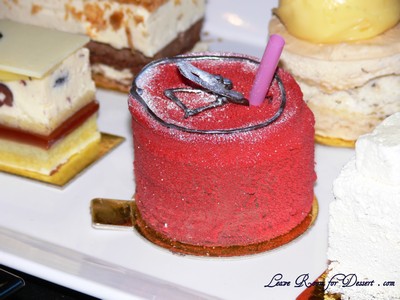
“Escape from a Colombia Rainforest” - flourless chocolate sponge, dark chocolate fizzy disc, cherry cola jelly, cherry cola slurp, chocolate sabayon mousse.

“Escape from a Colombia Rainforest” - flourless chocolate sponge, dark chocolate fizzy disc, cherry cola jelly, cherry cola slurp, chocolate sabayon mousse.

“P” - Mandarin mousse, tonka bean brulee, pain d’epice, sour cream jelly, almond ginger crunch disc.

“P” - Mandarin mousse, tonka bean brulee, pain d’epice, sour cream jelly, almond ginger crunch disc.

Adriano, Rachel and the other lovely staff at the café had a spread of the new collection of cakes out for us to photograph and after choosing a few to buy and take home, we were able to share the remaining cakes there.

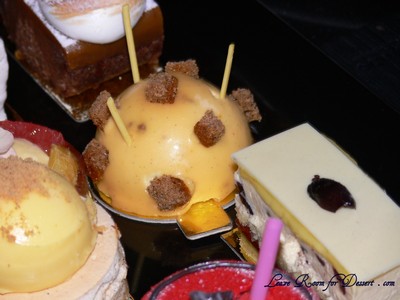
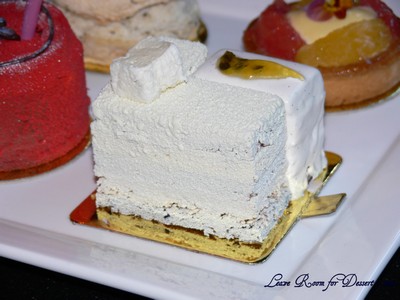
“6/11/81″ - Milk passion caramel mousse, lime creme, passionfruit marshmallow, coconut crunch and brownie.

“6/11/81″ - Milk passion caramel mousse, lime creme, passionfruit marshmallow, coconut crunch and brownie.

At Adriano’s I tried a beautiful lime and passionfruit marshmallow cake. There were two sections to this cake, one with a slightly crunchy coconut layer on the outside, with layers of marshmallow and cake and the other covered in luscious mousse. I would have this again – and have been craving it since! 🙂

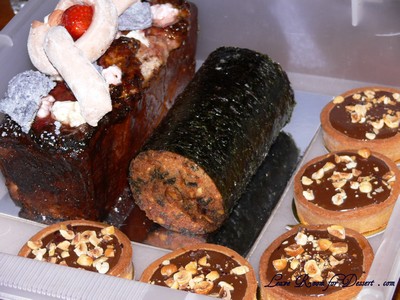
Smoked toasted marshmallow & chocolate cake, Carrot and seaweed teacake  and Gianduja ganache with caramel in a pate sable shell

Smoked toasted marshmallow & chocolate cake, Carrot and seaweed teacake and Gianduja ganache with caramel in a pate sable shell

Adriano also bought out a few different cakes that were sliced up on the spot. A carrot cake wrapped in seaweed along with a marshmallow cake which had marshmallow in the top of the cake, with a distinctly smoky flavoured cake and glaze, which was topped with marshmallow and ‘coal’-like pieces on top.

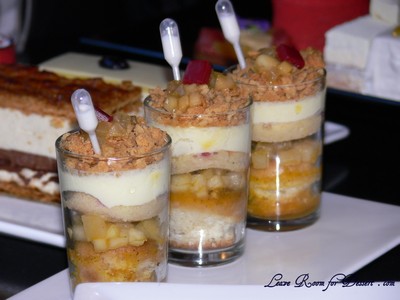
“S” - Tea and passionfruit soaked pears & savarin, lavender saffron mascarpone creme, crumble, raspberry jelly, coconut rehydration pipette.

“S” - Tea and passionfruit soaked pears & savarin, lavender saffron mascarpone creme, crumble, raspberry jelly, coconut rehydration pipette.

“W” - Chocolate pop rock & popcorn disc, vanilla almond chantilly, dulce de leche, flourless chocolate sponge, almond feulletine.

“W” - Chocolate pop rock & popcorn disc, vanilla almond chantilly, dulce de leche, flourless chocolate sponge, almond feulletine.

Unfortunately I didn’t get a chance to try the chocolate popcorn stack, but heard it was lovely, this means I’ll have to travel back there 😉 Anyone interested?

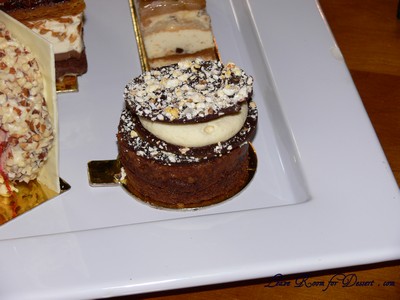
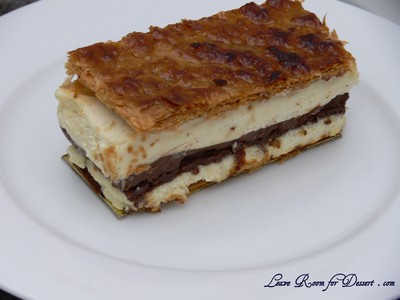
‘X' - Pine nut gianduja mousse, dark chocolate crème, pate feulletage caramelise, sacher sponge

‘X' - Pine nut gianduja mousse, dark chocolate crème, pate feulletage caramelise, sacher sponge

I decided to buy two cakes to take home for my family to try. One was the Mille Feuille, which consisted of layers of pine nut mousse, fresh and cripsy puff pastry and chocolate crème. There were a few flavours I couldn’t pick in this dish and most people enjoyed this one.

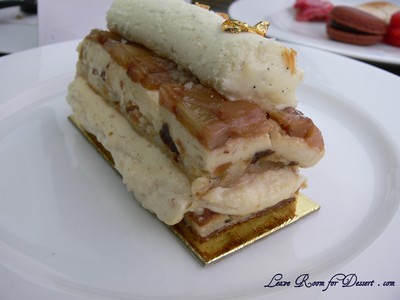
(It fell while I took in on trek home), but it didn't change how much I love it. “V” - Macadamia praline mousse, macadamia dacquoise, vanilla chantilly, pear tatine palette, macadamia feulletine.

(It fell over while I took it on the trek home), but it didn't change how much I loved it. “V” - Macadamia praline mousse, macadamia dacquoise, vanilla chantilly, pear tatine palette, macadamia feulletine.

I really enjoyed ‘V’. After hearing the numerous amounts of ways macadamia were incorporated into this dish and seeing its gorgeous presentation, I thought both my family and I would certainly enjoy this tremendously. It was certainly one of the favourites with the vanilla chantilly working wonders with the macadamia layers, and the pear tatine cutting some of the creaminess in the dish.

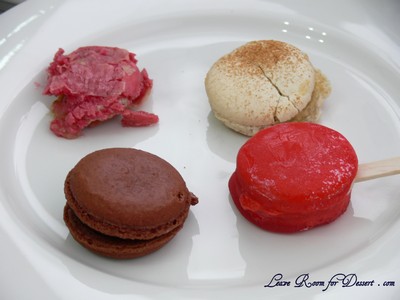
Macaron flavours, clockwise from back left: Baklava, Rice Pudding, Toffe Apple, Dark Chocolate

(These also got a bit broken on the way home). 🙁 Macaron flavours, clockwise from back left: Baklava, Rice Pudding, Toffe Apple, Dark Chocolate

I took four macarons home to try as well. The rice pudding was my favourite with a lovely vanilla flavour and rice texture. The chocolate macaron was lovely, slightly bitter with rich dark chocolate. The baklava macaron had a big hit of what I thought was cardamon? But I’m never good at picking flavours and the toffee apple had a hard and (beware for those with loose fillings) chewy outside toffee shell, with a soft apple interior.

The Man himself - Adriano being inundated by bloggers wanting photos

The Man himself - Adriano being inundated by bloggers wanting photos

Thanks again to both Adriano and Rachael at the café for all the hard work they put into making sure the food bloggers had a great range of cakes to try. They were both lovely, friendly and very helpful. Thanks again and I look forward to my next visit. Thanks also to all the food bloggers!! 😉

Adriano Zumbo
Café Chocolat
Shop 5, 308 Darling St Balmain
Ph 02 9555 1199
Open from 8 to 4 Monday to Friday, 8 to 5 on Saturdays and 9 to 5 Sundays

Pâtisserie
296 Darling St Balmain
Ph 02 9810 7318
Open 8 to 6 Monday to Saturday and 8 to 4 on Sundays


Melomakarona – Walnut Syrup Biscuits

May 28th, 2009

melomakarona-04

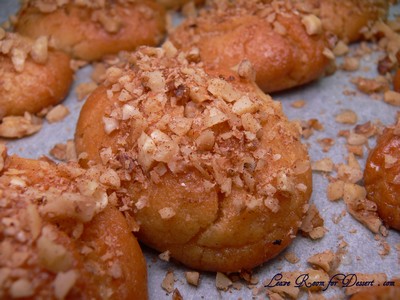
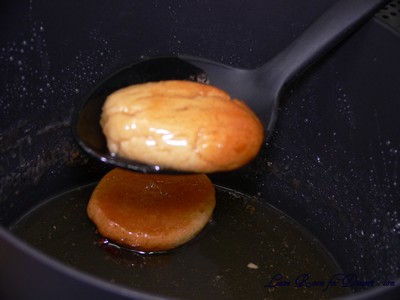
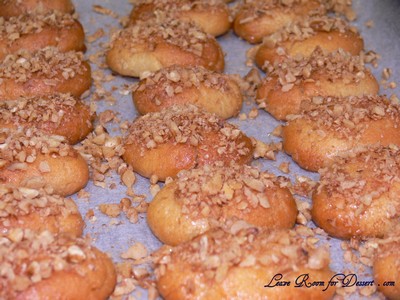
Since being introduced to Greek food, with the main focus on Greek sweets, I just can’t seem to stop trying new biscuits and baklava. A batch of biscuits made with a cup of oil seemed a bit concerning to me… I find it easier to justify when I use that much butter, as somehow it doesn’t seem as scary to me. I’m game to try out new foods though and if that includes using a cup of oil, who am I to criticise?

melomakarona-02

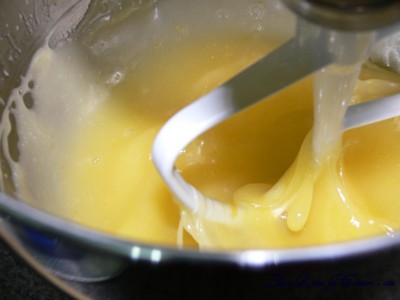
Using my KitchenAid, the oil beat up a lot quicker than the suggested time and I wasn’t sure whether I should have used a whisk attachment instead. Although once rolled and cooked, I was happy with the result and it seemed those who tried them also enjoyed them. There was a beautiful melt-in-your-mouth feel to the biscuits, with a lovely subtly spiced sweet syrup with a hint of walnuts – Very nice indeed 😛

Melomakarona (walnut syrup biscuits)

(Recipe from Super Food Ideas and Taste.com.au)

Makes: 32

1 cup vegetable oil
½ cup white sugar
2 oranges, juiced
½ lemon, juiced
1 egg yolk
1 tablespoon ouzo liqueur (optional – I left this out)
3 cups self-raising flour
¾ teaspoon ground cinnamon
1 1/3 cups walnuts, finely chopped

Syrup
1 cup white sugar
½ cup honey
½ cup boiling water
1 cinnamon stick
4 cloves
½ lemon, juiced

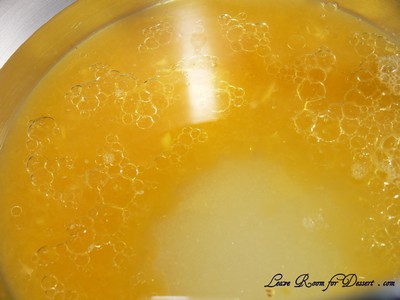
Preheat oven to 180°C. Line 2 flat baking trays with baking paper. Using an electric mixer, beat oil, sugar, 1/2 cup orange juice and 2 tablespoons lemon juice on high speed for 10 minutes or until thick and creamy (start electric mixer on low speed and increase speed as mixture thickens).

melomakarona-05

melomakarona-06

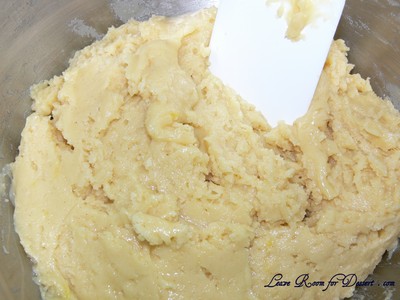
Add egg yolk and ouzo. Beat for 5 minutes. Sift flour and 1/4 teaspoon cinnamon over oil mixture. Fold gently to combine (mixture should be a light, doughy texture).

melomakarona-07

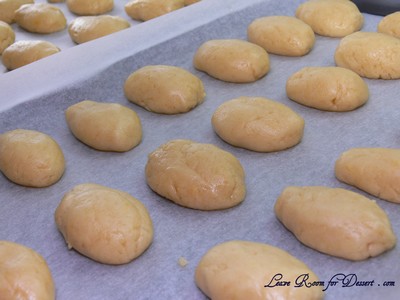
Using hands, roll tablespoons mixture into oval shapes. Place on prepared trays. Bake for 25 minutes or until firm to touch. Allow to cool on trays.

melomakarona-09

To make the syrup, combine ingredients in a saucepan over medium-high heat. Cook, stirring, for 5 minutes or until sugar has dissolved. Bring to the boil. Reduce heat to medium-low. Simmer for 4 minutes or until syrup thickens slightly.

Using a slotted spoon, dip cooled biscuits, 1 at a time (I put 4-5 in at a time), into hot syrup for about 30 seconds, turning over often until well coated. Return to trays. Combine walnuts and remaining ground cinnamon. Sprinkle over biscuits. Allow to cool. Serve.

melomakarona-12

melomakarona-01

melomakarona-03


Meatloaf with Hidden Boiled Egg – Cooking Class 7

May 23rd, 2009

meatloafegg10

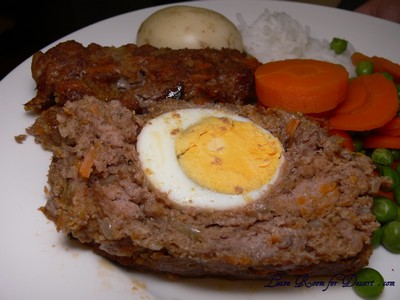
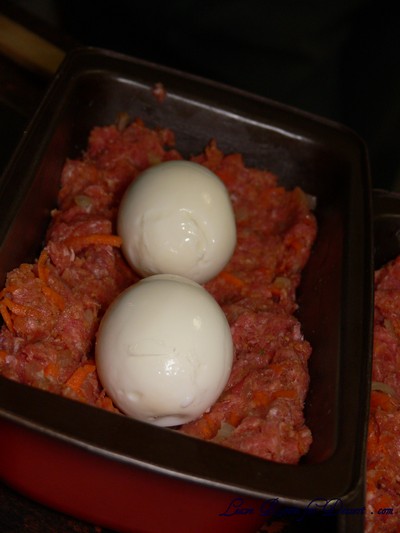
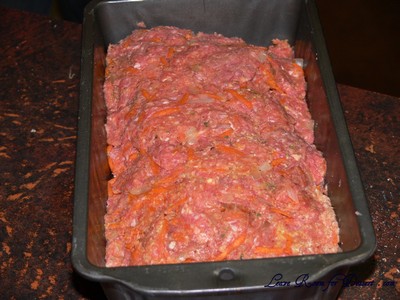
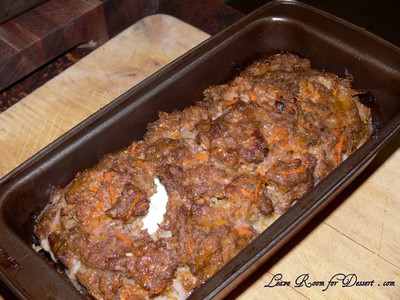
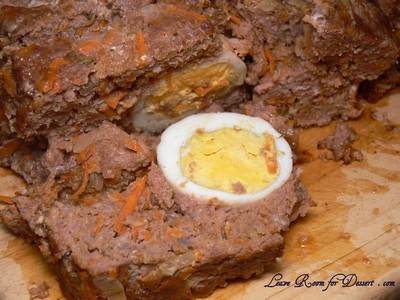
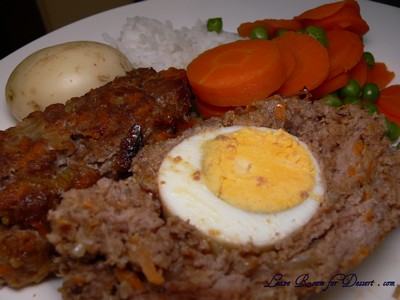
You may be surprised to hear that I can only remember maybe once eating meatloaf and I certainly can’t remember if it had egg in it. This dish was chosen with the special condition that there was whole boiled eggs hidden in the middle of the loaf, so when it was sliced when serving, a lovely slice of egg was evident.

This mix was very tasty, the only problem being that the meat mix fell apart a bit while slicing. Maybe we should push down on the mix more, compact the top? Possibly add a bit more beaten egg to combine the meat better? Either way, it was a lovely flavour combination and I would be more than happy to try and perfect this… maybe the host would too? 😉

Meatloaf with Hidden Eggs

1 tablespoon of olive oil
1 large size brown onion, finely chopped
8 eggs (2 of these eggs, beaten lightly)
2 teaspoon of dried mixed herbs
¼ cup of tomato sauce
1.5kg beef mince
500g sausage mince
1½ cups breadcrumbs
¼ tablespoon freshly ground pepper
1 medium carrot, finely grated
5 tablespoons of HP sauce

Hard boil 6 eggs and allow to cool before removing their shells. Heat a large saucepan to medium heat, add the oil and cook the onion for 5-10 minutes, until translucent.

Preheat oven to 180°C. Mix beef and sausage mince using a wooden spoon or by hand. Add the remaining ingredients, including the beaten eggs (excluding the boiled eggs) and mix until well blended.

Spoon half of the mixture into the bottom of 2 or 3 greased loaf tins. Form small indentations for the hard boiled eggs and place eggs into mixture. Smooth the remainder of the mixture into the tin over the eggs.

meatloafegg03

meatloafegg05

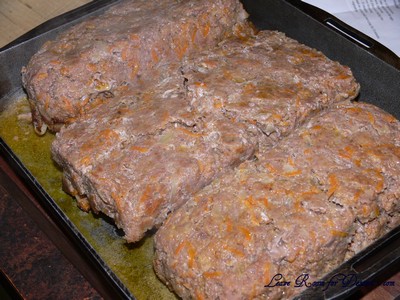
Bake in oven for 30 minutes, then remove from oven. Remove from the loaf tin and place on a baking tray. Cover loosely with foil to prevent over-browning. Bake in oven for a further 20 minutes.

meatloafegg06

meatloafegg07

Remove from oven and allow to stand for 5-10 minutes. Slice and serve with vegetables.

meatloafegg08

meatloafegg01


Flourless Chocolate and Almond Cake

May 21st, 2009

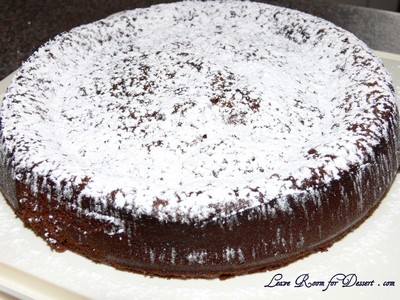
flourlesschoccake02

There aren’t a whole heap of cakes that I’ve made that don’t contain flour… maybe some friands and macarons. I’ve tried a lovely chocolate flourless cake at a bakery near my work and wanted to try making one similar to this and for anyone who is unable to eat foods containing flour.

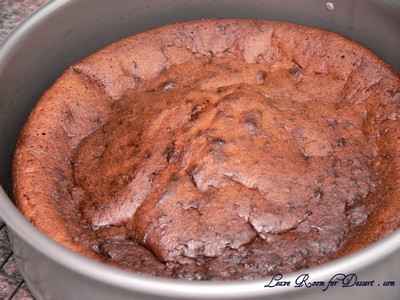
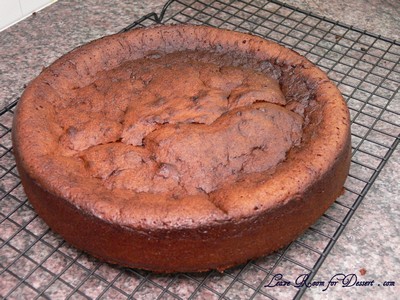
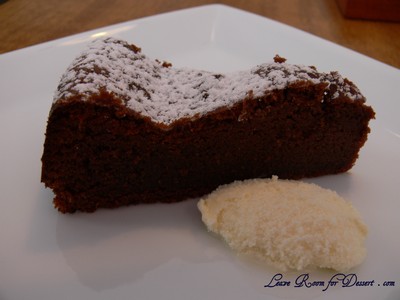
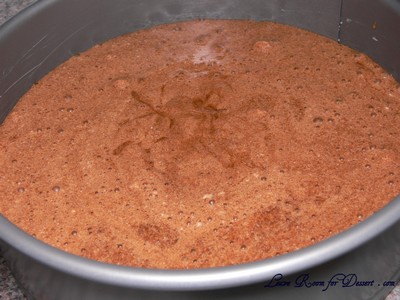
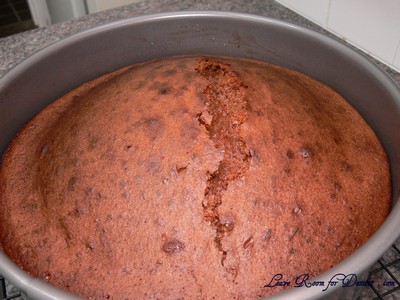
I wanted to make sure this was moist and between the consistency of brownie and a cake, so icing wasn’t needed. Therefore I took the cake out of the oven a little earlier than I would a normal cake. The middle had risen and started to crack – two things I didn’t really want to happen. So I took it out of the oven when there was slightly wet cake mix sticking to the skewer and let it cool in the tin, where it finished cooking and the middle sunk down.

flourlesschoccake01

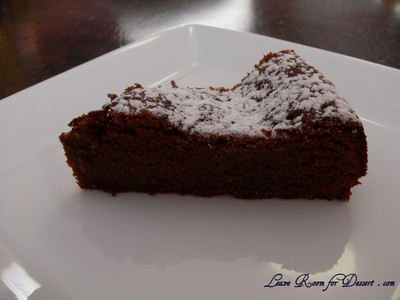
The result: a very lovely moist chocolate cake, I know many people enjoyed it on Mothers Day and I hope more people try it and enjoy it.

Flourless Chocolate and Almond Cake

200g dark chocolate, chopped
150g butter, chopped
150g caster sugar
2 tablespoons Kahlua (optional – I didn’t notice any taste from the Kahlua)
5 eggs, separated
100g almond meal

Preheat oven to 180°C. Lightly grease and line a 20 or 22cm round tin (I used a spring-form tin).

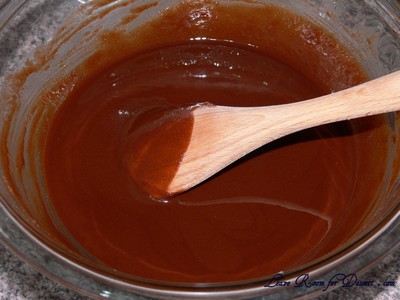
Place chocolate, butter, sugar and Kahlua in a bowl over simmering water (make sure the water is not touching the bowl. Stir until just combined and remove from on top of saucepan and allow to cool slightly.

flourlesschoccake05

Add egg yolks and beat in one at a time. Fold in almond meal.

Beat egg whites until stiff peaks form. Mix a few large spoonfuls into the chocolate mix to lighten the mixture. Fold the remaining egg white through the chocolate mix and pour into prepared tin. Bake for 40 minutes (more if you want it more cake like, less if you want it more fudgey).

flourlesschoccake06

Enjoy with thickened cream or ice cream.

flourlesschoccake07

flourlesschoccake10

flourlesschoccake11

flourlesschoccake12

flourlesschoccake03


White Chocolate and Honeycomb Mud Cake

May 19th, 2009

whitechochoneycomb07

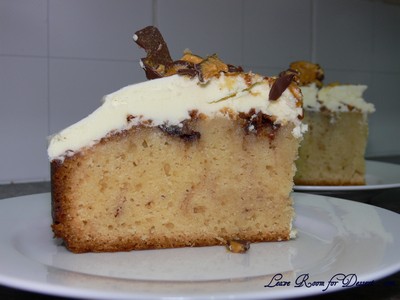
I know I said that I would be trying a white chocolate and hazelnut mud cake after making my first white chocolate mud cake, although I saw this recipe and thought it sounded so fun and would be perfect for my turn baking for our work meeting.

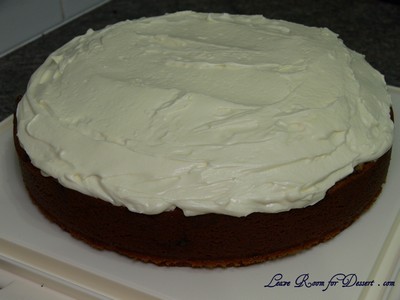
I love anything honeycomb and chocolate so combining this into a cake sounded great and the ganache on top looked lovely and fluffy, even though it doesn’t contain any icing sugar. Due to time restrictions I had to make the cake two nights before the meeting, the ganache the night before and I chopped up the remaining violet crumble just before the meeting so it didn’t soften or go sticky due to moisture.

whitechochoneycomb09

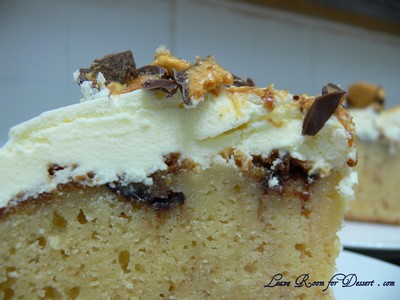
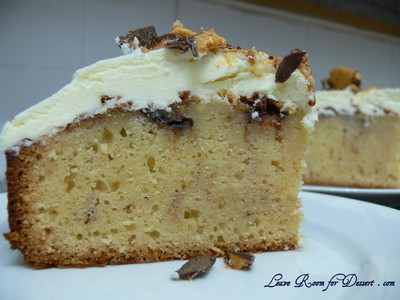
Unfortunately I only have photos of the two remaining slices that I had to hide away so Nick could try the cake (as he had been tempted by it during the baking as it smelled gorgeous and the ganache was beautiful and looked like ivory silk – although stiffened up slightly with time), This means the Violet Crumble was a little sticky and melted. The Violet crumble throughout the cake was not very evident, although the pieces which were at the top of the cake while cooking formed a lovely caramelised tasty top to the cake. I would definitely make this again (and already have), I’ve even added a little more Violet Crumble in the cake mixture… 😛

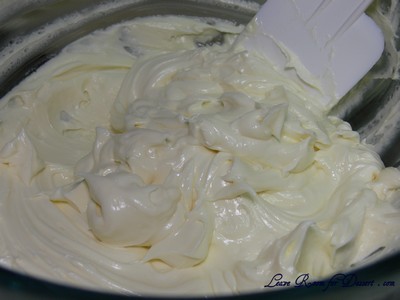
We had to tweak the ganache slightly as I tried to whisk gently the cooled chocolate and cream mixture and it did nothing. It was still very runny. After adding 2-3 tablespoons cold thickened cream (or letting it cool for a lot longer than the recommended time) and beating the mix with a hand mixer, scraping the sides a few times (I found this rest helped it thickened faster) it changed to a light and fluffy ganache.

whitechochoneycomb10

White Chocolate and Honeycomb Mud Cake
(Recipe adapted from super food ideas May 2009)

180g white chocolate, chopped
250g butter, chopped
1 cup milk
1¾ cup caster sugar
2 teaspoons vanilla essence/extract
1¾ cup plain flour, sifted
½ cup self raising flour, sifted
2 eggs, lightly beaten
1-2 x 50g Violet Crumble bars

White Chocolate Ganache
180g white chocolate
1/3 cup thickened cream
+ 2-3 tablespoons cold cream extra
1 x 50g Violet Crumble bars, chopped just before serving

Stir white chocolate, butter, milk, sugar and vanilla essence in a saucepan over low-medium heat until melted and smooth.

Pour into a large bowl and leave to cool for 25 minutes. Preheat oven to 160C or 140C fan forced. Grease and line a 20-22cm round tin with baking paper.

Add eggs and sifted flours and whisk to combine. Fold through Violet Crumble. Pour into prepared tin and cook for 1½ -2 hours or until skewer combs out with clean or with a few crumbs. If the cake starts to brown too much, cover loosely with a piece of foil.

whitechochoneycomb02

Remove from oven when cooked and rest in tin for 10 minutes. Allow to finish cooling on cooling rack.

whitechochoneycomb03

To make the ganache, put the white chocolate and cream in a bowl and microwave on high for 1 minutes, stirring half way through. Stir until smooth. Allow to cool for 15 minutes.

whitechochoneycomb04

Using an electric beater, beat the white chocolate mix for 2-3 minutes. Add extra cream to help cool down the mix and help it thicken easier. Beat on high for 2 minutes at a time, scrapping and observing the texture. Once it is nice and thick cover the cooled cake with the ganache.

whitechochoneycomb05

whitechochoneycomb06

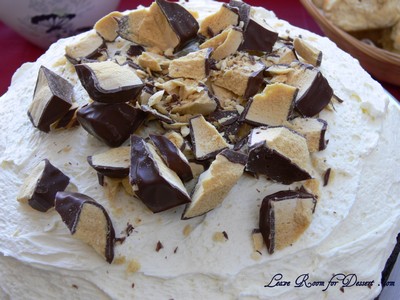
Just before serving, chop up the remaining Violet Crumble and scatter over cake. Serve.

whitechochoneycomb01

whitechochoneycomb08


Phad Thai – Cooking Class 6

May 17th, 2009

phadthai07

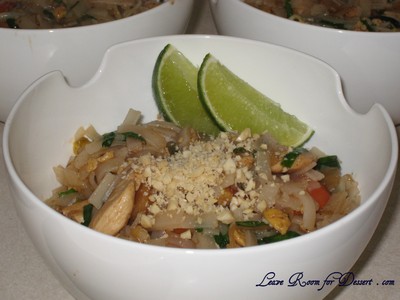
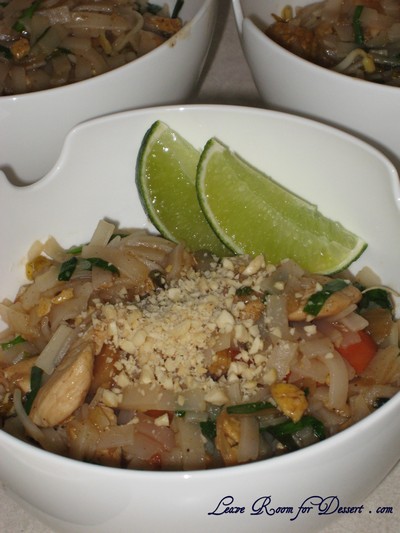
For the latest family cooking class there was a desire to find the perfect home-made Phad Thai. Although this was a lovely mix (I especially loved the sugar content 🙂 – although this was one of the downfalls for most others), the host of this weeks cooking class was not satisfied with the overall flavours and textures of this dish.

We would certainly try to combine some aspects of this recipe with some other recipes and try to improve on the overall dish.

phadthai01

Any suggestions on things we are missing or how things could be improved would be most welcomed. 🙂 But I’ll give you the recipe in case anyone likes a sweet Phad Thai.

Phad Thai Noodles

Serves: 4-6

375g packet rice stick dried noodles, soaked in cold water for 2 hours or overnight to soften, drain
vegetable oil
½ onion, sliced
500g chicken, cut into small strips
2 tablespoon pickled white radish (optional)
2 garlic cloves, finely chopped
2 eggs
2 spring onions, sliced
½ can baby corn pieces
1 carrot, sliced
half bunch Chinese chives, cut into 2.5cm pieces
1 cup bean sprouts
3-4 tablespoons chopped roasted peanuts

Sauce
2 tablespoon tamrind concentrate
1 cup sugar
1½ tablespoons fish sauce
½ cup water

Make sauce by mixing ingredients in a saucepan and heating on medium heat, boil for around 15 minutes while preparing the rest of the meal and keep warm.

Heat oil in wok on medium heat and cook onion until transparent and browning slightly. Remove from wok. Cook chicken in batches in the wok and set aside.

Add eggs and stir-fry until scrambled and slightly dry. Remove from pan.

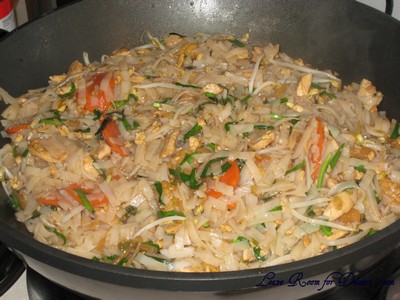
Add some oil and cook spring onions for 1-2 minutes, then add corn, carrot, cooked chicken and onion. Add sauce and noodles and mix. Add chives and bean sprouts and serve with lime wedges, chopped peanuts and ground chilli, if desired.

phadthai04

phadthai08


Choc-A-Block Trifle

May 13th, 2009

chocablocktrifle10

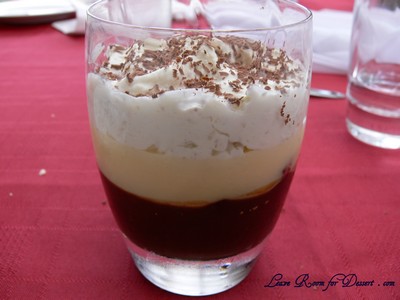
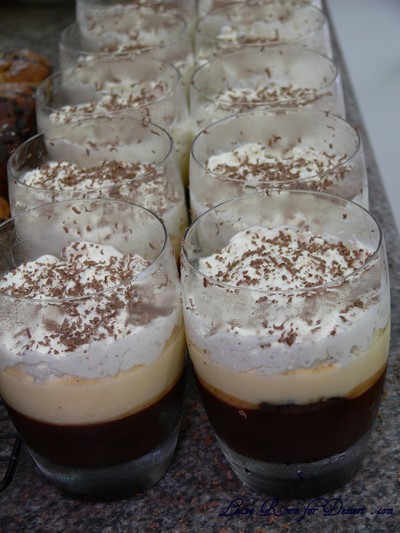
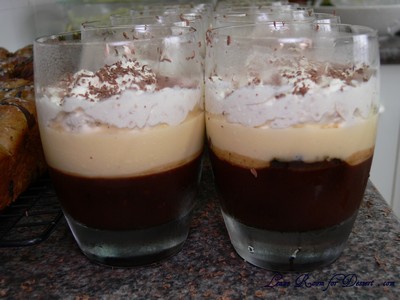
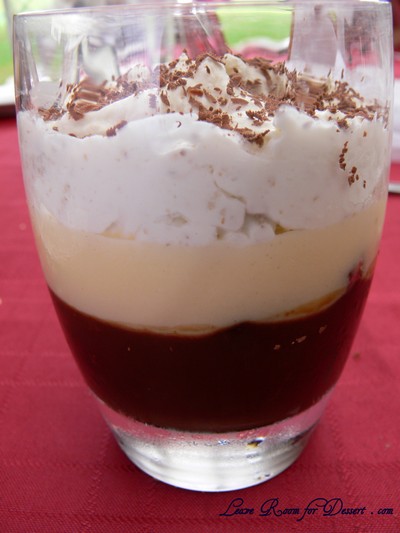
Now this is my sort of trifle! When I first saw this recipe in the delicious Magazine I knew I would one day make it. How could you resist making a trifle that contains chocolate brownies with dark chocolate sauce and Kahlua, fresh thick white chocolate custard and whipped cream with white chocolate and walnuts… are you drooling yet?

Well I certainly am.

chocablocktrifle08

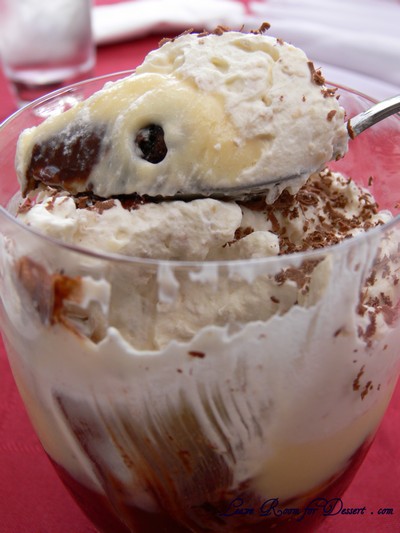
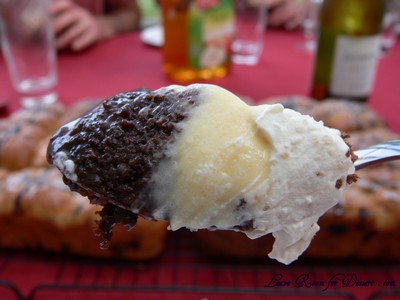
You certainly need to leave room for THIS dessert! With the gorgeously rich chocolate layer at the bottom – I must admit I had a little trouble finishing it, after eating a rather largish meal beforehand – others didn’t seem to have this same problem and cleaned out their glass. I loved the addition of the walnuts and white chocolate to the cream, which really complimented the chocolate layer wonderfully. I was expecting a little more participation from the white chocolate custard, but it got a little lost between the other two stronger flavours. I also found it didn’t thicken as much while cooking as I was expecting (something like the Portuguese custard tarts) so I may have overcooked it a little – unfortunately. :o( . Once cooled it was set, with no problems spreading the cream layer on top.
Apart from the long waiting times between layers setting, the entire recipe doesn’t take terribly long. It’s fantastic having a dessert already waiting for a diner party and I had easily made double the batch, using 14 baked brownies from the previous day. The other problem I had with the recipe (apart from the custard overcooking) was the addition of water to the melted chocolate…

The first tablespoon of boiling water was added to the melted chocolate and delicately stirred in… and the mixture became a conglomeration of thickening hard chocolate!! The more I stirred, the more it thickened – I was supposed to be making a sauce!! After an immense amount of stress on my part, Nick came to the rescue and took over stirring wildly, while adding boiling water faster than I was game – the recipe did say to add one by one to stop the chocolate seizing. Once the initial thickening had occurred, the chocolate formed a lovely sauce, which thickened up in the fridge to be decadently rich and slightly runny.
chocablocktrifle09

Choc-A-Block Trifle
Recipe from delicious magazine March 2008 by Valli Little

Serves: 6

4 good-quality chocolate brownies (about 85g each) (I used 7 of my home-made brownies)
¼ cup (60ml) Kahlua (or other coffee liqueur)
275g dark chocolate, roughly chopped
3 egg yolks
1½ tablespoons caster sugar
1 teaspoon cornflour
600ml thickened cream
150g white chocolate, roughly chopped
¼ cup (30g) toasted chopped walnuts
Dark chocolate curls (see note), to decorate

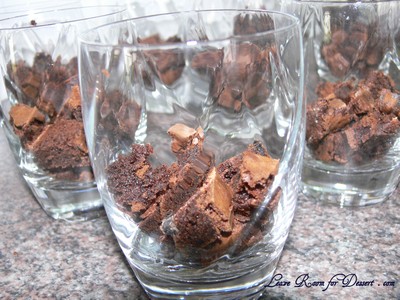
Break up brownies into small pieces and place in the bottom of a 1.5 litre dish or 6 x 1 cup (250ml) serving glasses. Drizzle over the Kahlua, then set aside.

chocablocktrifle03

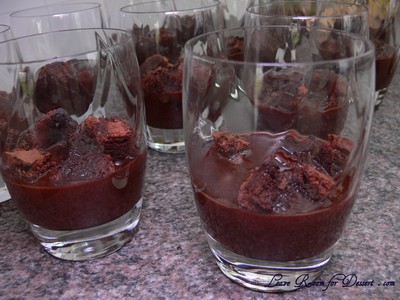
Place dark chocolate in a heatproof bowl set over a saucepan of gently simmering water (don’t let the bowl touch the water). Allow to melt, then stir very gently until smooth. Remove from heat and add 225ml boiling water, 1 tablespoon at a time, stirring to make a sauce (don’t add water more quickly or the chocolate will ‘seize’ and become grainy). Pour sauce over the brownies, then cover and chill for 2 hours.

chocablocktrifle05

Meanwhile, beat the egg yolks, sugar and cornflour together in a bowl with electric beaters until thick and pale.

Heat 300ml of the cream in a saucepan over medium heat until just below boiling point. Pour the hot cream mixture over the egg mixture, stirring to combine. Transfer to a clean saucepan and place over low heat. Stir for 2-3 minutes until a thick custard forms.

Place two thirds (100g) of the white chocolate in a heatproof bowl. Pour the custard into the bowl, stirring until the chocolate is melted and the mixture is well combined. Cool completely, then pour over the chocolate brownie base. Chill for 2 hours.

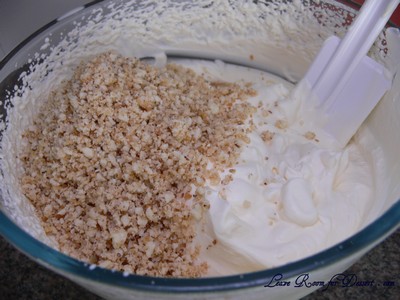
Place the remaining 50g of white chocolate in a food processor with the walnuts and pulse until fine. Whip the remaining cream to soft peaks, stir in the walnut mixture, then spread over the trifle. Chill for at least 2 hours until set, then serve decorated with chocolate curls, if desired.

chocablocktrifle07

chocablocktrifle11

chocablocktrifle01

All the layers of goodness!!

All the layers of goodness!!


Quiche

May 11th, 2009

quiche34

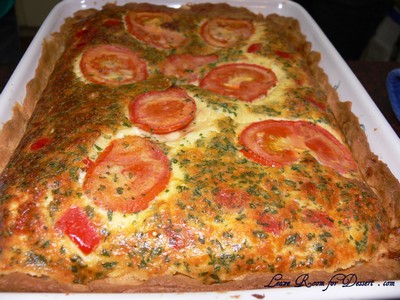
I haven’t had many good quiches, they’re always a bit too eggy for me. Either a strong egg taste or uncooked egg in the middle – eww. This is one of the reasons other family members also haven’t (or should I now say “hadn’t”) liked quiches.

But when I saw a great looking quiche with a fantastic crispy pastry on Not Quite Nigella’s blog, I knew I had to make it. I’ve used the same base for the quiche mix, changed a few different ingredients as I was missing some of the suggested ingredients and used the same pastry recipe.

quiche18

The pastry is delicious either cooked with the quiche mix or blind-baked for a bit too, it’s lovely and rich and extremely easy if you have food processor, which I now do! We, and when I say ‘we’, I mean Nick has tried grating of butter for the pastry, which is definitely easier when place in the freezer for a bit, although is a little messy and a bit more difficult.

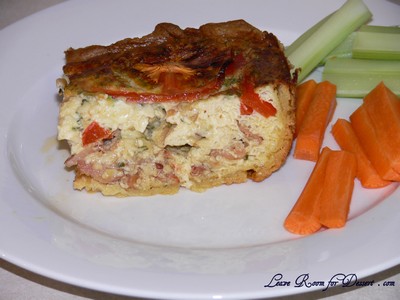
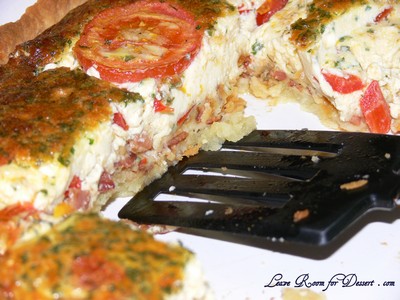
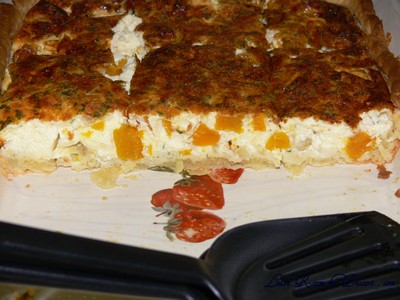
The pastry, bacon and capsicum or pumpkin and ricotta make the quiche a very tasty meal, the only problem is trying to eat a small portion! It’s very easy to divide it into 6 serves… or 8 if you’re not as greedy as me 🙂 .

Quiche
Recipe adapted from Perfect Picnic Quiche on Not Quite Nigella

Serves: 6-8

200g cream cheese
125g cold butter
1 -1 ¼ cups plain flour

4 rashers bacon, chopped – fat removed, but few large pieces kept for cooking
1-2 red capsicums, chopped
5 spring onions or 1 brown onion, sliced finely
Olive oil
6-7 eggs
1½ cups milk
1 cup grated cheese
2 tablespoons chopped parsley
2½ tablespoons plain flour
1 tablespoon mayonnaise
Salt and pepper
1 tomato, sliced (or a handful of cherry tomatoes)

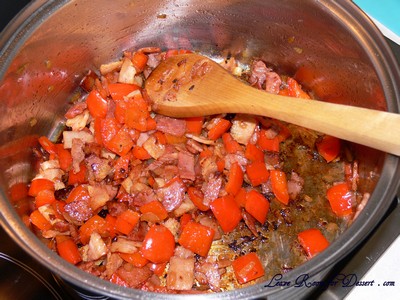
Heat a saucepan over medium high heat, add bacon fat with bacon. Cook, stirring, for 3-4 minutes or until bacon starts to brown. Add 1-2 tablespoons olive oil and add the spring onions and red capsicum. Continue to cook on medium high heat for 4 minutes, stirring occasionally. Turn heat down to medium low and continue cooking until capsicum starts to soften.

quiche10

Preheat oven to 180-200°C. Place a baking tray in the oven.

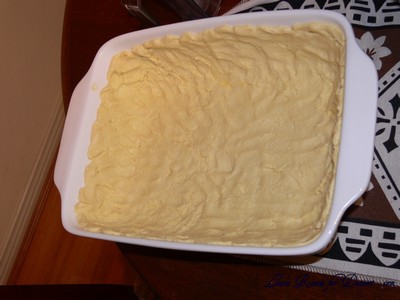
Chop cream cheese and place in microwave safe bowl. Cover with plastic wrap and cook in microwave for 30sec or until soft. Grate butter and add to cream cheese, stir quickly and then stir in plain flour, alternately place the soft cream cheese in a food processor, add chilled butter cut in cubes, process then add plain flour and process until combined. If it is too wet, add a bit more flour.

Place in a quiche dish (I used a 20 x 25 cm lasagne dish) and press out dough with fingers until covering the base and sides evenly. (If you want extra crispy pastry, cook this for 10 minutes in the oven, then remove and add filling – my pastry fell down the sides a bit but still turned out good).

quiche09

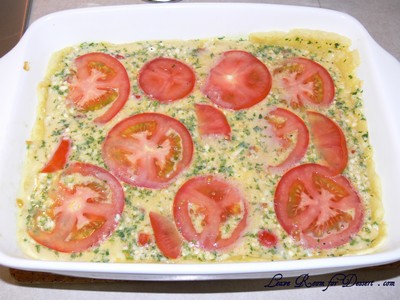
Whisk eggs, add milk and mayonnaise and whisk again. Add cheese, parsley, plain flour and salt and pepper and mix. Add the cooked bacon, capsicum and spring onion mix, stir and then pour into the pastry. Place sliced tomato on top.

quiche12

Place quiche on baking tray and cook at 180-200°C for 40-60 minutes, or until golden brown and firm on top.

quiche02

Alternative: Roast 1/8 (approx 300-400g) large kent or jap pumpkin, peeled, cored and cubed on a roasting tray in the oven at 180°C for 20-30 minutes or until cooked through. Cube 100g feta and add to normal quiche mix with pumpkin and feta in replace or bacon, capsicum and tomato.

quiche01