Main Meals

Pumpkin Soup

Monday, April 6th, 2009

Now after all the baking and rich dinners that I cook, it’s only reasonable that once in a while we make something which doesn’t contain loads of carbs or sugar. Many of you may not think this is an appropriate recipe to add to my blog, but it’s more put up to remind people of easy, budget meals (especially in these times) that anyone can make any time. It fulfils a lot of requirements for dinner:

pumpkinsoup

Cheap – I was able to buy a 3.7kg Kent pumpkin @ $0.98/kg = $3.65 for the entire batch of soup– if this serves 8 people it’s 46c per serve – Bargain!
Not many ingredients required
Low in Kilojoules – If you’re on Weight Watchers it’s 0 points!! (as long as you don’t add cream or eat bread with it)
Easy and Fast
Able to freeze (Just thaw and reheat)

What more could you want?
You only really need two ingredients a pumpkin and some chicken or vegetable stock, or stock powder – for those who won’t use up the rest of container of stock.

You can refrigerate or freeze the leftovers and reheat in the microwave or on the stove (it may form crystals when frozen, but once mixed through it’s fine).

Pumpkin Soup
Serves: 8 or more

3.5kg Jap or Kent Pumpkin (any other pumpkin will do e.g. Butternut, etc)
1 teaspoon chicken or vegetable stock powder (or one cup stock)

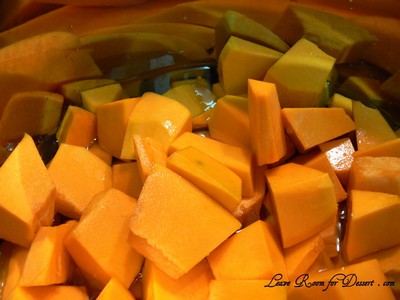
pumpkin

Peel and de-seed pumpkin. Cut in small pieces (4 x 4 x 1.5cm) and place in a large pot. Add enough water to almost cover (1-2cm below) the pumpkin pieces. This will make a thick soup, so you can add more water now or after blending if you prefer it thinner. Add the stock and heat over medium heat until the pumpkin is soft and a cake tester or sharp knife goes in and comes out easily.

Stir occasionally to make sure all pumpkin is cooked evenly

Stir occasionally to make sure all pumpkin is cooked evenly

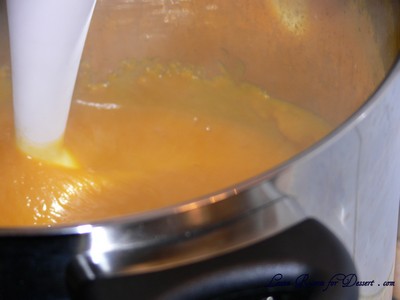
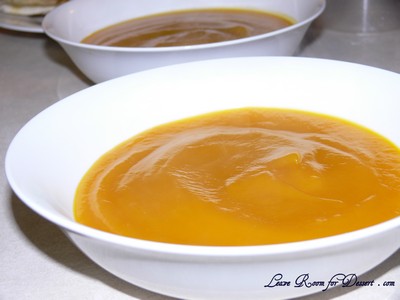
Use a hand blender to blend up the pumpkin.

Blend then serve

Blend then serve

See – I told you it was easy!
Now you can eat your cake or a lovely decadent dessert and not feel so guilty! 🙂

Variation:
You could always fry up one finely sliced onion before adding the pumpkin, a bit of cream after it’s blended to add some more taste and serve with tasty herb bread. Of course the bread and cream make this a bit less healthy, but it certainly tastes great!

Butter Chicken Pie

Thursday, March 19th, 2009

Happy Birthday Mum!

So many birthdays close together… Well I guess with a large family already, when you add friends and extended family the number of days between birthdays becomes few.

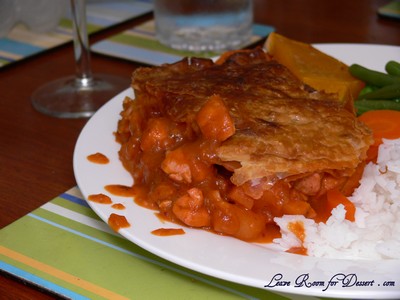
butterchickenpiecut

When I asked my mum what she’d like for her birthday dinner, she replied “Whatever you’d like to make”. Just like last year and the year before and the year before….

It takes only a few threats that we will not make her any food if she doesn’t choose what she wants, before she finally comes around to choosing things that she does want for her dinner. For dinner she asked for a butter chicken pie, one of the recipes Nick introduced to our family. Dessert and Birthday Cake is another story…

Butter Chicken Pie

Serves: 8

1 kg chicken, fat removed and diced
1 tablespoon peanut oil
3 carrots, diced
4 small potatoes, diced
1 sweet potato, diced
1 large jar (540g) butter chicken sauce (we used Patak’s – although we’ve made our own before, which tastes great)
1-2 sheets shortcrust pastry
1-2 sheets puff pastry
1 egg, lightly beaten

Preheat oven to 180°C.

Place carrots, potato and sweet potato in a saucepan with water and bring to the boil for 5 -10 minutes until almost cooked.

Heat oil in a saucepan over medium to high heat and add chicken stirring until brown. Add butter chicken sauce and heat through.

Add drained carrots, potato and sweet potato and cook until sauce has thickened a little.

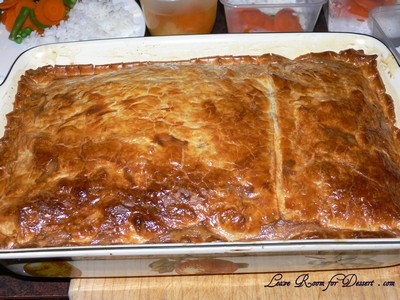
butterchickenpie

Line a lasagne dish with shortcrust pastry, add chicken mixture and cover with puff pastry. Slice some holes in the top of the pastry and brush with beaten egg. Cook for 30 minutes in oven or until pastry is golden brown.

Beef Wellington – Cooking Class 2

Tuesday, March 17th, 2009

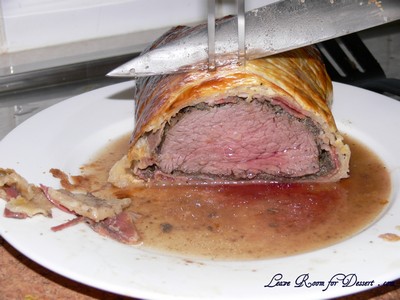
beef_wellington

Thank you Gordon Ramsay!

Nick has wanted to make Beef Wellington for years and when searching for a video of it he came across a recipe and video from Gordon Ramsay’s the F-word. It looked reasonably easy and even though he knew very early what he wanted to make, he still needed to recruit help in getting all the ingredients.

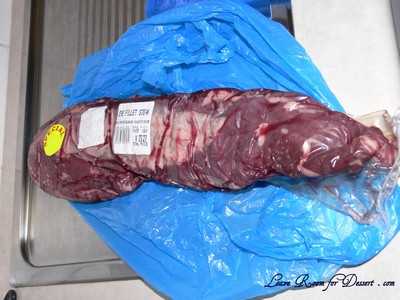
A fantastic Beef Eye Fillet from a whole-sale butcher was chosen. It was the smallest one available and it was 1.3kg, so we decided two Beef Wellington’s were on the menu (even though one would have been sufficient to feed the six of us that were there – better to have too much than too little, and people were certainly going back for seconds).

Absolutely gorgeous!!

Absolutely gorgeous!!

Neither pictures nor words can describe the texture and flavour of this dish, but I’ll try. I’ll also apologise for the photos, as they certainly don’t do it justice – being taken with bad lighting and a short amount of time (due to a table full of hungry family members).

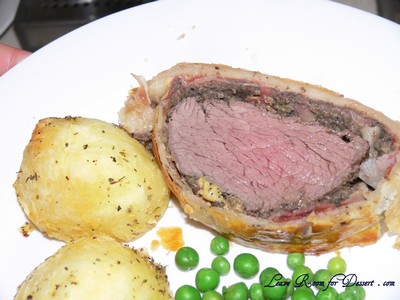
This recipe was incredibly easy for the absolutely delectable, fantastic flavour combination of the fall-apart beef, mushroom paste, prosciutto and mustards topped off by a buttery, crispy, golden pastry.

Beef Wellington
(adapted from Gordon Ramsay’s – The F-word)

Serves: 4-6

650 – 700g beef eye fillet
1 teaspoon Dijon mustard (even though Gordon says not to use it – we thought it may tone down the hot English mustard, although no burn was tasted)
1 teaspoon hot English mustard
4-6 mushrooms
8 slices prosciutto
2 sheets puff pastry
1 egg yolk, beaten
salt and pepper to taste

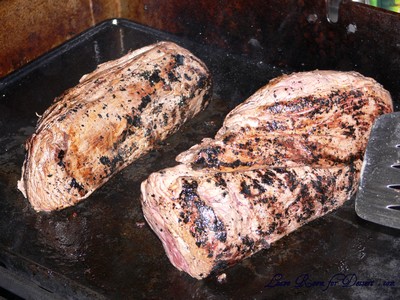
Heat a saucepan or BBQ tray on high. Season the fillet with salt and pepper, then lightly rub with olive oil and sear all edges, about 30 seconds on each side. Set aside to cool.

Beef Eye Fillet

Beef Eye Fillet

Seared Beef Eye Fillet

Seared Beef Eye Fillet

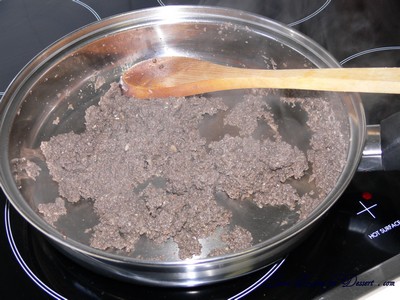
Blend the mushrooms in a food processor until it has formed a paste. Heat a saucepan on medium to high and add the mushrooms (do not use any butter, oil or liquid to cook the mushrooms). Stir the mushrooms until most of the liquid has evaporated. Set aside to cool.

Blend the mushrooms and cook off excess liquid

Blend the mushrooms and cook off excess liquid

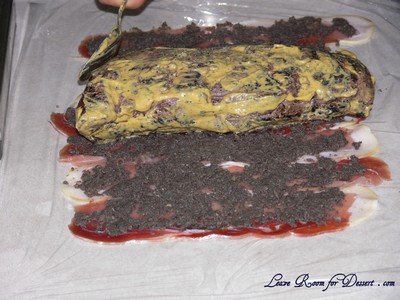
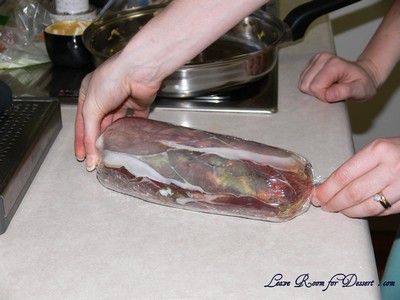
Place a long sheet of cling film onto the counter. Place the prosciutto slices overlapping on the plastic, enough to cover the beef fillet. Carefully spread the mushroom mix over the prosciutto. Mix the mustards together and rub over the beef fillet. Lay the fillet on the mushroom, prosciutto layers and carefully move the plastic to encase the fillet in prosciutto tightly. Tie off the plastic ends and place in the fridge for 10 minutes.

Overlap proscuitto, spread with blended mushrooms and place mustard coated beef fillet on top

Overlap proscuitto, spread with blended mushrooms and place mustard coated beef fillet on top

Roll the proscuitto up around the beef fillet and twist ends to seal - place in fridge

Roll the proscuitto up around the beef fillet and twist ends to seal - place in fridge

Preheat oven to 180°C. Take the puff pastry out of the freezer to thaw. Overlap puff pastry enough to encase the fillet.

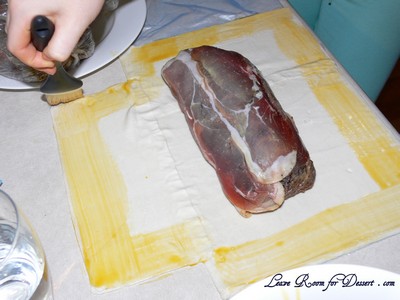
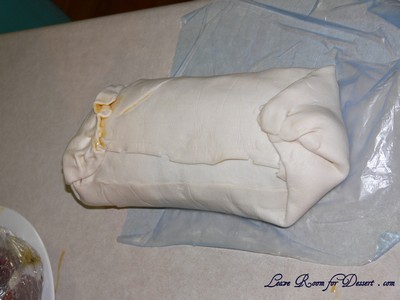
Remove plastic from beef fillet and place in the middle of the puff pastry sheets. Brush egg yolk mix around the edges and encase the beef fillet in the puff pastry, folding under edges.

Brush the edges with egg yolk mix

Brush the edges with egg yolk mix

Fold up the pastry sealing the beef inside

Fold up the pastry sealing the beef inside

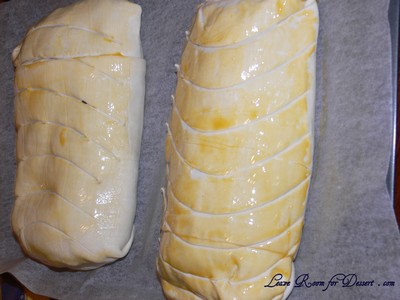
Place on baking tray lined with baking paper and brush with remaining egg yolk. Score the pastry for effect. Season with salt and pepper. Place in the oven and cook for 40 – 50 minutes, or until the pastry is golden brown.

Score the pastry with a knife

Score the pastry with a knife

Slice Beef Wellington thickly and serve with roast vegetables.

Please sir, I want some more...

Please sir, I want some more...

Apple and Sage Roast Pork

Wednesday, March 11th, 2009

roast_pork2

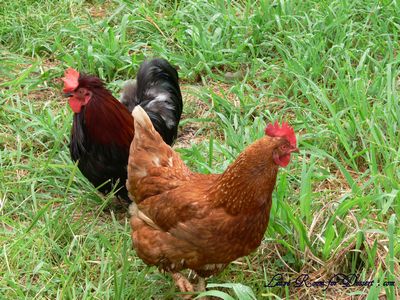
Recently Nick and I visited his parents at their farm which is close to Kyogle. They are growing fruit trees and recently started growing vegetables and collecting eggs from their chicken (now chickens), while working and trying to establish themselves.

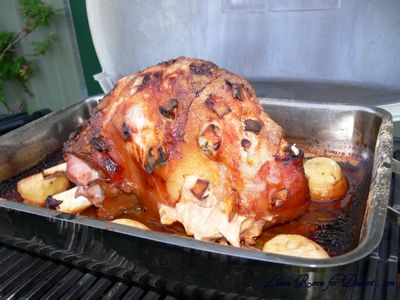
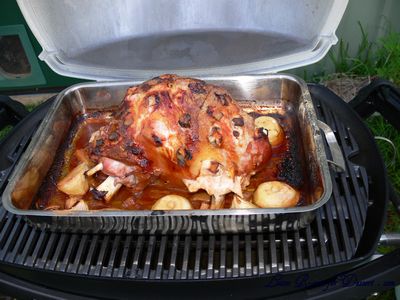
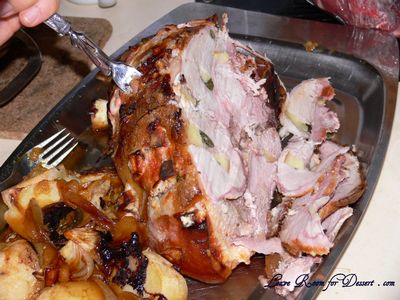
They had a leg of pork to roast and Nick suggested using some of the sage from their herb spiral and apples to flavour the pork. The pork was cooked to perfection using a digital meat thermometer, with lovely flavours of sage and apple. The cooked apple had caramelised and made a perfect accompaniment with the home-grown potatoes.

Apple and Sage Roast Pork

Serves: 6 or more

Pork on leg (ours was 2.5kg)
3 apples (Gala or similar)
20 Sage leaves (approximately)
Potatoes (1 per person), halved
1-2 brown onions, halved
Apple Cider
Mustard powder
Plain Flour
½ cup red wine

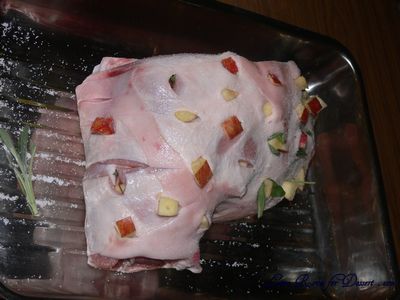
Cut one of the apples into slices the width of a pencil and approximately 3cm long. Cut the other two apples into 8 slices for roasting. Slice a knife in through the skin of the pork, enough to fit the apple slices, cutting every 3-4cm. Stick a piece of sage into each slit followed by a piece of apple.

Apple and sage stuck into pork

Apple and sage stuck into pork

Place the pork in a large roasting pan. Surround the pork with the onions, potatoes and remaining apple pieces. Lightly dust the pork and vegetables with plain flour, then mustard powder. Pour apple cider and ½ cup water into the roasting pan and cook at medium heat 180°C for 1 hour per kg.

Golden brown and lovely

Golden brown and lovely

Once cooked to well done, remove and carve the leg. Remove vegetables and make gravy with the sauce surrounding the leg. Add ½ cup red wine to the sauce and mix together. Serve on top of carved roast pork.

Slice and serve with roasted vegetables

Slice and serve with roasted vegetables

Fresh home grown potatoes

Fresh home grown potatoes

Chicken and Rooster happy to be free

Chicken and Rooster happy to be free

Figs

Figs

Banana Flowers

Banana Flowers

Friendly native wildlife

Friendly native wildlife

Fashion on the Farm

Fashion on the Farm

Honey Chicken and Baked Spring Rolls – Cooking Class 1

Tuesday, March 10th, 2009

My sisters and I have wanted to join a cooking class to learn some new cooking techniques and recipes as well as meeting a few new people and having a great time. Although with all the moving that’s going to be happening with my family, we don’t have much extra time or flexibility with a course.

SpringRolls

So K. came up with a great idea, we each choose a dish we’ve never made before and would like to make, buy the food, then everyone comes around and helps make it together. This way we each get to help make something new and try a whole range of new foods as well as have a bit of fun!

K. was first up and chose a Chinese-themed night: Baked Spring Rolls and Honey Chicken with stir-fry vegetables. We were each allocated a separate job with preparing the vegetables for the spring rolls, cooking the filling and rolling them, as well as cutting the chicken, making the batter and sauce and cooking it in hot oil.
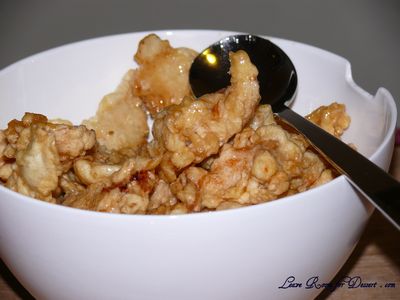
HoneyChicken

The recipe for the honey chicken was a bit lacking in some quantities, leaving some trouble-shooting for the batter, which included at least 10 minutes of people jamming a fork into the non-Newtonian fluid (where the fluid behaves like a solid rather than a liquid) we made from the cornflour and water (check out a video of people running on pool filled with it here:
http://www.youtube.com/watch?v=f2XQ97XHjVw).
After more water was added the mixture started acting a bit more like batter is supposed to. Although once cooked, the crispy chicken was coated in a lovely honey syrup and tasted great!

With all that oil, batter and honey, we were lucky that my sister had chosen baked spring roll recipe rather than another deep-fried recipe. These spring rolls are extra tasty and I’m sure they’d be quite healthy too and can certainly be adapted to make Vegetarian spring rolls by omitting the chicken and ham.

Oven Baked Spring Rolls
Recipe from Nutrition Australia website

Makes 20

1 teaspoon oil for trays
2 teaspoons oil
1 medium onion, diced
½ teaspoon finely chopped ginger or ½ teaspoon ground ginger
1 clove garlic, finely chopped
1 stick celery, finely chopped
5 mushrooms, finely diced
½ capsicum, finely diced
2 cups finely chopped cabbage
½ – 1 cup finely diced cooked lean ham or chicken
½ cup bean sprouts, e.g. mung beans
1 tablespoon cornflour
1 teaspoon sweet chilli sauce
1 tablespoon salt-reduced soy sauce
2 tablespoons chopped fresh herbs (choose one or a combination of: parsley, coriander, basil)
250g packet frozen spring roll pastry, thawed

Preheat oven to 200 C. Brush an oven tray with oil/ or lightly spray with oil.
Heat the oil in a wok or frying pan over medium to high heat. Add the onion, ginger and garlic stir-fry for 1 minute.

Add celery, mushrooms, capsicum and cabbage and stir-fry for about 3 minutes. Add ham/ chicken and sprouts. Put on the lid and let vegetables cook for another minute.
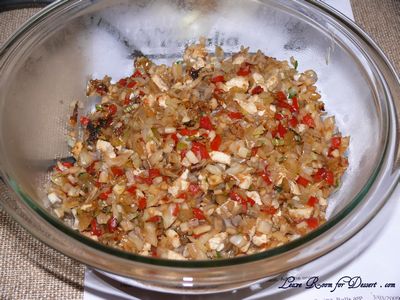
Spring Roll Filling

Spring Roll Filling

Meanwhile combine the cornflour, sweet chilli sauce, soy, and herbs. Add the mixed sauces to the spring roll filling, heat until mixture boils and thickens. Remove saucepan from the heat and allow mixture to cool.
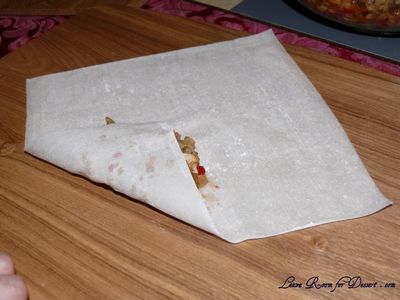
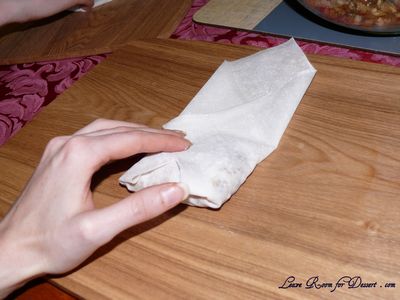
Place 1-2 tablespoons of the mixture on the bottom corner of one spring roll sheet. Fold edges of sheet in and roll up. Continue until all the mixture is used.
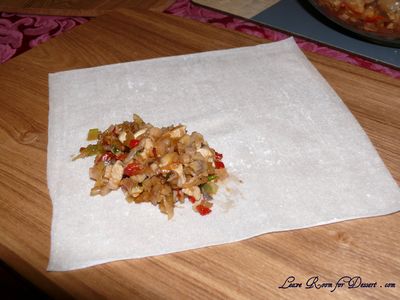
Place Filling on Spring Roll Sheet
Place Filling on Spring Roll Sheet

Fold base pf sheet up over filling
Fold base pf sheet up over filling

Fold sides of sheet to the middle then continue to roll up to make the spring roll
Fold sides of sheet to the middle then continue to roll up to make the spring roll

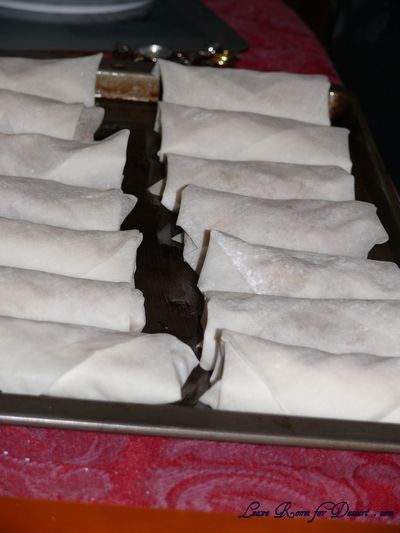
Ready to bake

Ready to bake

Bake in a hot oven for 15-20 minutes or until the spring rolls are golden brown. Serve with a dipping sauce as a snack or with rice for a main meal.

Serve with sweet chilli sauce

Serve with sweet chilli sauce


Chinese Honey Chicken

Recipe from Geocities

Serves: 4-6

500g skinless chicken breast
¾ cup honey
1 cup cornflour
½ teaspoon baking powder
2 egg whites
cold water (we used around ½ cup)
oil for deep-frying
extra cornflour (for dusting chicken)
1½ teaspoons sweet chilli sauce
garnish: spring onion (chopped) or sesame seeds

Cut chicken breasts into bite-sized pieces.

Make the batter: mix together cornflour, baking powder, beaten egg whites and cold water.
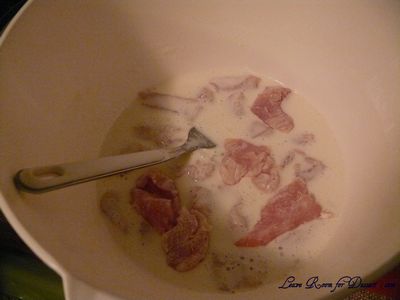
Coat the chicken in the batter

Coat the chicken in the batter

Dust chicken with cornflour then dip it into the batter. Deep-fry chicken pieces for 1 min or till crisp on the outside and cooked through.
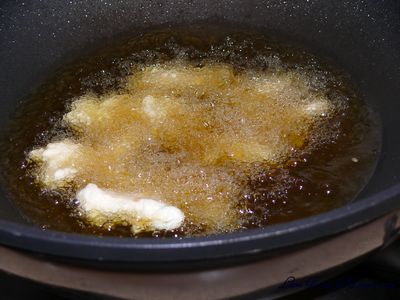
Deep fry the battered chicken in hot oil

Deep fry the battered chicken in hot oil

In another pan, add honey and chilli sauce and heat over medium heat. Pour hot sauce over chicken. Garnish with chopped spring onions and serve immediately.
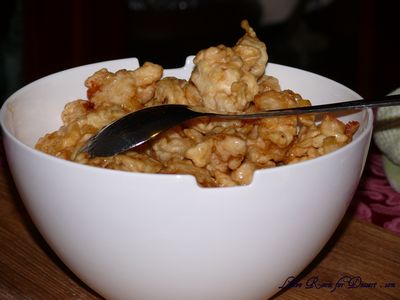
Add honey sauce over crispy chicken and serve

Add honey sauce over crispy chicken and serve

The first cooking class is finished, next is Nick’s turn…
Chorizo Roast Chicken

Saturday, March 7th, 2009

Most people love a roast chicken. Unfortunately I’m not normally one of them. I often find it a bit dry and a bit plain. So when I found this recipe in the delicious Magazine, which had tips to make the chicken both flavoured and moist, I thought why not give it one more chance to prove itself.

Chorizo_Roast_Chicken
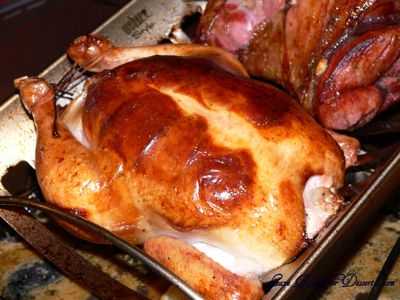
I’m not sure which part contributed to making the chicken moist, turning it over to rest or the fat from the cooking chorizo. It doesn’t really bother me though, as I will now always add chorizo under the chicken skin and turn the chicken over to rest for a few minutes.

This recipe was adapted from the Chorizo-Stuffed Chicken with Couscous found in delicious magazine December 2008/January 2009 issue. Tobie Puttock placed onion, garlic cloves, half a lemon and thyme into the cavity while cooking, although Nick made up a chorizo, onion, lemon, breadcrumb and pistachio stuffing.

Chorizo Roast Chicken
1.2 – 1.5kg chicken
1 chorizo sausage, thinly sliced
Olive oil

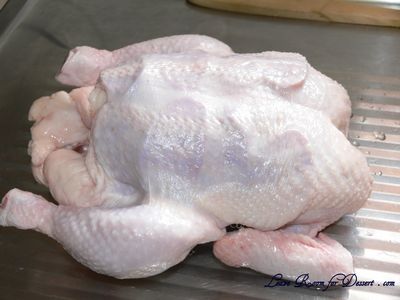
Preheat oven to 180°C. Gently work your fingers underneath the skin of the chicken and slide in sliced chorizo in 1 layer, you will probably only be able to stuff half the chorizo under the skin.

Chorizo stuffed under the skin of the chicken

Chorizo stuffed under the skin of the chicken


Place lemon, onion, garlic and thyme into cavity or add a homemade stuffing and tie the legs of the chicken together. Rub with some oil and season.

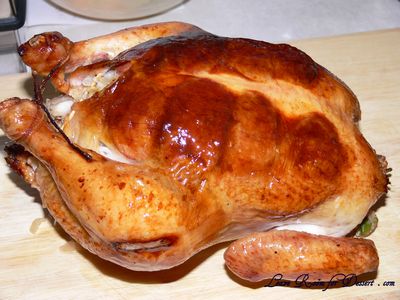
Roast for 50 minutes to 1 hour, basting occasionally, until cooked through – juices will run clear when thigh is pierced.

Roasted to perfection, moist and tasty

Roasted to perfection, moist and tasty


Remove the string and carefully turn the bird upside-down on a board to keep the breast from drying out. Rest for 5 minutes. Carve and serve with roast vegetables or couscous.