Dessert

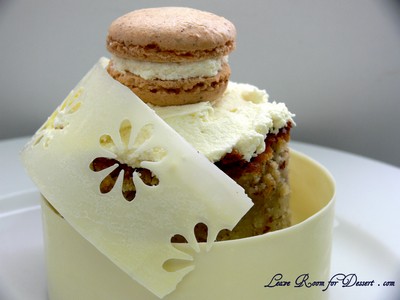
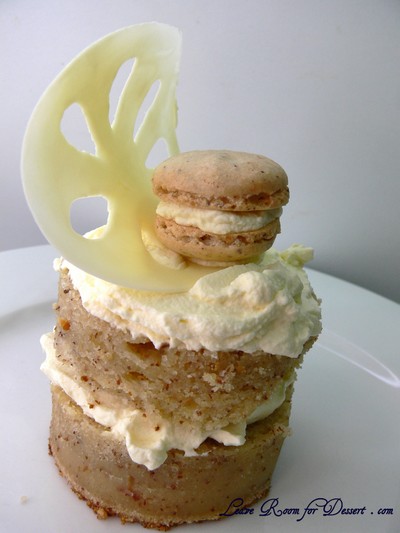
White Chocolate and Hazelnut Mud Cake with Hazelnut Macaron and White Chocolate Rings

Sunday, October 11th, 2009

WhiteChocHazelnut09

For my lovely Nick…

WhiteChocHazelnut12

I wanted to create something quite special for my wedding anniversary. I didn’t get to eat much of the wedding cake on the day, or the day after, and I’m not sure how well it will have kept from a year ago (as we froze the top layer of the cake).

WhiteChocHazelnut08

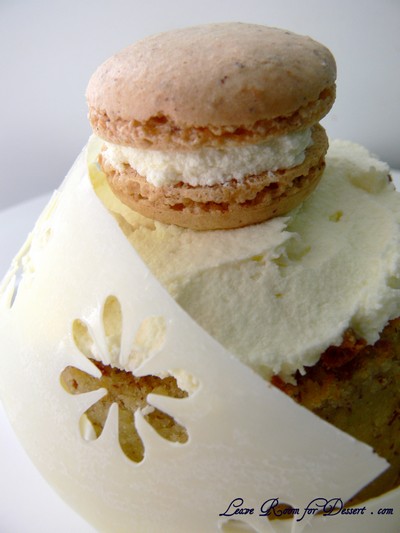
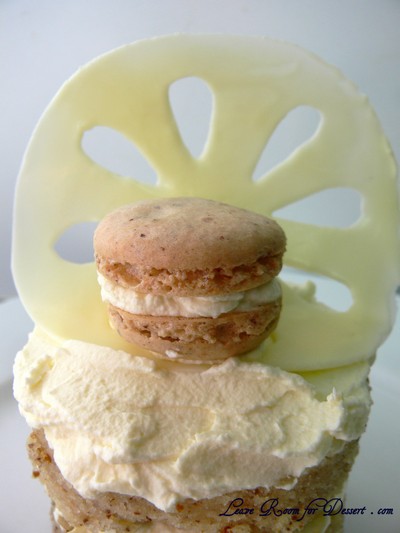
We had a white chocolate hazelnut cake for our wedding and for more than a year I have been wanting to make one. I decided to make some hazelnut macarons and white chocolate rings to add some depth and interest to the cake.
Both the mud cake and macarons tasted fantastic. The mud cake had subtle white chocolate and hazelnut flavours, without being too sweet. It was moist and kept very well. The macaron had a lovely noticeable hazelnut flavour, perfectly chewy on the inside and slightly crispy on the outside.

WhiteChocHazelnut11

The macarons were left to form a shell, and I’m not sure whether it had too much moisture or hazelnuts to cause cracking of the top of the macaron or whether the oven played any part in this.

WhiteChocHazelnut07

My tempering wasn’t perfect, I heated 2/3 of the (180g block) white chocolate to 43C over a double boiler, added the other 1/3 and cooled to 29C (which took a while) then heated to 31C. The white chocolate still snapped when set, but wasn’t as shiny as I’d hoped.

WhiteChocHazelnut10

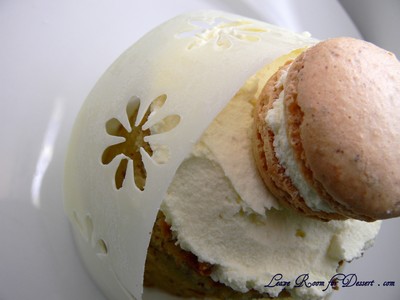
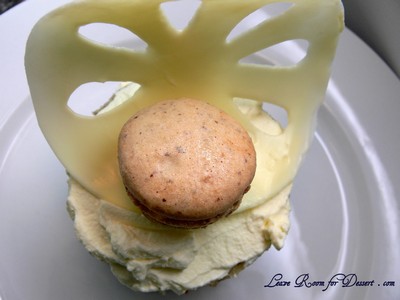
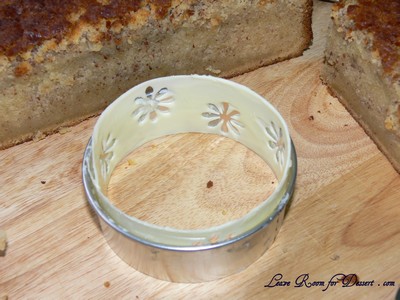
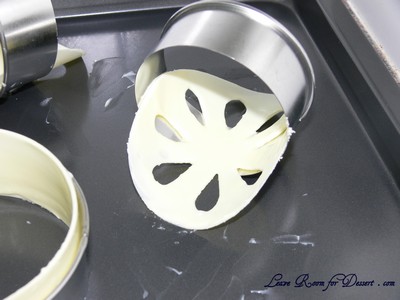
To make the white chocolate rings, I cut out strips of projector film, coated them in tempered white chocolate, let them set for a bit, then curled them up in a circular cookie cutter. For the flower ring, I punched flowers out of the film using a craft paper puncher.

WhiteChocHazelnut03

WhiteChocHazelnut15

To another lovely year… and many more to come…

WhiteChocHazelnut06 A beautiful bouquet of double delight roses from Nick

White Chocolate and Hazelnut Mud Cake

(Cake recipe by kel11 on HubPages)

350g white chocolate pieces
225g butter
600ml water
3 eggs
400g castor sugar
325g self-raising flour
75g hazelnut meal

Grease and line a 23cm/ 9” round cake tin (use a non-spring-tin as it will probably leak a little). Preheat oven to 170ºC, 150ºC fan forced.

In a saucepan over low heat, heat chocolate, butter and water. Stir frequently until melted and smooth. Remove from the heat and cool slightly.

In a large bowl, lightly beat eggs. Gradually beat cooled chocolate mixture into eggs. Whisk sugar and flour into chocolate mixture, continue until smooth and well blended.

Pour mixture into cake tin. Cook for 1½ to 2 hours (the recipe says 45 minutes, but this was way too short for my oven) or until skewer inserted into centre of cake comes out clean. (Cover with some foil if the cake is browning too much on the edges).

Turn cake onto wire rack to cool. Spread top with chocolate ganache when cooled.

White Chocolate Ganache

180g white chocolate
1/3 cup thickened cream
+ 2-3 tablespoons cold cream extra

Put the white chocolate and cream in a bowl and microwave on high for 1 minute, stirring half way through. Stir until smooth. Allow to cool for 15 minutes.

Using an electric beater, beat the white chocolate mix for 2-3 minutes. Add extra cream to help cool down the mix and help it thicken easier. Beat on high for 2 minutes at a time, scrapping and observing the texture. Once it is nice and thick cover the cooled cake with the ganache.

Hazelnut Macarons

5 egg whites, aged overnight
50g caster sugar
300g icing sugar
100g almond meal
80g hazelnut meal

Sift the icing sugar with the almond meal and hazelnut meal – discard any large bits.

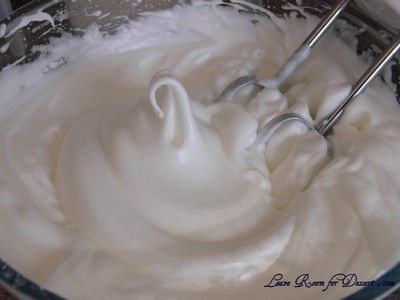
Beat the egg whites until soft peaks form. Gradually add the caster sugar while continually beating until a thick glossy meringue mixture is formed. Add the sifted icing sugar and meals and stir and fold into the meringue. The mixture needs to be firm enough so it doesn’t lose all the air and structure, and soft enough that peaks are not evident when piped out.

Pipe out macaron mix into 3-4cm circles on baking paper and let sit at room temperature for 30minutes – 1hour. Preheat oven to 170C.

Cook macarons for 15-20minutes until crispy on the outside and chewy on the inside. Let the macarons sit on the tray for a few minutes, before carefully removing them and leaving them to finish cooling on a wire rack.

When cooled, fill with white chocolate ganache.

Chicken and Chorizo Paella (Risotto) and Churros – Cooking Class 10

Monday, October 5th, 2009

Paella&Churros01

I have wanted to try churros for so long. I have only once tried them at a Spanish restaurant and was absolutely disappointed. The churros were very soggy and the dipping sauce tasted like a bottle of cheap chocolate sauce used for ice cream.

Such high expectations and such a horrible dish – and what’s worse is one of the staff said it was their favourite dish – and she was Spanish!!! I am waiting patiently to try some at another Spanish restaurant, hopefully this time I will have a better experience.

Paella&Churros05

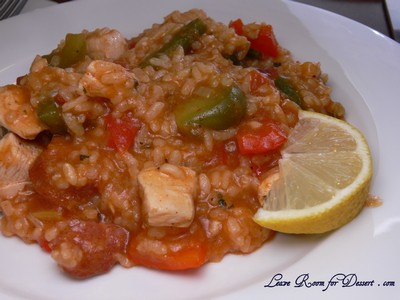
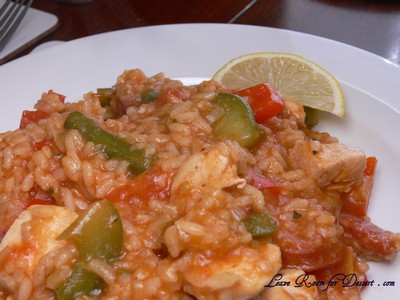
So for my second cooking class I chose a non-seafood paella and churros! I had a few problems with both dishes… The first was the quantity of paella we made. It is difficult to cook something properly when you are cooking for 12 or more people (we take lunches to work). One very large stockpot doesn’t really allow the amount of water evaporate as it should. None-the-less it turned out a lovely risotto. 🙂

Paella&Churros02

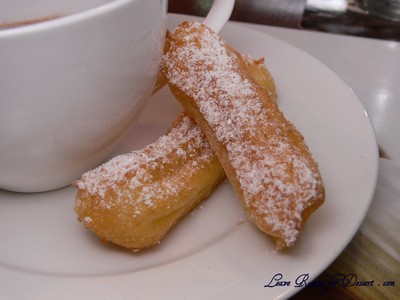
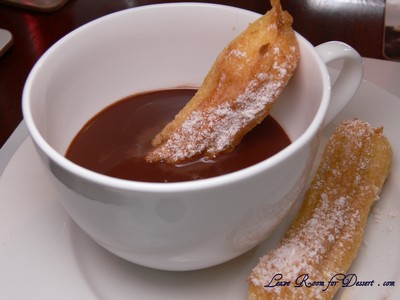
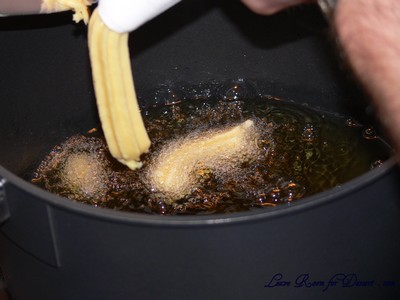
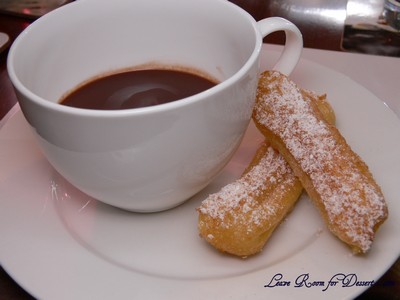
Then came the churros. These were quite nice and I would love to try them again. Our biggest problem was controlling the temperature of the oil, too hot or too cold and the churros didn’t cook properly. I also think they were a little thick – I used the biggest star nozzle that came in the piping pack I bought. This seemed to be the perfect size until they doubled (or maybe tripled) in size whilst cooking – although while cooling they did reduce in size a little. All-in-all it was fun and I would definitely make these again.

Chicken and Chorizo Paella (Risotto)

Serves: 8

2 chorizos, halved lengthways and sliced
8 large chicken breast or thighs, cut into large chunks
Olive oil
2 onions, chopped
4 garlic cloves, crushed
1 tablespoon smoked sweet paprika
600g paella or risotto rice
2-2.2 litres hot chicken stock
2 red capsicums, de-seeded and sliced or cut into chunks
1 green capsicum, de-seeded and sliced or cut into chunks
1 cup peas, frozen peas should be thawed in some boiling water while preparing
6 large, ripe plum tomatoes, cut into chunky pieces
2 tablespoons parsley, chopped
Lemon wedges, to serve

Heat a large, deep frying pan over a medium heat. When hot, add chorizos and cook, stirring occasionally, for 3-4 minutes, until turning golden and the oil has been released. Remove and set aside.

Add the chicken in a few sets and cook for 3-4 minutes, stirring, until golden. Remove with a slotted spoon and set aside.

Add 1 tablespoon olive oil, then add the onions and cook, stirring occasionally, for 6-8 minutes, until softened. Add the garlic and paprika to the pan and cook for 1 minute. Add the rice, stir to coat in the oil and then add 2 litres hot stock. Simmer for 15 minutes, stirring occasionally.

Return the chicken to the pan and add the capsicum, peas and tomatoes. Stir and cook for 5 minutes, adding a little more stock or hot water if necessary. Season and stir the chorizo and parsley into the pan.

Continue to cook for 5 minutes or until the rice is just tender and most of the liquid has evaporated. Serve with lemon wedges.

Paella&Churros04

Churros and hot chocolate

Recipe from Karen Martini on Better Homes and Gardens (I watched the video and wrote down the instructions)

100ml milk
100ml water
80g butter
1½ tablespoons caster sugar
Pinch salt
120g plain flour
3 eggs, lightly whisked

Vegetable Oil, for frying

Hot chocolate
250g dark chocolate
800ml milk
2 tablespoons caster sugar
2 tablespoons cocoa

Icing sugar mixed with cinnamon, to dust on top of churros

Place vegetable oil in a large pot and start it heating up on medium/hot heat (eventually to 180ºC).

Bring milk, water, butter, caster sugar and salt to the boil in a medium saucepan. Add flour and stir to combine. Once combined, stir hard to form a thick dough and continue to cook for 3-4 minutes to cook the flour and remove lumps.

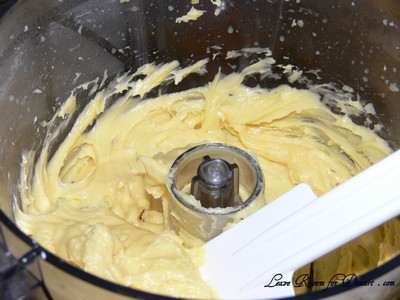
Put mixture into a food processor while still hot and turn food processor on. Add whisked eggs and process for 30 seconds until a smooth sticky paste is formed. Scoop out and put into a piping bag with a star nozzle ready for frying.

Paella&Churros06

For the hot chocolate, place a large metal bowl over a saucepan with simmering water. Place 250g dark chocolate in the bowl. In a separate saucepan, place milk, caster sugar and cocoa and whisk together, bring to a simmer, then pour over the melted chocolate, whisk until smooth. Keep chocolate mixture over water to keep hot, until ready to serve.

To fry the churros, either pipe a figure 8 on a oiled spatula and slide carefully into the hot oil (180C), or pipe a line and cut with a knife and fry for 2-3 minutes until golden, they will double in size. Remove from oil and place on paper towel for a bit, then heavily dust with cinnamon icing sugar mix and serve with hot chocolate.

Paella&Churros08

Paella&Churros11

Vols-au-Vents – Daring Bakers Challenge September 2009

Sunday, September 27th, 2009

volauvonts22

The September 2009 Daring Bakers’ challenge was hosted by Steph of A Whisk and a Spoon. She chose the French treat, Vols-au-Vent based on the Puff Pastry recipe by Michel Richard from the cookbook Baking With Julia by Dorie Greenspan.
volauvonts05

I was a bit intimidated seeing puff pastry was one of the chosen recipes for this month’s Daring Bakers challenge, but also excited to finally be “pushed” into making it.

Steph, our lovely host for this month, provided a great video showing how to make the puff pastry and it was brilliant! I would strongly recommend anyone wanting to make this or any other puff pastry recipe, to first watch the video.

I was just amazed at how easy the puff pastry was to make and roll, it didn’t take as long as I expected either (maybe 2-3 hours – mostly consisting of resting). The pastry looked perfect, very similar to the one on the video – lovely and smooth.
volauvonts06

I think the biggest problem for me was doing the vol-au-vent cases on a busy day – and this made it feel like it was taking forever. Plus the fact that I was making three different fillings…

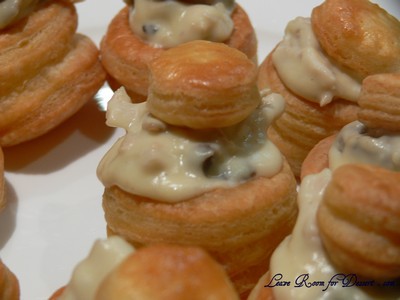
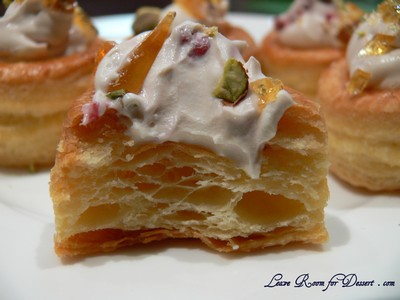
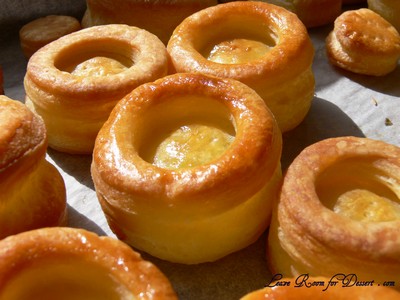
Apart from the restricted time, the vol-au-vents turned out very well. They looked just like bought vol-au-vents and all the fillings were thoroughly enjoyed (once I tweaked my chicken and mushroom filling – a request from a family member).
volauvonts09

I am definitely thinking of making some more puff pastry after being pleasantly surprised by this recipe, although I think it might have to involved custard this time… like perhaps my Portuguese Custard Tarts. Not many things can be more rewarding than custard with pastry.

Forming and Baking the Vols-au-Vent

Yield: 1/3 of the puff pastry recipe below will yield about 8-10 1.5” vols-au-vent or 4 4” vols-au-vent

-well-chilled puff pastry dough (recipe below)
-egg wash (1 egg or yolk beaten with a small amount of water)
-your filling of choice

Line a baking sheet with parchment and set aside.

Using a knife or metal bench scraper, divide your chilled puff pastry dough into three equal pieces. Work with one piece of the dough, and leave the rest wrapped and chilled. (If you are looking to make more vols-au-vent than the yield stated above, you can roll and cut the remaining two pieces of dough as well…if not, then leave refrigerated for the time being or prepare it for longer-term freezer storage. See the “Tips” section below for more storage info.)
volauvonts18

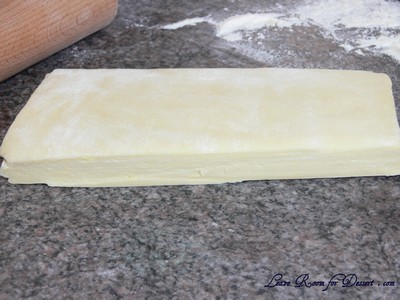
On a lightly floured surface, roll the piece of dough into a rectangle about 1/8 to 1/4-inch (3-6 mm) thick. Transfer it to the baking sheet and refrigerate for about 10 minutes before proceeding with the cutting.

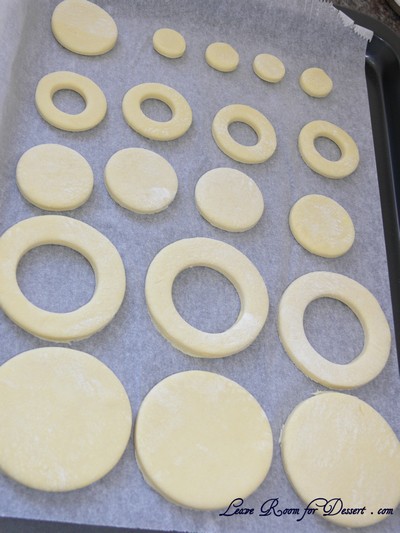
(This assumes you will be using round cutters, but if you do not have them, it is possible to cut square vols-au-vents using a sharp chef’s knife.) For smaller, hors d’oeuvre sized vols-au-vent, use a 1.5” round cutter to cut out 8-10 circles. For larger sized vols-au-vent, fit for a main course or dessert, use a 4” cutter to cut out about 4 circles. Make clean, sharp cuts and try not to twist your cutters back and forth or drag your knife through the dough. Half of these rounds will be for the bases, and the other half will be for the sides. (Save any scrap by stacking—not wadding up—the pieces…they can be re-rolled and used if you need extra dough. If you do need to re-roll scrap to get enough disks, be sure to use any rounds cut from it for the bases, not the ring-shaped sides.)

Using a ¾-inch cutter for small vols-au-vent, or a 2- to 2.5-inch round cutter for large, cut centers from half of the rounds to make rings. These rings will become the sides of the vols-au-vent, while the solid disks will be the bottoms. You can either save the center cut-outs to bake off as little “caps” for you vols-au-vent, or put them in the scrap pile.
volauvonts01

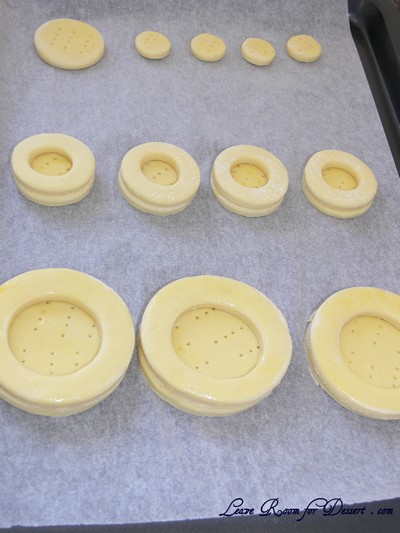
Dock the solid bottom rounds with a fork (prick them lightly, making sure not to go all the way through the pastry) and lightly brush them with egg wash. Place the rings directly on top of the bottom rounds and very lightly press them to adhere. Brush the top rings lightly with egg wash, trying not to drip any down the sides (which may inhibit rise). If you are using the little “caps,” dock and egg wash them as well.
volauvonts02

Refrigerate the assembled vols-au-vent on the lined baking sheet while you pre-heat the oven to 400ºF (200ºC). (You could also cover and refrigerate them for a few hours at this point.)

Once the oven is heated, remove the sheet from the refrigerator and place a silicon baking mat (preferred because of its weight) or another sheet of parchment over top of the shells. This will help them rise evenly. Bake the shells until they have risen and begin to brown, about 10-15 minutes depending on their size. Reduce the oven temperature to 350ºF (180ºC), and remove the silicon mat or parchment sheet from the top of the vols-au-vent. If the centers have risen up inside the vols-au-vent, you can gently press them down. Continue baking (with no sheet on top) until the layers are golden, about 15-20 minutes more. (If you are baking the center “caps” they will likely be finished well ahead of the shells, so keep an eye on them and remove them from the oven when browned.)

Remove to a rack to cool. Cool to room temperature for cold fillings or to warm for hot fillings.
volauvonts04

Fill and serve.

*For additional rise on the larger-sized vols-au-vents, you can stack one or two additional ring layers on top of each other (using egg wash to “glue”). This will give higher sides to larger vols-au-vents, but is not advisable for the smaller ones, whose bases may not be large enough to support the extra weight.

*Although they are at their best filled and eaten soon after baking, baked vols-au-vent shells can be stored airtight for a day.

*Shaped, unbaked vols-au-vent can be wrapped and frozen for up to a month (bake from frozen, egg-washing them first).

Michel Richard’s Puff Pastry Dough

From: Baking with Julia by Dorie Greenspan
Yield: 2-1/2 pounds dough

Steph’s note: This recipe makes more than you will need for the quantity of vols-au-vent stated above. While I encourage you to make the full recipe of puff pastry, as extra dough freezes well, you can halve it successfully if you’d rather not have much leftover.

There is a wonderful on-line video from the PBS show “Baking with Julia” that accompanies the book. In it, Michel Richard and Julia Child demonstrate making puff pastry dough (although they go on to use it in other applications). They do seem to give slightly different ingredient measurements verbally than the ones in the book…I listed the recipe as it appears printed in the book.

2-1/2 cups (12.2 oz/ 354 g) unbleached all-purpose flour
1-1/4 cups (5.0 oz/ 142 g) cake flour
1 tbsp. salt (you can cut this by half for a less salty dough or for sweet preparations)
1-1/4 cups (10 fl oz/ 300 ml) ice water
1 pound (16 oz/ 454 g) very cold unsalted butter

plus extra flour for dusting work surface

Mixing the Dough:

Check the capacity of your food processor before you start. If it cannot hold the full quantity of ingredients, make the dough into two batches and combine them.

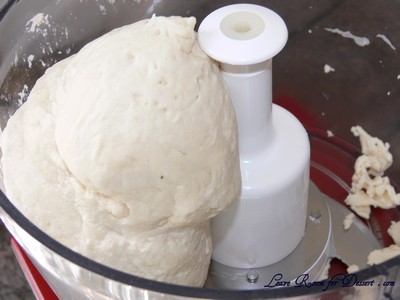
Put the all-purpose flour, cake flour, and salt in the work bowl of a food processor fitted with a metal blade and pulse a couple of times just to mix. Add the water all at once, pulsing until the dough forms a ball on the blade. The dough will be very moist and pliable and will hold together when squeezed between your fingers. (Actually, it will feel like Play-Doh.)
volauvonts10

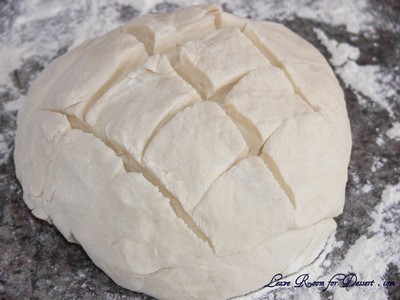
Remove the dough from the machine, form it into a ball, with a small sharp knife, slash the top in a tic-tac-toe pattern. Wrap the dough in a damp towel and refrigerate for about 5 minutes.
volauvonts11

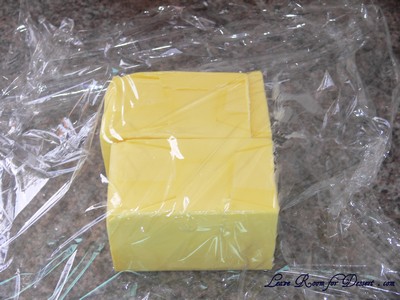
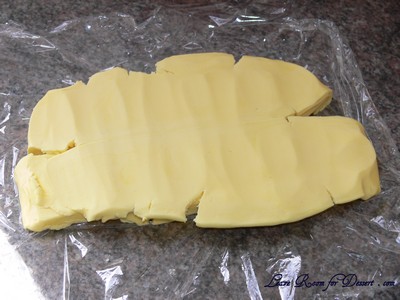
Meanwhile, place the butter between 2 sheets of plastic wrap and beat it with a rolling pin until it flattens into a square that’s about 1″ thick. Take care that the butter remains cool and firm: if it has softened or become oily, chill it before continuing.
volauvonts12

volauvonts13

Incorporating the Butter:

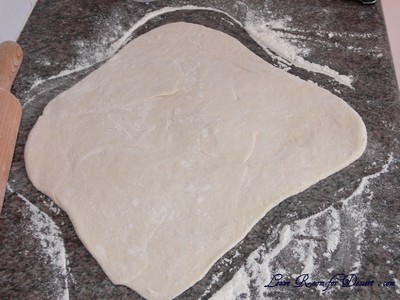
Unwrap the dough and place it on a work surface dusted with all-purpose flour (A cool piece of marble is the ideal surface for puff pastry) with your rolling pin (preferably a French rolling pin without handles), press on the dough to flatten it and then roll it into a 10″ square. Keep the top and bottom of the dough well floured to prevent sticking and lift the dough and move it around frequently. Starting from the center of the square, roll out over each corner to create a thick center pad with “ears,” or flaps.
volauvonts14

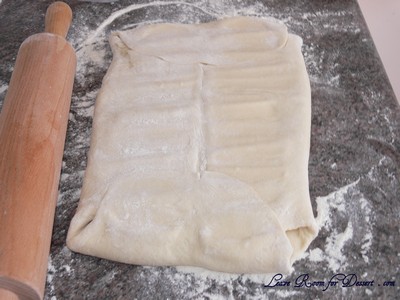
Place the cold butter in the middle of the dough and fold the ears over the butter, stretching them as needed so that they overlap slightly and encase the butter completely. (If you have to stretch the dough, stretch it from all over; don’t just pull the ends) you should now have a package that is 8″ square.
volauvonts15

To make great puff pastry, it is important to keep the dough cold at all times. There are specified times for chilling the dough, but if your room is warm, or you work slowly, or you find that for no particular reason the butter starts to ooze out of the pastry, cover the dough with plastic wrap and refrigerate it . You can stop at any point in the process and continue at your convenience or when the dough is properly chilled.

Making the Turns:

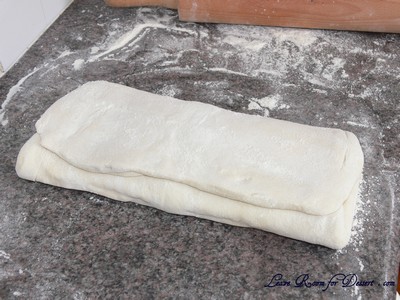
Gently but firmly press the rolling pin against the top and bottom edges of the square (this will help keep it square). Then, keeping the work surface and the top of the dough well floured to prevent sticking, roll the dough into a rectangle that is three times as long as the square you started with, about 24″ (don’t worry about the width of the rectangle: if you get the 24″, everything else will work itself out.) With this first roll, it is particularly important that the butter be rolled evenly along the length and width of the rectangle; check when you start rolling that the butter is moving along well, and roll a bit harder or more evenly, if necessary, to get a smooth, even dough-butter sandwich (use your arm-strength!).
volauvonts16

With a pastry brush, brush off the excess flour from the top of the dough, and fold the rectangle up from the bottom and down from the top in thirds, like a business letter, brushing off the excess flour. You have completed one turn.

Rotate the dough so that the closed fold is to your left, like the spine of a book. Repeat the rolling and folding process, rolling the dough to a length of 24″ and then folding it in thirds. This is the second turn.
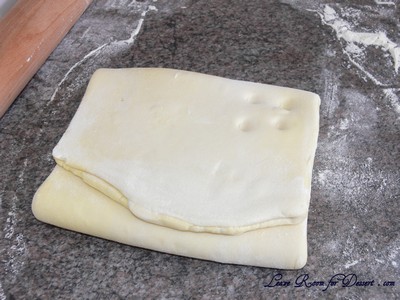
volauvonts17

Chilling the Dough:

If the dough is still cool and no butter is oozing out, you can give the dough another two turns now. If the condition of the dough is iffy, wrap it in plastic wrap and refrigerate it for at least 30 minutes. Each time you refrigerate the dough, mark the number of turns you’ve completed by indenting the dough with your fingertips. It is best to refrigerate the dough for 30 to 60 minutes between each set of two turns.

The total number of turns needed is six. If you prefer, you can give the dough just four turns now, chill it overnight, and do the last two turns the next day. Puff pastry is extremely flexible in this regard. However, no matter how you arrange your schedule, you should plan to chill the dough for at least an hour before cutting or shaping it.
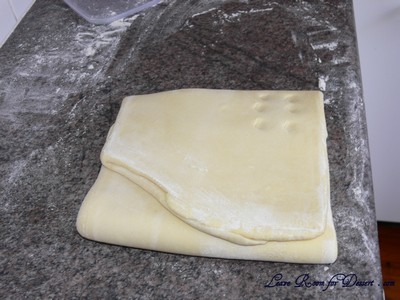
volauvonts20

Steph’s extra tips:

-While this is not included in the original recipe we are using (and I did not do this in my own trials), many puff pastry recipes use a teaspoon or two of white vinegar or lemon juice, added to the ice water, in the détrempe dough. This adds acidity, which relaxes the gluten in the dough by breaking down the proteins, making rolling easier. You are welcome to try this if you wish.

-Keep things cool by using the refrigerator as your friend! If you see any butter starting to leak through the dough during the turning process, rub a little flour on the exposed dough and chill straight away. Although you should certainly chill the dough for 30 to 60 minutes between each set of two turns, if you feel the dough getting to soft or hard to work with at any point, pop in the fridge for a rest.

-Not to sound contradictory, but if you chill your paton longer than the recommended time between turns, the butter can firm up too much. If this seems to be the case, I advise letting it sit at room temperature for 5-10 minutes to give it a chance to soften before proceeding to roll. You don’t want the hard butter to separate into chuncks or break through the dough…you want it to roll evenly, in a continuous layer.

-Roll the puff pastry gently but firmly, and don’t roll your pin over the edges, which will prevent them from rising properly. Don’t roll your puff thinner than about about 1/8 to 1/4-inch (3-6 mm) thick, or you will not get the rise you are looking for.

-Try to keep “neat” edges and corners during the rolling and turning process, so the layers are properly aligned. Give the edges of the paton a scooch with your rolling pin or a bench scraper to keep straight edges and 90-degree corners.

-Brush off excess flour before turning dough and after rolling.

-Make clean cuts. Don’t drag your knife through the puff or twist your cutters too much, which can inhibit rise.

-When egg washing puff pastry, try not to let extra egg wash drip down the cut edges, which can also inhibit rise.

-Extra puff pastry dough freezes beautifully. It’s best to roll it into a sheet about 1/8 to 1/4-inch thick (similar to store-bought puff) and freeze firm on a lined baking sheet. Then you can easily wrap the sheet in plastic, then foil (and if you have a sealable plastic bag big enough, place the wrapped dough inside) and return to the freezer for up to a few months. Defrost in the refrigerator when ready to use.

-You can also freeze well-wrapped, unbaked cut and shaped puff pastry (i.e., unbaked vols-au-vent shells). Bake from frozen, without thawing first.

-Homemade puff pastry is precious stuff, so save any clean scraps. Stack or overlap them, rather than balling them up, to help keep the integrity of the layers. Then give them a singe “turn” and gently re-roll. Scrap puff can be used for applications where a super-high rise is not necessary (such as palmiers, cheese straws, napoleons, or even the bottom bases for your vols-au-vent).

For My Fillings:

Try and fill vol-au-vents on the day they are made.

Salmon and Cream Cheese
120g cream cheese
50ml thickened cream
Juice of 1/2 a small lemon
1 sprig of dill
smoked salmon, cut into 3 x 3 cm squares or similar

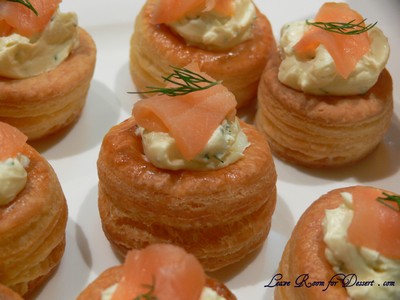
Soften the cream-cheese by mixing vigorously with a spoon. When the cream-cheese has softened, add the lemon juice and cream and mix until combined. Once combined stir in 1/8 teaspoon dill. Spoon into vol-au-vent cases, top with a piece of smoked salmon and a small piece of dill.

volauvonts05

Creamy Chicken and Mushroom
1 small chicken breast, cut in 4 chunks
6 mushrooms, halved and sliced
1 lemon, juice and rind
250ml (1 cup) white wine
3 sprigs of thyme
50g butter
3 tablespoon plain flour
250ml (1 cup) milk
100ml thickened cream

Combine wine, lemon juice, lemon rind, thyme and ¼ cup water in a saucepan. Bring to the boil and add the chicken. Cook for 10 minutes or until cooked. Remove chicken, shred or cut into small pieces and strain juices from pan into a small bowl. Place the pan back onto medium heat and add the mushrooms. Add small amounts of juice to help the mushrooms cook. Once cooked (5-10 minutes), remove and place with chicken.

In a clean saucepan cook the butter on high until bubbling. Add flour and cook for a few minutes. Add the milk and whisk together. Continue to whisk on heat until mixture thickens. Add the cream and remove from stove. Stir in chicken and mushrooms.

Spoon chicken mixture into vol-au-vent cases and place in a 180C preheated oven for 10 minutes or until mixture and cases are heated through. Serve hot/warm.

volauvonts06


White Chocolate and Raspberry Cream

50g white chocolate, chopped finely
250ml (1 cup) thickened cream
20 raspberries (fresh or frozen), chopped

Pistachio Praline
50g pistachios
50g caster sugar
3 tablespoons water

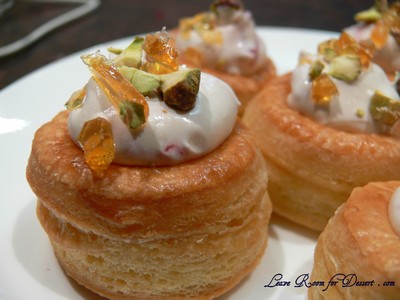
Place cream in a saucepan and just bring to the boil. Pour over chopped white chocolate in a bowl and whisk until chocolate has melted. Cool at room temperature and then cool in the fridge for a few hours. Once cooled, beat the white chocolate cream mix until fluffy. Fold through raspberries. Spoon into vol-au-vent cases and sprinkle with chopped praline.

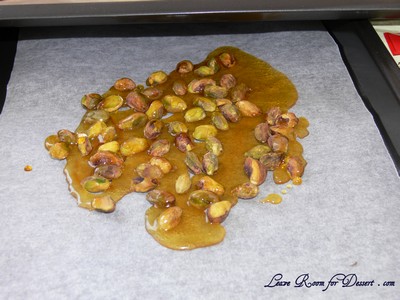
For praline: Roast pistachios in 180C preheated oven for 5-10minutes. Place sugar and water in a small saucepan. Heat on low, stirring until the sugar dissolves. Then turn the heat up to medium-high and cook until golden brown. Pour over pistachios on baking paper and leave to cool. Chop praline into pieces when cooled.
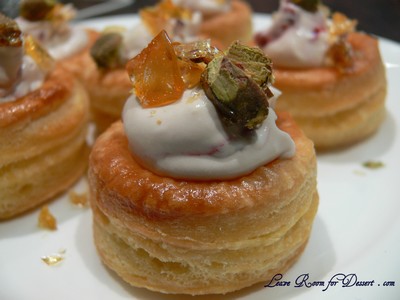
volauvonts03

volauvonts07

Chocolate Mousse

Wednesday, September 16th, 2009

chocmousse-17

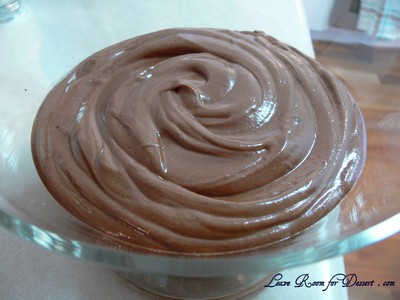
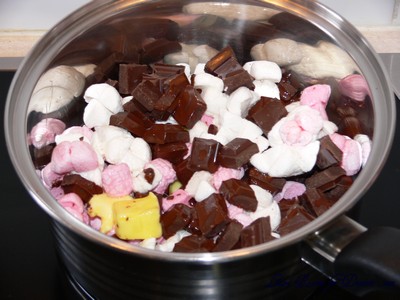
While watching Nigella Lawson’s Express cooking show quite a while ago, I saw she made a lovely quick mousse, which doesn’t contain eggs and instead uses marshmallows to hold the mousse together.

I love chocolate, cream and marshmallows so this couldn’t go wrong… or so I thought…

chocmousse-11

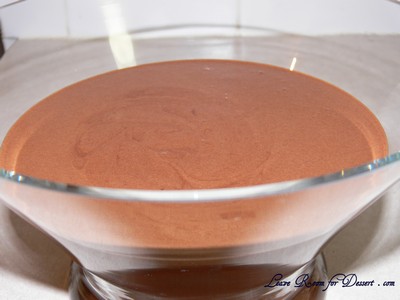
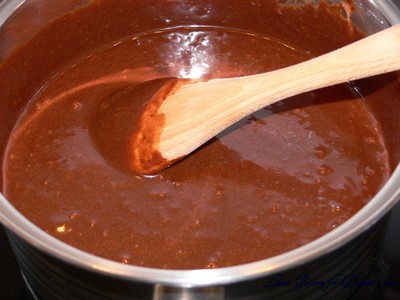
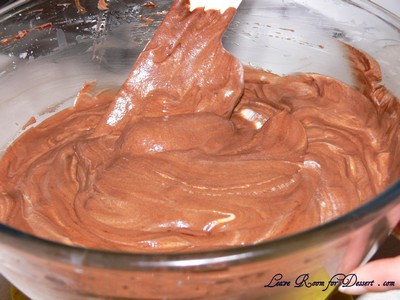
Nigella seemed to cook this in 5 minutes, with not much cooling involved for the chocolate mix. When I added the slightly cooled chocolate to my whipped cream, the cream MELTED!! Well, what was I expecting… This only really affected the look of the mousse, with it needing to be cooled in the fridge for a while to set.

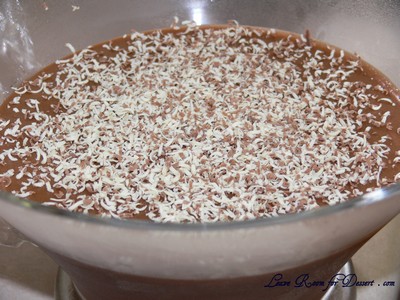
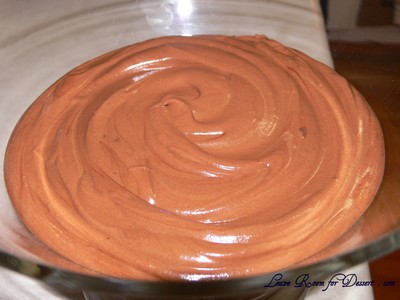
If you let the chocolate mix cool a bit longer – before it sets itself, it can be folded through the whipped cream and can be spooned into individual serves or a decorative bowl for serving. I haven’t tried it slightly chilled yet, only refrigerated for a while, which is lovely and best served with vanilla ice cream to soften the richness from the mousse.

The one that didn't work... because the chocolate mix was too hot.

The one that didn't work... because the chocolate mix was too hot.

This is a great recipe for those who prefer not to eat raw eggs or who are allergic. I’m sure it would be a great recipe for kids to help with too… although then you may have to fight over who gets to lick the spatula and bowl 🙂

chocmousse-05

Chocolate Mousse

Recipe by Nigella Lawson from Nigella Express

Serves: 4-6

150g mini marshmallows (or normal marshmallows, chopped)
50g soft butter
250g best-quality semisweet chocolate, chopped into small pieces
60ml hot water from a recently boiled kettle
284ml heavy (thickened) cream
1 teaspoon vanilla extract

Put the marshmallows, butter, chocolate, and water in a heavy-bottomed saucepan. Put the saucepan on the stove over a fairly gentle heat to melt, stirring every now and again. Remove from heat to cool.

chocmousse-18

chocmousse-23

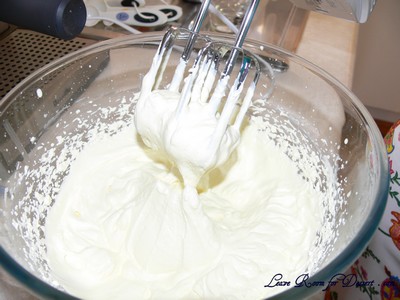
Meanwhile, whip the cream with the vanilla until thick and then fold the cooled chocolate mixture into the whipped cream until you have a smooth, cohesive mixture. (I poured the chocolate mix in while cooling [not very hot] and it melted the cream and became liquid, not fluffy – although leaving in the fridge still resulted in lovely tasting mousse)

chocmousse-27

chocmousse-06

Pour or scrape into 4 glasses or small dishes, about ¾ cup each in capacity, or 6 smaller (½ cup) ones, and chill until you want to eat. The sooner the better!

chocmousse-13

Aria Chocolate Tart

Monday, August 31st, 2009

ariatart29

Again with the MasterChef recipes….

ariatart04

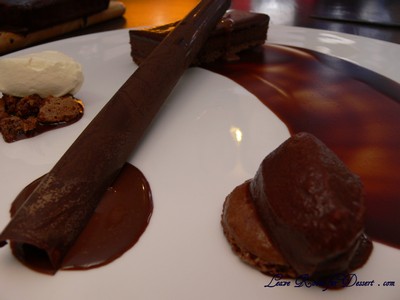
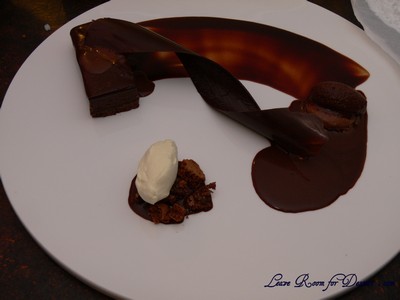
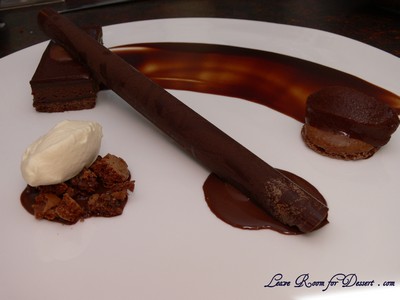
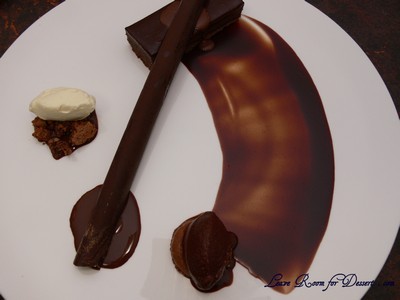
I was jumping off the lounge screaming when I saw Matt Moran’s beautiful chocolate tart and tasting plate. It looked magnificent!

ariatart05

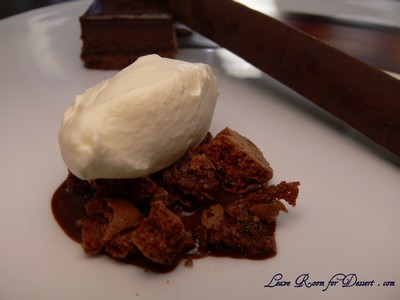
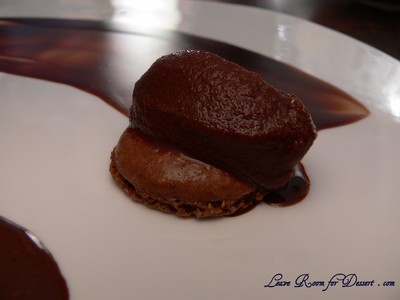
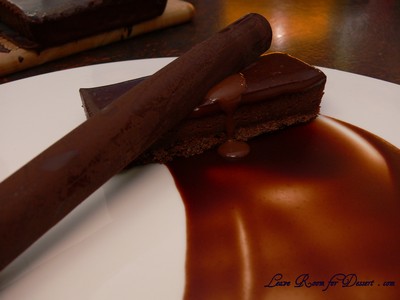
It combined dark chocolate-based components and created a lovely artwork on the plate. Every aspect seemed to have the possibility of problems, too thick pastry, grainy sorbet and bad tempering of the chocolate – leaving it not shiny and not able to be snapped.

It also involved more than 1kg of dark chocolate… crazy!

Unfortunately, I wasn’t as pleased with this as I was with my most recent triple chocolate praline tart. This tart/combination was too rich for me (it may not have helped me eating parts of the dish as I was making it), but I generally only have a couple pieces of dark chocolate when I eat it, whereas I can eat half a block or more of milk chocolate in one sitting.

ariatart06

The sorbet was quite rich, with both the sorbet and the remaining tart filling (which was used to hold the macarons and pipe on the plate) didn’t freeze well enough (as you can probably see in some of the photos), in more than 2 hours in a normal freezer. Both the sorbet and tart filling were a better consistency after freezing overnight (we had a lot leftover as it made a heaps more than was required for the dishes).

ariatart03

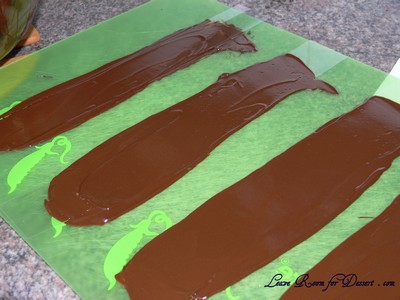
I tried quite hard to temper the chocolate, although it still didn’t turn out how the MasterChef one did… Here are a few reasons that I think it may not have worked:

I’ve done a bit of research and found most sites say to bring the chocolate up to 46-48C, whereas this one stated 55C. Is this temperature too high?

ariatart02

I used a milk thermometer as it seemed more sensitive at lower temperatures than my sugar thermometer (was it not sensitive enough?)

Maybe the quality of the chocolate wasn’t good enough for this recipe?

Perhaps some water did get into the chocolate?

I put the bowl into a preheated oven of 160C – the recipe didn’t state how hot the oven should be (it may have heated too much at this stage)

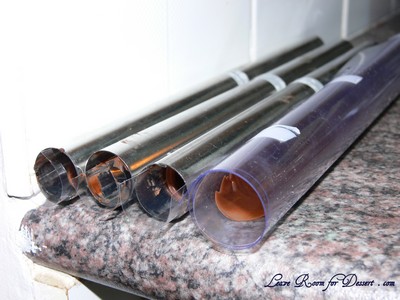
I placed the chocolate covered film in a metal tube at room temperature (could the metal tube have caused it to set too fast?)

ariatart19

I noticed the chocolate that was spread on later films turned out shinier and cracked – did it need to be cooled to a certain temperature before spreading?

ariatart18

I am definitely looking forward to trying tempered chocolate again, this time using a more specific recipe, with a lower temperature for the melted chocolate.

ariatart11

Everyone needed to add a couple scoops of vanilla ice cream to their dish to cut the richness of all the dark chocolate.

ariatart26

After all that, I am glad I tried this dish, but I wouldn’t make it again. I would be interested in trying the one from Aria though to see how it compares.

Check out the full recipe at MasterChef.com.au

Dobos Torte – Daring Bakers Challenge August 2009

Thursday, August 27th, 2009

dobostorte04

The August 2009 Daring Bakers’ challenge was hosted by Angela of A Spoonful of Sugar and Lorraine of Not Quite Nigella. They chose the spectacular Dobos Torte based on a recipe from Rick Rodgers’ cookbook Kaffeehaus: Exquisite Desserts from the Classic Caffés of Vienna, Budapest, and Prague.

dobostorte10

After seeing a photo of the final product for the Daring Bakers Challenge this month, I got a little scared – although quite excited at the thought of making this beautiful cake or torte. I had never heard of a Dobos Torte (also called Dobos Torta) before, and therefore never tried it – but it looked so gorgeous, it had to be good.

dobostorte12

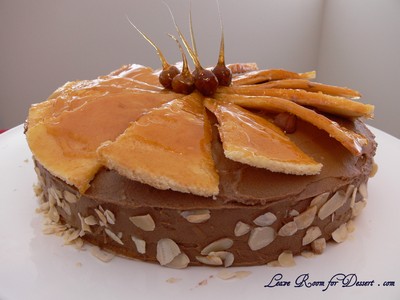
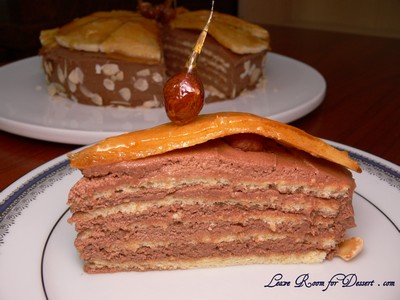
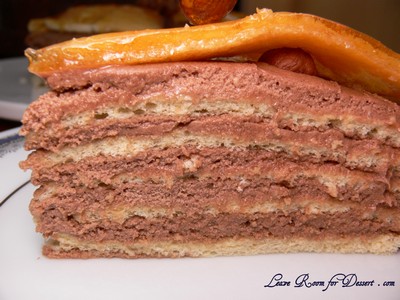
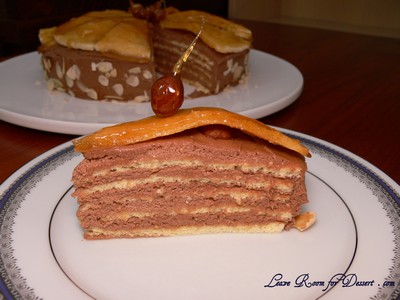
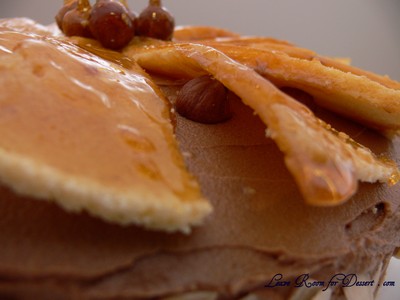
Multiple layers of sponge cake, chocolate buttercream and decorated with sponge covered in toffee or caramel then cut and arranged over the top of the cake… Eeeek.

dobostorte13

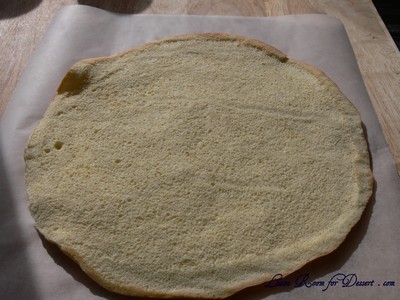
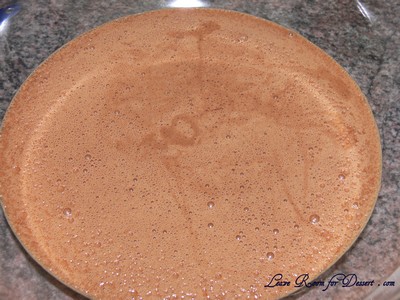
Everything worked quite well, the sponges took a little while, spreading the mixture between 6 trays and cooking them. The buttercream tasted beautiful and buttery with a lovely chocolate flavour.

dobostorte07

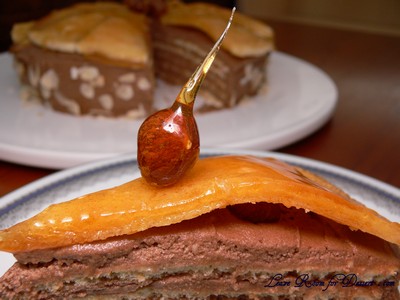
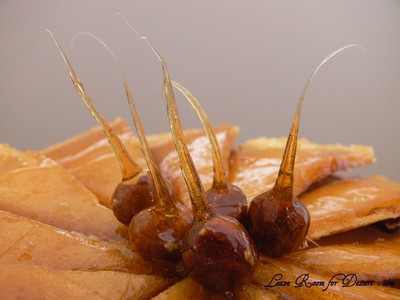
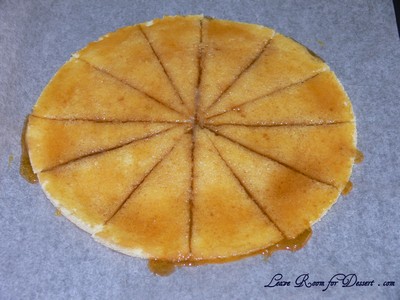
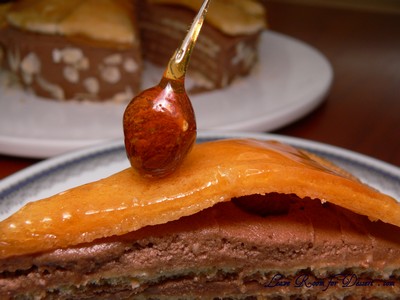
My main problem occurred when making the caramel. I’ve never had caramel do this before, but it was producing heaps of bubbles, they were almost climbing out of the small saucepan I used and made it quite difficult to keep it at a high temperature and also try to see the colour it was changing to. Once it turned a lovely amber colour, I decided to pour it over the sponge and also make some toffee hazelnuts. Although with soft sticky caramel which didn’t want to set/harden… the top layer and hazelnuts didn’t turn out quite how I had wanted. Both were a bit droopy and stuck quite a bit to everyone’s teeth. I would try another caramel recipe for the top, if I were to try it again, perhaps a recipe that says what temperature the caramel should get to.

dobostorte14

Dobos Torte

Equipment
2 baking sheets
9” (23cm) springform tin and 8” cake tin, for templates
mixing bowls (1 medium, 1 large)
a sieve
a double boiler (a large saucepan plus a large heat-proof mixing bowl which fits snugly over the top of the pan)
a small saucepan
a whisk (you could use a balloon whisk for the entire cake, but an electric hand whisk or stand mixer will make life much easier)
metal offset spatula
sharp knife
a 7 1/2” cardboard cake round, or just build cake on the base of a sprinfrom tin.
piping bag and tip, optional

Prep times
Sponge layers: 20 mins prep, 40 mins cooking total if baking each layer individually.
Buttercream: 20 mins cooking. Cooling time for buttercream: about 1 hour plus 10 minutes after this to beat and divide.
Caramel layer: 10-15 minutes.
Assembly of whole cake: 20 minutes

Sponge cake layers
6 large eggs, separated, at room temperature
1 1/3 cups (162g) confectioner’s (icing) sugar, divided
1 teaspoon (5ml) vanilla extract
1 cup plus 2 tablespoons (112g) sifted cake flour (SUBSTITUTE 95g plain flour + 17g cornflour (cornstarch) sifted together)
pinch of salt

Chocolate Buttercream
4 large eggs, at room temperature
1 cup (200g) caster (ultrafine or superfine white) sugar
4oz (110g) bakers chocolate or your favourite dark chocolate, finely chopped
2 sticks plus 2 tablespoons (250g) unsalted butter, at room temperature.

Caramel topping
1 cup (200g) caster (superfine or ultrafine white) sugar
12 tablespoons (180 ml) water
8 teaspoons (40 ml) lemon juice
1 tablespoon neutral oil (e.g. grapeseed, rice bran, sunflower)

Finishing touches
a 7” cardboard round
12 whole hazelnuts, peeled and toasted
½ cup (50g) peeled and finely chopped hazelnuts

Directions for the sponge layers:

NB. The sponge layers can be prepared in advance and stored interleaved with parchment and well-wrapped in the fridge overnight.

1. Position the racks in the top and centre thirds of the oven and heat to 400F (200C).

2. Cut six pieces of parchment paper to fit the baking sheets. Using the bottom of a 9″ (23cm) springform tin as a template and a dark pencil or a pen, trace a circle on each of the papers, and turn them over (the circle should be visible from the other side, so that the graphite or ink doesn’t touch the cake batter.)

3. Beat the egg yolks, 2/3 cup (81g) of the confectioner’s (icing) sugar, and the vanilla in a medium bowl with a mixer on high speed until the mixture is thick, pale yellow and forms a thick ribbon when the beaters are lifted a few inches above the batter, about 3 minutes. (You can do this step with a balloon whisk if you don’t have a mixer.)

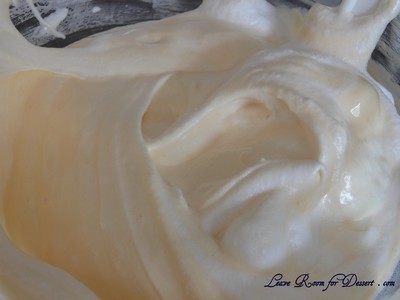
4. In another bowl, using clean beaters, beat the egg whites until soft peaks form. Gradually beat in the remaining 2/3 cup (81g) of confectioner’s (icing)sugar until the whites form stiff, shiny peaks. Using a large rubber spatula, stir about 1/4 of the beaten whites into the egg yolk mixture, then fold in the remainder, leaving a few wisps of white visible. Combine the flour and salt. Sift half the flour over the eggs, and fold in; repeat with the remaining flour.

dobostorte16

dobostorte17

dobostorte18

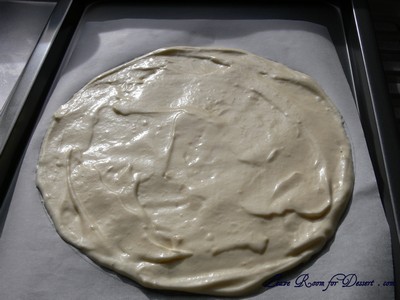
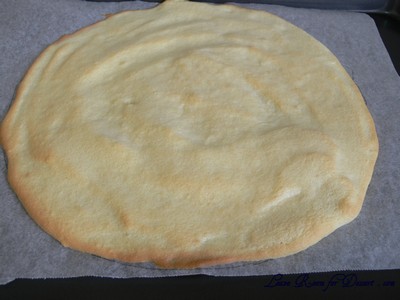
5. Line one of the baking sheets with a circle-marked paper. Using a small offset spatula, spread about 3/4cup of the batter in an even layer, filling in the traced circle on one baking sheet. Bake on the top rack for 5 minutes, until the cake springs back when pressed gently in the centre and the edges are lightly browned. While this cake bakes, repeat the process on the other baking sheet, placing it on the centre rack. When the first cake is done, move the second cake to the top rack. Invert the first cake onto a flat surface and carefully peel off the paper. Slide the cake layer back onto the paper and let stand until cool. Rinse the baking sheet under cold running water to cool, and dry it before lining with another parchment. Continue with the remaining papers and batter to make a total of six layers. Completely cool the layers. Using an 8″ springform pan bottom or plate as a template, trim each cake layer into a neat round. (A small serrated knife is best for this task.)

dobostorte19

dobostorte21

dobostorte20

Directions for the chocolate buttercream:

NB. This can be prepared in advance and kept chilled until required.

1. Prepare a double-boiler: quarter-fill a large saucepan with water and bring it to a boil.

2. Meanwhile, whisk the eggs with the sugar until pale and thickened, about five minutes. You can use a balloon whisk or electric hand mixer for this.

3. Fit bowl over the boiling water in the saucepan (water should not touch bowl) and lower the heat to a brisk simmer. Cook the egg mixture, whisking constantly, for 2-3 minutes until you see it starting to thicken a bit. Whisk in the finely chopped chocolate and cook, stirring, for a further 2-3 minutes.

4. Scrape the chocolate mixture into a medium bowl and leave to cool to room temperature. It should be quite thick and sticky in consistency.

5. When cool, beat in the soft butter, a small piece (about 2 tablespoons/30g) at a time. An electric hand mixer is great here, but it is possible to beat the butter in with a spatula if it is soft enough. You should end up with a thick, velvety chocolate buttercream. Chill while you make the caramel topping.

dobostorte23

Lorraine’s note: If you’re in Winter just now your butter might not soften enough at room temperature, which leads to lumps forming in the buttercream. Male sure the butter is of a very soft texture I.e. running a knife through it will provide little resistance, before you try to beat it into the chocolate mixture. Also, if you beat the butter in while the chocolate mixture is hot you’ll end up with more of a ganache than a buttercream!

Directions for the caramel topping:

1. Choose the best-looking cake layer for the caramel top. To make the caramel topping: Line a jellyroll pan with parchment paper and butter the paper. Place the reserved cake layer on the paper. Score the cake into 12 equal wedges. Lightly oil a thin, sharp knife and an offset metal spatula.

2. Stir the sugar, water and lemon juice in a small saucepan. Bring to a boil over a medium heat, stirring often to dissolve the sugar. Once dissolved into a smooth syrup, turn the heat up to high and boil without stirring, swirling the pan by the handle occasionally and washing down any sugar crystals on the sides of the pan with a wet brush until the syrup has turned into an amber-coloured caramel.

3. The top layer is perhaps the hardest part of the whole cake so make sure you have a oiled, hot offset spatula ready. I also find it helps if the cake layer hasn’t just been taken out of the refrigerator. I made mine ahead of time and the cake layer was cold and the toffee set very, very quickly—too quickly for me to spread it. Immediately pour all of the hot caramel over the cake layer. You will have some leftover most probably but more is better than less and you can always make nice toffee pattern using the extra to decorate. Using the offset spatula, quickly spread the caramel evenly to the edge of the cake layer. Let cool until beginning to set, about 30 seconds. Using the tip of the hot oiled knife (keep re-oiling this with a pastry brush between cutting), cut through the scored marks to divide the caramel layer into 12 equal wedges. Cool another minute or so, then use the edge of the knife to completely cut and separate the wedges using one firm slice movement (rather than rocking back and forth which may produce toffee strands). Cool completely.

dobostorte01

Angela’s note: I recommend cutting, rather than scoring, the cake layer into wedges before covering in caramel (reform them into a round). If you have an 8” silicon round form, then I highly recommend placing the wedges in that for easy removal later and it also ensures that the caramel stays on the cake layer. Once set, use a very sharp knife to separate the wedges.

Assembling the Dobos

1. Divide the buttercream into six equal parts.

2. Place a dab of chocolate buttercream on the middle of a 7 1/2” cardboard round and top with one cake layer. Spread the layer with one part of the chocolate icing. Repeat with 4 more cake layers. Spread the remaining icing on the sides of the cake.

3. Optional: press the finely chopped hazelnuts onto the sides of the cake.

4. Propping a hazelnut under each wedge so that it sits at an angle, arrange the wedges on top of the cake in a spoke pattern. If you have any leftover buttercream, you can pipe rosettes under each hazelnut or a large rosette in the centre of the cake. Refrigerate the cake under a cake dome until the icing is set, about 2 hours. Let slices come to room temperature for the best possible flavour.

dobostorte08

dobostorte11

Storage

Angela’s notes: I am quite happy to store this cake at room temperature under a glass dome, but your mileage may vary. If you do decide to chill it, then I would advise also using a glass dome if you have done. I should also note that the cake will cut more cleanly when chilled.

Variations

Shape:
The traditional shape of a Dobos Torta is a circular cake, but you can vary the shape and size if you want. Sherry Yard in Desserts By The Yard makes a skyscraper Dobos by cutting a full-size cake into four wedges and stacking them to create a tall, sail-shaped cake. Mini Dobos would be very cute, and you could perch a little disc of caramel on top.

Flavour: While we both love the dark chocolate buttercream and this is traditional, we think it would be fun to see what fun buttercreams you all come up with! So, go wild! Or, you could brush each layer with a flavoured syrup if you just want a hint of a second flavour. Cointreau syrup would be divine!

Nuts: These are optional for decoration, so no worries if you’re allergic to them. If you don’t like hazelnuts, then substitute for another variety that you like.

Egg concerns: The cooking process for the buttercream will produce lightly cooked eggs. If you fall into a vulnerable health group then you may wish to use an egg-less buttercream.

Greek Baklava

Monday, August 24th, 2009

greekbaklava02

One of Nick’s friends at work brought in some homemade baklava a while ago and once trying it on the train on my way home from work, I said to Nick “ask for the recipe!”, as I absolutely love baklava.
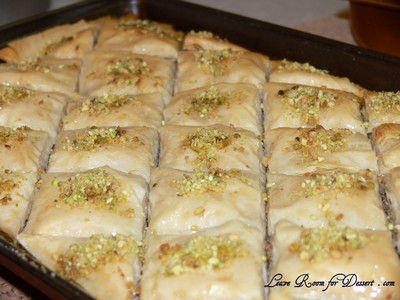
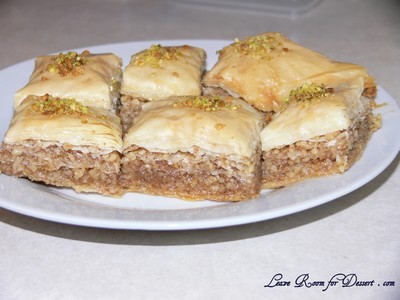
This is a Greek recipe for baklava, which is has lovely flaky pastry, great flavours and is dripping in syrup and very sweet (if you prefer your baklava less sweet, reduce the amount in the syrup and/or walnut mix).

greekbaklava03

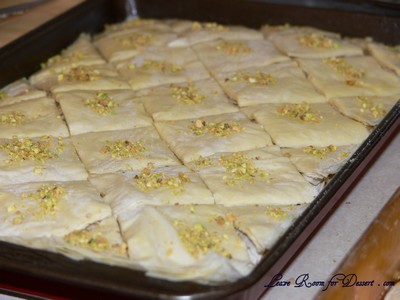
If you want to add a little colour to the top, process some pistachios and place on top once cooked.

Greek Baklava
Recipe from Arthur X’s mum

1 pack (375g) Fillo Pastry
500g cracked walnuts
1 teaspoons cinnamon powder
1 teaspoons clove spice powder
1 cup sugar

Canola Oil (we used melted butter)

Sugar Syrup
4 cups sugar
4 cups water
Juice of half a lemon

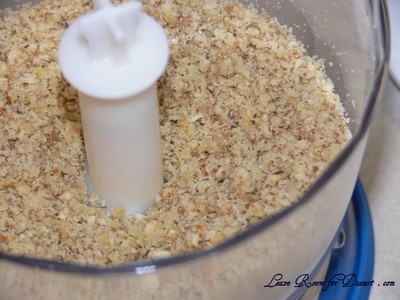
Grate walnuts (I processed them in a food processor) and place the walnuts, spices and sugar into a bowl and mix well.

greekbaklava04

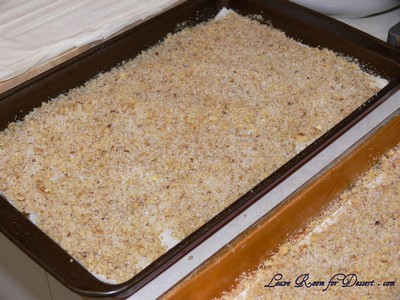
Oil a baking tray and put in 6 layers of Fillo pastry and brush canola oil on each individual sheet. Put a thin layer of walnut mixture onto the Fillo pastry and then cover with another layer of fillo pastry and brush with canola oil.

Repeat this until all Fillo sheets are used (around 10 sheets) and remember to keep 6 sheets aside for the top of Baklava. Once all mixture is used put 6 sheets on the top and brush each sheet of Fillo pastry with canola oil.

greekbaklava09

Cut the Baklava into a diamond pattern, almost to the bottom before putting into a fan forced oven at 180 degrees for around 40 minutes.

{don't put the pistachios on at this point like I did  as they will brown too much}

{don't put the pistachios on at this point like I did as they will brown too much}

While the Baklava is cooking you have to make the syrup and then let the syrup cool down to room temperature.

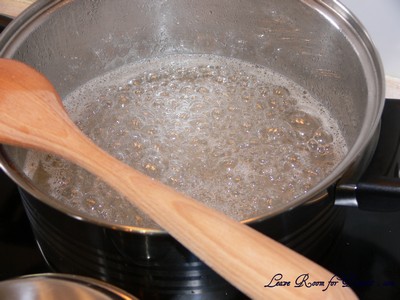
Put 4 cups of sugar and 4 cups of water into a saucepan and the juice from half a lemon and put into stove. Let the syrup boil until it thickens and then put aside to cool down.

greekbaklava08

Once the Baklava has finished cooking take it out put it into a serving tray and pour the room temperature syrup onto the hot Baklava and set aside to cool for at least 6 hours.

greekbaklava02

Triple Chocolate Praline Tart

Monday, August 17th, 2009

triplechocolatepralinetart03

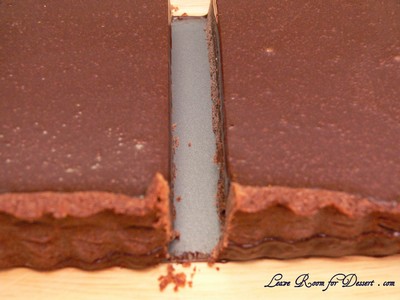
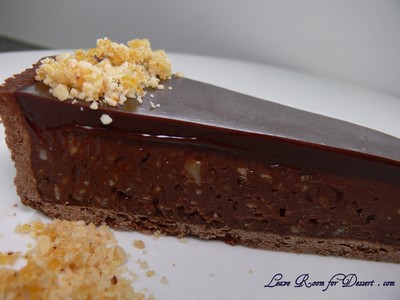
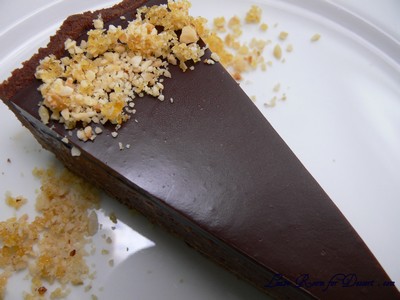
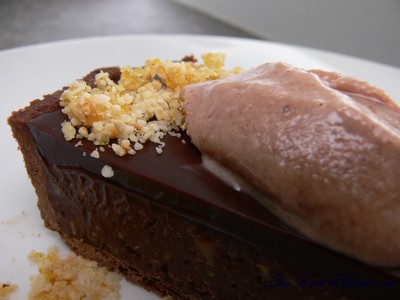
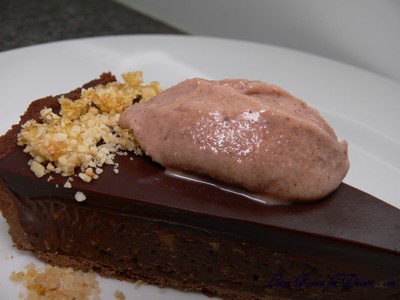
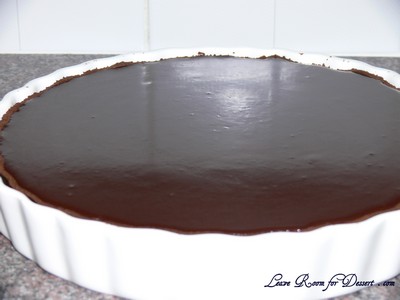
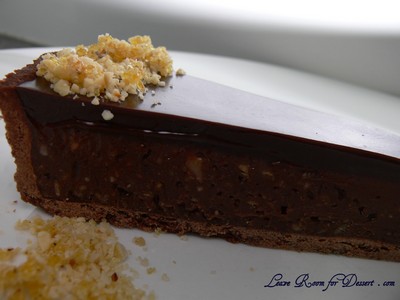
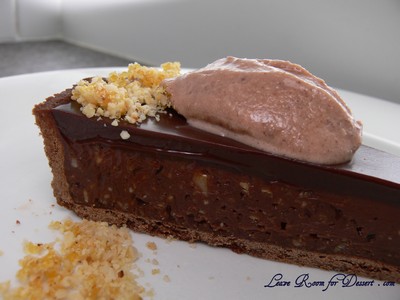
On the cover of Gourmet Traveller a few months ago was one of the most tempting chocolate tarts I have ever seen. Gorgeous rich shiny chocolate on top of a chocolate, hazelnut praline mousse and crispy chocolate pastry. How could I resist making this?

triplechocolatepralinetart05

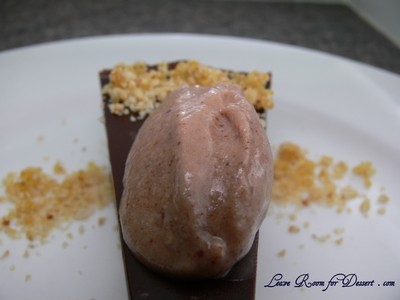
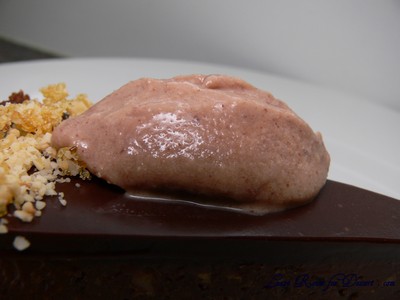
Even though I felt I should serve this with vanilla ice cream, I really wanted to serve it with baci gelato and the combination was fantastic! The tart was rich and relatively soft, with a crisp pastry. The chocolate ganche on top was beautiful and very reflective, the hazelnut praline gave the tart a lovely crunch and all layers worked fantastically together.

triplechocolatepralinetart11

A loose bottomed tart tin would have been very helpful in getting out the tart slices, as I had a few problems with removing the first few. Each part of the tart was quite easy, you just need to organise your time a bit, to make sure it’s ready on time. We had some leftovers, as this is a very rich tart, and it tastes gorgeous on the days afterward, so if you didn’t have time to make it on the day I would consider making it the day before.

triplechocolatepralinetart07

Triple Chocolate Praline Tart
Recipe from Gourmet Traveller (my hints in italics)

Serves: 16

160ml pouring cream
40ml milk
200g dark chocolate (61% cocoa solids), finely chopped

Chocolate pastry
200g plain flour
60g pure icing sugar, sifted
30g Dutch-process cocoa
100g cold butter, coarsely chopped
2 egg yolks
(I had to add 2 tablespoons of cold water at the end for it to form a dough)

Milk chocolate praline filling
150g hazelnuts, roasted and skins removed
175g raw caster sugar
300ml pouring cream
400g milk chocolate, finely chopped

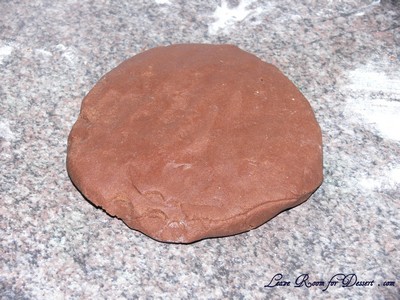
For chocolate pastry, process flour, icing sugar and cocoa in a food processor until combined. Add butter, process until mixture resembles fine crumbs, then add egg yolks, process to combine. (If you need to add some cold water add it now and process, I needed to do this as it was very crumbly). Turn onto a lightly floured work surface and bring pastry together with the heel of your hand. Wrap in plastic wrap, refrigerate for 1 hour to rest.

triplechocolatepralinetart13

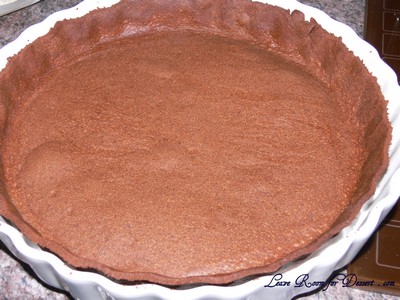
Preheat oven to 180°C. Roll out pastry on a lightly floured surface to 3mm thick and line a 28cm-diameter loose-bottomed tart tin, trimming edges (I used a quiche dish as that’s all I had). Refrigerate for 1 hour, then blind bake for 8-10 minutes (place a piece of baking paper in the tart and add rice, beans or weights), remove paper and weights and bake until dry and crisp (8-10 minutes).
triplechocolatepralinetart16

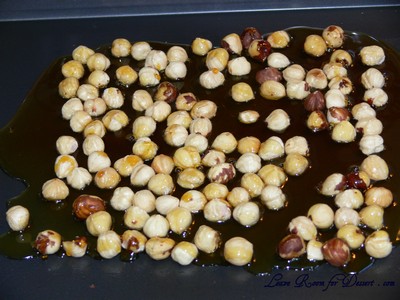
Meanwhile, for praline filling, spread hazelnuts on an oiled baking tray, set aside. Combine sugar and 60ml water in a small saucepan, stir over medium-high heat until sugar dissolves. Bring to the boil, cook until dark caramel in colour (4-5 minutes), pour over nuts. Stand until cool and set (8-10 minutes), process in a food processor until finely ground, set aside.

triplechocolatepralinetart15

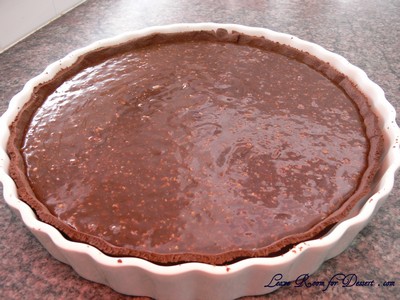
Bring cream to the simmer in a small saucepan over medium heat, add chocolate, stir until smooth, remove from heat, stir in two-thirds of praline mixture (reserve remaining to serve). Spoon into pastry case, smooth top, refrigerate until just set (1½-2 hours).

triplechocolatepralinetart17

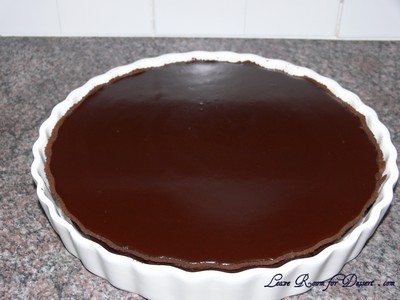
Combine cream and milk in a small saucepan, bring to the simmer over medium-high heat. Add dark chocolate, remove from heat, stir until smooth. Spread over tart, refrigerate until just set (45 minutes-1 hour). Cut into wedges with a hot knife and serve immediately scattered with reserved praline. (I would also suggest serving this with vanilla ice cream, whipped cream or baci gelato).

triplechocolatepralinetart19

triplechocolatepralinetart20

triplechocolatepralinetart02

triplechocolatepralinetart12

triplechocolatepralinetart10

Baci Gelato

Thursday, August 13th, 2009

bacigelato02

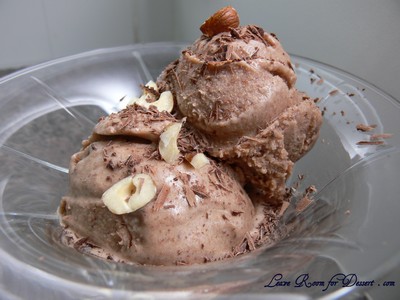
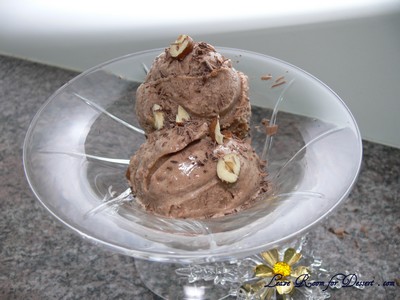
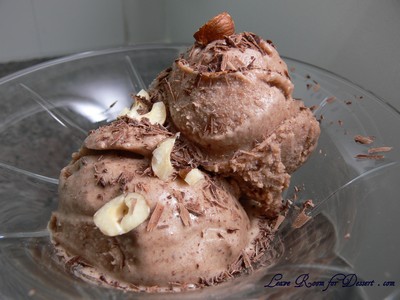
When I received my ice cream maker a few years ago, one of the first things I wanted to make was a ferrero rocher gelato or ice cream. I tried to find a recipe, but ended up with a quite solid very rich ice cream – which was not what I wanted at all. I was hoping for a beautifully soft lightly chocolate hazelnut flavoured gelato.

When I saw this baci gelato in my delicious magazine, I was extremely excited to try it (even though I have yet to make a good vanilla ice cream, it’s still on my list).

bacigelato04

This was absolutely gorgeous!!! All I wanted was more and more gelato! Unfortunately I had made it a little late in the day and not cooled it enough for my ice cream machine, resulting in the machine stopping its churning and I then had to continue beating the gelato every 2 hours. When it was time to serve the gelato with a lovely chocolate tart, it wasn’t completely frozen, but the colder edges tasted absolutely fantastic! The following days it still tasted wonderful… now, when can I make it again…? 😛

bacigelato05

Baci Gelato
Recipe from delicious magazine May 2009 (some of my hints/changes are in italics)

Consider making this the day before (or early) and placing the ice cream mix in the fridge or on ice to cool before putting it in the ice cream maker.

Serves: 6 (when served with a chocolate tart, it serves 12 or more)

2 cups (500ml) pure (thin) cream
2 cups (500ml) milk
1 vanilla bean, split, seeds scraped (I used 1 teaspoon vanilla essence)
300g caster sugar (split into 2 x 150g lots)
5 egg yolks
220g Nutella or other hazelnut spread (It was cold here, so I place it in a bowl over hot water)
Cocoa powder, to dust (if desired)

Place the cream, milk, vanilla pod and seeds (or essence) and 150g sugar in a pan over medium heat, stirring to dissolve sugar. Bring to just below boiling point, then remove from the heat.

Beat the yolks and remaining 150g caster sugar with electric beaters (in a large bowl) until pale. Slowly add the hot cream mixture, whisking well to combine. Pour into a clean large saucepan and cook gently over low heat for 3-4 minutes, stirring constantly until the mixture is thick enough to coat the back of a spoon. Remove from the heat and discard the vanilla pod. Stir in the Nutella until well combined.
Pour mixture into a shallow container. Freeze for 2 hours or until frozen at the edges. Remove and beat with electric beaters, then return to the container and refreeze. Repeat 2 or 3 times, then freeze for 4 hours or until firm. Alternatively, churn mixture in an ice cream machine according to manufactures instructions.

Scoop gelato into bowls and serve by itself or with White Chocolate slab (recipe also in delicious magazine), or with a slice of Triple Chocolate Praline Tart.

bacigelato06

bacigelato01

triplechocolatepralinetart091

Sticky Date Pudding with Butterscotch Sauce and Almond Praline

Saturday, August 1st, 2009

stickydatepudding06

There are many dishes that I have on my list of yummy things to make after watching the MasterChef Australia 2009 series – and this was one of them. You may have already seen my first MasterChef challenge – the Crouquembouche, which I will be making again (not necessarily in a cone shape – perhaps just profiteroles filled with gorgeous custard, placed on baking paper and toffee poured over them, thereby reducing any injury due to placing fingers in hot toffee).

stickydatepudding08

The judges absolutely loved the contestants’ sticky date puddings for this pressure test, with none of them being eliminated as they had all done so well. A friend at work had also made this dish – at least 3 times, so I figured it must be good.

stickydatepudding07

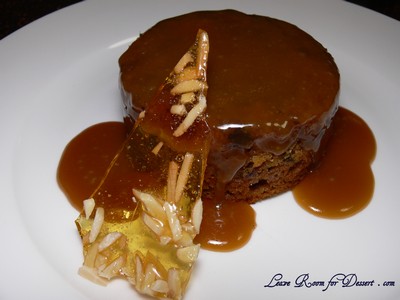
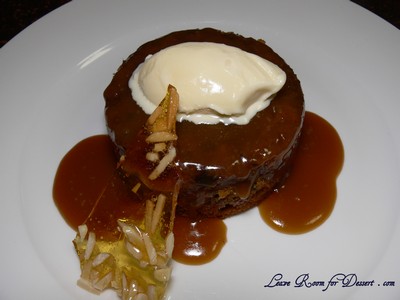
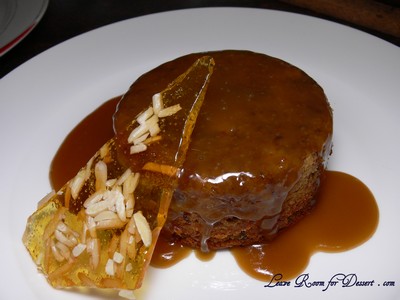
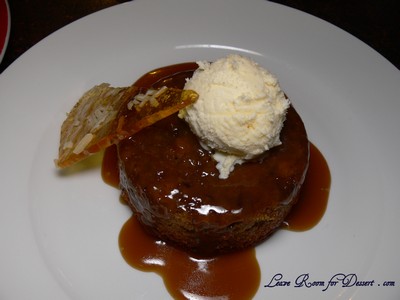
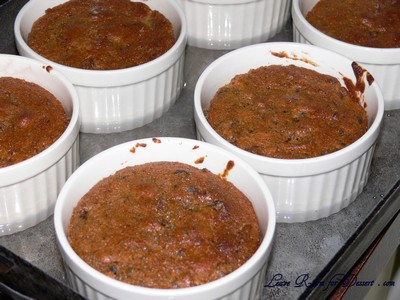
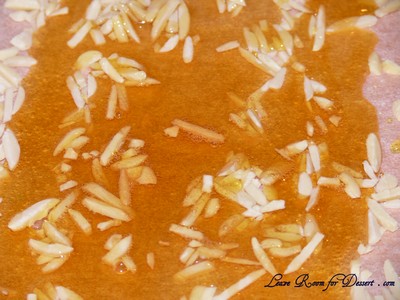
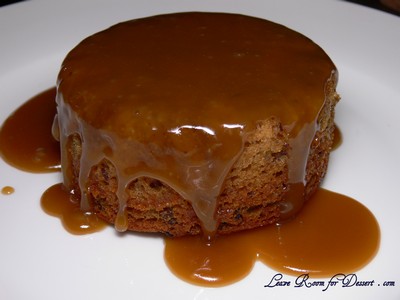
I thought the dish was very lovely, although I think my expectations on taste had been lifted so high from the Crouquembouche that it didn’t live up to that recipe. The butterscotch sauce was easy and beautiful (I love butterscotch flavoured desserts) and the praline was quite nice too (although when I poured it over my almond slivers, it tended to push them away rather than flow over the top – not sure what I did wrong). The sticky date pudding itself was very tasty, even though I don’t normally like sticky date puddings out at restaurants.

stickydatepudding09

Sticky Date Pudding with Butterscotch Sauce and Almond Praline
Recipe from MasterChef Australia 2009

Makes: 6-8

180g dates, pitted and roughly chopped
11/4 cups (310ml) water
1/2 teaspoon bicarbonate of soda
3/4 cup (165g) firmly packed brown sugar
60g butter, softened chopped
2 eggs
1 cup (150g) self-raising flour

Almond praline
1/2 cup (110g) caster sugar
1/4 cup (35g) slivered almonds

Butterscotch sauce
50g butter
1 cup (220g) brown sugar
1 cup (250ml) cream
1 tsp vanilla extract

Preheat oven to 180°C (160°C fan-forced). Lightly grease 8 (1/2 cup capacity) metal dariole moulds. (I used 6 ramekins)

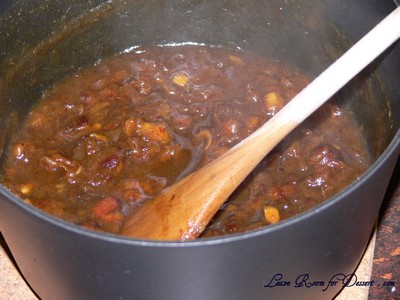
Place dates and water in a saucepan and bring to the boil over a high heat. Remove from the heat. Add
bicarbonate of soda, stir until dates start to break down, set aside to cool, stirring occasionally.

stickydatepudding14

Beat butter and sugar in a bowl using a hand beater, gradually add eggs one at a time, beat until light and fluffy.

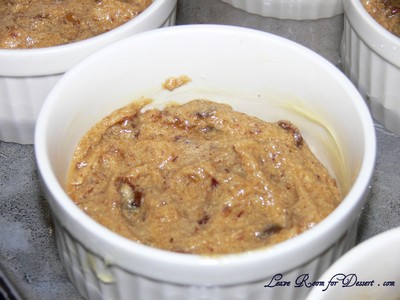
Add date mixture, stir to combine. Carefully fold through sifted flour, divide mixture evenly between the eight moulds (I used 6 ramekins), until 2/3 full.

stickydatepudding02

Place moulds in a baking tray, carefully pour water in tray until it comes up 1/3 of the side of the moulds. Bake in oven for 40 minutes or until golden and skewer comes out clean.

stickydatepudding03

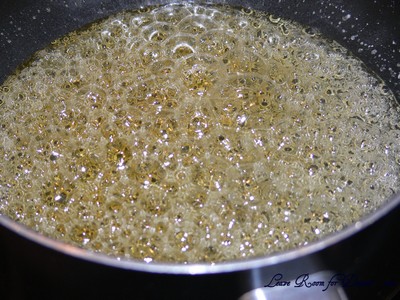
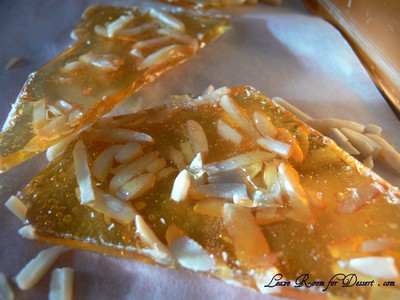
Meanwhile, for the almond praline, combine sugar and 2 tablespoons water in a saucepan over medium heat and cook caramel without stirring, swirling pan, until deep golden. Scatter almonds onto a baking paper-lined oven tray, pour over caramel and cool until set. Break praline into pieces.

stickydatepudding12

stickydatepudding13

stickydatepudding01

For the butterscotch sauce, combine butter, sugar, cream and vanilla in small saucepan over low heat until butter melts and sugar dissolves. Bring sauce to the boil, reduce heat and cook for 5-6 minutes or until sauce thickens slightly.

To serve, invert the hot pudding onto a serving plate, top with butterscotch sauce and shards of praline.

stickydatepudding04

stickydatepudding08