Cooking Class – Family

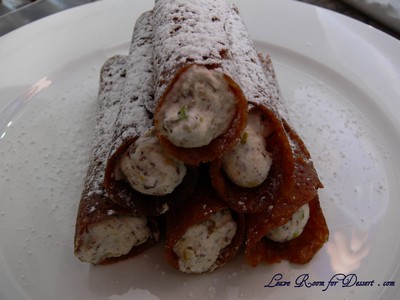
Cannelloni and Quick Cannoli – Cooking Class 4

Monday, May 4th, 2009

cannoli1

It’s my turn for our family cooking class!!! And the “theme” is TUBES 🙂
cannelloni10

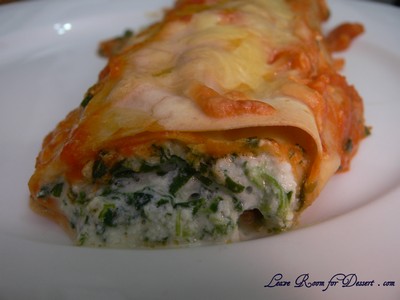
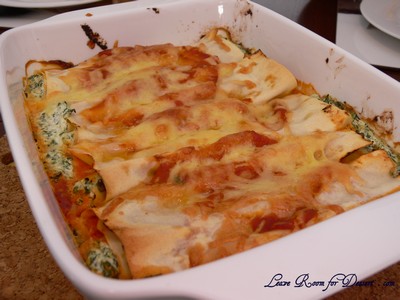
I wanted to make both a main meal and dessert and what better than Cannelloni and Cannoli? I knew I wanted to make spinach and ricotta cannelloni, so that was an easy choice. When it came to the Cannoli (which I have never even tried before, let alone made before) I wasn’t organised enough to find somewhere that actually stocked cannoli tubes or forms (metal tubes used to stick the pastry together, which is then placed with the pastry into hot oil). I searched the internet and called stores around Sydney City and there was nothing to be found! Essential Ingredient said they normally stock them, but unfortunately they were out of stock too! (Not that I had much time to go and get them anyway). Guess I will put this on my birthday or Christmas list – along with a pastry bag, sugar thermometer and some new cookbooks 🙂 .

cannoli3

So I guess the quick version will of cannoli will have to do and I bought some pre-made brandy snap tubes. I’ve seen the majority of recipes using ricotta, although the pack suggested using whipped cream, so seeing as it was already not exactly what I wanted to make, I went with the cream version.
cannelloni7

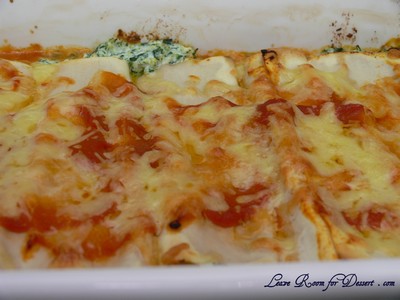
The spinach and ricotta cannelloni turned out lovely, with the tomato sauce a MUST! (even more could have been made). The cannoli was beautifully tasty, with sweet vanilla cream, chocolate and pistachios.

Cannelloni

Serves: 8-12

2 packets lasagne sheets (16 sheets altogether)
1.8kg ricotta
3 packets finely chopped frozen spinach, thawed and drained
½ cup parmesan cheese, finely grated
parsley
basil
salt and pepper
2 cups grated cheese or mozzarella cheese

Tomato Sauce
Oil
3 onions, sliced
3 cloves of garlic, crushed
1 teaspoon salt
1 tablespoon sugar
2 x 800g can diced or crushed tomatoes
5 tablespoons tomato paste

Make the tomato sauce by sautéing onions in oil in a large saucepan heated over medium heat. Once onions soften and become translucent, 5-10 minutes, add the garlic and stir for a minute. Add tomatoes, stir then add salt, sugar and tomato paste. Cook for 5-10 minutes over medium heat until reduced slightly. Blend in a food processor or with a hand blender in the saucepan. Set aside to cool.

In a large bowl mix ricotta, spinach, parmesan cheese, parsley, basil, salt and pepper.

Pour a third to half the tomato sauce into two lightly greased lasagne dishes. Preheat oven to 180°C.

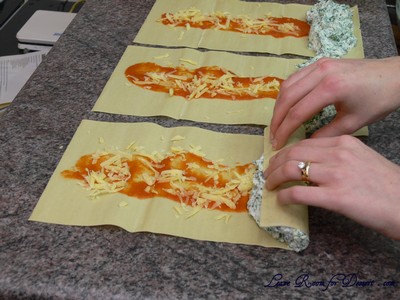
Lay each lasagne sheet out on a clean bench or board (you may cut the lasagne sheets in half if you want less pasta). Add a spoonful or two of tomato sauce onto the lasagne sheet and spread around the middle, missing the rolling ends. Sprinkle with some grated cheese. Add a large amount of spinach and ricotta mix onto the short edge of the sheet, making it evenly distributed. Roll up to form a tube and place on top of the tomato sauce with the loose edge down.
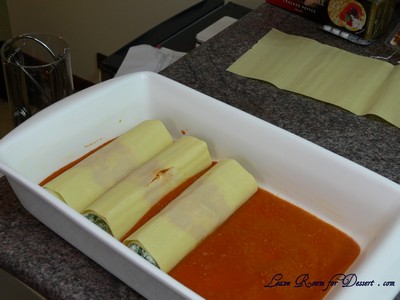
cannelloni3

cannelloni4

Continue with remaining lasagne sheets, until all mixture is used up. Place the remaining tomato sauce on top of the cannelloni and sprinkle with cheese. Cook in preheated oven for 20-30 minutes or until browning on top. Serve with salad or herb bread.
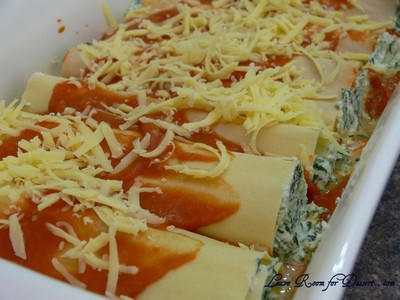
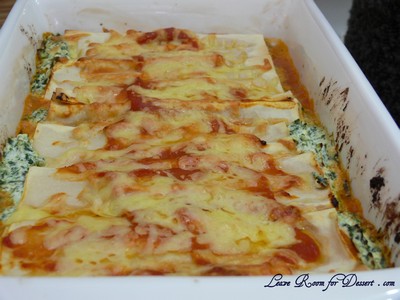
cannelloni5

cannelloni6

cannelloni8

Quick Cannoli

1 packet (approximately 8 ) brandy snap tubes or cannoli tubes
150ml thickened cream
1 teaspoon vanilla
1 teaspoon caster sugar
¼ cup pistachios, chopped
100g chocolate, chopped

Beat thickened cream with vanilla and sugar until medium peaks form. Fold in chopped pistachios and chocolate and place in pastry bag with star nozzle (or place in cake decorating bag without nozzle attached. Pipe into tubes and dust with icing sugar or icing mixture. Serve very soon after piped.


cannoli4

cannoli2

Stuffed Capsicums – Cooking Class 3

Thursday, April 30th, 2009

stuffedcapsicums6

You may be wondering what has happened to our family cooking classes… Well they have continued, even with the busy process of moving. Although there was an added delay due to possibly deleted photos – and I didn’t want to post without photos 😛 . Yay – photos found… now I’ll continue…

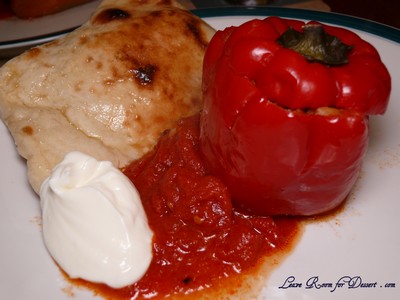
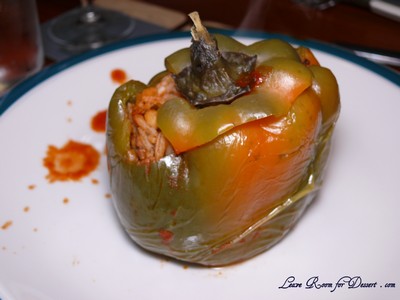
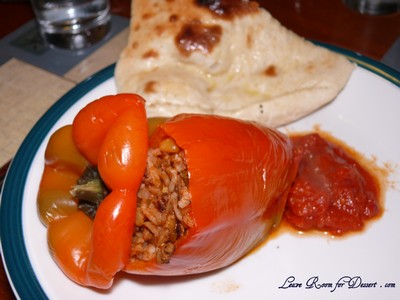
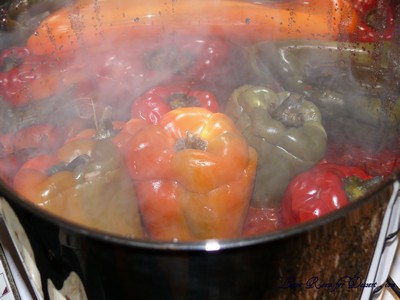
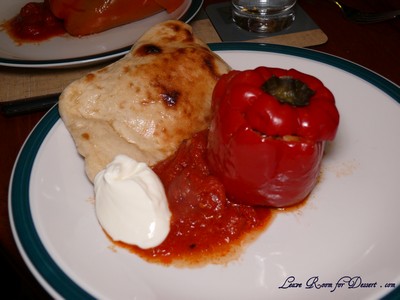
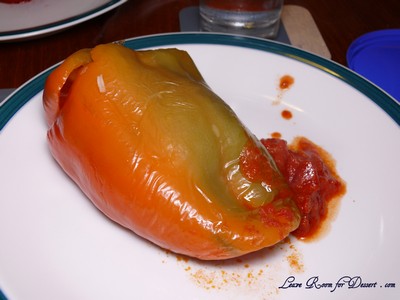
Our third family cooking class was a lovely stuffed capsicum dish, with a rice, lamb, onion, tomato and spice stuffing in capsicums which had been boiled in salted water (a step I had never done before) then cooked on the stove (another step I hadn’t done – I’ve always cooked them in the oven) in diced tomatoes and lemon juice.

stuffedcapsicums5

It may have taken a bit longer than we had expected, as it often takes a while to figure out what you’re meant to be doing from the recipe and trying to make sure everyone gets a go. They are relatively easy though, even though I mentioned it took a while, especially if you have made the rice or filling beforehand. I’m sure for those who do not want or are unable to get lamb mince, that you could substitute it with beef mince or a vegetable filling of mushrooms, eggplant etc and it would still taste fantastic!

Nonetheless, once you’ve got these capsicums in and cooking, there is plenty of time to make naan bread and/or clean up from the preparation.

stuffedcapsicums2

Stuffed Capsicums
Recipe adapted from rice and risotto (sorry I’m not sure of the author as this isn’t from one of my books)

Serves: 6

6 capsicums
2 tablespoons oil
1 onion, finely diced
3 spring onions, finely chopped
150g minced lamb
2 cloves garlic, crushed
1/4 cup yellow split peas
1/2 – 1 cup cooked long grain rice
2 tablespoons finely chopped fresh parsley
2 tablespoons finely chopped mint
2 tablespoons finely chopped chives
1 teaspoon cinnamon
juice of two lemons
2-4 tablespoons tomato puree
400g (one or two cans) chopped tomatoes
tablespoon butter
salt and ground pepper
natural yoghurt and naan bread, to serve

Cut the tops off the capsicums, remove seeds and core. If the capsicums are going to fall over, trim a little off the bottom, so they stand. Cook in boiling salted water for 5 minutes, then drain, rinse under cold water and set aside.

Place the split peas in a saucepan and cover with water. Bring to the boil, then cook on medium heat for 15-20 minutes, until soft. Drain.

Heat the oil in a large saucepan and cook onion and spring onions until golden brown. Add the garlic and lamb and cook over medium heat until well browned. Stir in split peas, cooked rice, herbs, cinnamon, juice of lemon and tomato puree into the meat mixture. Stir to combine, then stuff into the capsicums. Place capsicum lids on top.

Place chopped tomatoes, butter and juice of one lemon into a large saucepan. Place capsicums on top of tomato mix with stems upwards. Bring to boil, cover with lid and cook on low/medium for 40-45minutes until peppers are tender.

stuffedcapsicums3

Serve with the tomato mixture, yoghurt and naan bread.

stuffedcapsicums7

stuffedcapsicums1

Beef Wellington – Cooking Class 2

Tuesday, March 17th, 2009

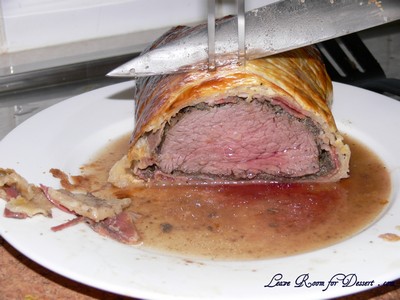
beef_wellington

Thank you Gordon Ramsay!

Nick has wanted to make Beef Wellington for years and when searching for a video of it he came across a recipe and video from Gordon Ramsay’s the F-word. It looked reasonably easy and even though he knew very early what he wanted to make, he still needed to recruit help in getting all the ingredients.

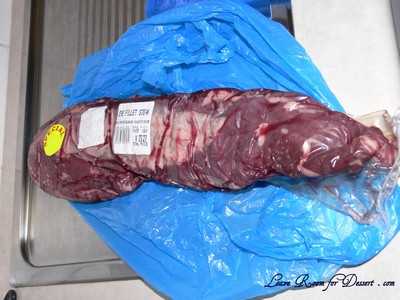
A fantastic Beef Eye Fillet from a whole-sale butcher was chosen. It was the smallest one available and it was 1.3kg, so we decided two Beef Wellington’s were on the menu (even though one would have been sufficient to feed the six of us that were there – better to have too much than too little, and people were certainly going back for seconds).

Absolutely gorgeous!!

Absolutely gorgeous!!

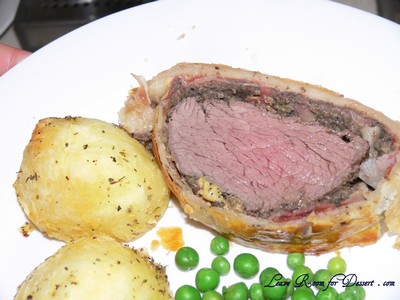
Neither pictures nor words can describe the texture and flavour of this dish, but I’ll try. I’ll also apologise for the photos, as they certainly don’t do it justice – being taken with bad lighting and a short amount of time (due to a table full of hungry family members).

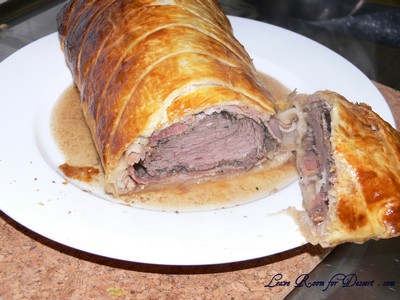
This recipe was incredibly easy for the absolutely delectable, fantastic flavour combination of the fall-apart beef, mushroom paste, prosciutto and mustards topped off by a buttery, crispy, golden pastry.

Beef Wellington
(adapted from Gordon Ramsay’s – The F-word)

Serves: 4-6

650 – 700g beef eye fillet
1 teaspoon Dijon mustard (even though Gordon says not to use it – we thought it may tone down the hot English mustard, although no burn was tasted)
1 teaspoon hot English mustard
4-6 mushrooms
8 slices prosciutto
2 sheets puff pastry
1 egg yolk, beaten
salt and pepper to taste

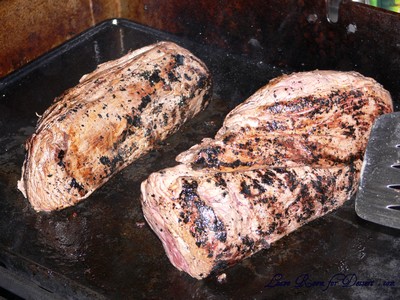
Heat a saucepan or BBQ tray on high. Season the fillet with salt and pepper, then lightly rub with olive oil and sear all edges, about 30 seconds on each side. Set aside to cool.

Beef Eye Fillet

Beef Eye Fillet

Seared Beef Eye Fillet

Seared Beef Eye Fillet

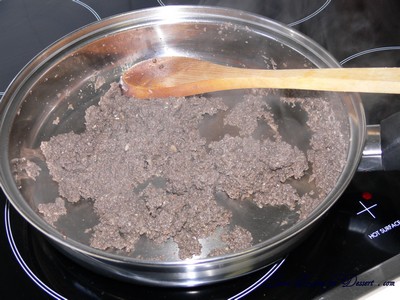
Blend the mushrooms in a food processor until it has formed a paste. Heat a saucepan on medium to high and add the mushrooms (do not use any butter, oil or liquid to cook the mushrooms). Stir the mushrooms until most of the liquid has evaporated. Set aside to cool.

Blend the mushrooms and cook off excess liquid

Blend the mushrooms and cook off excess liquid

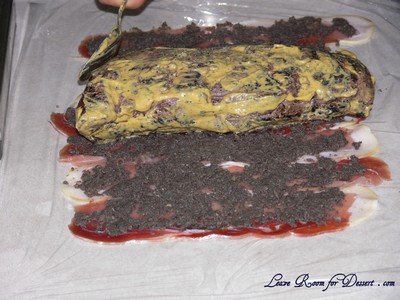
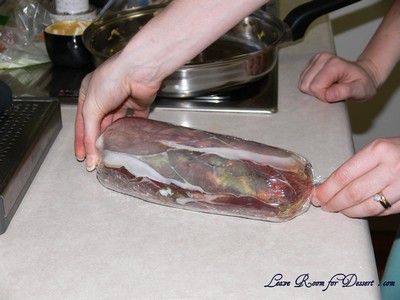
Place a long sheet of cling film onto the counter. Place the prosciutto slices overlapping on the plastic, enough to cover the beef fillet. Carefully spread the mushroom mix over the prosciutto. Mix the mustards together and rub over the beef fillet. Lay the fillet on the mushroom, prosciutto layers and carefully move the plastic to encase the fillet in prosciutto tightly. Tie off the plastic ends and place in the fridge for 10 minutes.

Overlap proscuitto, spread with blended mushrooms and place mustard coated beef fillet on top

Overlap proscuitto, spread with blended mushrooms and place mustard coated beef fillet on top

Roll the proscuitto up around the beef fillet and twist ends to seal - place in fridge

Roll the proscuitto up around the beef fillet and twist ends to seal - place in fridge

Preheat oven to 180°C. Take the puff pastry out of the freezer to thaw. Overlap puff pastry enough to encase the fillet.

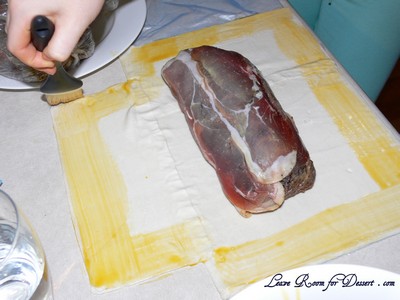
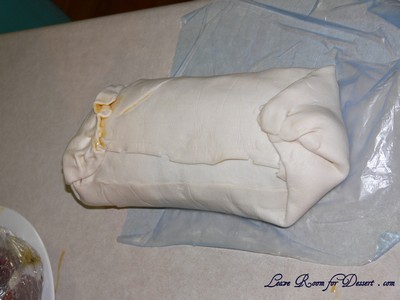
Remove plastic from beef fillet and place in the middle of the puff pastry sheets. Brush egg yolk mix around the edges and encase the beef fillet in the puff pastry, folding under edges.

Brush the edges with egg yolk mix

Brush the edges with egg yolk mix

Fold up the pastry sealing the beef inside

Fold up the pastry sealing the beef inside

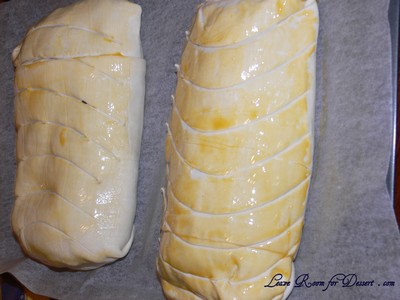
Place on baking tray lined with baking paper and brush with remaining egg yolk. Score the pastry for effect. Season with salt and pepper. Place in the oven and cook for 40 – 50 minutes, or until the pastry is golden brown.

Score the pastry with a knife

Score the pastry with a knife

Slice Beef Wellington thickly and serve with roast vegetables.

Please sir, I want some more...

Please sir, I want some more...

Honey Chicken and Baked Spring Rolls – Cooking Class 1

Tuesday, March 10th, 2009

My sisters and I have wanted to join a cooking class to learn some new cooking techniques and recipes as well as meeting a few new people and having a great time. Although with all the moving that’s going to be happening with my family, we don’t have much extra time or flexibility with a course.

SpringRolls

So K. came up with a great idea, we each choose a dish we’ve never made before and would like to make, buy the food, then everyone comes around and helps make it together. This way we each get to help make something new and try a whole range of new foods as well as have a bit of fun!

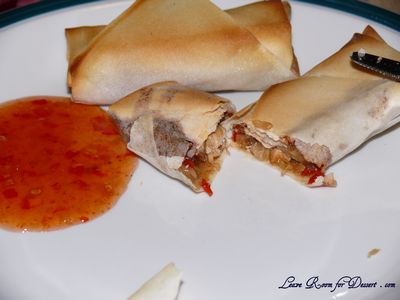
K. was first up and chose a Chinese-themed night: Baked Spring Rolls and Honey Chicken with stir-fry vegetables. We were each allocated a separate job with preparing the vegetables for the spring rolls, cooking the filling and rolling them, as well as cutting the chicken, making the batter and sauce and cooking it in hot oil.

HoneyChicken

The recipe for the honey chicken was a bit lacking in some quantities, leaving some trouble-shooting for the batter, which included at least 10 minutes of people jamming a fork into the non-Newtonian fluid (where the fluid behaves like a solid rather than a liquid) we made from the cornflour and water (check out a video of people running on pool filled with it here:
http://www.youtube.com/watch?v=f2XQ97XHjVw).
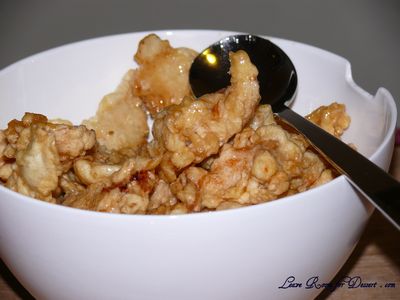
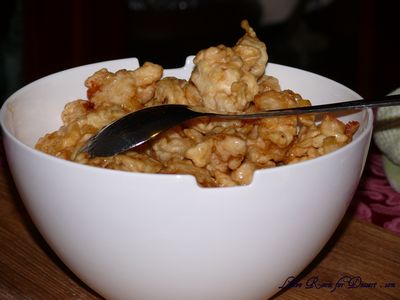
After more water was added the mixture started acting a bit more like batter is supposed to. Although once cooked, the crispy chicken was coated in a lovely honey syrup and tasted great!

With all that oil, batter and honey, we were lucky that my sister had chosen baked spring roll recipe rather than another deep-fried recipe. These spring rolls are extra tasty and I’m sure they’d be quite healthy too and can certainly be adapted to make Vegetarian spring rolls by omitting the chicken and ham.

Oven Baked Spring Rolls
Recipe from Nutrition Australia website

Makes 20

1 teaspoon oil for trays
2 teaspoons oil
1 medium onion, diced
½ teaspoon finely chopped ginger or ½ teaspoon ground ginger
1 clove garlic, finely chopped
1 stick celery, finely chopped
5 mushrooms, finely diced
½ capsicum, finely diced
2 cups finely chopped cabbage
½ – 1 cup finely diced cooked lean ham or chicken
½ cup bean sprouts, e.g. mung beans
1 tablespoon cornflour
1 teaspoon sweet chilli sauce
1 tablespoon salt-reduced soy sauce
2 tablespoons chopped fresh herbs (choose one or a combination of: parsley, coriander, basil)
250g packet frozen spring roll pastry, thawed

Preheat oven to 200 C. Brush an oven tray with oil/ or lightly spray with oil.
Heat the oil in a wok or frying pan over medium to high heat. Add the onion, ginger and garlic stir-fry for 1 minute.

Add celery, mushrooms, capsicum and cabbage and stir-fry for about 3 minutes. Add ham/ chicken and sprouts. Put on the lid and let vegetables cook for another minute.

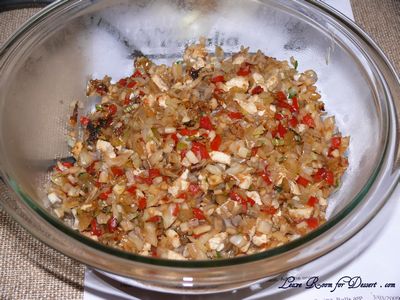
Spring Roll Filling

Spring Roll Filling

Meanwhile combine the cornflour, sweet chilli sauce, soy, and herbs. Add the mixed sauces to the spring roll filling, heat until mixture boils and thickens. Remove saucepan from the heat and allow mixture to cool.
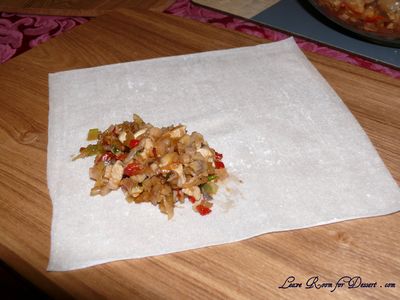
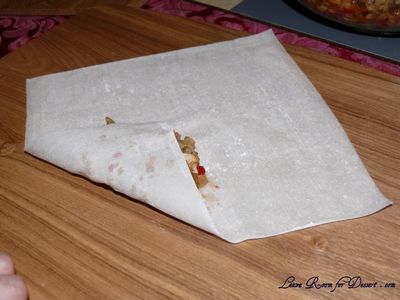
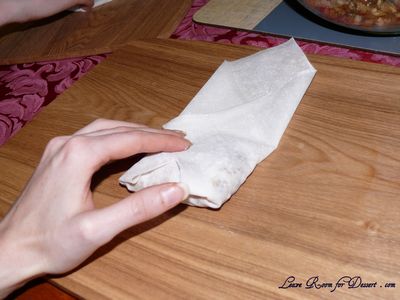
Place 1-2 tablespoons of the mixture on the bottom corner of one spring roll sheet. Fold edges of sheet in and roll up. Continue until all the mixture is used.

Place Filling on Spring Roll Sheet

Place Filling on Spring Roll Sheet

Fold base pf sheet up over filling

Fold base pf sheet up over filling

Fold sides of sheet to the middle then continue to roll up to make the spring roll

Fold sides of sheet to the middle then continue to roll up to make the spring roll

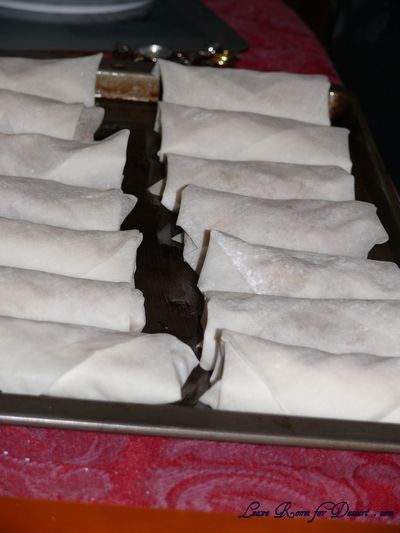
Ready to bake

Ready to bake

Bake in a hot oven for 15-20 minutes or until the spring rolls are golden brown. Serve with a dipping sauce as a snack or with rice for a main meal.

Serve with sweet chilli sauce

Serve with sweet chilli sauce


Chinese Honey Chicken

Recipe from Geocities

Serves: 4-6

500g skinless chicken breast
¾ cup honey
1 cup cornflour
½ teaspoon baking powder
2 egg whites
cold water (we used around ½ cup)
oil for deep-frying
extra cornflour (for dusting chicken)
1½ teaspoons sweet chilli sauce
garnish: spring onion (chopped) or sesame seeds

Cut chicken breasts into bite-sized pieces.

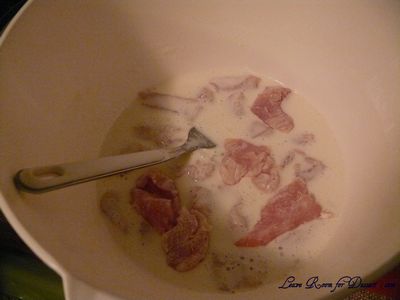
Make the batter: mix together cornflour, baking powder, beaten egg whites and cold water.

Coat the chicken in the batter

Coat the chicken in the batter

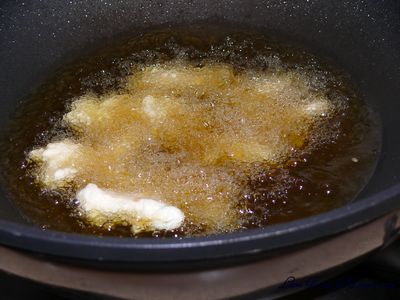
Dust chicken with cornflour then dip it into the batter. Deep-fry chicken pieces for 1 min or till crisp on the outside and cooked through.

Deep fry the battered chicken in hot oil

Deep fry the battered chicken in hot oil

In another pan, add honey and chilli sauce and heat over medium heat. Pour hot sauce over chicken. Garnish with chopped spring onions and serve immediately.

Add honey sauce over crispy chicken and serve

Add honey sauce over crispy chicken and serve

The first cooking class is finished, next is Nick’s turn…