Cakes, Slices and Biscuits

Cannoli – Daring Bakers Challenge November 2009

Friday, November 27th, 2009

CannoliDaringBakers09

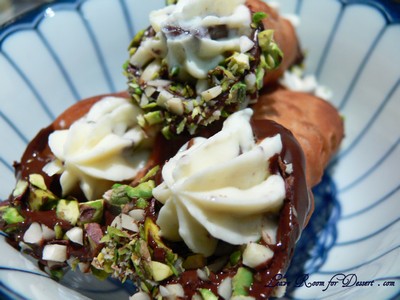
The November 2009 Daring Bakers Challenge was chosen and hosted by Lisa Michele of Parsley, Sage, Desserts and Line Drives. She chose the Italian Pastry, Cannolo (Cannoli is plural), using the cookbooks Lidia’s Italian-American Kitchen by Lidia Matticchio Bastianich and The Sopranos Family Cookbook by Allen Rucker; recipes by Michelle Scicolone, as ingredient/direction guides. She added her own modifications/changes, so the recipe is not 100% verbatim from either book.
CannoliDaringBakers14

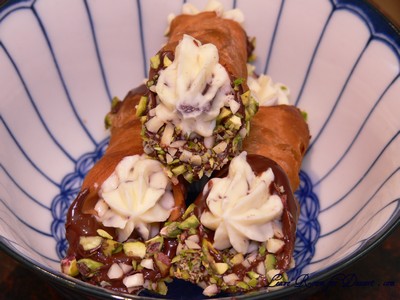
Yippee. I had plans to make some cannoli so long ago when I hosted my first cooking class with my family. Unfortunately I didn’t have any metal cannoli tubes/forms, plus – it was probably a bit difficult to make cannoli from scratch plus dinner on a work night.
CannoliDaringBakers08

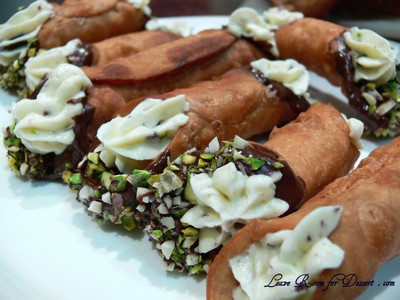
All I know is I was excited to finally be making cannoli from scratch, even though I had never eaten a bought cannoli before.

I found the dough a bit difficult to roll out, as it kept springing back. Even when it had been rolled out thinly, cut in a circle, rolled into an oval and wrapped around the cannoli tube, it still continued to shrink and resulted in a few quite small/thickish cannoli tubes. This didn’t change how they fried up, they were still great.

I also found they cooked very quickly – 30sec or less at 170-180C and they were perfectly cooked.
CannoliDaringBakers10

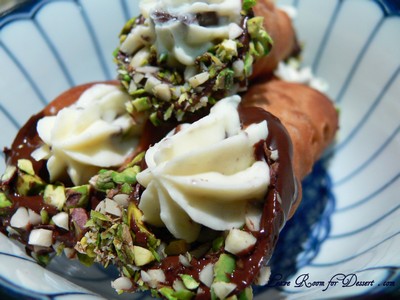
Overall, I was quite happy with the cannoli tubes. They went extremely well with the sweet ricotta, pistachio and chocolate filling and lasted very well (not filled) in a sealed container for a few days.

I don’t think it was quite up to the standard of the bought cannoli I tried a day after making these (for a friend’s birthday morning tea). But they were still fantastic. Would I make them again? I might look for a recipe that isn’t as hard to roll out or perhaps use the pasta machine to make it quite thin. I’d also only do it when I’m not in a rush (which I was this time when I was frying the shells, and it seemed to take ages).
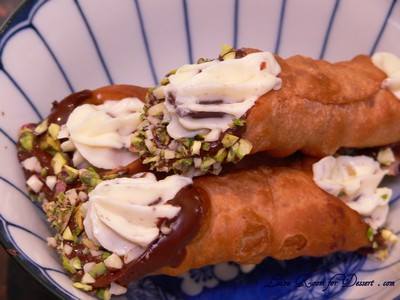
CannoliDaringBakers16

Lidisano’s Cannoli

Makes 22-24 4-inch cannoli
Prep time:
Dough – 2 hours and 10-20 minutes, including resting time, and depending on whether you do it by hand or machine.
Filling – 5-10 minutes plus chilling time (about 2 hours or more)
Frying – 1-2 minutes per cannoli
Assemble – 20–30 minutes

CANNOLI SHELLS

2 cups (250 grams/16 ounces) all-purpose flour
2 tablespoons(28 grams/1 ounce) sugar
1 teaspoon (5 grams/0.06 ounces) unsweetened baking cocoa powder
1/2 teaspoon (1.15 grams/0.04 ounces) ground cinnamon
1/2 teaspoon (approx. 3 grams/0.11 ounces) salt
3 tablespoons (42 grams/1.5 ounces) vegetable or olive oil
1 teaspoon (5 grams/0.18 ounces) white wine vinegar
Approximately 1/2 cup (approx. 59 grams/approx. 4 fluid ounces/approx. 125 ml) sweet Marsala or any white or red wine you have on hand
1 large egg, separated (you will need the egg white but not the yolk)
Vegetable or any neutral oil for frying – about 2 quarts (8 cups/approx. 2 litres)
1/2 cup (approx. 62 grams/2 ounces) toasted, chopped pistachio nuts, mini chocolate chips/grated chocolate and/or candied or plain zests, fruits etc.. for garnish
Confectioners’ sugar

Note – If you want a chocolate cannoli dough, substitute a few tablespoons of the flour (about 25%) with a few tablespoons of dark, unsweetened cocoa powder (Dutch process) and a little more wine until you have a workable dough (Thanks to Audax).

CANNOLI FILLING
2 lbs (approx. 3.5 cups/approx. 1 kg/32 ounces) ricotta cheese, drained
1 2/3 cups cup (160 grams/6 ounces) confectioner’s sugar, (more or less, depending on how sweet you want it), sifted
1/2 teaspoon (1.15 grams/0.04 ounces) ground cinnamon
1 teaspoon (4 grams/0.15 ounces) pure vanilla extract or the beans from one vanilla bean
3 tablespoons (approx. 28 grams/approx. 1 ounce) finely chopped good quality chocolate of your choice
2 tablespoons (12 grams/0.42 ounces) of finely chopped, candied orange peel, or the grated zest of one small to medium orange (I added 2 tablespoons chopped slivered almonds)
3 tablespoons (23 grams/0.81 ounce) toasted, finely chopped pistachios

Note – If you want chocolate ricotta filling, add a few tablespoons of dark, unsweetened cocoa powder to the above recipe, and thin it out with a few drops of warm water if too thick to pipe.

DIRECTIONS FOR SHELLS:
In the bowl of an electric stand mixer or food processor, combine the flour, sugar, cocoa, cinnamon, and salt. Stir in the oil, vinegar, and enough of the wine to make a soft dough. Turn the dough out onto a lightly floured surface and knead until smooth and well blended, about 2 minutes. Shape the dough into a ball. Cover with plastic wrap and let rest in the fridge from 2 hours to overnight.
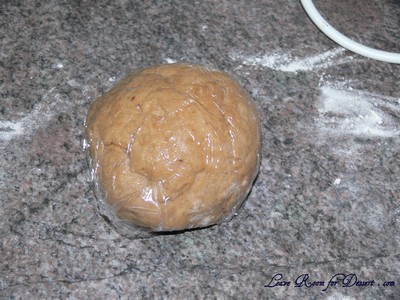
CannoliDaringBakers18

Cut the dough into two pieces. Keep the remaining dough covered while you work. Lightly flour a large cutting or pastry board and roll the dough until super thin, about 1/16 to 1/8” thick (An area of about 13 inches by 18 inches should give you that). Cut out 3 to 5-inch circles (3-inch – small/medium; 4-inch – medium/large; 5-inch;- large. Your choice). Roll the cut out circle into an oval, rolling it larger and thinner if it’s shrunk a little.
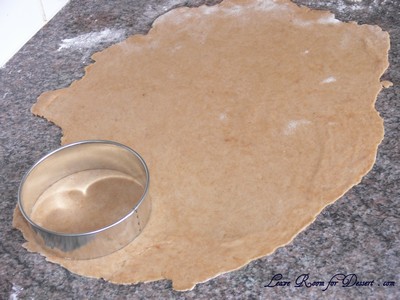
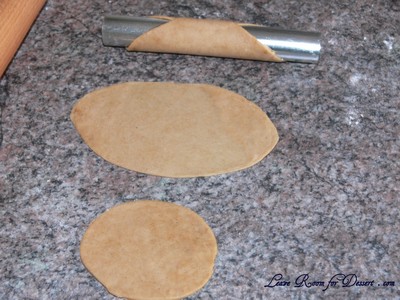
CannoliDaringBakers01

CannoliDaringBakers02

Oil the outside of the cannoli tubes (You only have to do this once, as the oil from the deep fry will keep them well, uhh, oiled..lol). Roll a dough oval from the long side (If square, position like a diamond, and place tube/form on the corner closest to you, then roll) around each tube/form and dab a little egg white on the dough where the edges overlap. (Avoid getting egg white on the tube, or the pastry will stick to it.) Press well to seal. Set aside to let the egg white seal dry a little.
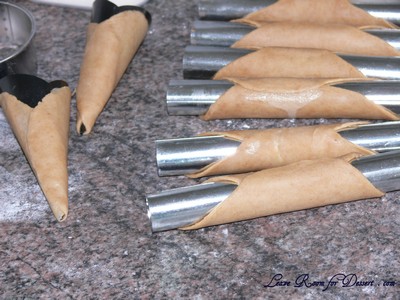
CannoliDaringBakers03

In a deep heavy saucepan, pour enough oil to reach a depth of 3 inches, or if using an electric deep-fryer, follow the manufacturer’s directions. Heat the oil to 375°F (190 °C) on a deep fry thermometer, or until a small piece of the dough or bread cube placed in the oil sizzles and browns in 1 minute. Have ready a tray or sheet pan lined with paper towels or paper bags.

Carefully lower a few of the cannoli tubes into the hot oil. Do not crowd the pan. Fry the shells until golden, about 2 minutes (mine took less than 30sec @ 170-180 °C), turning them so that they brown evenly.

Lift a cannoli tube with a wire skimmer or large slotted spoon, out of the oil. Using tongs, grasp the cannoli tube at one end. Very carefully remove the cannoli tube with the open sides straight up and down so that the oil flows back into the pan. Place the tube on paper towels or bags to drain. Repeat with the remaining tubes. While they are still hot, grasp the tubes with a potholder and pull the cannoli shells off the tubes with a pair of tongs, or with your hand protected by an oven mitt or towel. Let the shells cool completely on the paper towels. Place shells on cooling rack until ready to fill.
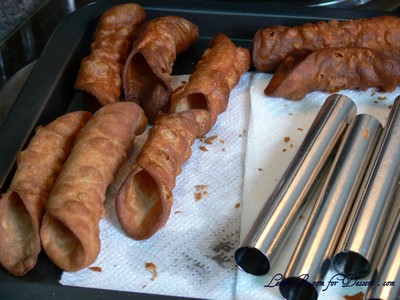
CannoliDaringBakers04

Repeat making and frying the shells with the remaining dough. If you are reusing the cannoli tubes, let them cool before wrapping them in the dough.

Pasta Machine method:
Divide the dough into 4 equal pieces. Starting at the middle setting, run one of the pieces of dough through the rollers of a pasta machine. Lightly dust the dough with flour as needed to keep it from sticking. Pass the dough through the machine repeatedly, until you reach the highest or second highest setting. The dough should be about 4 inches wide and thin enough to see your hand through

Continue rolling out the remaining dough. If you do not have enough cannoli tubes for all of the dough, lay the pieces of dough on sheets of plastic wrap and keep them covered until you are ready to use them.

Roll, cut out and fry the cannoli shells as according to the directions above.

DIRECTIONS FOR FILLING:
Line a strainer with cheesecloth. Place the ricotta in the strainer over a bowl, and cover with plastic wrap and a towel. Weight it down with a heavy can, and let the ricotta drain in the refrigerator for several hours to overnight.

In a bowl with electric mixer, beat ricotta until smooth and creamy. Beat in confectioner’s sugar, cinnamon, vanilla and blend until smooth. Transfer to another bowl and stir in chocolate, zest and nuts. Chill until firm.(The filling can be made up to 24 hours prior to filling the shells. Just cover and keep refrigerated).

ASSEMBLE THE CANNOLI:
When ready to serve..fill a pastry bag fitted with a 1/2-inch plain or star tip, or a ziplock bag, with the ricotta cream. If using a ziplock bag, cut about 1/2 inch off one corner. Insert the tip in the cannoli shell and squeeze gently until the shell is half filled. Turn the shell and fill the other side. You can also use a teaspoon to do this, although it’s messier and will take longer.

Press or dip cannoli in chopped pistachios, grated chocolate/mini chocolate chips, candied fruit or zest into the cream at each end. Dust with confectioner’s sugar and/or drizzles of melted chocolate if desired.
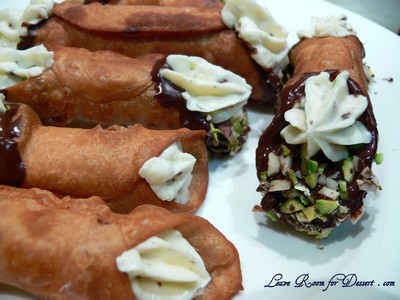
CannoliDaringBakers06

TIPS AND NOTES:
– Dough must be stiff and well kneaded

– Rolling the dough to paper thinness, using either a rolling pin or pasta machine, is very important. If the dough is not rolled thin enough, it will not blister, and good cannoli should have a blistered surface.

– Initially, this dough is VERY stubborn, but keep rolling, it eventually gives in. Before cutting the shapes, let the dough rest a bit, covered, as it tends to spring back into a smaller shapes once cut. Then again, you can also roll circles larger after they’re cut, and/or into ovals, which gives you more space for filling.

– Your basic set of round cutters usually doesn’t contain a 5-inch cutter. Try a plastic container top, bowl etc, or just roll each circle to 5 inches. There will always be something in your kitchen that’s round and 5-inches if you want large cannoli.

– Oil should be at least 3 inches deep and hot – 360°F-375°F, or you’ll end up with greasy shells. I prefer 350°F – 360°F because I felt the shells darkened too quickly at 375°F.

– If using the cannoli forms, when you drop the dough on the form into the oil, they tend to sink to the bottom, resulting in one side darkening more. Use a slotted spoon or skimmer to gently lift and roll them while frying.

– DO NOT crowd the pan. Cannoli should be fried 2-4 at a time, depending on the width of your saucepan or deep fryer. Turn them once, and lift them out gently with a slotted spoon/wire skimmer and tongs. Just use a wire strainer or slotted spoon for flat cannoli shapes.

– When the cannoli turns light brown – uniform in color, watch it closely or remove it. If it’s already a deep brown when you remove it, you might end up with a really dark or slightly burnt shell.

– Depending on how much scrap you have left after cutting out all of your cannoli shapes, you can either fry them up and sprinkle with confectioner’s sugar for a crispy treat, or let the scraps rest under plastic wrap and a towel, then re-roll and cut more cannoli shapes.

– Push forms out of cannoli very gently, being careful not to break the shells as they are very delicate. DO NOT let the cannoli cool on the form, or you may never get it off without it breaking. Try to take it off while still hot. Hold it with a cloth in the center, and push the form out with a butter knife or the back of a spoon.

– When adding the confectioner’s sugar to the filling..TASTE. You may like it sweeter than what the recipe calls for, or less sweet, so add in increments.

– Fill cannoli right before serving! If you fill them an hour or so prior, you’ll end up with soggy cannoli shells.

– If you want to prepare the shells ahead of time, store them in an airtight container, then re-crisp in a 350°F (176 °C) oven for a few minutes, before filling.

– Practice makes perfect. My first batch of shells came out less than spectacular, and that’s an understatement. As you go along, you’ll see what will make them more aesthetically pleasing, and adjust accordingly when rolling. My next several batches turned out great. Don’t give up!!
Scones

Sunday, November 22nd, 2009

SconesMasterChef5

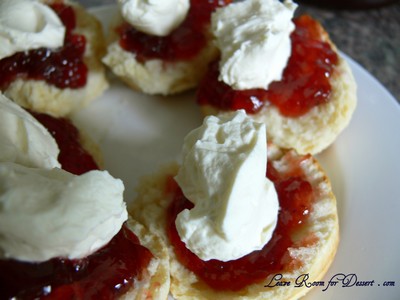
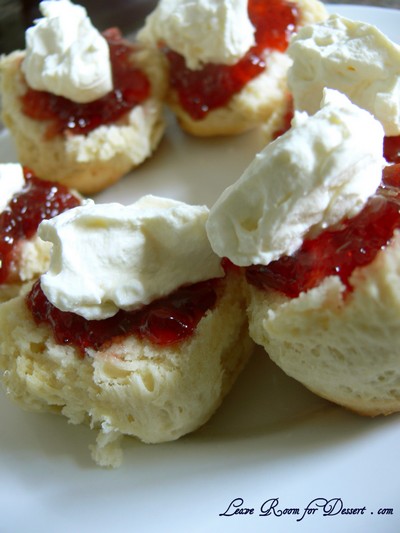
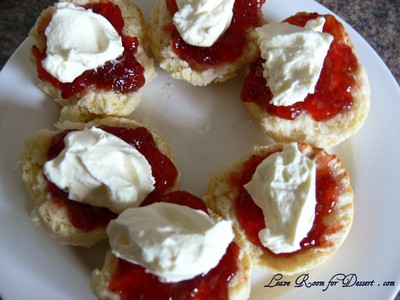
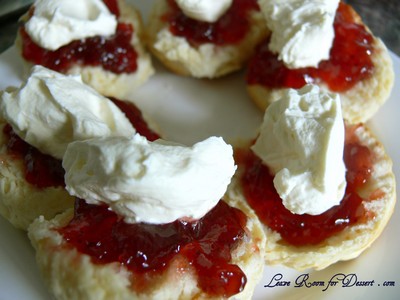
I love scones. Almost nothing is as good as jam and whipped cream on some fresh scones.

SconesMasterChef3

Even better is when they’re so quick and easy to make – and these ones surely are. They were seen on a masterclass show on MaterChef, although had dates and lemon. I’m sure this flavour combination would be great, but without them the recipe is lovely.

SconesMasterChef4

Scones

Recipe adapted from MasterChef’s Date and Lemon Scone recipe

150ml-175ml milk
150ml cream
1 egg
3 cups self-raising flour
2 tablespoons caster sugar
Cream & jam, to serve

Preheat oven 200°C fan forced. Line large flat oven tray with baking paper.

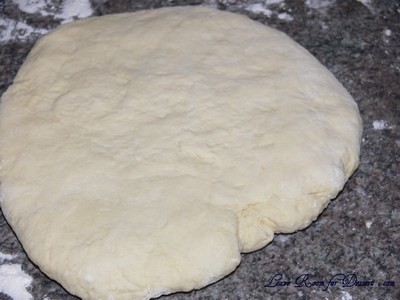
Whisk 150ml milk, cream and egg together until well combined. Combine flour and sugar in a large bowl. Add milk mixture and stir gently to a soft dough, adding remaining milk if necessary. Turn onto a lightly floured surface and knead gently until dough comes together.

Press dough out to 2cm-thick.

SconesMasterChef03

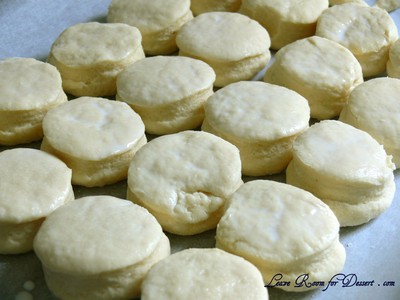
Cut scones from dough and place onto tray flat-side up. Press dough together gently and repeat using the remaining dough.

SconesMasterChef2

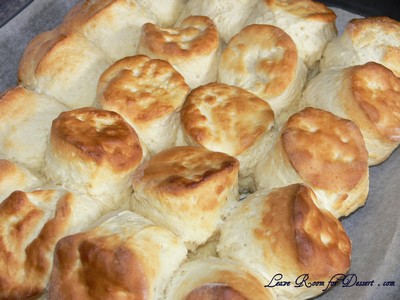
Brush the tops with milk and sprinkle with a little sugar. Bake 12-15 minutes until golden and well risen. Serve hot with jam and cream.

SconesMasterChef05

SconesMasterChef1

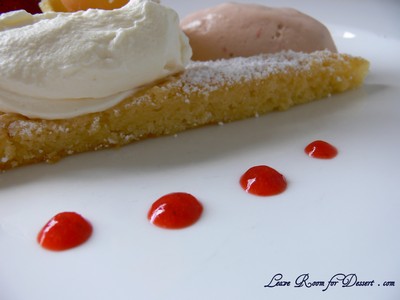
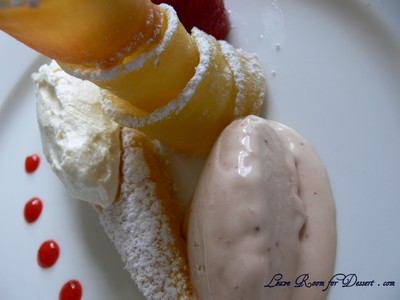
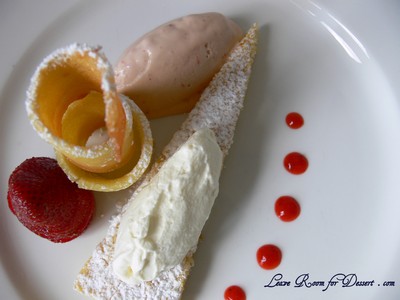
Strawberries and Cream with White Chocolate Sponge and Ice Cream

Saturday, November 7th, 2009

StrawberryCreamMasterChef07

When I saw Katrina Kanetani from Pier walk into the MasterChef kitchen on Wednesday night I was so excited as I knew desserts would be on the menu. Katrina was named Chef of the Year in 2007 and is the head Pastry Chef at the three-hatted restaurant Pier, how could I not be excited to see what creations the celebrity contestants had to choose from.

StrawberryCreamMasterChef24

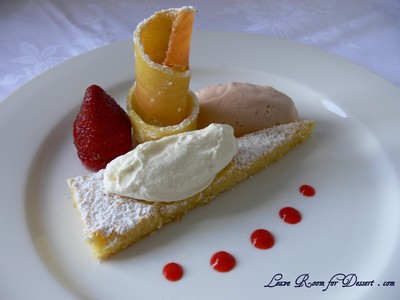
I thought both desserts Katrina revealed were gorgeous. How could you choose? Being a chocoholic I was obviously eager to get the recipe for the chocolate dessert – a chocolate brulee. But, after saying that, the strawberry, cream, sponge and tuile creation looked marvellous (this was the chosen dessert).

StrawberryCreamMasterChef08

Even better? I actually had most of the ingredients at home (couldn’t find sumac, though). So I had decided, printed the recipe off the day after the show and started planning how I would fit it in on the weekend, without making the whole day full of cooking and dirtying the kitchen, like I tend to do.

StrawberryCreamMasterChef16

So I made the ice cream the night before, chilled the custard on ice and placed it in my ice cream maker. It looked gorgeous (and tasted beautiful). I placed it in the freezer overnight and left it out for 10 minutes or more for it to soften.

StrawberryCreamMasterChef18

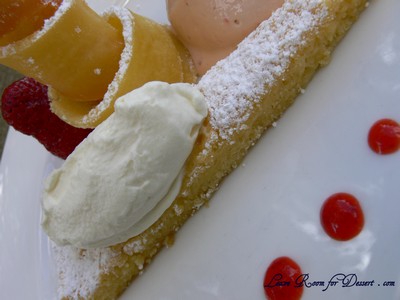
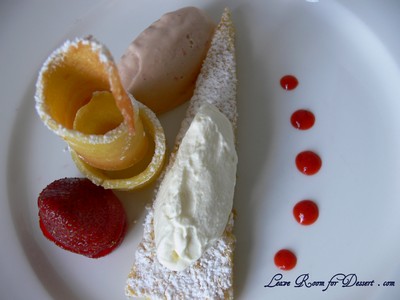
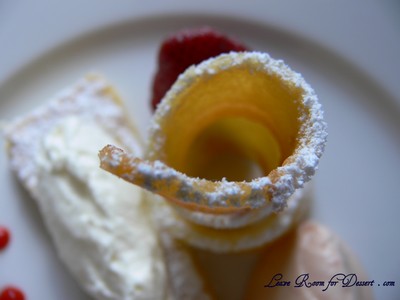
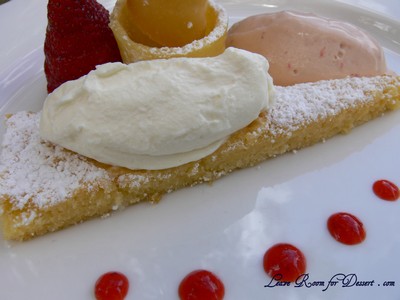
Everything on the plate worked fantastically together. It looked amazing too. I couldn’t believe I actually got it quite close to the actual dessert. I had a few problems with the tuile, mainly the fact my baking trays decided to buckle under the heat, causing the tuile mixture to be uneven. Overall I was very happy with my result.

StrawberryCreamMasterChef12

Aren’t my dinner guests tonight going to be happy? 😛

StrawberryCreamMasterChef15

Strawberries and Cream with White Chocolate Sponge and Ice Cream

Recipe by Katrina Kanetani as seen on Celebrity MasterChef 2009

Strawberry Ice-cream
180g strawberries, hulled, halved
360ml cream
5 egg yolks, reserve whites
120g caster sugar

White chocolate sponge cake

135g white coverture chocolate, broken up
125g unsalted butter, softened
5 egg yolks
4 egg whites
90g caster sugar
60g plain flour, sifted

Tuile
50g plain flour
60g caster sugar
35g icing sugar
Pinch salt
4 egg whites
65g butter, melted

Chantilly cream
200ml cream
1 tbs icing sugar
½ tsp vanilla bean extract

Strawberries

3 large strawberries, hulled
2 tsp icing sugar
½ tsp sumac (I left this out as I had none)

To serve
Icing sugar
Sumac (I left this out as I had none)
(Some of the strawberry puree – see method for ice cream)

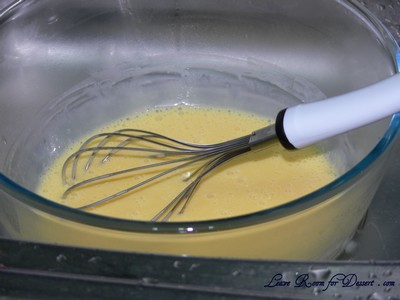
To make the strawberry ice-cream, puree the strawberries in a small food processor and pass through a sieve. Reserve 1 tablespoon of the puree for serving. Place the cream in a small saucepan and heat over medium heat to just below boiling point. Whisk the egg yolks and sugar together in a large bowl. Gradually pour the hot cream into the yolk mixture, while whisking continuously until all the cream is added. Transfer the mixture into a clean medium saucepan and cook over low heat, stirring until custard thickens and coats the back of a spoon (mixture will be about 84°C). Strain custard through a fine sieve and place over a bowl of iced water, whisking until cold.

StrawberryCreamMasterChef26

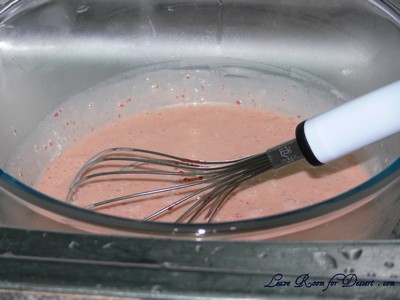
Stir through the remaining strawberry puree.

StrawberryCreamMasterChef27

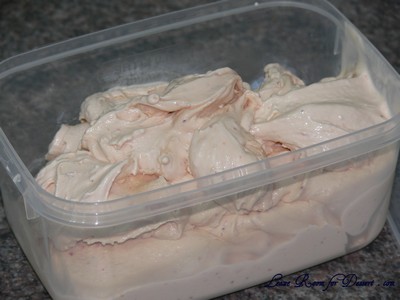
Transfer ½ cup of the ice-cream base into a cream canister and charge twice, shaking vigorously after each charge (I didn’t do this part as I wasn’t sure where it should be used for serving, plus I didn’t have the equipment. I placed it all in the ice cream maker.). Refrigerate cream canister until ready to serve. Pour remaining ice-cream base into a chilled ice cream maker and churn for about 20 minutes. Remove from ice cream maker and place in the blast chiller for about 10 minutes or until firm. (I placed mine in the freezer overnight)

StrawberryCreamMasterChef29

To make the white chocolate sponge cake, preheat oven to 160°C fan forced. Grease and line a 4cm deep baking tray (mine was 4.5cm x 21cm x 31cm). Place the chocolate in a glass bowl and place over a saucepan of simmering water. Stir with a metal spoon until melted. Transfer to a large bowl and cool. Add the butter to the cooled chocolate and beat until smooth. Stir in egg yolks and mix until well combined.

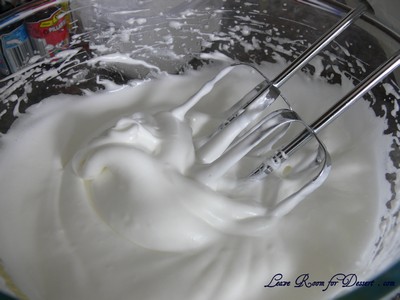
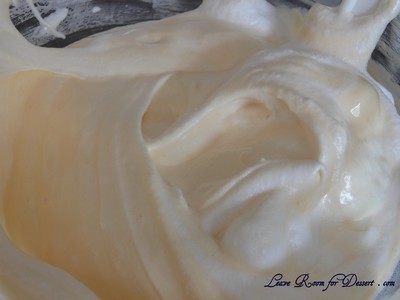
Using an electric hand beater, whip the egg whites to soft peaks. Add the sugar and continue beating until it forms stiff peaks.

StrawberryCreamMasterChef30

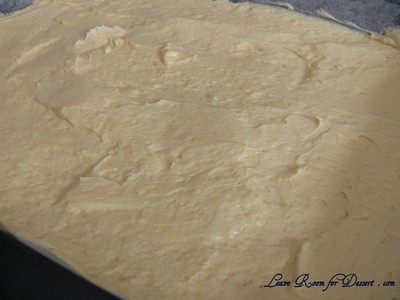
Fold the egg white mixture into the white chocolate and mix well. Gently fold in the flour. Spread the cake onto prepared baking tray until 2cm thick.

StrawberryCreamMasterChef01

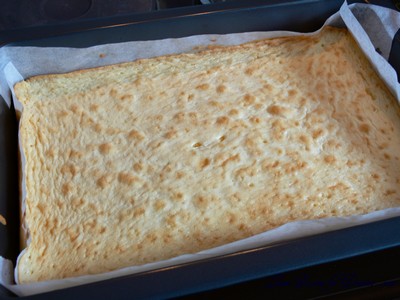
Bake for 10 minutes or until cooked (until skewer comes outs clean)(mine took 20-25 minutes). Allow to cool in pan then turn cake onto a board and remove baking paper. Turn cake over, top side up. Cut out a 3cm x 15cm x 15cm triangle. Reserve sponge triange and off-cuts for serving.

StrawberryCreamMasterChef03

To make the tuile, grease and line 2 flat baking trays with baking paper. Sift the flour, sugars and salt into a bowl. Mix in the egg whites and butter. Place in the blast chiller for 10 minutes (I placed it in the freezer for 15 minutes). Spread a thin layer of batter onto one of the prepared trays and bake for 8 minutes (tuile should be set but not browned yet) (I did this at 160C fan forced). Using a sharp knife, cut the tuile, lengthways into 5cm wide strips. Turn onto the second prepared tray, separated slightly and return to oven until golden brown. While still hot, twist the tuiles and allow to cool to your desired shape.

To make the Chantilly cream, place the cream, icing sugar and vanilla in a bowl and beat with an electric beater until soft peaks form; refrigerate.

To prepare the strawberries, slice strawberries into 3mm thick rounds. Place the strawberry slices, sugar and sumac in a bowl and toss to coat all side of the strawberries.

To serve, dust the sponge cake triangle with icing sugar and place in the centre of the serving plate. Place a quinell of Chantilly cream on top of sponge triangle and sprinkle the cream and some of the plate with a little sumac. Rebuild strawberry next to the sponge so bottom becomes the top. Place a small piece of squashed off cut sponge on the plate to stand the ice-cream on. With a warmed spoon, take a quinell of strawberry ice-cream and place it on top of the squashed sponge (squashed sponge should not be visible – it is just use to hold the ice-cream). Dust the tuile with icing sugar and place in the centre of the plate. (I used a piping bag to make the strawberry puree into smallish dots on the plate)

StrawberryCreamMasterChef21

Butterscotch Surprise Cake

Wednesday, November 4th, 2009

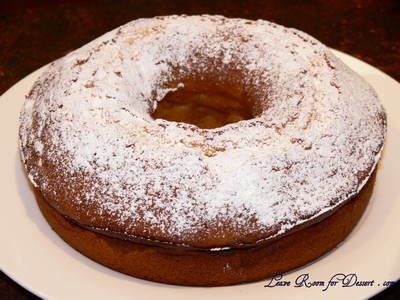
ButterscotchSurpriseCake09

In my family, we get to choose our own dinner and cake for our birthday. I tend to choose the same thing each year (most of us choose chicken schnitzel), although this year I decided on Beef Wellington (as we had chicken schnitzel a few days prior to my birthday dinner). For my cake I chose the cake I choose every year – a butterscotch surprise cake.

ButterscotchSurpriseCake07

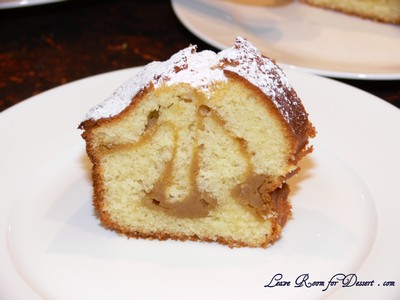
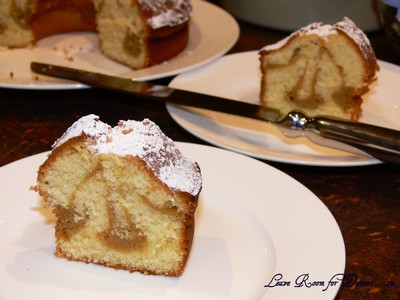
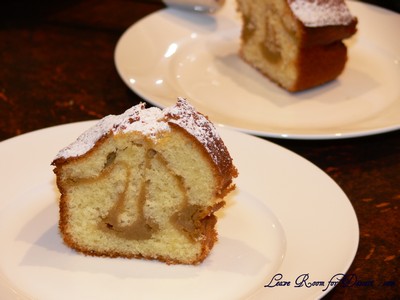
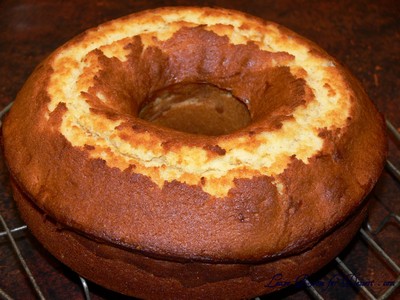
I love butterscotch, so this cake (as well as butterscotch puddings) are among my favourite. The cake consists of light and lovely vanilla cake, with a swirl or line of butterscotch in the middle.

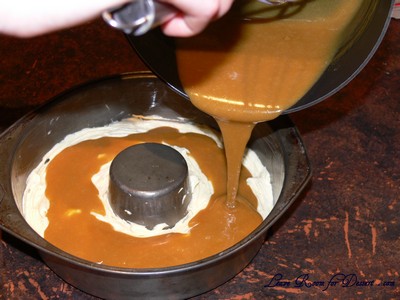
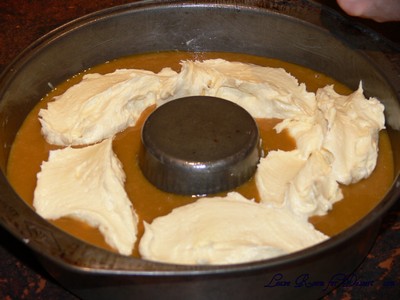
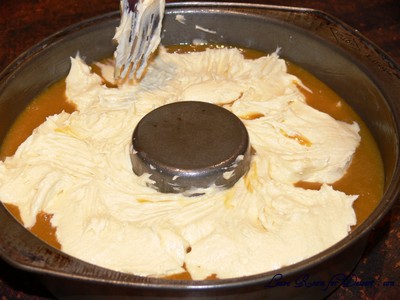
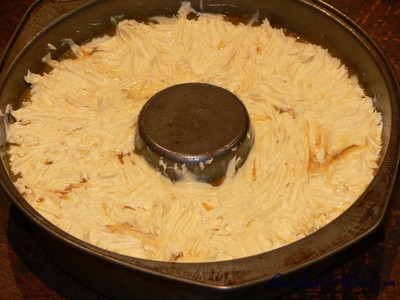
It’s a little more difficult than the recipe suggests and my mum had to do a bit of experimenting to get the layering right. If there’s not enough cake on the bottom, the butterscotch sinks, and if there’s not enough on top, you can’t cover the butterscotch. Trying to spread a thick cake mix over a reasonably liquid butterscotch is quite difficult. My mum’s trick is to place 2/3rds of the cake mix on the bottom and level the top, then add the butterscotch and spoon the remaining cake on top, spreading gently and cautiously with a fork.

ButterscotchSurpriseCake11

Let me know if you give it a go – it is my favourite!
Butterscotch Surprise Cake

Recipe from AWW Menu Planner No.5 1988

125g butter, softened
¾ cup castor sugar
2 eggs
¾ cup plain flour
½ cup self-raising flour
¼ cup milk
1 teaspoon vanilla essence

Butterscotch Filling
½ cup brown sugar, firmly packed
2 tablespoons custard powder
½ cup milk
2 teaspoons butter
1 egg

Note: Cake can be made up to 2 days ahead; store in an airtight container. This recipe is unsuitable to freeze or microwave.

Combine butter, sugar, eggs, sifted flours, milk and essence in large bowl of electric mixer, beat on low speed until combined, then on medium speed until smooth and lighter in colour.

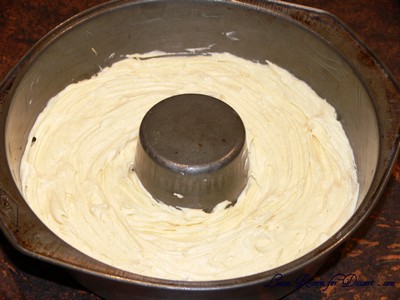
Spread half the cake mixture into greased 20cm ring pan, pour butterscotch filling evenly over mixture, top with remaining cake mixture.

ButterscotchSurpriseCake18

ButterscotchSurpriseCake19

ButterscotchSurpriseCake20

ButterscotchSurpriseCake01

ButterscotchSurpriseCake02

Bake in moderate oven 30 to 40 minutes, stand 10 minutes before turning onto wire rack to cool. Dust top with sifted icing sugar when cold.

ButterscotchSurpriseCake04

ButterscotchSurpriseCake05

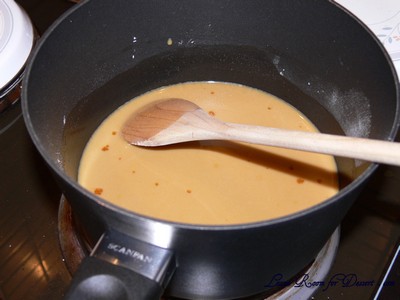
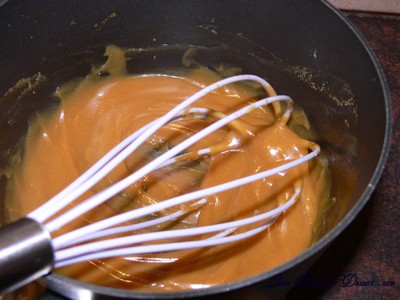
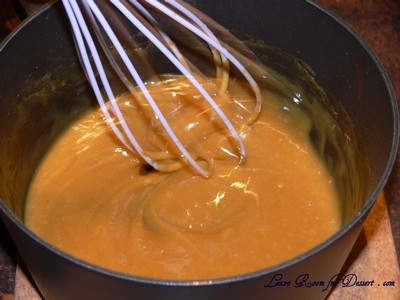
Butterscotch Filling: Combine brown sugar and custard powder in saucepan and gradually stir in milk. Stir constantly over heat until mixture boils and thickens, stir in butter, cool 5 minutes, stir in egg, use while warm.

ButterscotchSurpriseCake14

ButterscotchSurpriseCake15

ButterscotchSurpriseCake17

ButterscotchSurpriseCake08

Macarons – Daring Bakers Challenge October 2009

Tuesday, October 27th, 2009

Macarons04

The 2009 October Daring Bakers’ challenge was brought to us by Ami S. She chose macarons from Claudia Fleming’s The Last Course: The Desserts of Gramercy Tavern as the challenge recipe.

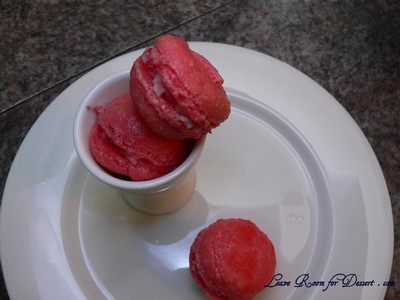
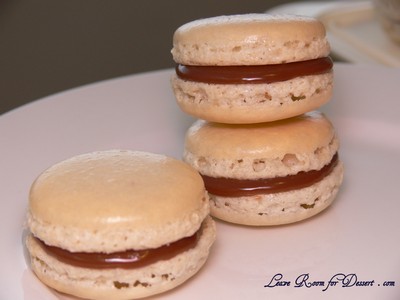
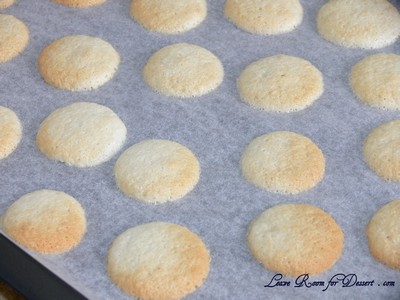
Unfortunately, my two attempts at this recipe were quite disappointing. I had made macarons a few times before (not having perfected them…yet), so I thought I would manage quite well and hoped that this would be the perfect recipe and the macarons would look gorgeous. This was not the case. My macarons looked worse than all other trials – including my first one, when I didn’t even know what they should look like. The macarons didn’t form “feet”, didn’t have a nice crisp top – they just puffed a bit in the oven then the top dried a bit and they sunk back down. Fortunately they were still moist and tasted quite good.

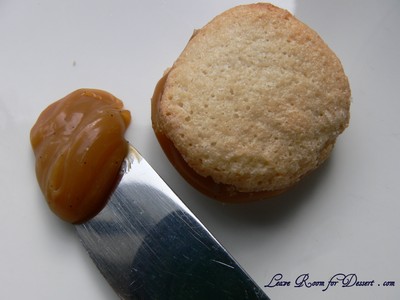
For the filling, I made salted caramel which had mixed reviews. Most people enjoyed it immensely, others found it extra sweet, and I just found the taste a bit strange, I think I’m just not a caramel liking person, unfortunately. I like butterscotch, flavours, so I’m not sure why I don’t like caramel?

Macarons03

I made two batches of this recipe, as I thought the first time it mustn’t have worked because, perhaps I didn’t beat my meringue mixture enough (as it says stiff peaks and other recipes state glossy meringue), or that drying them out in the oven caused the problems that occurred. Neither seemed to be the cause, I decided to keep beating the meringue, but it just would not form a glossy meringue. Either I put my KitchenAid on too fast and over beat the meringue, added my sugar too late or there may not have been enough sugar to form the meringue, although I’m not totally sure.

I have decided to share all my previous macaron experiences with you all, to give you an idea of problems I have had through each recipe, as well as give everyone suggestions for recipes they may or may not like to try. I never got around to posting these (apart from the latest one), as each had something slightly wrong with it (not necessarily the recipe, most are my mistakes while learning and trying to achieve the perfect macaron, inside and out).

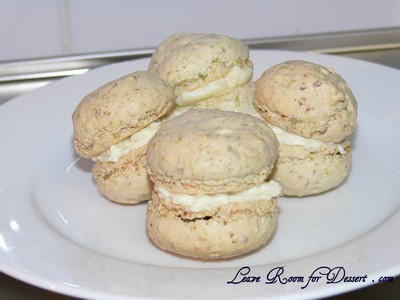
The following photo was my first ever attempt at macarons and was Nigella Lawson’s pistachio macarons from How to be a domestic goddess. The recipe did not state to leave the macarons to form a skin, resulting in biscuit looking macarons. This flavour was beautiful and as I recall the inside texture was also lovely, with the only problem being the look. They had half the recipes’ pistachio buttercream in them (the full amount is way too much, like stated on many other blogs).

Macarons06

After reading many more macaron tips, I had decided to trial out the pistachio macarons using Syrup and Tang’s French meringue method (replacing the almond meal for pistachio meal). After leaving them to sit for half and hour the formed quite lovely macarons that probably could have been beaten a few more times, for a better look and because they were a bit meringue-y still. Also – half almond, half pistachio may have worked better. I filled these with a rosewater buttercream. (For the buttercream: 25g butter, 1/4 cup cream, 1/2 cup icing sugar and 1/8 teaspoon rose water – beat the butter till soft and lightened in colour. Beat in the cream, then the sifted icing sugar or mixture with the rose water).

Macarons08

I had heard that the Italian meringue method was by far the most reliable and best around, I used Syrup and Tang’s Italian meringue method for these macarons. The two problems I had (apart from my enthusiasm with the pink food colouring) were the sugar syrup forming large chunks when drizzled into the egg white mix, as well as bumpy tops. The first problem may have occurred as my sugar thermometer didn’t reach into the sugar syrup, so I had to keep tipping the saucepan up to read the temperature. This disruption may be the cause of the sugar lumps. The second problem may have been able to be fixed by beating the mix a few more times. I would like to try this again as the inside was lovely and moist, filled the entire shell and seemed the perfect consistency. These were filled with white chocolate and raspberry ganache from Gourmet Traveller.

Macarons09

The recipe that produced the most beautiful macaron was Helen’s from Tartlette. Helen’s recipe produced a gorgeous glossy smooth top with pretty feet. My only problem with these were a bit of a hole under the shell of the macaron – could this be an oven problem? I filled these with a simple chocolate ganache.

Macarons12

My latest trial were hazelnut macarons, which had a beautiful flavour, although were lacking slightly in appearance.

WhiteChocHazelnut09

Macarons

Recipe adapted by Ami S from Claudia Felming’s The Last Course.

Confectioners’ (Icing) sugar: 2 ¼ cups (225 g, 8 oz.)
Almond flour: 2 cups (190 g, 6.7 oz.)
Granulated sugar: 2 tablespoons (25 g , .88 oz.) (I used castor sugar)
Egg whites: 5 (Have at room temperature) (I aged mine overnight at room temperature, covered in a paper towel)

Preheat the oven to 200°F (93°C). Combine the confectioners’ sugar and almond flour in a medium bowl. If grinding your own nuts, combine nuts and a cup of confectioners’ sugar in the bowl of a food processor and grind until nuts are very fine and powdery.

Beat the egg whites in the clean dry bowl of a stand mixer until they hold soft peaks. Slowly add the granulated sugar and beat until the mixture holds stiff peaks.

Sift a third of the almond flour mixture into the meringue and fold gently to combine. If you are planning on adding zest or other flavorings to the batter, now is the time. Sift in the remaining almond flour in two batches. Be gentle! Don’t overfold, but fully incorporate your ingredients.

Spoon the mixture into a pastry bag fitted with a plain half-inch tip (Ateco #806). You can also use a Ziploc bag with a corner cut off. It’s easiest to fill your bag if you stand it up in a tall glass and fold the top down before spooning in the batter.

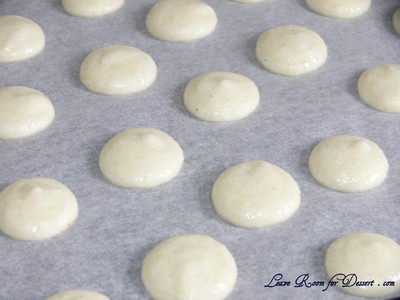
Pipe one-inch-sized (2.5 cm) mounds of batter onto baking sheets lined with nonstick liners (or parchment paper).

Macarons13

Bake the macaroon for 5 minutes. Remove the pan from the oven and raise the temperature to 375°F (190°C). Once the oven is up to temperature, put the pans back in the oven and bake for an additional 7 to 8 minutes, or lightly colored. (I also tried leaving them at room temperature for 30 mins at room temperature, bu they still didn’t rise like they should).

Macarons01

Cool on a rack before filling.

I filled my macarons with salted caramel

Salted Caramel

Recipe from Chef Pang Kok Keong on Chubby Hubby’s blog

200g sugar
1 vanilla pod
200g cream
3.75g fleur de sel (I used salt flakes, as that’s all I had 🙁 )
140g butter, chilled

In a 1 litre heavy based pot, cook the sugar, stirring all the time to get an even caramel. Then add in the vanilla pod, scraped. Add in the warm cream a bit at a time as it will bubble up and splatter. Then add in the fleur de sel. Stir to make sure all the caramel has dissolved. Cool the mixture to approximately 40 degrees Celsius. Add in the well chilled butter, cut into cubes. Using an immersion blender, blend in the butter till you achieve a smooth glossy paste. Line the surface of the caramel with plastic wrap or greaseproof paper to prevent a skin from forming and chill in the fridge until needed.

Macarons05

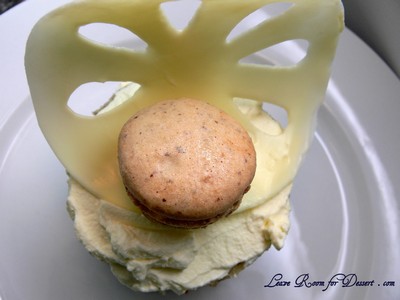
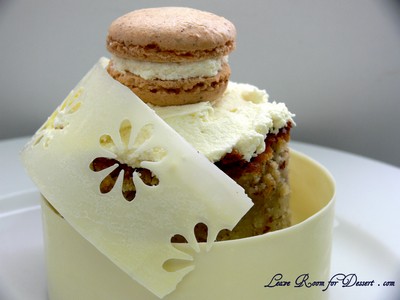
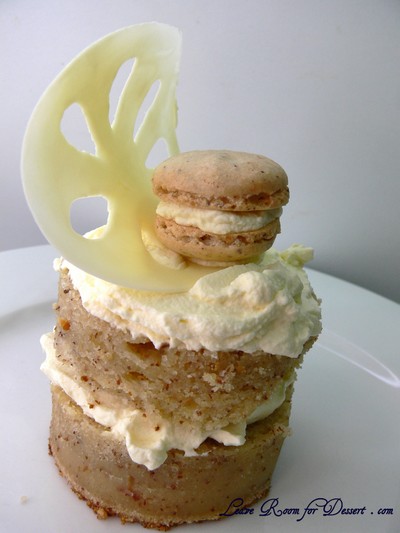
White Chocolate and Hazelnut Mud Cake with Hazelnut Macaron and White Chocolate Rings

Sunday, October 11th, 2009

WhiteChocHazelnut09

For my lovely Nick…

WhiteChocHazelnut12

I wanted to create something quite special for my wedding anniversary. I didn’t get to eat much of the wedding cake on the day, or the day after, and I’m not sure how well it will have kept from a year ago (as we froze the top layer of the cake).

WhiteChocHazelnut08

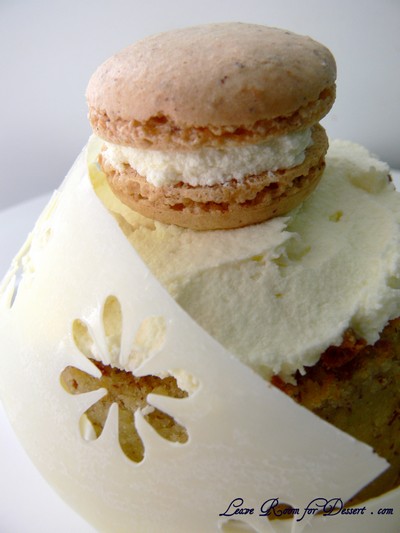
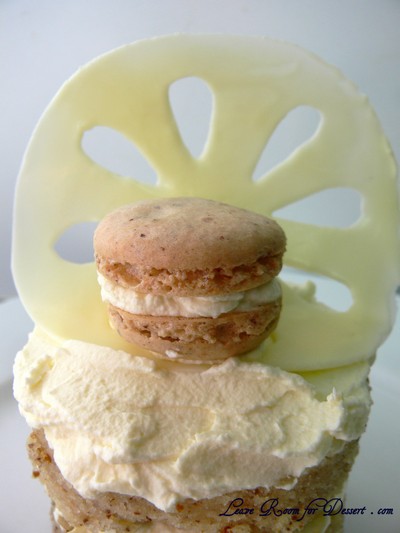
We had a white chocolate hazelnut cake for our wedding and for more than a year I have been wanting to make one. I decided to make some hazelnut macarons and white chocolate rings to add some depth and interest to the cake.
Both the mud cake and macarons tasted fantastic. The mud cake had subtle white chocolate and hazelnut flavours, without being too sweet. It was moist and kept very well. The macaron had a lovely noticeable hazelnut flavour, perfectly chewy on the inside and slightly crispy on the outside.

WhiteChocHazelnut11

The macarons were left to form a shell, and I’m not sure whether it had too much moisture or hazelnuts to cause cracking of the top of the macaron or whether the oven played any part in this.

WhiteChocHazelnut07

My tempering wasn’t perfect, I heated 2/3 of the (180g block) white chocolate to 43C over a double boiler, added the other 1/3 and cooled to 29C (which took a while) then heated to 31C. The white chocolate still snapped when set, but wasn’t as shiny as I’d hoped.

WhiteChocHazelnut10

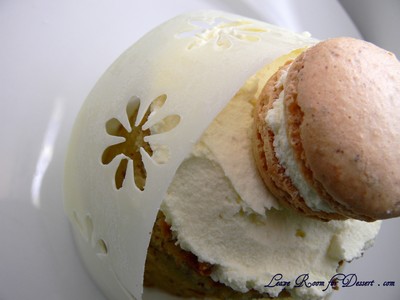
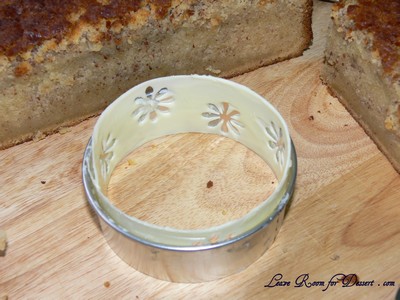
To make the white chocolate rings, I cut out strips of projector film, coated them in tempered white chocolate, let them set for a bit, then curled them up in a circular cookie cutter. For the flower ring, I punched flowers out of the film using a craft paper puncher.

WhiteChocHazelnut03

WhiteChocHazelnut15

To another lovely year… and many more to come…

WhiteChocHazelnut06 A beautiful bouquet of double delight roses from Nick
White Chocolate and Hazelnut Mud Cake

(Cake recipe by kel11 on HubPages)

350g white chocolate pieces
225g butter
600ml water
3 eggs
400g castor sugar
325g self-raising flour
75g hazelnut meal

Grease and line a 23cm/ 9” round cake tin (use a non-spring-tin as it will probably leak a little). Preheat oven to 170ºC, 150ºC fan forced.

In a saucepan over low heat, heat chocolate, butter and water. Stir frequently until melted and smooth. Remove from the heat and cool slightly.

In a large bowl, lightly beat eggs. Gradually beat cooled chocolate mixture into eggs. Whisk sugar and flour into chocolate mixture, continue until smooth and well blended.

Pour mixture into cake tin. Cook for 1½ to 2 hours (the recipe says 45 minutes, but this was way too short for my oven) or until skewer inserted into centre of cake comes out clean. (Cover with some foil if the cake is browning too much on the edges).

Turn cake onto wire rack to cool. Spread top with chocolate ganache when cooled.

White Chocolate Ganache

180g white chocolate
1/3 cup thickened cream
+ 2-3 tablespoons cold cream extra

Put the white chocolate and cream in a bowl and microwave on high for 1 minute, stirring half way through. Stir until smooth. Allow to cool for 15 minutes.

Using an electric beater, beat the white chocolate mix for 2-3 minutes. Add extra cream to help cool down the mix and help it thicken easier. Beat on high for 2 minutes at a time, scrapping and observing the texture. Once it is nice and thick cover the cooled cake with the ganache.

Hazelnut Macarons

5 egg whites, aged overnight
50g caster sugar
300g icing sugar
100g almond meal
80g hazelnut meal

Sift the icing sugar with the almond meal and hazelnut meal – discard any large bits.

Beat the egg whites until soft peaks form. Gradually add the caster sugar while continually beating until a thick glossy meringue mixture is formed. Add the sifted icing sugar and meals and stir and fold into the meringue. The mixture needs to be firm enough so it doesn’t lose all the air and structure, and soft enough that peaks are not evident when piped out.

Pipe out macaron mix into 3-4cm circles on baking paper and let sit at room temperature for 30minutes – 1hour. Preheat oven to 170C.

Cook macarons for 15-20minutes until crispy on the outside and chewy on the inside. Let the macarons sit on the tray for a few minutes, before carefully removing them and leaving them to finish cooling on a wire rack.

When cooled, fill with white chocolate ganache.

Aria Chocolate Tart

Monday, August 31st, 2009

ariatart29

Again with the MasterChef recipes….

ariatart04

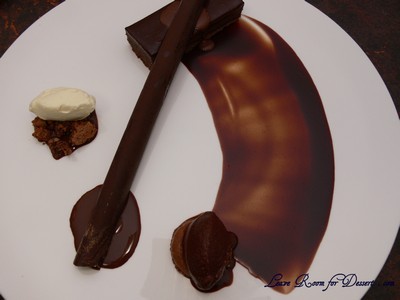
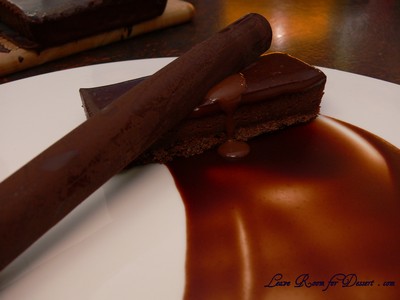
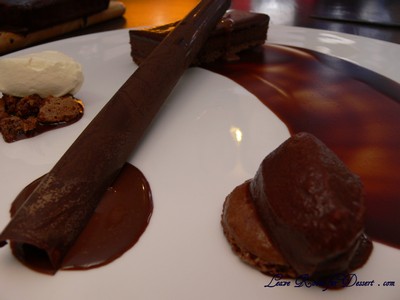
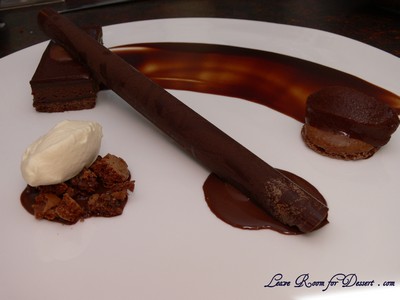
I was jumping off the lounge screaming when I saw Matt Moran’s beautiful chocolate tart and tasting plate. It looked magnificent!

ariatart05

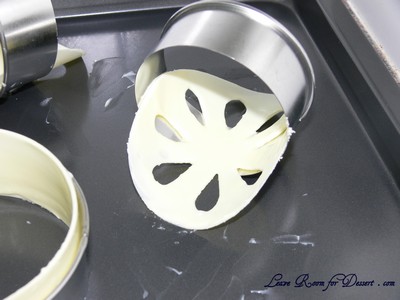
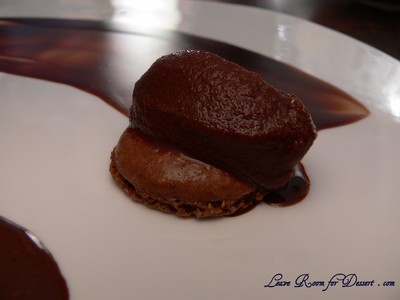
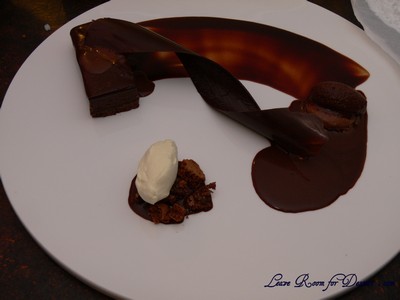
It combined dark chocolate-based components and created a lovely artwork on the plate. Every aspect seemed to have the possibility of problems, too thick pastry, grainy sorbet and bad tempering of the chocolate – leaving it not shiny and not able to be snapped.

It also involved more than 1kg of dark chocolate… crazy!

Unfortunately, I wasn’t as pleased with this as I was with my most recent triple chocolate praline tart. This tart/combination was too rich for me (it may not have helped me eating parts of the dish as I was making it), but I generally only have a couple pieces of dark chocolate when I eat it, whereas I can eat half a block or more of milk chocolate in one sitting.

ariatart06

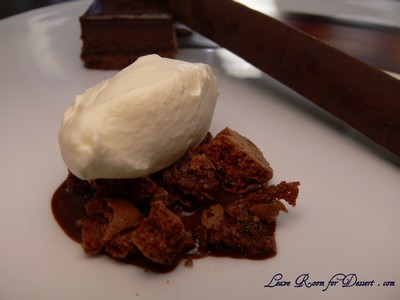
The sorbet was quite rich, with both the sorbet and the remaining tart filling (which was used to hold the macarons and pipe on the plate) didn’t freeze well enough (as you can probably see in some of the photos), in more than 2 hours in a normal freezer. Both the sorbet and tart filling were a better consistency after freezing overnight (we had a lot leftover as it made a heaps more than was required for the dishes).

ariatart03

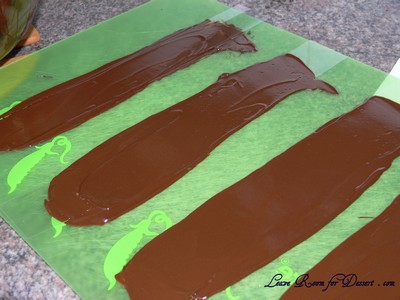
I tried quite hard to temper the chocolate, although it still didn’t turn out how the MasterChef one did… Here are a few reasons that I think it may not have worked:

I’ve done a bit of research and found most sites say to bring the chocolate up to 46-48C, whereas this one stated 55C. Is this temperature too high?

ariatart02

I used a milk thermometer as it seemed more sensitive at lower temperatures than my sugar thermometer (was it not sensitive enough?)

Maybe the quality of the chocolate wasn’t good enough for this recipe?

Perhaps some water did get into the chocolate?

I put the bowl into a preheated oven of 160C – the recipe didn’t state how hot the oven should be (it may have heated too much at this stage)

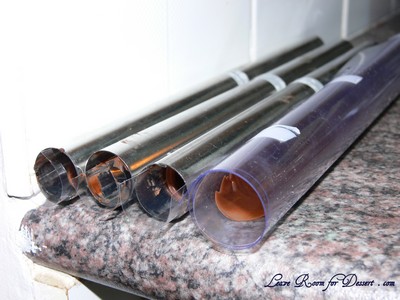
I placed the chocolate covered film in a metal tube at room temperature (could the metal tube have caused it to set too fast?)

ariatart19

I noticed the chocolate that was spread on later films turned out shinier and cracked – did it need to be cooled to a certain temperature before spreading?

ariatart18

I am definitely looking forward to trying tempered chocolate again, this time using a more specific recipe, with a lower temperature for the melted chocolate.

ariatart11

Everyone needed to add a couple scoops of vanilla ice cream to their dish to cut the richness of all the dark chocolate.

ariatart26

After all that, I am glad I tried this dish, but I wouldn’t make it again. I would be interested in trying the one from Aria though to see how it compares.

Check out the full recipe at MasterChef.com.au

Dobos Torte – Daring Bakers Challenge August 2009

Thursday, August 27th, 2009

dobostorte04

The August 2009 Daring Bakers’ challenge was hosted by Angela of A Spoonful of Sugar and Lorraine of Not Quite Nigella. They chose the spectacular Dobos Torte based on a recipe from Rick Rodgers’ cookbook Kaffeehaus: Exquisite Desserts from the Classic Caffés of Vienna, Budapest, and Prague.

dobostorte10

After seeing a photo of the final product for the Daring Bakers Challenge this month, I got a little scared – although quite excited at the thought of making this beautiful cake or torte. I had never heard of a Dobos Torte (also called Dobos Torta) before, and therefore never tried it – but it looked so gorgeous, it had to be good.

dobostorte12

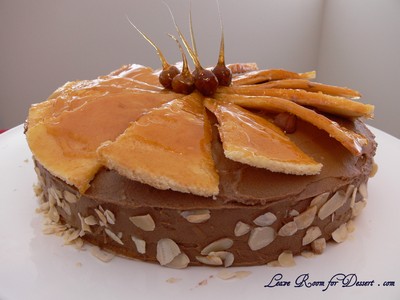
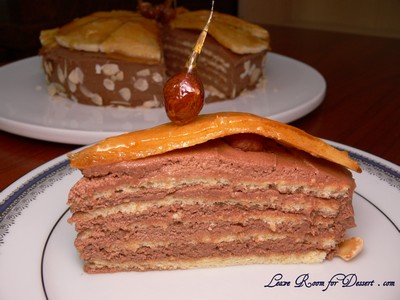
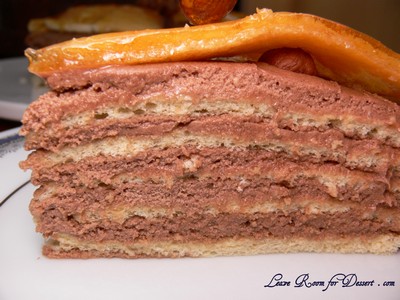
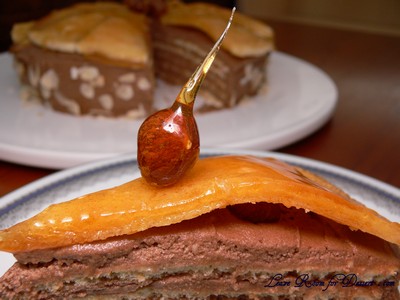
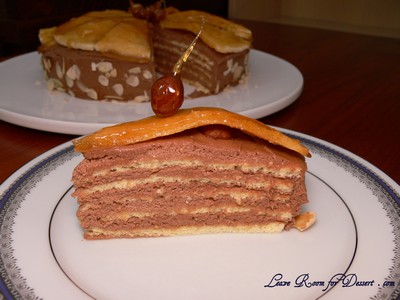
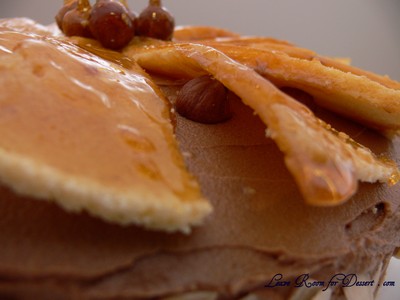
Multiple layers of sponge cake, chocolate buttercream and decorated with sponge covered in toffee or caramel then cut and arranged over the top of the cake… Eeeek.

dobostorte13

Everything worked quite well, the sponges took a little while, spreading the mixture between 6 trays and cooking them. The buttercream tasted beautiful and buttery with a lovely chocolate flavour.

dobostorte07

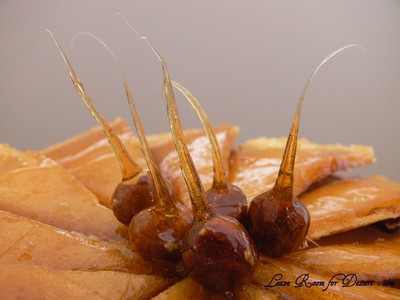
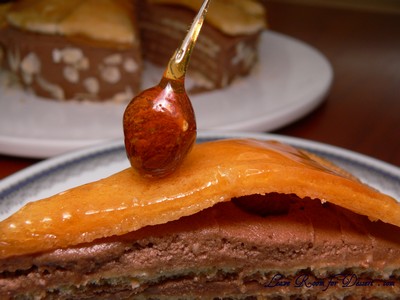
My main problem occurred when making the caramel. I’ve never had caramel do this before, but it was producing heaps of bubbles, they were almost climbing out of the small saucepan I used and made it quite difficult to keep it at a high temperature and also try to see the colour it was changing to. Once it turned a lovely amber colour, I decided to pour it over the sponge and also make some toffee hazelnuts. Although with soft sticky caramel which didn’t want to set/harden… the top layer and hazelnuts didn’t turn out quite how I had wanted. Both were a bit droopy and stuck quite a bit to everyone’s teeth. I would try another caramel recipe for the top, if I were to try it again, perhaps a recipe that says what temperature the caramel should get to.

dobostorte14

Dobos Torte

Equipment
2 baking sheets
9” (23cm) springform tin and 8” cake tin, for templates
mixing bowls (1 medium, 1 large)
a sieve
a double boiler (a large saucepan plus a large heat-proof mixing bowl which fits snugly over the top of the pan)
a small saucepan
a whisk (you could use a balloon whisk for the entire cake, but an electric hand whisk or stand mixer will make life much easier)
metal offset spatula
sharp knife
a 7 1/2” cardboard cake round, or just build cake on the base of a sprinfrom tin.
piping bag and tip, optional

Prep times
Sponge layers: 20 mins prep, 40 mins cooking total if baking each layer individually.
Buttercream: 20 mins cooking. Cooling time for buttercream: about 1 hour plus 10 minutes after this to beat and divide.
Caramel layer: 10-15 minutes.
Assembly of whole cake: 20 minutes

Sponge cake layers
6 large eggs, separated, at room temperature
1 1/3 cups (162g) confectioner’s (icing) sugar, divided
1 teaspoon (5ml) vanilla extract
1 cup plus 2 tablespoons (112g) sifted cake flour (SUBSTITUTE 95g plain flour + 17g cornflour (cornstarch) sifted together)
pinch of salt

Chocolate Buttercream
4 large eggs, at room temperature
1 cup (200g) caster (ultrafine or superfine white) sugar
4oz (110g) bakers chocolate or your favourite dark chocolate, finely chopped
2 sticks plus 2 tablespoons (250g) unsalted butter, at room temperature.

Caramel topping
1 cup (200g) caster (superfine or ultrafine white) sugar
12 tablespoons (180 ml) water
8 teaspoons (40 ml) lemon juice
1 tablespoon neutral oil (e.g. grapeseed, rice bran, sunflower)

Finishing touches
a 7” cardboard round
12 whole hazelnuts, peeled and toasted
½ cup (50g) peeled and finely chopped hazelnuts

Directions for the sponge layers:

NB. The sponge layers can be prepared in advance and stored interleaved with parchment and well-wrapped in the fridge overnight.

1. Position the racks in the top and centre thirds of the oven and heat to 400F (200C).

2. Cut six pieces of parchment paper to fit the baking sheets. Using the bottom of a 9″ (23cm) springform tin as a template and a dark pencil or a pen, trace a circle on each of the papers, and turn them over (the circle should be visible from the other side, so that the graphite or ink doesn’t touch the cake batter.)

3. Beat the egg yolks, 2/3 cup (81g) of the confectioner’s (icing) sugar, and the vanilla in a medium bowl with a mixer on high speed until the mixture is thick, pale yellow and forms a thick ribbon when the beaters are lifted a few inches above the batter, about 3 minutes. (You can do this step with a balloon whisk if you don’t have a mixer.)

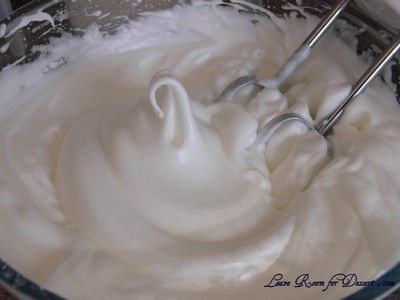
4. In another bowl, using clean beaters, beat the egg whites until soft peaks form. Gradually beat in the remaining 2/3 cup (81g) of confectioner’s (icing)sugar until the whites form stiff, shiny peaks. Using a large rubber spatula, stir about 1/4 of the beaten whites into the egg yolk mixture, then fold in the remainder, leaving a few wisps of white visible. Combine the flour and salt. Sift half the flour over the eggs, and fold in; repeat with the remaining flour.

dobostorte16

dobostorte17

dobostorte18

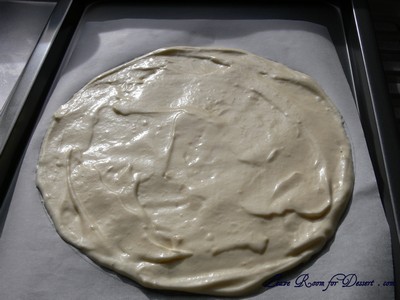
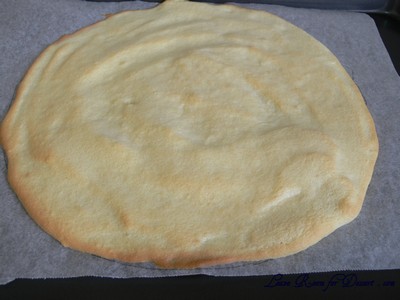
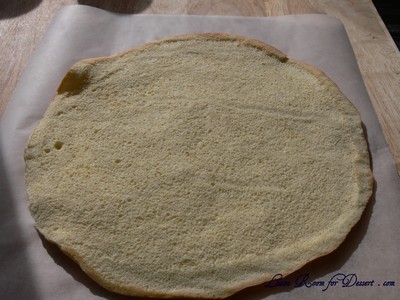
5. Line one of the baking sheets with a circle-marked paper. Using a small offset spatula, spread about 3/4cup of the batter in an even layer, filling in the traced circle on one baking sheet. Bake on the top rack for 5 minutes, until the cake springs back when pressed gently in the centre and the edges are lightly browned. While this cake bakes, repeat the process on the other baking sheet, placing it on the centre rack. When the first cake is done, move the second cake to the top rack. Invert the first cake onto a flat surface and carefully peel off the paper. Slide the cake layer back onto the paper and let stand until cool. Rinse the baking sheet under cold running water to cool, and dry it before lining with another parchment. Continue with the remaining papers and batter to make a total of six layers. Completely cool the layers. Using an 8″ springform pan bottom or plate as a template, trim each cake layer into a neat round. (A small serrated knife is best for this task.)

dobostorte19

dobostorte21

dobostorte20

Directions for the chocolate buttercream:

NB. This can be prepared in advance and kept chilled until required.

1. Prepare a double-boiler: quarter-fill a large saucepan with water and bring it to a boil.

2. Meanwhile, whisk the eggs with the sugar until pale and thickened, about five minutes. You can use a balloon whisk or electric hand mixer for this.

3. Fit bowl over the boiling water in the saucepan (water should not touch bowl) and lower the heat to a brisk simmer. Cook the egg mixture, whisking constantly, for 2-3 minutes until you see it starting to thicken a bit. Whisk in the finely chopped chocolate and cook, stirring, for a further 2-3 minutes.

4. Scrape the chocolate mixture into a medium bowl and leave to cool to room temperature. It should be quite thick and sticky in consistency.

5. When cool, beat in the soft butter, a small piece (about 2 tablespoons/30g) at a time. An electric hand mixer is great here, but it is possible to beat the butter in with a spatula if it is soft enough. You should end up with a thick, velvety chocolate buttercream. Chill while you make the caramel topping.

dobostorte23

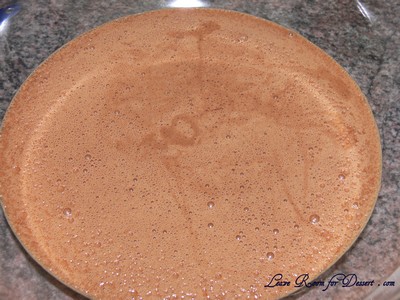
Lorraine’s note: If you’re in Winter just now your butter might not soften enough at room temperature, which leads to lumps forming in the buttercream. Male sure the butter is of a very soft texture I.e. running a knife through it will provide little resistance, before you try to beat it into the chocolate mixture. Also, if you beat the butter in while the chocolate mixture is hot you’ll end up with more of a ganache than a buttercream!

Directions for the caramel topping:

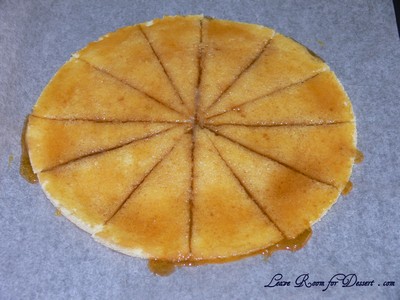
1. Choose the best-looking cake layer for the caramel top. To make the caramel topping: Line a jellyroll pan with parchment paper and butter the paper. Place the reserved cake layer on the paper. Score the cake into 12 equal wedges. Lightly oil a thin, sharp knife and an offset metal spatula.

2. Stir the sugar, water and lemon juice in a small saucepan. Bring to a boil over a medium heat, stirring often to dissolve the sugar. Once dissolved into a smooth syrup, turn the heat up to high and boil without stirring, swirling the pan by the handle occasionally and washing down any sugar crystals on the sides of the pan with a wet brush until the syrup has turned into an amber-coloured caramel.

3. The top layer is perhaps the hardest part of the whole cake so make sure you have a oiled, hot offset spatula ready. I also find it helps if the cake layer hasn’t just been taken out of the refrigerator. I made mine ahead of time and the cake layer was cold and the toffee set very, very quickly—too quickly for me to spread it. Immediately pour all of the hot caramel over the cake layer. You will have some leftover most probably but more is better than less and you can always make nice toffee pattern using the extra to decorate. Using the offset spatula, quickly spread the caramel evenly to the edge of the cake layer. Let cool until beginning to set, about 30 seconds. Using the tip of the hot oiled knife (keep re-oiling this with a pastry brush between cutting), cut through the scored marks to divide the caramel layer into 12 equal wedges. Cool another minute or so, then use the edge of the knife to completely cut and separate the wedges using one firm slice movement (rather than rocking back and forth which may produce toffee strands). Cool completely.

dobostorte01

Angela’s note: I recommend cutting, rather than scoring, the cake layer into wedges before covering in caramel (reform them into a round). If you have an 8” silicon round form, then I highly recommend placing the wedges in that for easy removal later and it also ensures that the caramel stays on the cake layer. Once set, use a very sharp knife to separate the wedges.

Assembling the Dobos

1. Divide the buttercream into six equal parts.

2. Place a dab of chocolate buttercream on the middle of a 7 1/2” cardboard round and top with one cake layer. Spread the layer with one part of the chocolate icing. Repeat with 4 more cake layers. Spread the remaining icing on the sides of the cake.

3. Optional: press the finely chopped hazelnuts onto the sides of the cake.

4. Propping a hazelnut under each wedge so that it sits at an angle, arrange the wedges on top of the cake in a spoke pattern. If you have any leftover buttercream, you can pipe rosettes under each hazelnut or a large rosette in the centre of the cake. Refrigerate the cake under a cake dome until the icing is set, about 2 hours. Let slices come to room temperature for the best possible flavour.

dobostorte08

dobostorte11

Storage

Angela’s notes: I am quite happy to store this cake at room temperature under a glass dome, but your mileage may vary. If you do decide to chill it, then I would advise also using a glass dome if you have done. I should also note that the cake will cut more cleanly when chilled.

Variations

Shape:
The traditional shape of a Dobos Torta is a circular cake, but you can vary the shape and size if you want. Sherry Yard in Desserts By The Yard makes a skyscraper Dobos by cutting a full-size cake into four wedges and stacking them to create a tall, sail-shaped cake. Mini Dobos would be very cute, and you could perch a little disc of caramel on top.

Flavour: While we both love the dark chocolate buttercream and this is traditional, we think it would be fun to see what fun buttercreams you all come up with! So, go wild! Or, you could brush each layer with a flavoured syrup if you just want a hint of a second flavour. Cointreau syrup would be divine!

Nuts: These are optional for decoration, so no worries if you’re allergic to them. If you don’t like hazelnuts, then substitute for another variety that you like.

Egg concerns: The cooking process for the buttercream will produce lightly cooked eggs. If you fall into a vulnerable health group then you may wish to use an egg-less buttercream.

Greek Baklava

Monday, August 24th, 2009

greekbaklava02

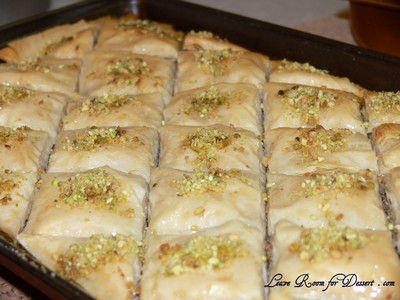
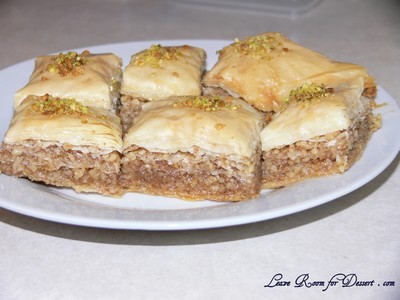
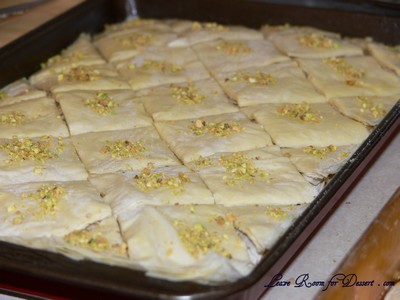
One of Nick’s friends at work brought in some homemade baklava a while ago and once trying it on the train on my way home from work, I said to Nick “ask for the recipe!”, as I absolutely love baklava.
This is a Greek recipe for baklava, which is has lovely flaky pastry, great flavours and is dripping in syrup and very sweet (if you prefer your baklava less sweet, reduce the amount in the syrup and/or walnut mix).

greekbaklava03

If you want to add a little colour to the top, process some pistachios and place on top once cooked.

Greek Baklava
Recipe from Arthur X’s mum

1 pack (375g) Fillo Pastry
500g cracked walnuts
1 teaspoons cinnamon powder
1 teaspoons clove spice powder
1 cup sugar

Canola Oil (we used melted butter)

Sugar Syrup
4 cups sugar
4 cups water
Juice of half a lemon

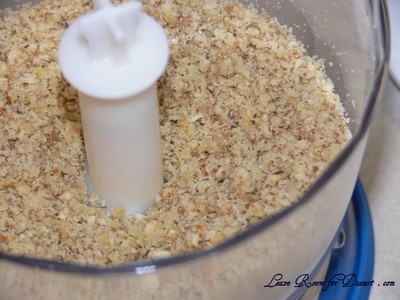
Grate walnuts (I processed them in a food processor) and place the walnuts, spices and sugar into a bowl and mix well.

greekbaklava04

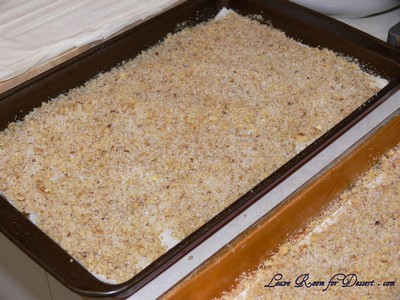
Oil a baking tray and put in 6 layers of Fillo pastry and brush canola oil on each individual sheet. Put a thin layer of walnut mixture onto the Fillo pastry and then cover with another layer of fillo pastry and brush with canola oil.

Repeat this until all Fillo sheets are used (around 10 sheets) and remember to keep 6 sheets aside for the top of Baklava. Once all mixture is used put 6 sheets on the top and brush each sheet of Fillo pastry with canola oil.

greekbaklava09

Cut the Baklava into a diamond pattern, almost to the bottom before putting into a fan forced oven at 180 degrees for around 40 minutes.

{don't put the pistachios on at this point like I did  as they will brown too much}

{don't put the pistachios on at this point like I did as they will brown too much}

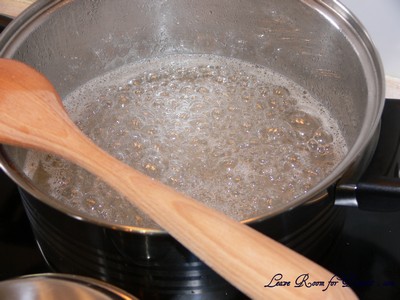
While the Baklava is cooking you have to make the syrup and then let the syrup cool down to room temperature.

Put 4 cups of sugar and 4 cups of water into a saucepan and the juice from half a lemon and put into stove. Let the syrup boil until it thickens and then put aside to cool down.

greekbaklava08

Once the Baklava has finished cooking take it out put it into a serving tray and pour the room temperature syrup onto the hot Baklava and set aside to cool for at least 6 hours.

greekbaklava02

Triple Chocolate Praline Tart

Monday, August 17th, 2009

triplechocolatepralinetart03

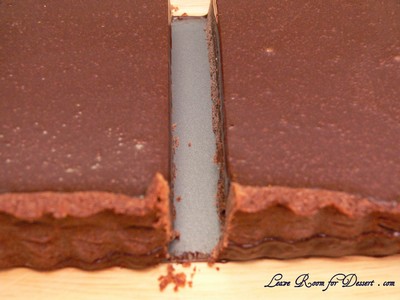
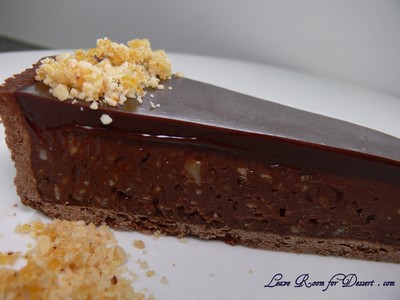
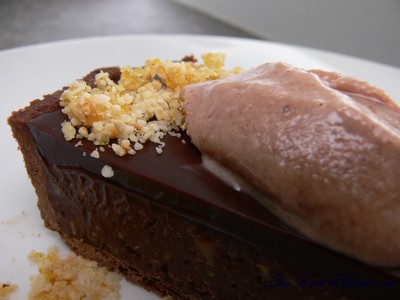
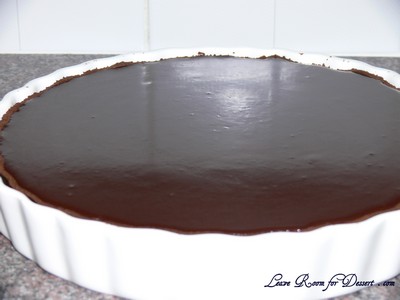
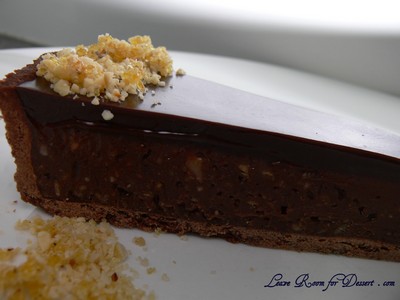
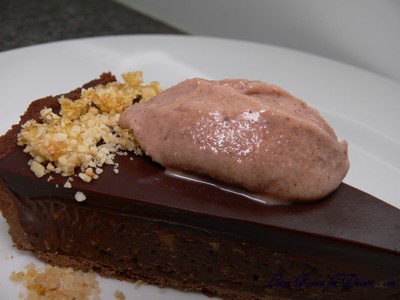
On the cover of Gourmet Traveller a few months ago was one of the most tempting chocolate tarts I have ever seen. Gorgeous rich shiny chocolate on top of a chocolate, hazelnut praline mousse and crispy chocolate pastry. How could I resist making this?

triplechocolatepralinetart05

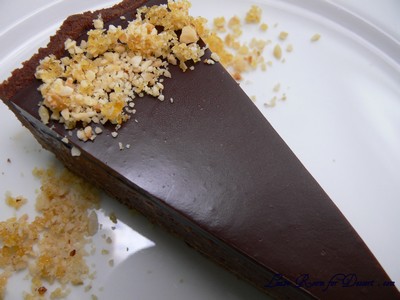
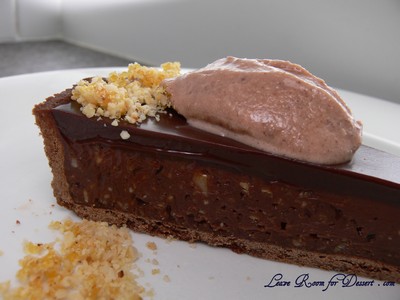
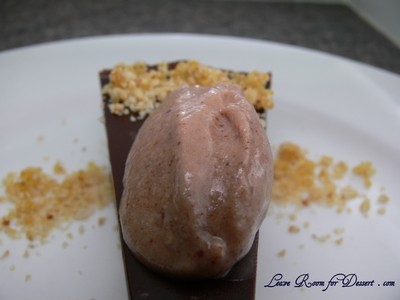
Even though I felt I should serve this with vanilla ice cream, I really wanted to serve it with baci gelato and the combination was fantastic! The tart was rich and relatively soft, with a crisp pastry. The chocolate ganche on top was beautiful and very reflective, the hazelnut praline gave the tart a lovely crunch and all layers worked fantastically together.

triplechocolatepralinetart11

A loose bottomed tart tin would have been very helpful in getting out the tart slices, as I had a few problems with removing the first few. Each part of the tart was quite easy, you just need to organise your time a bit, to make sure it’s ready on time. We had some leftovers, as this is a very rich tart, and it tastes gorgeous on the days afterward, so if you didn’t have time to make it on the day I would consider making it the day before.

triplechocolatepralinetart07

Triple Chocolate Praline Tart
Recipe from Gourmet Traveller (my hints in italics)

Serves: 16

160ml pouring cream
40ml milk
200g dark chocolate (61% cocoa solids), finely chopped

Chocolate pastry
200g plain flour
60g pure icing sugar, sifted
30g Dutch-process cocoa
100g cold butter, coarsely chopped
2 egg yolks
(I had to add 2 tablespoons of cold water at the end for it to form a dough)

Milk chocolate praline filling
150g hazelnuts, roasted and skins removed
175g raw caster sugar
300ml pouring cream
400g milk chocolate, finely chopped

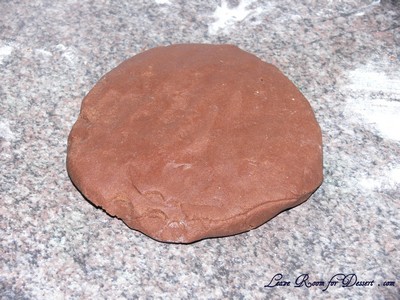
For chocolate pastry, process flour, icing sugar and cocoa in a food processor until combined. Add butter, process until mixture resembles fine crumbs, then add egg yolks, process to combine. (If you need to add some cold water add it now and process, I needed to do this as it was very crumbly). Turn onto a lightly floured work surface and bring pastry together with the heel of your hand. Wrap in plastic wrap, refrigerate for 1 hour to rest.

triplechocolatepralinetart13

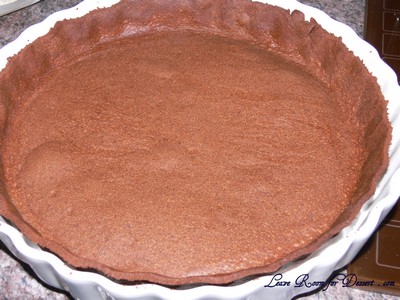
Preheat oven to 180°C. Roll out pastry on a lightly floured surface to 3mm thick and line a 28cm-diameter loose-bottomed tart tin, trimming edges (I used a quiche dish as that’s all I had). Refrigerate for 1 hour, then blind bake for 8-10 minutes (place a piece of baking paper in the tart and add rice, beans or weights), remove paper and weights and bake until dry and crisp (8-10 minutes).
triplechocolatepralinetart16

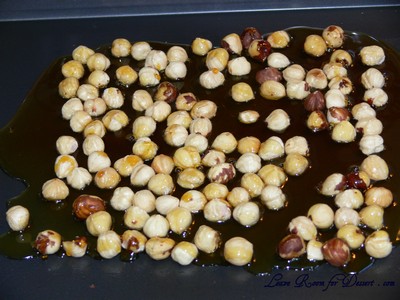
Meanwhile, for praline filling, spread hazelnuts on an oiled baking tray, set aside. Combine sugar and 60ml water in a small saucepan, stir over medium-high heat until sugar dissolves. Bring to the boil, cook until dark caramel in colour (4-5 minutes), pour over nuts. Stand until cool and set (8-10 minutes), process in a food processor until finely ground, set aside.
triplechocolatepralinetart15

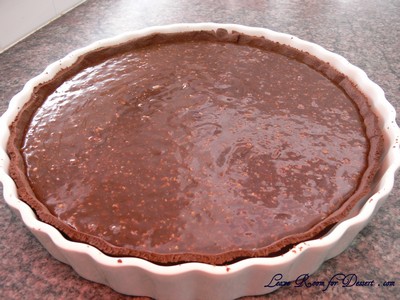
Bring cream to the simmer in a small saucepan over medium heat, add chocolate, stir until smooth, remove from heat, stir in two-thirds of praline mixture (reserve remaining to serve). Spoon into pastry case, smooth top, refrigerate until just set (1½-2 hours).

triplechocolatepralinetart17

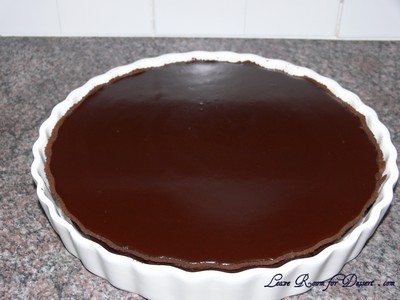
Combine cream and milk in a small saucepan, bring to the simmer over medium-high heat. Add dark chocolate, remove from heat, stir until smooth. Spread over tart, refrigerate until just set (45 minutes-1 hour). Cut into wedges with a hot knife and serve immediately scattered with reserved praline. (I would also suggest serving this with vanilla ice cream, whipped cream or baci gelato).

triplechocolatepralinetart19

triplechocolatepralinetart20

triplechocolatepralinetart02

triplechocolatepralinetart12

triplechocolatepralinetart10