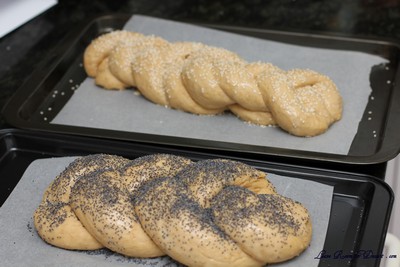
Daring Bakers

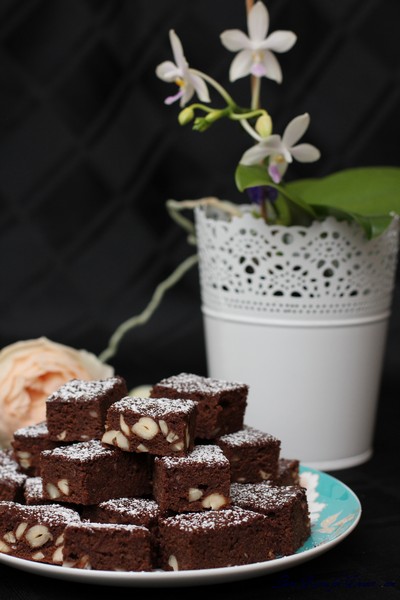
Cashew Kidney Bean Chocolate Brownies – Daring Bakers Challenge March 2013

Wednesday, March 27th, 2013

Ruth from Makey-Cakey was our March 2013 Daring Bakers’ challenge host. She encouraged us all to get experimental in the kitchen and sneak some hidden veggies into our baking, with surprising and delicious results!

I think hiding vegetables in dishes is great idea! I often stretch my spaghetti bolognese out with loads of veggies both grated and chopped – although I’m sure kids wouldn’t think they are particularly well hidden.

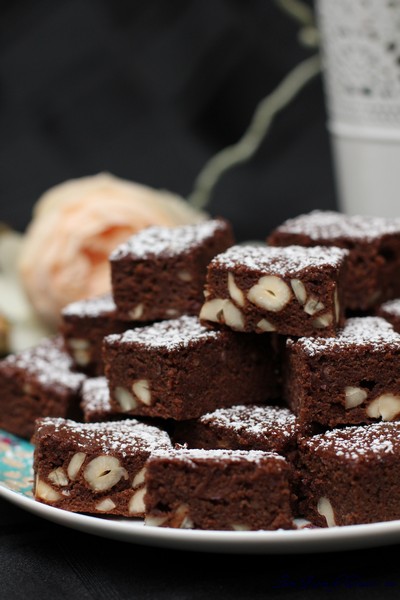
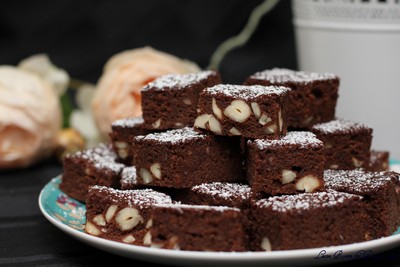
So it was easy to choose from the recipes we were given this month, I liked the idea or using red kidney beans in the brownies. I cooked the mix for only about 15minutes and it was properly cooked by that stage. When I tried it after it had cooled I enjoyed the taste and found the brownie quite light – more the consistency of cake.

I tested this on most of my family and none could pick the secret ingredient – some screwing up their face when I said “what’s the secret ingredient” after they had already eaten a piece. I found the top of the cake went a little tacky on top as moisture got to it, so it may have helped having a thin icing perhaps. I wouldn’t substitute this recipe for any of my current brownie recipes, although it has opened my eyes to what can be hidden in food.

Cashew Kidney Bean Chocolate Brownies

Servings:
makes one 8 inch x 13 inch/20cm x 33cm tray

Ruth said:
I tested these on half a dozen people and none could identify kidney beans in the finished taste. Indeed they couldn’t hazard a guess at anything weird at all – they just commented that they were good brownies!

400gm (14 oz) tin of kidney beans (in water, not salted water), drained

1 cup (240 ml) (225 gm) (8 oz) unrefined caster (superfine) sugar (can use regular white granulated sugar)

2 tablespoons (30ml) maple syrup

½ cup (120 ml) (70 gm) (2½ oz) of plain all-purpose flour

1 teaspoon (5 ml) (5 gm) baking powder

½ cup (120 ml) (60 gm) (2 oz) cocoa powder

½ cup (120 ml) flavorless oil like canola or vegetable

4 large eggs

1 teaspoon (5 ml) vanilla extract

½ cup (120 ml) (140 gm) (5 oz) raw cashew nuts (can use roasted cashews, but unsalted is best)

Preheat the oven to 350°F/180°C/gas mark 4 and grease and base line your baking tin.
Drain, rinse and puree the kidney beans until smooth – if in doubt, blend it a bit more – bits of unblended kidney bean in the finished brownie spoil the ‘hidden’ element of surprise!
Combine all the ingredients apart the nuts and beat well until mixed. You could do this in a food processor or mixer if you wanted.
Stir in the nuts.
Pour into the prepared tin, and bake for about 25 minutes until just firm to the touch.
Cool in the tin, then cut, serve, allow people to enjoy, and then surprise them with the secret ingredient!

Raincoast Crisps – Daring Bakers Challenge February 2013

Wednesday, February 27th, 2013

Sarah from All Our Fingers in the Pie was our February 2013 Daring Bakers’ host and she challenges us to use our creativity in making our own Crisp Flatbreads and Crackers! 🙂

It wouldn’t be the end of the month without me rushing to finish and post my Daring Bakers Challenge. This month was focused around crackers, and after the last challenge made such wonderful ones, I was looking forward to it.

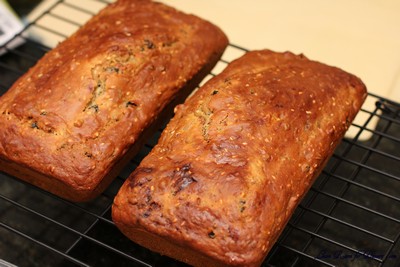
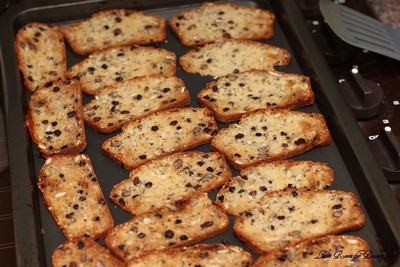
I think I may have chosen the easiest recipe given, as the dough came together very quickly. Although when it came to drying all the crackers, this looked like it would take a reasonable amount of time, as my oven only has two shelves (and the bottom shelf never cooks as fast or even). One loaf when sliced as thin as I could manage fit on two trays and after needing to put a pie in the oven, I decided on leaving the second loaf – as we had already eaten some of the thin slices that weren’t cut very well.

We ate the loaf for breakfast, sliced thickly, grilled and with a bit of butter, and it tasted very nice – with the currants (I used instead of raisins), adding a nice addition of sweetness and moisture. I think my parents in law would be quite surprised to see me eating dried fruit in bread or cake as I’ve always had an aversion to it.

I think the loaf was a little nicer than the crisps, as the flavour was more evident. I would definitely consider making the bread component of this challenge again.

Thanks to our host this month! It’s always a pleasure trying new recipes.

Raincoast Crisps

From Dinner with Julie blog with Julie van Rosendahl
Servings: About 8 dozen

Ingredients
2 cups (480 ml) (280 gm) (10 oz) all-purpose (plain) flour
2 teaspoons (10 ml) (10 gm) (1/3 oz) baking soda
1/2 teaspoon (2½ ml) (3 gm) salt
2 cups (480 ml) buttermilk
1/4 cup (60 ml) (50 gm) (1¾ oz) brown sugar, firmly packed
1/4 cup (60 ml) honey
1 cup (240 ml) (180 gm) (6½ oz) raisins (I used half a cup of currants)
1/2 cup (120 ml) (60 gm) (2 oz) chopped pecans
1/2 cup (120 ml) (125 gm) (4½ oz) roasted pumpkin seeds (optional)
1/4 cup (60 ml) (30 gm) (1 oz) sesame seeds
1/4 cup (60 ml) (30 gm) (1 oz) flax seed, ground
1 tablespoon (15 ml) (2 gm) finely chopped fresh rosemary

Directions
Preheat oven to moderate 350°F/180°C/gas mark 4.
In a large bowl, stir together the flour, baking soda and salt. Add the buttermilk, brown sugar and honey and stir a few strokes. Add the raisins, pecans, pumpkin seeds, sesame seeds, flax seed and rosemary and stir just until blended.
Pour the batter into two 8”x4” (20cmx10cm) loaf pans that have been sprayed with nonstick spray. Bake for about 45 minutes, until golden and springy to the touch. Remove from the pans and cool on a wire rack.

The cooler the bread, the easier it is to slice really thin. You can leave it until the next day or pop it in the freezer. Slice the loaves as thin as you can and place the slices in a single layer on an ungreased cookie sheet. Slice so thin that they are almost lacy. Reduce the oven heat to slow 300°F/150°C/gas mark 2 and bake them for about 15 minutes, then flip them over and bake for another 10 minutes, until crisp and deep golden. You can also cut in half before the second baking. This is the way I like them. The size works better. Be careful not to burn.

Storage and Freezing Instructions/Tips: Store in an airtight container at room temperature for up to 1 month. Prolong the freshness by freezing for up to 3 months.

Gevulde Speculaas – Daring Bakers Challenge January 2013

Sunday, January 27th, 2013

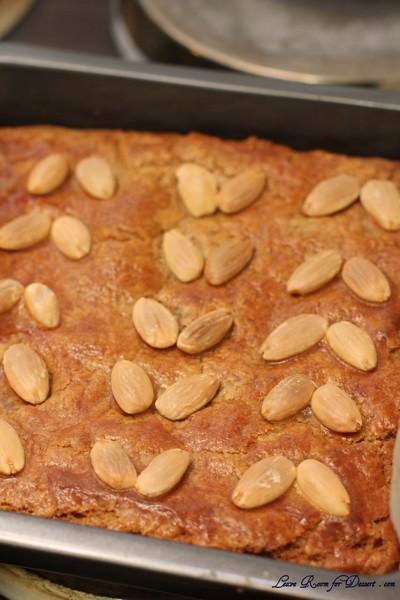
Francijn of Koken in de Brouwerij was our January 2013 Daring Bakers’ Hostess and she challenged us to make the traditional Dutch pastry, Gevulde Speculaas from scratch! That includes making our own spice mix, almond paste and dough! Delicious!

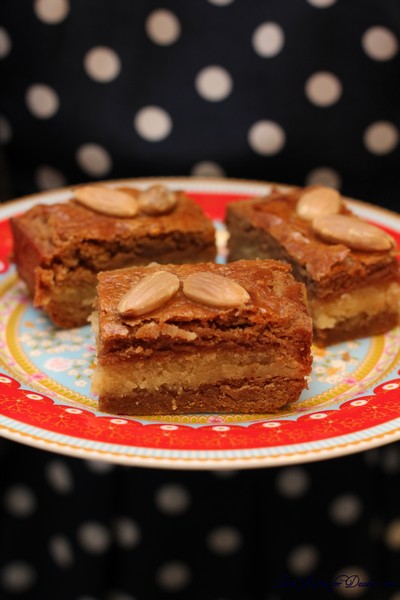
I was very glad this was a quick and easy recipe, I have only just taken it out of the oven and taken a bite and some photos. Although not fully cooled in the tin, the warm gevulde speculaas was nice and soft and full of flavour, I can’t wait to have some tomorrow.

After smelling and making the dough, I was a little concerned it may have been too spiced, although once cooked I was happy with the strong and lovely flavour. The addition of the almond paste layer worked very well between the two pastry layers. This is certainly a great “slice” you could make that is a little different and not too sweet.

I used a 20cm square tin and it turned out well in that sized tin. Thanks Francijn for this lovely recipe, I love exploring food from other countries :).

Speculaas Spices

Speculaas spices can be bought in a store. But it’s more fun to make your own mixture, so that you can adjust the flavor. Here is a representative recipe from the extensive Dutch tradition.

Mandatory:
cinnamon 40 to 60 % of the total amount
ground cloves 1 or 2 parts
mace ½ or 1 part
ginger ½ or 1 part

Optional:
white pepper ½ or 1 part
cardamom ½ or 1 part
coriander ½ or 1 part
anise ½ or 1 part
nutmeg 1 or 2 parts

A convenient way to mix the spices is as follows:

Take at least 1 or 2 teaspoons of ground cloves, ½ or 1 teaspoon of mace and ½ or 1 teaspoon of ginger.

Add to taste ½ or 1 teaspoon of white pepper, ½ or 1 teaspoon of cardamom, ½ or 1 teaspoon of coriander, ½ or 1 teaspoon of anise, and 1 or 2 teaspoons of nutmeg.
Measure or weigh the amount of spices you have now, and add an equal amount of cinnamon.

This method yields at least 4 and at most 18 teaspoons of spices, so if you plan to mix just a few spices, use bigger or more spoons to get a reasonable amount.
Take your time to smell the ingredients individually before you decide how much to add. And remember the proportions, that will make adjustments easier next time.
Store the spices airtight, dry and dark, they will not spoil for a long time.

Recipe Almond Paste
As we are going to make stuffed speculaas, we will need almond paste. You can buy it in a store, but homemade almond paste tastes better.

7/8 cup (210 ml)(125 gm)(4½ oz) raw almonds (or 1-1/3 cups (320 ml)(125 gm) (4½ oz) ground almonds)
5/8 cup (150 ml) (125 grams) (4½ oz) granulated sugar
1 large egg
1 teaspoon (5 ml) (3 gm) lemon zest

If the raw almonds still have their brown skins, remove them as follows. Bring water to a boil, add the almonds, cook them for one minute, drain immediately and let cool for a few minutes. Rub them between your fingers to remove the skins.

Grind the almonds for one or two minutes in a food processor, until you see nothing but very small pieces. (Or skip this step if you use ground almonds.)
Add the sugar, and grind for another one or two minutes. It must be very fine after this step.
Add the egg and let the food processor combine it – if it is powerful enough. Otherwise you will have to combine it with your fingers.

Store the almond paste in an airtight container in the refrigerator. Although the flavor gets better as days pass by, it is not wise to store the paste for too long, as it contains a raw egg. For the same reason you should not eat the paste unbaked.

To be safe, you could choose one of these options:
use egg powder and water to replace the egg (follow instructions with the powder)
use 50 ml of an other liquid, like lemon juice (in that case, leave the zest out)
add the egg just before you are going to bake the pastry

The paste can also be kept in the freezer.

Recipe Speculaas Dough

1¾ cups (250 gm) (9 oz) all purpose (plain) flour
1 teaspoon (5 ml) (5 gm) baking powder
¾ cup (150 grams) (5-1/3 oz) brown sugar, firmly packed
a pinch salt
2 tablespoons (30 ml) (15 gm) (½ oz) speculaas spices
3/4 cup (1½ stick) (175 gm) (6 oz) unsalted butter

Put flour, baking powder, sugar, salt and spices in a bowl.
Cut the butter in dices and add.
Knead until smooth.
Feel free to add a little milk if the dough is too dry.
Wrap in clingfoil and put in the refrigerator for two hours.

You can choose to make the dough a few days in advance, just like the almond paste, that will benefit the flavor. Freezing is no problem.

Assembling and baking the Gevulde Speculaas

speculaas dough
almond paste
whole almonds without skins for decoration
1 large egg

shallow baking pan, 8×10 inch (20×26 cm) or, round with of diameter 10 inch (26 cm)

1. Grease the pan.
2. Preheat the oven to moderate 350°F/180°C/gas 4
3. Divide the dough into two portions.
4. Roll out both portions on a lightly floured surface, until they are exactly as big as the baking pan.

5. Put one of the layers in the pan and press it lightly to fill the bottom.
6. Lightly beat the egg with a teaspoon cold water.
7. Smear 1/3 of the egg over the dough in the pan.
8. Roll out the almond paste between two sheets of clingfoil, until it is exactly as big as the pan, and put it on the dough in the pan. (If you chose to make the paste soft, you can smear the paste instead of rolling it.)
9. Press the paste lightly down to fit in the pan, and smear the next 1/3 of the egg over it.
10. Now put the second layer of dough on top of the paste, press it lightly, and make as smooth as possible.
11. Smear the last 1/3 of the egg over the dough.
12. Decorate the pastry with the almonds.

13. Bake for 40 minutes in the preheated oven.
14. Let cool completely in the pan, then cut it in portions as you like.

15. If you wrap the stuffed speculaas in clingfoil, after it has cooled completely, you can store it a few days at room temperature. Freezing is possible, but fresh speculaas tastes better.

Storage & Freezing Instructions/Tips:
Speculaas spices: store them airtight, dry and dark, and they will not spoil for a long time.
Almond paste: keep it in the refrigerator. Some people keep it there for months, but if it contains raw egg, I recommend not more than a few days. Can easily be frozen.
Speculaas dough: can be kept in the refrigerator for days, or in the freezer for months. But remember: fresh tastes better.
Stuffed speculaas: if you let it cool completely, you can wrap it in clingfoil and keep it a few days at room temperature. And again: freezing is possible, but fresh is better.

Panettone – Daring Bakers Challenge December 2012

Thursday, December 27th, 2012

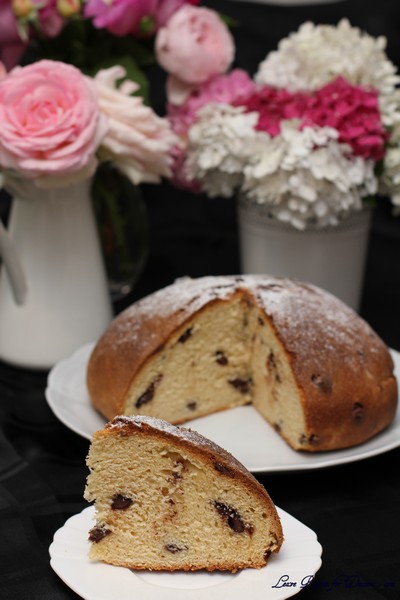
The December 2012 Daring Bakers’ challenge was hosted by the talented Marcellina of Marcellina in Cucina. Marcellina challenged us to create our own custom Panettone, a traditional Italian holiday bread!

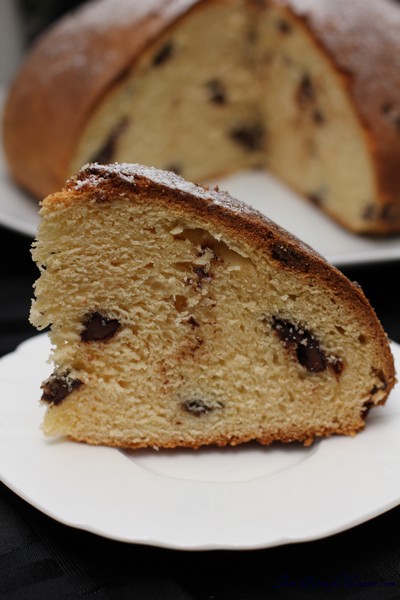
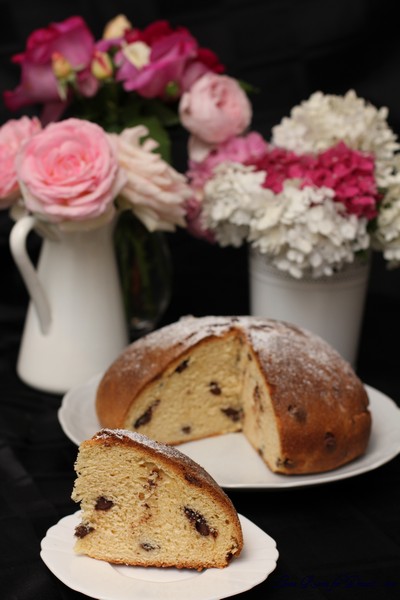
Like most recipes that require dried fruit, I always tend to substitute chocolate. I don’t normally get many complaints either, so no doubt you have already noticed that this isn’t your traditional panettone.

Honestly I have never tried a panettone before, and wasn’t sure what to expect. It was a mix between a cake and bread, and quite interesting – although due to my exclusions of this recipe, I doubt I have done it justice. The addition of the extra flavours would have made it more appealing to most.

A great suggestion I received only a few hours ago included using panettone in place of bread for French toast – it sounds splendid, and I might just give it ago on the weekend.

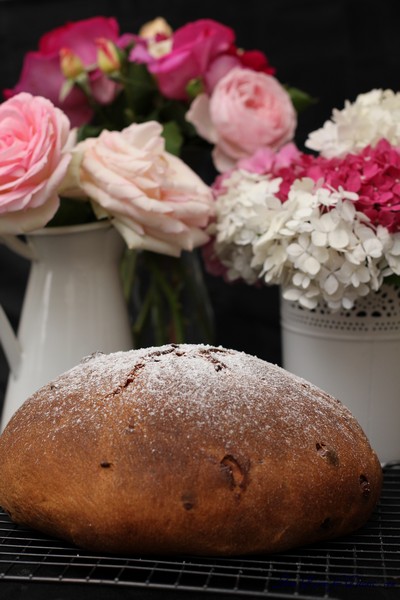
My panettone didn’t rise as much as I would have expected in the second and final rise, it’s quite possible I added too much flour – as I was trying to get a dough consistency. Due to this it looked more like a bun, causing Nick to name it “‘bun’-ettone”. I didn’t add the lemon or orange essence, and I changed the final ingredients for chocolate chips.

For a more detailed post on making the panettone see Marcellina’s post.

I hope everyone had a wonderful Christmas, and has an exciting New Year.

Panettone

Makes 2 Panettoni

Ingredients

Sponge
1 satchel (2¼ teaspoons) (7 gm) active dry yeast
1/3 cup (80 ml) warm water
½ cup (70 gm) unbleached all purpose flour

First Dough
1 satchel (2¼ teaspoons) (7 gm) active dry yeast
3 tablespoons (45 ml) warm water
2 large eggs, at room temp
1¼ cup (175 gm) unbleached all-purpose (plain) flour
¼ cup (55 gm) (2 oz) sugar
½ cup (1 stick) (115 gm) unsalted butter, at room temp

Second dough
2 large eggs
3 large egg yolks
2/3 cup (150 gm) (5-2/3 oz) sugar
3 tablespoons (45 ml) honey
1 tablespoon (15 ml) vanilla extract
1 teaspoon (5 ml) lemon essence/extract
1 teaspoon (5 ml) orange essence/extract
1 teaspoon (5 ml) (6 gm) salt
1 cup (2 sticks) (225 gm) unsalted butter, at room temp
3 cups (420 gm) (15 oz) unbleached all-purpose (plain) flour; plus up to (2/3 cup) 100 gm for kneading

Filling and final dough
1½ cups (250 gm) (9 oz) golden raisins or golden sultanas
½ cup (75 gm) (2-2/3 oz) candied citron ( I didn’t have this so I made it up with candied orange peel)
½ cup (75 gm) (2-2/3 oz) candied orange peel (try making your own; recipe below)
Grated zest of 1 orange
Grated zest of 1 lemon
2 to 3 tablespoons (30-45 ml) (15-25 gm) unbleached all-purpose (plain) flour

Directions:

Sponge

Mix the yeast and water in a small bowl and allow to stand until creamy. That’s about 10 minutes or so
Mix in the flour.
Cover with plastic wrap and allow to double in size for about 20 to 30 minutes

First Dough

By hand:

Mix the yeast and water in a large bowl and allow to stand until creamy. Again, about 10 minutes or so
Mix in the sponge and beat well with a wooden spoon
Stir in the eggs, flour and sugar.
Mix in the butter well
This should only take about 5 – 6 minutes
Cover with plastic wrap and allow double in size, about 1 – 1 ¼ hours

By Mixer:

In the mixer bowl, mix together the yeast and water and allow to stand until creamy. Again, about 10 minutes or so
With the paddle attached mix in the sponge, eggs, flour, and sugar.
Add in the butter and mix for 3 minutes until the dough is smooth and even.
Cover with plastic wrap and allow double in size, about 1 – 1 ¼ hours

Second dough

By Hand:

Be sure to have your dough in a large bowl as above.
With a wooden spoon mix in eggs, egg yolk, sugar, honey, vanilla, essences/extracts and salt.
Mix in the butter.
Then add the flour. Stir until smooth.
At this stage the dough will seem a little too soft, like cookie dough.
Turn it out and knead it on a well-floured surface until it sort of holds its shape. Don’t knead in too much flour but you may need as much as 2/3 cup (100 gm). Be careful the excess flour will affect the finished product.

By Mixer:

With the paddle mix in thoroughly the eggs, egg yolks, sugar, honey, vanilla, essences/extracts, and salt.
Mix in the butter until smooth.
Add the flour and slowly incorporate.
At this stage the dough will seem a little too soft, like cookie dough.
Replace the paddle with the dough hook and knead for about 2 minutes.
Turn out the dough and knead it on a well-floured surface until it sort of holds its shape.
Don’t knead in too much flour but you may need as much as 2/3 cup (100 gm). Be careful the excess flour will affect the finished product.

First Rise

Oil a large bowl lightly, plop in your dough and cover with plastic wrap
Now we need to let it rise until it has tripled in size. There are two ways to go about this.

Rise in a warm place for 2 – 4 hours
Or find a cool spot (64°F -68°F) (18°C – 20°C) and rise overnight
Or rise for 2 hours on your kitchen bench then slow the rise down and place in the refrigerator overnight. If you do this it will take some time to wake up the next morning but I preferred this method.

Filling and Final Rise:

Soak the raisin/sultanas in water 30 minutes before the end of the first rise. Drain and pat dry with paper towels.
Now take your dough and cut it in half. Remember we are making two panettoni.
Combine all your filling ingredients and mix well
Press out one portion of dough into an oval shape
Sprinkle over one quarter of the filling and roll up the dough into a log
Press out again into an oval shape and sprinkle over another quarter of the filling
Roll into a log shape again.
Repeat with the second portion of dough
Shape each into a ball and slip into your prepared pans, panettone papers or homemade panettone papers.
Cut an X into the top of each panettone and allow to double in size.
Rising time will vary according to method of first rise. If it has been in the refrigerator it could take 4 hours or more. If it has been rising on the kitchen bench in a warm place it should be doubled in about 2 hours.

Baking

When you think your dough has only about 30 minutes left to rise preheat your oven to moderately hot 400°F/200°C/gas mark 6 and adjust your oven racks
Just before baking carefully (don’t deflate it!) cut the X into the dough again and place in a knob (a nut) of butter.
Place your panettoni in the oven and bake for 10 minutes
Reduce the heat to moderate 350°F/180°C/gas mark 4 and bake for another 10 minutes
Reduce the heat again to moderate 325°F/160°C/gas mark 3 and bake for 30 minutes until the tops are well browned and a skewer inserted into the panettone comes out clean.
Cooling your panettone is also important. If you have use papers (commercial or homemade) lie your panettoni on their side cushioned with rolled up towels. Turn gently as they cool. If you have used pans cool in the pans for 30 minutes then remove and cushion with towels as above.
Panettone can also be cooled suspended. How to do this? Firstly you need to use papers (commercial or homemade), insert clean knitting needles into the bottom of the panettone in a X shape. Flip over and support the knitting needles on the edges of a large saucepan with the panettone suspended within the saucepan. Yep, a lot of trouble and I didn’t really find that much difference – maybe I took too long to insert the needles.

Vanilla Slice – Daring Bakers Challenge October 2012

Saturday, October 27th, 2012

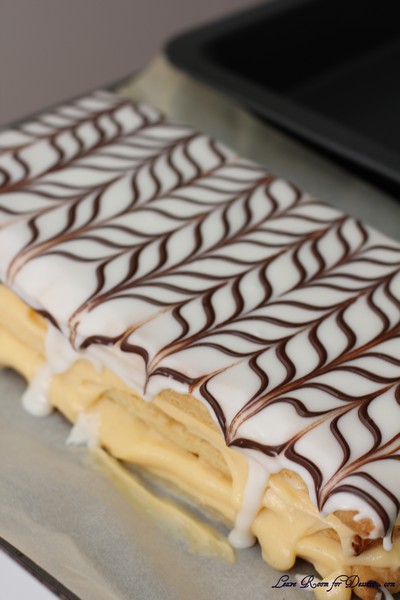
Our October 2012 Daring Bakers’ challenge was hosted by Suz of Serenely Full. Suz challenged us to not only tackle buttery and flaky puff pastry, but then take it step further and create a sinfully delicious Mille Feuille dessert with it!

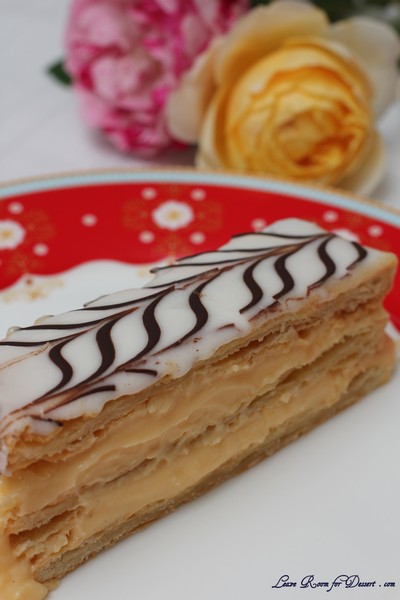
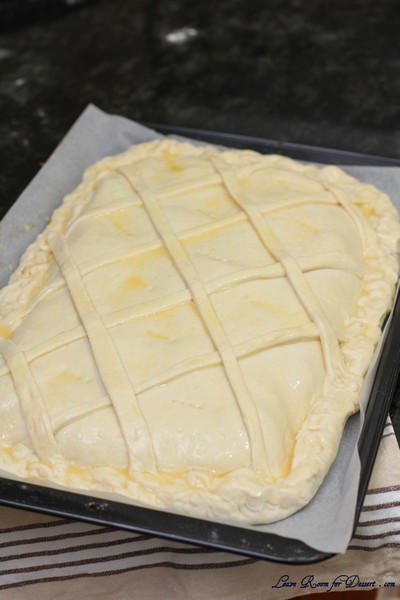
Anyone would have thought it was my Mum’s birthday – as I arrive with a large vanilla slice and a couple of roses in hand. It just so happens that my Mum has always wanted a vanilla slice made for her, as she will often buy them from bakeries. Although it was someone’s birthday, they certainly hadn’t asked for vanilla slice – and we didn’t need it after a large lunch of chicken schnitzel followed by cake. It did however almost all get eaten on the day I assembled it.
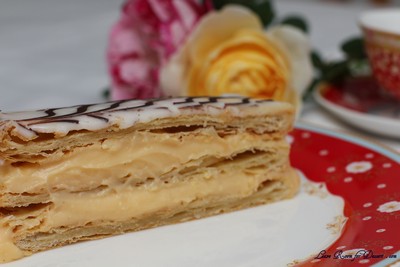
We have made puff pastry before in previous Daring Bakers Challenges, and I actually really enjoy making it. Finding time to make it is a little more difficult. I also had lots of fun making the decoration on top. The puff pastry and vanilla custard were both easy to make, the only difficulty I had with this challenge was cutting and presenting it nicely. I found the custard flowed out the sides quite a bit, so even neatening the pastry was difficult.

This certainly didn’t stop anyone from enjoying it though, and I even have a request to make it for my Mum’s birthday. The next time I make it I will probably try another custard recipe, to find one that will hopefully hold its shape whilst cutting.
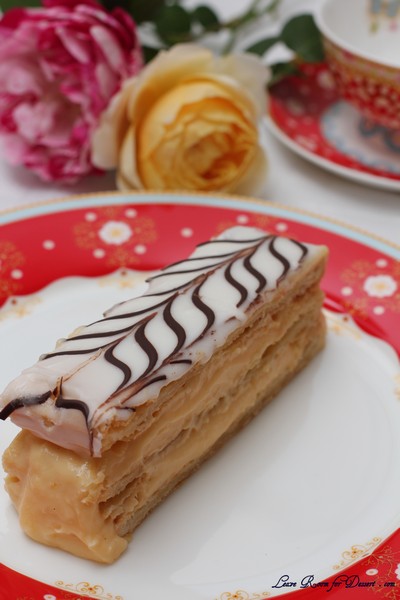
If you don’t wish to make the icing with egg white, you are able to make it with some teaspoons or tablespoons of hot water instead.

Thanks to our host for providing an extremely yummy challenge this month 🙂
Pâte feuilletée /Puff Pastry

Servings: Makes 8-10 mille-feuille (yields: 675g pastry)

Ingredients
1¾ cup (250g) plain/all-purpose flour
Scant ¼ cup (55 ml) (1¾ oz)(50g) unsalted butter, chilled and cubed
1 teaspoon (5ml) (6 gm) salt
½ cup plus 2 tablespoons (5/8 cup)(150 ml) cold water

14 tablespoons (210 ml) (7 oz) (200g) butter (for the beurrage), room temperature
3½ tablespoons (55ml) (30g) plain flour (for the beurrage)

Additional flour for rolling/turning

Directions:

1. Cut the larger quantity of butter into smallish pieces and set aside at room temperature.
2. Put the larger quantity of flour into a bowl with the salt and the cold, cubed butter.
3. Lightly rub the butter and flour between your fingertips until it forms a mealy breadcrumb texture.

4. Add the cold water and bring together with a fork or spoon until the mixture starts to cohere and come away from the sides of the bowl.
5. As the dough begins to come together, you can use your hands to start kneading and incorporating all the remaining loose bits. If the dough’s a little dry, you can add a touch more water.
6. Knead for three minutes on a floured surface until the dough is smooth.
7. Wrap in clingfilm and refrigerate for at least 30 minutes.

8. While the dough is chilling, take your room temperature butter and mix with the smaller amount of plain flour until it forms a paste.
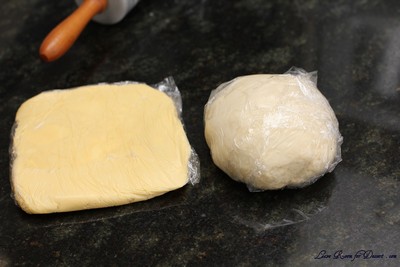
9. Place the butter paste between two sheets of clingfilm, and either with a rolling pin or your hands (I found hands easiest) shape it into a 4.5”/12cm square. You can use a ruler (or similar) to neaten the edges.

10. Refrigerate for about 10-15 minutes so the butter firms up slightly. If it’s still soft, leave it a bit longer. If it’s too hard and inflexible, leave it out to soften a touch. You want it to be solid but still malleable.
11. Once the dough has chilled, roll it out on a floured surface into a 6”/15cm square. Place the square of butter in the middle, with each corner touching the centre of the square’s sides (see photo below).
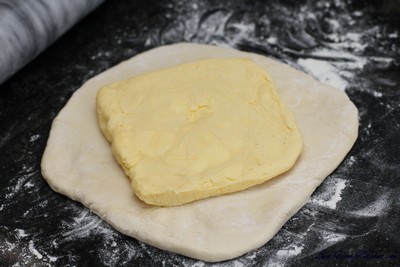
12. Fold each corner of dough over the butter so they meet the centre (you might have to stretch them a little) and it resembles an envelope, and seal up the edges with your fingers. You’ll be left with a little square parcel.
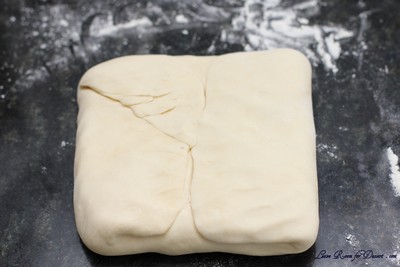
13. Turn the dough parcel over and tap the length of it with your rolling pan to flatten it slightly.
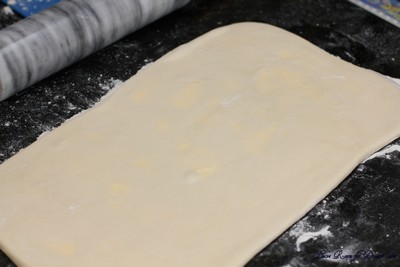
14. Keeping the work surface well floured, roll the dough carefully into a rectangle ¼ inch /6 mm in thickness.
15. With the longest side facing you, fold one third (on the right) inwards, so it’s covering the middle section, and ensure that it is lined up (see below).
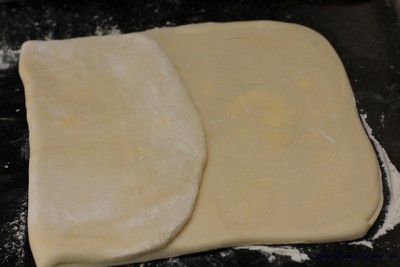
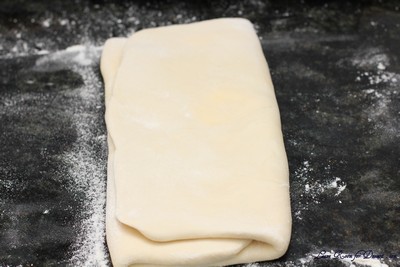
16. Then, fold the remaining flap of dough (on the left) inwards, so you’re left with a narrow three-layered strip (see below).
17. Repeat steps 14, 15, 16.
18. Wrap up in clingfilm and chill for at least 30 minutes.
19. Repeat steps 14, 15, 16 twice.
20. Wrap up in clingfilm and chill again for at least 30 minutes.
21. Repeat steps 14, 15, 16 two final times.
22. Wrap up in clingfilm and refrigerate until needed. The dough keeps a couple of days in the fridge.

Pastry Cream / Crème Pâtissière:

(full batch; makes enough for 8-10 mille-feuille)

Ingredients

2 cups (450ml) whole milk
¼ cup (1¼ oz)(35 gm) cornflour/cornstarch
1 cup less 1 tablespoon (200gm) (7 oz) caster sugar
4 large egg yolks (if you’re making the royal icing, reserve two egg whites)
2 large eggs
¼ cup (2 oz) (60gm) unsalted butter, cubed
2 teaspoons (10 ml) vanilla essence

Directions:

1. Mix the cornflour/cornstarch with ½ cup of milk and stir until dissolved.

2. Heat the remaining milk in a saucepan with the sugar, dissolving the sugar and bringing the milk to the boil. Remove from heat.
3. Beat the whole eggs into the cornflour/milk mixture. Then beat in the egg yolks. Pour in 1/3 of the hot milk, stirring constantly to prevent the eggs from cooking.

4. Now, bring the remaining milk back to the boil, and add the eggy mixture, whisking as your pour. Keep whisking (don’t stop or it’ll solidify) on a medium heat until the mixture starts to thicken.

5. Remove the saucepan from the heat and thoroughly whisk the pastry cream. At this stage the pastry cream can look slightly lumpy, but a good whisking soon makes it smoother.
(N.B. If you’re worried about the pastry cream continuing to cook off the heat, you can transfer it to a stainless steel/ceramic bowl.)
6. Beat in the butter and vanilla until fully incorporated.
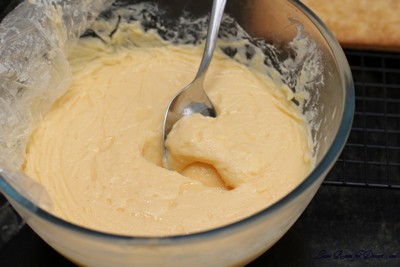
7. If you haven’t already, pour the pastry cream into a stainless steel or ceramic bowl, and then place clingfilm over the surface to stop a skin forming.
8. Refrigerate overnight to give the pastry cream time to further thicken.
Mille-Feuille/ Napoleon/ Custard Slice

Servings: Makes 8- 10

Ingredients
1 x batch pâte feuilletée/puff pastry (see above)
1 x batch crème pâtissière/pastry cream (see above)

2 ¾ cups (660 ml) (12⅓oz) (350gm) icing sugar
2 teaspoons (10 ml) lemon juice
2 large egg whites
½ cup (2¾ oz) (80gm) dark chocolate

Directions:

1. Preheat oven to moderately hot 200 °C /400°F/gas mark 6.
2. Lightly dust your work space with flour and remove your dough from the fridge.
3. Roll into a large rectangle, the thickness of cardboard. The recipe I followed specified no other dimensions, but I rolled mine to about 12”/30cm x 18”/46cm.

(I found it easiest to start the rolling on the work surface, and finish it off on a large piece of greaseproof paper. That way it’s easier to move the sheets of pastry around.)

4. Cut into three equal pieces and place on a baking tray. If you don’t have space for all three, you can bake them separately.
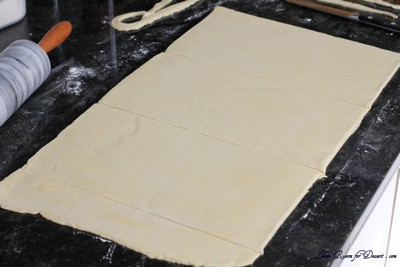
(I baked mine in separate batches. See below.)

5. Prick the pastry sheets all over with a fork.
6. Place another sheet of greaseproof paper over the top and then a heavy baking tray. This will prevent the layers from puffing up too much.

(N.B. I found my baking trays weren’t heavy enough, so also used a pyrex dish to add more weight. Just ensure that the pastry sheets are evenly weighted down.)

7. Bake each sheet for about 25 minutes in a moderately hot oven 200 °C /400°F/gas mark 6, removing the top layer of greaseproof paper/tray 10 minutes before the end for the tops to brown. Keep an eye on them and lower the temperature if you think they’re browning too much.
8. Remove the baked sheets from the oven and leave on a wire rack to cool.
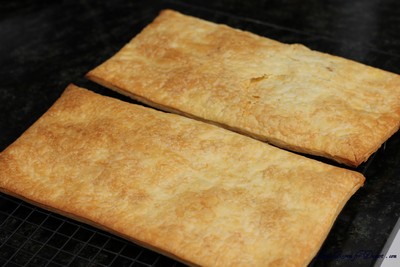
9. Once the pastry has cooled, you’re ready to assemble your mille-feuille. Get a sturdy flat board, your pastry and the chilled crème pâtissière from the fridge.
10. Lay one sheet on the board and spread half the crème patisserie evenly over the top.
11. Take the second sheet and place it on top, pressing down lightly with your hands to ensure that it sticks to the filling.
12. Spread the remaining crème pâtissière and place the last sheet of pastry on top, pressing down again. (Don’t worry if there’s some oozing at the sides. That can be neatened later.)
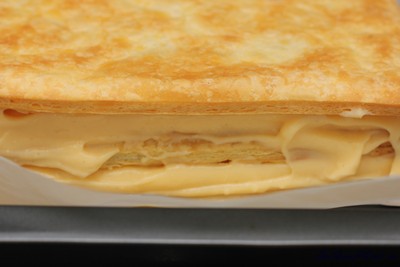
13. Pop in the fridge while you prepare the icing / chocolate.
14. Melt the chocolate in a bain marie, stirring periodically. Once melted, transfer to a piping bag (or plastic bag with end snipped), resting nozzle side down in a glass or other tall container.

15. To make the icing, whisk 2 egg whites with 2 teaspoons lemon juice until lightly frothy.
16. Whisk in about (2 cups) 300gm of the icing sugar on a low setting until smooth and combined. The mixture should be thick enough to leave trails on the surface. If it’s too thin, whisk in a bit more icing sugar.

17. Once ready, immediately pour over the top of the mille-feuille and spread evenly. I found that I didn’t quite need all of the icing.
18. Still working quickly, pipe a row of thin chocolate lines along the widest length of your pastry sheet (see below). You can make them as far apart/close together as you like.

(Again, don’t worry if it looks messy. It can be neatened later on.)

19. STILL working quickly (phew), take a sharp knife and lightly draw it down (from top to bottom) through the rows of chocolate. A centimeter (½ inch) or so further across, draw the knife up the way this time, from bottom to top. Move along, draw it down again. Then up. And so on, moving along the rows of chocolate until the top is covered in a pretty swirly pattern.

20. Once you’ve decorated your mille-feuille (no doubt far more beautifully than I did), with a clean knife mark out where you’re going to cut your slices, depending on how big you want them to be and leaving space to trim the edges. I got ten out of mine – two rows of five.
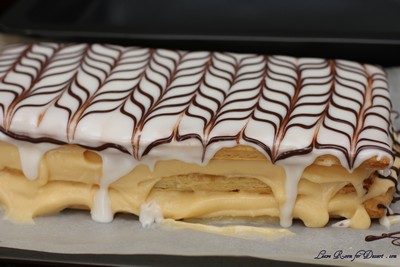

21. Chill for a couple of hours to give the icing (etc.) time to set.
22. With a sharp knife, trim the edges and cut your slices.
23. Dig in!

Storage & Freezing Instructions/Tips:
The puff pastry dough will keep in the fridge for up to two days. Any leftovers can be well wrapped up & frozen for a year. Thaw for 30 minutes on the counter or overnight in the fridge.

The completed mille-feuille can be made a day or two in advance; it will last 2 or 3 days in an airtight container in the fridge, though will become less crisp.
Empanadas – Daring Bakers Challenge September 2012

Thursday, September 27th, 2012

Patri of the blog, Asi Son Los Cosas, was our September 2012 Daring Bakers’ hostess and she decided to tempt us with one of her family’s favorite recipes for Empanadas! We were given two dough recipes to choose from and encouraged to fill our Empanadas as creatively as we wished!

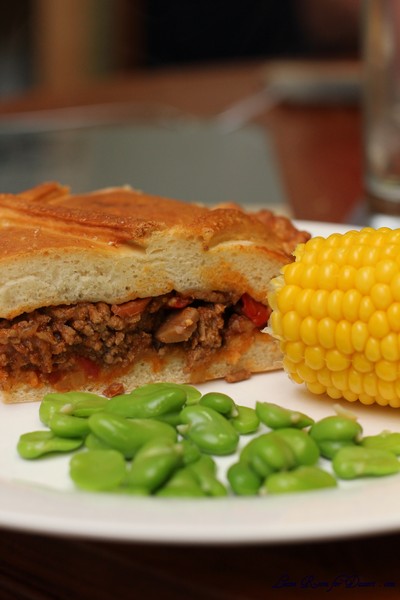
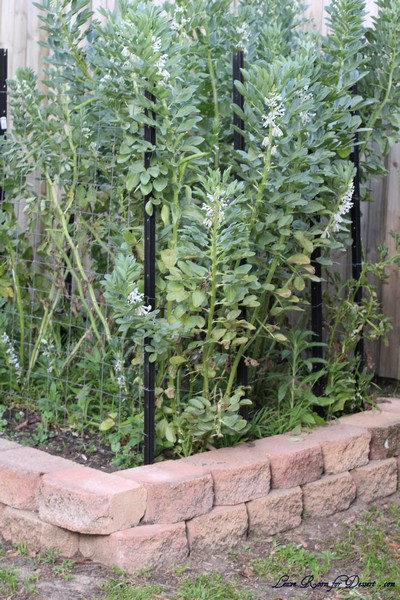
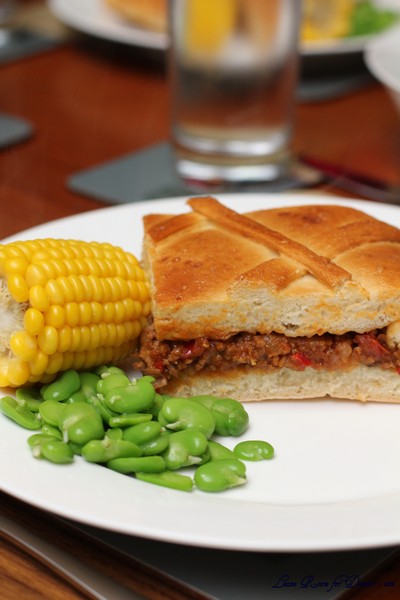
Nick’s veggie beds are all made 🙂 After the removal of some palm trees and their never ending root system, a partly new fence, a sturdy woodshed (made by my very talented Dad), there was finally room and time for Nick to make some raised garden beds. He used retaining wall blocks to build 5 veggie beds. On the weekend we were able to harvest our first broad beans from the bed, and we shared them with family – just as we shared this month’s Daring Bakers Challenge.


This recipe was quite easy to make and very tasty. I would love to make it again – maybe with a few changes on the ratio of bread to filling. (see my notes below). After seeing how easy it is, I’d love to try some more fillings.

My notes on the recipe:
I made double the meat mix and 1x the dough mix. Next time I will make about 4x the meat mix (~1kg), and 1x dough – and make it into 2x emapanadas (one on each tray).
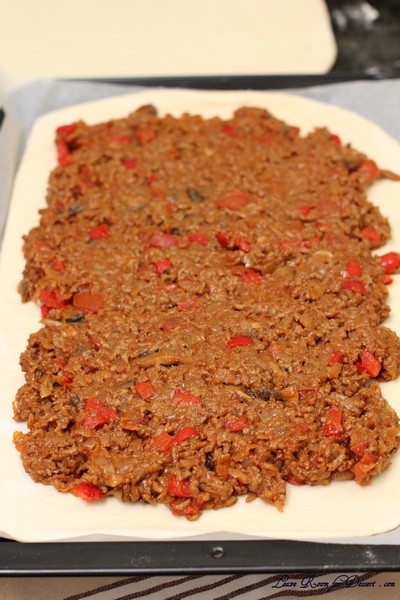
We added extra spices to the meat mix – try some salt, and cumin powder (and maybe some tomato paste). I also used mushrooms and red capsicum.

Empanadas

Serves about 8-10


Dough Ingredients:

5-1/3 cups (1280 ml) (750 gm) bread flour
2 cups (480 ml) of lukewarm water (about 85°F/30ºC), approximately
1 satchel (1 tablespoon) (15 gm) dry yeast or (1 oz) (30 gm) fresh yeast
2 teaspoons (10 ml) (11 gm) salt
4 tablespoons (60 ml) oil (you can use oil from the pan where you have cooked the filling)
1 large egg, for egg wash

Measure out all the ingredients.
Shift the flour into a big bowl and make a well in the middle. Rub the yeast in with your fingers.
In a small bowl, mix the water and the salt.
Now, using your fingers or a wooden spoon, start adding the water and mixing it with the flour-yeast mixture. Keep on working with your fingers or spoon until you have added enough water and all the flour has been incorporated and you have a messy ball of dough.
On a clean counter top, knead the dough for approximately 10 minutes
You could do all the above using a stand mixer, in that case mix the ingredients with the paddle attachment until mixed and then switch to a dough hook and knead on low for about 6 minutes.

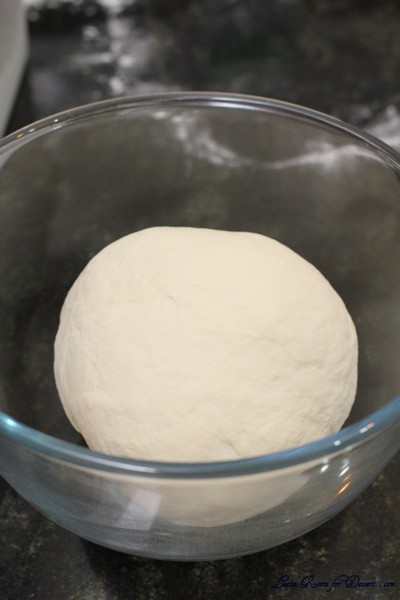
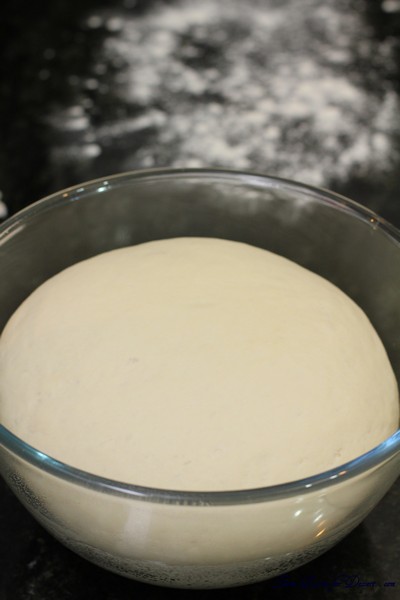
Clean and oil the big bowl you used for mixing and place the kneaded dough in it. Cover it with a napkin or piece of linen and keep it in a warm, draught-free place for approximately 40 to 50 minutes.

Once risen, turn the dough back into a floured counter and cut it in half. Cover one half with the napkin to prevent drying.
Spread the other half of the dough using a rolling pin. You can use a piece of wax paper over the counter, it will make it easier to move the dough around. Depending on the shape of your oven pan or cookie sheet, you will make a rectangle or a round.
Now, the thinness of the dough will depend on your choice of filling and how much bread you like in every bite. For your first time, make it about 3mm thin (about 1/10th of an inch) and then adjust from that in the next ones you make.

Ground meat filling:

400 gm (14 oz) chopped onion (approximately 1 big onion or 2 medium-sized ones)
200 gm (7 oz) tomatoes (peeled and seeded)
1 small green pepper
2 garlic cloves
¾ cup (180 ml) olive oil
300 grams (2/3 pound or 10.5 ounces) minced (ground) meat
1 teaspoon sweet paprika

Heat the oil in a skillet
Fry the finely chopped onions, pepper and garlic until the vegetables are soft. Add then the tomatoes, chopped small, and cook until done.
Add the meat and cook for about 5 minutes.
Add the paprika, and stir into the frittata.
Allow to cool for at least 30 minutes.
Fill the empanada en bake as indicated.

Assembling the empanada:

If you haven’t used wax paper, either lightly flour or line with wax paper your pan or tray.
Cover the base and sides with the dough. Using the rolling pin or a knife, cut the extra dough.
Place the filling, making sure it is cold and that all the base is covered. Using a hot filling will make the bottom layer of the empanada become soggy. Be careful to avoid adding too much oil from the filling, try to make it as “dry” as possible.
Start preheating your oven to moderate 350°F/180ºC/gas mark 4.
Take the other half of the dough and spread it out to the same or less thinness of the base. You can use a piece of wax paper for this too. Take into account that this “top” dough needs to be smaller around than the bottom, as it only needs to cover the filling.

If not using wax paper, move carefully the top to cover the filling. If using wax paper, transfer the dough, turn upside down, cover the filling and gently peel off the wax paper.
Using your fingers, join bottom and top dough, when you have gone all the way around, start pinching top and bottom together with your thumb and index finger and turning them half way in, that way you end up with a rope-like border. As a picture is worth a thousand words, please watch this video to see how it is done: http://youtu.be/CNpB7HkTdDk
When you are finished, make a 1 inch hole in the middle of the top layer. This will help hot air exit the empanada while it’s baking without breaking the cover.
You can use left-over dough to decorate the empanada, using rounds, bows, lines… let your imagination flow and make it pretty!
Using a fork, prick the top layer or, using scissors, make snips that go all the way through the top layer.
In a small bowl, beat an egg and add a tbsp of cold water. With the pastry brush, paint the top of the empanada with the egg wash.

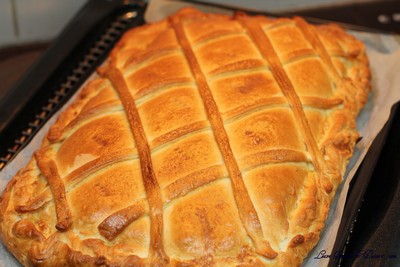
Place the empanada in the oven and bake for about 45 minutes. Check that the bottom part is done.

Filled Pate a Choux Swans – Daring Bakers Challenge August 2012

Monday, August 27th, 2012

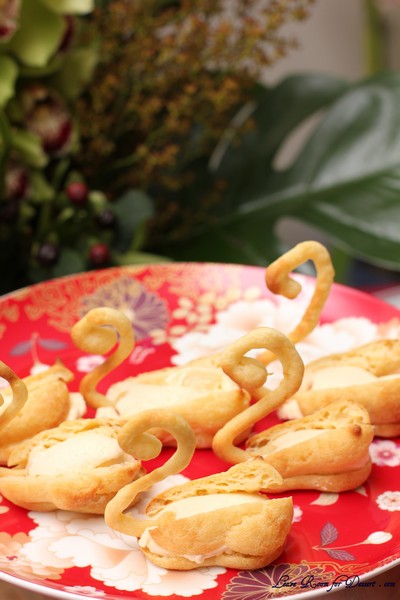
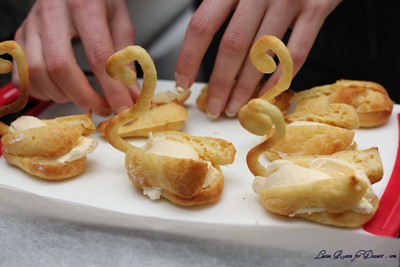
Kat of The Bobwhites was our August 2012 Daring Baker hostess who inspired us to have fun in creating pate a choux shapes, filled with crème patisserie or Chantilly cream. We were encouraged to create swans or any shape we wanted and to go crazy with filling flavors allowing our creativity to go wild!

I have made a tower of profiteroles before, but never a Swan (or other animal). One of the things I love about the croquembouche is the toffee and custard combination, and I think these swans would have looked lovely with toffee on their wings (but I didn’t have time to try it).

When I started this challenge, last night, I didn’t have many people to share the dessert with, so decided to halve the recipe for the choux pastry, as I find they don’t last very well overnight – and this recipe didn’t have any toffee (like the croquembouche), which helps disguise day old choux pastry. I found this recipe did not turn out how it should. The flour added to the butter/water mix didn’t form a solid enough dough. I am not sure if this is due to the amount of water or that it wasn’t boiling (the butter was just melted). This in turn made the final choux pastry quite liquidy. I placed it back on low/medium heat and whisked vigorously, it eventually became solid enough to pipe – although didn’t cook as nicely as it should.

I made the full amount of the vanilla creme, as I always love custards, although this is much lighter and creamier than the normal custard I would make, so after filling the few swans I made, I placed the vanilla creme in the freezer to see how it goes 🙂

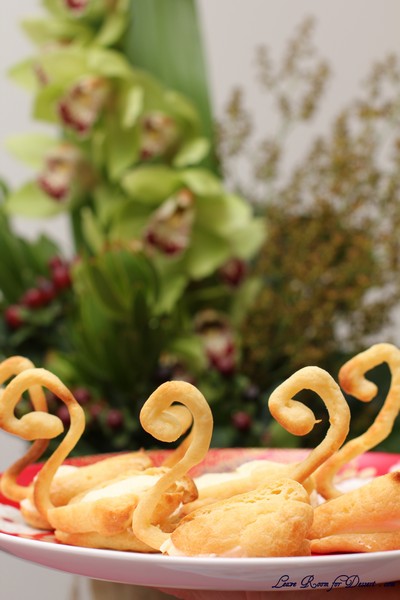
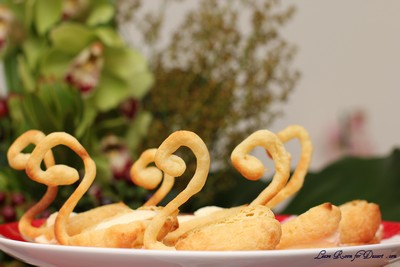
I was surprised at how the swans turned out, when I had made the different sections I thought it would look nothing like a swan, but I was happy with the look and taste (and short time required by) the challenge.

Recipe Source: Good Housekeeping Illustrated Guide to Cooking, 1980 edition.

Vanilla Creme

1 tablespoon (15 ml) (7 gm) (1/4 oz) (1 envelope) unflavored gelatin
½ cup (120 ml) (115 gm) (4 oz) sugar
2 tablespoons (30 ml) (18 gm) (2/3 oz) all-purpose (plain) flour
4 large egg yolks, well beaten
1 cup (240 ml) milk
1 teaspoon (5 ml) vanilla extract
1 cup (240 ml) heavy (whipping) cream (about 35% butterfat)

In a medium saucepan combine gelatin, flour, and sugar. Mix very well.
Add milk and egg yolks and turn heat to medium-low. Stir almost constantly until mixture is thick enough to cover the back of your spatula or spoon. This should take about 10 minutes.
Once thick, immediately dump into a bowl, straining the mixture if you are concerned about lumps of cooked egg.
Add the vanilla, and mix in well.
Cover the surface to prevent a skin from forming, and chill for about 45 minutes. You do not want the mixture to set, just to continue thickening.
Now is a good time to begin your choux paste.
In a large bowl, beat cream until light peaks form. Carefully fold the vanilla mixture into the whipped cream until the mixture is well-blended and fairly smooth.
Refrigerate mixture if not using immediately.

Pate a choux

(cannot be doubled)

½ cup (120 ml) (115 gm) (4 oz) butter
1 cup (240 ml) water
¼ teaspoon (1½ gm) salt
1 cup (240 ml) (140 gm) (5 oz) all-purpose flour
4 large eggs

Line at least two baking sheets with silicone mats or parchment paper, or grease pans well.
Preheat oven to moderately hot 375°F/190°C/gas mark 5 .
In a small saucepot, combine butter, water, and salt. Heat over until butter melts, then remove from stove.
Add flour all at once and beat, beat, beat the mixture until the dough pulls away from the sides of the pot.
Add one egg, and beat until well combined. Add remaining eggs individually, beating vigorously after each addition. Resulting mixture should be somewhat glossy, very smooth, and somewhat thick.
Using a ¼” (6 mm) tip on a pastry bag, pipe out about 36 swan heads. You’re aiming for something between a numeral 2 and a question mark, with a little beak if you’re skilled and/or lucky.
Remove the tip from the bag and pipe out 36 swan bodies. These will be about 1.5” (40 mm) long, and about 1” (25 mm) wide. One end should be a bit narrower than the other.
Bake the heads and bodies until golden and puffy. The heads will be done a few minutes before the bodies, so keep a close eye on the baking process.
Remove the pastries to a cooling rack, and let cool completely before filling.

Assembly

Take a swan body and use a very sharp knife to cut off the top 1/3rd to ½.
Cut the removed top down the center to make two wings.
Dollop a bit of filling into the body, insert head, and then add wings.


Your first attempt will probably not look like much, but the more you make, the more your bevy of swans will become a beautiful work of swan art.

Seedy Crisps – Daring Bakers Challenge July 2012

Friday, July 27th, 2012

Our July 2012 Daring Bakers’ Host was Dana McFarland and she challenged us to make homemade crackers! Dana showed us some techniques for making crackers and encouraged to use our creativity to make each cracker our own by using ingredients we love.

There are some things you never even consider making. For some this may be ice cream, marshmallow, nougat or maybe a crouquembouche. I didn’t realise until this month, that I had never thought of making crackers before.

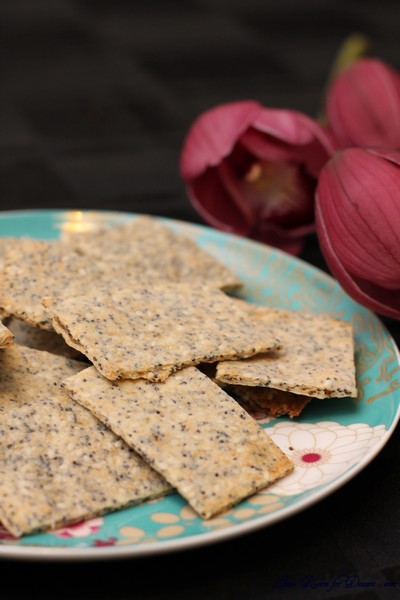
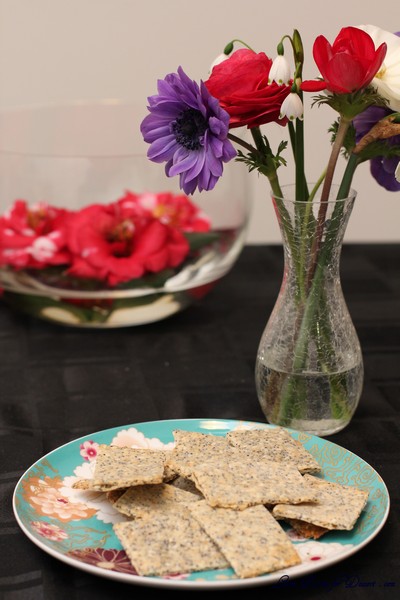
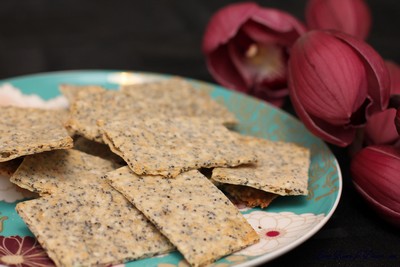
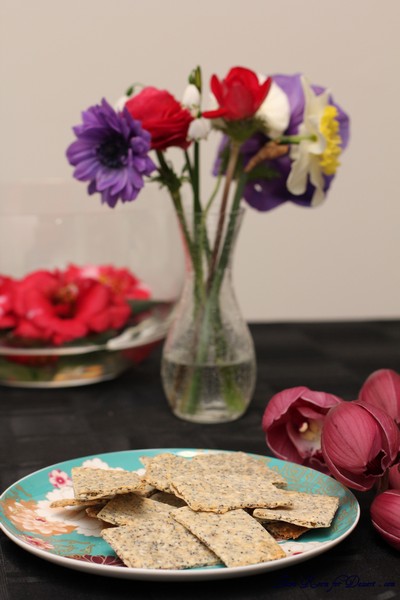
Whilst making the crackers or seedy crisps, I wasn’t sure how they would turn out. I couldn’t imagine their taste. When the first taste was taken, I understood why this challenge was chosen.

When everyone else tried these crisps, they were gobbled up quite quickly, with brie and dips. There was a lot of suggestion to make it again, possibly to serve it with the spinach dip.

Thanks Dana for a wonderful challenge I never expected.

Seedy Crisps

(Roll with pasta rollers or by hand)

Recipe Source: Brown, Alton (2011). Good Eats 3:The Early Years, “Seedy Crisps”. Stewart, Tabori & Chang, New York, NY.

Servings: Varies depending on thickness; approximately 50 crackers

1 cup (240 ml) (140 gm/5 oz) whole wheat four
1 cup (240 ml) 140 gm/5 oz) all-purpose (plain) flour
1/3 cup (80 ml) (50 gm) (1¾ oz)poppy seeds
1/3 cup (80 ml) (40 gm) (1¼ oz) sesame seeds
1½ teaspoons (7½ ml) (9 gm) table salt
1½ teaspoons (7½ ml) (8 gm) baking powder
3 tablespoons (45 ml) olive oil
¾ cup plus 1 tablespoon (195 ml) (6½ fl oz) water

1. Mix the flours, seeds, salt and baking powder in a large bowl.
2. Add the oil and stir until combined.
3. Add the water until the dough comes together.
4. Kneed the dough 5 or 6 times and allow to rest, covered, on the counter for 15 minutes. You can also chill the dough at this point and come back later.
5. Preheat the oven to hot 450°F/230°C/gas mark 8.
6. Working with a quarter of the dough at a time, either use a rolling pin to reach a desired thickness (thick or thin) or roll out in your pasta rollers. If you use pasta rollers, ensure the dough is well-floured so as not to stick.
7. Place strips of dough on a sheet pan lined with parchment.
8. If the crackers are thick, bake for 7minutes, flip them over and bake for 7 minutes more. Then cut or break into crackers shapes while still warm. Return to the oven for a further 5 minutes until crispy.
9. If not crispy enough when cooled, crackers can be returned to the oven.
10. Store in an airtight container and eat within 2 weeks

Battenberg Cake – Daring Bakers Challenge June 2012

Wednesday, June 27th, 2012

Mandy of What The Fruitcake?! came to our rescue last minute to present us with the Battenberg Cake challenge! She highlighted Mary Berry’s techniques and recipes to allow us to create this unique little cake with ease.

I was just about to go to bed when I thought – what’s the date today – whoops, it’s the day to post our Daring Bakers Challenge for the month.


You see, I have been away for most of the month on a two week road trip – which I’d love to post a few non-food related pics soon, and also let you know about some of the great places to see and places to eat too. So it seemed quite far away from when I made this cake at the beginning of the month.

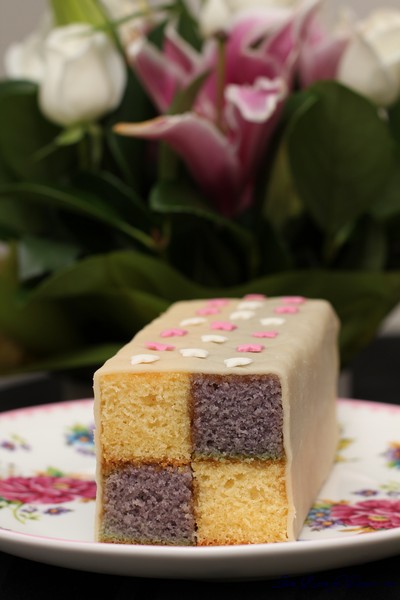
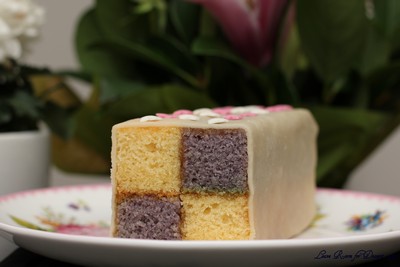
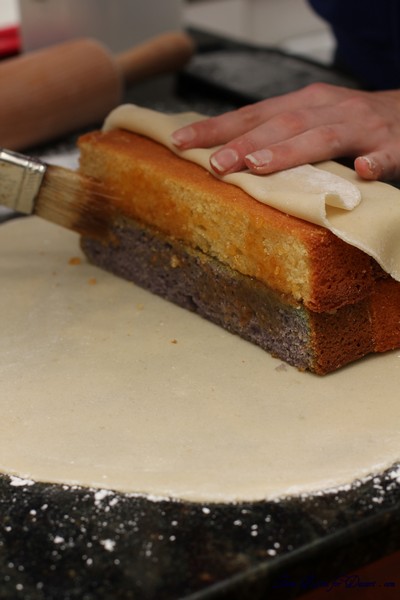
It was extremely fun to make such a pretty cake and also see some of the specialized tins people use to make the Battenberg cake. One change I would make is to use something in place or on top of the marzipan. I found the one I bought (which is quite common in supermarkets) was a little see-through and detracted being an off-white colour. I think a fondant or ready rolled icing may have been nice, or possibly some of the other options given by Mandy.

Traditional Battenberg

Recipe Source:
Traditional Battenberg adapted from Mary Berry’s “Baking Bible”

Servings: +- 8

Ingredients
¾ cup (1½ sticks) 175gm / 6 oz Unsalted Butter, softened & cut in cubes
¾ cup / 175gm / 6 oz Caster Sugar
1¼ cups / 175gm / 6 oz Self-Raising Flour (***see end of doc on how to make your own)
3 Large Eggs, room temp
½ cup / 65gm/ 2 1/3 oz Ground Almonds (Can be substituted with ground rice)
3/4 tsp / 3½ gm Baking Powder
½ tsp / 2½ ml Vanilla Extract
1/4 tsp (1¼ ml) Almond Extract
Red Food Colouring, paste, liquid or gel

To Finish
1/3 cup (80 ml) 100gm /3 ½ oz Apricot Jam
1 cup / 225gm / 8 oz Marzipan, natural or yellow

Directions:
1. Preheat oven to moderate 350°F/180°C/160°C Fan Assisted/Gas Mark 4
2. Grease an 8”/20cm square baking tin with butter
3. Line the tin with parchment paper, creating a divide in the middle with the parchment (or foil)
– Tip: See photos or watch video above for detailed instructions
4. OR Prepare Battenberg tin by brushing the tin with melted butter and flouring
5. Whisk together the dry ingredients then combine with the wet ingredients in a large bowl and beat together just until the ingredients are combined and the batter is smooth
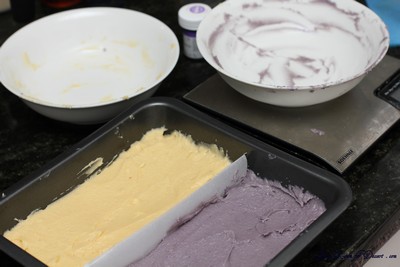
6. Spoon half the mixture into the one side of the prepared baking tin
7. Add a few drops of red food liquid/gel/paste to the remaining batter, stir until the colour is thoroughly distributed, add more colour if needed
8. Spoon the pink batter into the other half of the prepared baking tin
9. Smooth the surface of the batter with a spatula, making sure batter is in each corner


10. Bake for 25-30mins until the cake is well risen, springs back when lightly touched and a toothpick comes out clean (it should shrink away from the sides of the pan)
11. Leave to cool in the tin for a few minutes before turning out to cool thoroughly on a wire rack
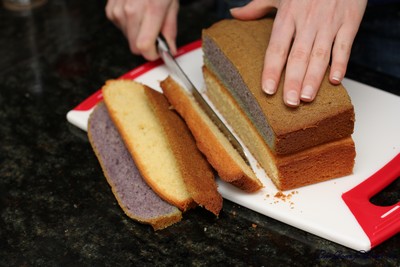
12. Once completely cool, trim the edges of the cake with a long serrated knife
13. Cut each coloured sponge in half lengthways so that you are left with four long strips of sponge

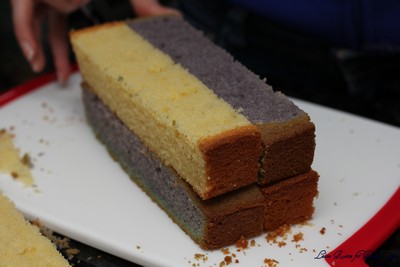
14. Neaten the strips and trim as necessary so that your checkered pattern is as neat and even as possible

15. Gently heat the apricot jam and pass through a small sieve

16. Brush warmed jam onto the strips of cake to stick the cake together in a checkered pattern (one yellow next to one pink. On top of that, one pink next to one yellow)
– Tip: See photos for detailed instructions
17. Dust a large flat surface with icing sugar then roll the marzipan in an oblong shape that is wide enough to cover the length of the cake and long enough to completely wrap the cake
18. Brush the top of the cake with apricot jam
19. Place the cake on the marzipan, jam side down
– Tip: Either in the middle or to the one side of the marzipan
20. Brush the remaining three sides with jam
21. Press the marzipan around the cake, making sure the join is either neatly in the one corner, or will be underneath the cake once turned over

– Tip: If you put the sponge to the one side of the marzipan, I found it easiest to “roll” the sponge over and over onto the marzipan instead of lifting the marzipan up onto the sponge
22. Carefully flip the cake over so that the seam is under the cake and score the top of the cake with a knife, you can also crimp the top corners with your fingers to decorate
23. Neaten the ends of the cake and remove excess marzipan by trimming off a small bit of cake on both ends to reveal the pattern

Challah – Daring Bakers Challenge May 2012

Sunday, May 27th, 2012

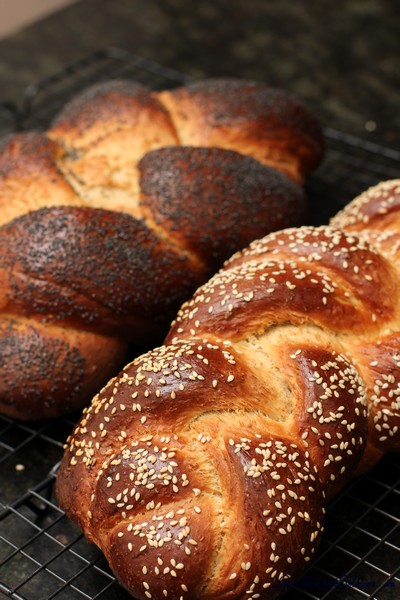
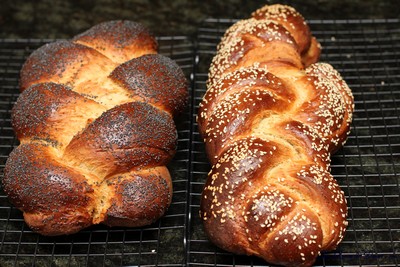
May’s Daring Bakers’ Challenge was pretty twisted – Ruth from The Crafts of Mommyhood challenged us to make challah! Using recipes from all over, and tips from “A Taste of Challah,” by Tamar Ansh, she encouraged us to bake beautifully braided breads.

I could not be happier with how my challah turned out this month. As I have never tried challah before, I can’t tell you how close this recipe is to bought ones, although I can tell you everyone who tried it was very happy with the taste and texture, and it was eaten quite quickly.

As it contains egg, it doesn’t last as long as other breads do, and would require an air-tight container, although is best eaten on the day of making.

It can be eaten by itself, which is how we mainly ate it (before dinner…), with leftovers being eaten grilled, or with caramelised balsamic vinegar and dukkah.

Thanks to our host this month, who gave three recipes for people to try, although I only got around to making one.

My anemone flowers are coming up at the moment, just before winter (I think I planted them in March). They are a beautiful addition to the garden at this time when some other plants are dying off before winter. Although I am not sure what time they will flower next year, as I thought they were going to flower in spring.

Ruth’s “Go-To” Whole Wheat Challah

(adapted from Tammy’s recipes)
Servings: 12

Ingredients
2 (.25 oz.) packages (4½ teaspoons) (22½ ml) (15 gm) (½ oz) dry yeast
1 cup (240 ml) warm water (100°F/38°C)
½ cup (120 ml) (100 gm) (3½ oz) brown sugar, firmly packed
½ cup (one stick) (120 ml) (115 gm/4 oz) margarine or unsalted butter – room temperature
2 tsp. (10 ml) (15 gm) (½ oz) salt
3 large eggs
2 cups (480 ml) (280 gm/10 oz) whole wheat flour
2 cups (480 ml) (280 gm/10 oz) all-purpose flour
½ cup (120 ml) (50 gm) (1¾ oz) rolled oats (Old Fashioned work just fine!)
Additional flour for kneading (½ to 1 cup) (120 to 240 ml) (70 to 140 gm) (2½ to 5 oz)
1 egg beaten with 1 tsp. water for glaze
Directions:

1. In the bowl of your stand mixer, dissolve yeast in warm water. Allow to stand about 5 minutes until creamy/foamy.
2. With paddle attachment beat 3 eggs, sugar, margarine (or butter), whole wheat flour, all purpose flour and oats into the yeast mixture. Or, if mixing by hand (ok, spoon), combine eggs and margarine/butter with yeast mixture until well mixed. Add flours and oats and mix until it becomes difficult to mix.
3. Once combined, switch to the dough hook and knead for 5 to 10 minutes until smooth and elastic, adding flour as/if needed. If kneading by hand, this should take about 10-12 minutes.
4. Form dough into a round, compact ball. Turn in oiled bowl, cover with a kitchen/tea towel. Let rise in warm area (I put it in the oven with the light on) until doubled, approx. 2 hours.
5. Once dough has doubled, punch down. Recover with towel, allow to rise again for an hour, but even 30 minutes will be fine if you’re in a hurry.
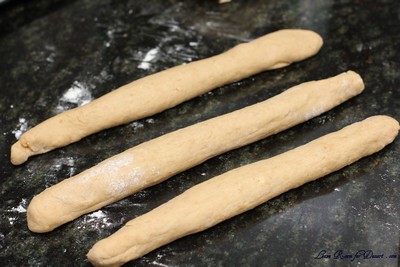
6. Punch the dough down again, divide in two.
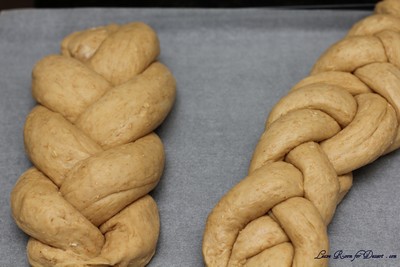
7. Shape each half as desired (3, 4 or 6 strand braid, rolls, etc.). Place shaped loaves onto parchment covered baking trays. Cover with the towel and allow to rise another hour.

8. Preheat oven to 350 degrees.
9. Brush loaves with egg wash. (Sprinkle with vanilla sugar/sesame seeds/poppy seeds/other topping here if desired)
10. Bake 30 to 40 min. until the loaf sounds hollow when tapped on the bottom.

11. Transfer loaves to a wire rack to cool before serving.